CAFM Way User Guide
Technician App
The phone app field technicians use to receive jobs, record the work, parts and photos, and close jobs on site.
technician.cafm-way.com · Last updated: 26 Sep 2026
Getting started
This part explains what the Technician app is for, how to open it and how to sign in. It is written for maintenance technicians, both your company's own staff and technicians who work for a contractor.
What the app is for
- Who: technicians (role Technician) and contractor technicians
- Where: the CAFM Way Technician app on your phone, or
technician.cafm-way.comin the phone's browser
The office raises work orders (jobs) in the CAFM Way web app and assigns them to you. The Technician app is where you receive those jobs and do everything that happens on site:
- See your jobs, with the most urgent one first.
- Accept a job, or decline it with a reason.
- Start work, which starts the job clock and the SLA response.
- Log what you did, take before and after photos, and record the parts you used or need.
- Close the job with notes, a root cause and the customer's signature, or send it to your supervisor to check.
Everything you record goes straight to the office. The supervisor sees the job status change on the web dashboard as you work.
The app has four tabs at the bottom of the screen:
| Tab | Use it to |
|---|---|
| Tasks | See and search your jobs (the home screen) |
| Schedule | See your jobs day by day for the week |
| Chat | Message colleagues, or talk about a specific job |
| Me | Your profile, van stock, safety, language and settings |
Install and open the app
- Who: any technician with a CAFM Way account
- Where: your phone
- Install the CAFM Way Technician app from the link your company gives you. If you have no install link, open
technician.cafm-way.comin your phone's browser; the browser version works the same way. - Open the app. The first time, a short welcome video plays.
- Tap Skip to close it now, or Don't show again so it does not play at the next start.
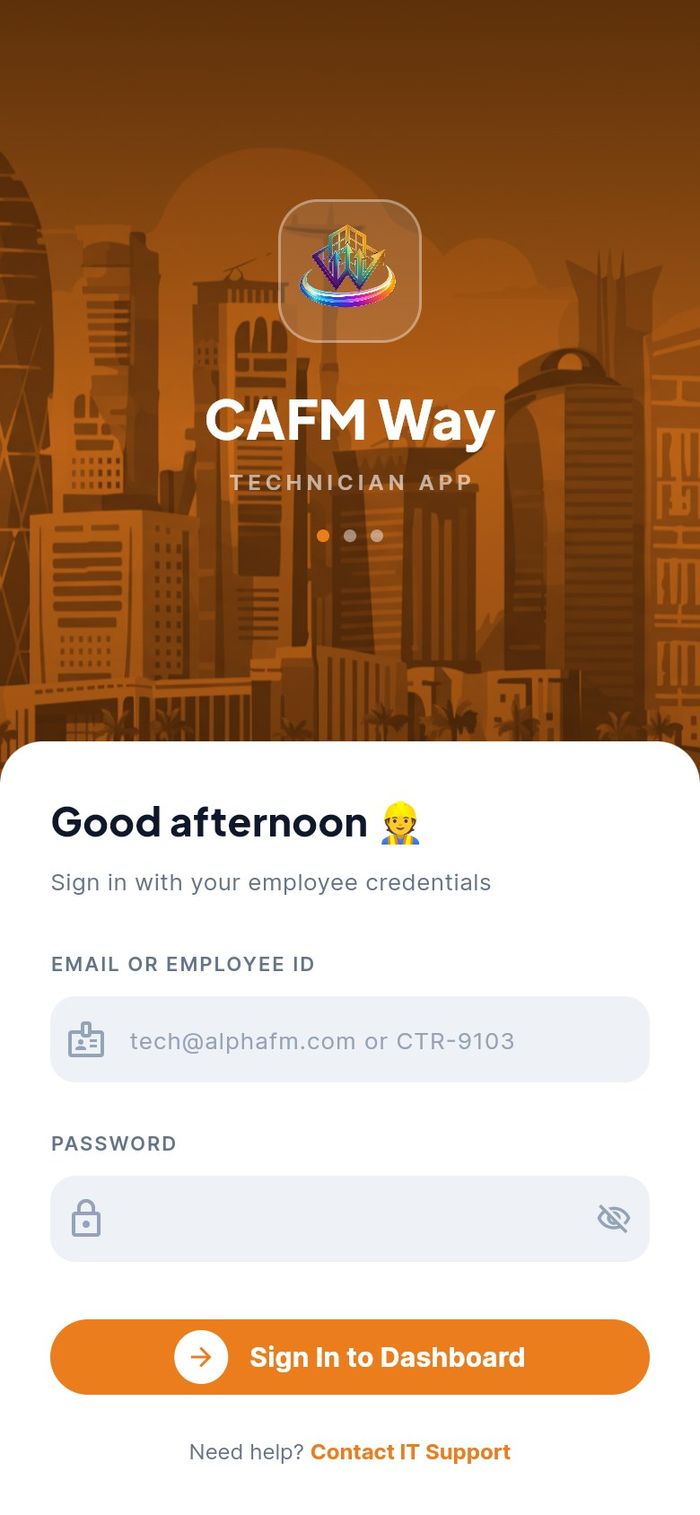
Sign in
- Who: any technician
- Where: the sign-in screen, which the app shows whenever you are signed out
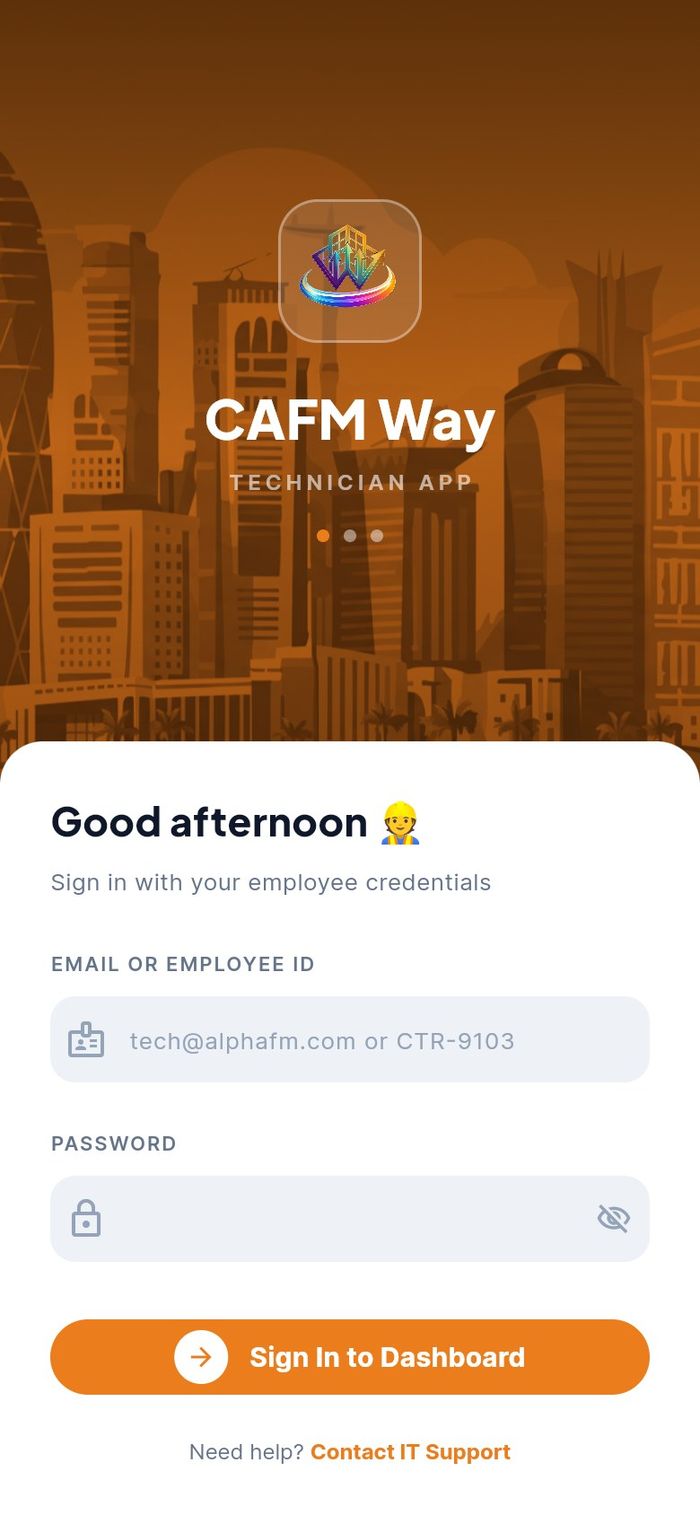
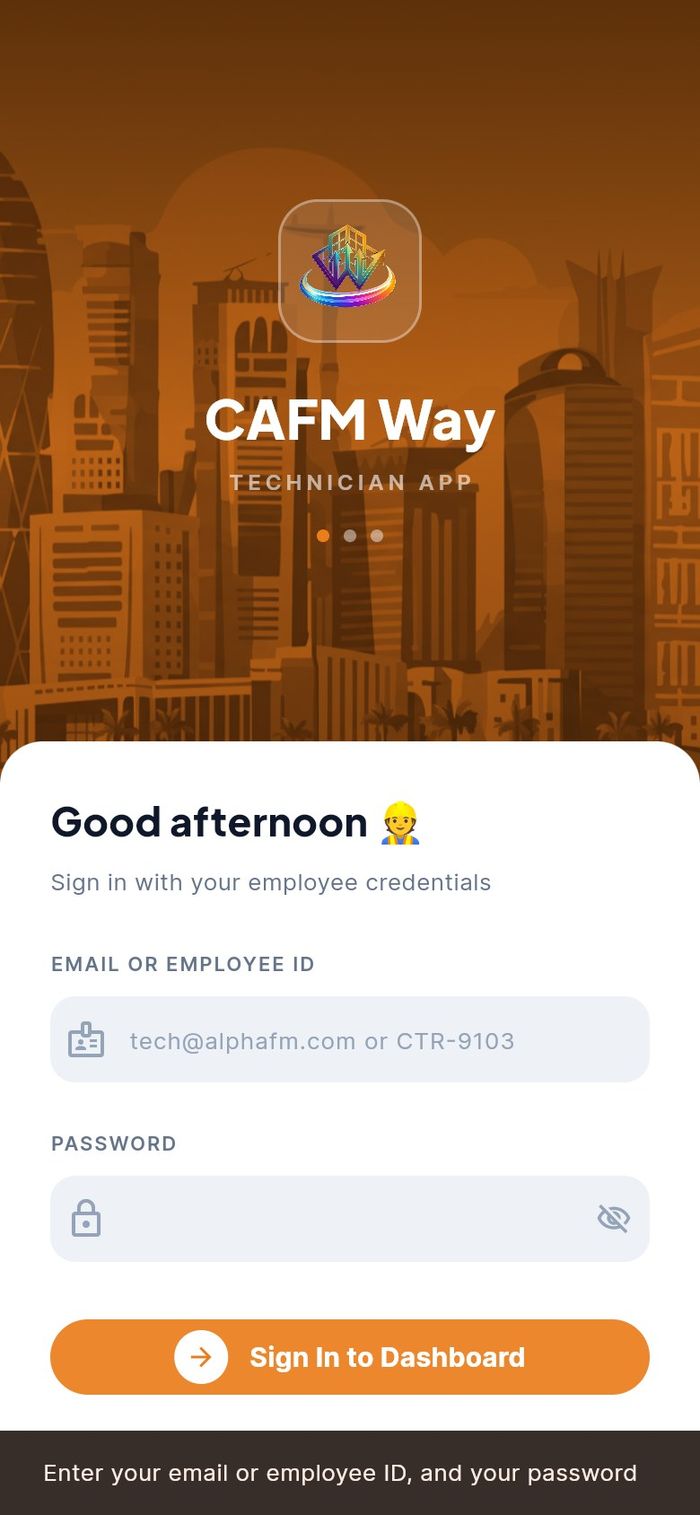
- In EMAIL OR EMPLOYEE ID, type your work email, for example
khalid@oasis-fm.test. A contractor technician can type the contractor user code instead (for exampleCTR-9129). - In PASSWORD, type your password. Tap the eye icon to show or hide it.
- Tap Sign In to Dashboard. The button reads Signing in… while it works.
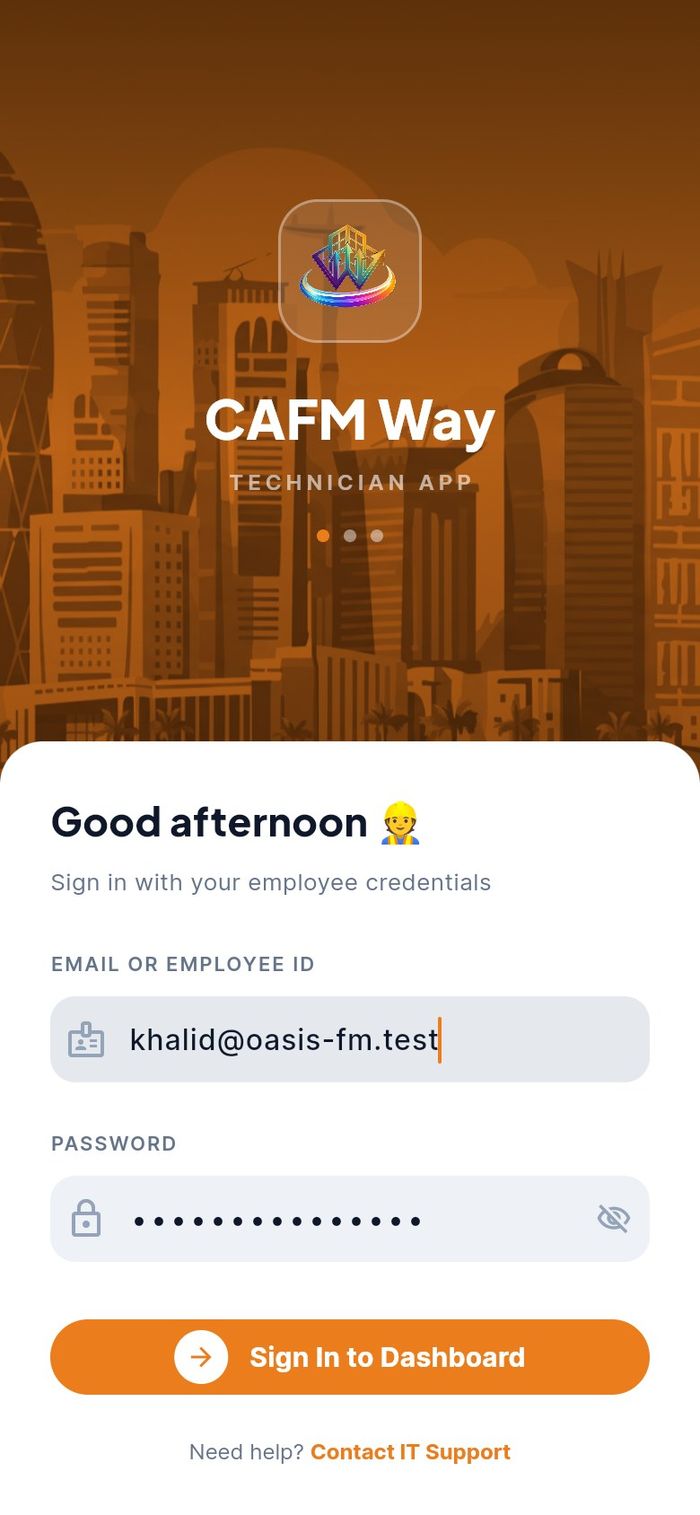
The app opens on Tasks. It remembers you, so next time it opens straight on your jobs without asking for the password again.
Sign-in problems
- Who: any technician
- Where: the sign-in screen
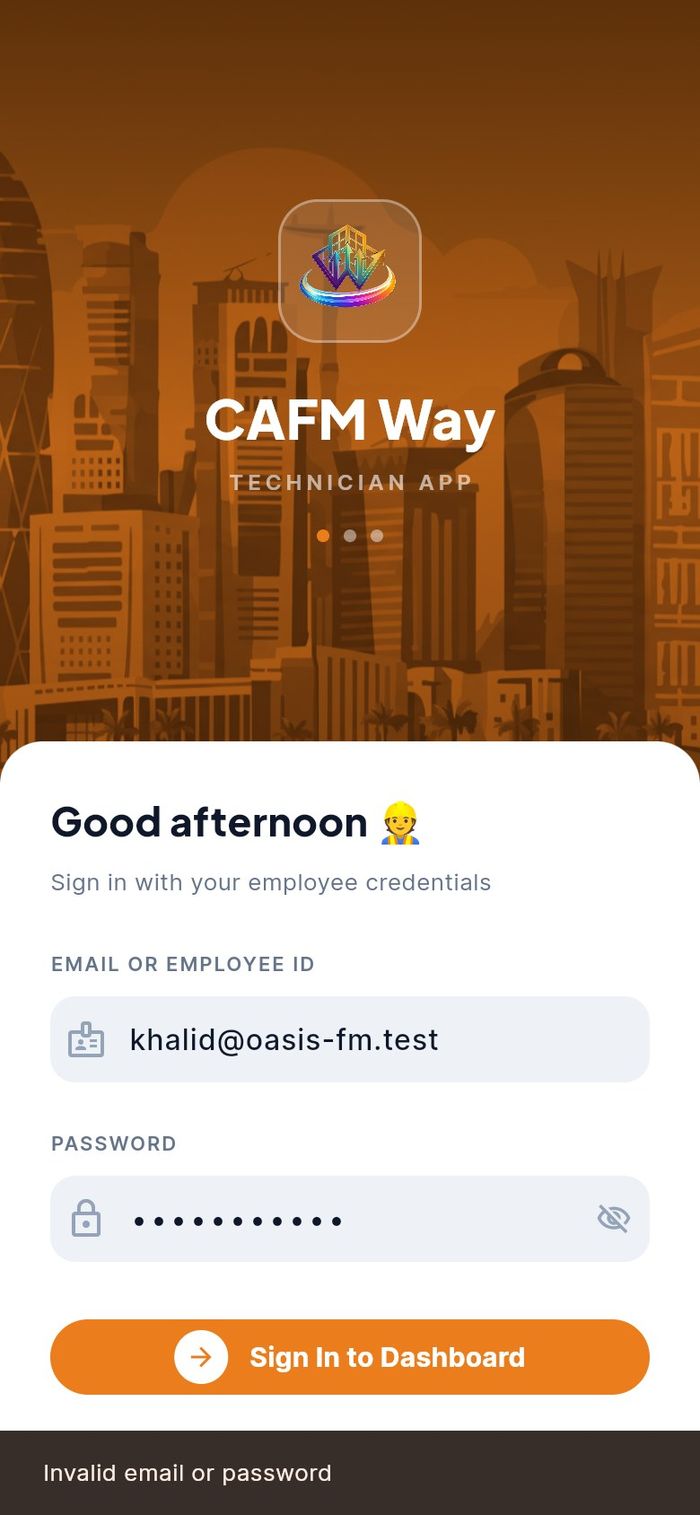
The app shows a message at the bottom of the screen when it cannot sign you in.
| Message | What it means | What to do |
|---|---|---|
| Enter your email or employee ID, and your password | One of the two fields is empty. | Fill in both fields. |
| Invalid email or password | The email (or ID) and password do not match an account. You also see this when you sign in with an employee ID that is used in more than one company. | Check the spelling and try again with your email. |
| Too many login attempts… | Too many failed tries in a short time. | Wait a few minutes, then try again. |
| Cannot reach server… | The phone has no connection to CAFM Way. | Check mobile data or Wi-Fi and try again. |
| A message that your company is suspended or your location is not allowed | Your company's account or its security settings block the sign-in. | Contact your supervisor or IT support. |
Job lifecycle at a glance
This is the path a job follows from the moment it reaches your phone. The words in the boxes are the status chips you see in the app.
flowchart TD
  A[Assigned
job reaches your phone] --> B{Your choice}
  B -- Accept --> C[Accepted]
  B -- I cannot do this job --> R[Rejected
back to supervisor]
  C -- Start Work --> D[In Progress
job clock running]
  A -- Start Work --> D
  D --> E[Add Work, photos,
parts]
  E --> F[Finish Work]
  F -- Confirm Complete --> G[Completed]
  F -- Send to supervisor --> P[Pending
supervisor checks]
  P -- Verified in web app --> G
  F -- Company needs approval --> Q[Stays In Progress
until approver releases]
  Q --> G
| Status chip | Meaning |
|---|---|
| Assigned | The job is yours but you have not accepted or started it. |
| Accepted | You have acknowledged the job. |
| In Progress | You pressed Start Work. The job clock is running. |
| Pending | You sent the job to your supervisor for verification. |
| Completed | The job is closed. |
| Rejected | You declined the job, or the office cancelled it. |
Your jobs
This part covers the home screen, finding a job, accepting or declining it, reading its details and planning your week.
Home screen (Tasks)
- Who: any technician
- Where: bottom tab Tasks
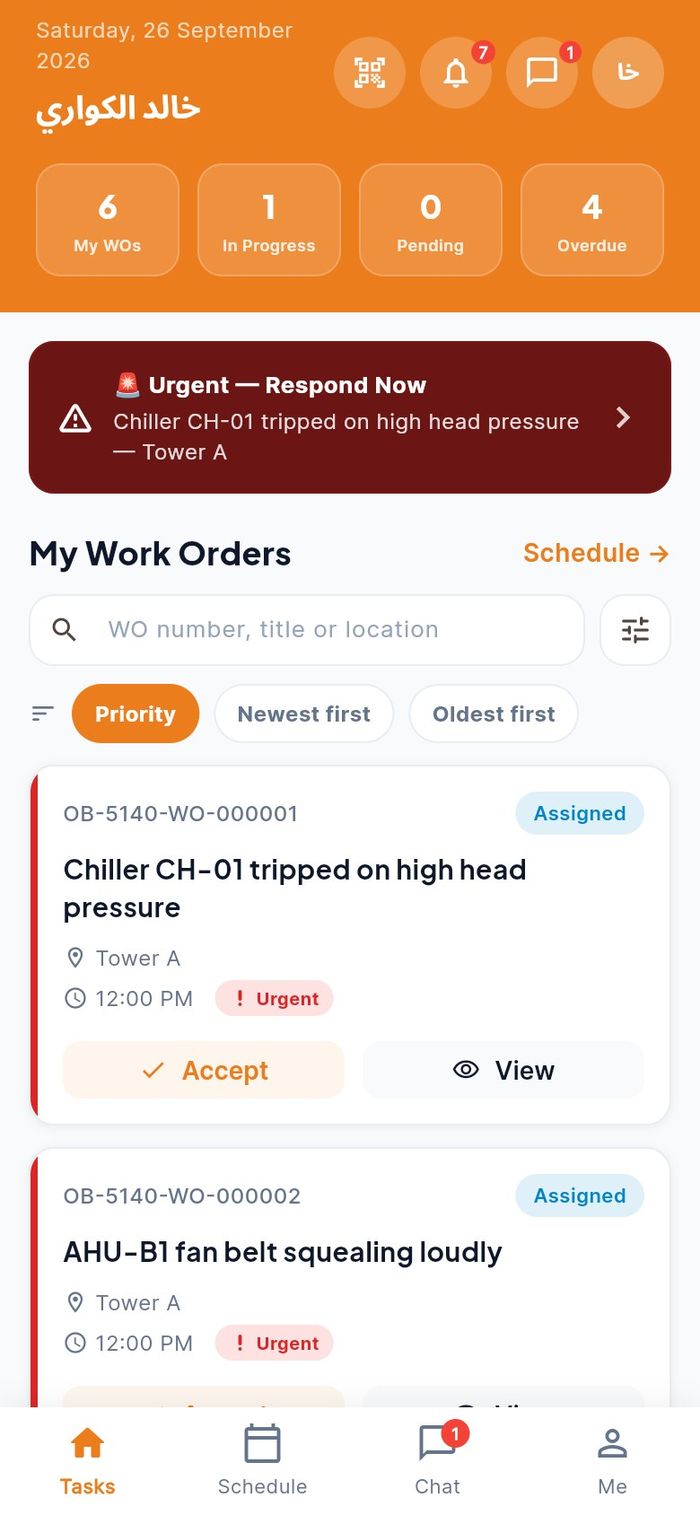
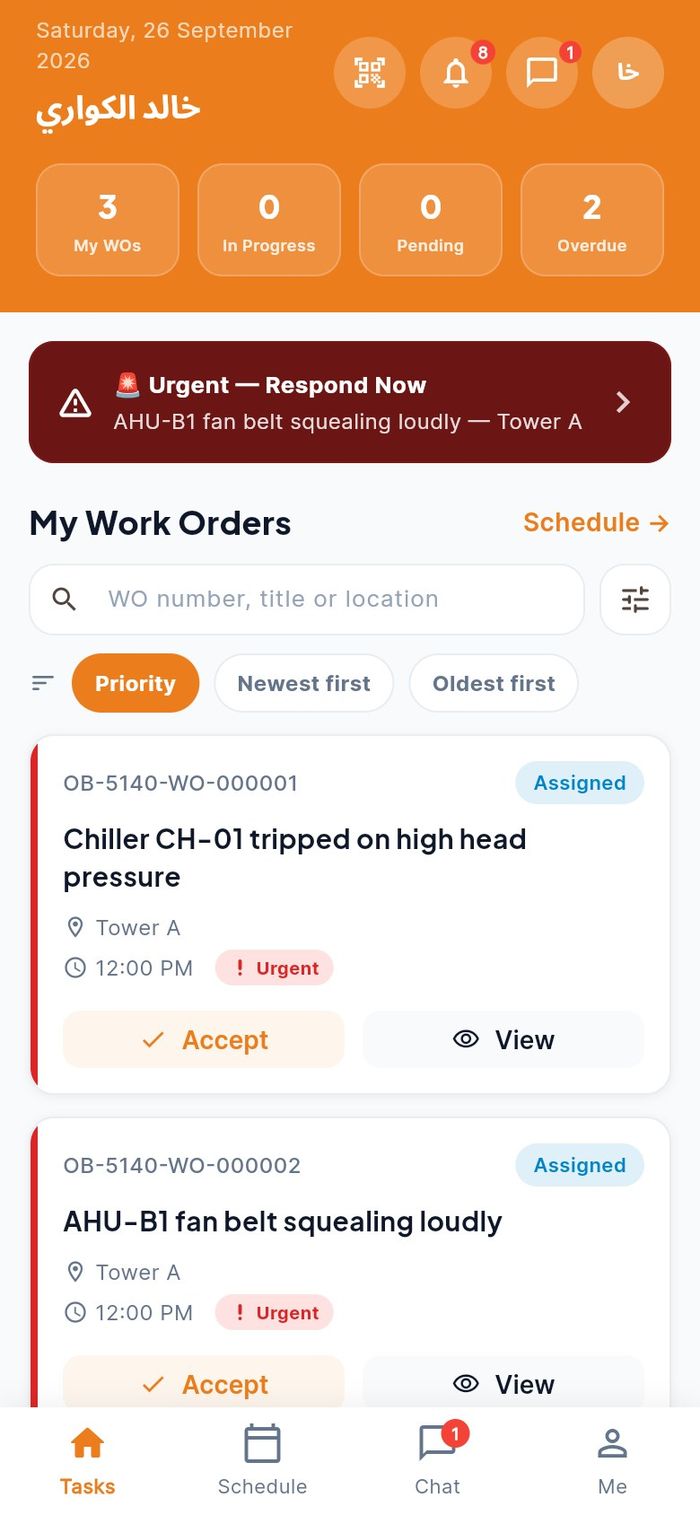
The top of the screen shows today's date, your name and four icons: the QR scanner, the notification bell, chat and your initials (which open Me). A red dot with a number shows unread notifications or messages.
The four counters summarise your jobs:
| Counter | Counts |
|---|---|
| My WOs | All jobs in your list |
| In Progress | Jobs you have started |
| Pending | Jobs waiting for your supervisor to verify |
| Overdue | Open jobs whose scheduled time has passed |
When you have an open urgent job, a dark red banner Urgent — Respond Now shows its title and location. Tap it to open that job.
Under My Work Orders, each card shows the work order number, the title, the location, the scheduled time (with the date when it is not today), the priority and the status. A job that is still Assigned has two buttons, Accept and View. Completed jobs are greyed out.
- Pull the list down to refresh it. New assignments and status changes also appear on their own while the app is open.
- The list loads 25 jobs at a time. Scroll down, or tap Load more, to see older ones.
Find a job: search, sort and filter
- Who: any technician
- Where: Tasks
- Type a work order number, a word from the title or a location in the search box WO number, title or location.
- Tap a sort chip: Priority (the default), Newest first or Oldest first.
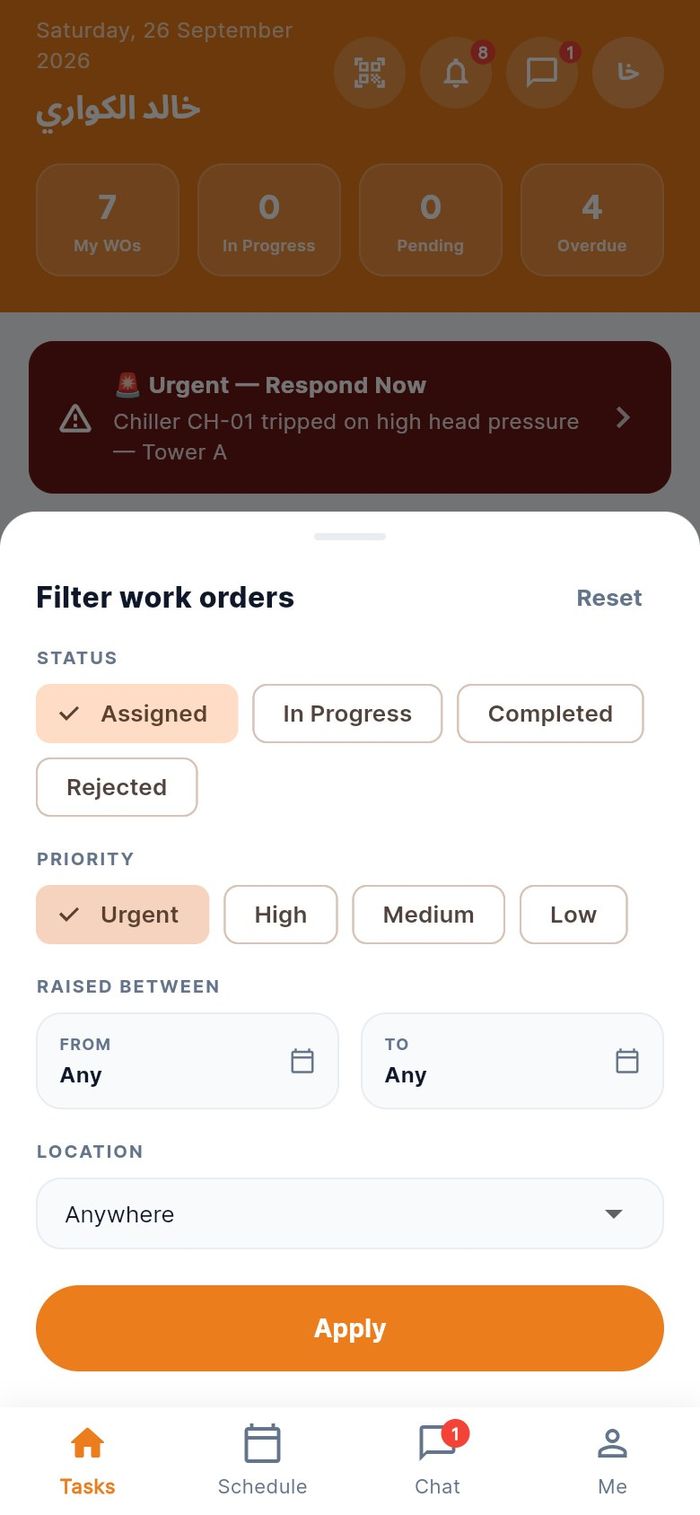
- Tap the filter icon at the right of the search box. The sheet Filter work orders opens.
- Choose any of:
- STATUS: Assigned, In Progress, Completed, Rejected.
- PRIORITY: Urgent, High, Medium, Low.
- RAISED BETWEEN: a FROM and TO date.
- LOCATION: one site, or Anywhere.
- Tap Apply. The list and the counters now show only the matching jobs.
To go back to all jobs, open the sheet again, tap Reset, then Apply. When you searched or filtered by place or date, a line Showing jobs… appears under the search box with Clear all.
Accept a job
- Who: the technician the job is assigned to
- Where: Tasks, on the job's card
Accepting tells your supervisor you have seen the job and will do it.
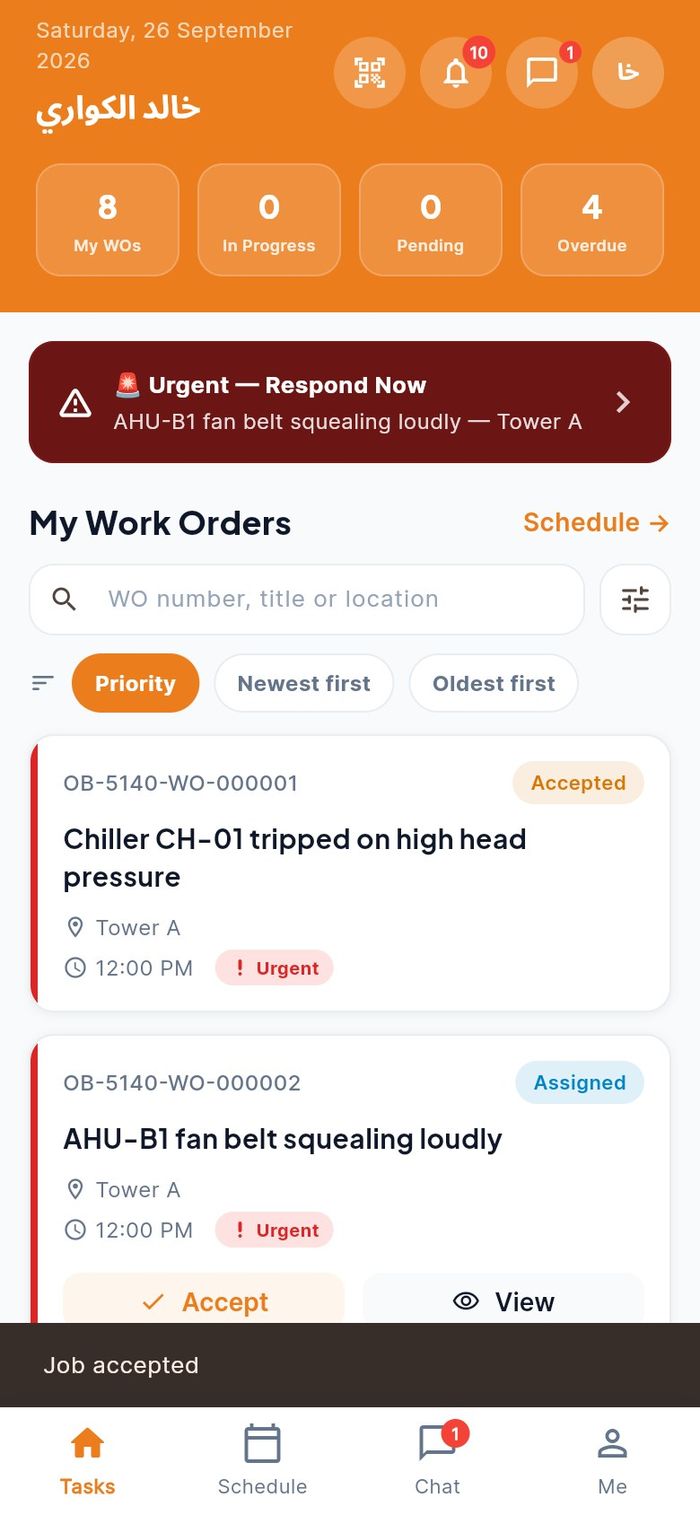
- Find the card with the status Assigned.
- Tap Accept.
The message Job accepted appears, the status chip changes to Accepted and the Accept button disappears.
Open a job
- Who: any technician
- Where: tap a job card, View, the urgent banner, a notification, a scan result or a schedule tile
The job screen has a header and four tabs.
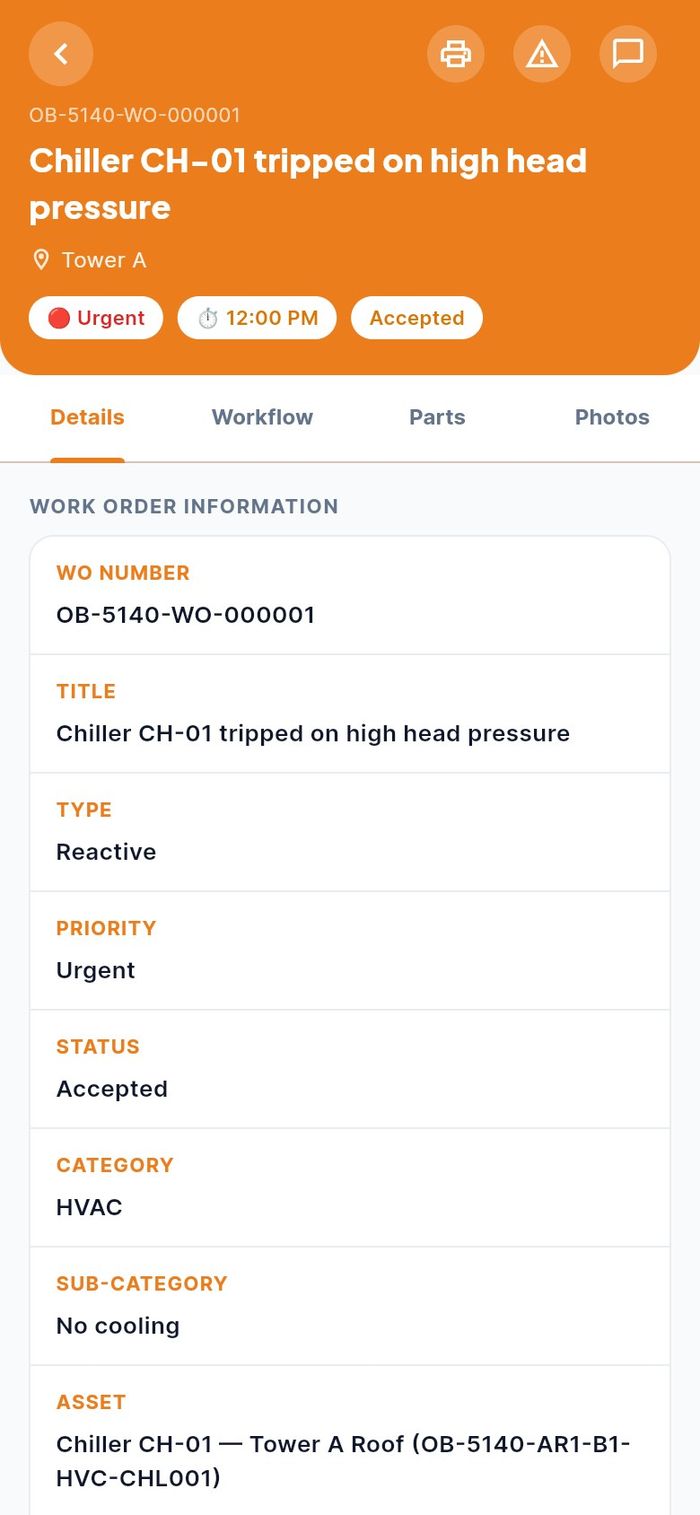
The header shows the work order number, the title, the location, the priority, the scheduled time and the status. The three icons at the top right are:
- Print work order: makes a PDF of the job.
- Report incident: opens the incident form linked to this job (see Report a safety incident).
- Chat about this work order: opens the job's conversation (see Chat).
The tabs are:
| Tab | What you do there |
|---|---|
| Details | Read the job: type, priority, category, asset, location, description, dates, the assigned team and technician, and the SLA targets. |
| Workflow | Start the job, log your work, decline it or finish it. |
| Parts | Use parts from your van, request parts and see what was issued. |
| Photos | Add the before and after photos. |
Scroll down the Details tab to see the assigned team, the response and resolution targets and whether each SLA was met.
Decline a job
- Who: the technician the job is assigned to
- Where: job → Workflow → I cannot do this job
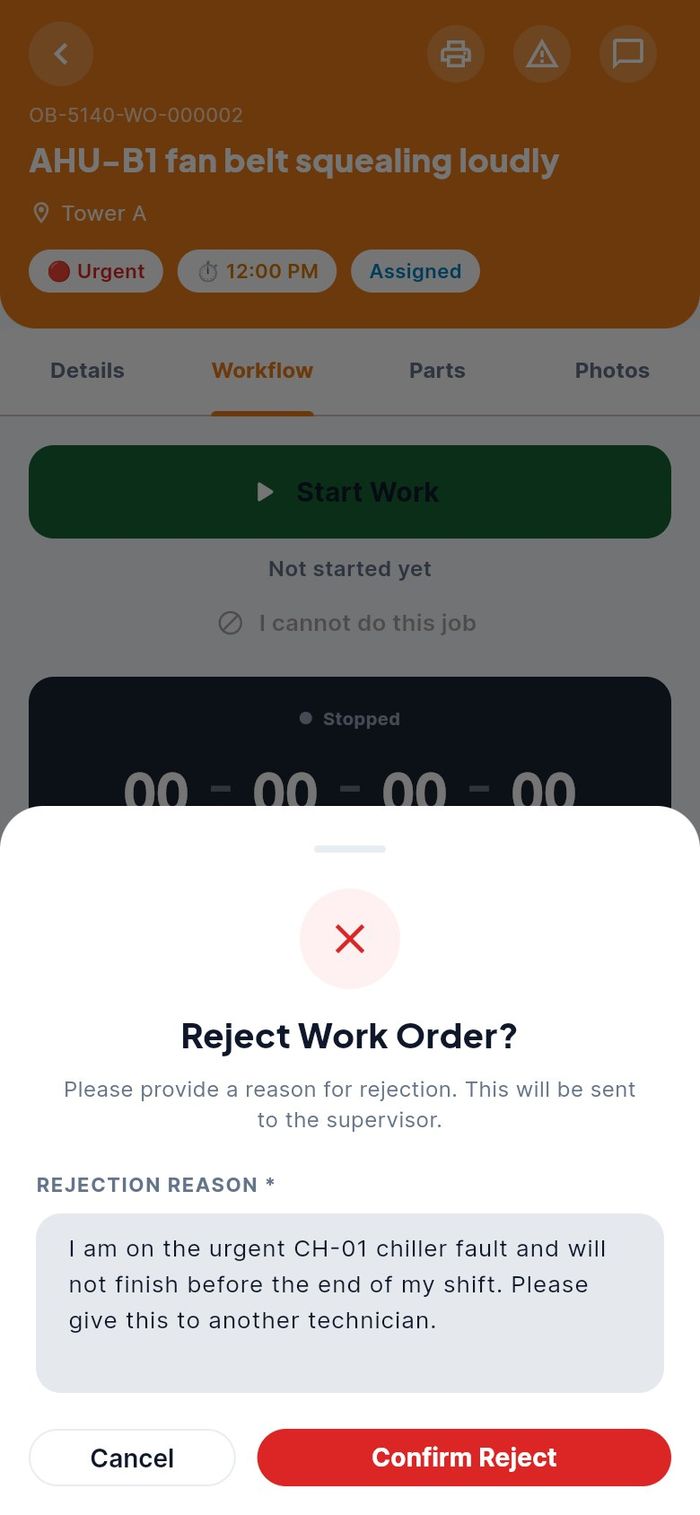
Decline a job when you cannot do it, for example because you are tied up on an emergency. Your supervisor gets your reason and can give the job to someone else.
- Open the job and tap the Workflow tab.
- Tap the red link I cannot do this job under Start Work.
- The sheet Reject Work Order? opens. Type the reason in REJECTION REASON.
- Tap Confirm Reject.
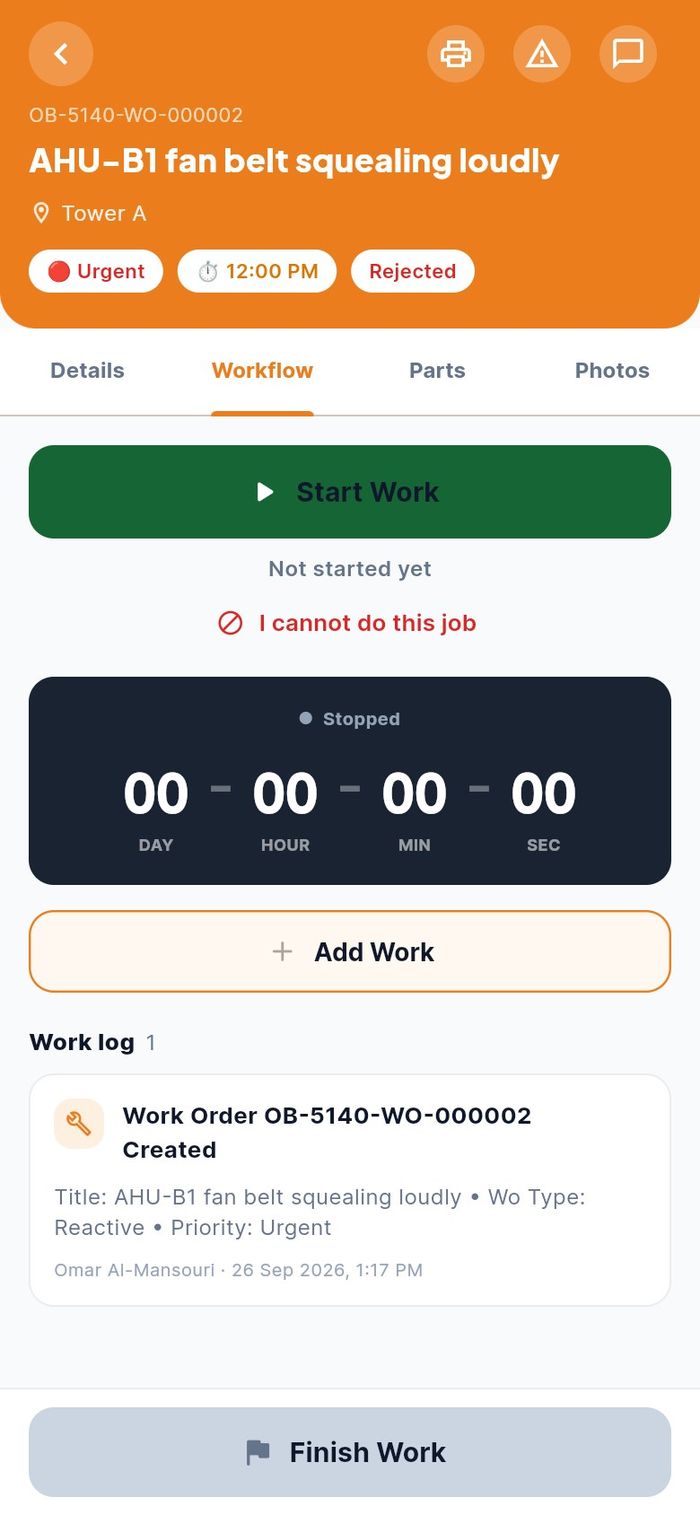
The job's status changes to Rejected and your supervisor is told.
Schedule
- Who: any technician
- Where: bottom tab Schedule, or Schedule → on the Tasks screen
The Schedule shows one week at a time. Planned maintenance visits (PPM) are grouped under Planned maintenance, with a PPM badge and the asset name. Breakdowns and requests are under Reactive work.
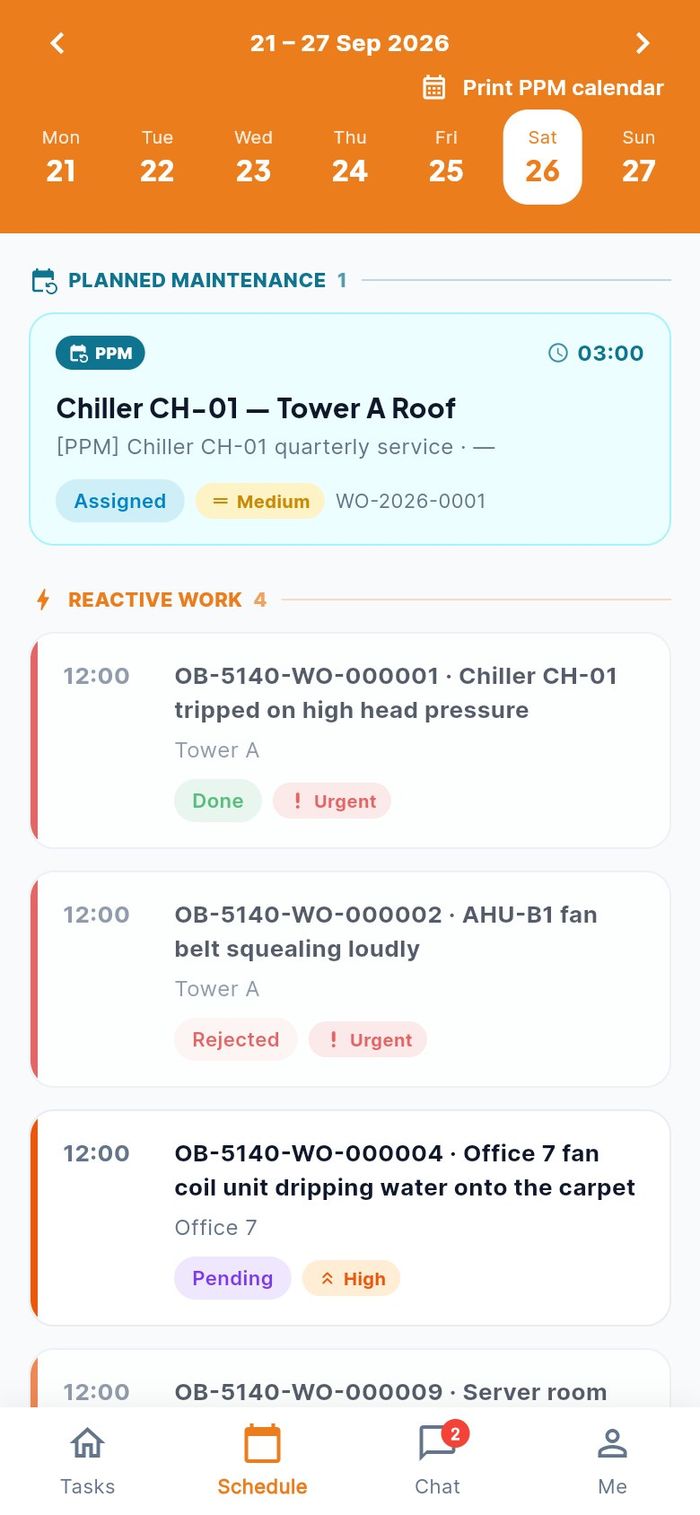
- Tap a day in the day strip to see its jobs.
- Use the arrows beside the week label to move a week back or forward. Tap the week label to return to this week.
- Tap a tile to open the job.
- Tap Print PPM calendar to make a PDF of your planned visits for the period.
Doing the work
This part follows a job on site: starting the clock, logging the work, photos, parts and closing the job.
Start work and log what you do
- Who: the technician the job is assigned to
- Where: job → Workflow
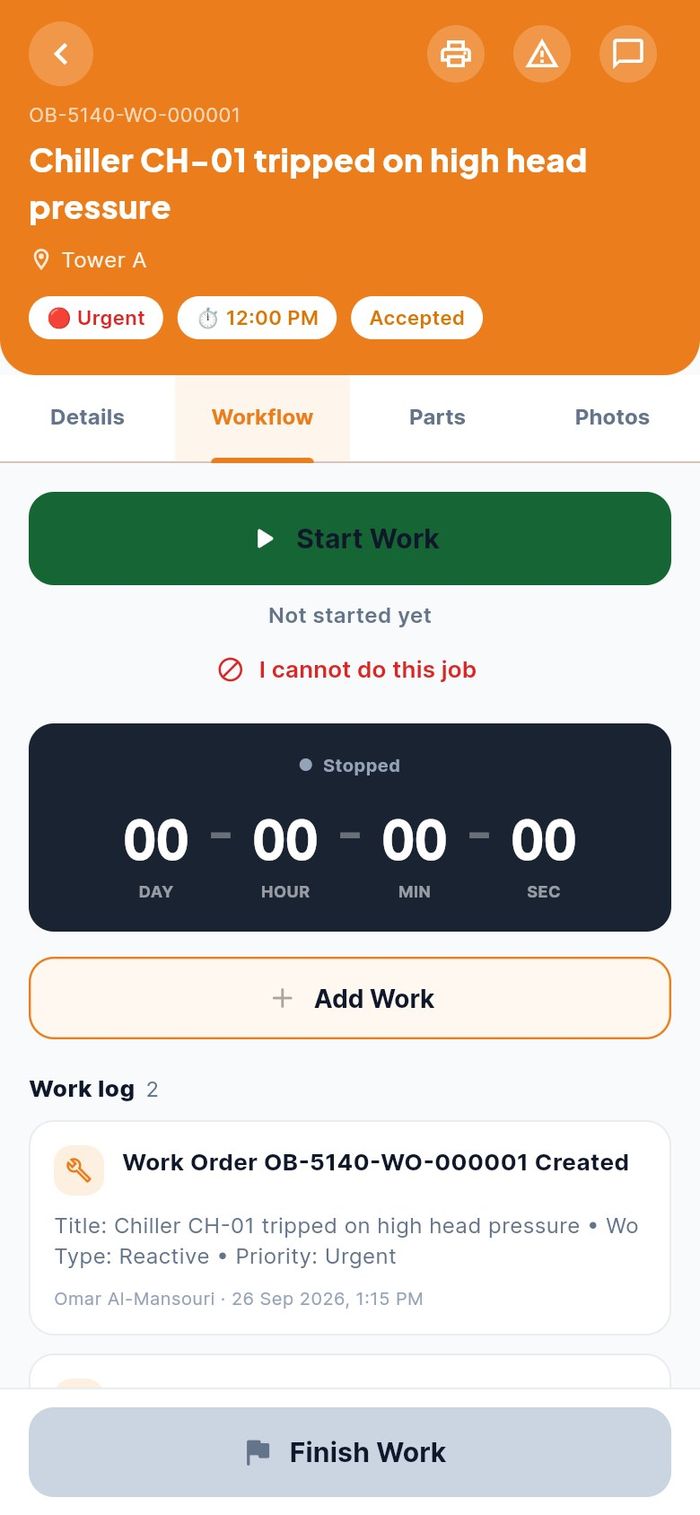
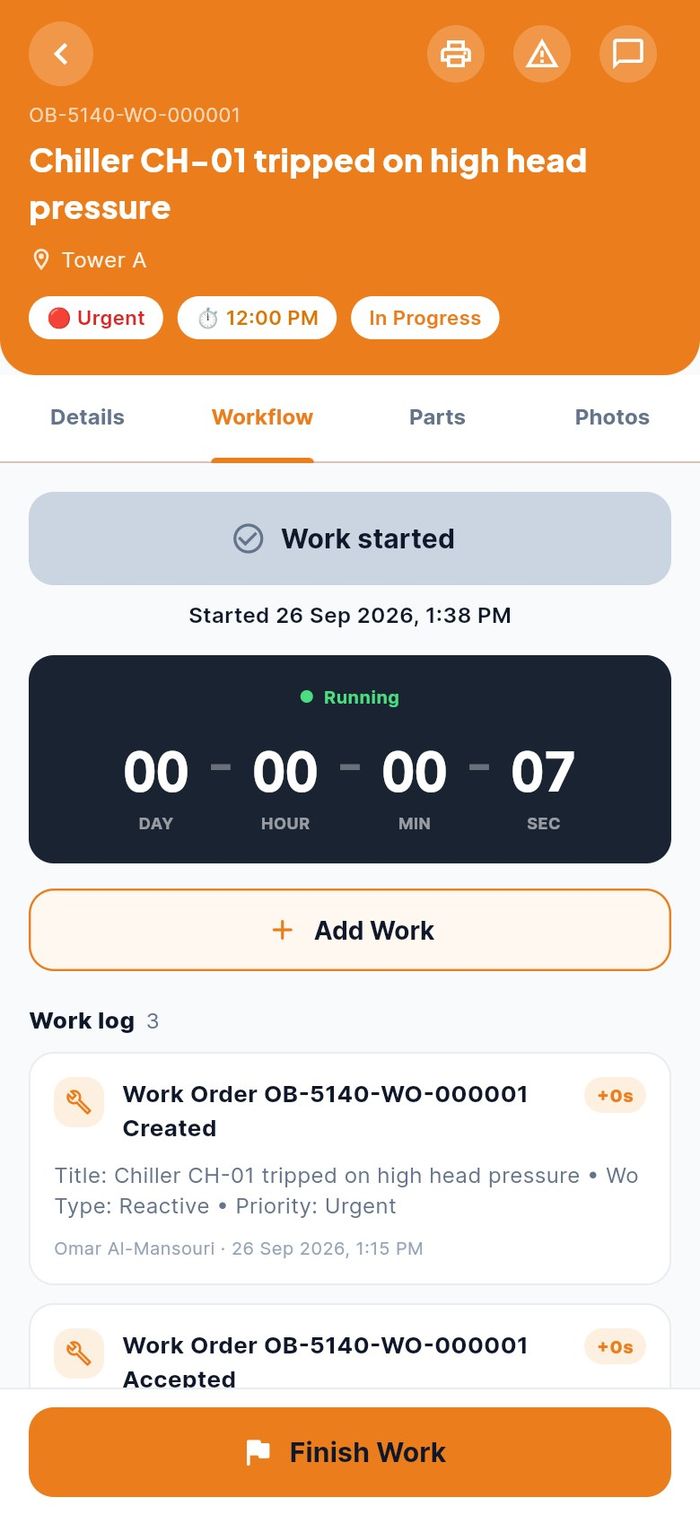
- When you are at the equipment and ready, tap the green Start Work button.
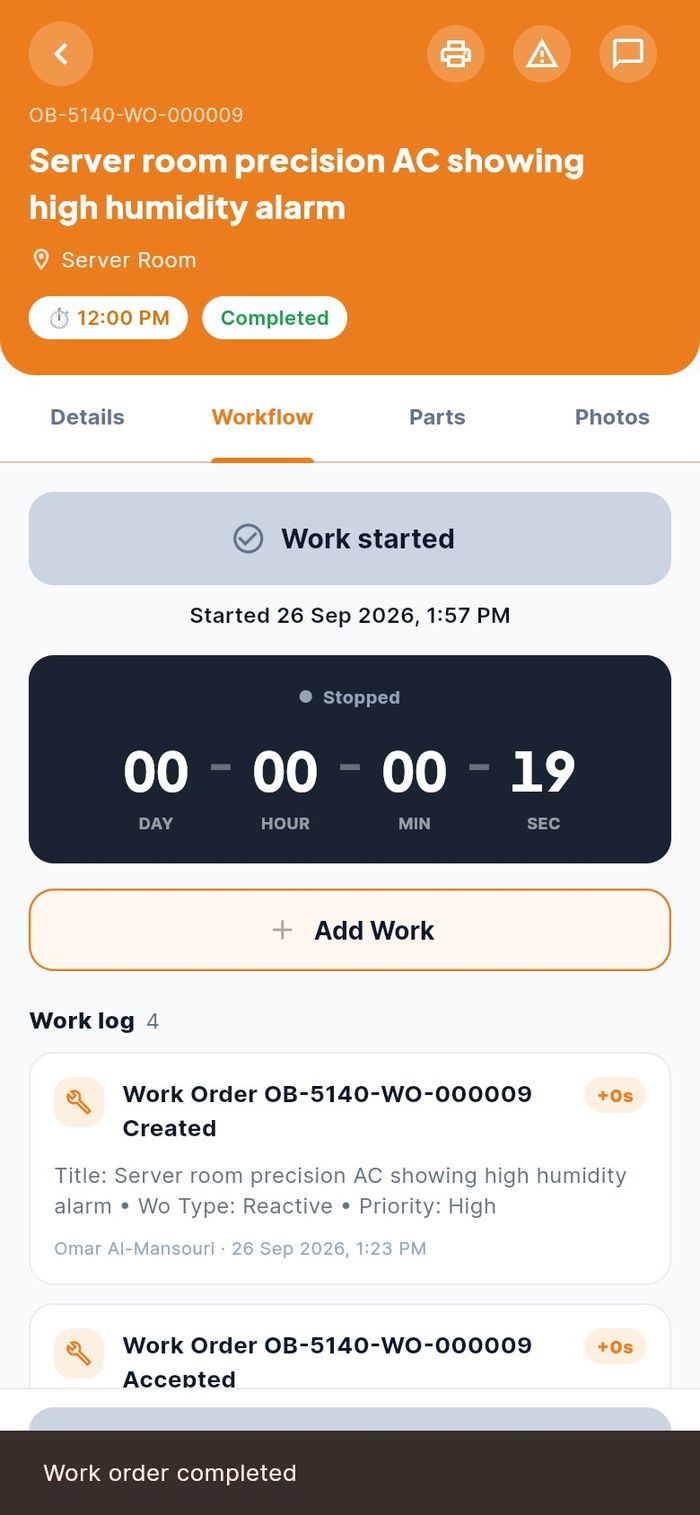
- The button turns grey and reads Work started, with the start time under it. The timer shows the days, hours, minutes and seconds since you started, and the status changes to In Progress.
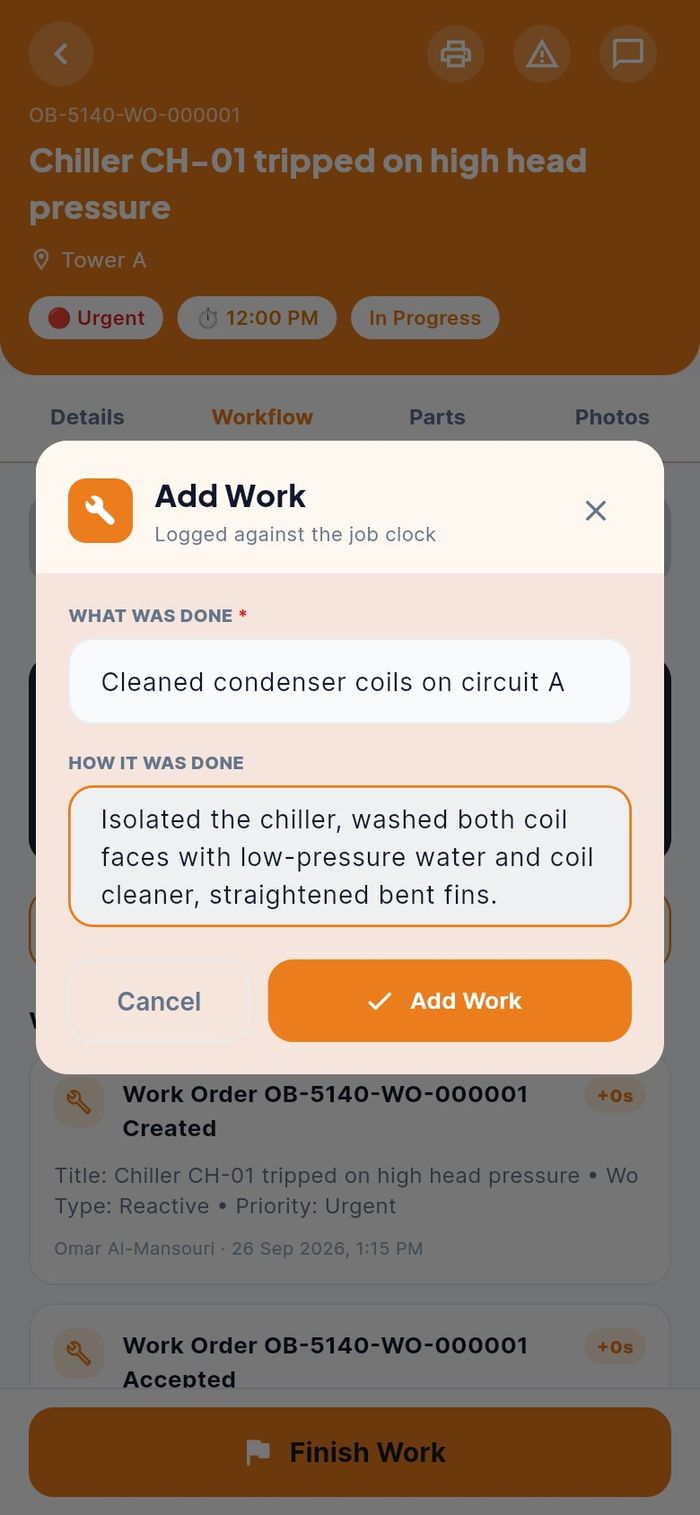
- As you work, tap Add Work. The dialog Add Work opens, with the note Logged against the job clock.
- In WHAT WAS DONE, type the task in a few words. This field is required.
- In HOW IT WAS DONE, add the tools, parts or steps if useful.
- Tap Add Work.
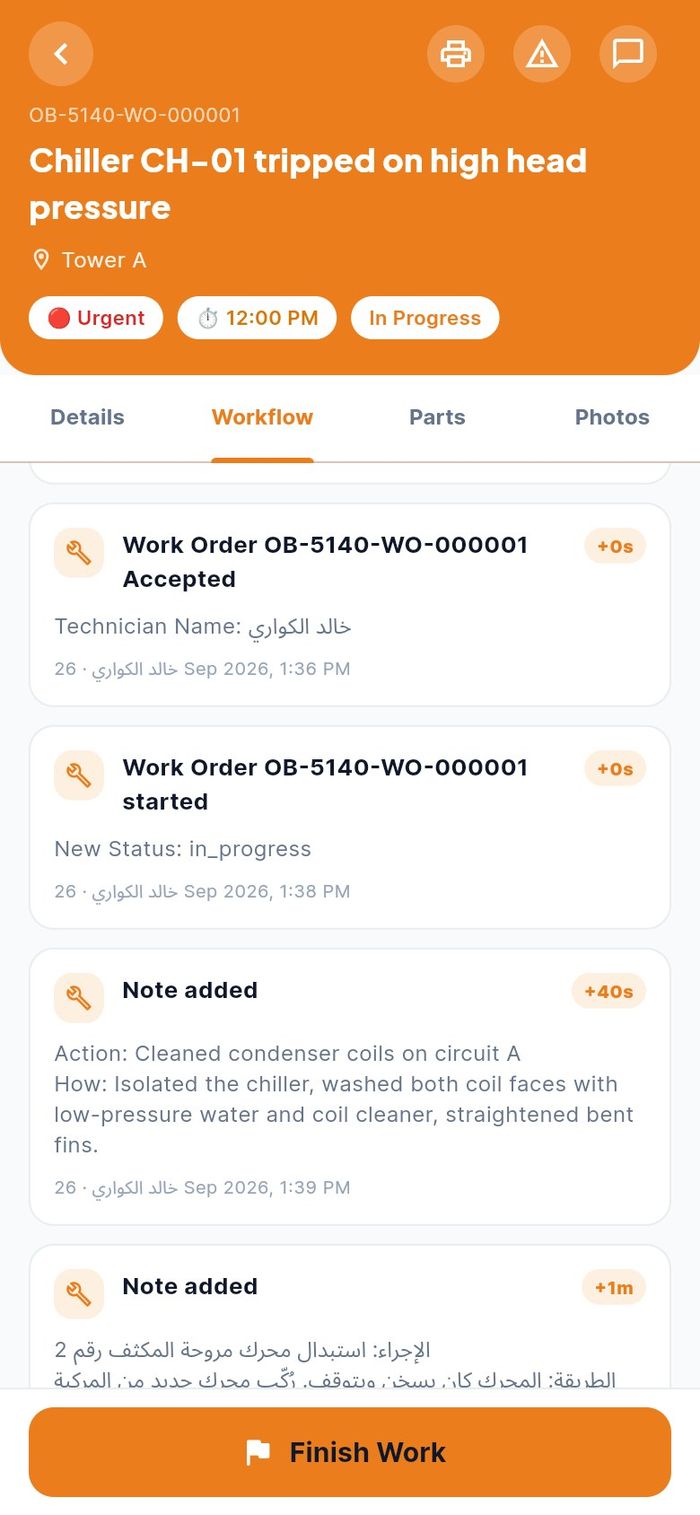
Each entry is added to the Work log with its time. The log also shows the job's history: when it was created, accepted and started.
Before and after photos
- Who: the technician working on the job
- Where: job → Photos
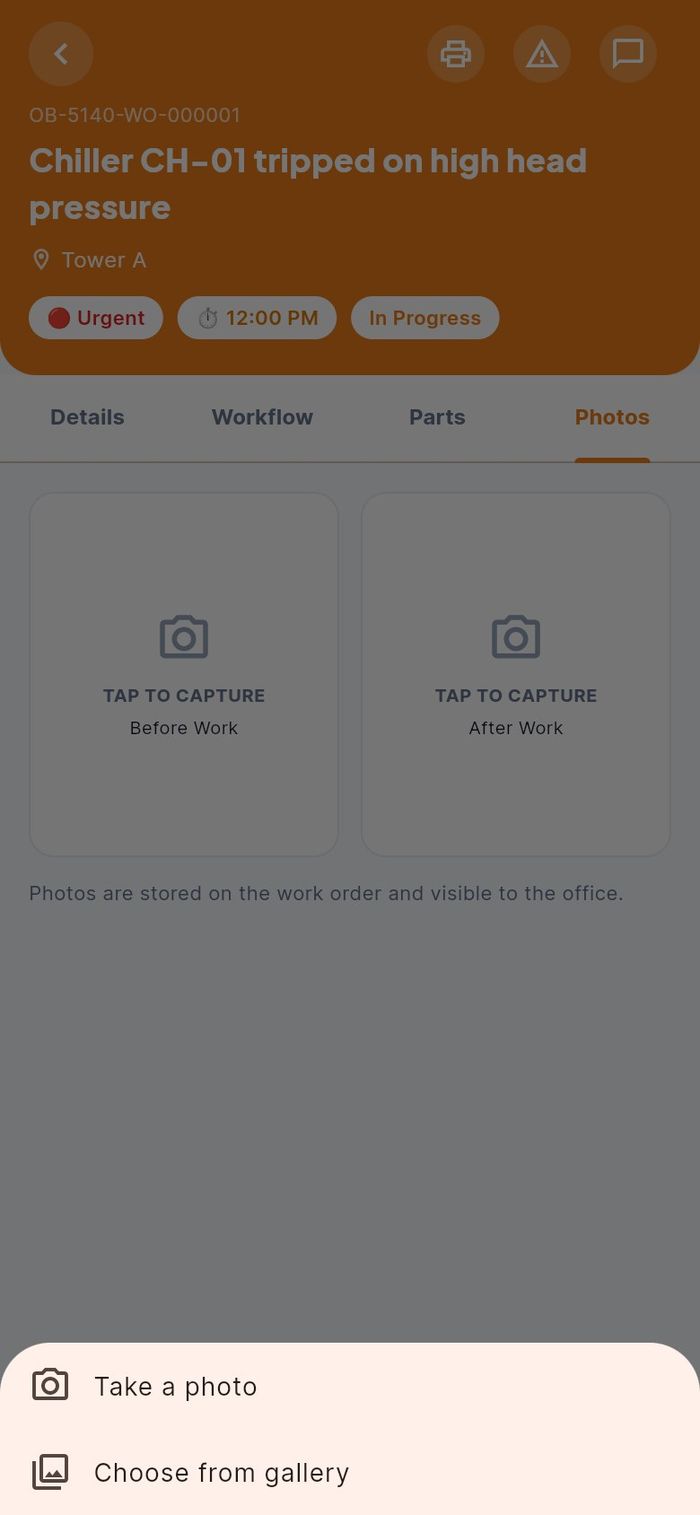
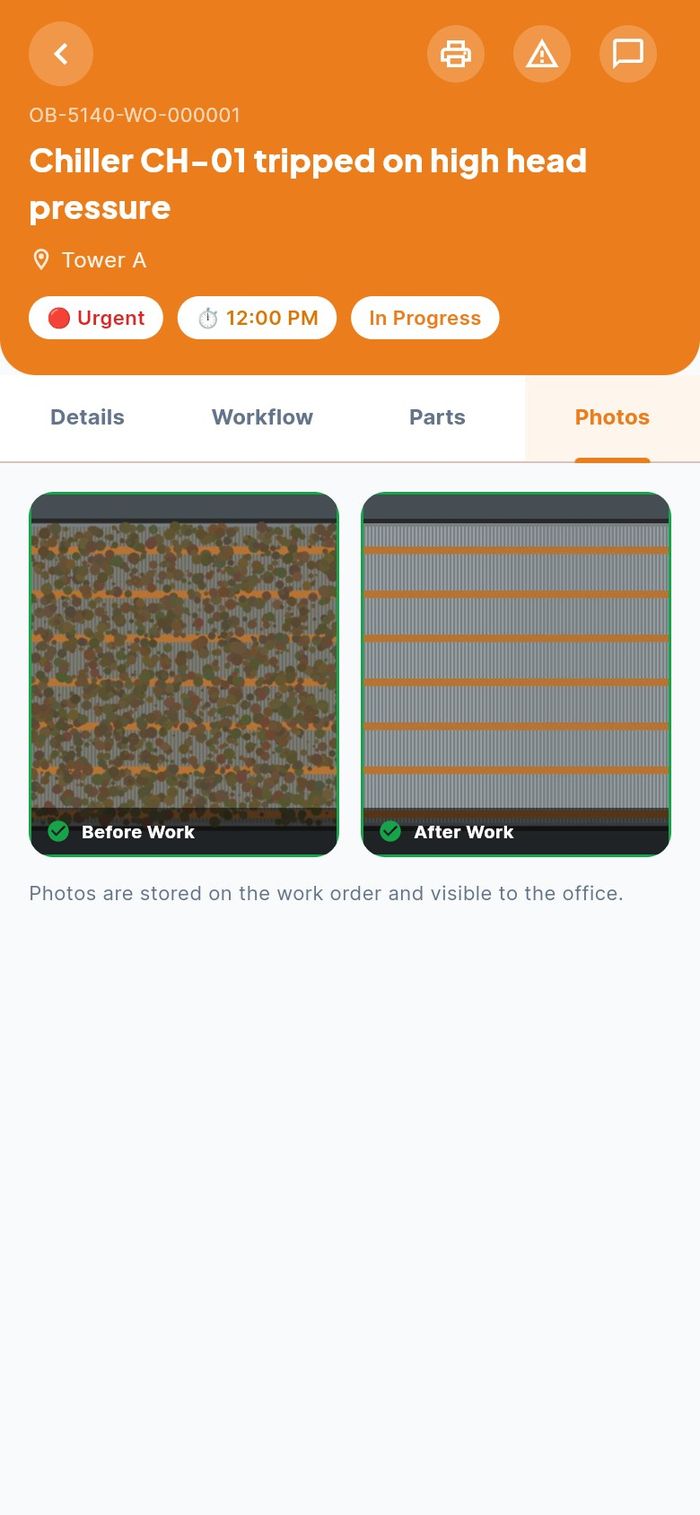
Each job has one Before Work photo and one After Work photo. They are saved on the job and the office sees them.
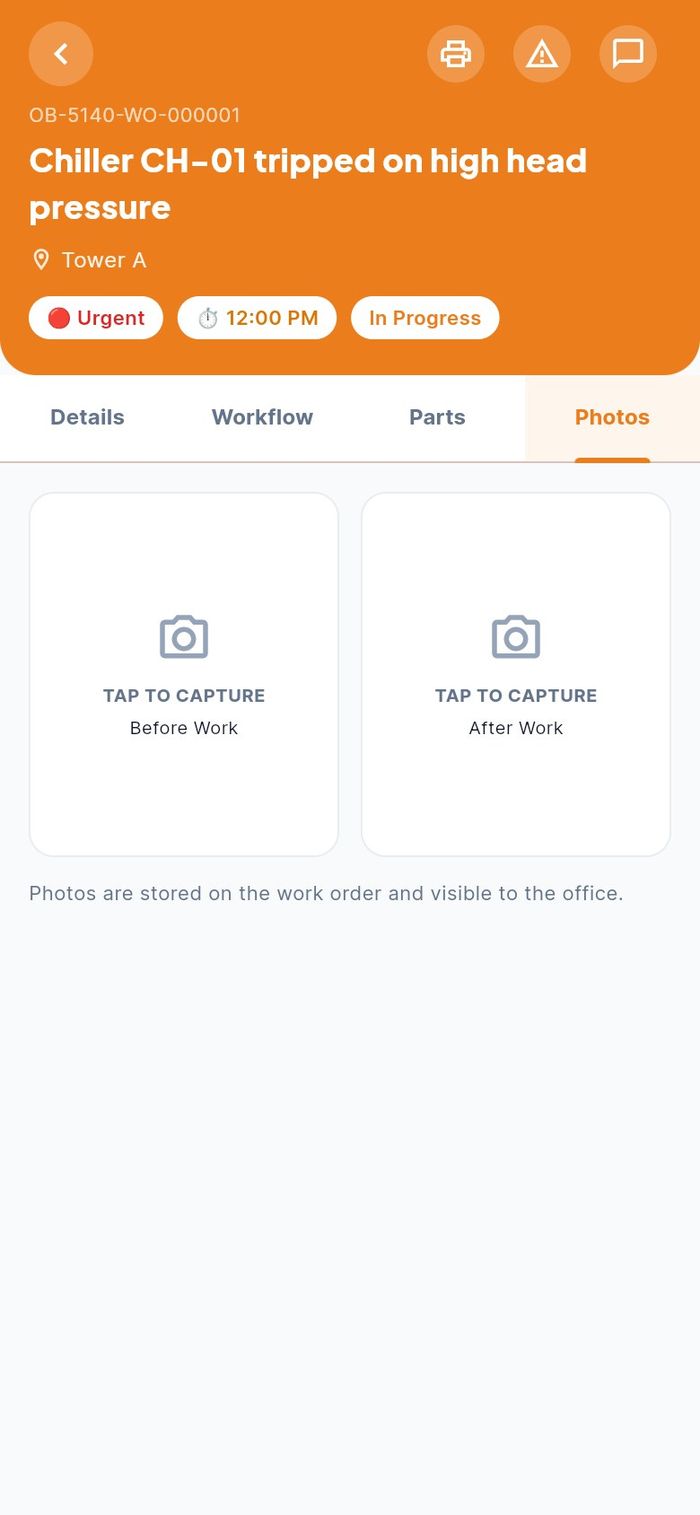
- Tap the Before Work tile (TAP TO CAPTURE).
- Choose Take a photo to use the camera, or Choose from gallery to pick a photo you already took.
- The photo uploads and appears in the tile with a green tick.
- When the work is done, do the same with the After Work tile.
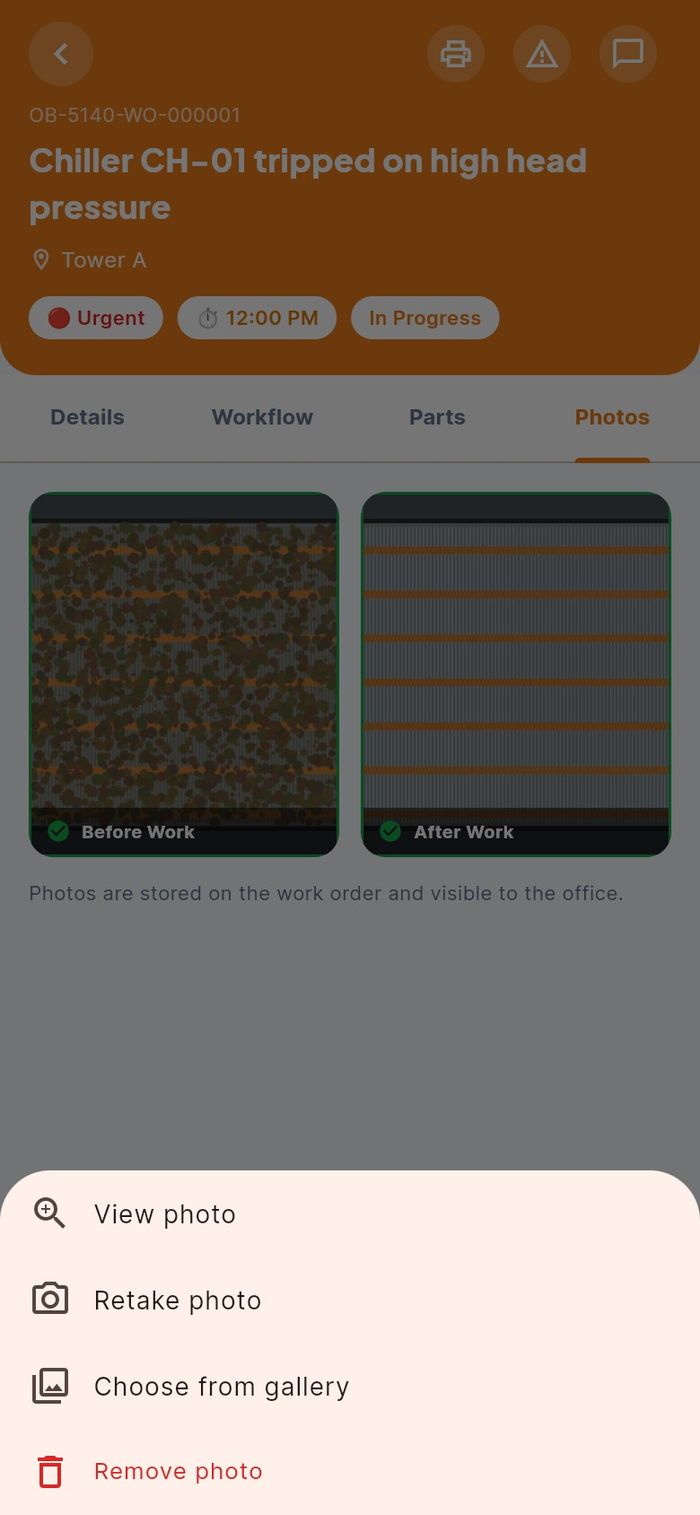
To change a photo, tap it. You can then View photo, Retake photo, Choose from gallery or Remove photo.
Use a part from your van
- Who: company technicians who have a van stock location (not contractors)
- Where: job → Parts → Use from Van
When you fit a part you carry in your van, record it against the job. The part is charged to the job and taken off your van stock.
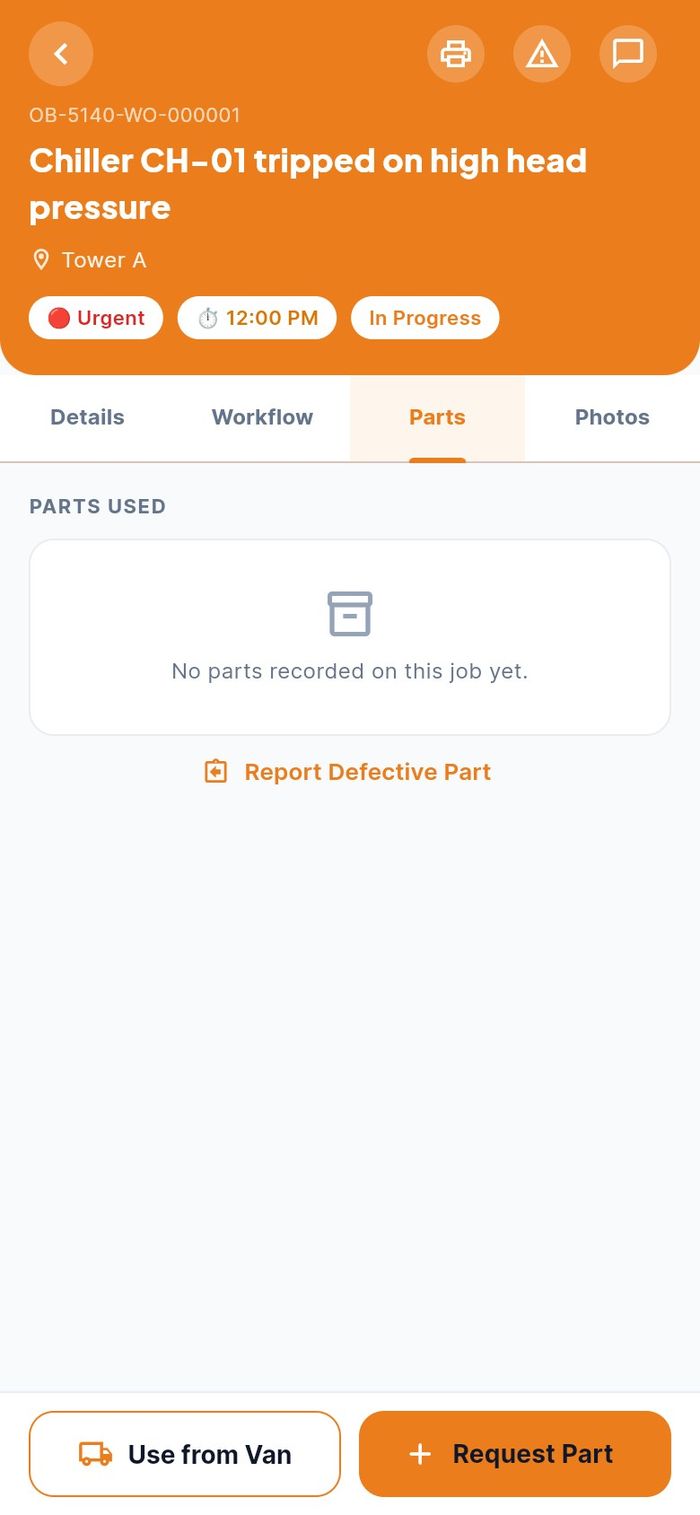
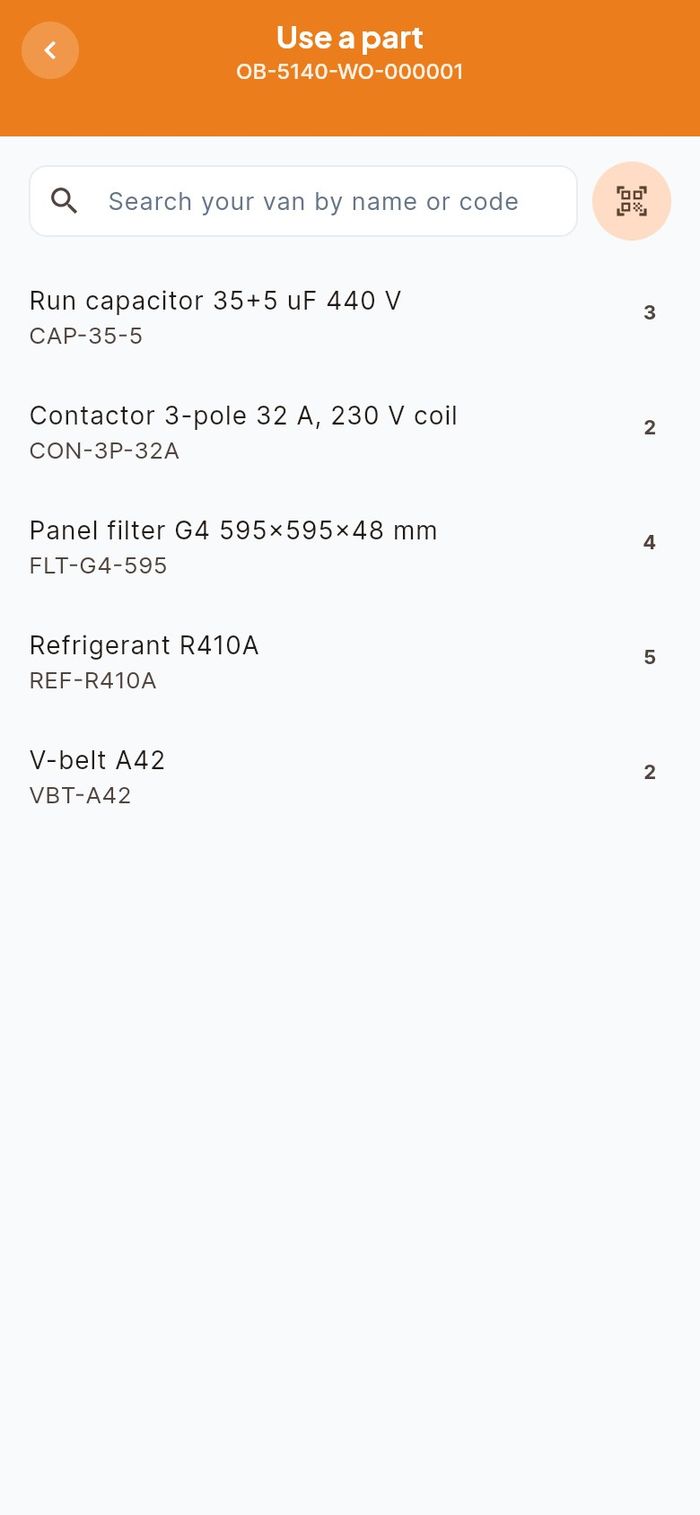
- Open the job, tap Parts, then Use from Van. The screen Use a part lists what is in your van with the quantity.
- Find the part: scroll, type in Search your van by name or code, or tap the scan icon to scan the part's barcode.
- Tap the part. Under How many?, use + and − to set the quantity.
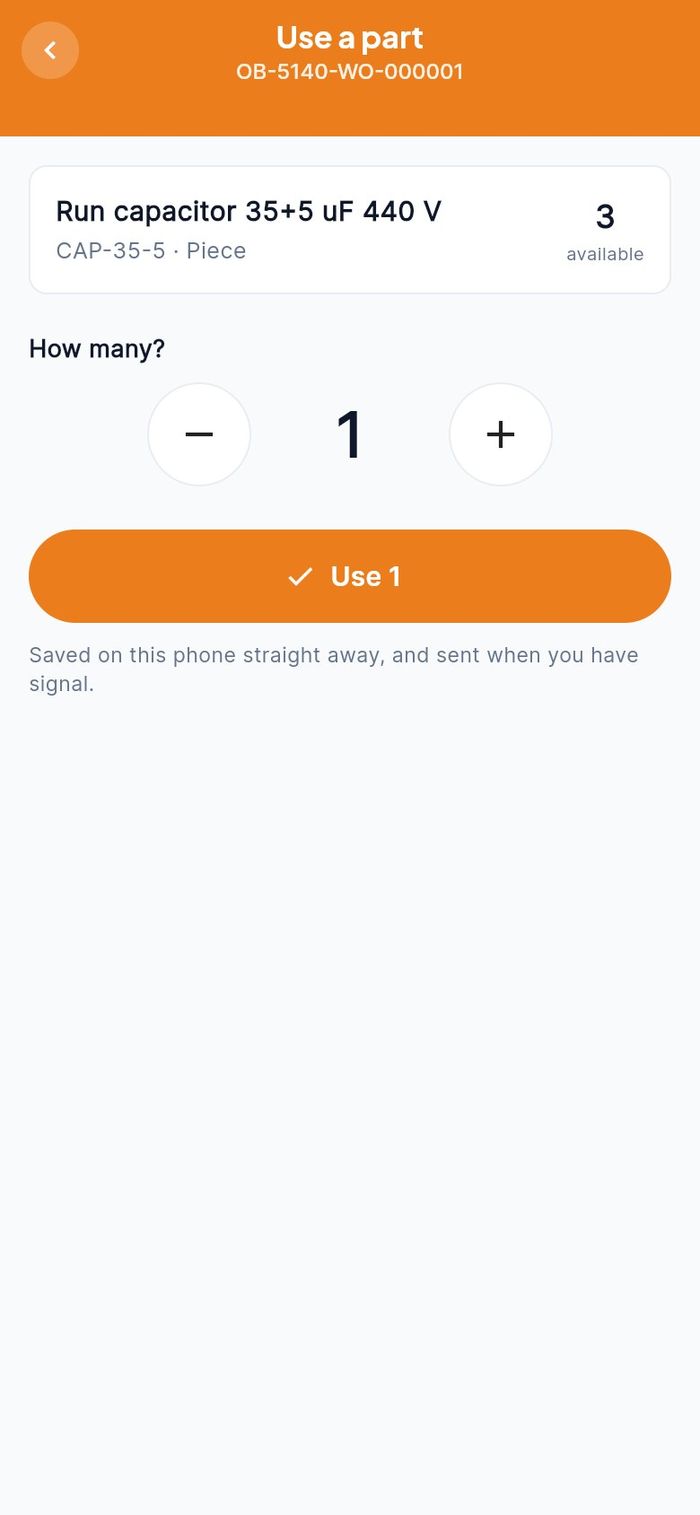
- Tap Use 1 (the number follows the quantity).
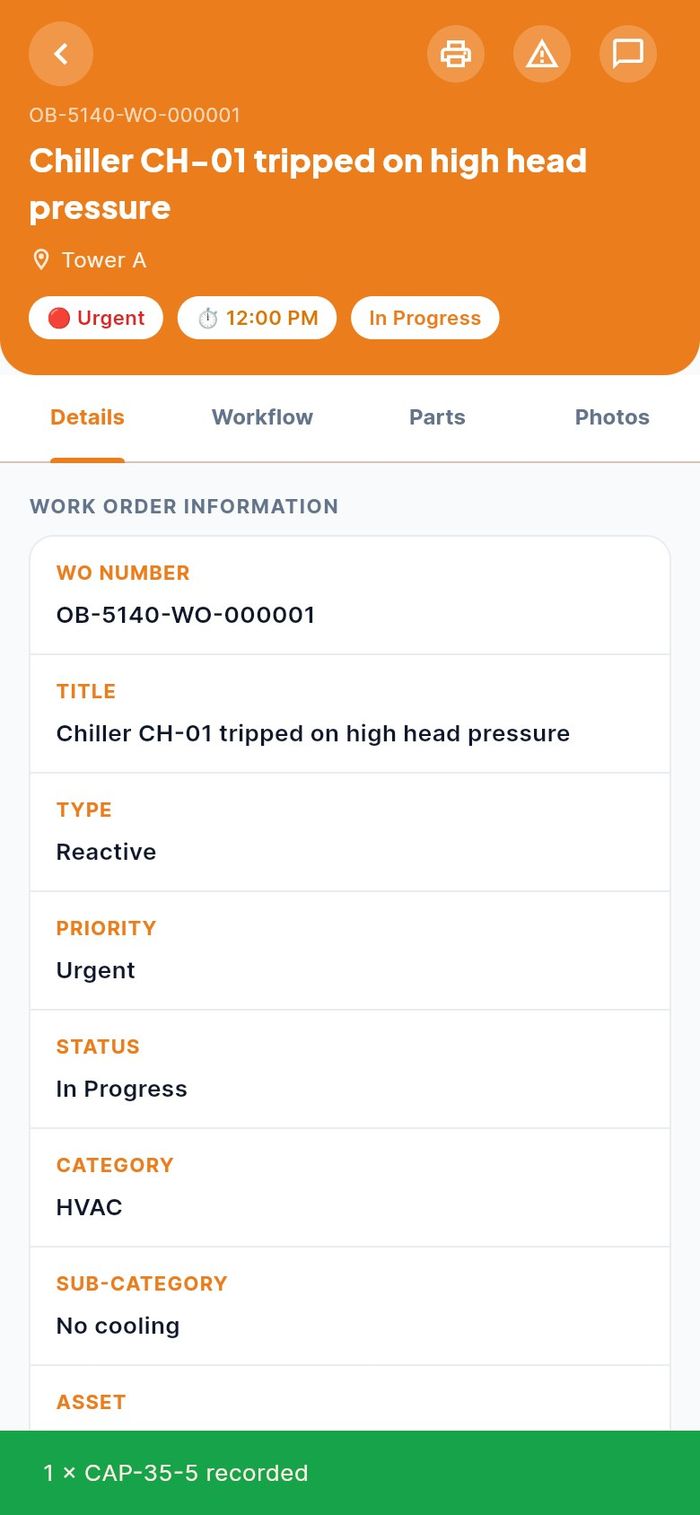
The app confirms, for example 1 × CAP-35-5 recorded, and returns to the job.
Request a part from the store
- Who: company technicians (contractors use Add Item instead)
- Where: job → Parts → Request Part
Ask the store for a part you do not have. The request goes to approval, then the storekeeper issues it for this job.
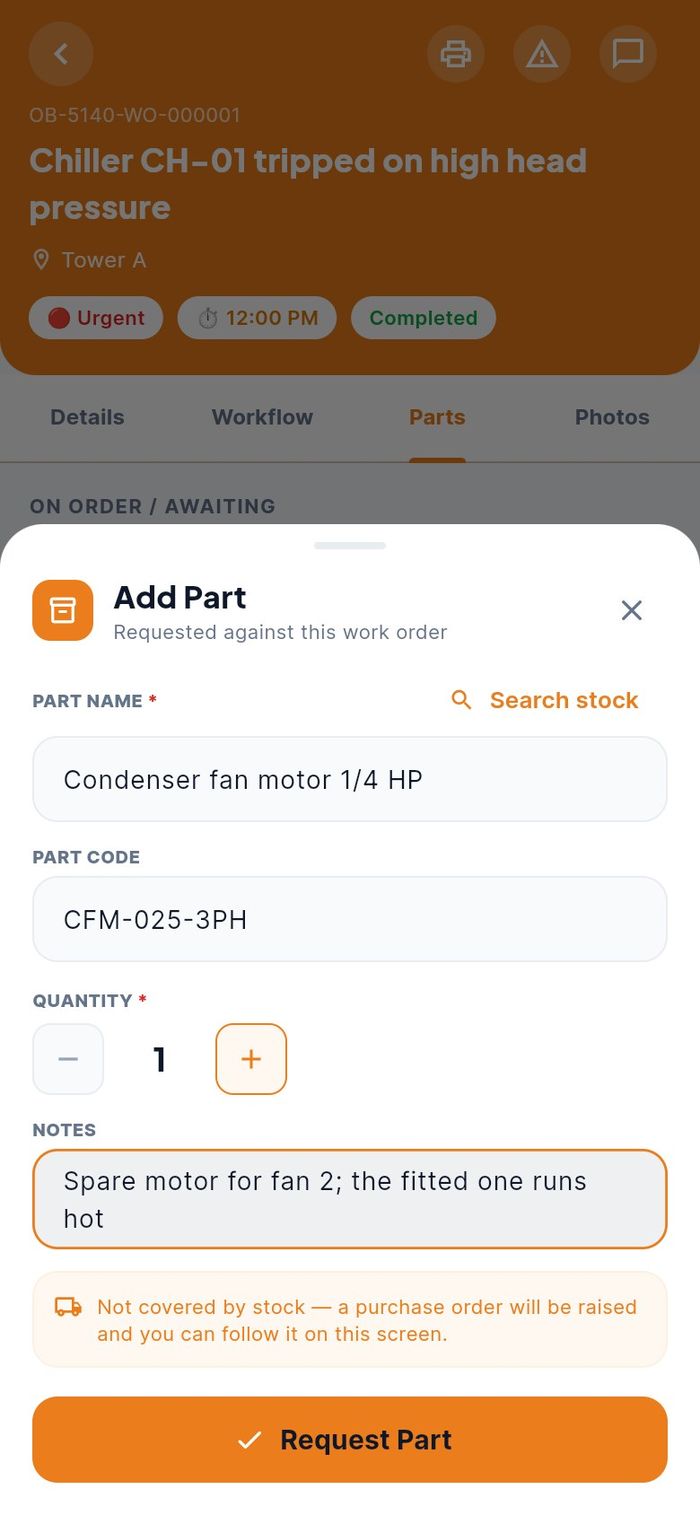
- Open the job, tap Parts, then Request Part. The sheet Add Part opens.
- Under FIND IN INVENTORY, type part of the name or code. Each result shows how many are in stock, or Out of stock.
- Tap the part you need.
- Set the QUANTITY and, if useful, a note in NOTES.
- Read the line at the bottom: In stock — goes to the storekeeper for issue once approved. or that a purchase order will be raised.
- Tap Request Part.
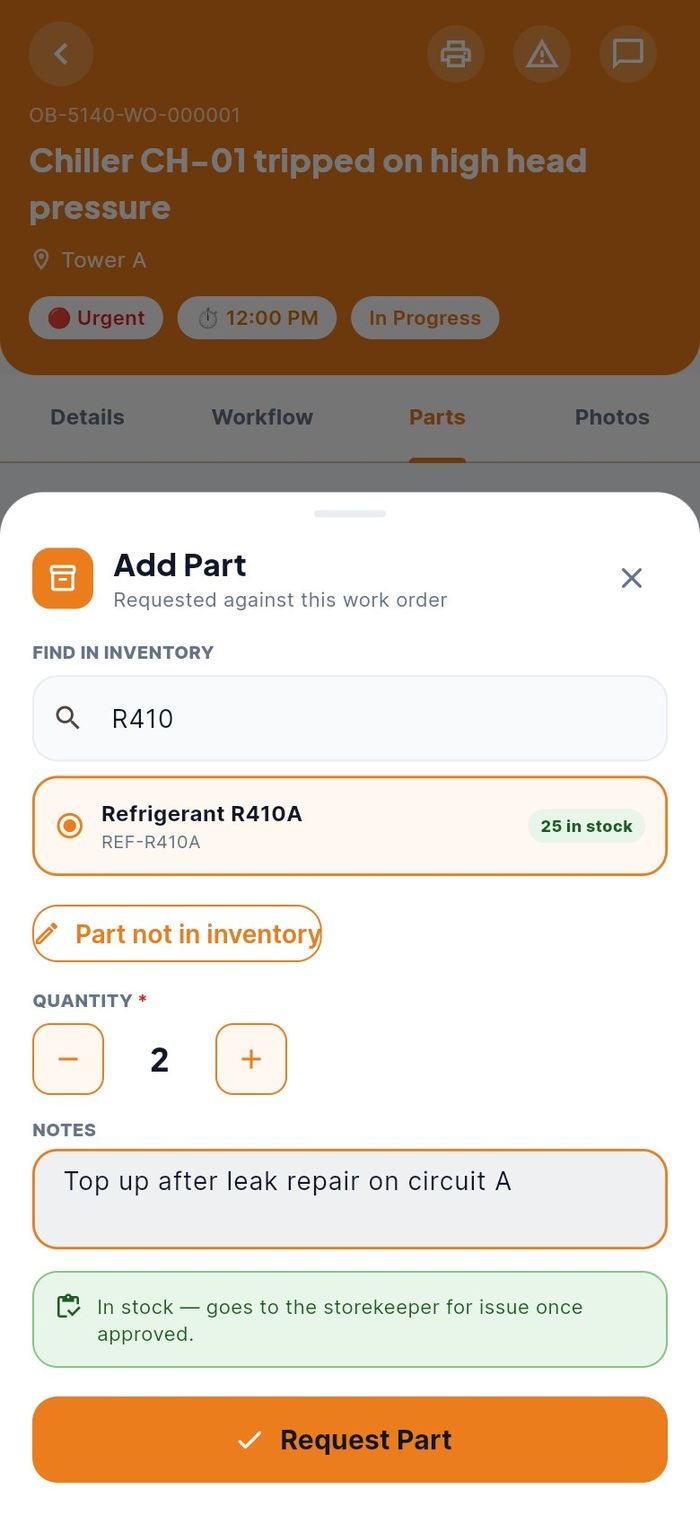
If the part is not in the list, tap Part not in inventory, type the PART NAME and, if you know it, the PART CODE, then tap Request Part. A purchase order is raised for it.
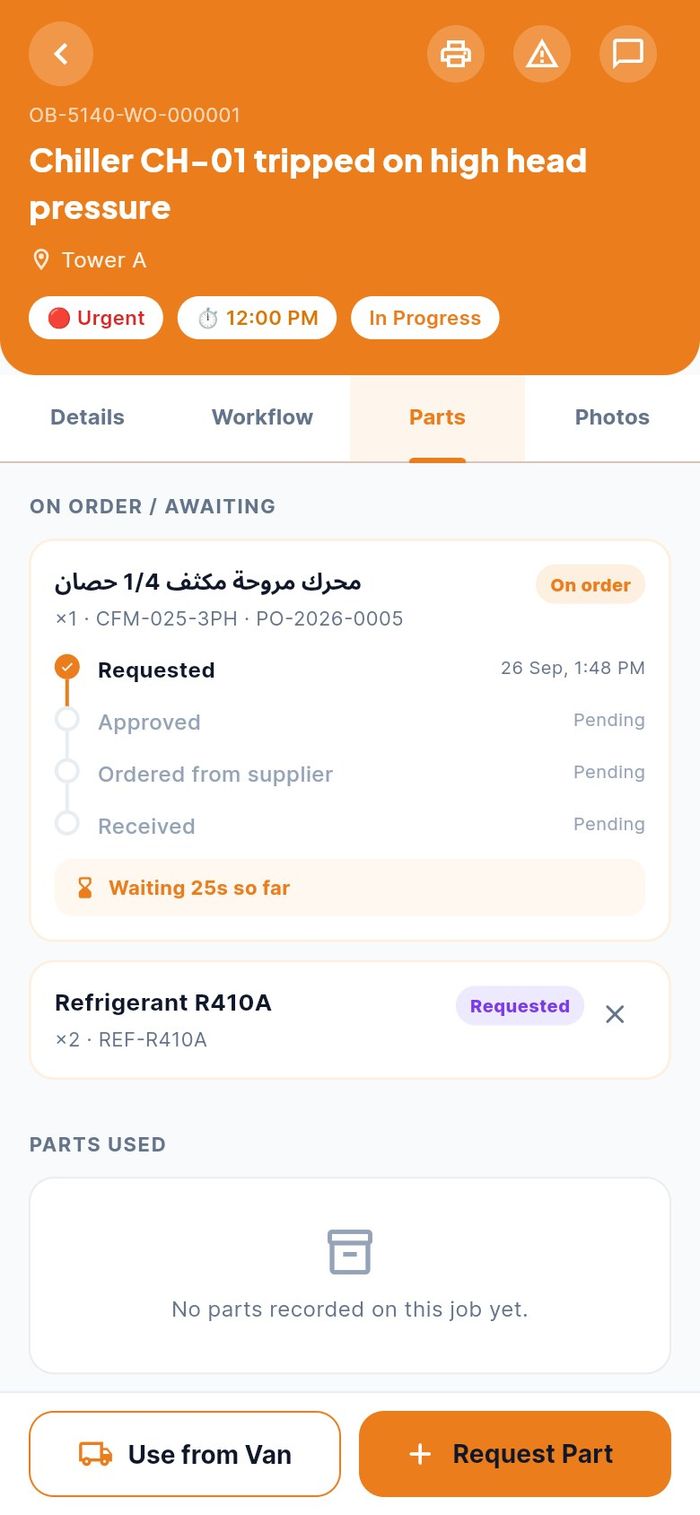
The message Part requested. appears. The request is listed under ON ORDER / AWAITING with its status. For a purchased part you can follow each step: Requested, Approved, Ordered from supplier and Received, and how long you have been waiting.
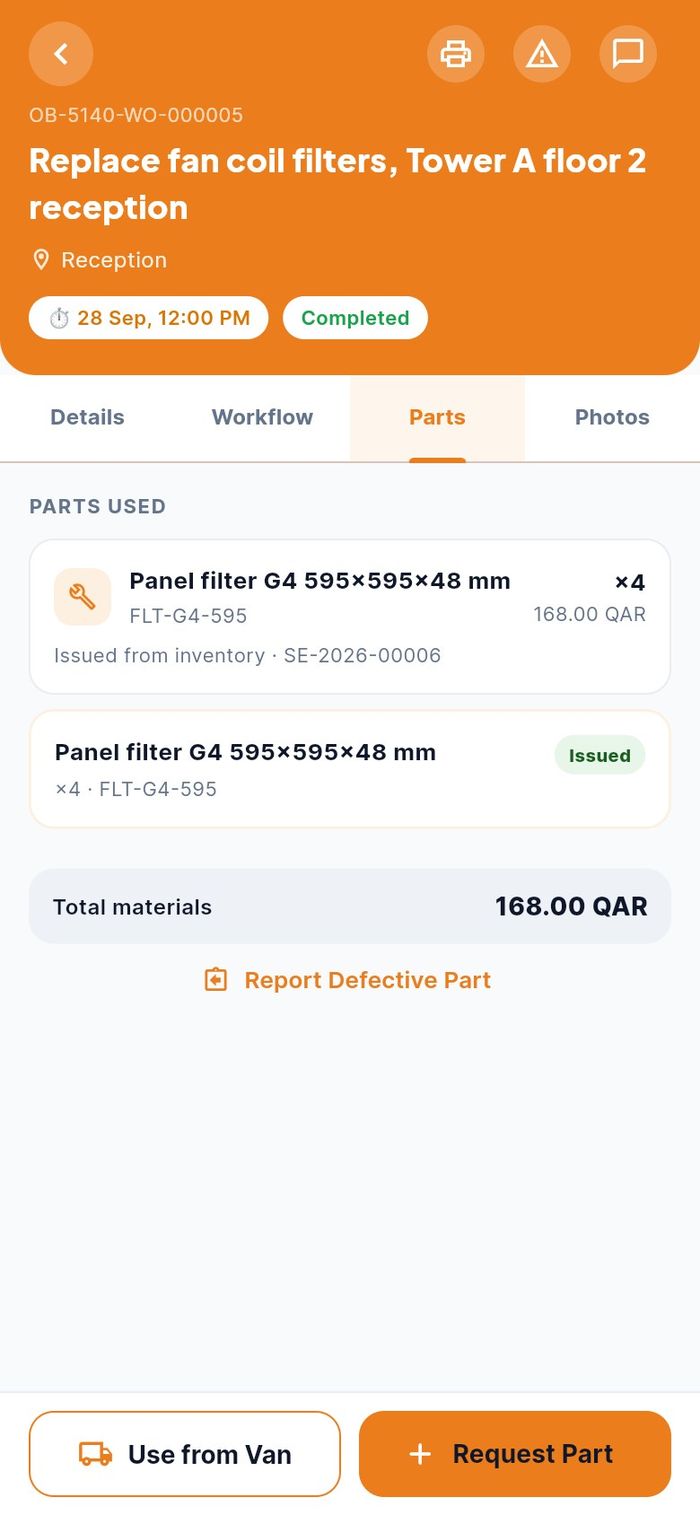
When the storekeeper issues the part, you get a notification and the part moves to PARTS USED with its cost. The Total materials line adds up the cost of the parts on the job.
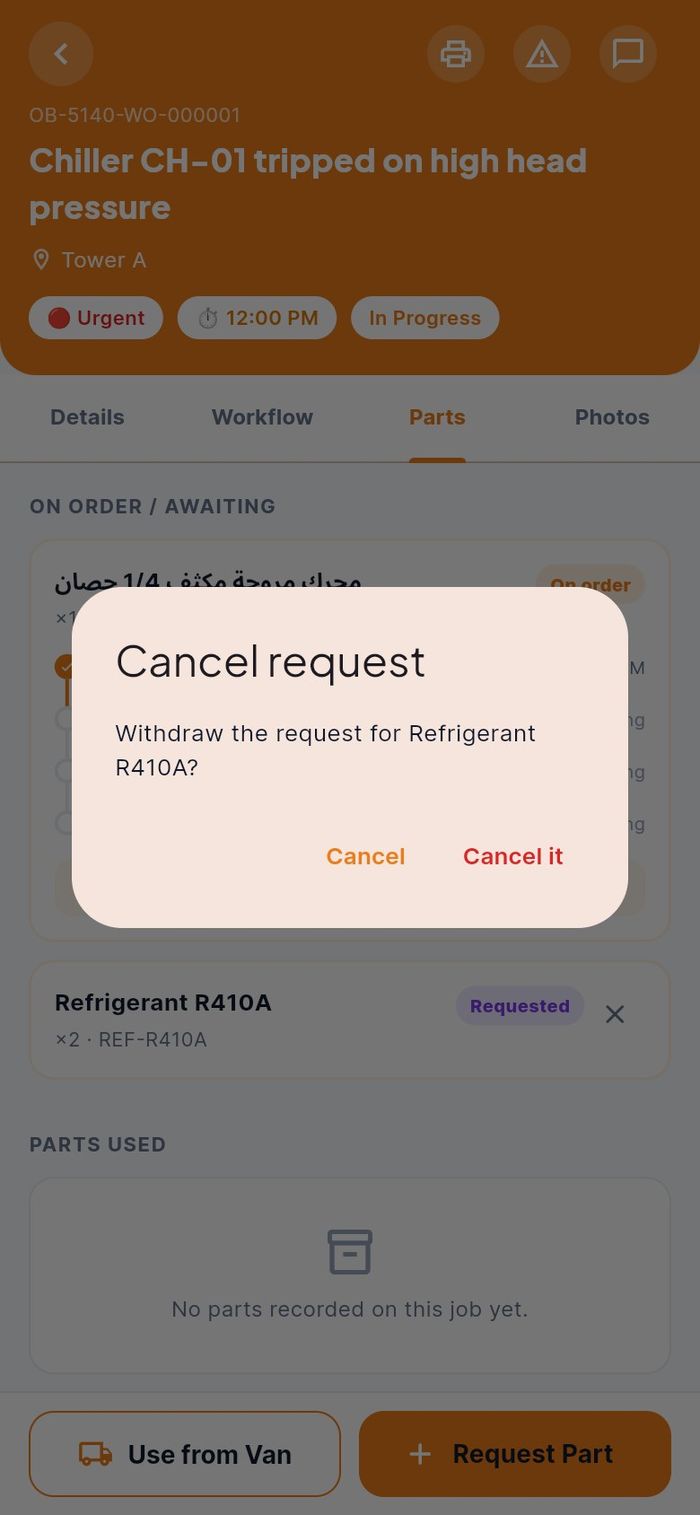
To withdraw a request that nobody has approved yet, tap the ✕ beside it, then Cancel it in the dialog Cancel request.
Report a defective part
- Who: company technicians
- Where: job → Parts → Report Defective Part
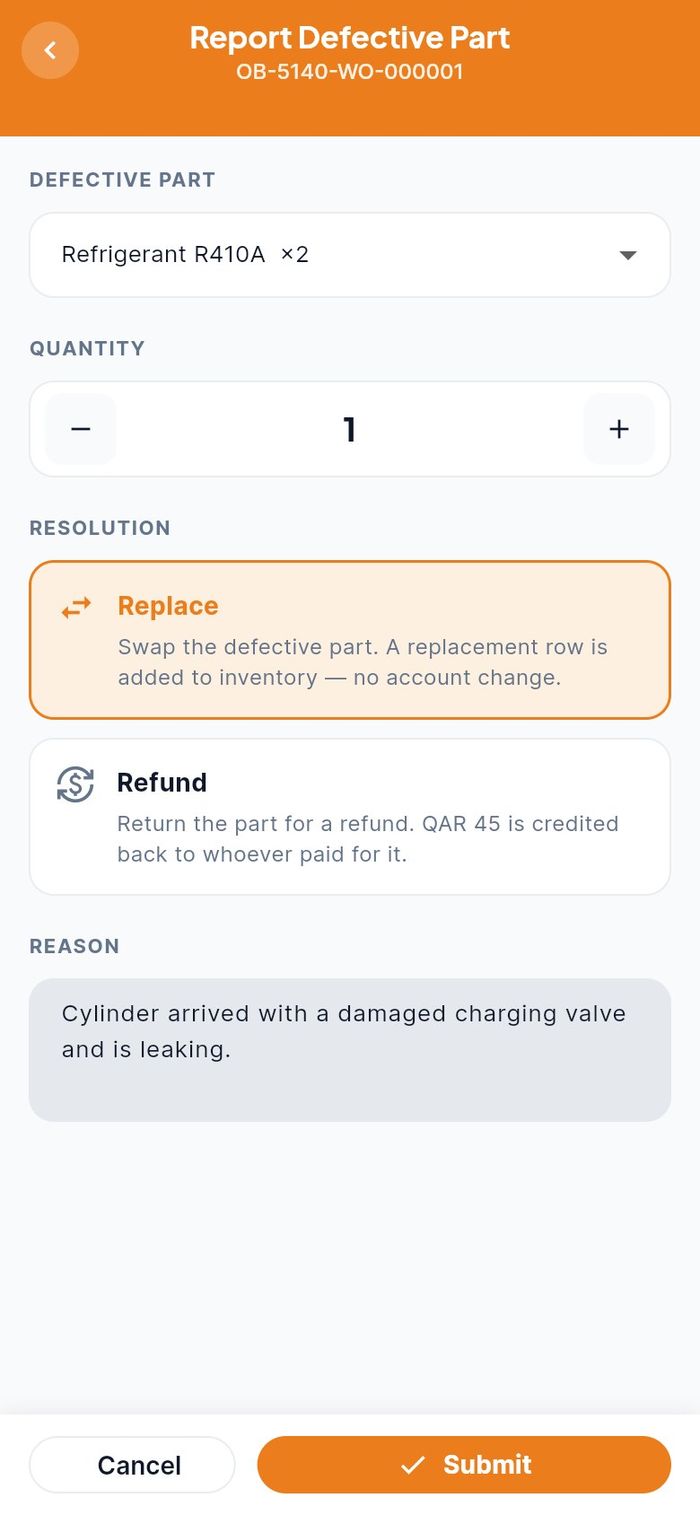
Use this when a part the store issued for this job turns out to be faulty. You choose whether you want a replacement or a refund.
- Open the job, tap Parts, then Report Defective Part.
- Under DEFECTIVE PART, tap Select part and choose the part. Only parts issued to this job are listed.
- Set the QUANTITY.
- Under RESOLUTION, choose:
- Replace: the faulty part is swapped and a replacement goes back into stock.
- Refund: the part is returned and its value is credited back.
- Describe the fault in REASON.
- Tap Submit.
Finish and complete a job
- Who: the technician working on the job
- Where: job → Workflow → Finish Work
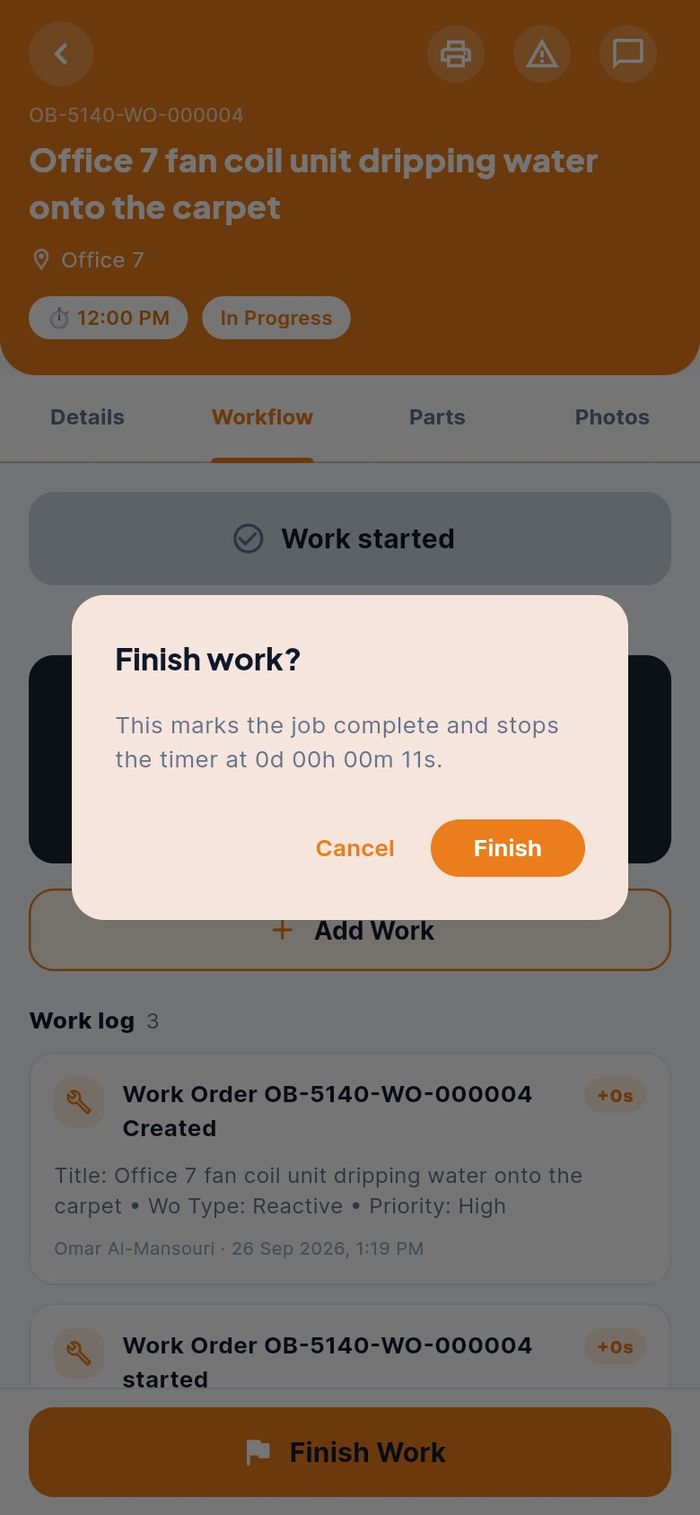
- When the work is done, tap Finish Work at the bottom of the Workflow tab. The button works only after Start Work.
- The dialog Finish work? shows how long the timer has run. Tap Finish.
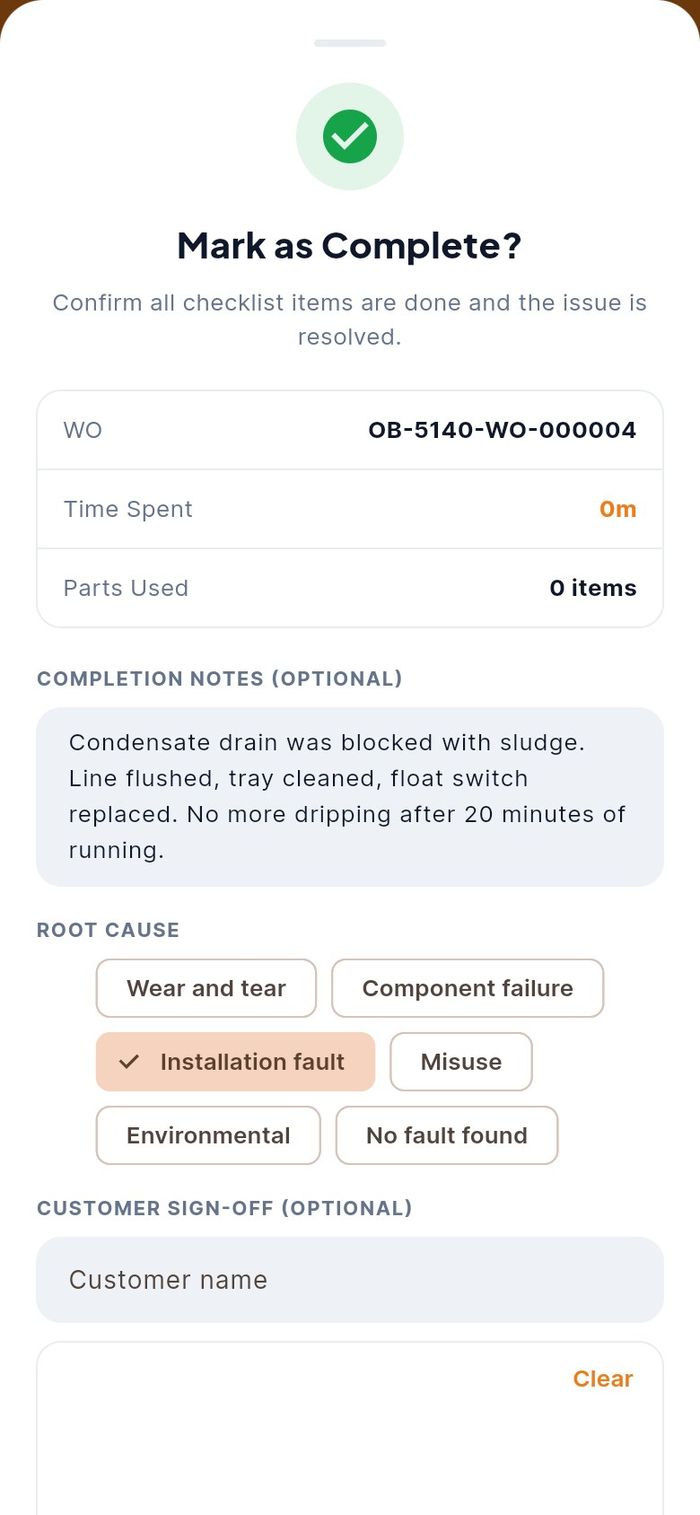
- The sheet Mark as Complete? opens. It shows the work order, the Time Spent and the number of Parts Used.
- In COMPLETION NOTES (OPTIONAL), write what you found and what you did.
- Under ROOT CAUSE, tap the cause that fits: Wear and tear, Component failure, Installation fault, Misuse, Environmental or No fault found.
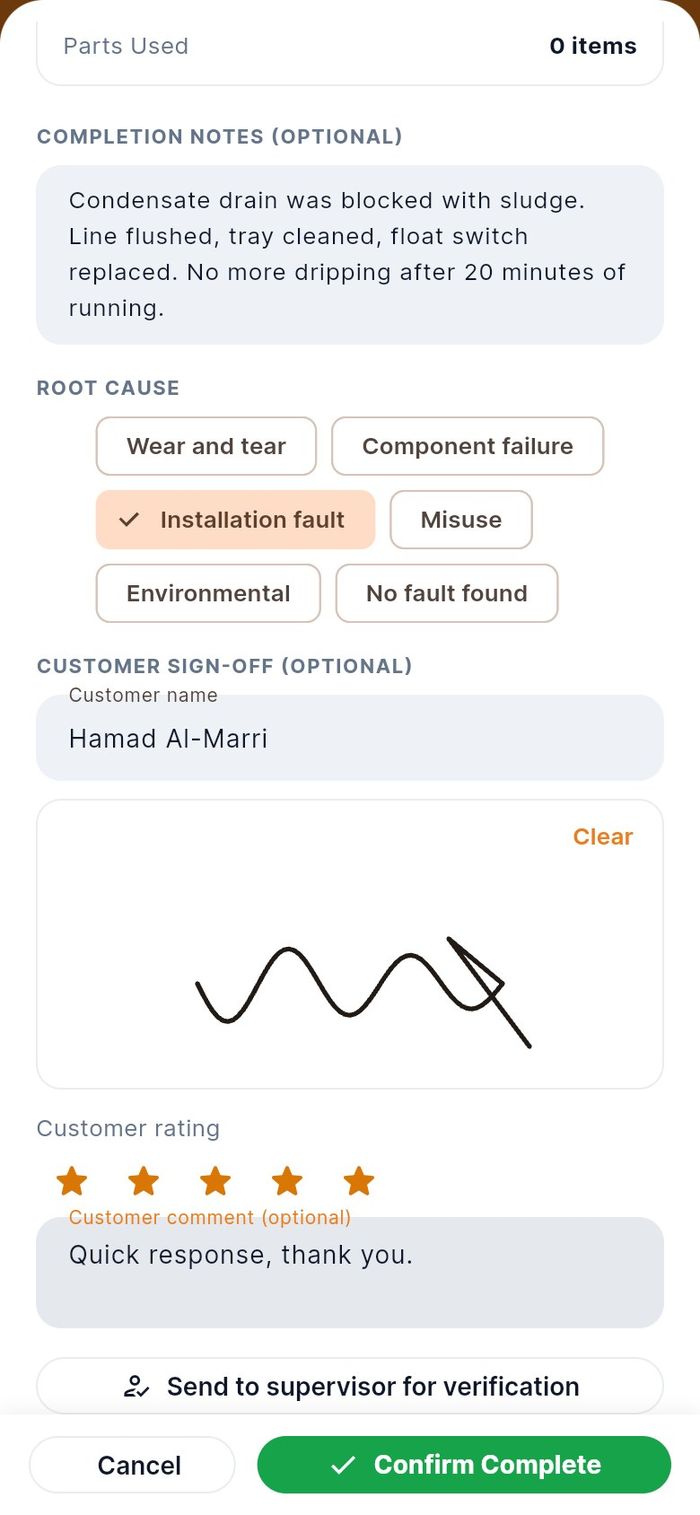
- If the customer is with you, fill in CUSTOMER SIGN-OFF (OPTIONAL):
- Customer name.
- The customer signs in the box with a finger. Clear wipes it.
- Customer rating: tap one to five stars.
- Customer comment (optional).
- Tap Confirm Complete.
The message Work order completed appears. The status changes to Completed, the timer stops and the bar at the bottom reads Work finished. The person who raised the request is told the job is done.
Send a job for verification
- Who: the technician working on the job
- Where: the Mark as Complete? sheet
Some jobs must be checked by your supervisor before they close, for example work in an occupied office or a repair that needs testing over time. In that case do not complete the job yourself.
- Follow steps 1 to 6 of Finish and complete a job.
- Tap Send to supervisor for verification instead of Confirm Complete.
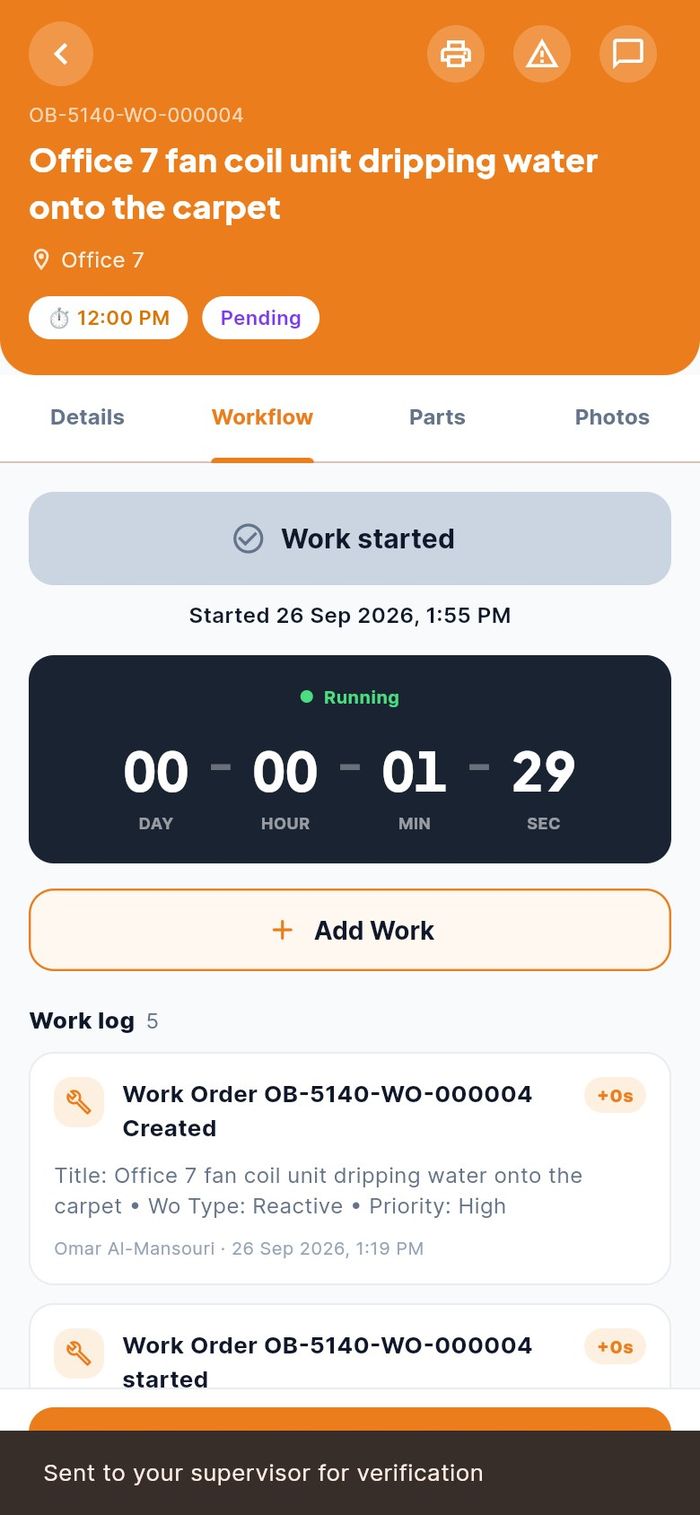
The message Sent to your supervisor for verification appears and the status changes to Pending. Your supervisor verifies the job in the web app, which closes it.
Jobs whose completion needs approval
- Who: technicians in companies that require approval to close work orders
- Where: Confirm Complete
Your company can decide that a completed job must be approved before it counts as closed. This is set in the web app under Settings → Approvals → Work order — closing.
When this rule is on:
- You complete the job as usual with Confirm Complete.
- The job does not close yet. It stays In Progress in your list while the approver reviews it in the web app under Approvals.
- When the approver taps Approve, the job changes to Completed. If the approver rejects it, it stays open and your supervisor tells you what is missing.
Report a safety incident
- Who: any technician
- Where: job header → Report incident, or Me → Safety → Report incident
Report an injury, a near miss, damage or a hazard straight away. When you start from a job, the report is linked to it.
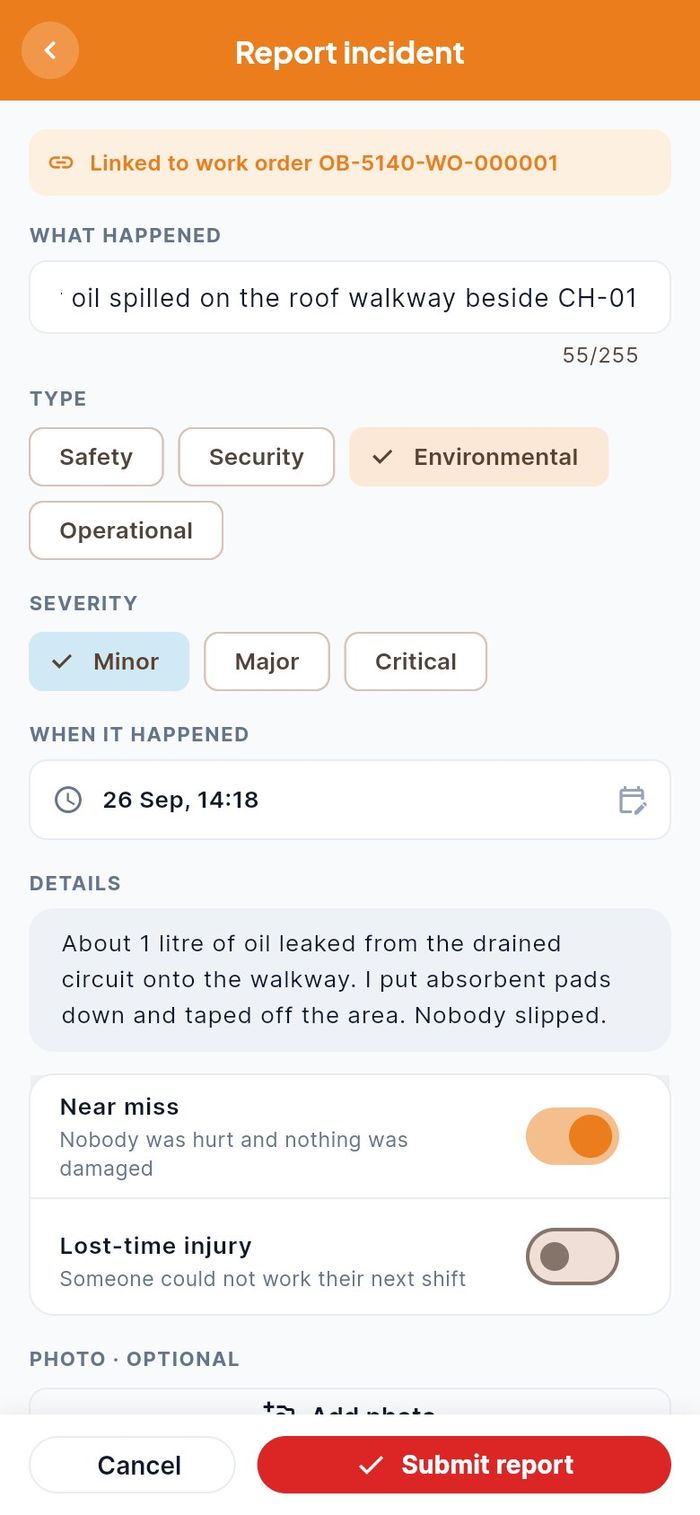
- Open the job and tap the warning triangle Report incident in the header. A banner shows Linked to work order and its number.
- In WHAT HAPPENED, write a short title.
- Choose the TYPE (Safety, Security, Environmental, Operational) and the SEVERITY (Minor, Major, Critical).
- Check WHEN IT HAPPENED (it cannot be in the future).
- In DETAILS, describe what happened, who was involved and what you did.
- Switch on Near miss if nobody was hurt and nothing was damaged, or Lost-time injury if someone could not work their next shift (then enter the days lost).
- Add a photo under PHOTO - OPTIONAL if you can.
- Tap Submit report.
The app confirms with the incident number, for example Incident INC-2026-0001 reported. The health and safety team follows it up in the web app.
Tools on the go
This part covers the QR scanner, chat, notifications, your van stock and your tools.
Look up an asset by its QR tag
- Who: any technician
- Where: Tasks → the QR icon at the top
Scan the QR tag on a piece of equipment to see what it is and which jobs are open on it. Scanning does not change any job status.
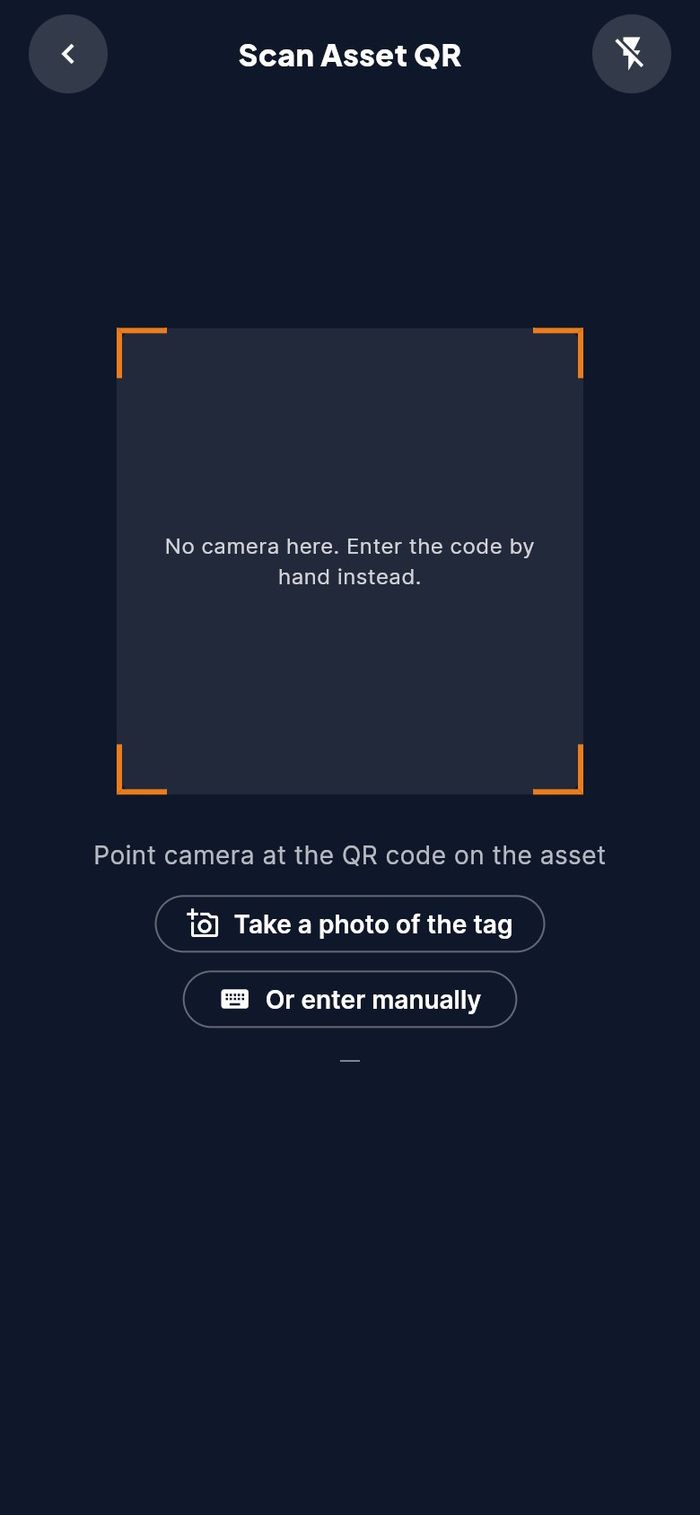
- Tap the QR icon at the top of the Tasks screen. The screen Scan Asset QR opens.
- Point the camera at the tag. Use the torch icon in dark plant rooms.
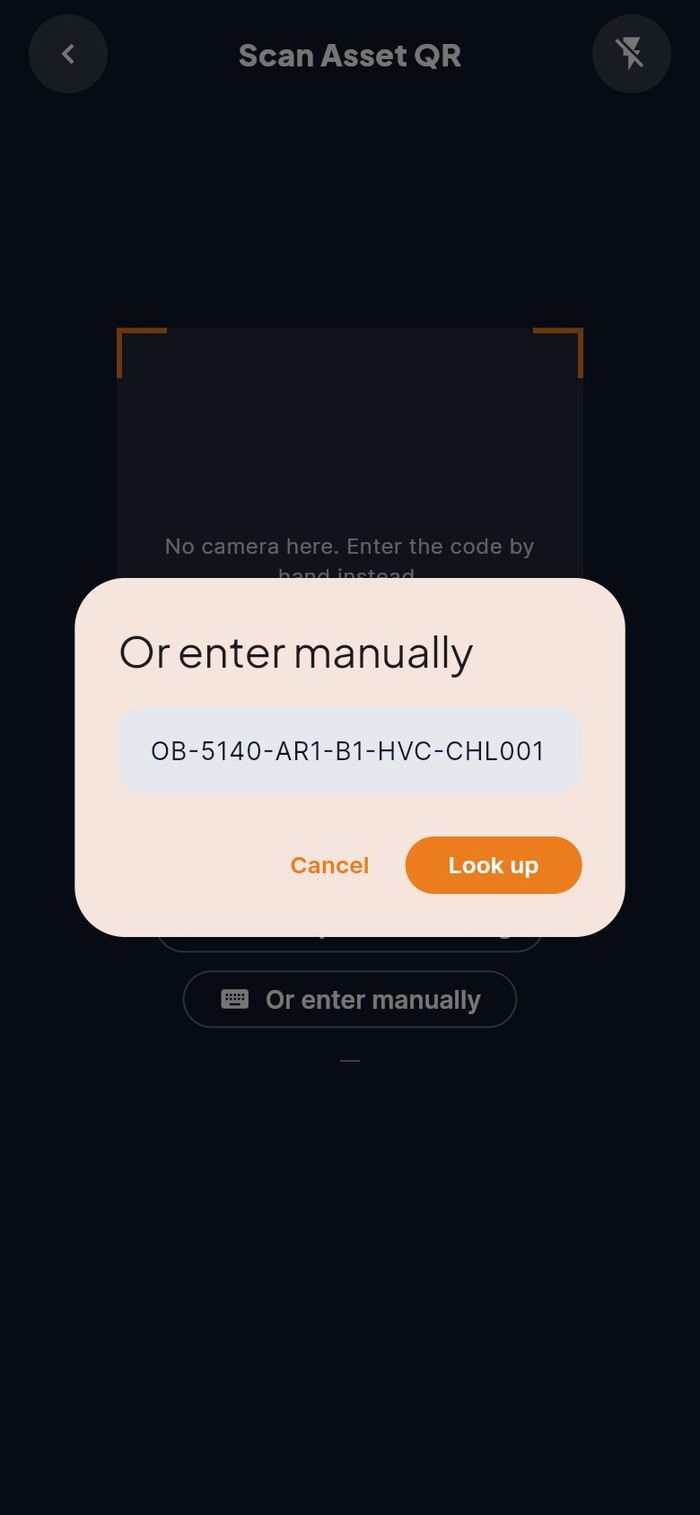
- If the tag will not scan, tap Or enter manually, type the code printed on the tag (for example
OB-5140-AR1-B1-HVC-CHL001) and tap Look up. You can also tap Take a photo of the tag.
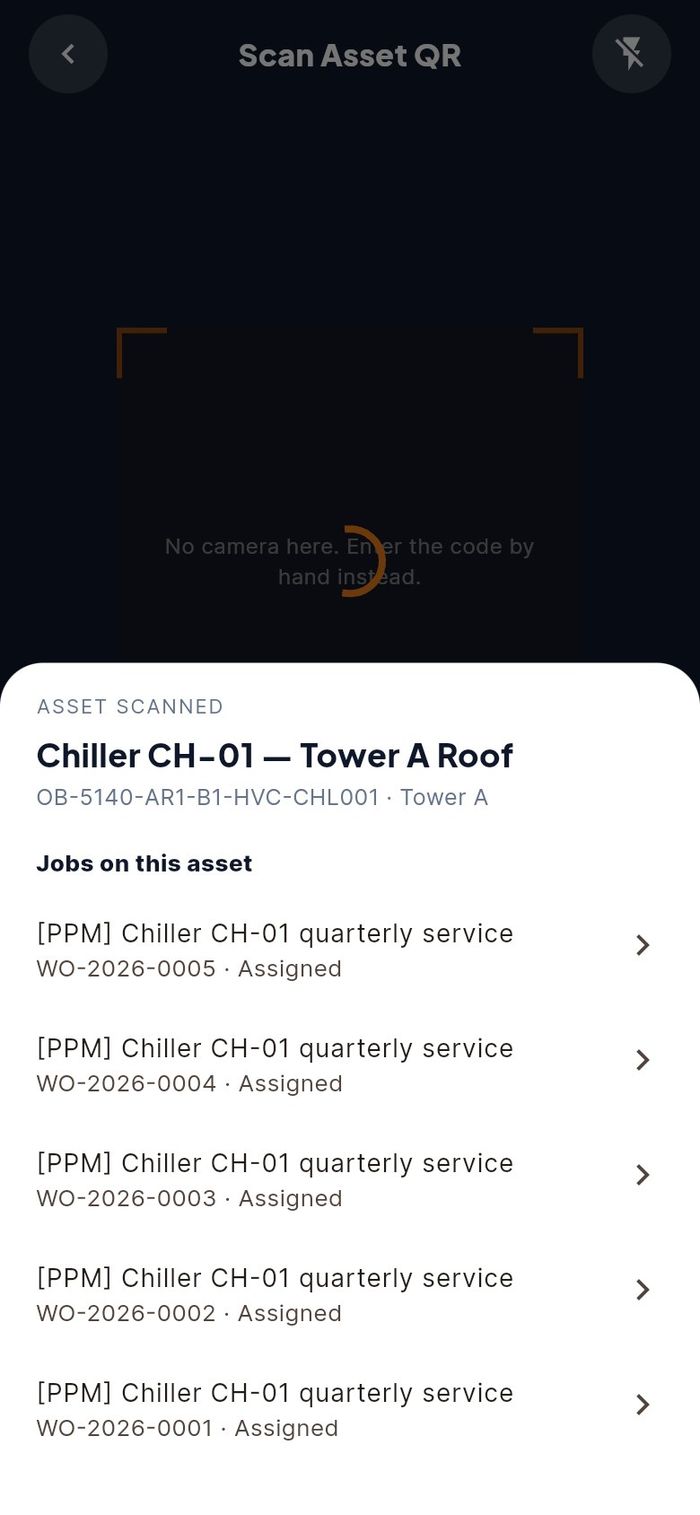
- The sheet ASSET SCANNED shows the asset name, its code and location, and the Jobs on this asset. Tap a job to open it.
Chat
- Who: any technician
- Where: bottom tab Chat, or the chat icon in a job's header
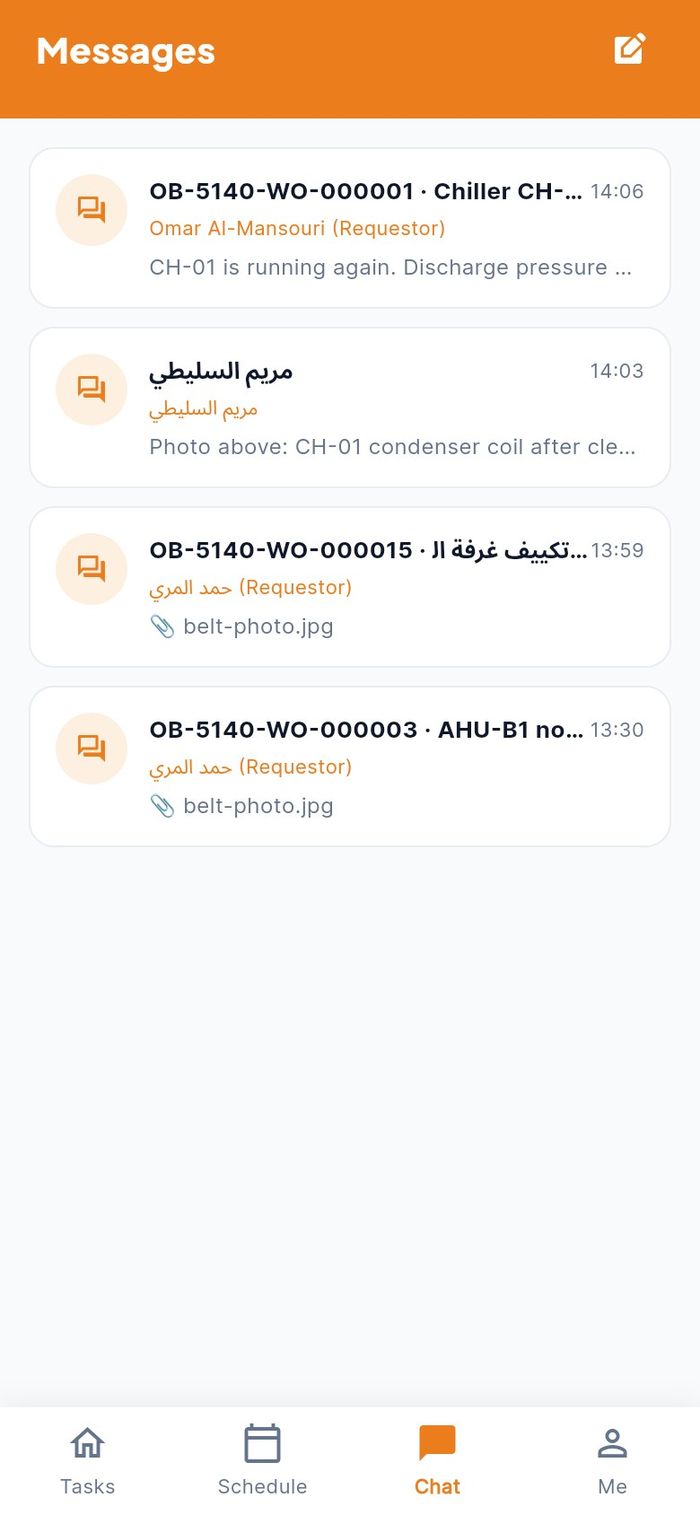
The Messages screen lists your conversations, newest first, with the last message and its time. A red number on the Chat tab shows unread messages.
Start a conversation with a person
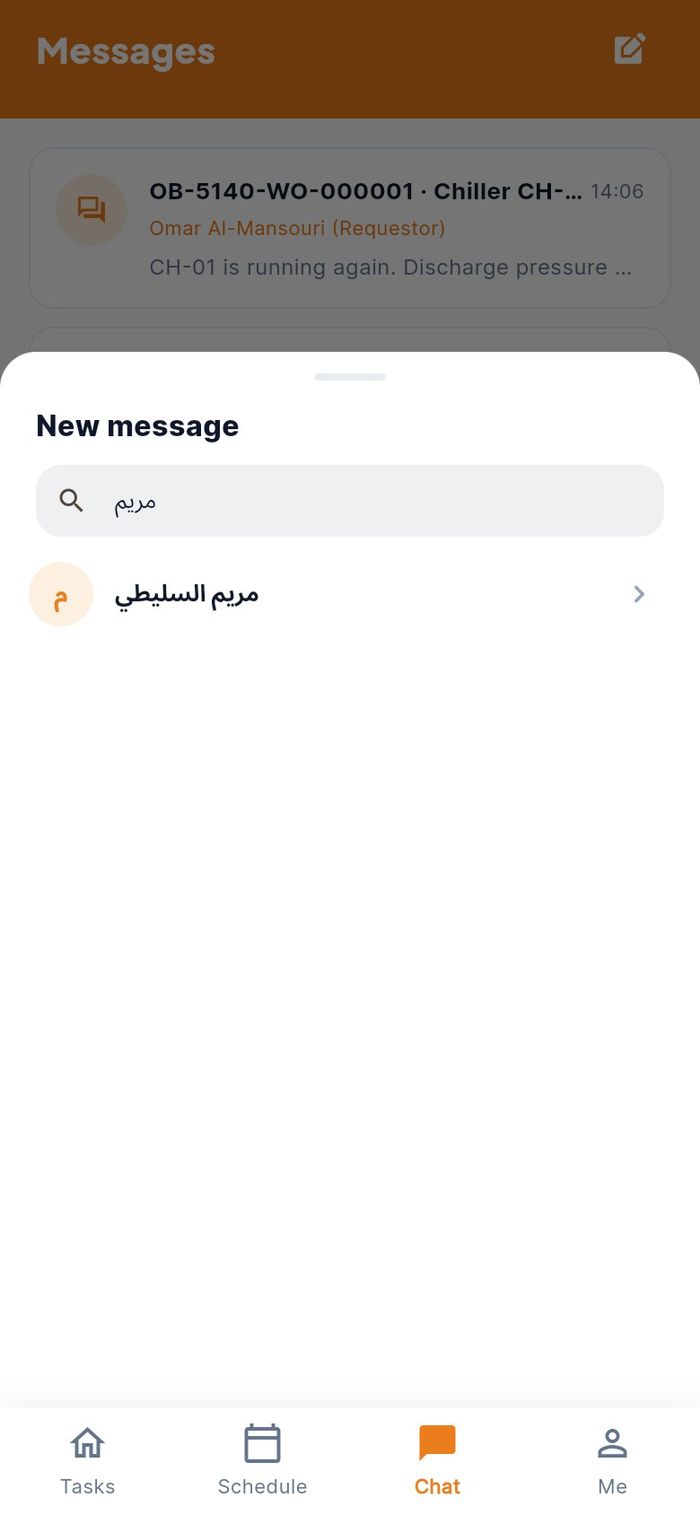
- Tap the new-message icon at the top right.
- In Search people, type a name and tap the person.
- Type your message and tap the send button.
Talk about a job
- Open the job and tap Chat about this work order in the header.
- The job's conversation opens, with everyone involved in the job. Your first message creates it if it does not exist yet.
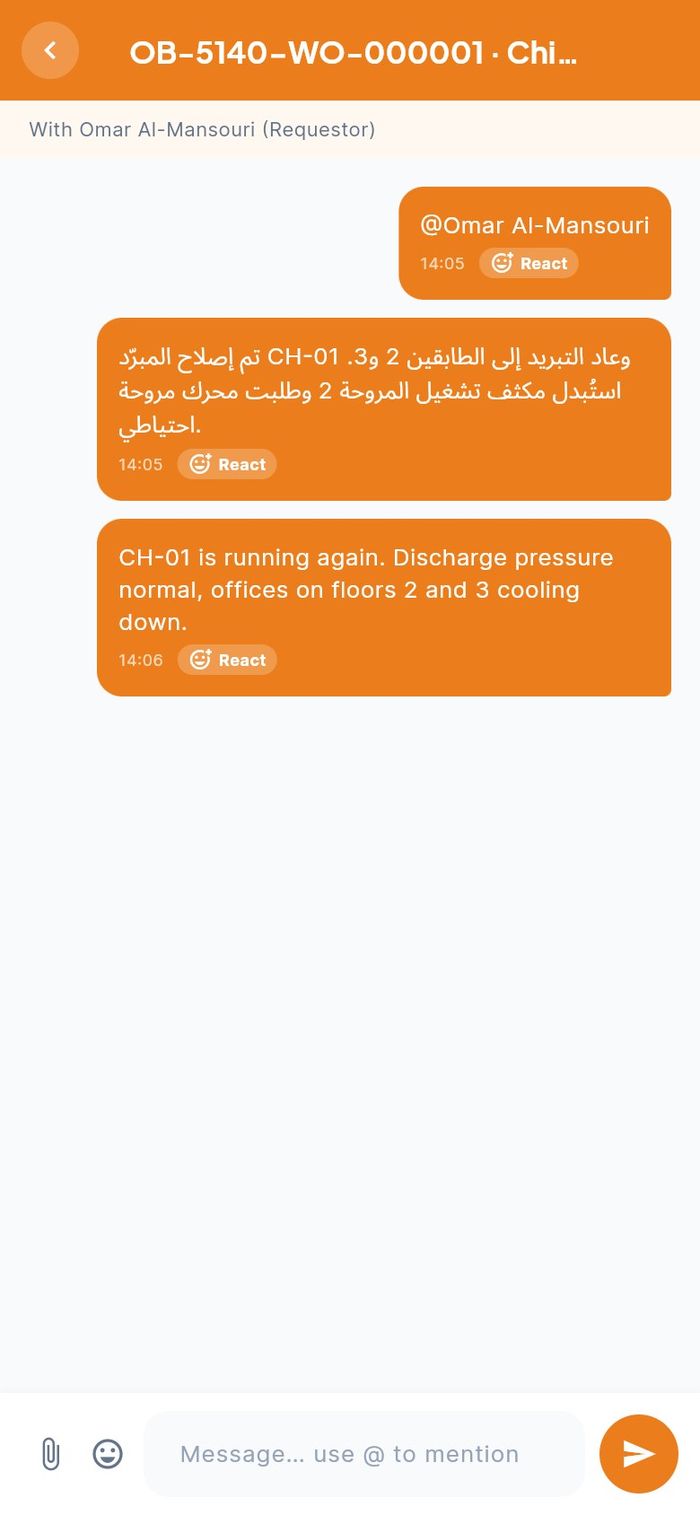
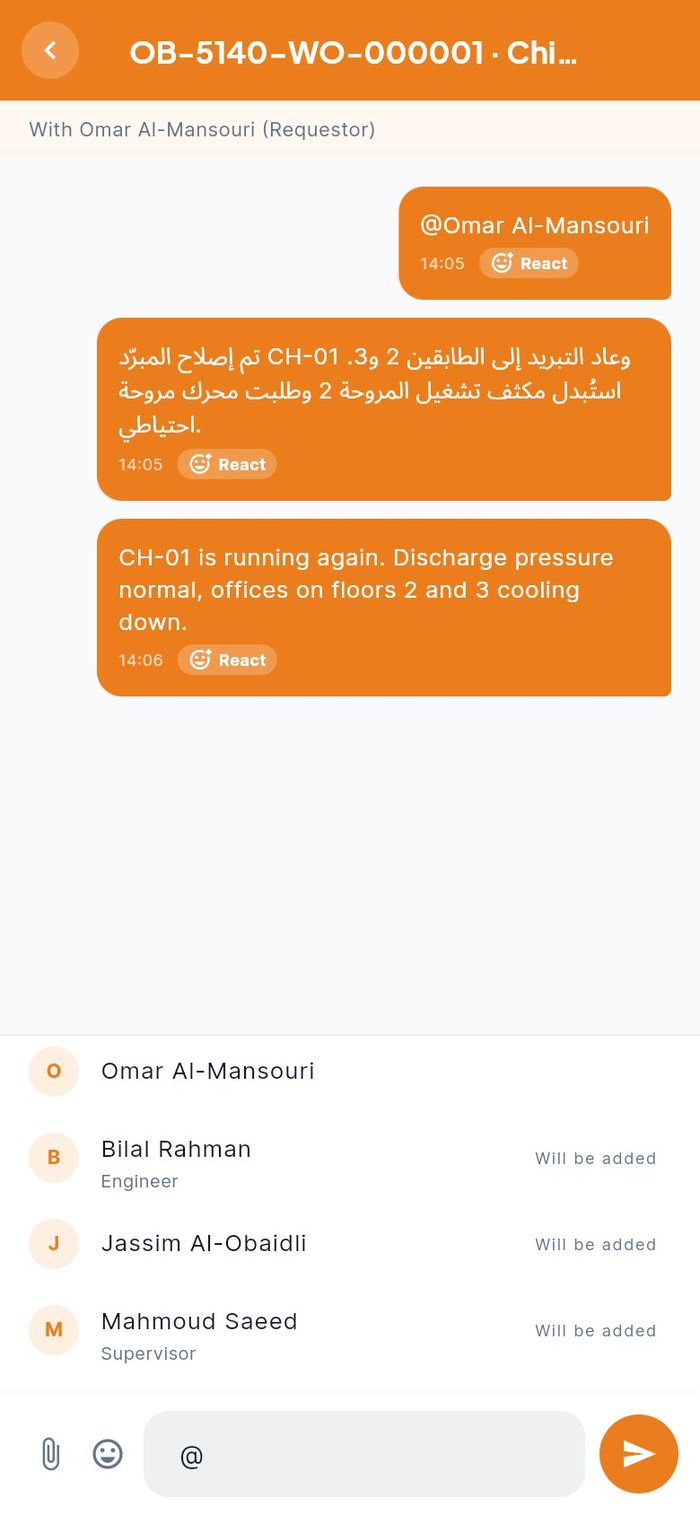
In a conversation
- Type @ to mention someone. People not yet in the conversation are marked Will be added.
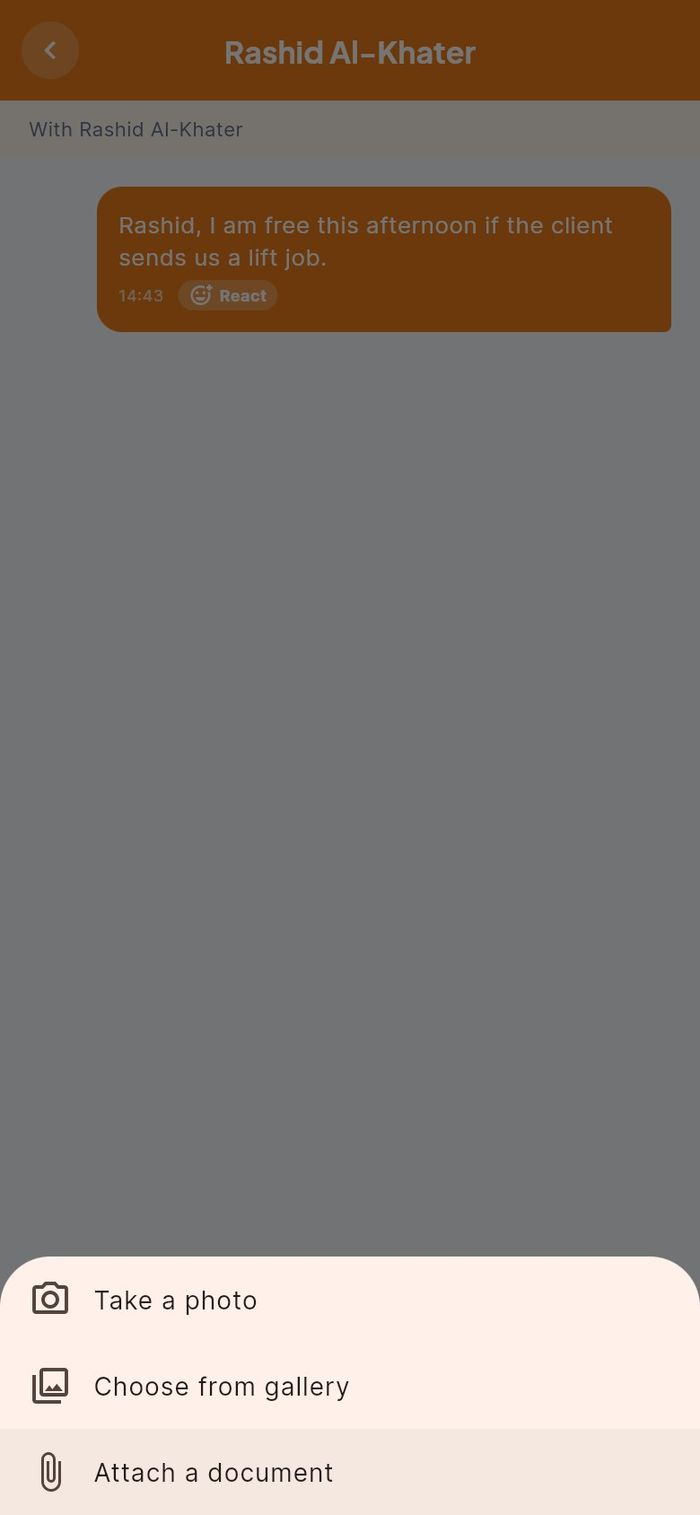
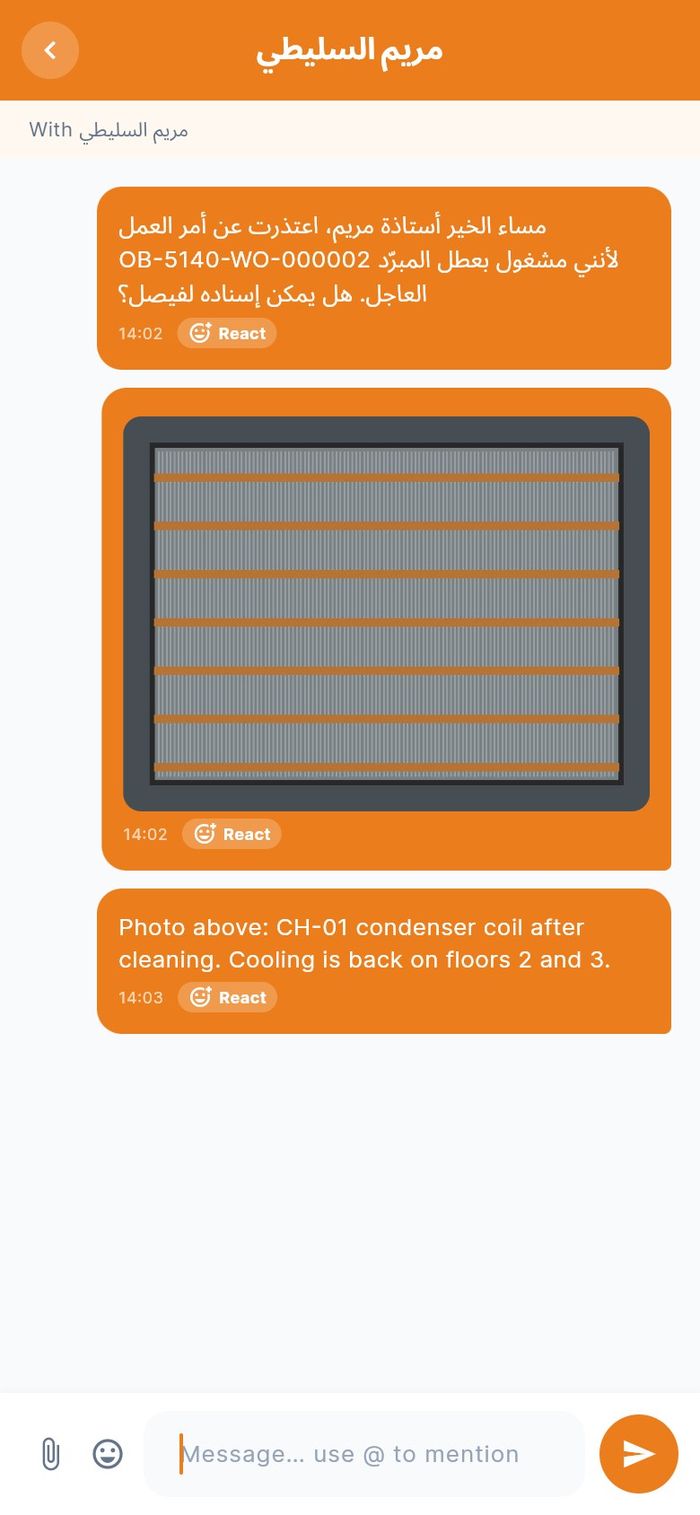
- Tap the paperclip to Take a photo, Choose from gallery or Attach a document.
- Tap the smiley to add an emoji. Tap React under a message to react to it.
Notifications
- Who: any technician
- Where: the bell icon at the top of Tasks
You are notified when a job is assigned to you, when someone mentions you in chat, and when your part requests move (approved, issued, ordered).
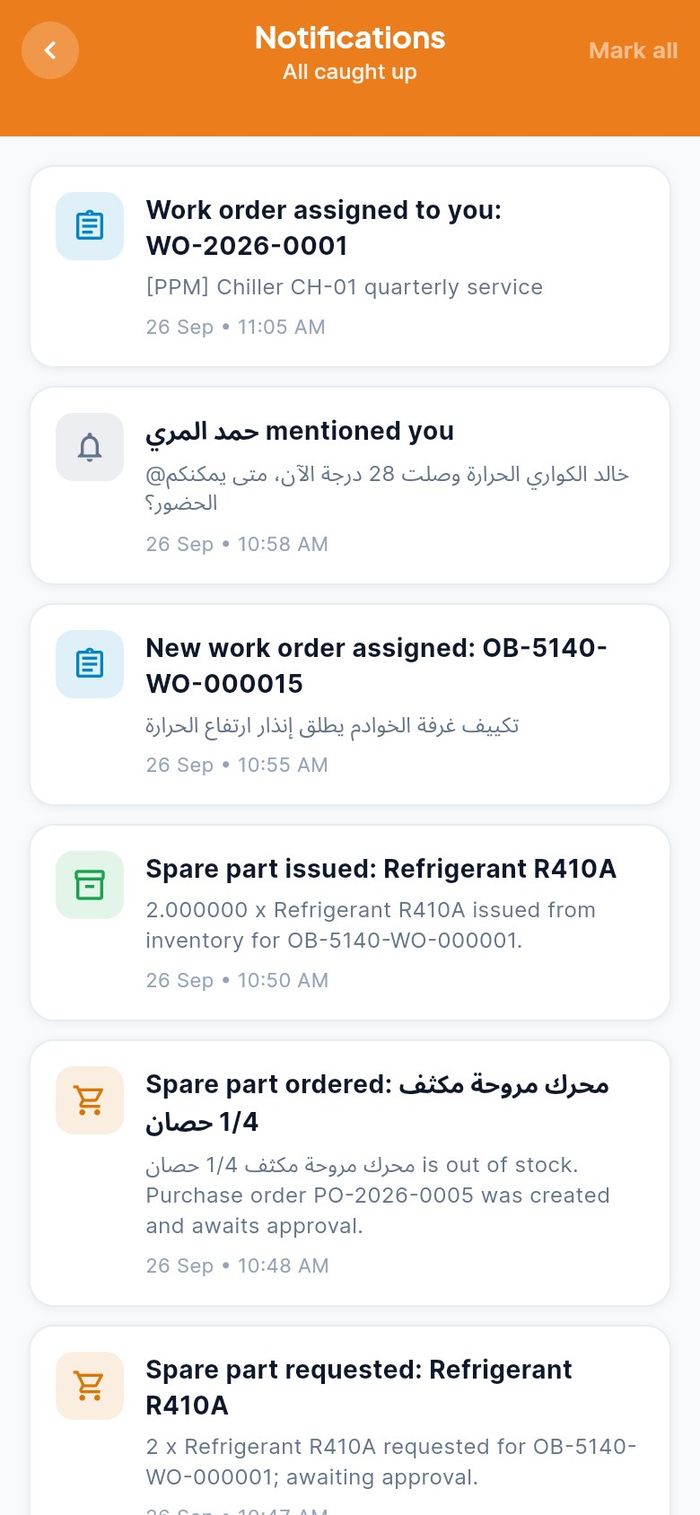
- Tap the bell. The screen Notifications shows the number unread under the title. Unread items have an orange dot.
- Tap a notification to open what it is about: the job, the conversation or the job the part is for. It is marked as read.
- Tap Mark all to mark everything as read. The subtitle then reads All caught up.
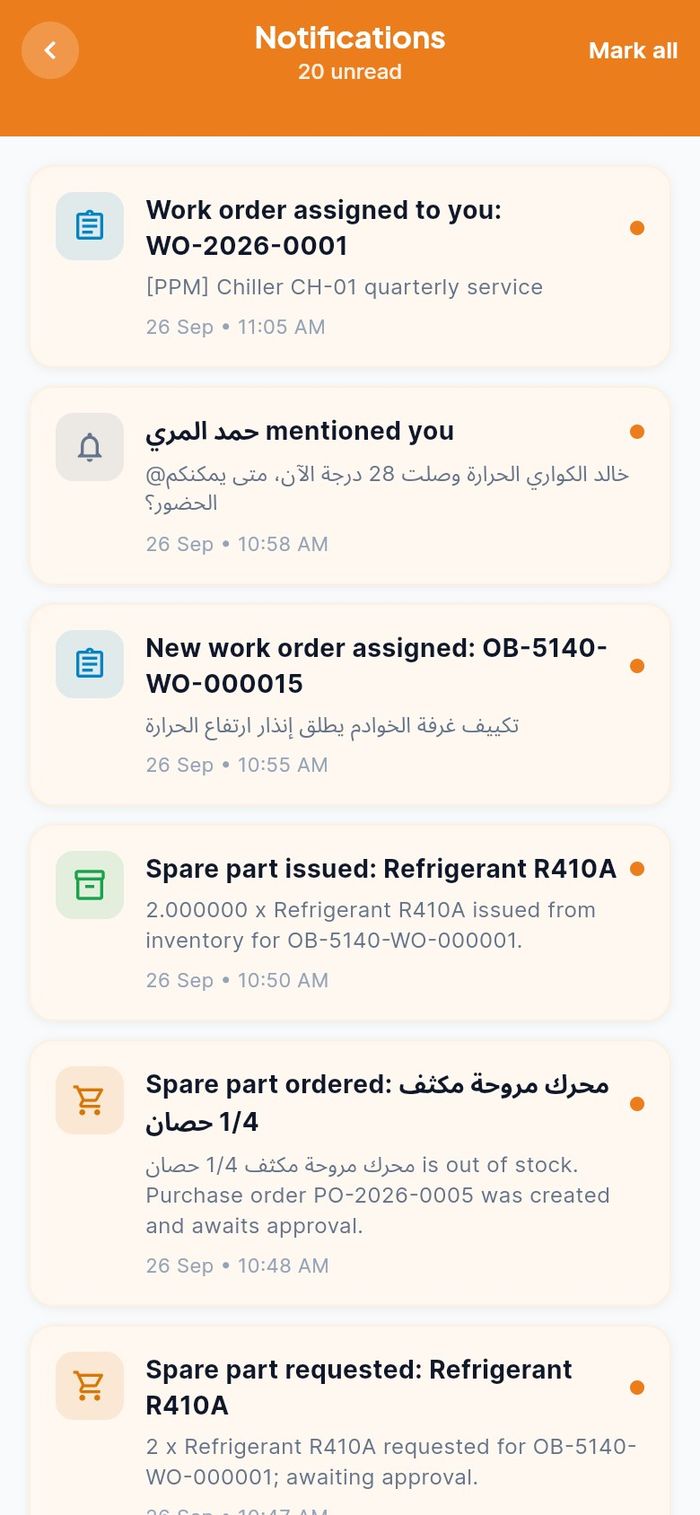
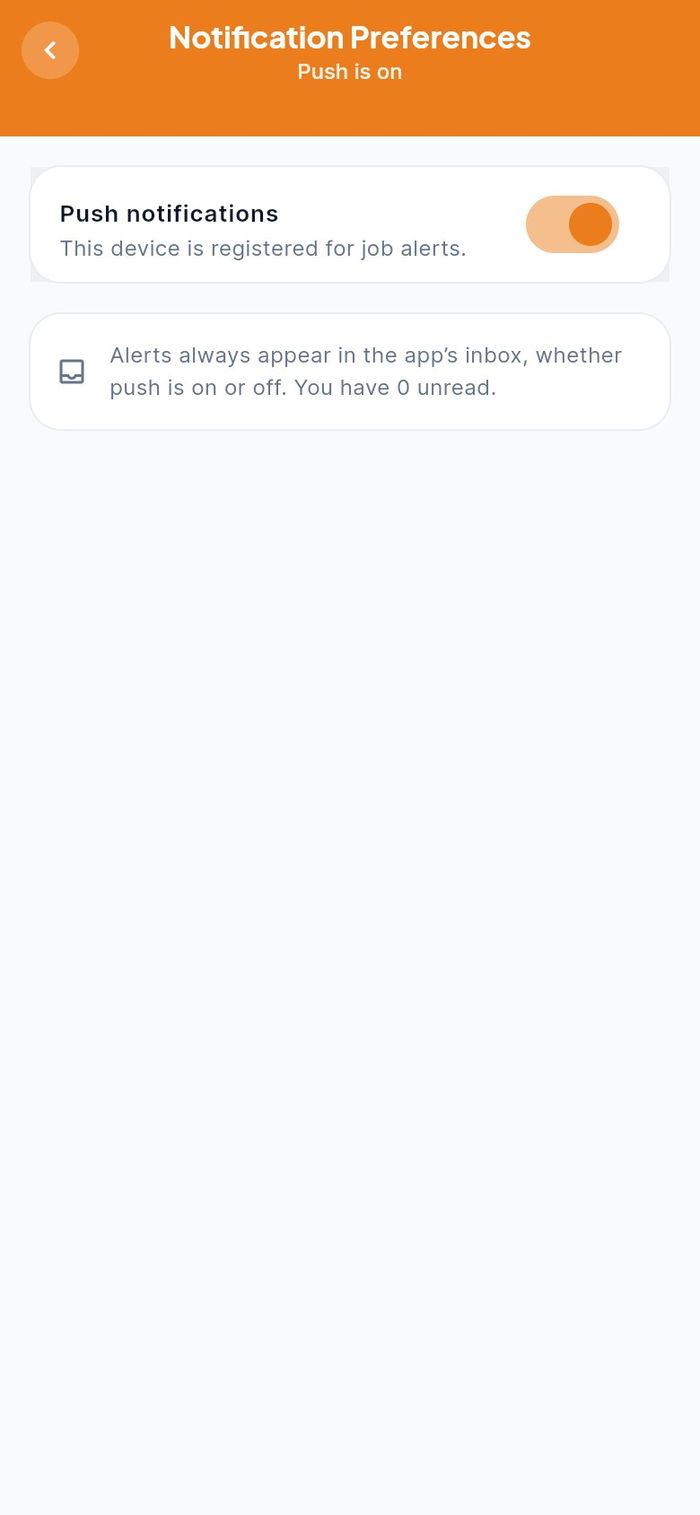
On an installed app, notifications also arrive as phone alerts. Turn them on or off under Me → Notification Preferences → Push notifications. Alerts always appear in the app's inbox either way.
My van stock and van count
- Who: company technicians who have a van stock location
- Where: Me → My Van Stock
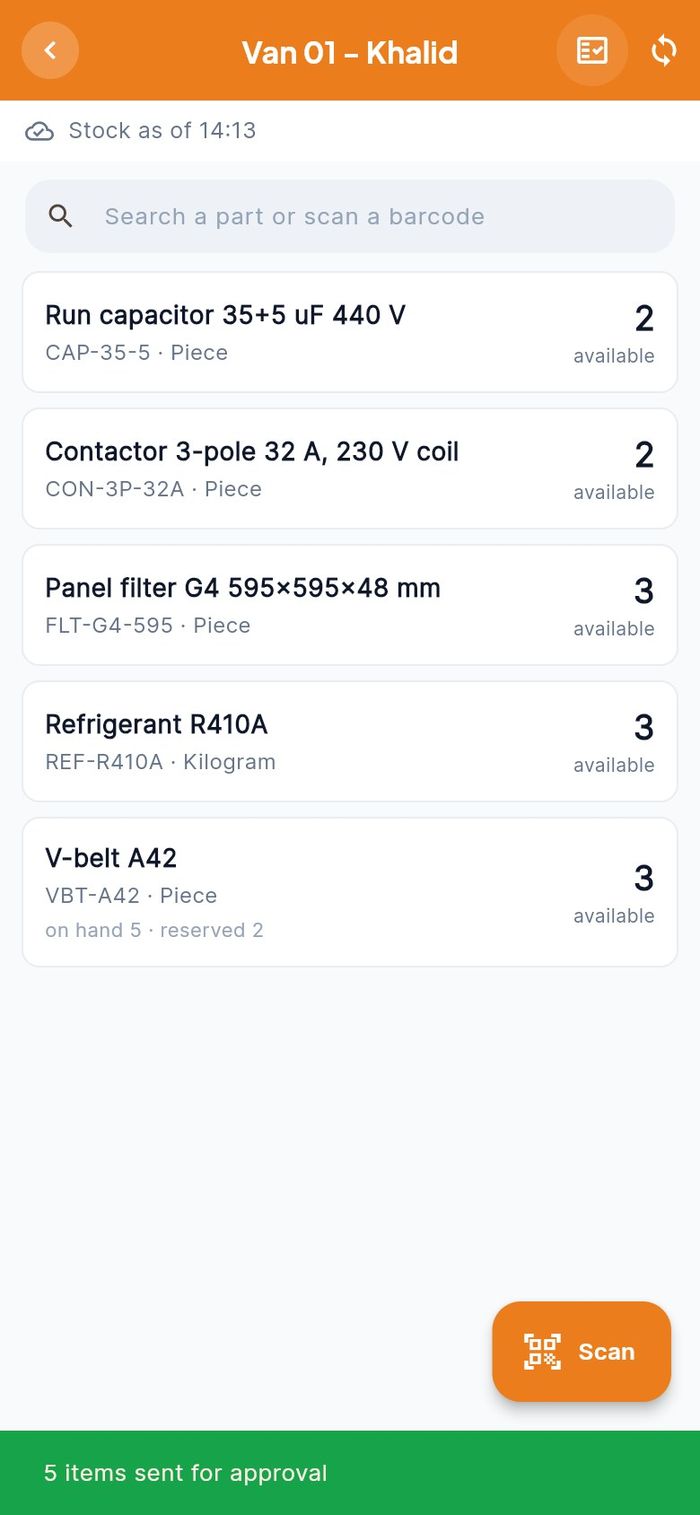
The van stock screen lists every part in your van with the quantity available. A part that is reserved for a job also shows on hand and reserved. The line at the top shows when the list was last downloaded.
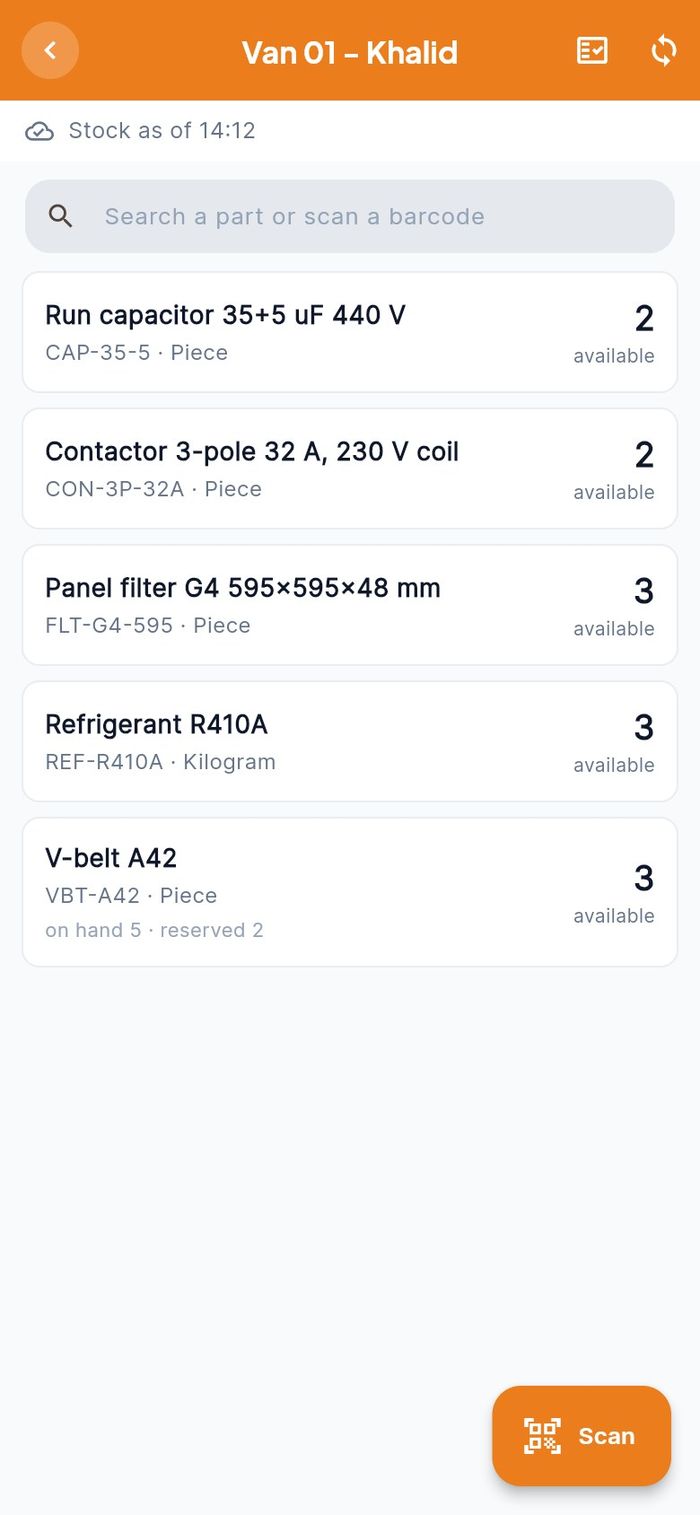
- Tap the refresh icon (Sync now) to download the latest figures.
- Tap a part, or Scan, to record that you used it (see Use a part from your van).
Count your van
The store asks you to count your van from time to time. The count is blind: you do not see the system quantity until you have entered yours.
- Tap the clipboard icon Count my van at the top.
- Type the quantity you actually find in the van for each part.
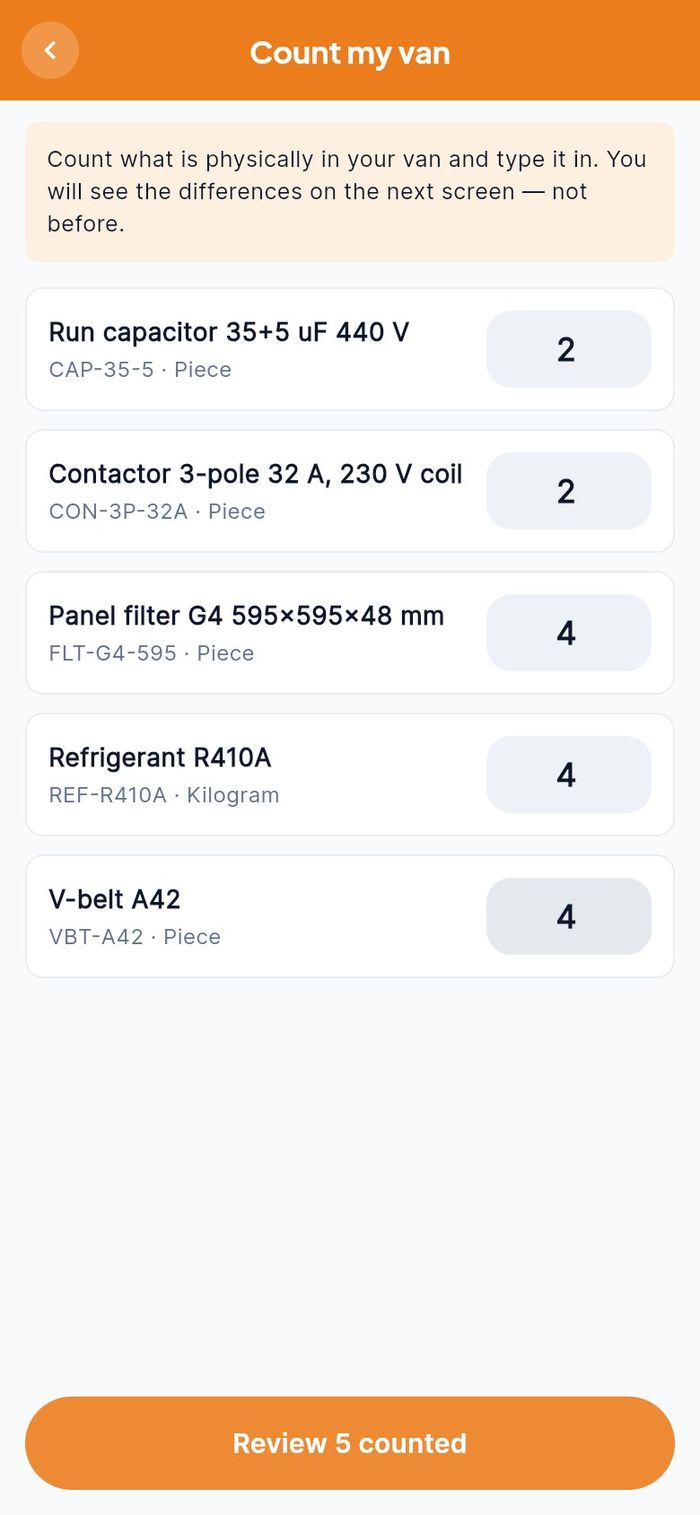
- Tap Review … counted. The screen Check your count shows only the parts where your count differs from the system, for example system 3 → counted 4.
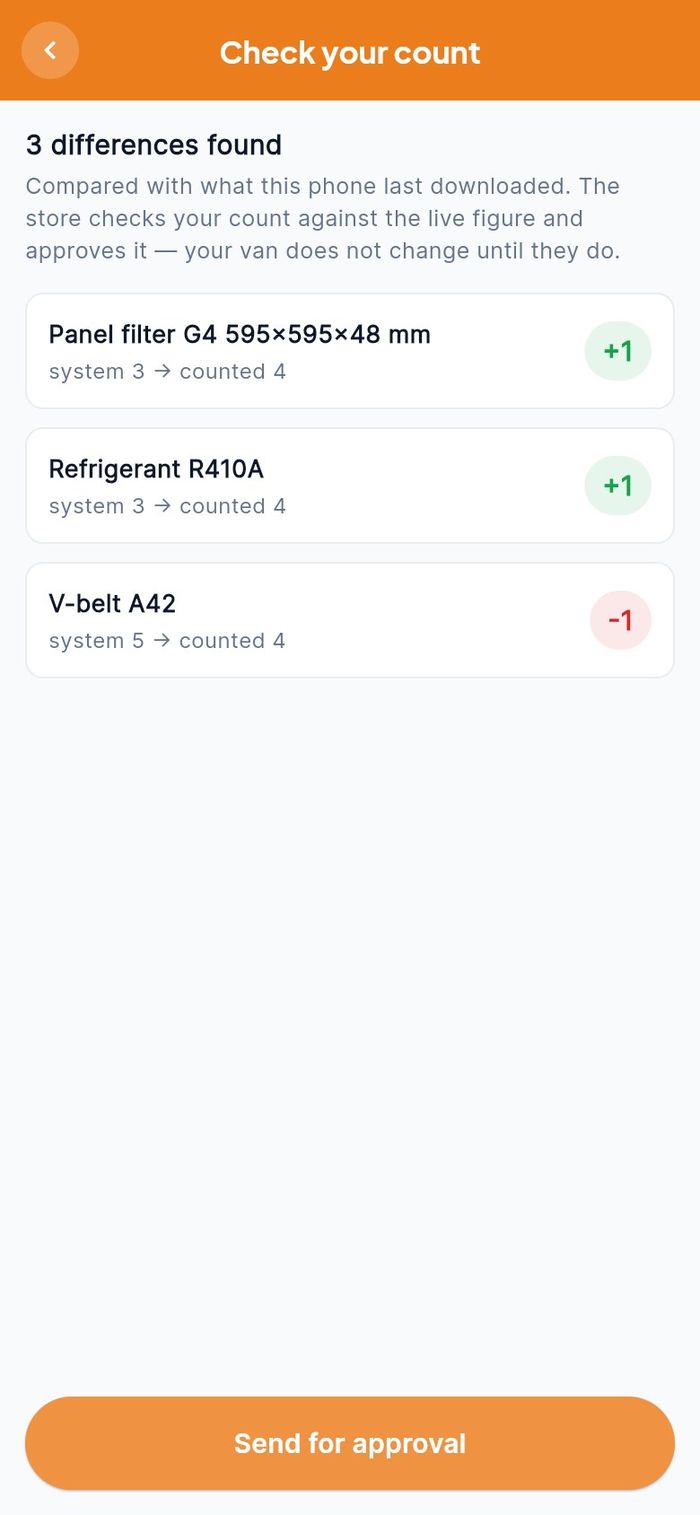
- Tap Send for approval.
Tools and safety checklists
- Who: any technician
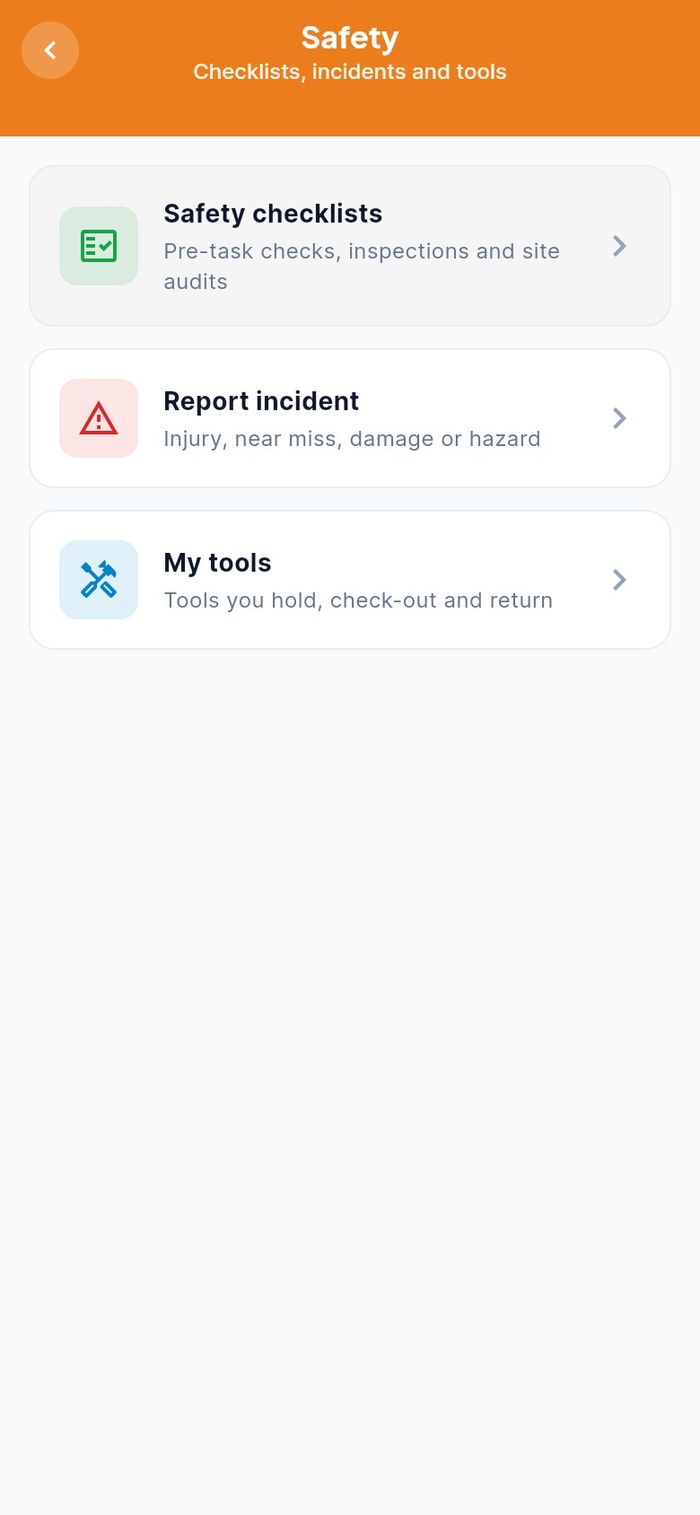
- Where: Me → Safety
The Safety screen has three entries: Safety checklists, Report incident and My tools.
Check out a tool
- Open My tools and tap Check out a tool.
- Pick the tool from the list (search by name or code).
- Under FOR WHICH JOB (OPTIONAL), choose the job you need it for, and add a note if useful.
- Tap Check out. The app confirms that the tool is now with you.
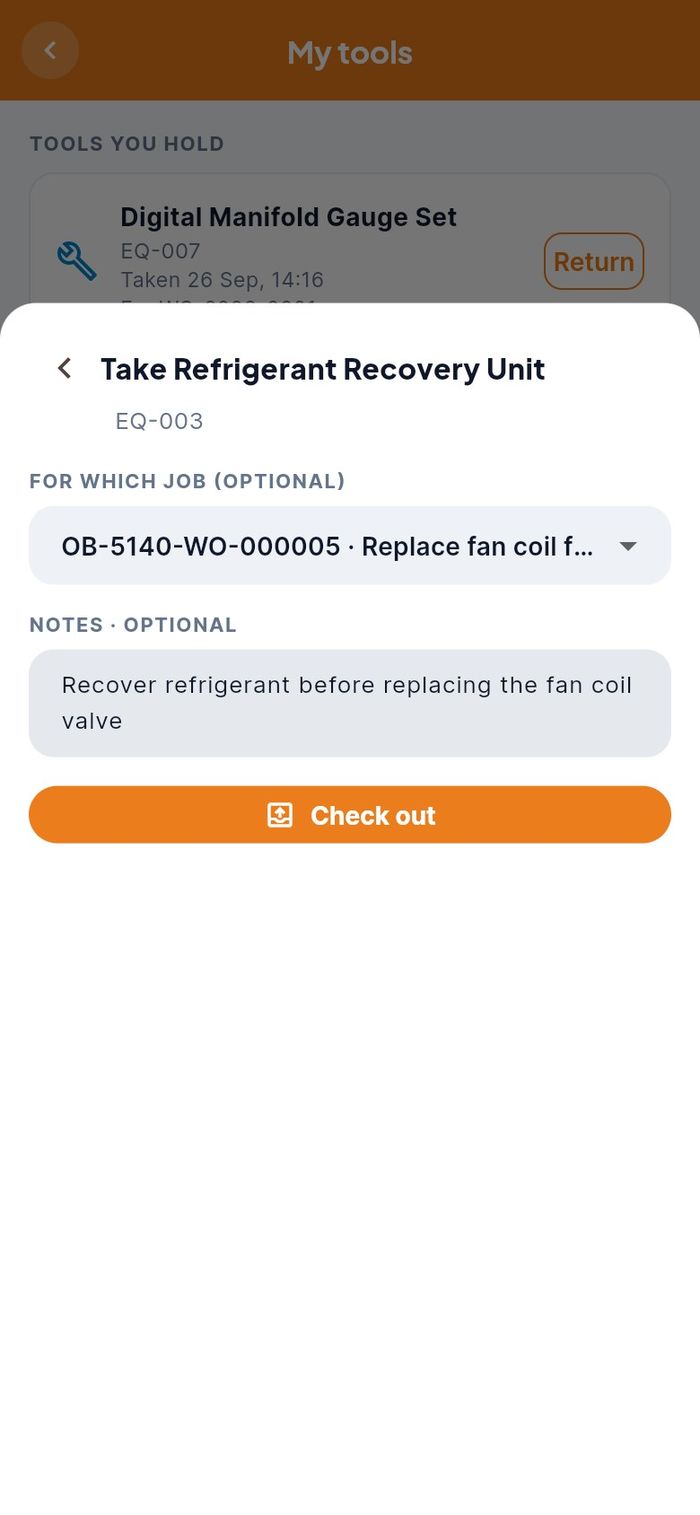
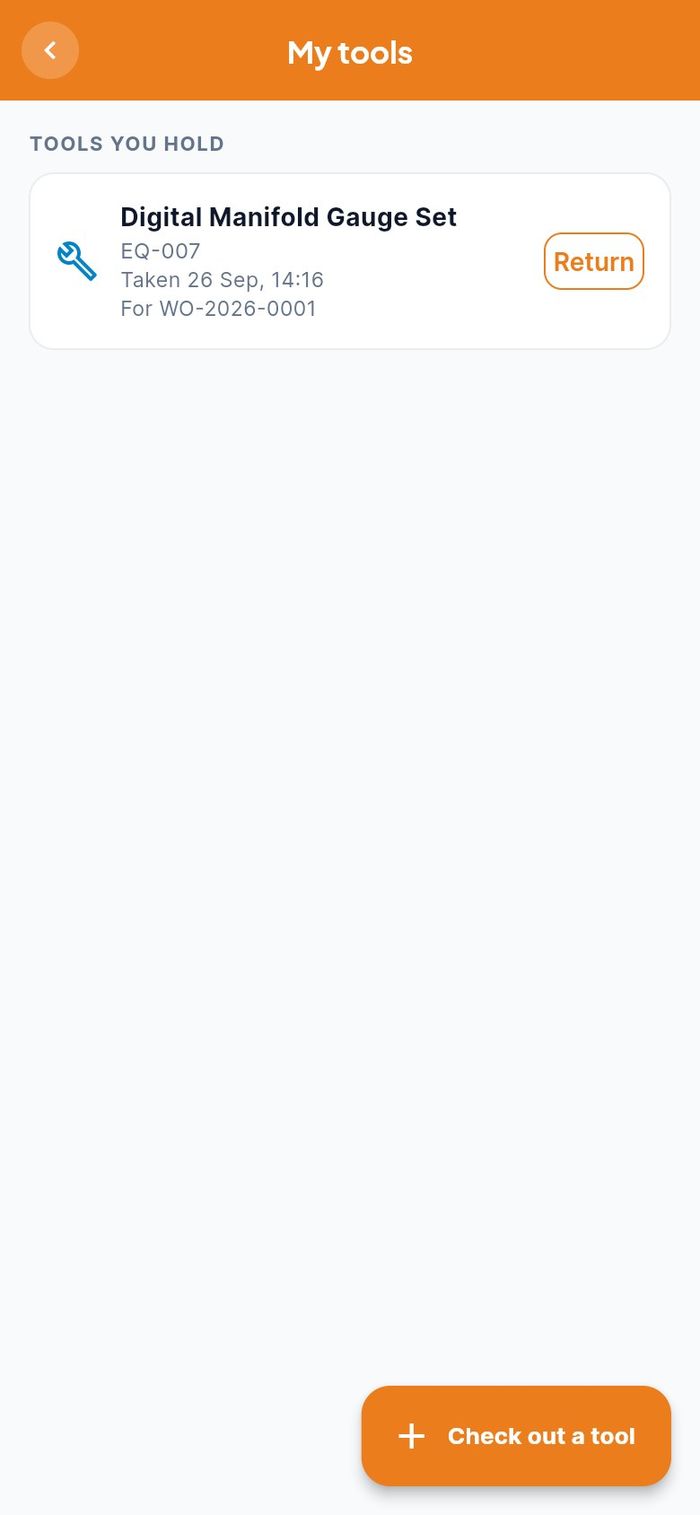
The tool is listed under TOOLS YOU HOLD with the date you took it and the job.
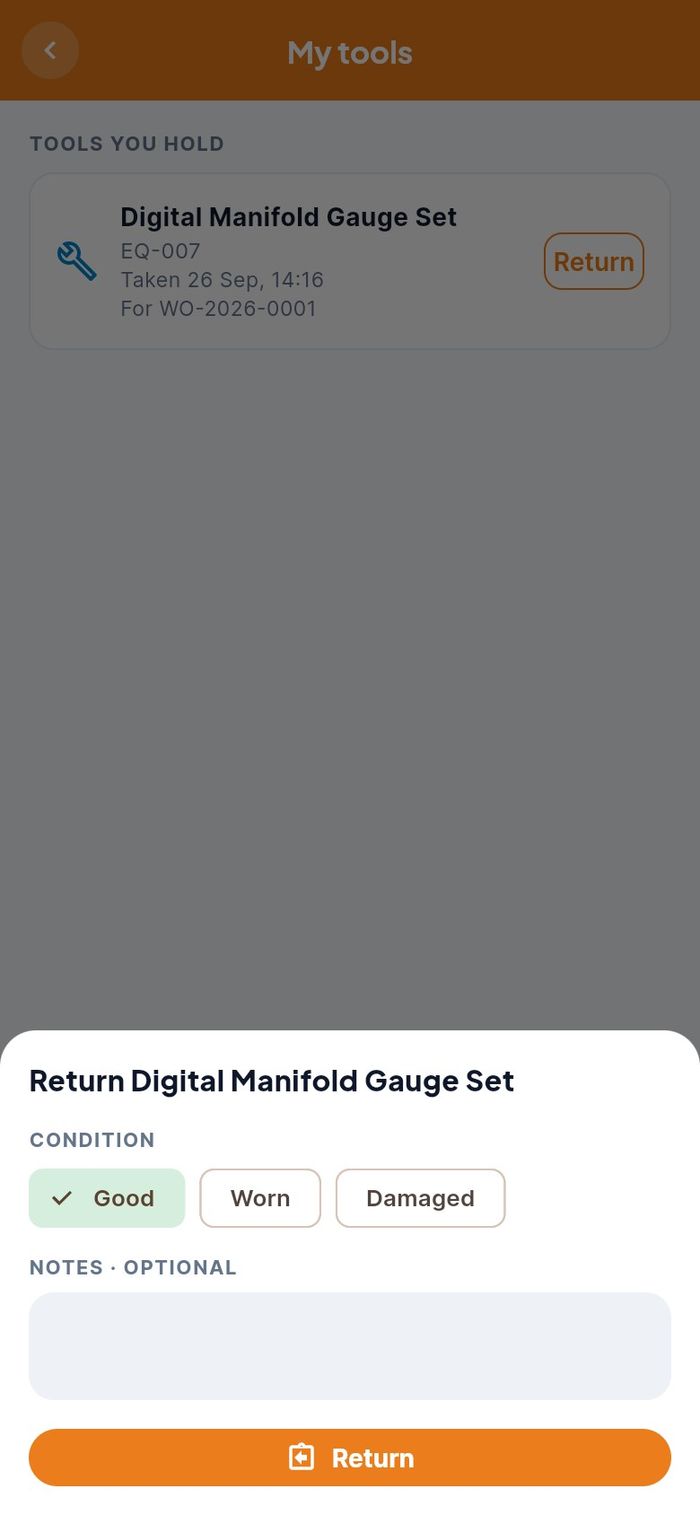
Return a tool
- In My tools, tap Return beside the tool.
- Choose its CONDITION: Good, Worn or Damaged. A damaged tool goes to maintenance.
- Tap Return.
Safety checklists
When the safety team assigns you a checklist (a pre-task check, an equipment inspection or a site audit), it appears under Safety checklists in To complete, with its due date. Open it, work through the checklist on site, then enter how many items you Checked, how many Passed and Failed, any Findings and the Corrective actions, and tap Submit result.
Your account
This part covers your profile, language, help, app updates, working without signal and signing out.
Profile and settings
- Who: any technician
- Where: bottom tab Me
The Me screen shows your name, job title and skills, then your Employee ID, Department, Phone, Email and Jobs completed, and your CERTIFICATIONS.
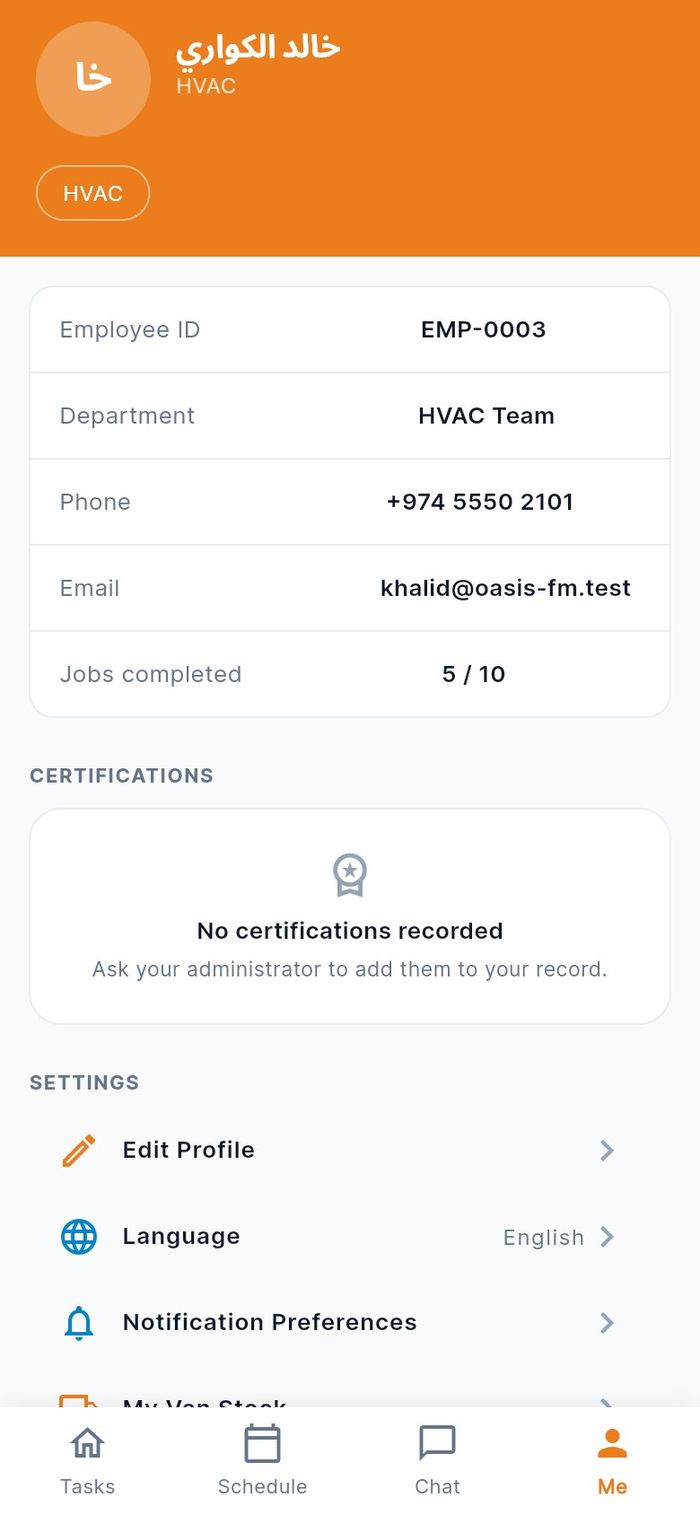
Under SETTINGS you find every other screen of the app:
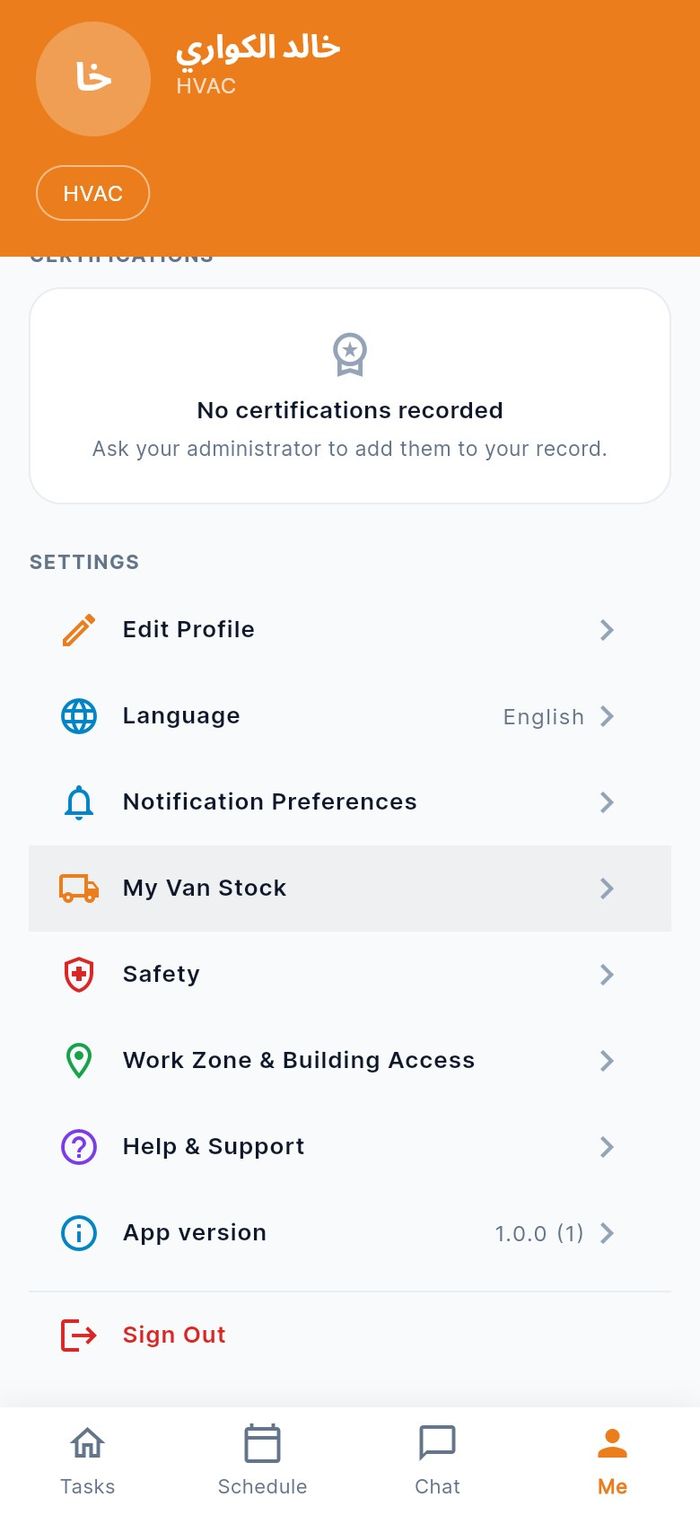
| Entry | Use it to |
|---|---|
| Edit Profile | Change your full name and phone number |
| Language | Choose the app's language |
| Notification Preferences | Turn phone alerts on or off |
| My Van Stock | See and count your van (see My van stock) |
| Safety | Checklists, incidents and tools |
| Work Zone & Building Access | See your department, skills and the buildings where you have jobs |
| Help & Support | Answers to common questions and diagnostics |
| App version | See the version and check for an update |
| Sign Out | Sign out of this phone |
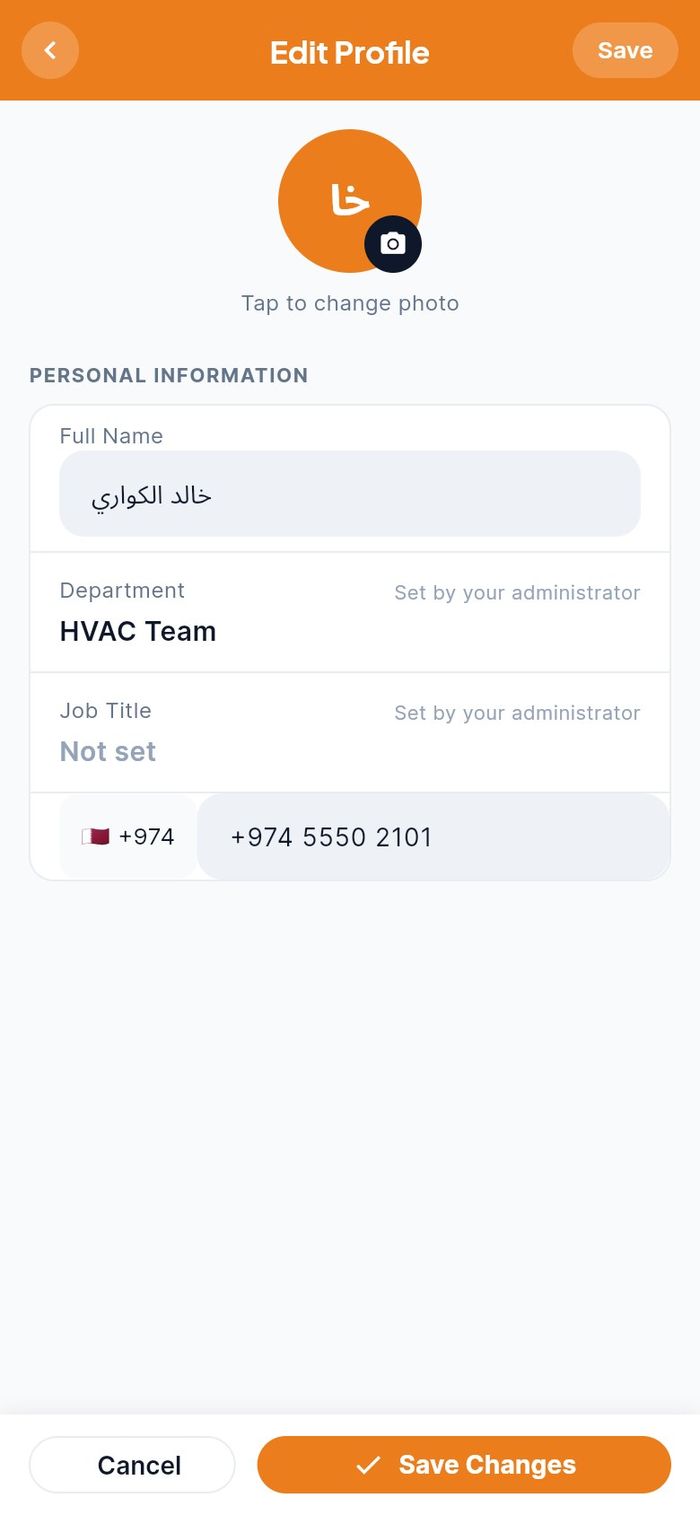
Edit your profile
- Tap Edit Profile.
- Change your Full Name or phone number.
- Tap Save Changes. The message Profile updated appears.
Language
- Who: any technician
- Where: Me → Language
- Tap Language.
- Tap English, العربية (Arabic), Français, اردو (Urdu) or हिन्दी (Hindi).
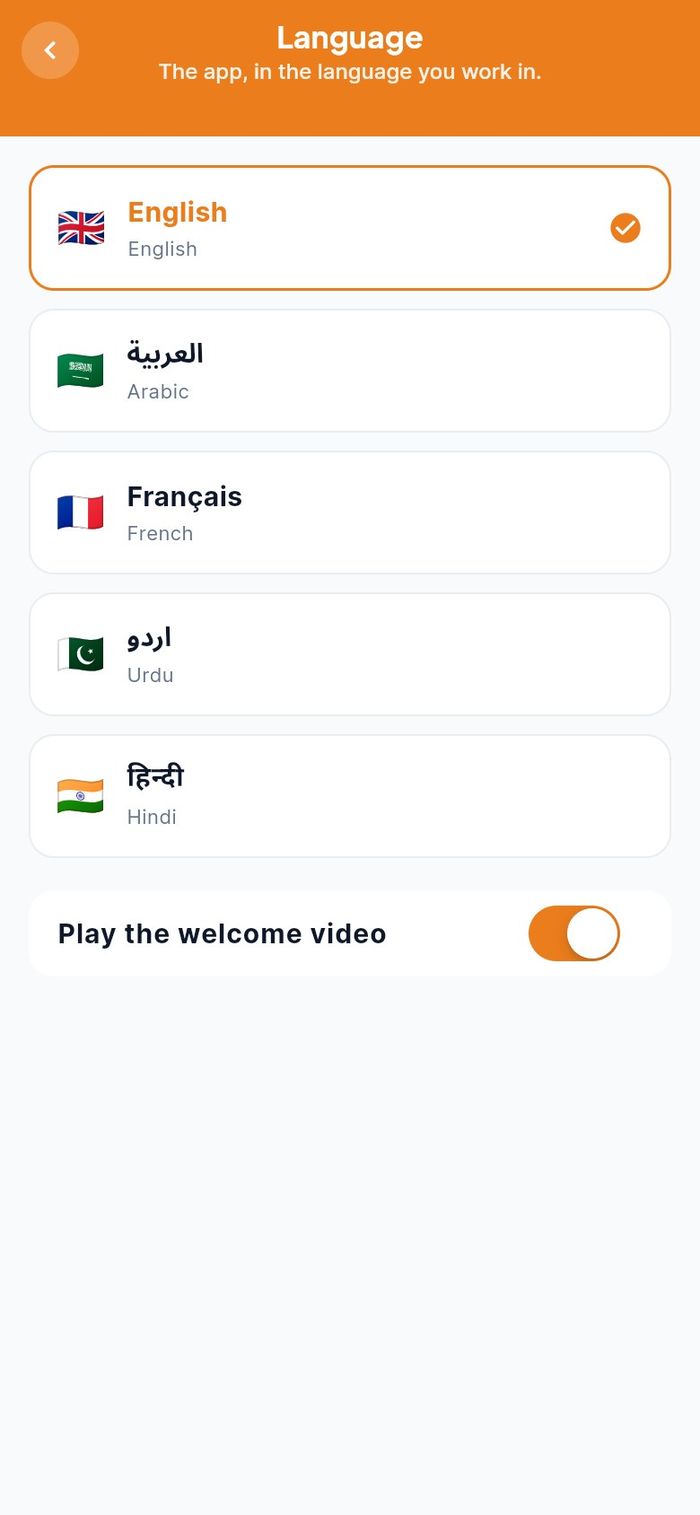
The whole app switches at once. Arabic and Urdu also turn the layout right to left. A message confirms the new language.
The same screen has the switch Play the welcome video.
Work zone and help
- Who: any technician
- Where: Me → Work Zone & Building Access, Me → Help & Support
Work Zone & Building Access shows your department, job title and routing skills, and lists the buildings where you have jobs with the number of jobs in each. Building access itself is granted by your administrator.
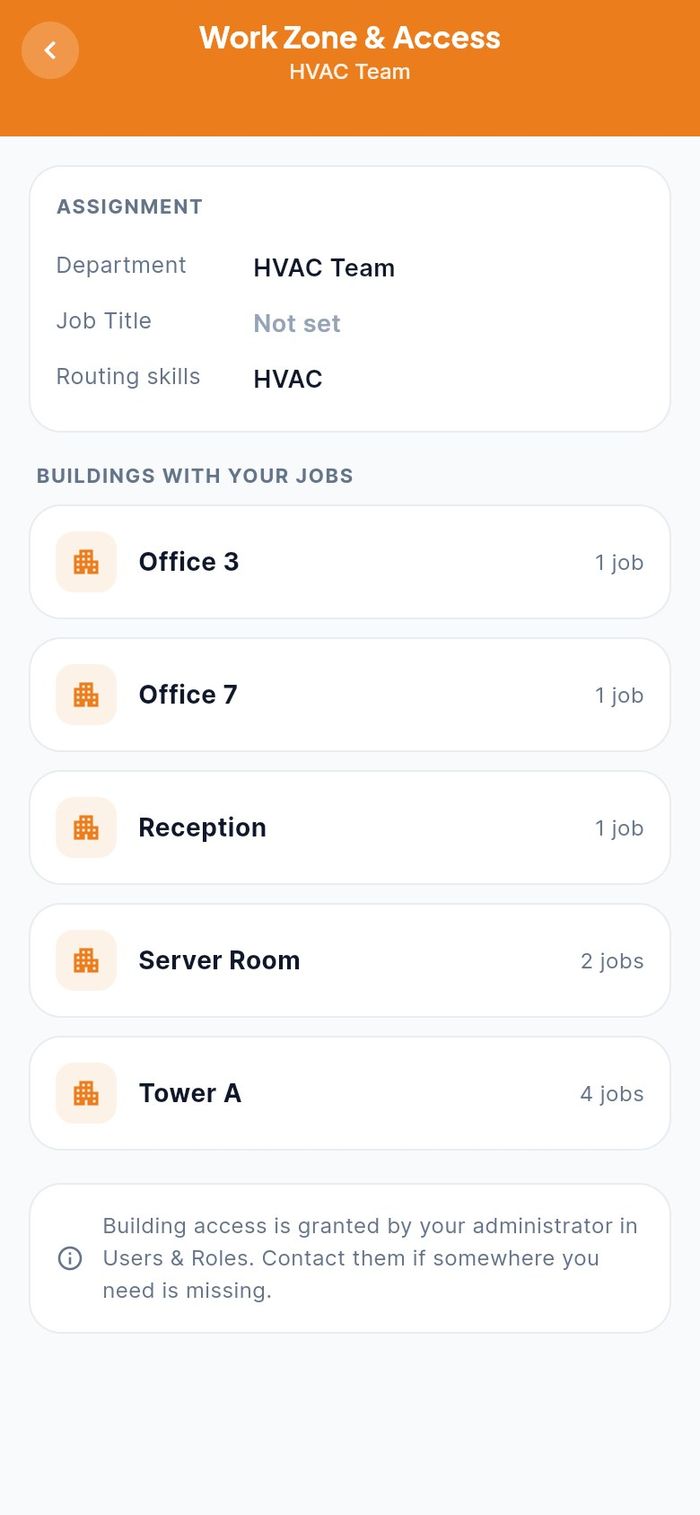
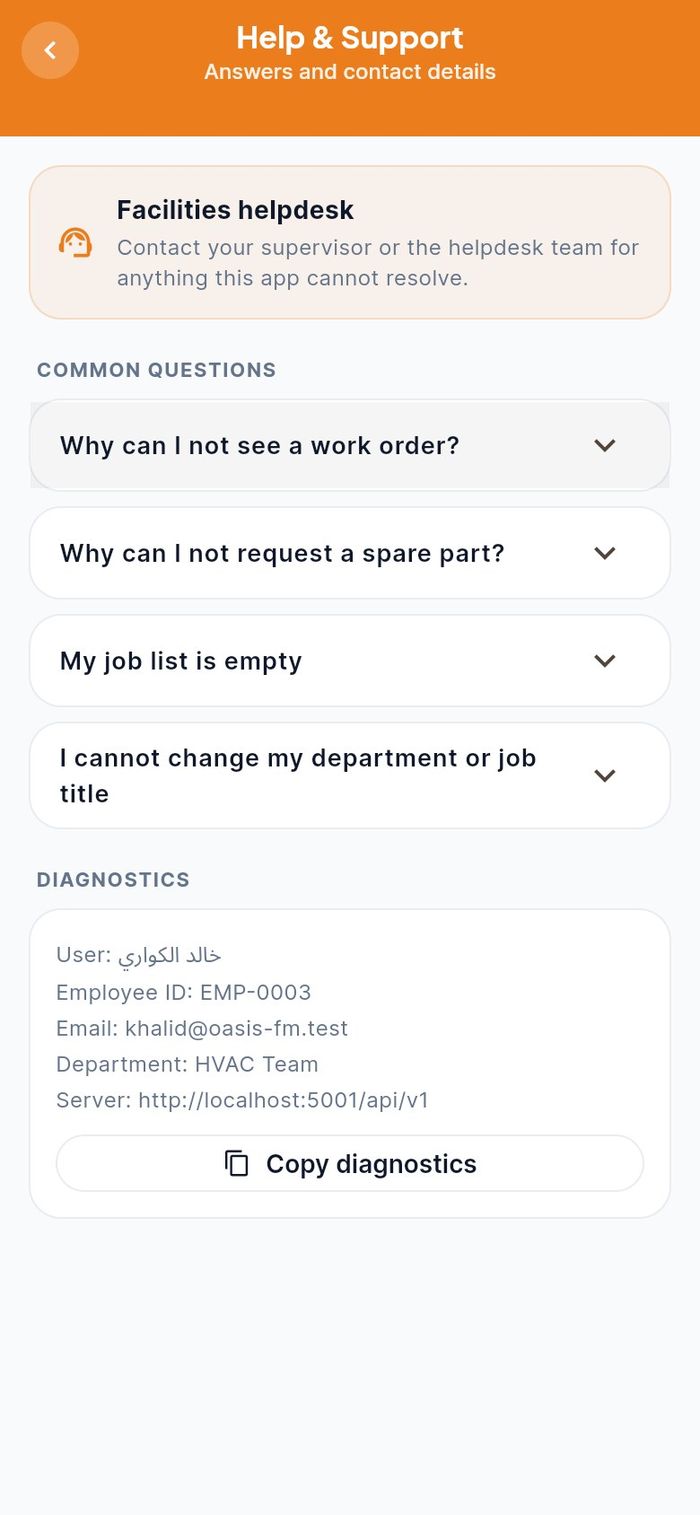
Help & Support answers common questions (why a work order or a spare part is missing, an empty job list, changing your department) and has a DIAGNOSTICS card. If IT support asks for details, tap Copy diagnostics and paste them into your message.
App updates
- Who: any technician
- Where: appears on its own; Me → App version to check
When a newer version of the app is published, a bar appears: A new version of the app is available. (or Version … is available.). Tap Update to download it, or Later to be reminded next time.
If your version is too old to be used, the app shows Update required with your version and the new one, and you must tap Update before you can carry on.
In the browser version, a bar A new version of the app has been deployed. asks you to tap Reload.
Working without signal
- Who: any technician using the installed app
- Where: everywhere in Tasks and in a job
Plant rooms and basements often have no signal. The installed app keeps working:
- The job list and the jobs you opened are kept on the phone. Without a connection, Tasks shows Offline — showing jobs as of and the time the list was saved.
- Accept, Start Work, Add Work, photos, the customer signature, decline, Confirm Complete and Send to supervisor for verification are saved on the phone with the time you did them. The app shows Saved on this phone — it will be sent when you are back online, and the job changes on screen straight away.
- A job with unsent changes shows This job has changes waiting to sync, and the Tasks screen shows Changes waiting to sync: with the number and a Sync now button.
- Parts used from the van and van counts are also saved and sent later.
When the signal returns, the app sends everything in the order you did it. If the server refuses a change (for example the office cancelled the job meanwhile), the banner shows Could not be applied: with the number. Tap Review to see Changes the server refused, then Try again or Discard each one.
Sign out
- Who: any technician
- Where: Me → Sign Out
- Scroll to the bottom of Me and tap Sign Out.
- Tap Sign Out in the dialog.
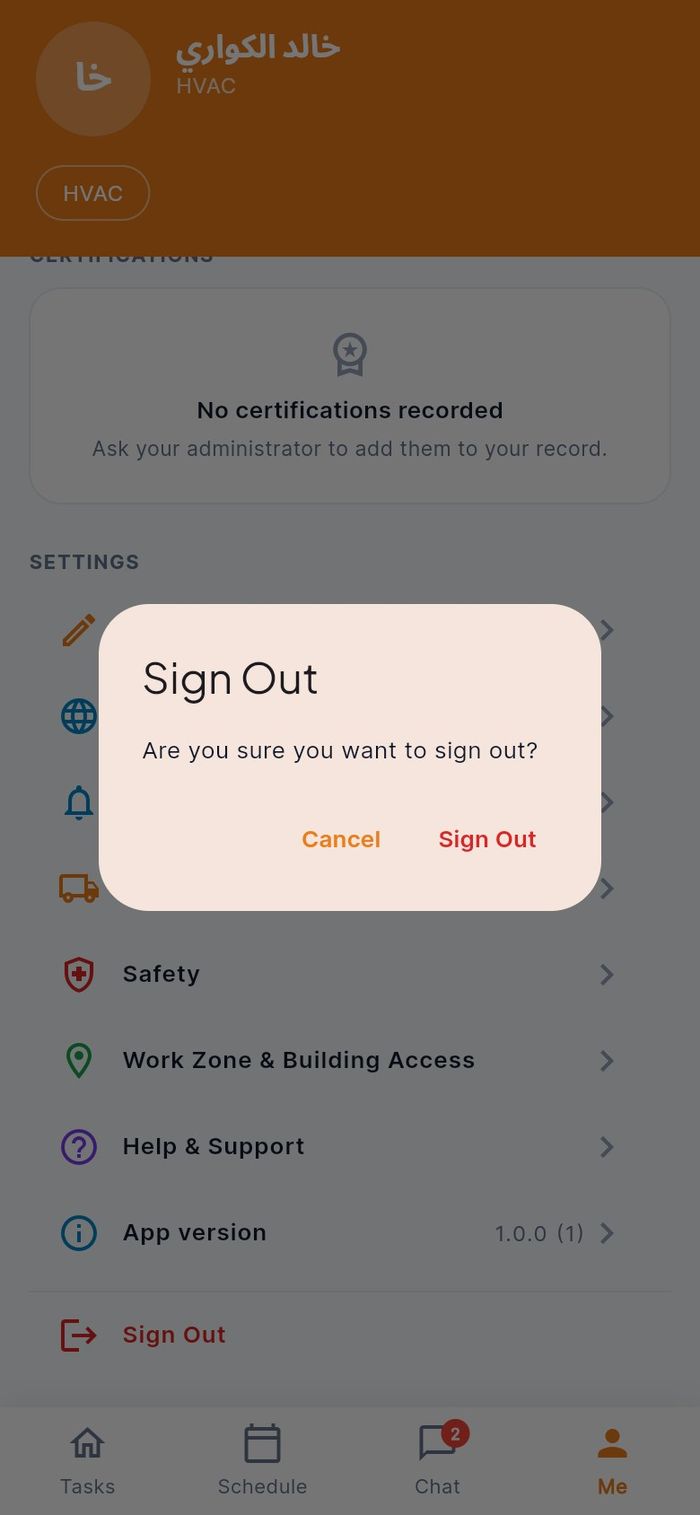
The app returns to the sign-in screen. Signing out ends the session on this phone only. Any changes not yet sent are kept and sent after you sign in again.
Contractor technicians
This part is for technicians who work for a contractor company, for example Lift Tech Qatar, and use the same app.
What is different for contractors
- Who: users of a contractor company with the portal role Technician
- Where: the same Technician app
Sign in with the email or contractor user code your account manager gave you (for example sami@lifttech-qa.test or CTR-9129). After that the app works as described in this guide, with these differences:
| Area | Company technician | Contractor technician |
|---|---|---|
| Tasks | Jobs assigned to you | Jobs your company assigned to you, and your company's jobs that nobody has taken yet |
| Parts tab | Use from Van, Request Part, Report Defective Part | One button, Add Item, to record a part or material your company supplied |
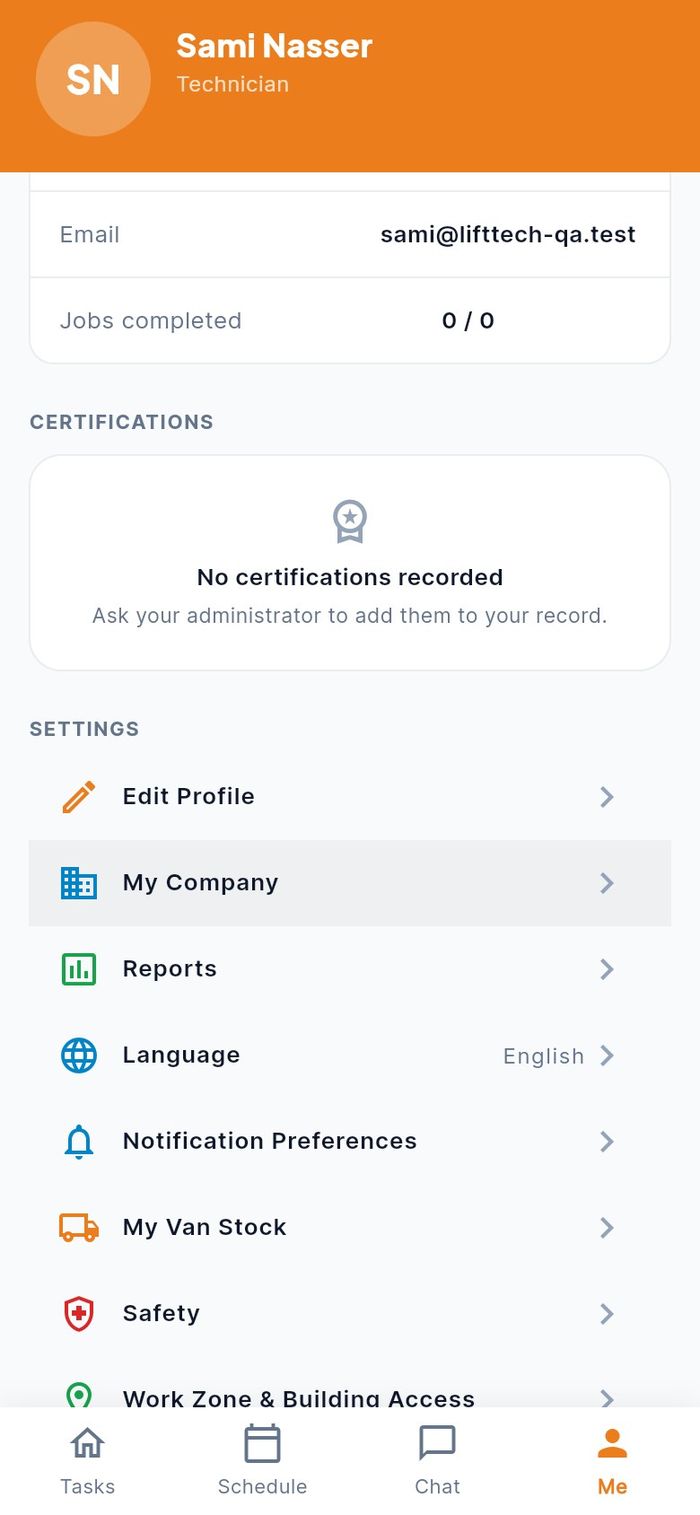
| Me | Standard settings | Adds My Company and Reports (and SLA Penalties if your company lets you see financial data) |
Record a part your company supplied
- Open the job, tap Parts, then Add Item.
- Enter the Item name and Quantity, and if you have them the Part code, Unit price, Description, Type (Spare Part, Consumable, Tool, Other), Country of origin and Currency. The line total is calculated for you.
- Save. The app confirms Item added to this job. You can remove an item you added with Remove item.
My Company and reports
- Who: contractor technicians
- Where: Me → My Company, Me → Reports
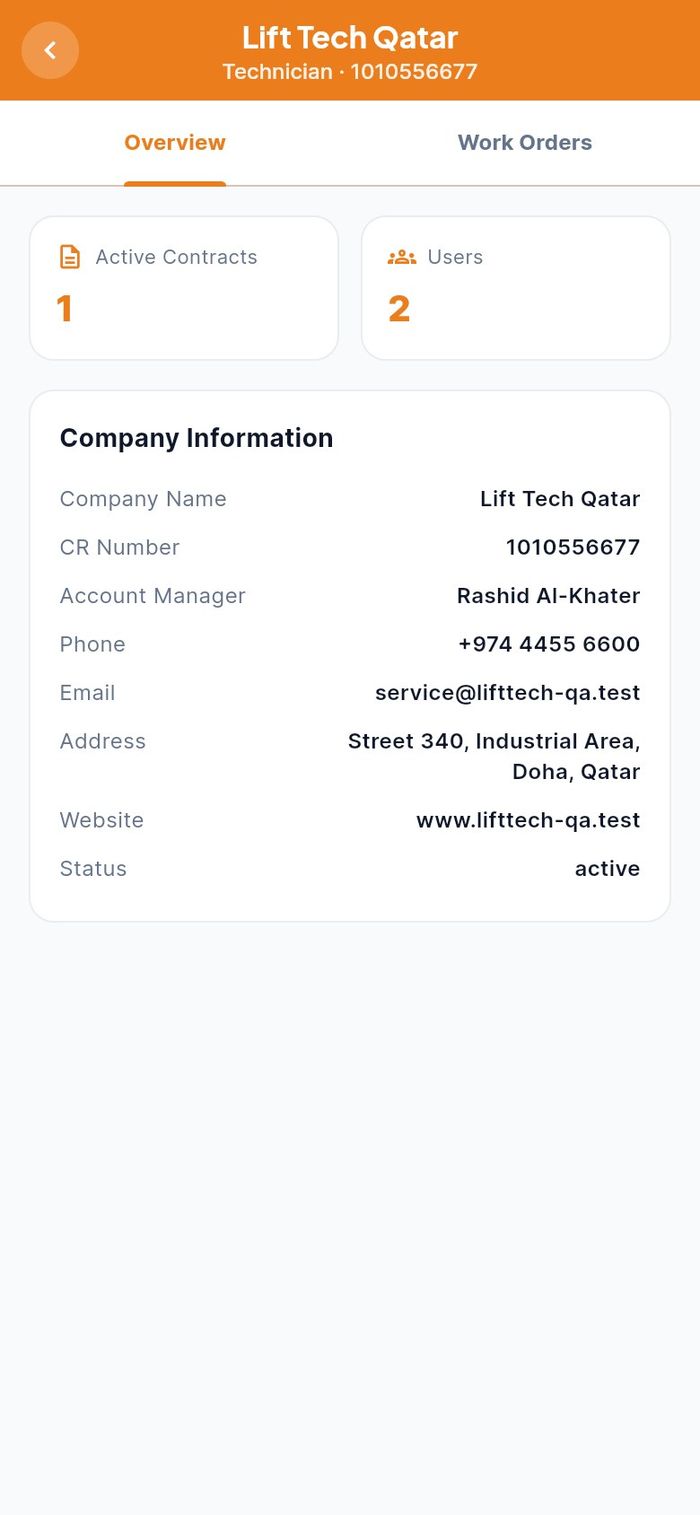
My Company shows your company's details. As a technician you see two tabs:
- Overview: the number of active contracts and users, and the company information.
- Work Orders: the company's jobs.
Account managers and supervisors see more tabs (contracts, users, penalties and financials) and can assign company jobs to a technician. That is covered in the contractor part of the web app guide.
Reports lists the reports you can run for your company, such as Work Orders (every job assigned to the company in a period, with its SLA outcome) and PPM Calendar.
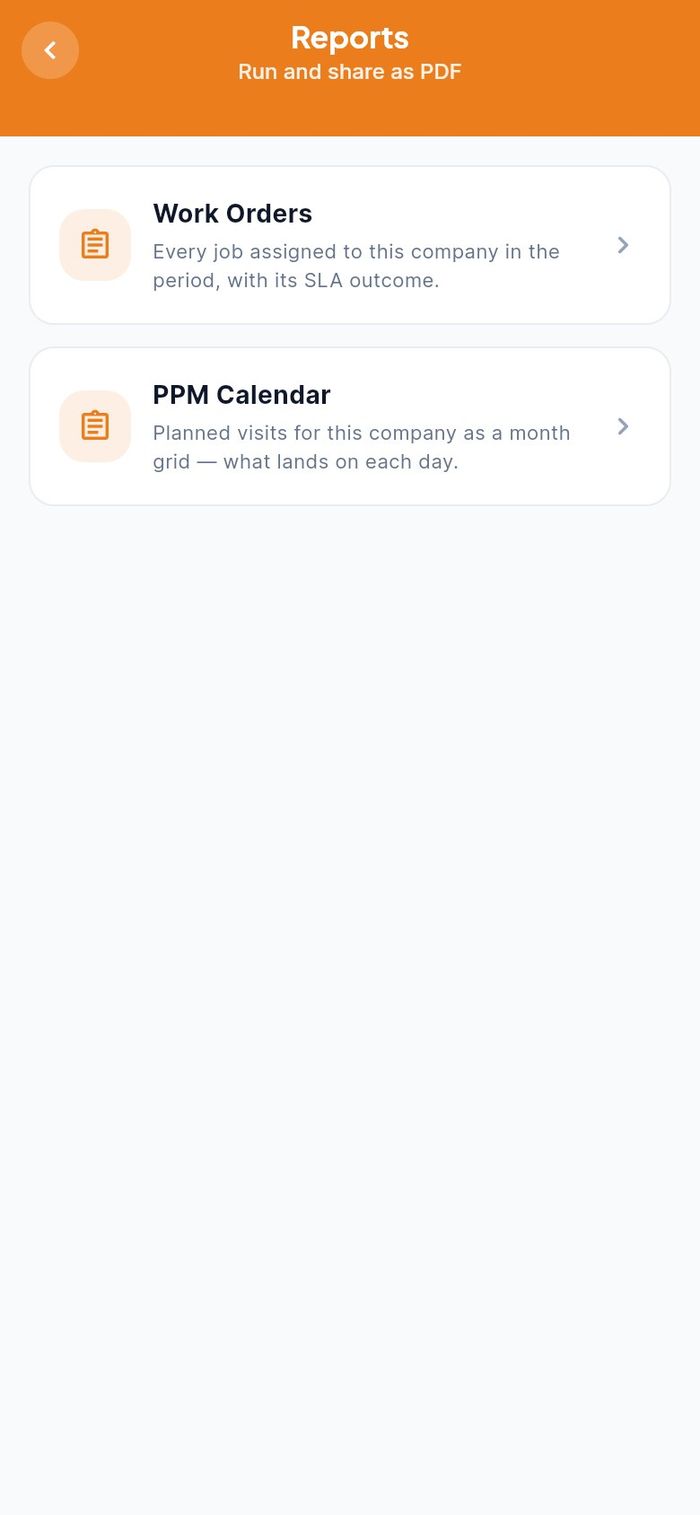
- Tap a report.
- Set FROM and TO, and narrow by technician, location or escalation if needed.
- Read the totals on screen, or tap Export as PDF to share the report.