
CAFM Way User Guide
CAFM Way Web App
The facility management workspace each company uses to run its buildings, teams, contractors, work orders, stores, finance and ERP link.
app.cafm-way.com · Last updated: 26 Sep 2026
Getting started
This guide follows one company, Oasis Facilities Management, from its first sign-in to daily operations. Its account was created through the path described in the Platform Console guide. It manages Oasis Business Park: one area (North Campus), office towers A, B and C with floors and rooms, a visitor car park and a central garden.
Sign in
- Who: any company user with web access (administrators, managers, supervisors, helpdesk, finance, procurement)
- Where:
app.cafm-way.com
- Open
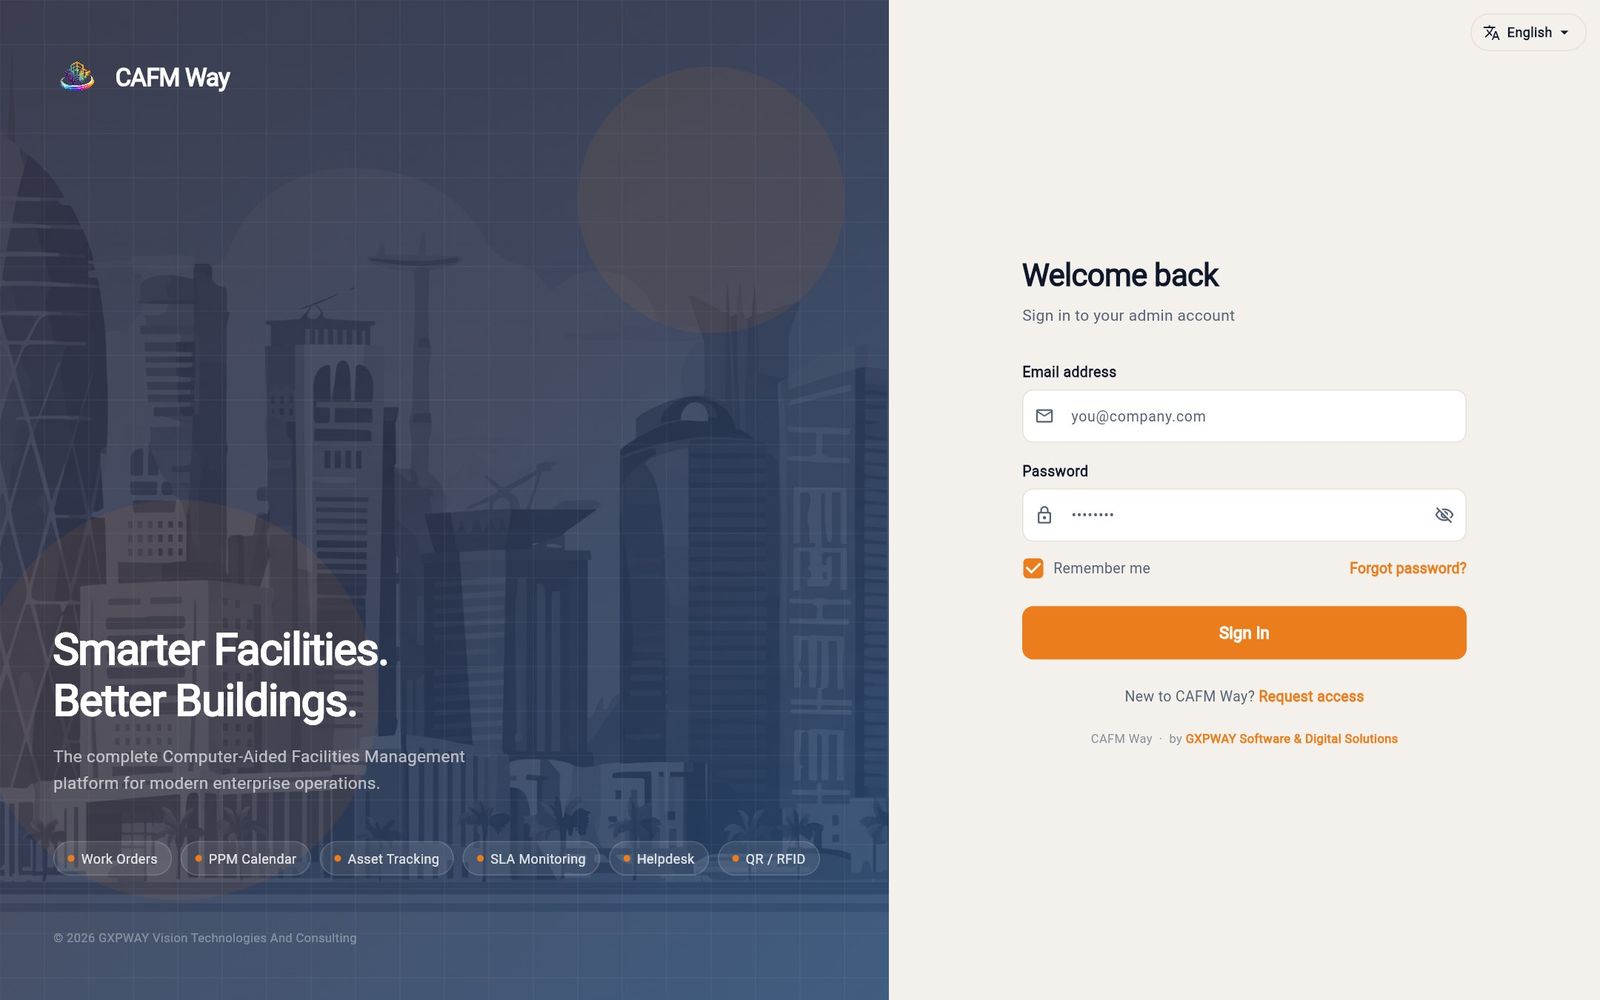
app.cafm-way.com. - To change the language, use the language button in the top corner. It offers English, العربية, हिन्दी and اردو. Arabic and Urdu switch the whole screen to right-to-left.
- Enter your email and password, then click Sign In. Remember me keeps you signed in on this browser.
Find your way around
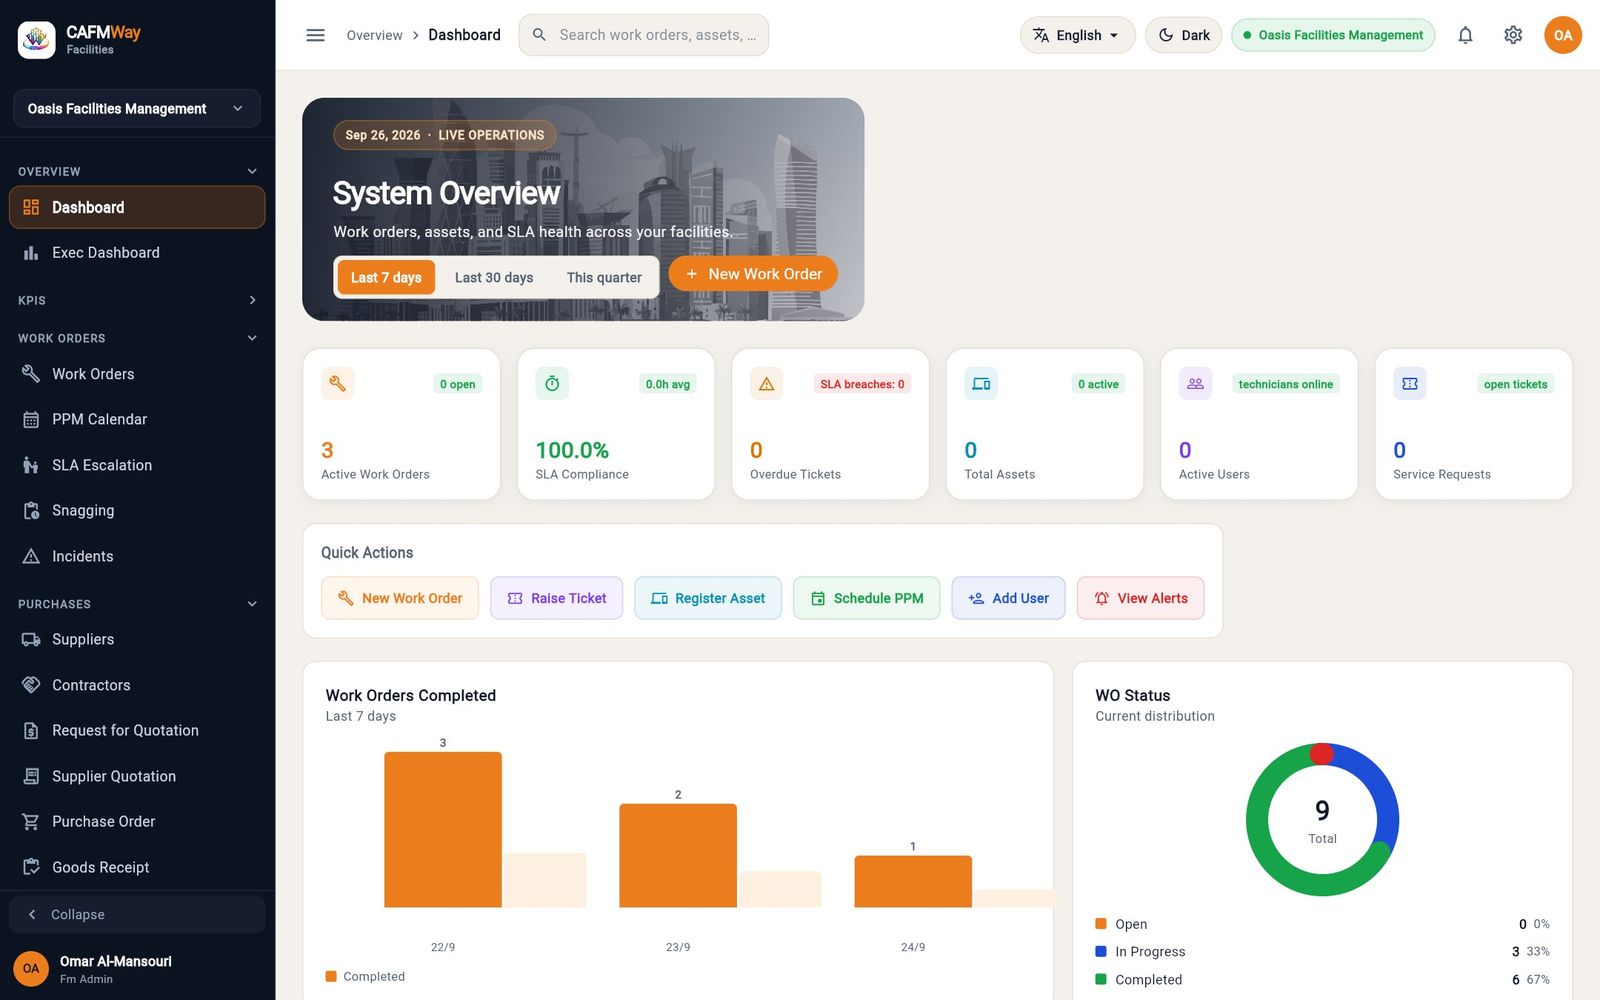
The workspace has three fixed parts:
- The sidebar groups every screen by job. Each section folds and unfolds, and Collapse at the bottom narrows it to icons. You only see the screens your role allows.
- The top bar holds the search box, the language and dark-mode switches, notifications, settings and your account menu. Press ⌘K (Ctrl+K on Windows) anywhere to search work orders, tickets, assets and locations.
- The page itself, with its own tabs and buttons.
| Sidebar section | What you do there | Covered in |
|---|---|---|
| OVERVIEW, KPIS | Dashboards and performance indicators | Dashboards & KPIs |
| WORK ORDERS | Work orders, PPM, SLA escalation, snagging, incidents | Work orders |
| PURCHASES | Suppliers, contractors, quotations, purchase orders, receipts, invoices, payments | Contractors, Purchasing & stores |
| ACCOUNTING & FINANCE | Ledger, budgets, fixed assets, tax, reports | Accounting |
| ASSETS & FACILITIES | Assets, locations, equipment, fleet | Locations & assets |
| INVENTORY | Items, warehouses, stock | Purchasing & stores |
| HEALTH & SAFETY | Permits, risk, checklists, observations, training, PPE | Health & safety |
| USERS | Users, roles, shifts, rosters, leave, organisation & SLA | Organisation & users |
| WORKPLACE | Space booking, waste, documents | Workplace |
| SYSTEM | Notifications, messages, settings, branding, integration, audit, subscription | ERP integration, Subscription |
Recommended setup order
A new company already has a lot in place on day one: the facility hierarchy it registered, a standard department tree, work categories, SLA calendars, a priority matrix, a chart of accounts and the administrator's account. To be ready for work orders, complete these steps in order:
- Organisation: review departments and work categories, and add what is missing (Organisation & SLA).
- People: create users for supervisors, technicians, the helpdesk, finance and requestors (Users).
- Places and equipment: check the location tree, print QR labels and register assets (Locations, Assets).
- Contractors: add contractor companies, their contracts and their users (Contractors).
- Stores and finance: items, warehouses, suppliers and accounting settings (Purchasing & stores, Accounting).
- Integration: connect your ERP if you use one (ERP integration).
After that, requests and work orders can flow: Work orders, plus the Technician app and Requestor app guides.
Organisation and users
Set up who does the work and how work is classified. Most of this is ready-made for a new company; you review it and add what is specific to you.
Organisation & SLA at a glance
- Who: FM administrators (needs the manage permissions right)
- Where: USERS → Organisation & SLA
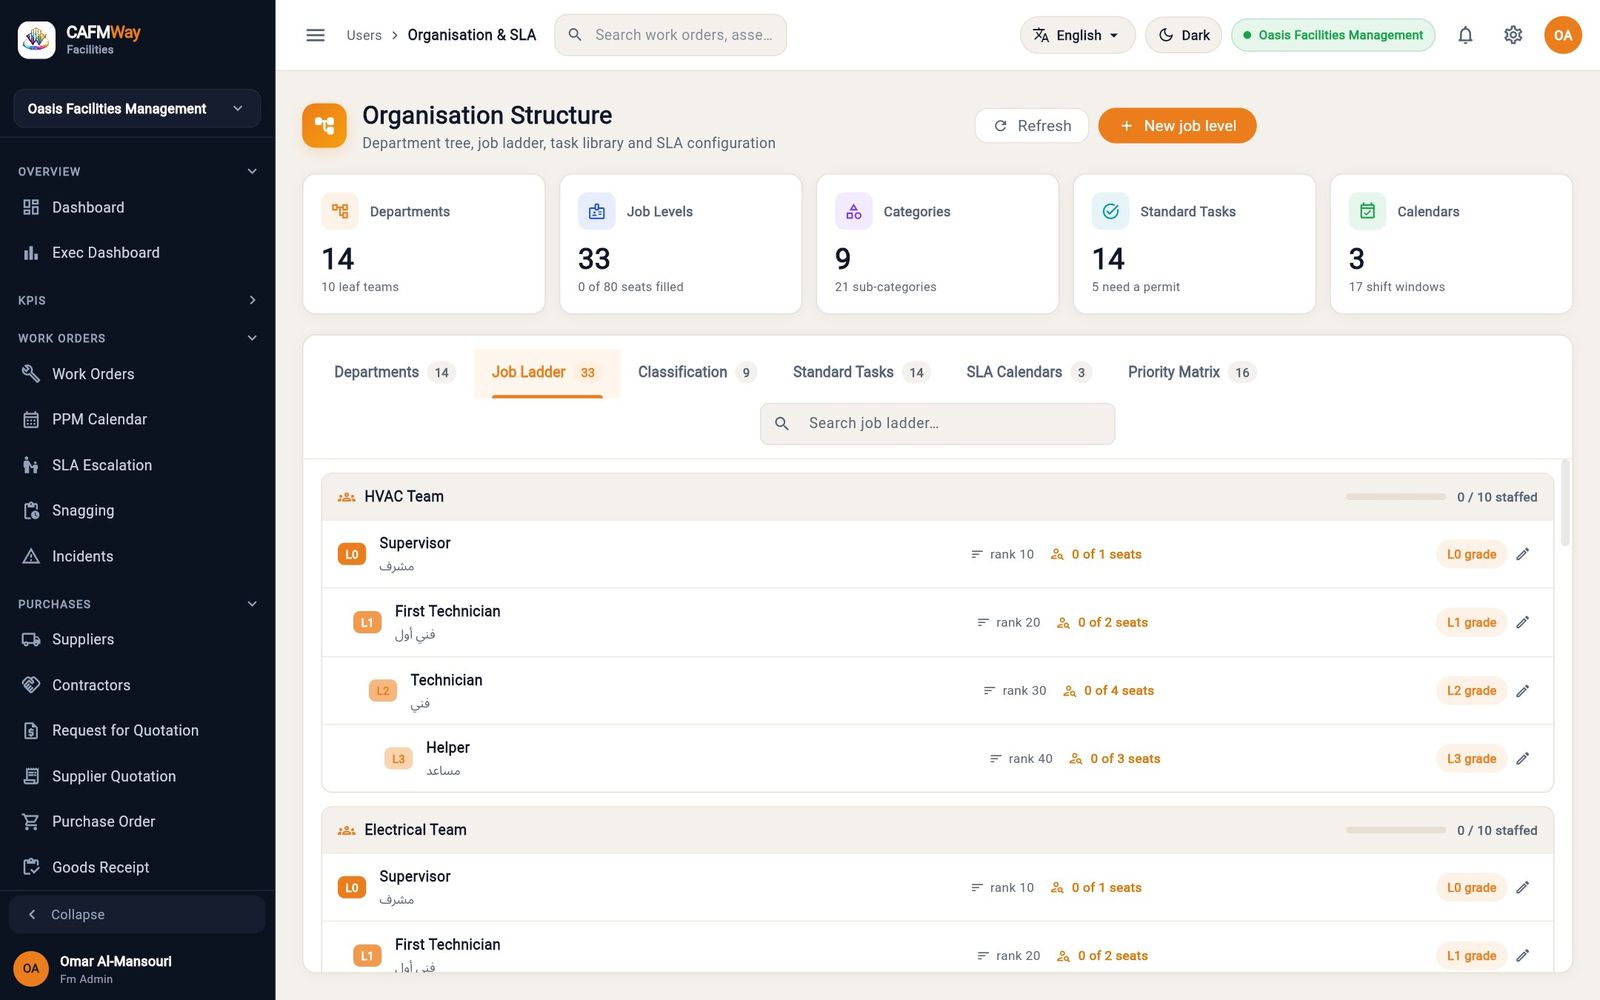
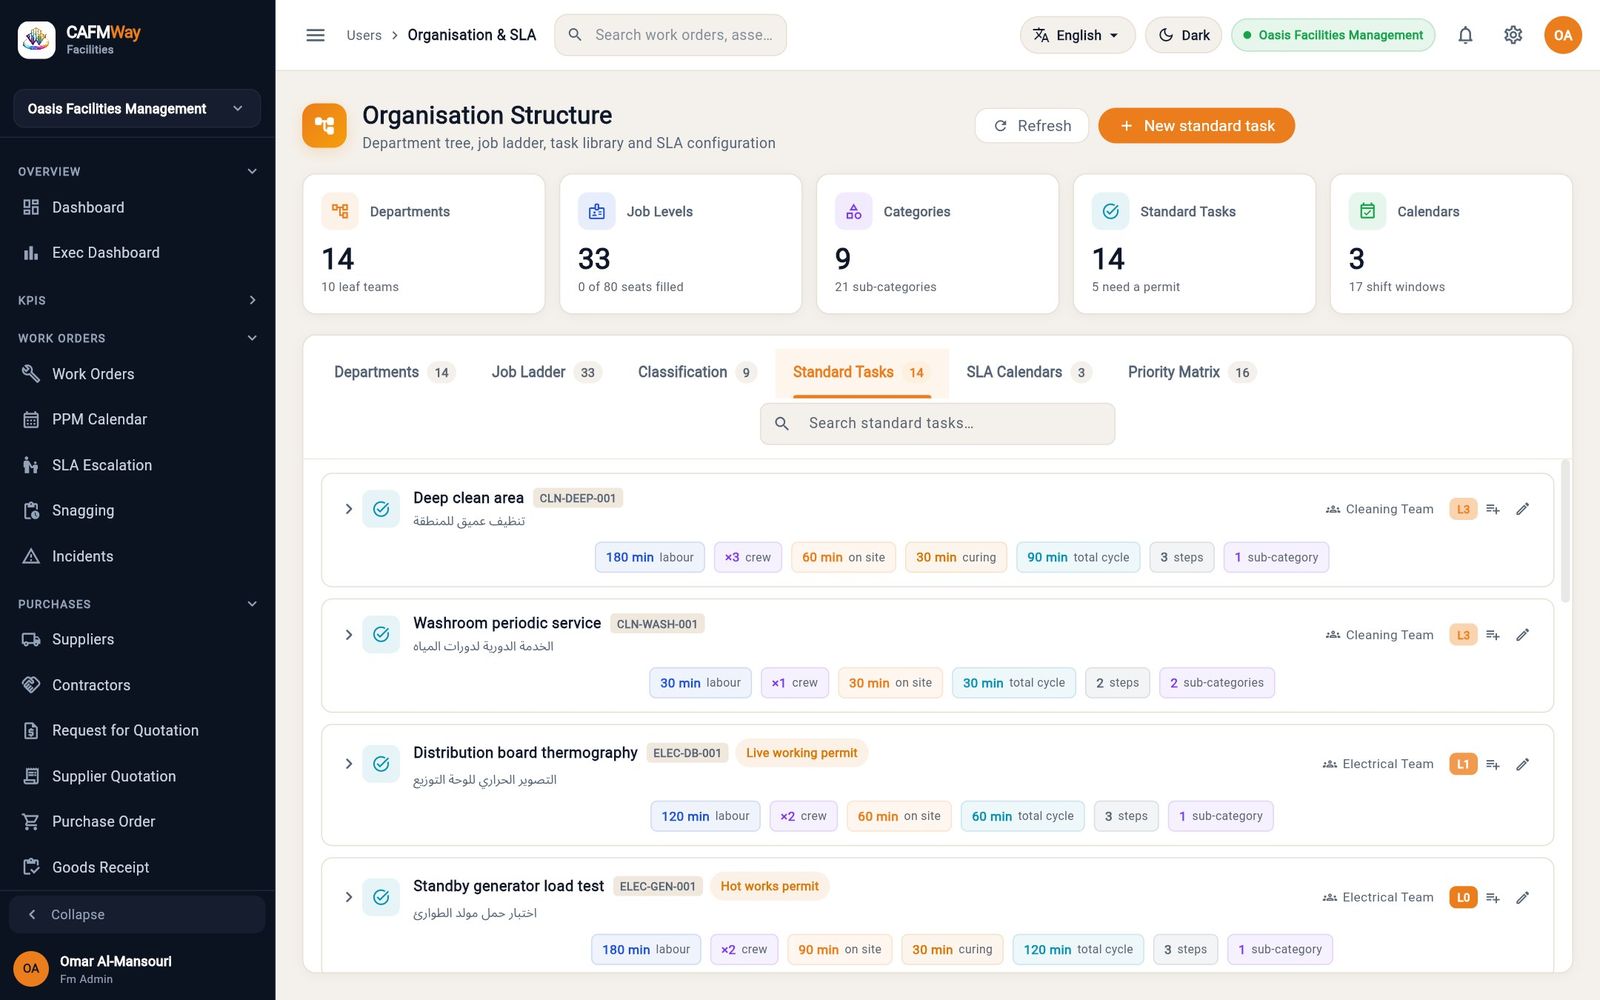
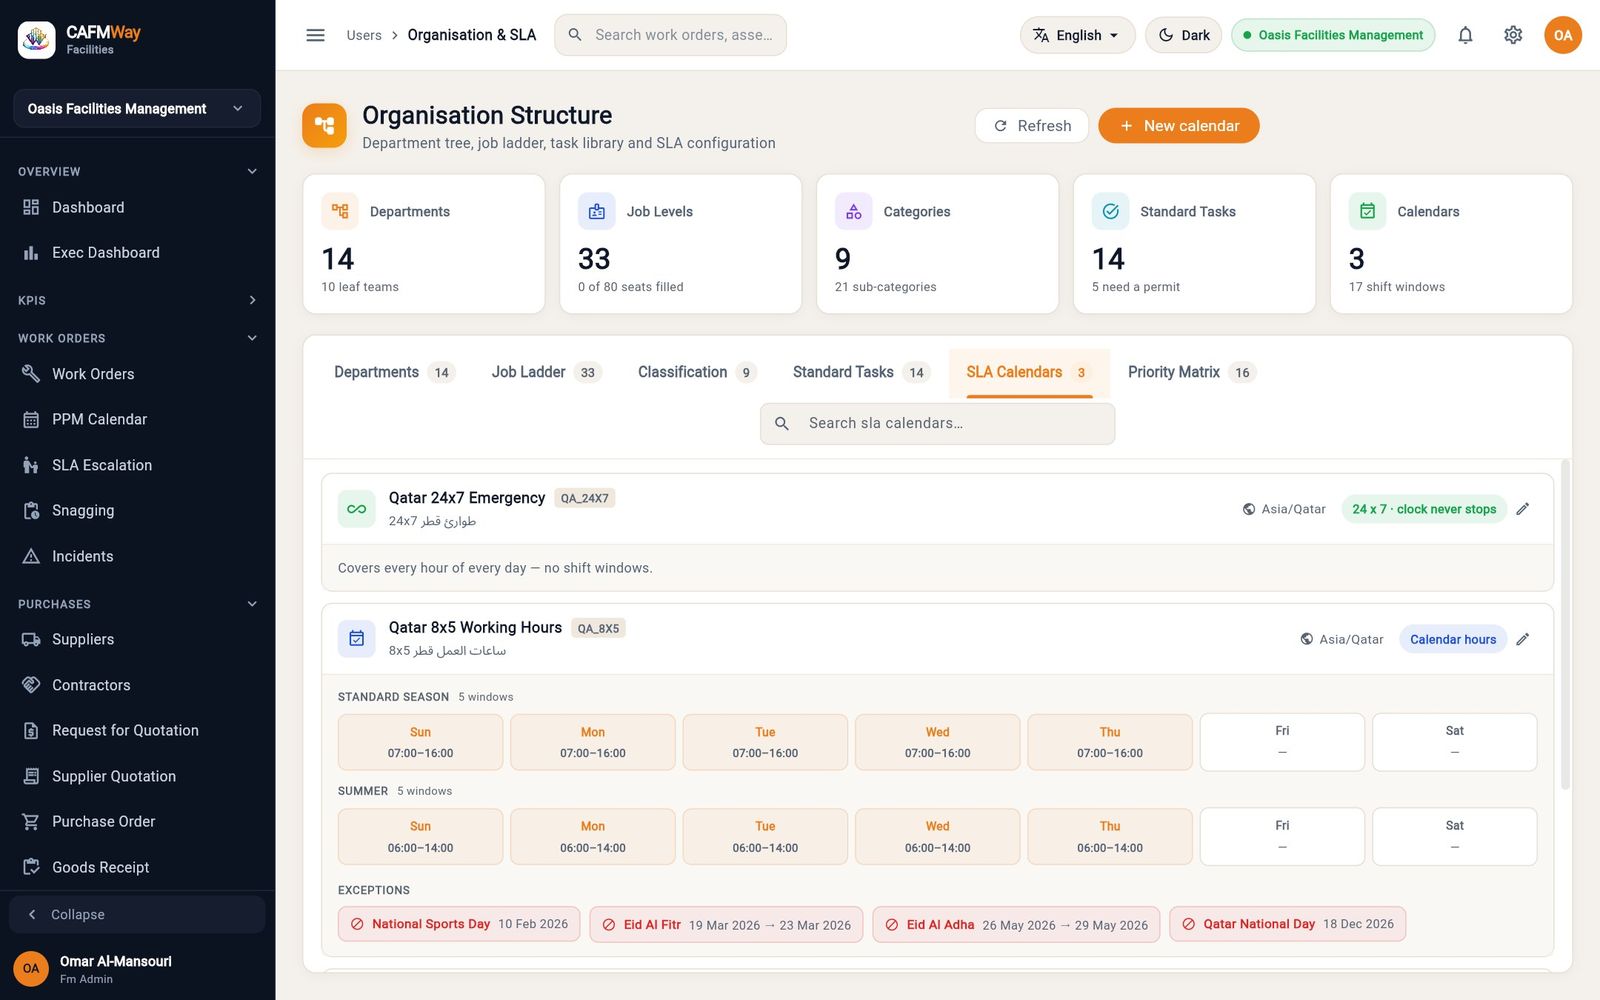
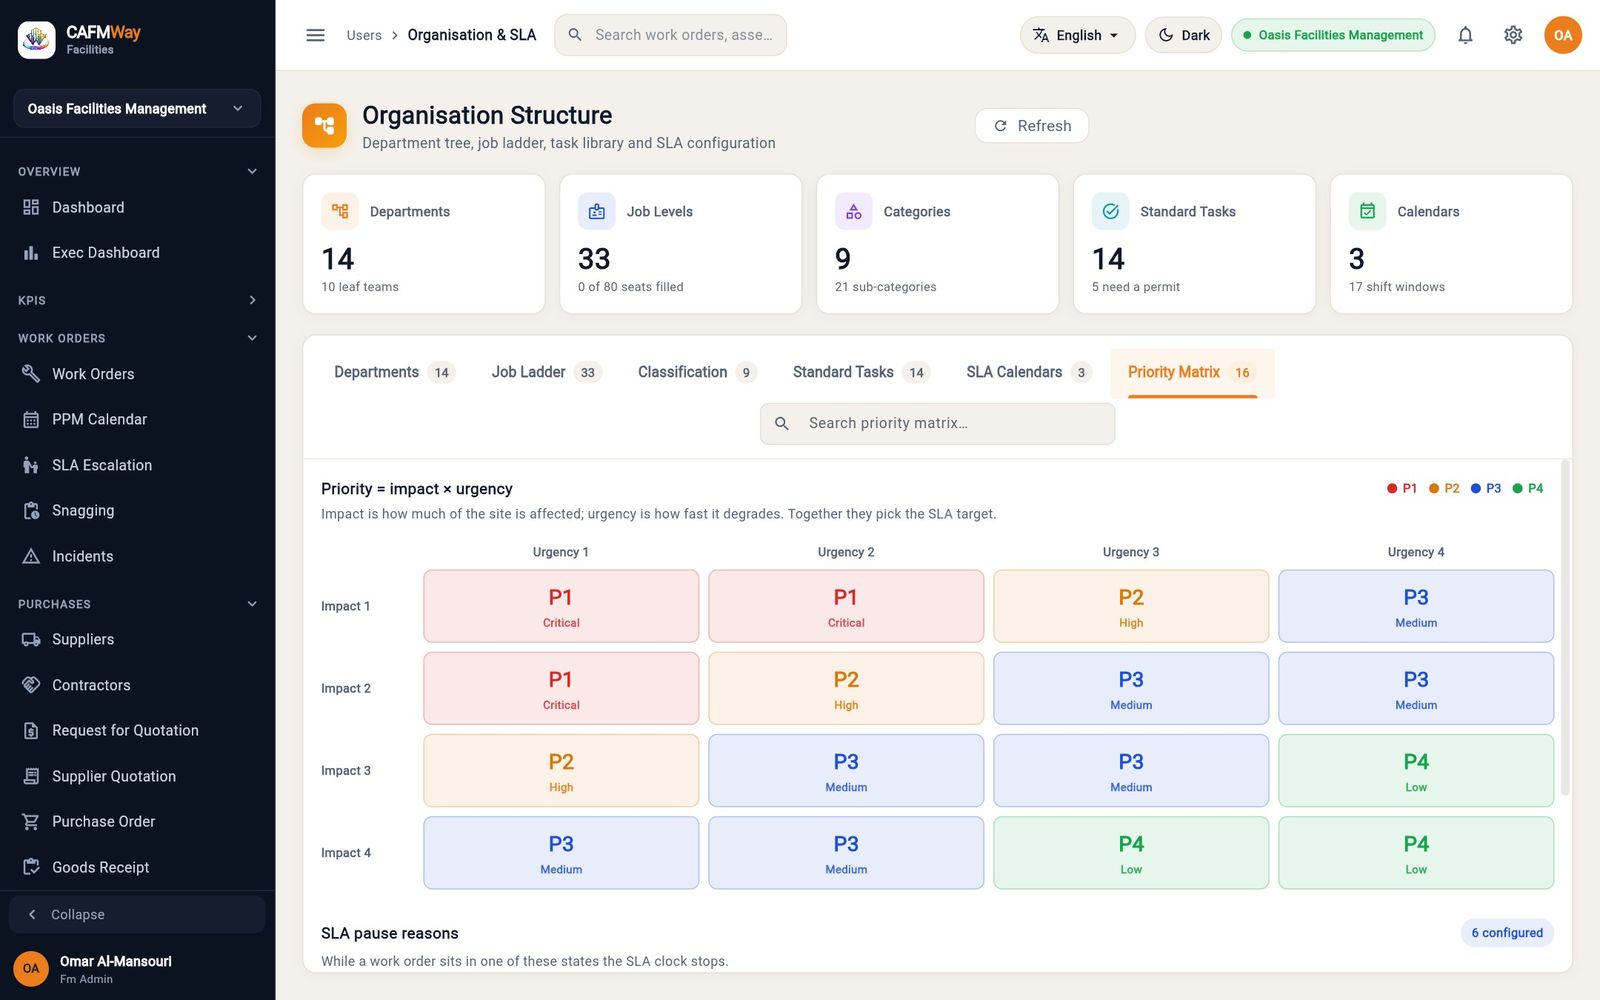
The page has six tabs, with a count on each:
| Tab | Holds | Used by |
|---|---|---|
| Departments | The department tree, from the whole FM organisation down to leaf teams (HVAC, Electrical…) | Users belong to a department; teams own work categories |
| Job Ladder | Job levels and seats per department | Job titles when adding users |
| Classification | Work categories and sub-categories ("works") | Every ticket and work order is classified by these |
| Standard Tasks | A library of standard jobs, with permit flags | Linked to sub-categories and PPM |
| SLA Calendars | Working calendars and shift windows | SLA time counting |
| Priority Matrix | Priority = impact × urgency, and the SLA target per priority | Work-order priority and deadlines |
Add a department
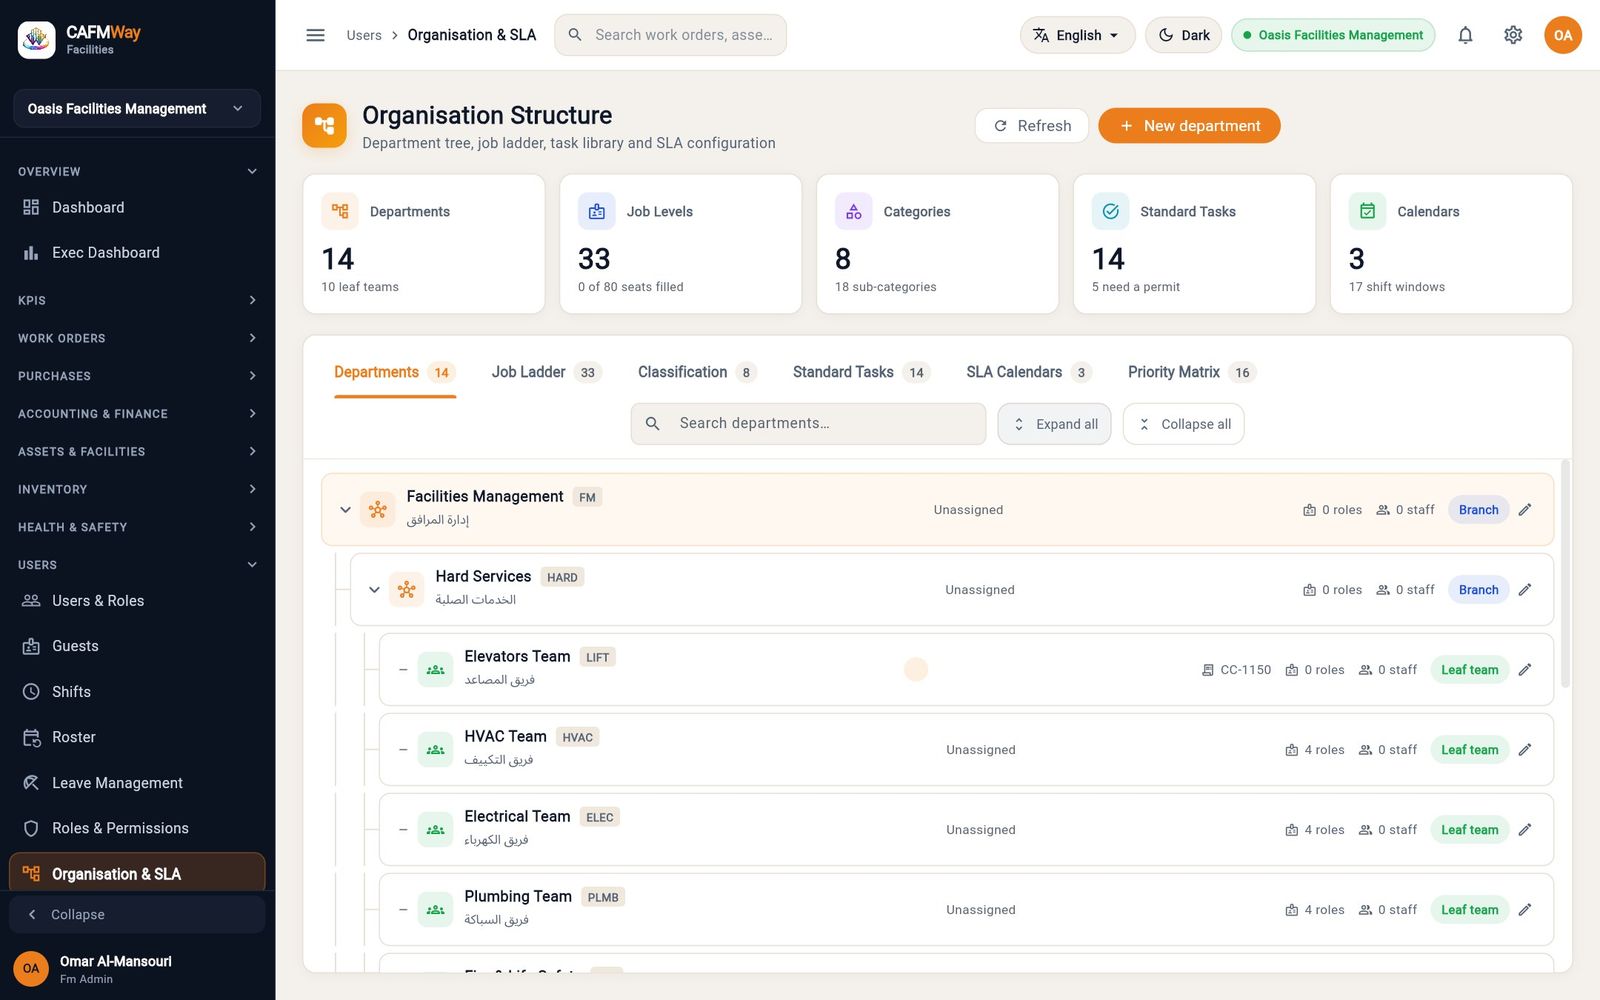
- On the Departments tab, click New department.
- Choose the parent department. Choosing Root department creates a new top-level branch.
- Enter a short code (for example
LIFT), the English and Arabic names, and the cost centre used for accounting. - Optionally pick the department manager.
- Click Create department.
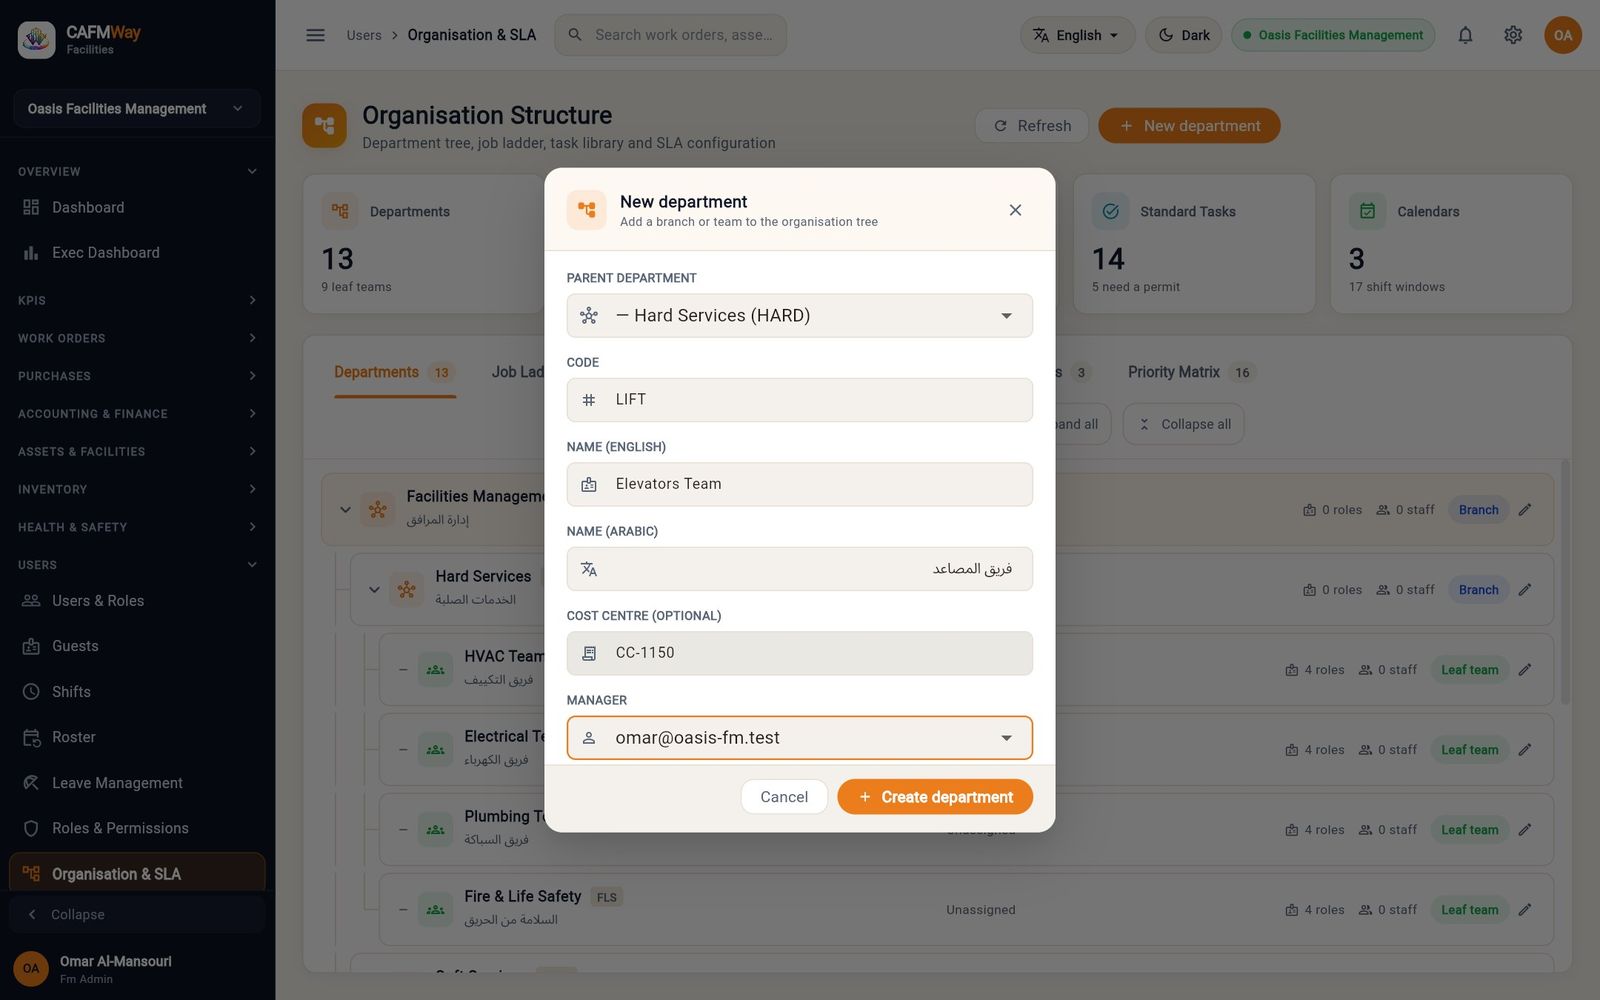
The tree shows each department as a Branch (it has sub-departments) or a Leaf team (people and work sit here), with its role and staff counts. Use Expand all / Collapse all and the search box to find a team. Click the pencil on a row to edit it.
Add work categories ("works")
Work categories answer what kind of work is this? Each category belongs to a department. That department's team receives the work, unless a contractor's contract covers the category (see Contractors).
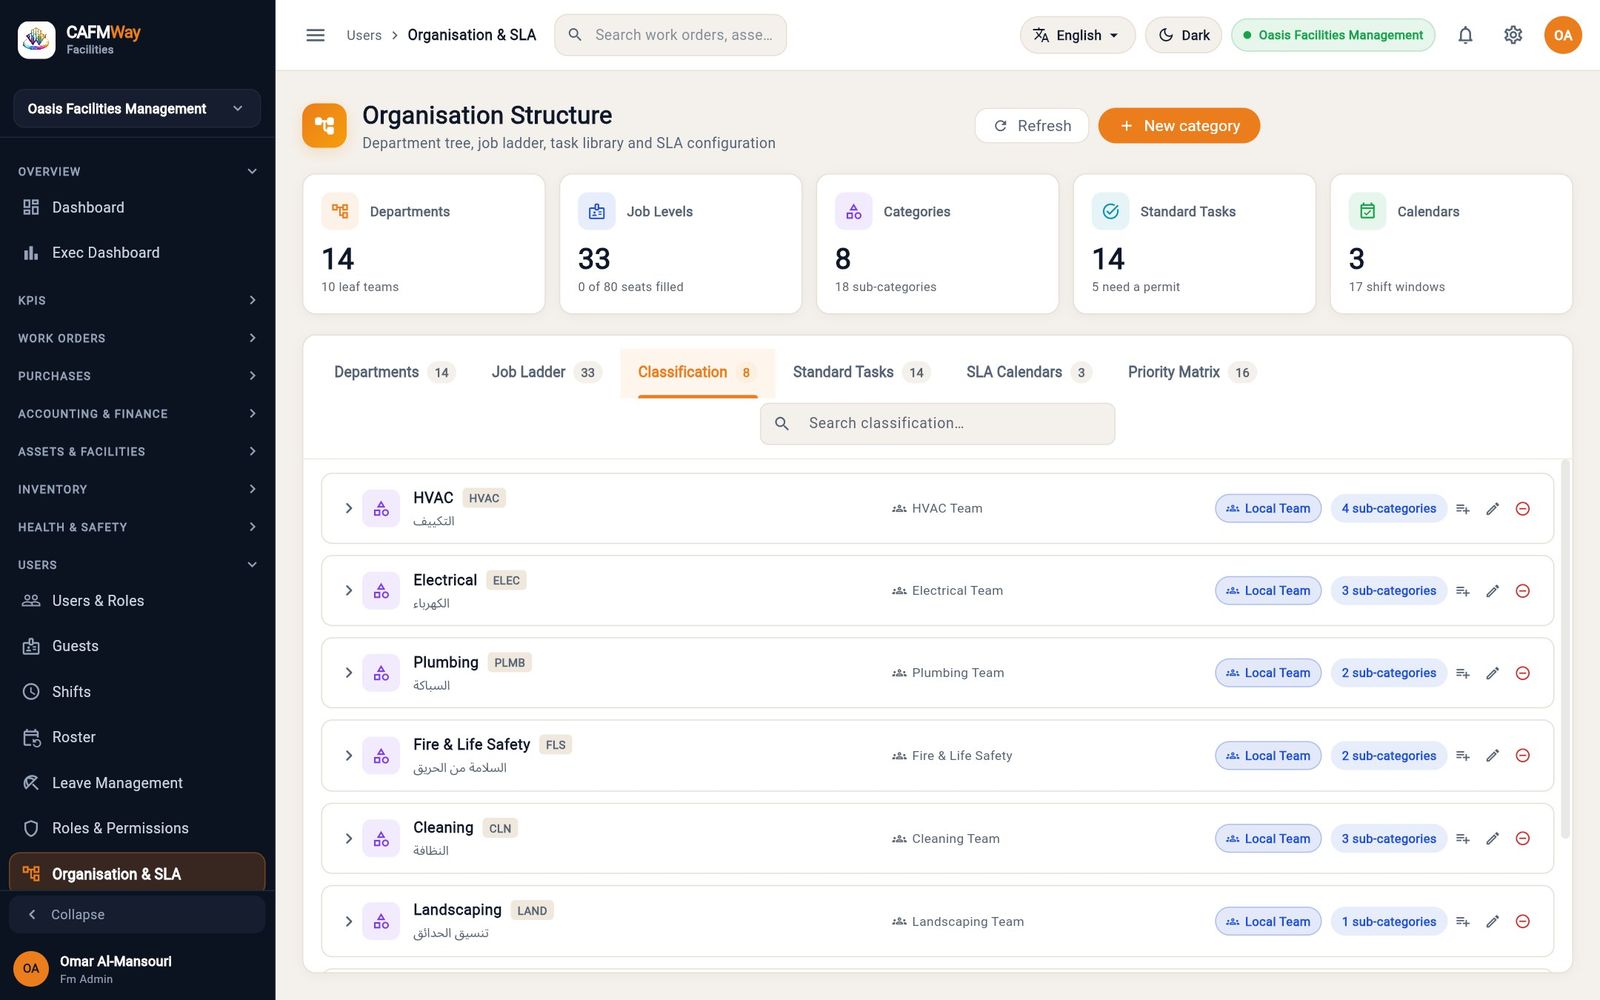
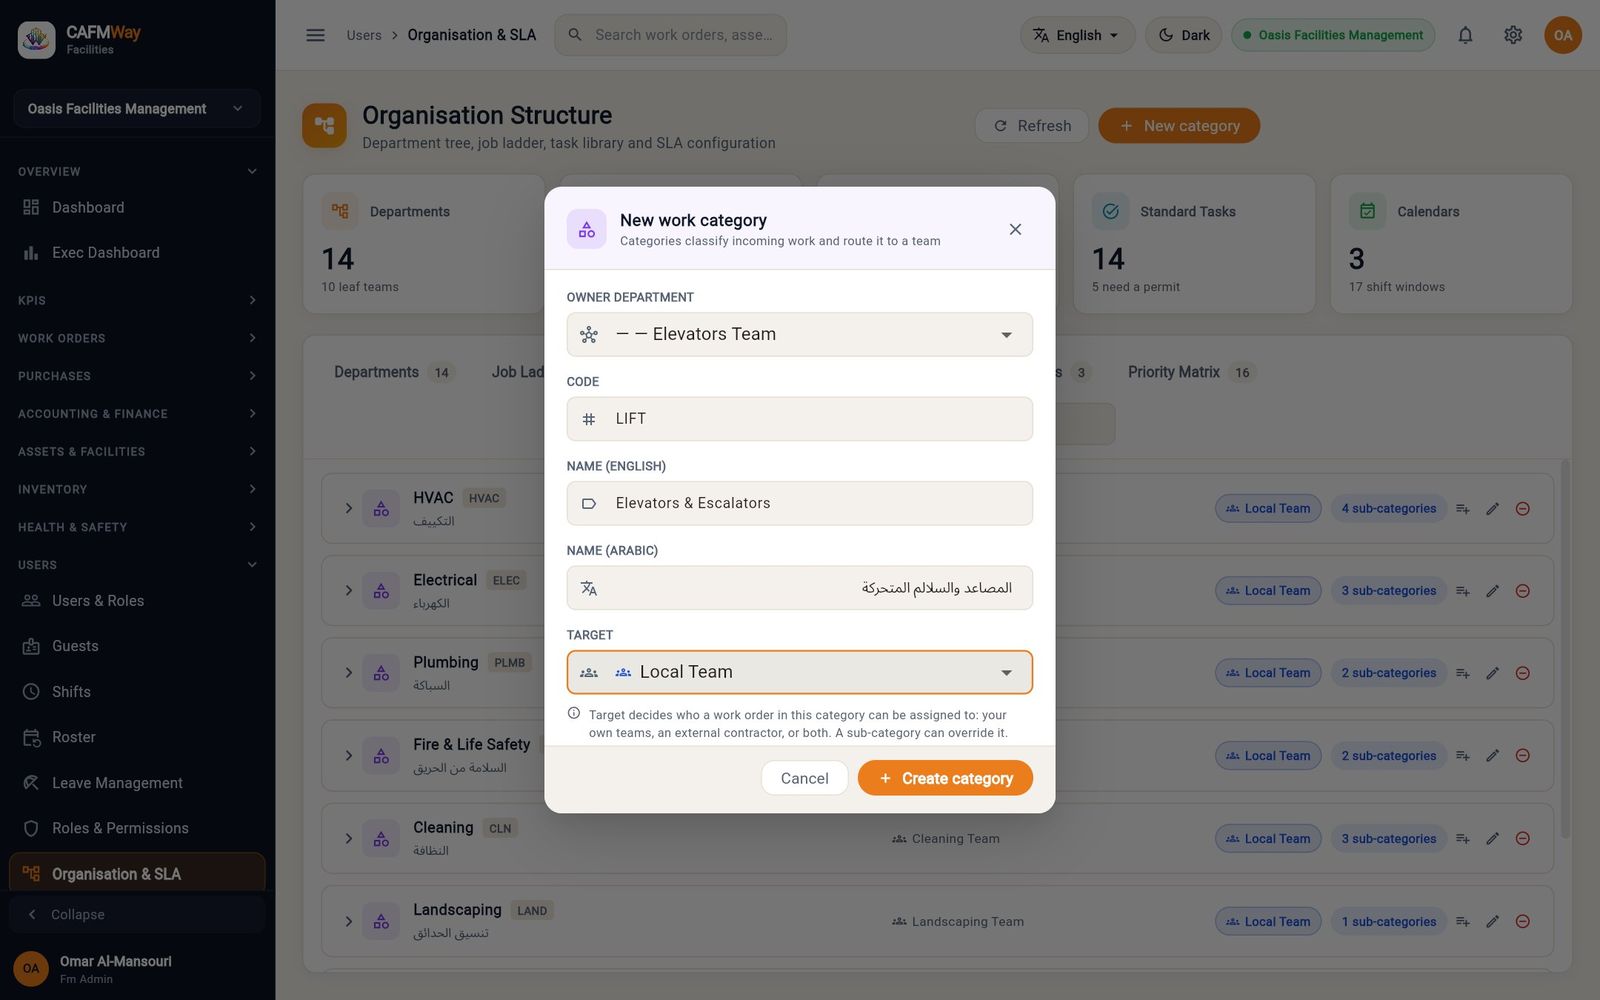
Add a category
- On the Classification tab, click New category.
- Choose the owning department, enter a code and the English and Arabic names.
- Leave the executor on Local Team. When a contractor's contract covers the category, the system routes the work to the contractor automatically (see Route work to the contractor).
- Click Create category.
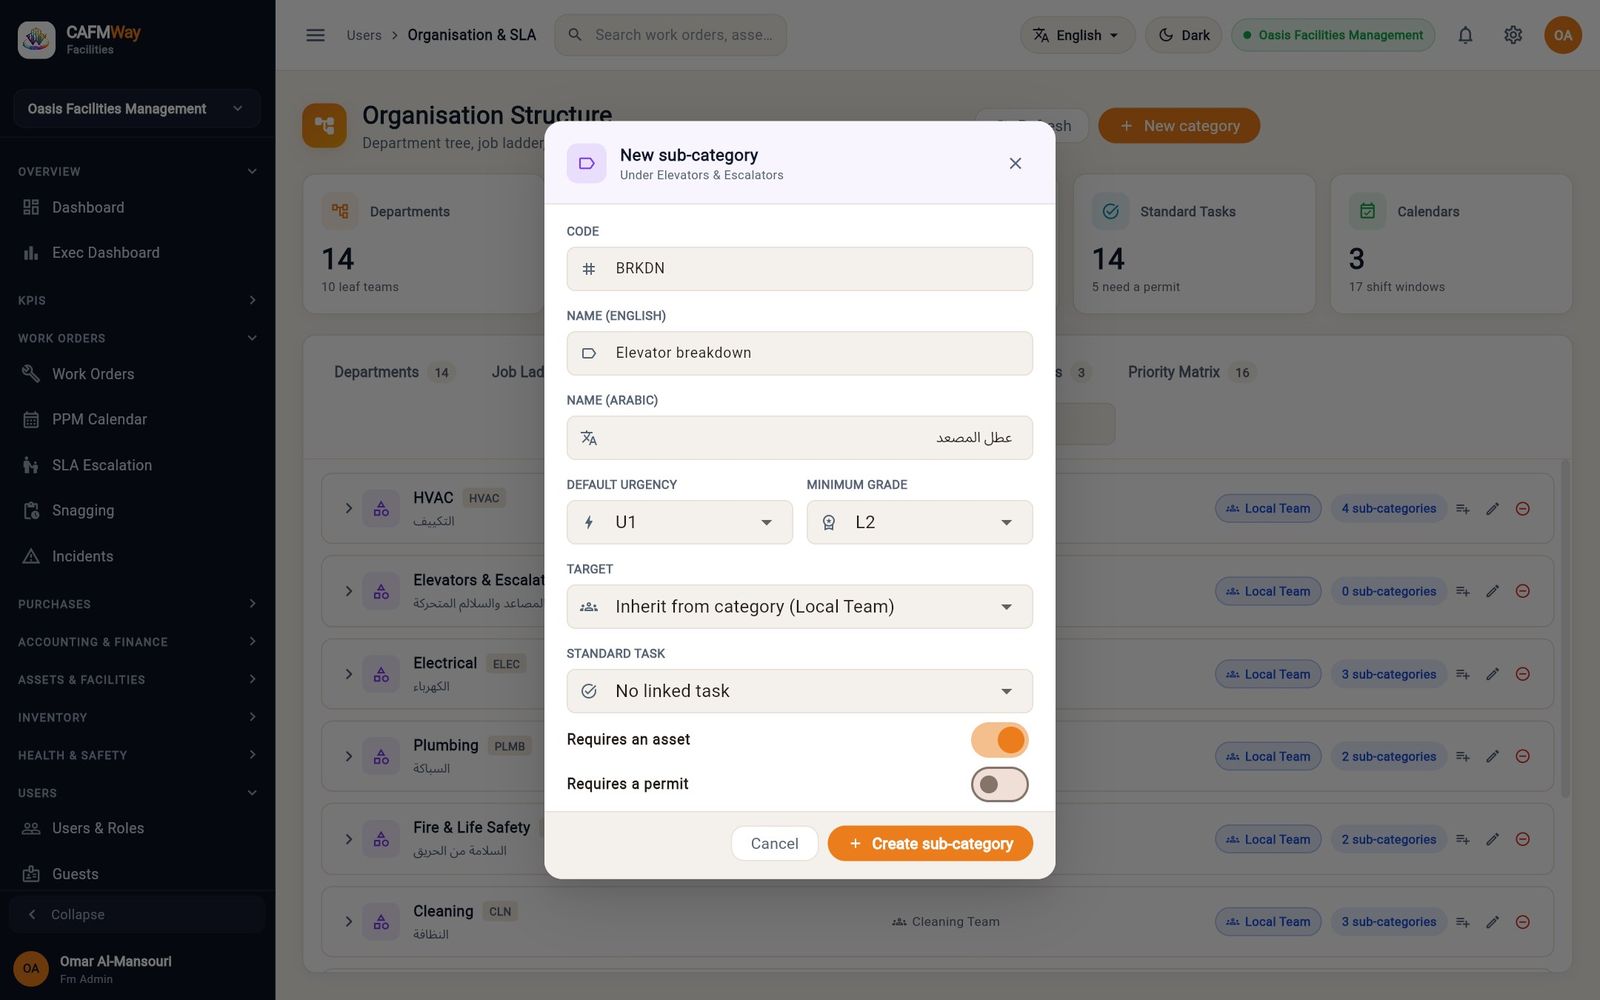
Add sub-categories. Sub-categories are the level requesters and dispatchers actually pick, such as Elevator breakdown.
- Click the Add sub-category icon on the category's row.
- Enter a code and the English and Arabic names.
- Set the default urgency (U1 is the most urgent) and the minimum grade of technician allowed to do the job.
- Optionally link a standard task, and switch on Requires an asset or Requires a permit when the job always needs one.
- Click Create sub-category.
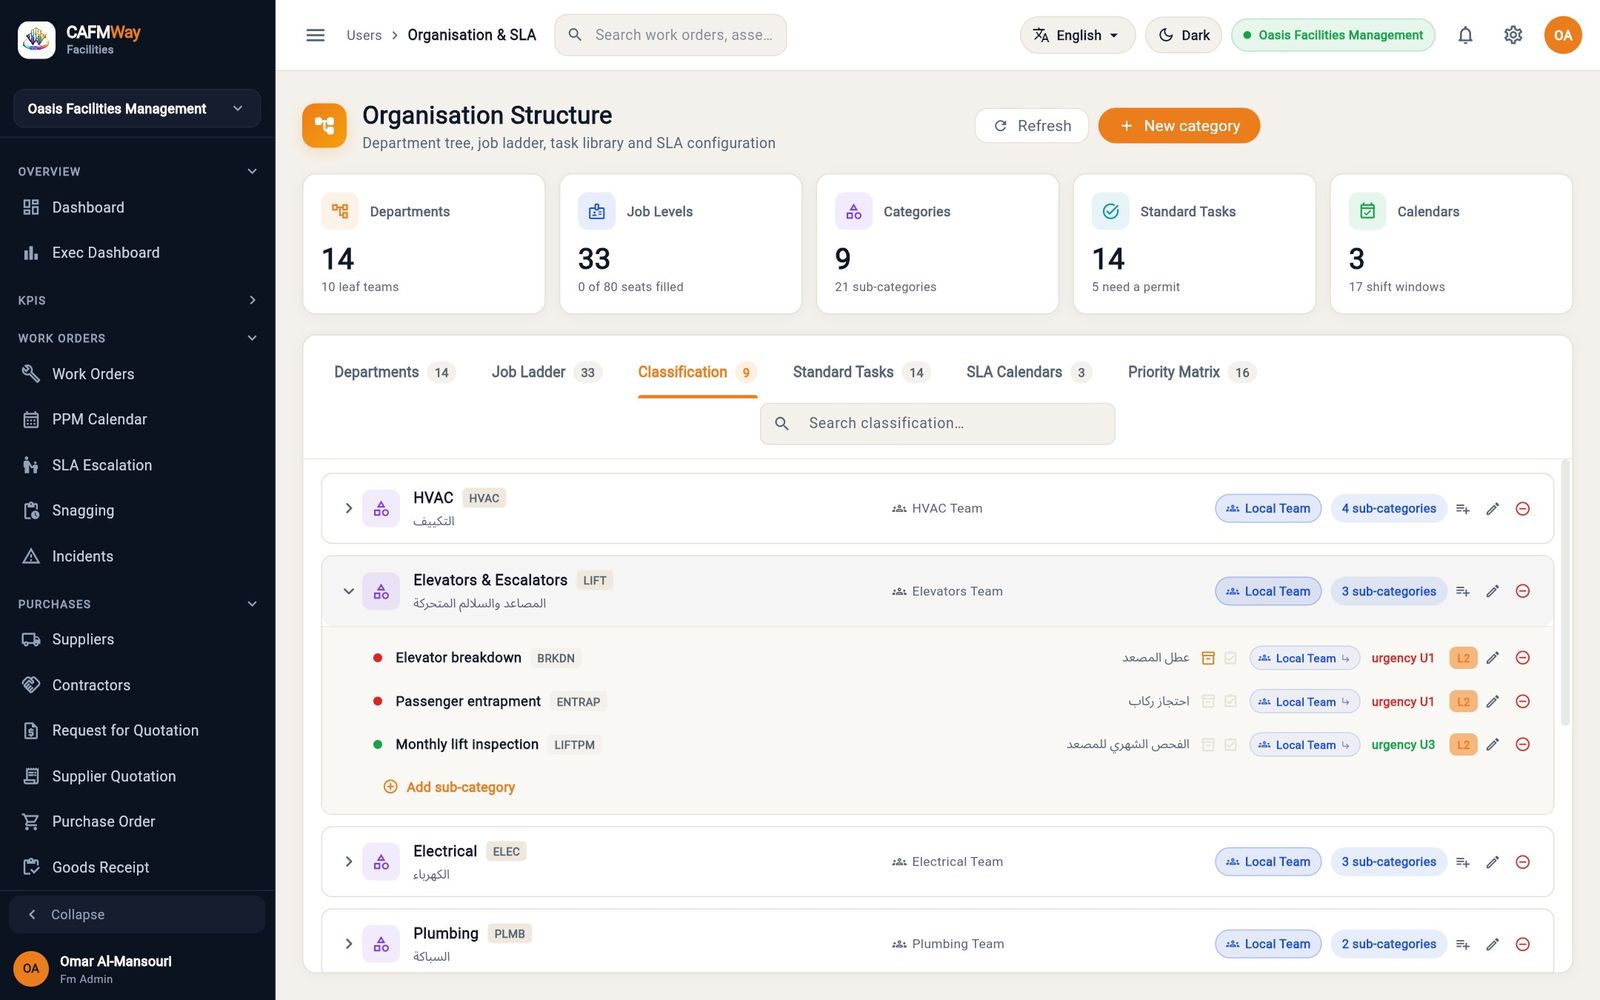
Job ladder, standard tasks, SLA calendars and the priority matrix
These tabs come pre-filled and usually need only small changes.
- Job Ladder: job levels per department and how many seats each has. The job titles offered when you add a user come from here.
- Standard Tasks: reusable job definitions, such as Filter replacement, with an indication of which ones need a permit to work.
- SLA Calendars: the working hours and shift windows SLA clocks run against.
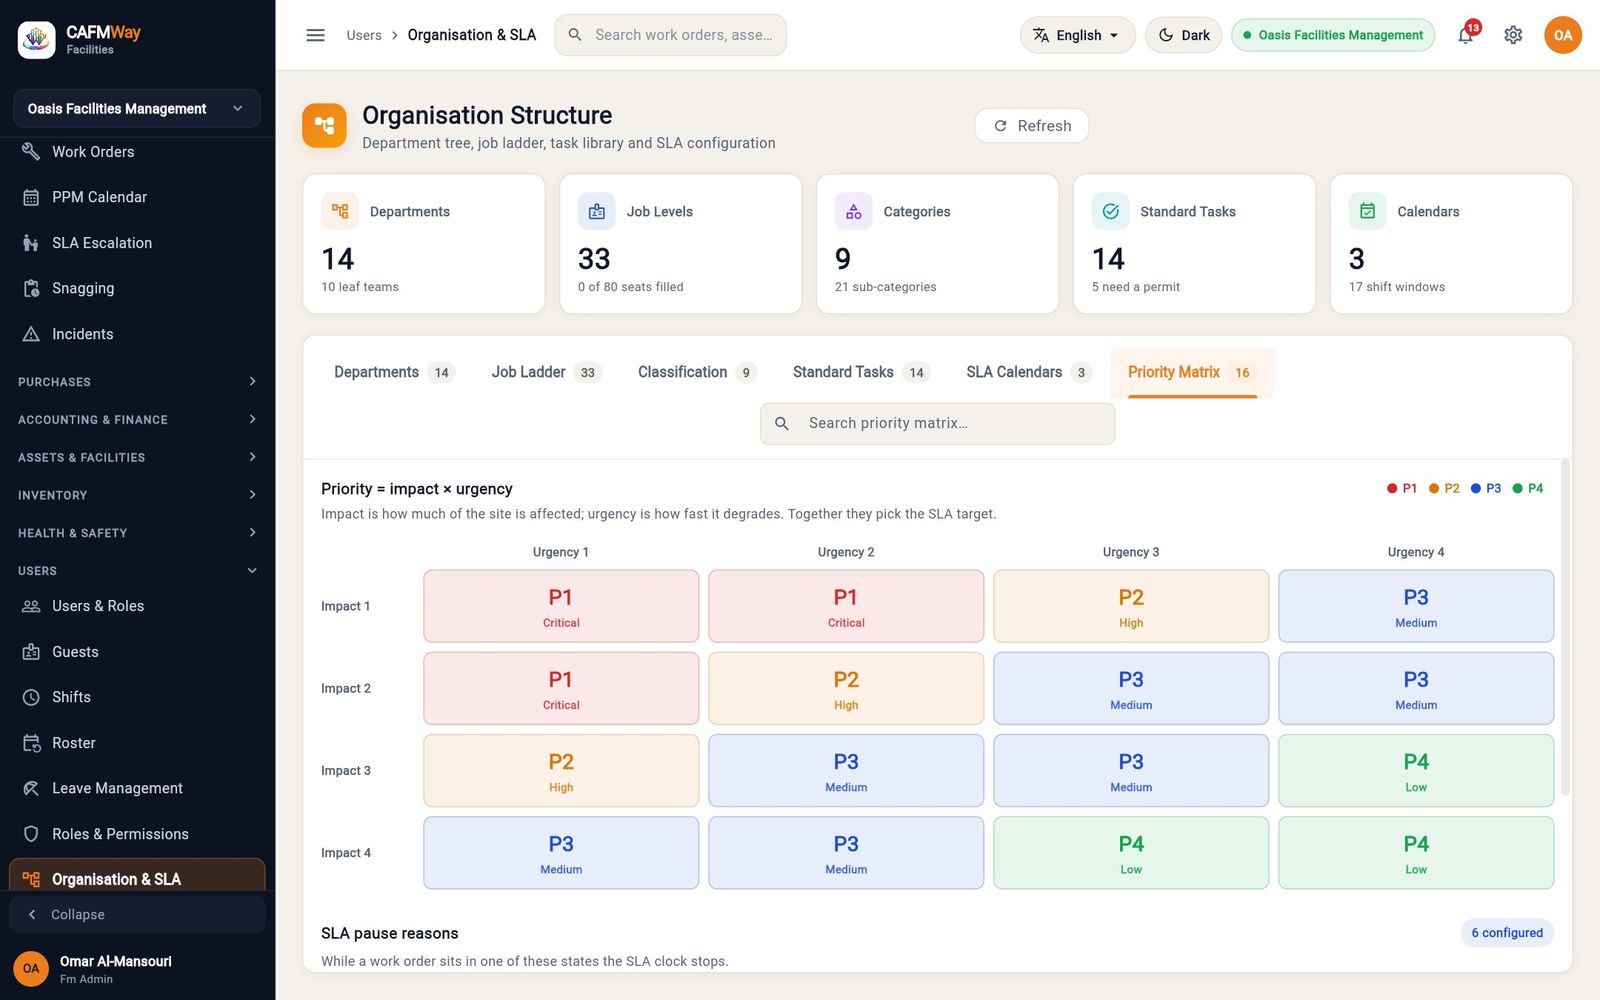
- Priority Matrix: how impact (how much of the site is affected) and urgency (how fast it gets worse) combine into a priority, P1 (critical) to P4 (low), and therefore the SLA target. Below the matrix, SLA pause reasons list the states in which the SLA clock stops.
Users
- Who: FM administrators
- Where: USERS → Users & Roles
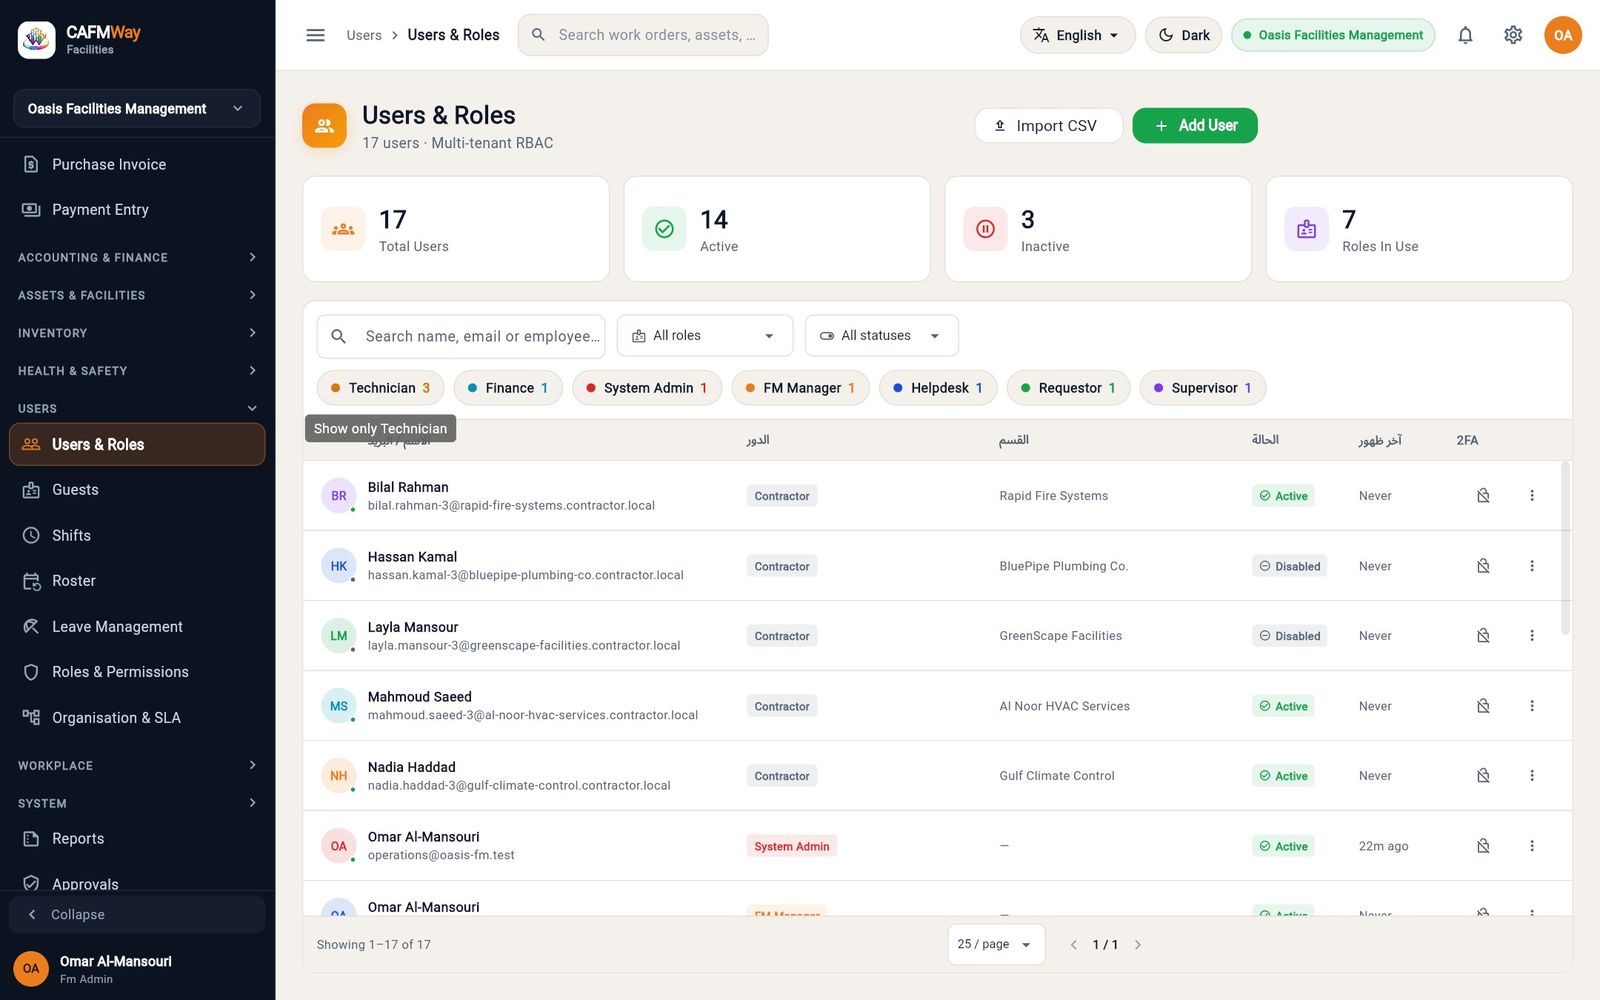
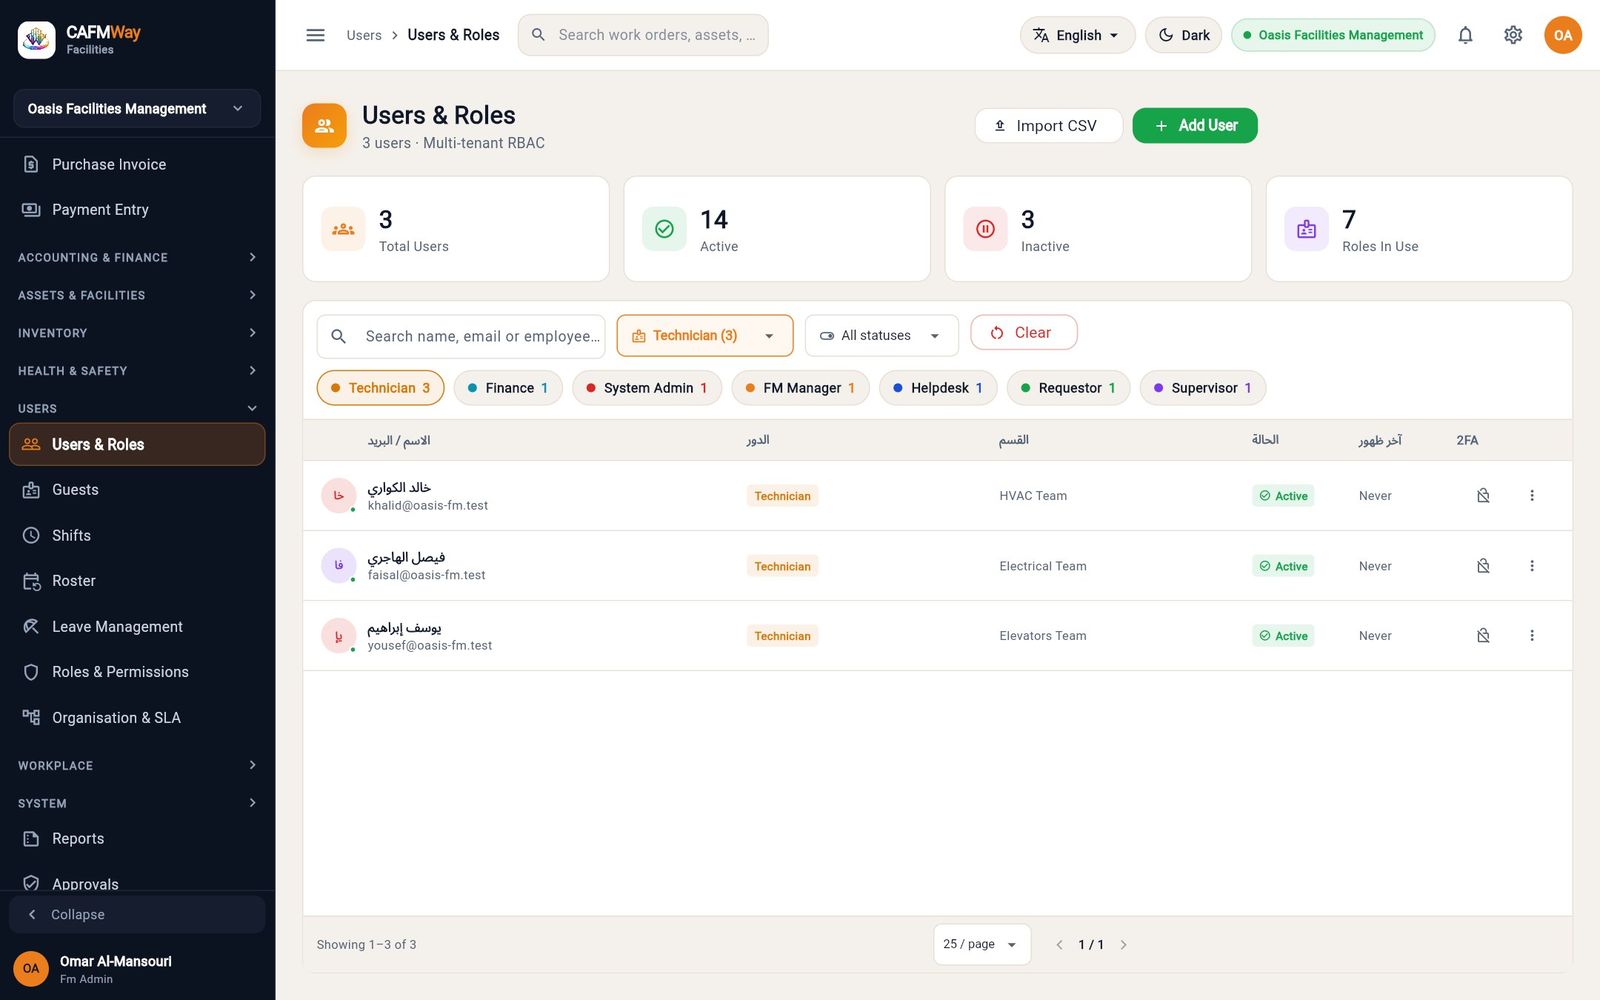
The list shows every account in the company with its role, department, status, last sign-in and two-factor state. The tiles at the top count all, active and inactive users and the roles in use. Filter by name, role or status, or click a role chip (for example Technician) to show only that role.
Add a user
Click Add User. A three-step form opens.
Identity:
- Enter the full name, phone, email (used to sign in), and a password twice.
- Choose the Department, then a Job Title from that department's job ladder.
- For technicians, add at least one routing skill: pick a work category (and optionally a sub-category), then click Add this skill. Routing skills decide which jobs the system suggests for this person.
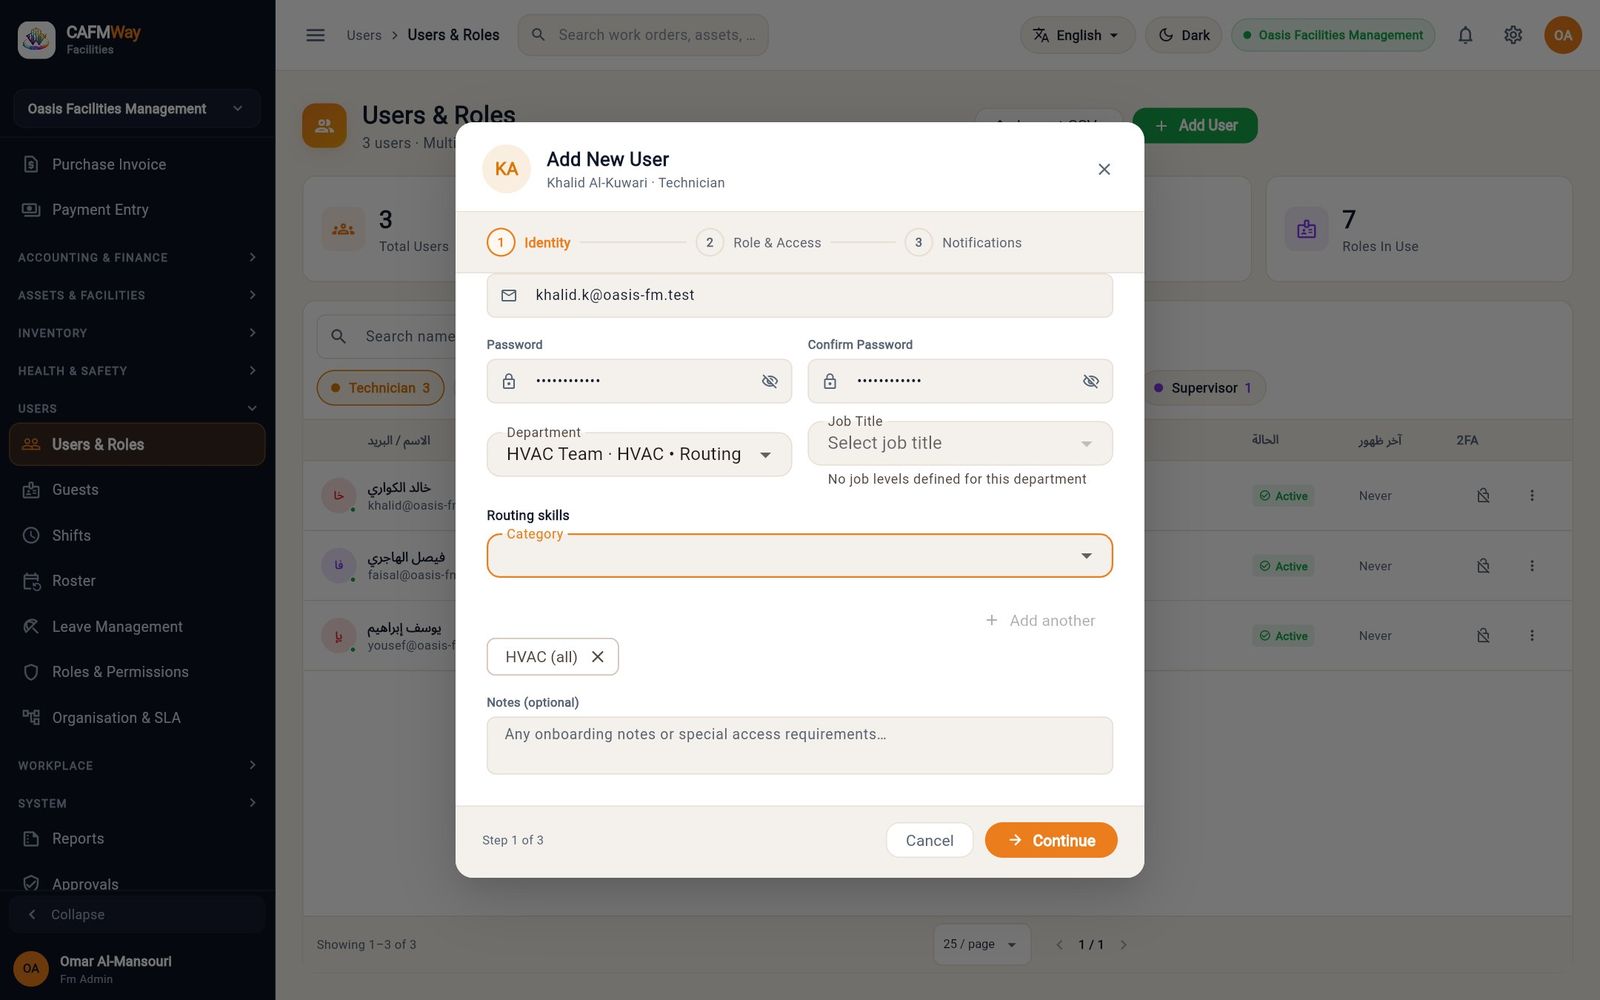
Figure 15 Step 1: identity, department and routing skills Role & Access: choose the system role and the account status (Active, Inactive or Pending).
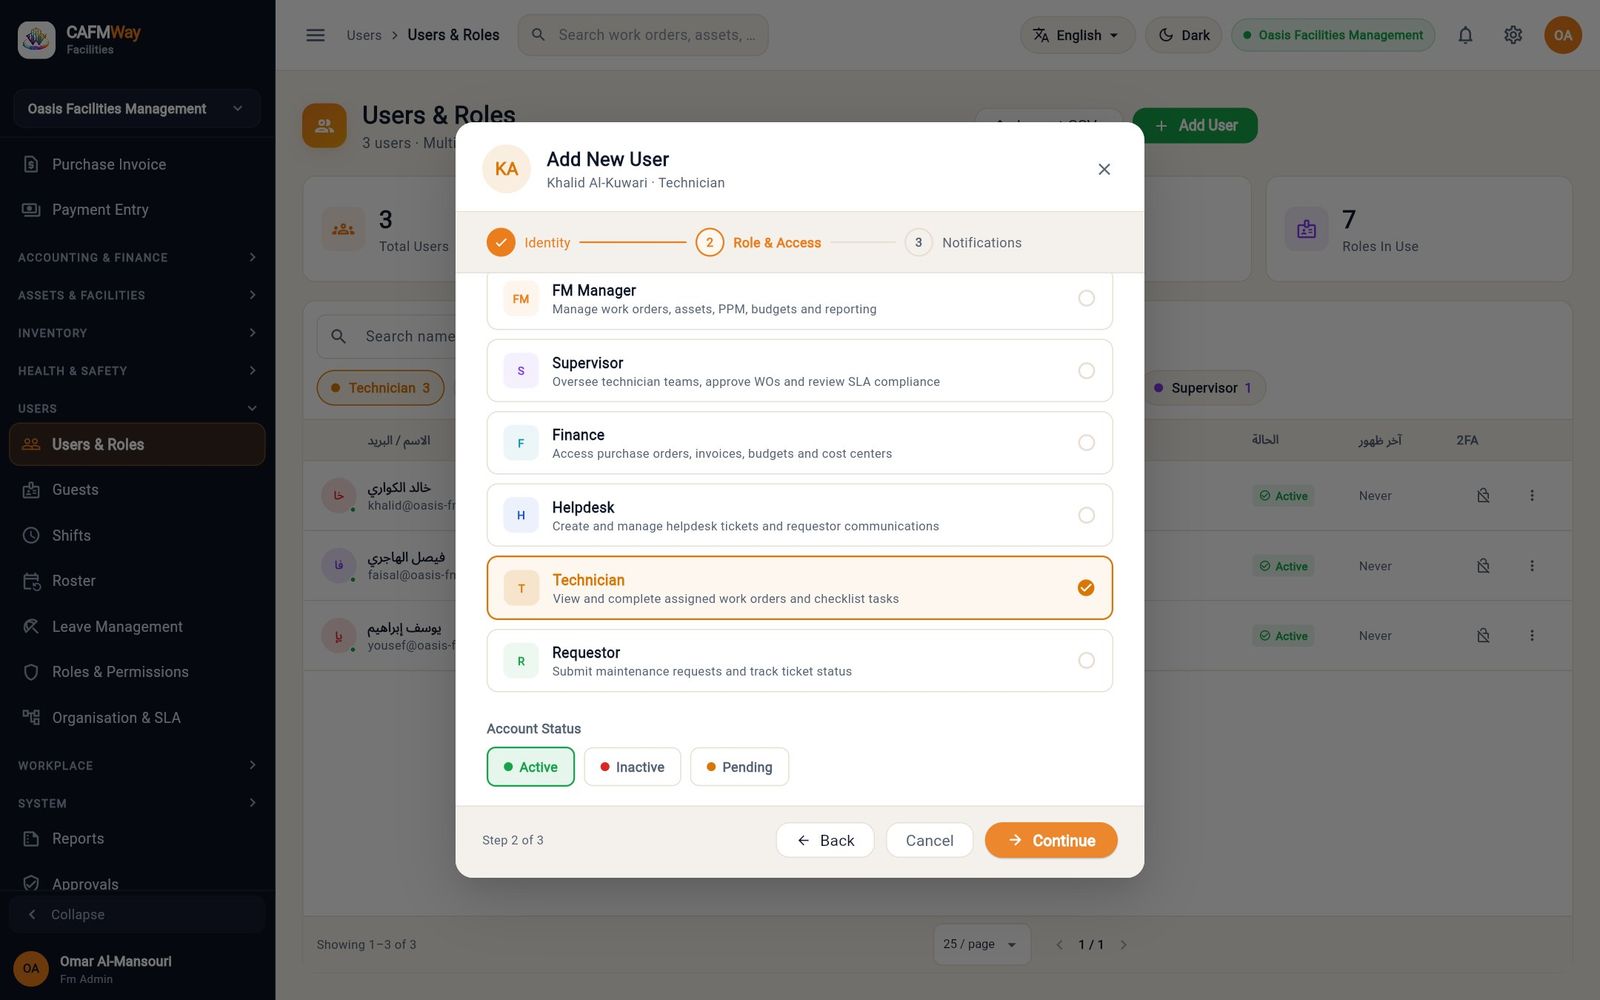
Figure 16 Step 2: role Role Typical user Can System Admin IT / owner Everything, including settings and permissions FM Manager Facilities manager Work orders, assets, PPM, budgets, reports Supervisor Team leader Oversee technicians, approve work orders, watch SLA Finance Accountant Purchase orders, invoices, budgets, cost centres Helpdesk Call centre Create tickets and talk to requesters Technician Field staff See and complete assigned work (Technician app) Requestor Occupant / tenant staff Raise and follow requests (Requestor app) Notifications: check the summary and the onboarding options (welcome email, two-factor setup), then click Create User.
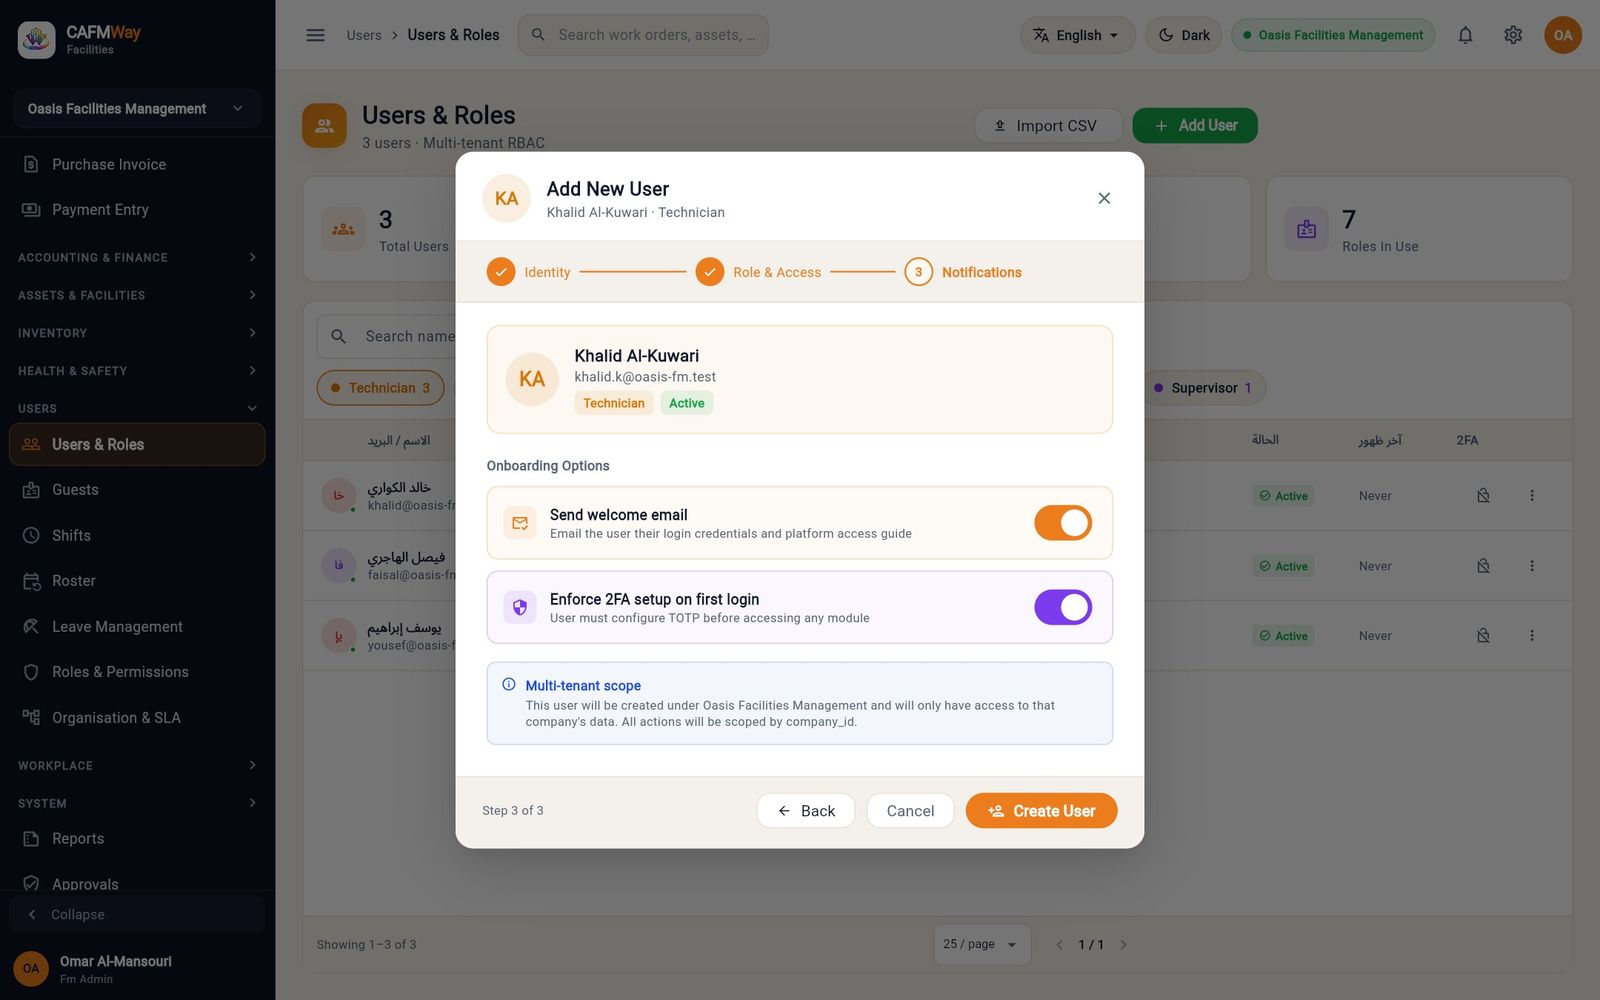
Figure 17 Step 3: onboarding options
The user gets the next employee number (for example EMP-0003). Technicians and requestors use their email or employee number to sign in to the mobile apps.
Manage a user
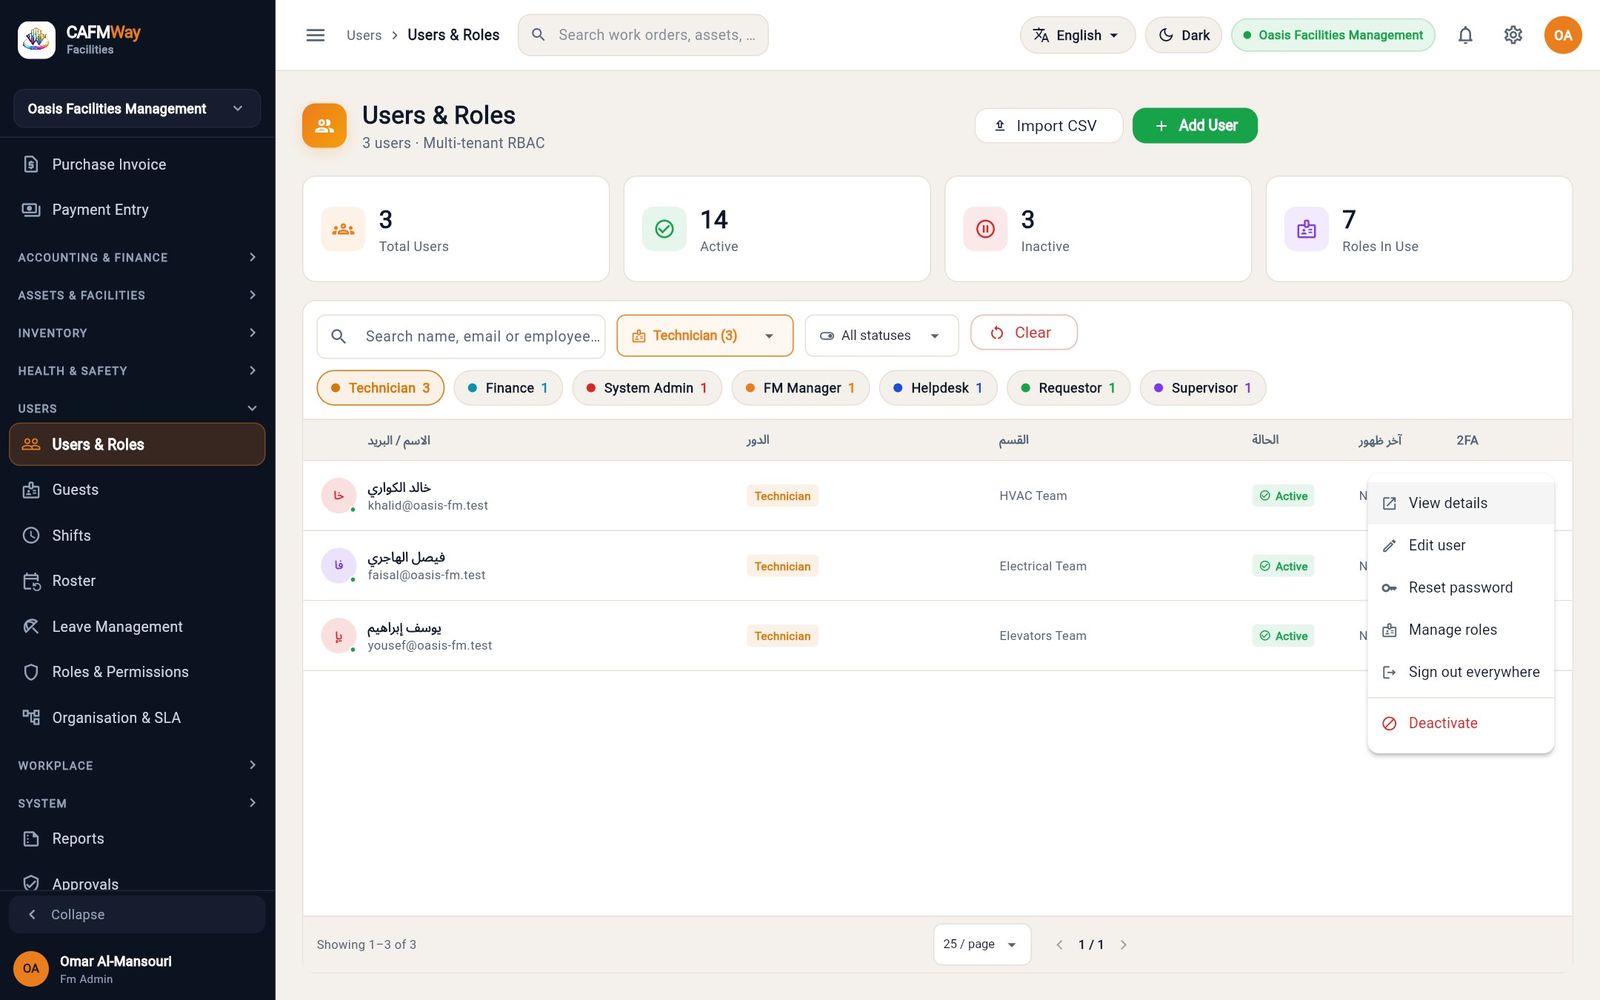
The ⋮ menu at the end of each row offers:
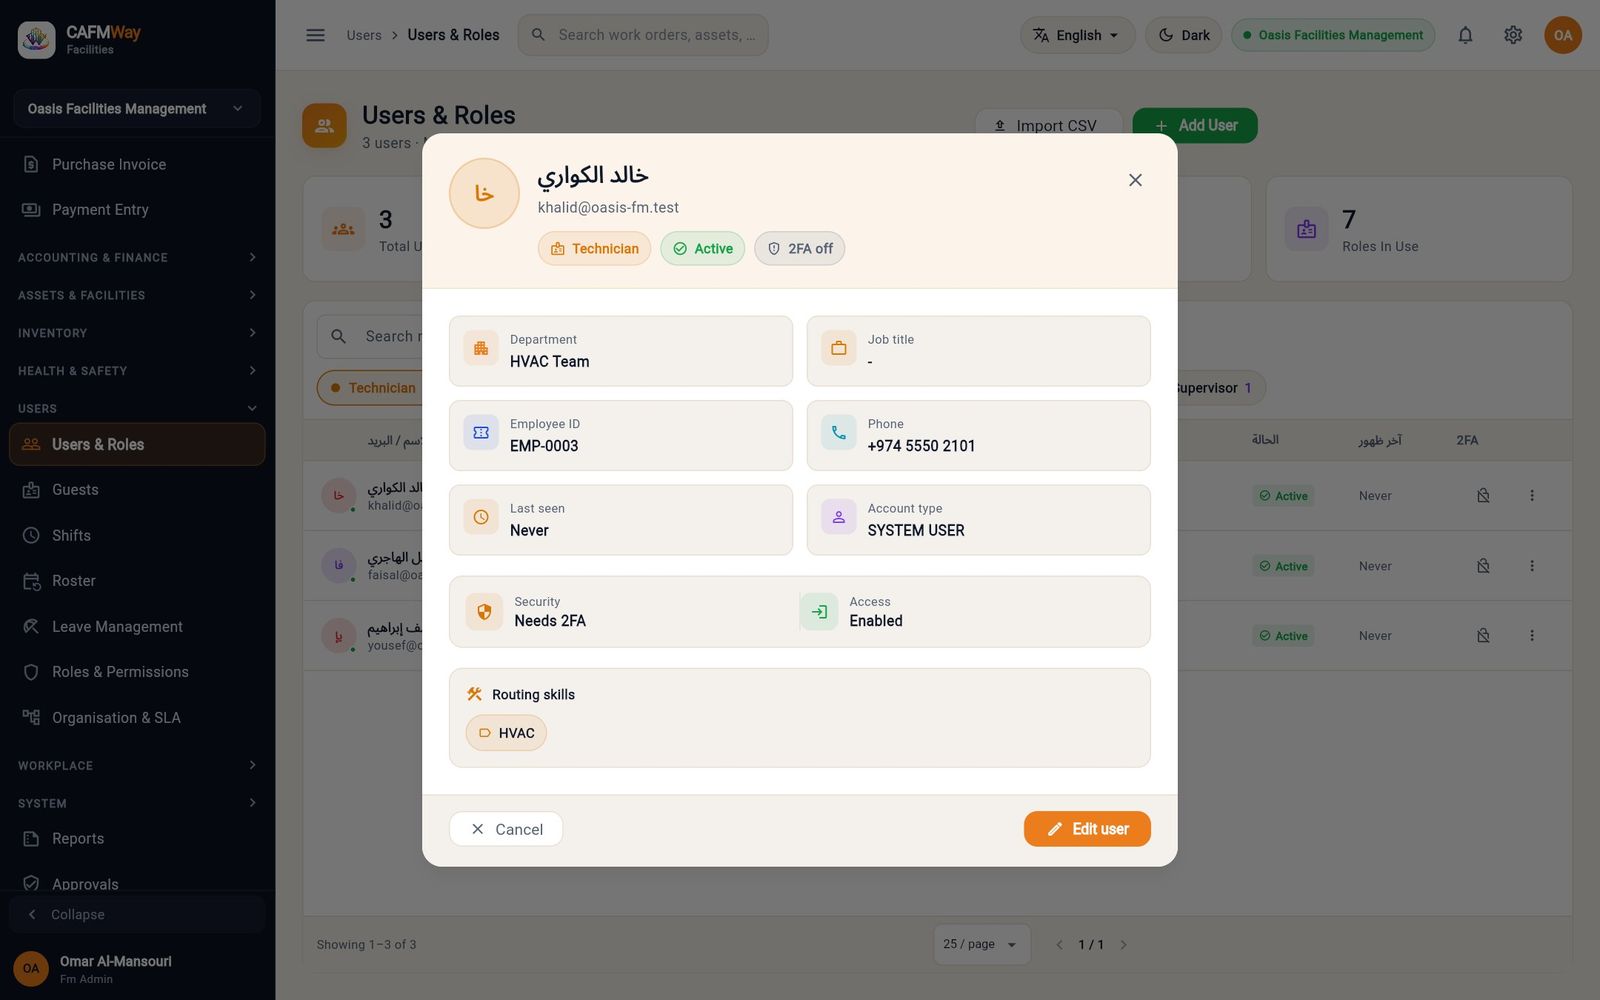
- View details
- Edit user
- Reset password
- Manage roles
- Sign out of all devices
- Deactivate
Roles and permissions
- Who: FM administrators
- Where: USERS → Roles & Permissions
The Overview tab links to every permission tool with a short explanation.
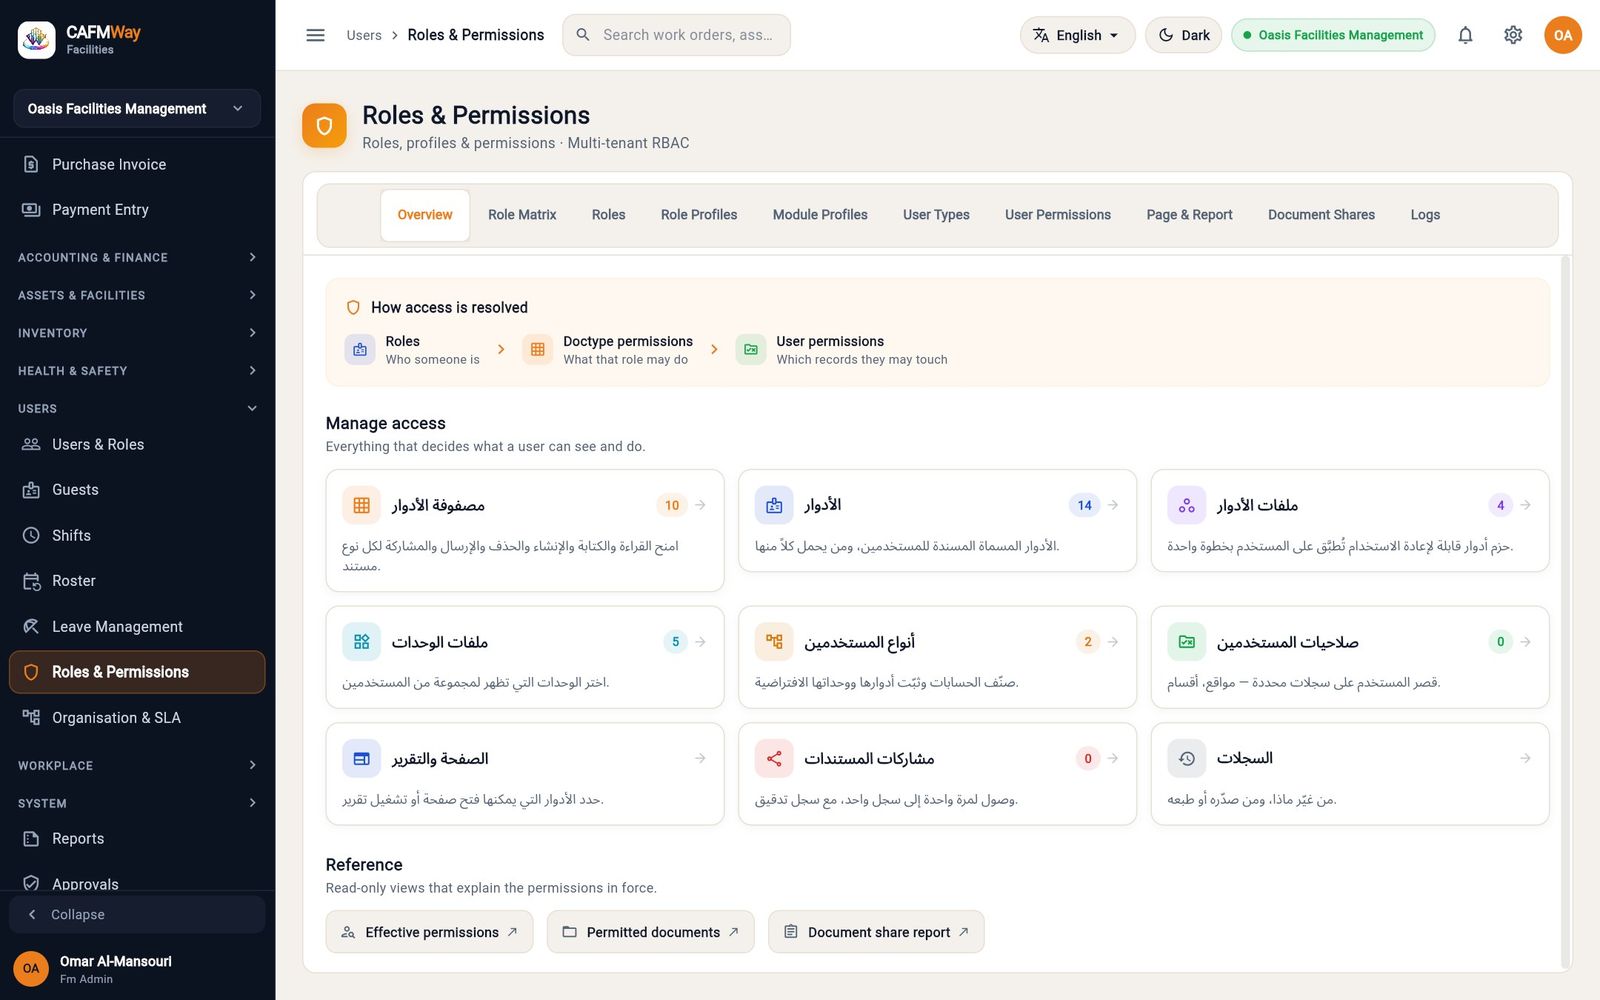
| Tab | Use it to |
|---|---|
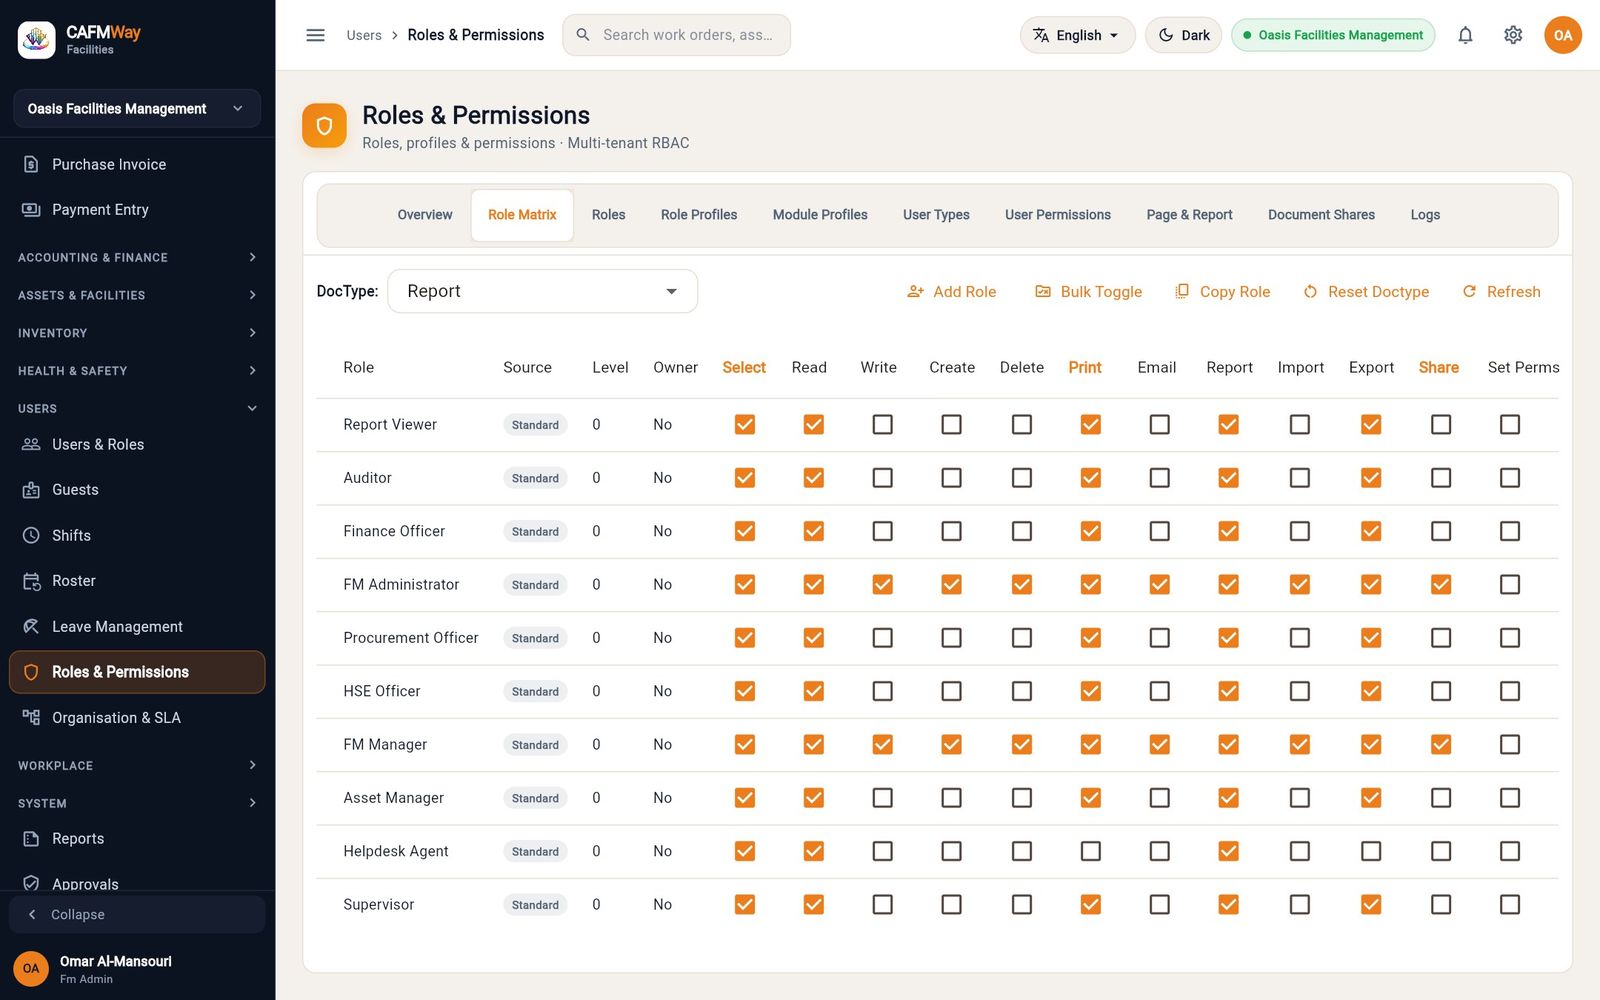
| Role Matrix | Tick what each role may do per document type: read, write, create, delete, submit, cancel, amend, report, import, export, print, email, share |
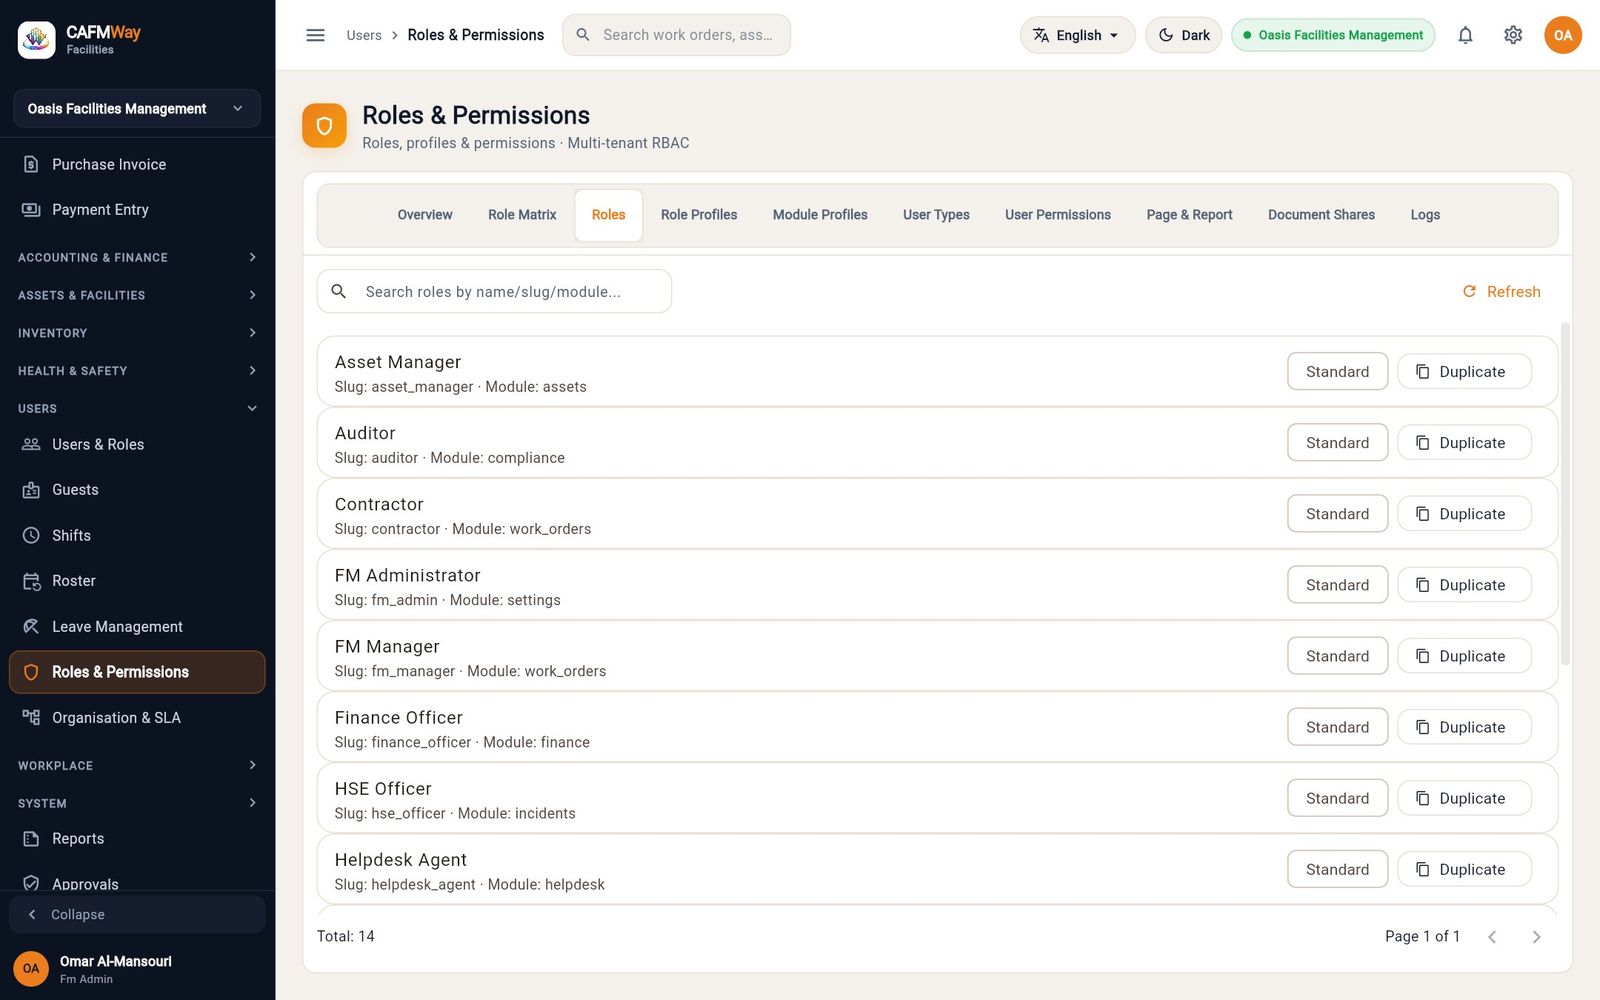
| Roles | See all 14 standard roles, their module and code; duplicate one to make your own |
| Role Profiles | Bundle roles to assign together |
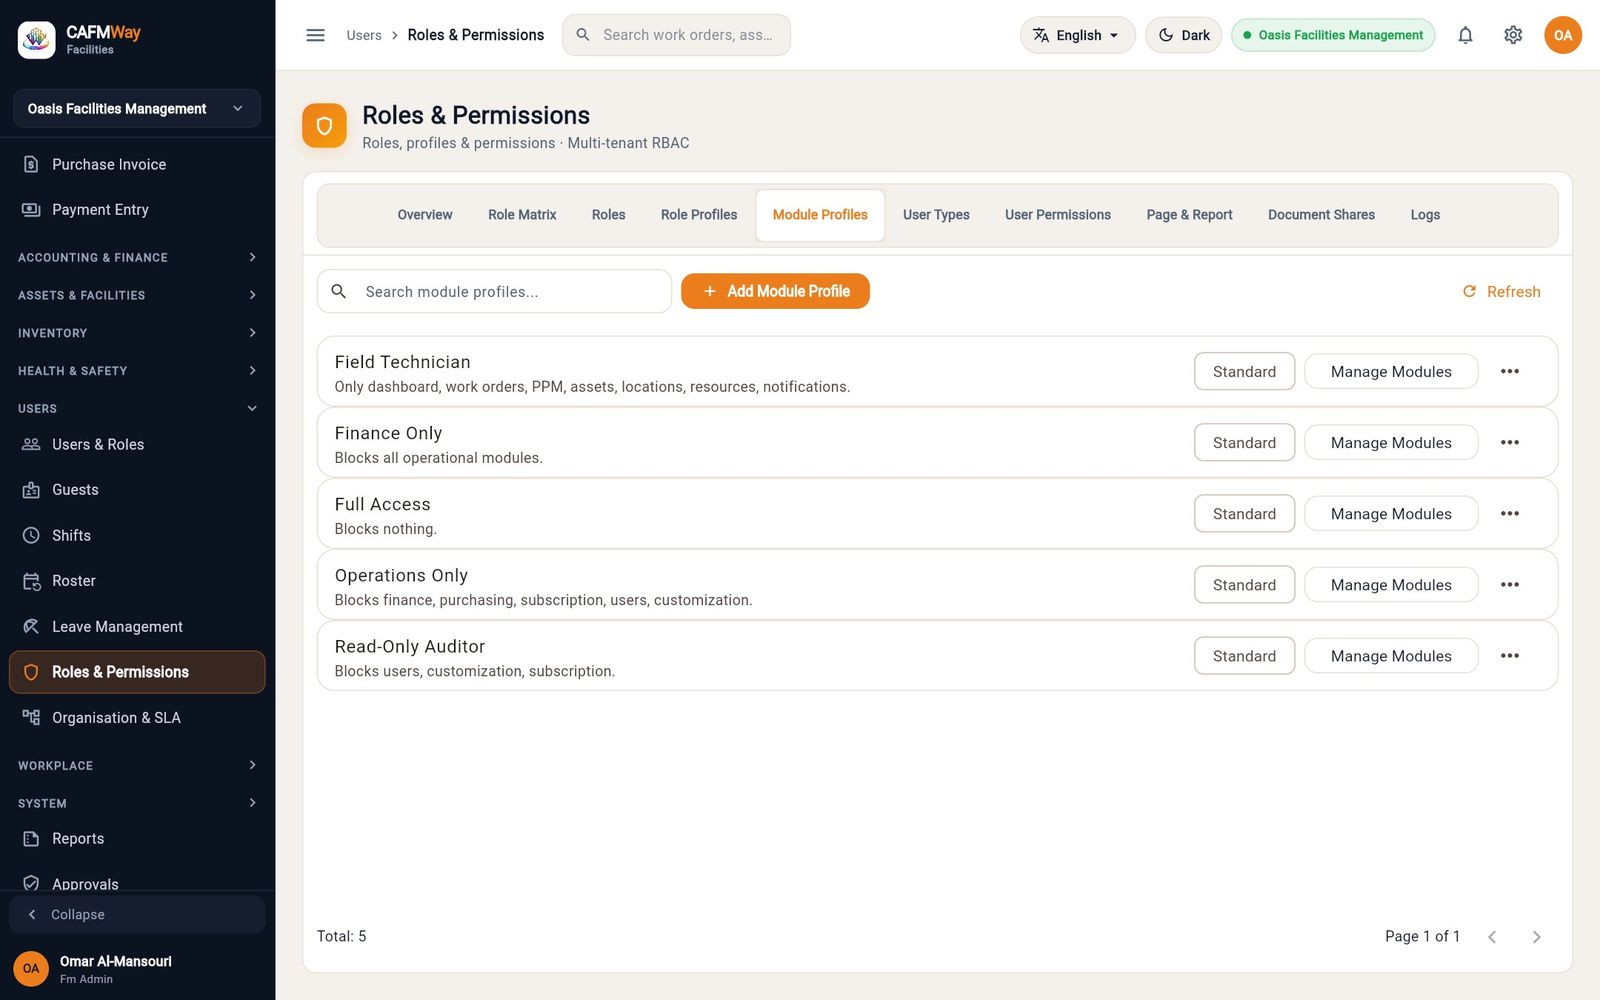
| Module Profiles | Choose which modules a group of users can see: Full Access, Operations Only, Finance Only, Field Technician, Read-Only Auditor |
| User Types | Classify accounts, for example System User or Restricted User |
| User Permissions | Limit a user to specific records, for example one project |
| Page & Report | Choose which roles can open a page or report |
| Document Shares | One-off access to a single record |
| Logs | Who changed permissions, and who exported or printed what |
Locations and assets
Everything in CAFM Way happens somewhere and often to something. Locations and assets give each request and work order that context, and every one of them has a QR code that people can scan.
The location hierarchy
- Who: FM administrators and managers
- Where: ASSETS & FACILITIES → Locations & Spaces
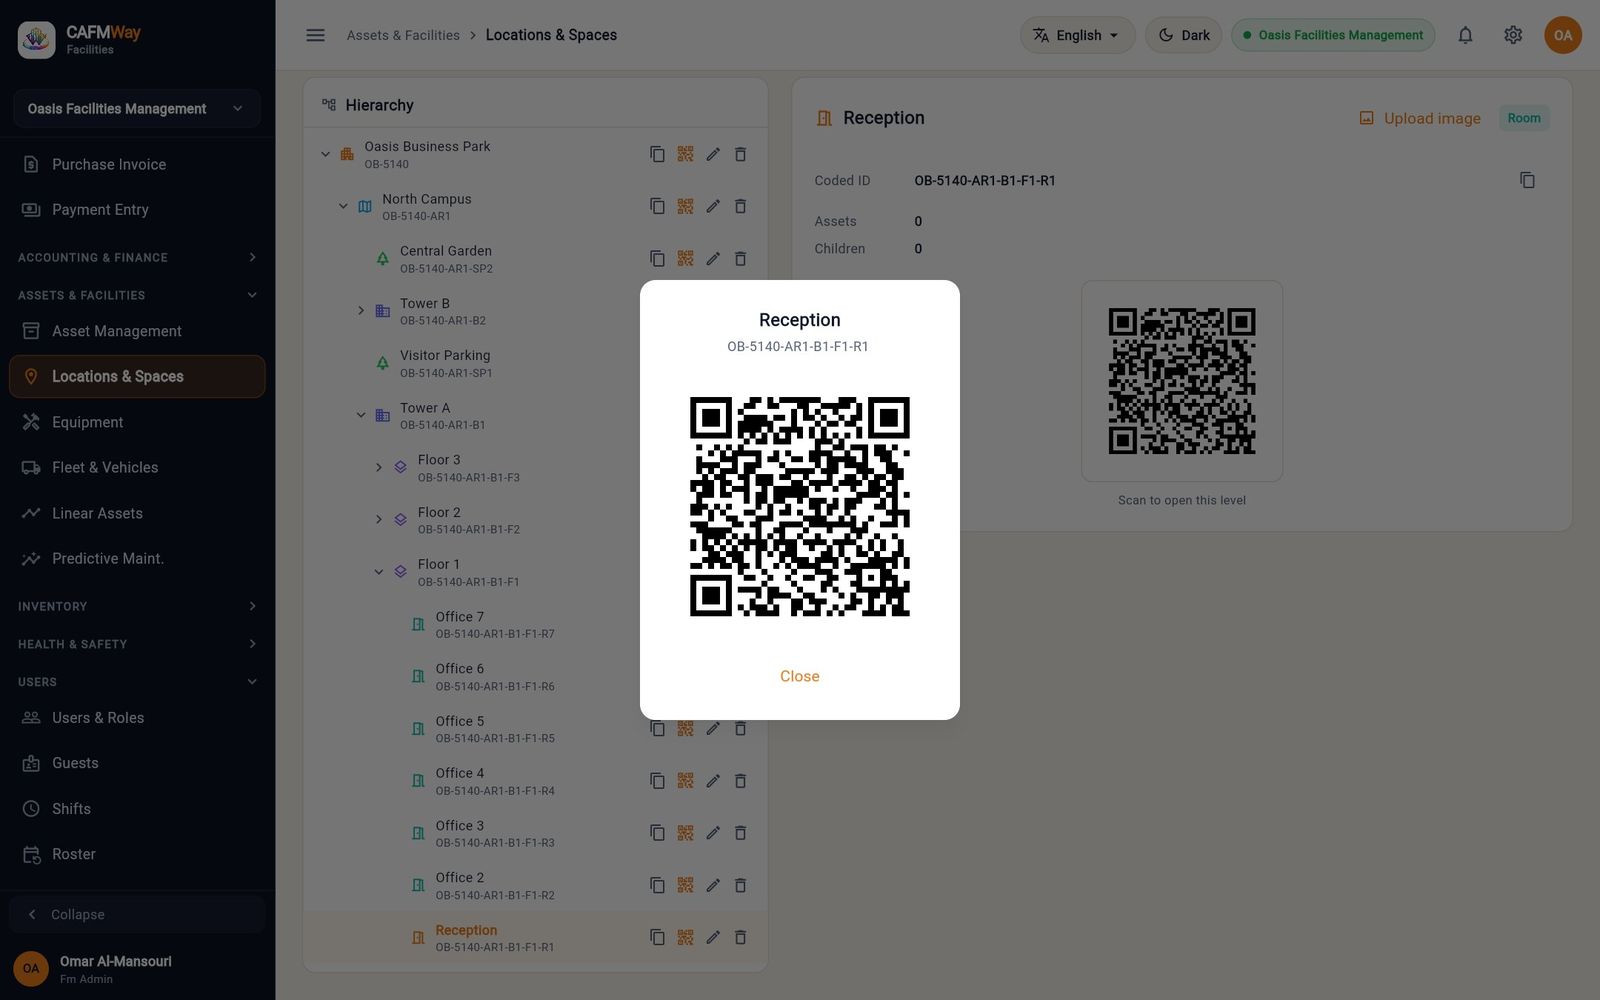
Locations form a coded tree: project › area › building › floor › room, with open spaces (car parks, gardens) under an area. Every level gets a coded ID built from its parents. For example OB-5140-AR1-B1-F1-R1 is the Reception room: project OB-5140, area 1, building 1, floor 1, room 1.
The chips above the tree compare what you use with what your subscription allows: areas, buildings, spaces and assets.
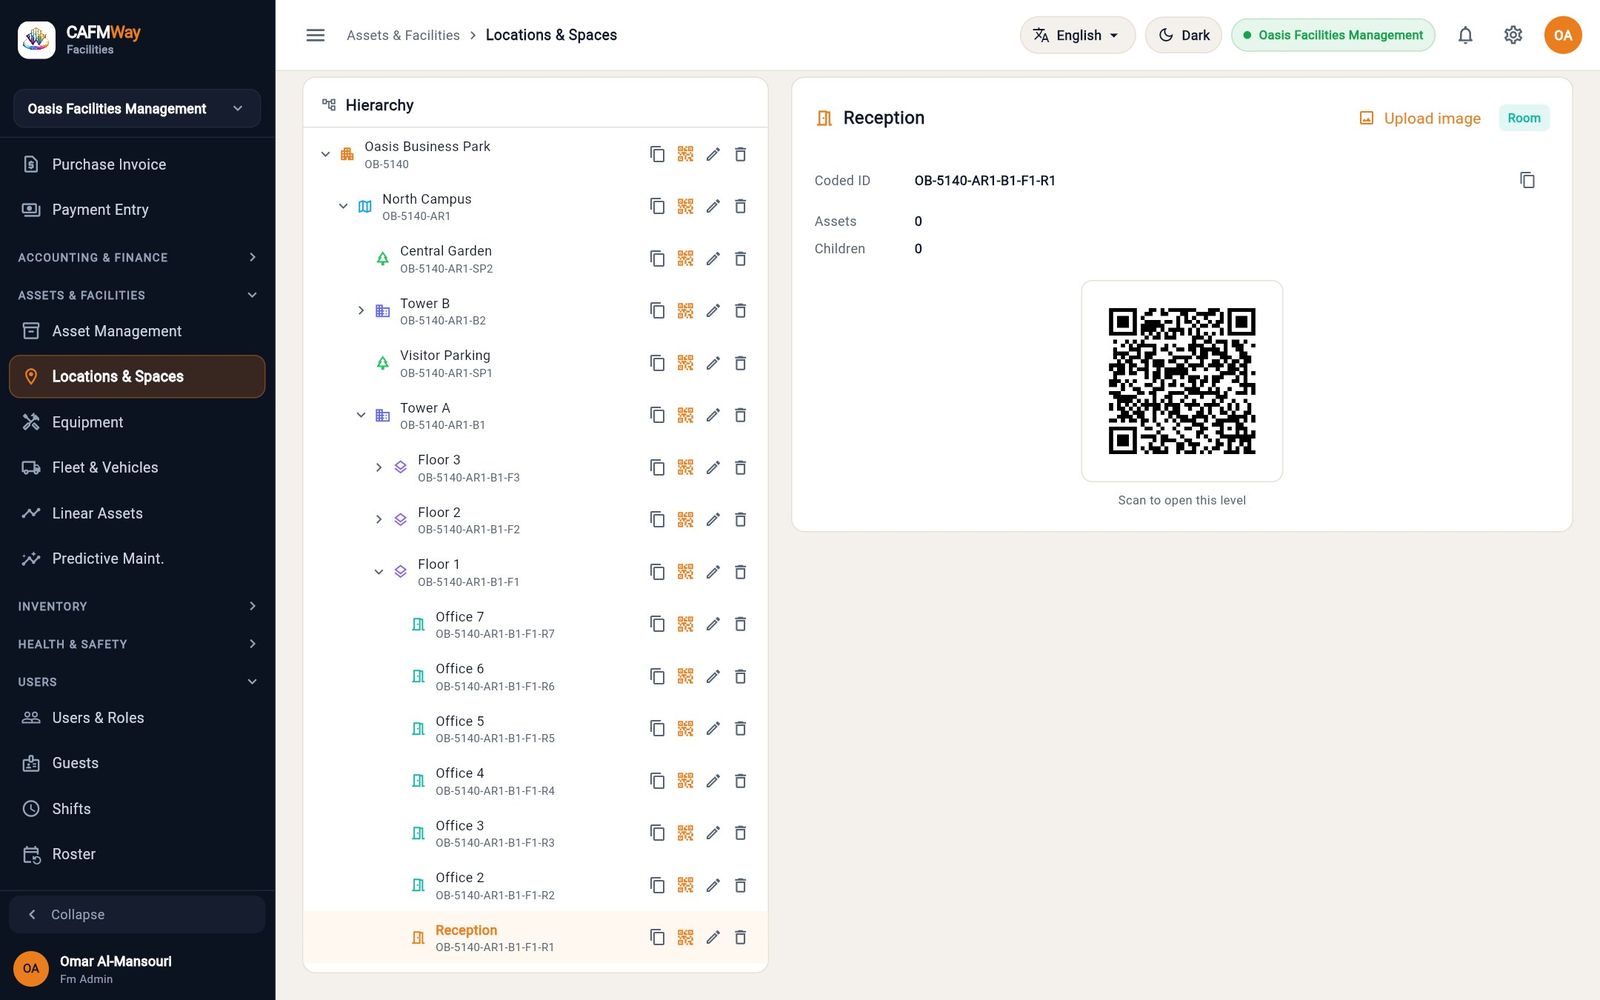
- Click the arrow on a level to open it. Click a level's name to see its coded ID, asset count, children and QR code on the right.
- The icons on each row: Copy coded ID, View QR, Rename and Delete location.
- Upload image attaches a photo or floor plan to the selected level.
Add a level
- Click Add Level.
- Choose the level type: Area, Building, Floor, Room or Space.
- Choose where it sits, for example Tower A › Floor 1. The list only offers valid parents for the type you chose.
- Enter the name and, optionally, a short code.
- Optionally click Upload image, then click Create.
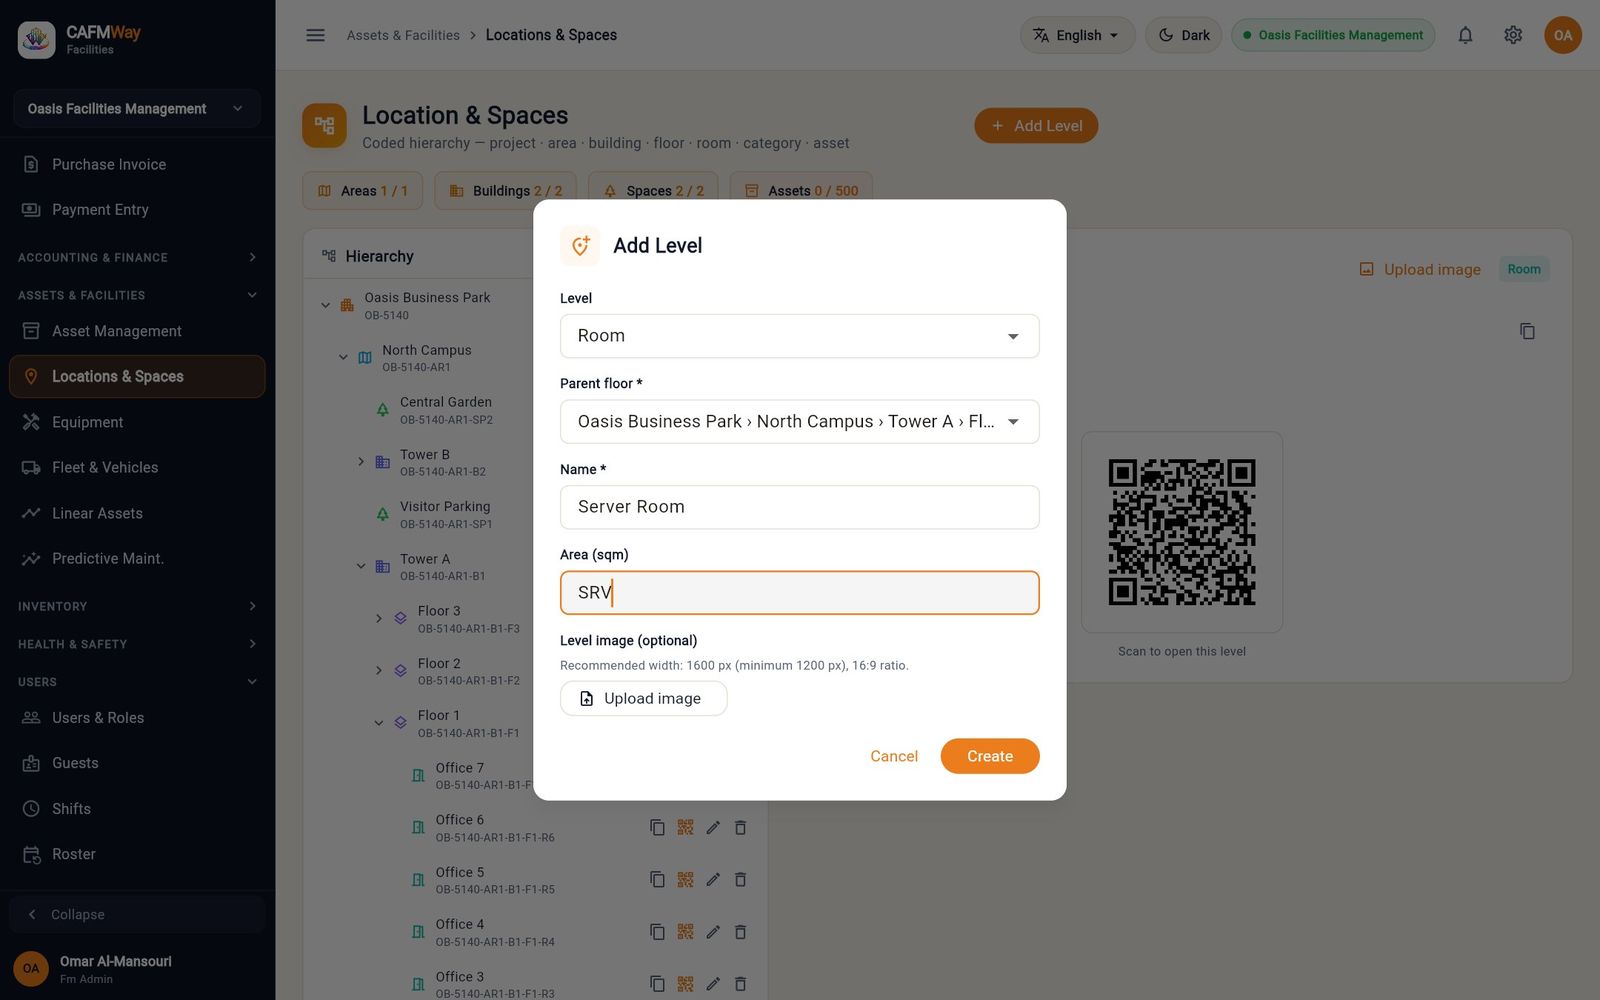
The new level gets the next coded ID (the server room became OB-5140-AR1-B1-F1-R8).
When you go beyond your subscription
Rooms and floors are unlimited. Areas, buildings and open spaces are counted against your subscription. If you add one beyond the limit, it is saved but marked Not submitted, and a banner explains:
Created, but not usable yet. This facility is beyond your current plan, so nothing else in CAFM can see it until CAFM confirms payment. Send it for pricing under Subscription → Requests.
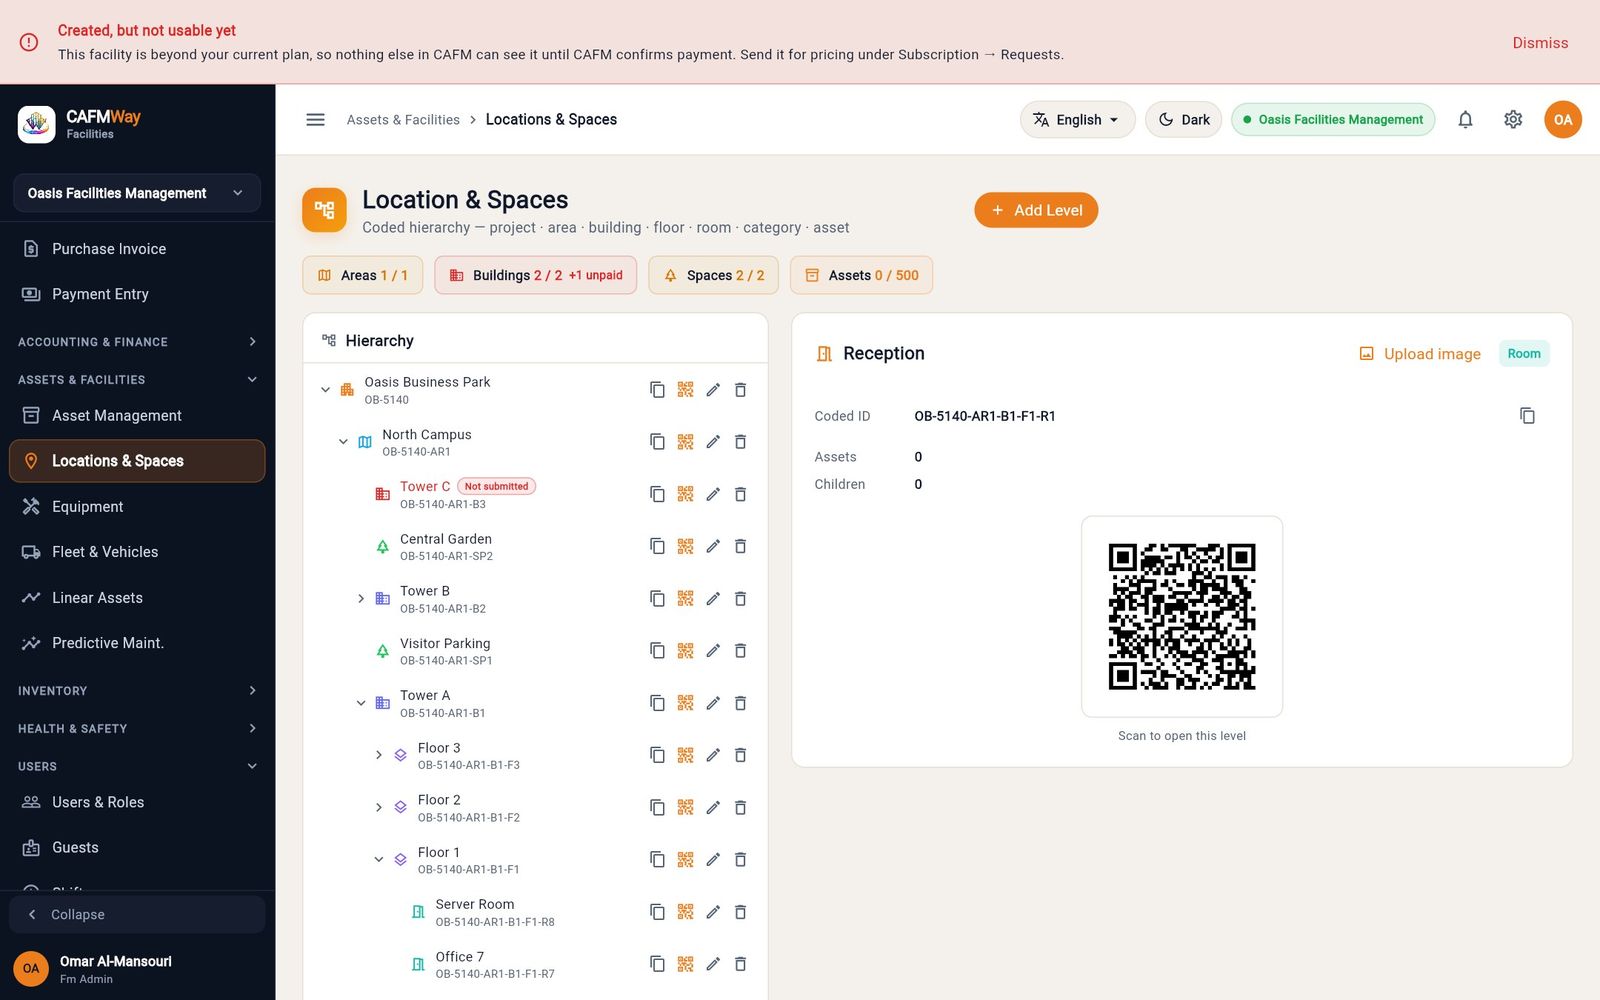
Send it to CAFM from Subscription → Requests (see Request more facilities). Once CAFM activates the request, the building becomes usable everywhere.
QR codes
Every location and every asset has a QR code. Scanning it with the Requestor app opens a request form that already knows where the problem is. In the Technician app, scanning shows the jobs for that place or asset.
- Select a level and click the View QR icon to show its code, or select an asset to see its code on the Overview tab.
- To print labels for many locations or assets at once, use the QR label report in the Reports centre.
Register an asset
- Who: FM administrators, asset managers
- Where: ASSETS & FACILITIES → Asset Management
Click Add Asset. The form has four steps.
Basic information:
- Choose the location (any level of the tree) and enter the asset name.
- Choose the category and type, for example HVAC › Chiller.
- Set the criticality, status, condition and ownership, and add notes.
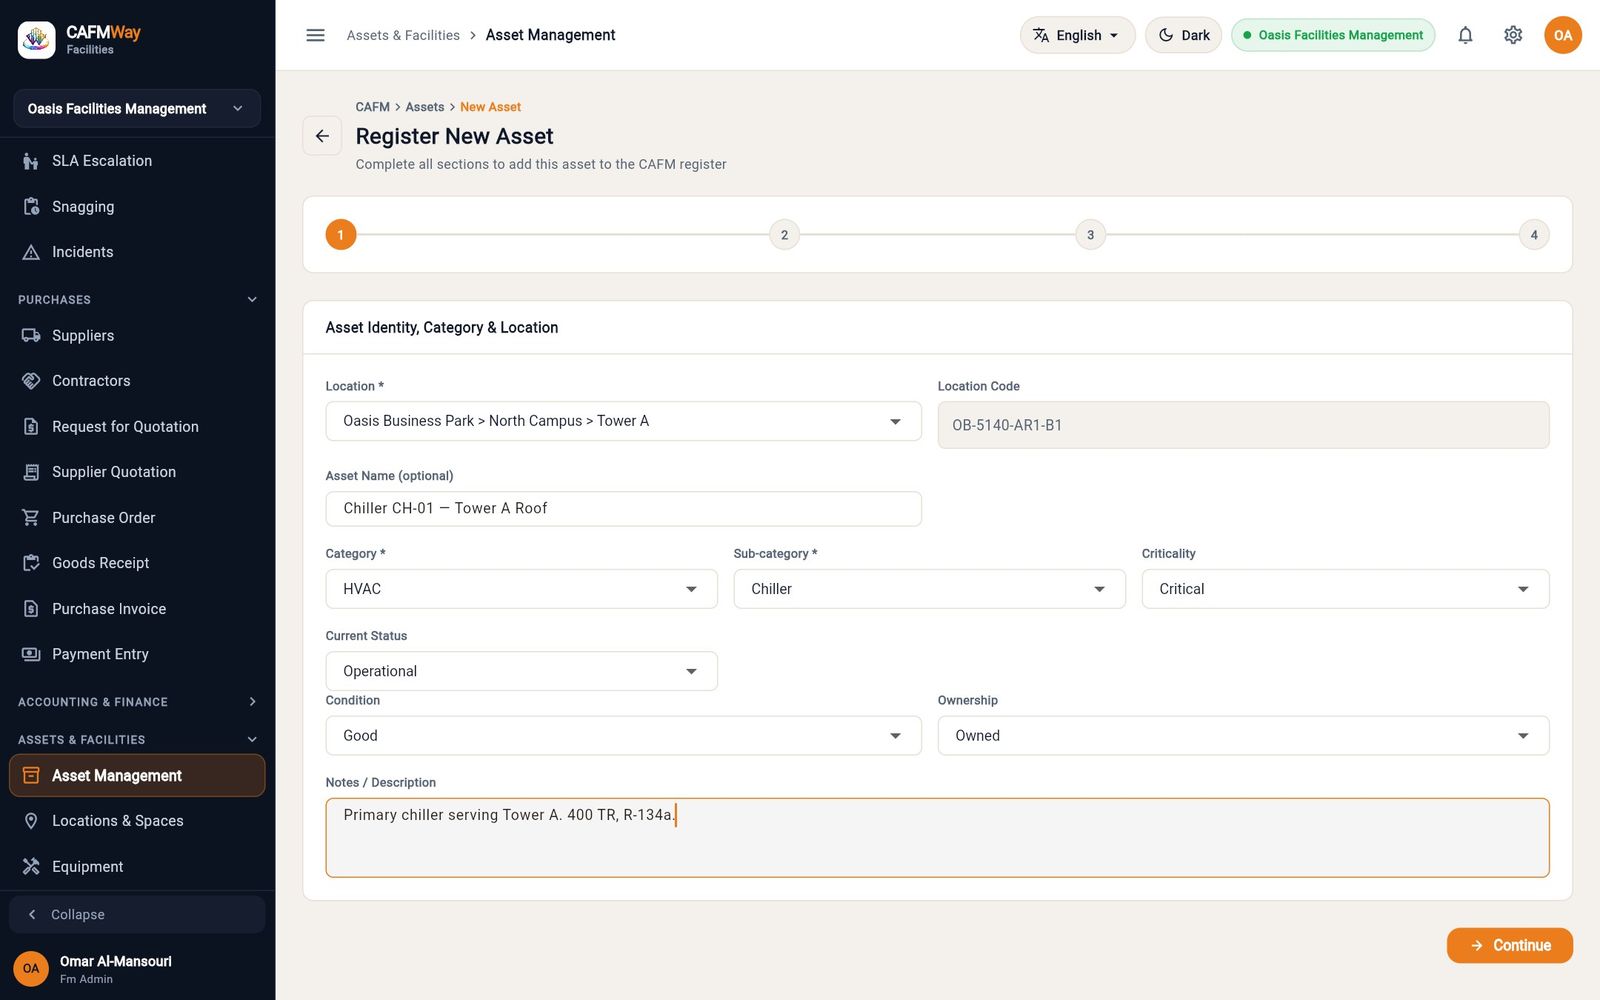
Figure 28 Step 1: location, category, type and criticality Technical details: manufacturer, model, serial number, installation and warranty dates, capacity, power supply, refrigerant, maintenance frequency, and the last and next service dates. Attach manuals, drawings or photos.
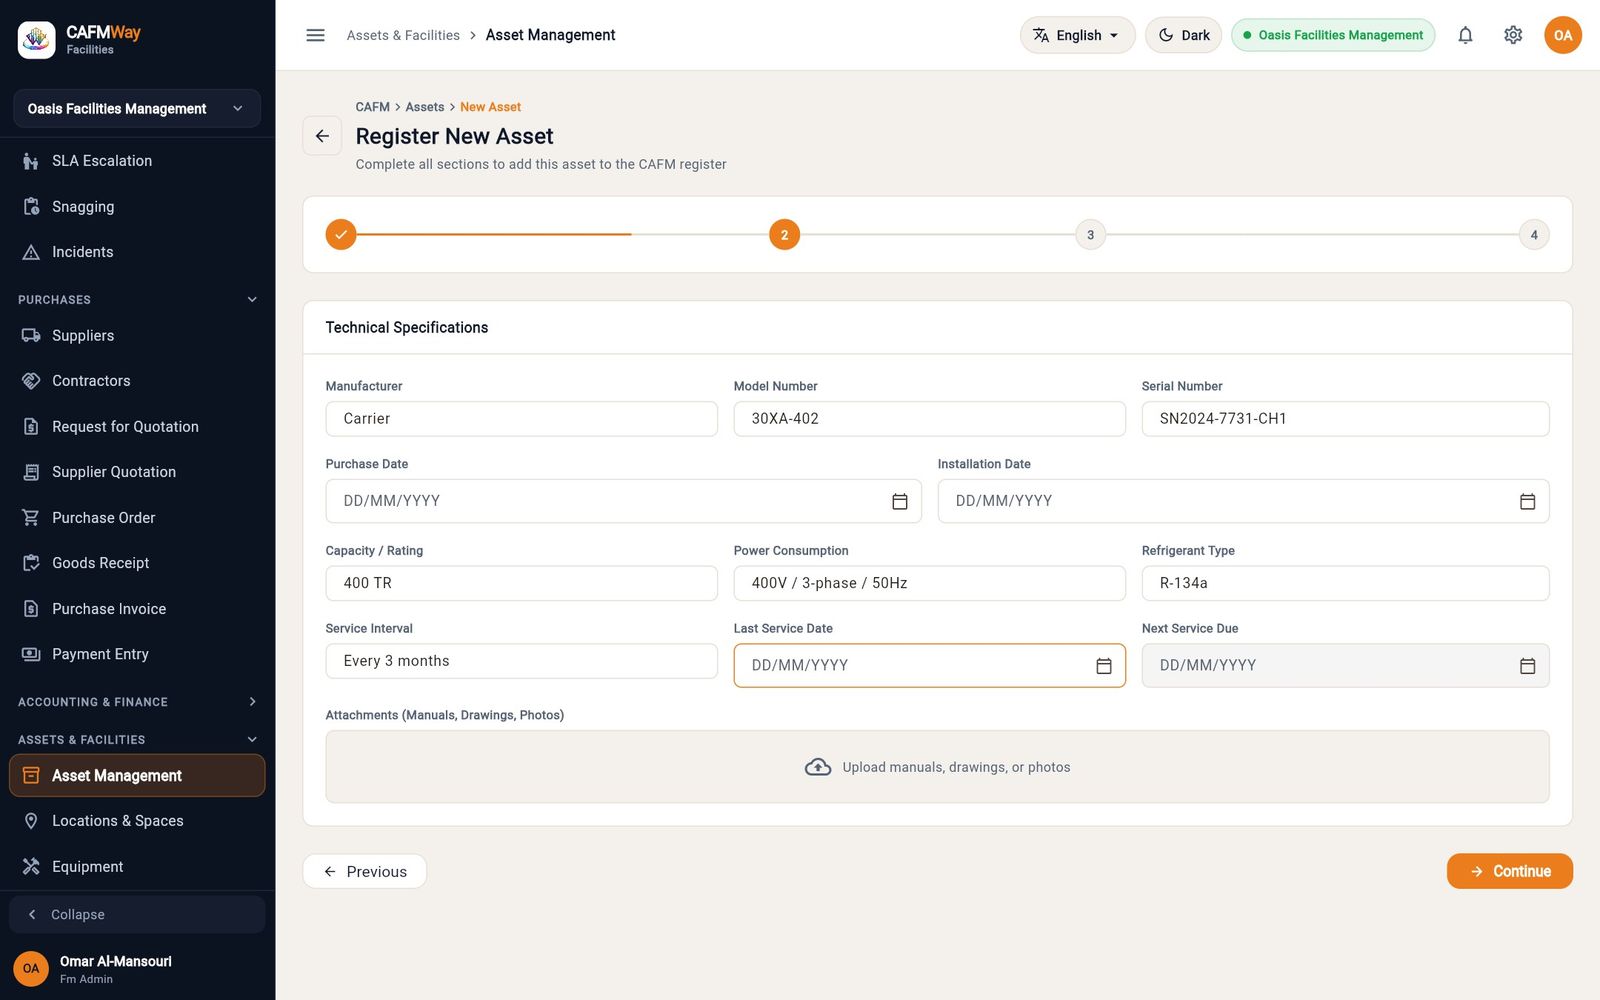
Figure 29 Step 2: technical details Financial and lifecycle:
- purchase cost, salvage value, useful life and depreciation method, and the asset account
- the supplier, purchase order, installation date and installer
- the warranty provider, contract number and support contact
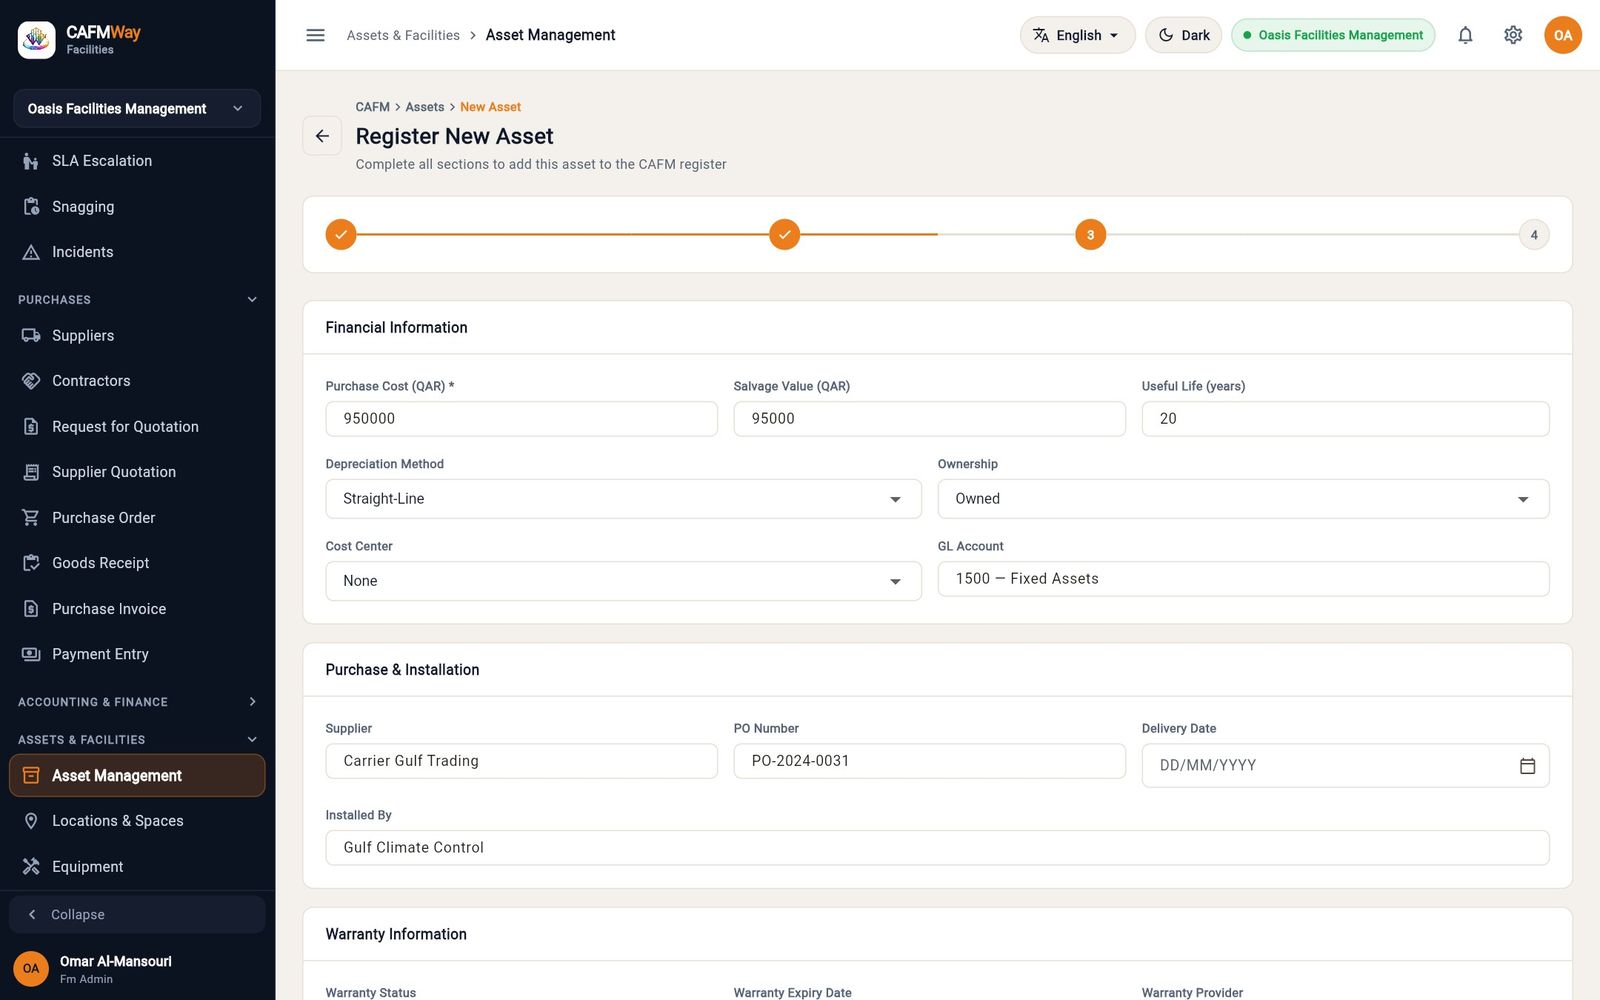
Figure 30 Step 3: cost, depreciation, purchase and warranty Review, then click Register Asset.
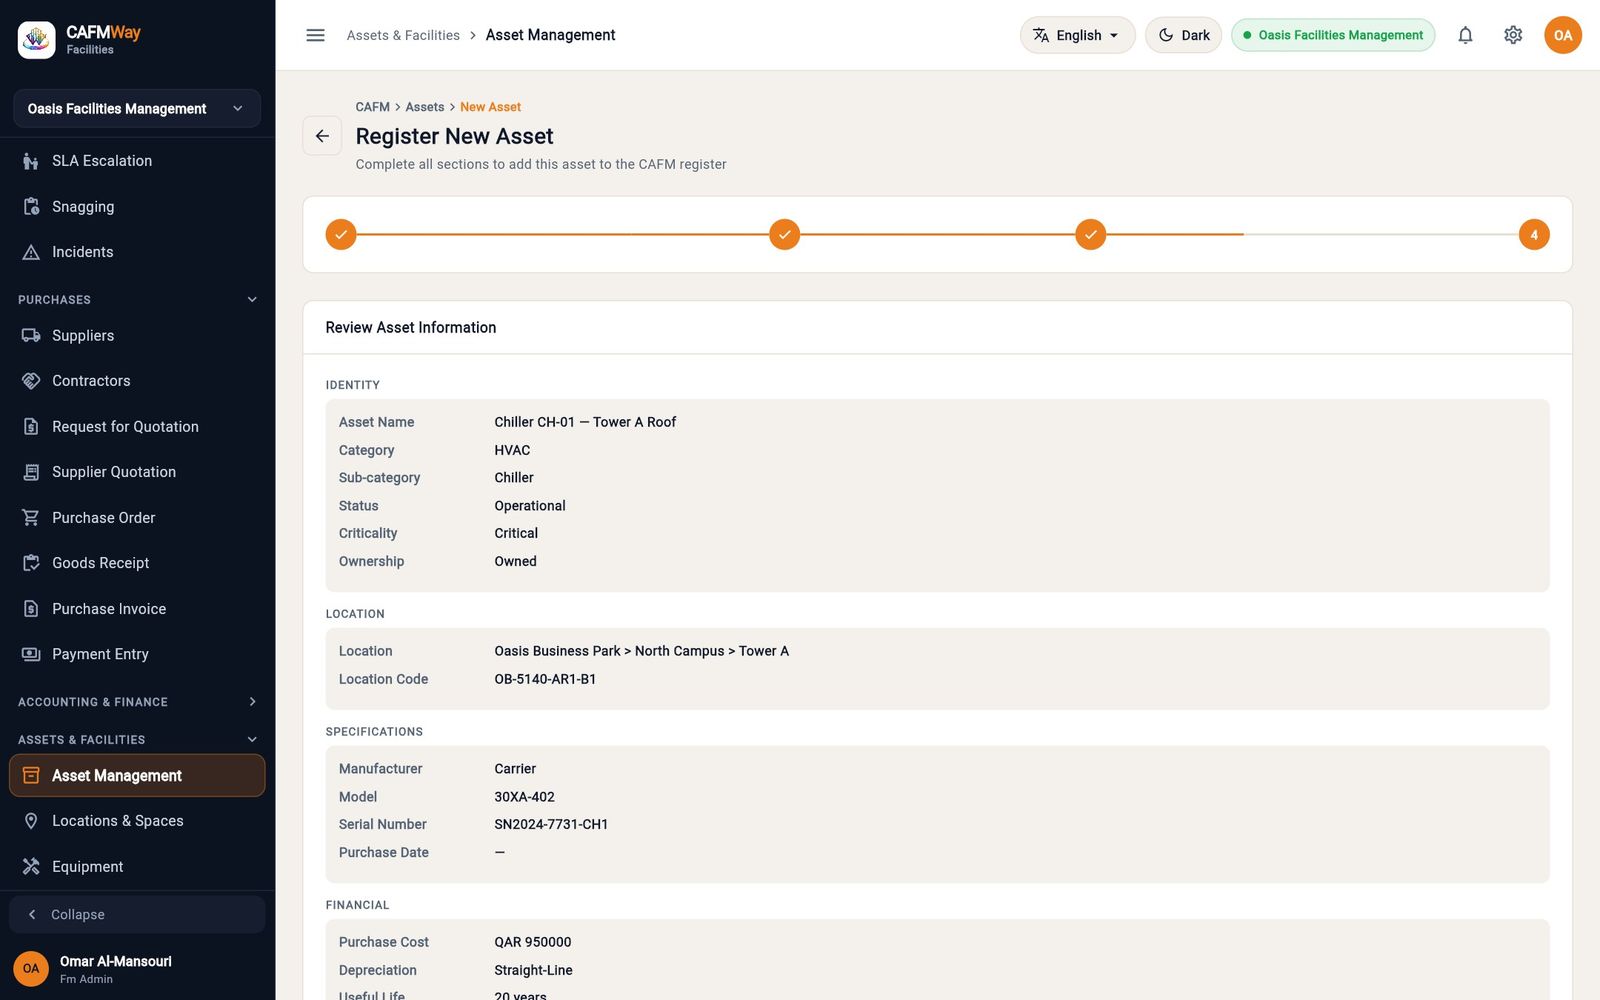
Figure 31 Step 4: review before registering
The asset gets a coded ID that extends its location's code with the category and type, for example OB-5140-AR1-B1-HVC-CHL001, and a QR label is ready to print. Register Another starts a new form, and View Assets returns to the register.
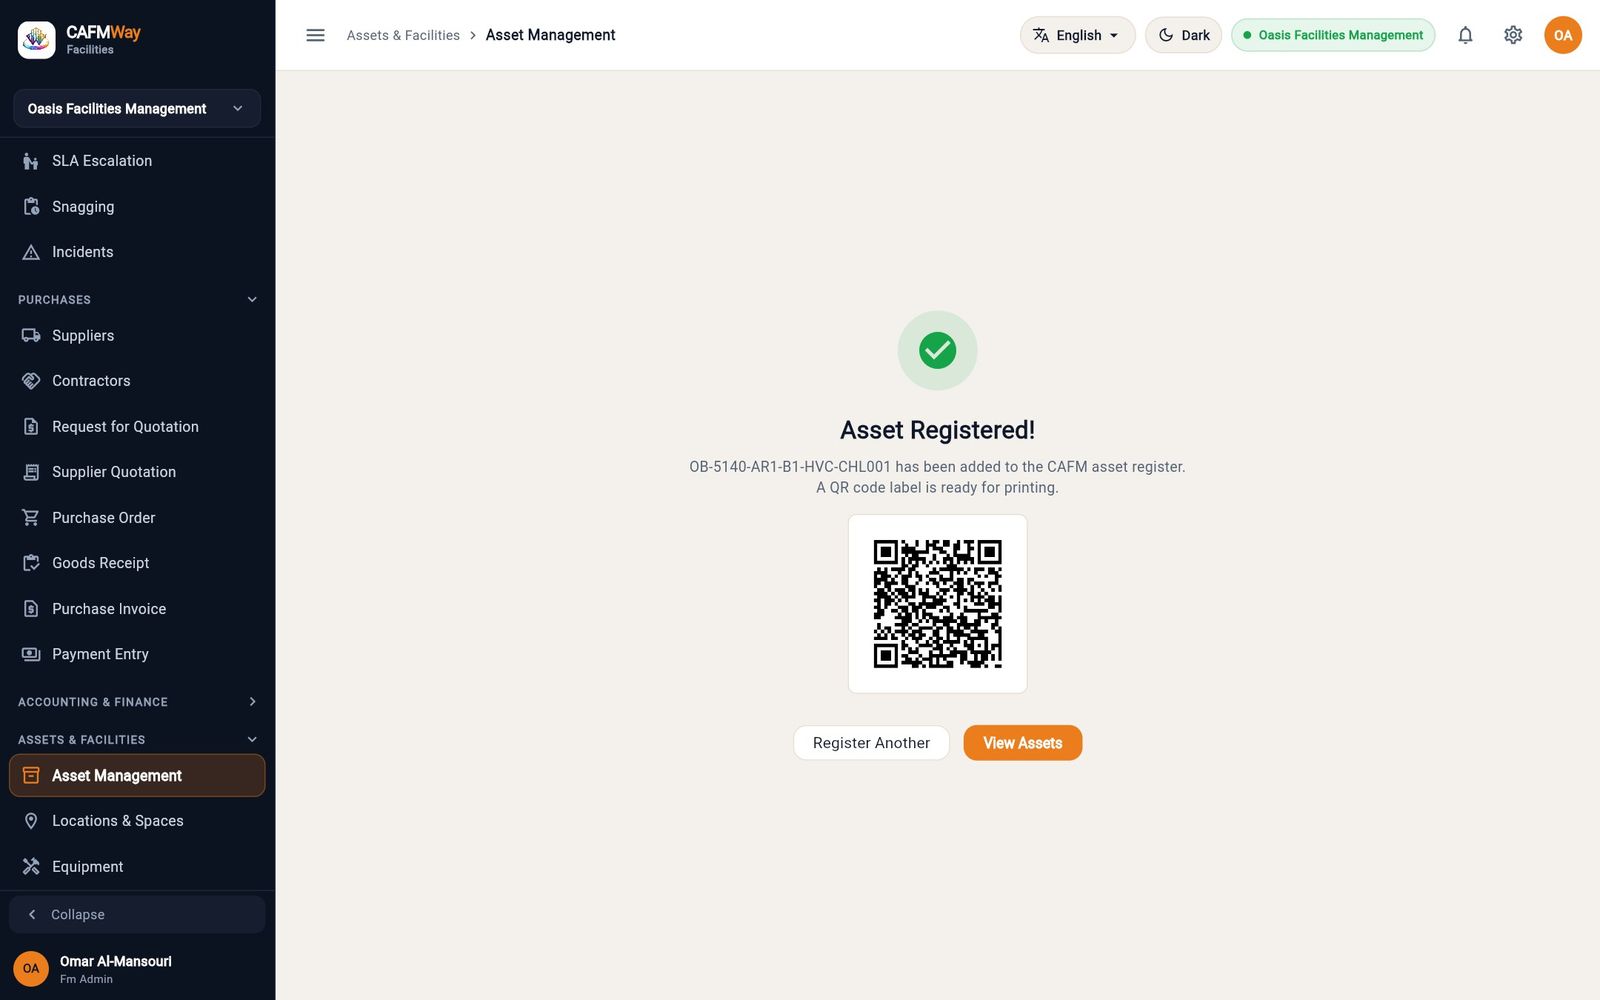
The asset register
The register shows totals (all, operational, under maintenance, critical or down) and every asset as a card or a list. Filter by category, location or status, or search by name or code. Export downloads the list.
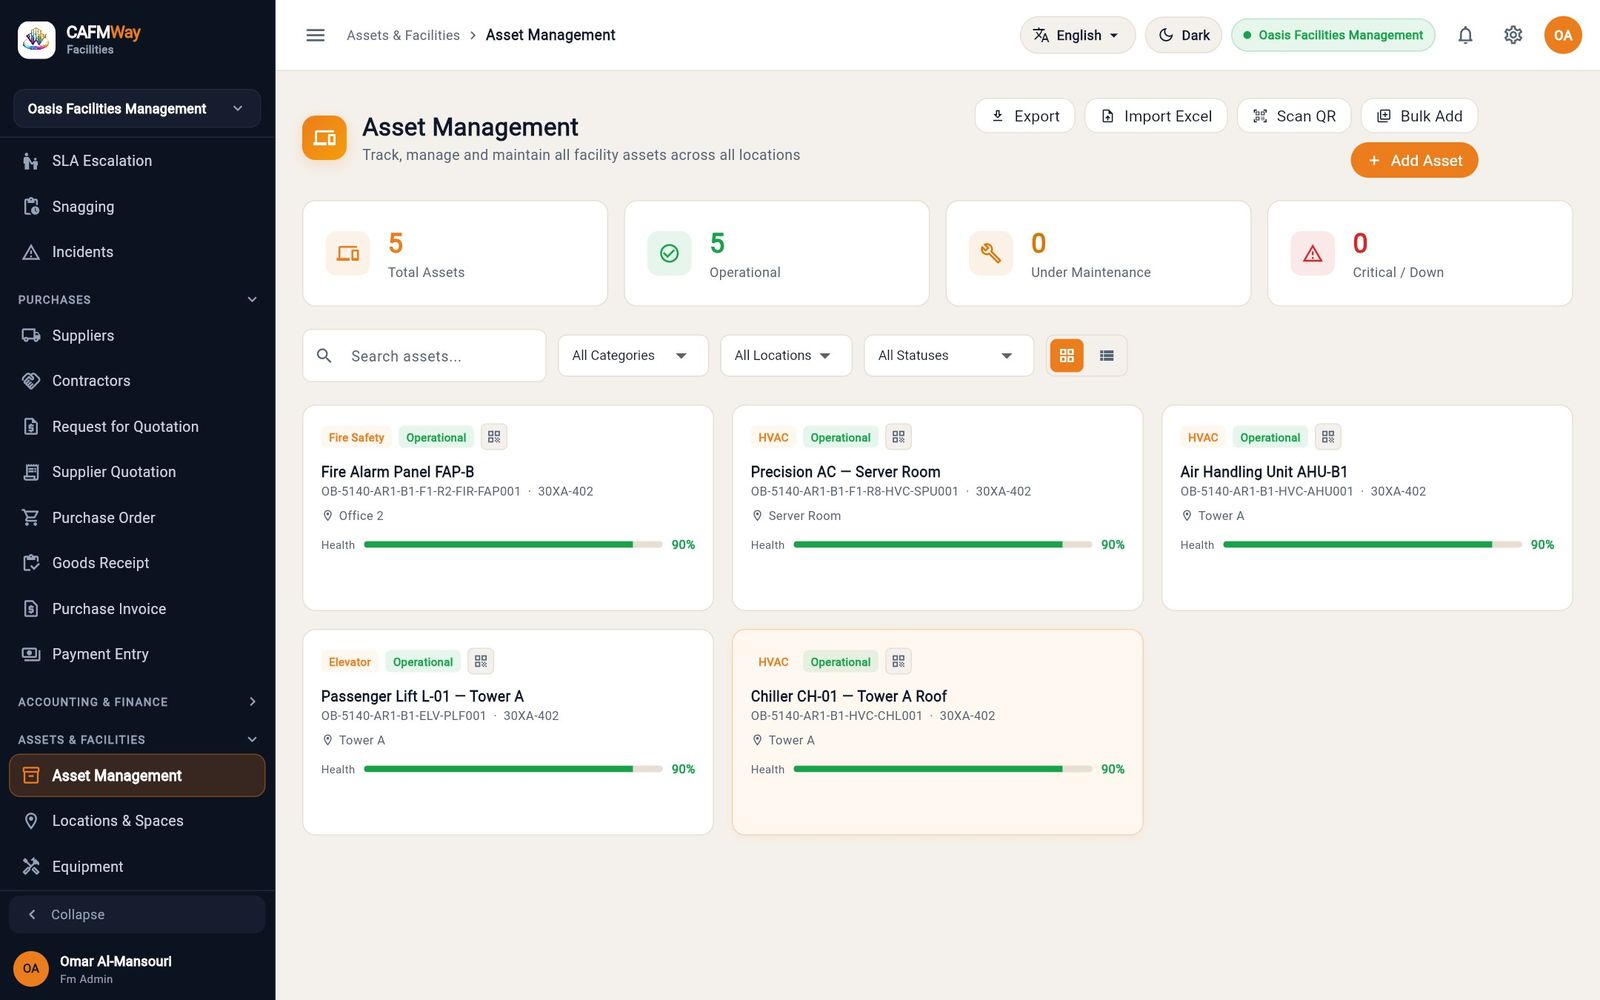
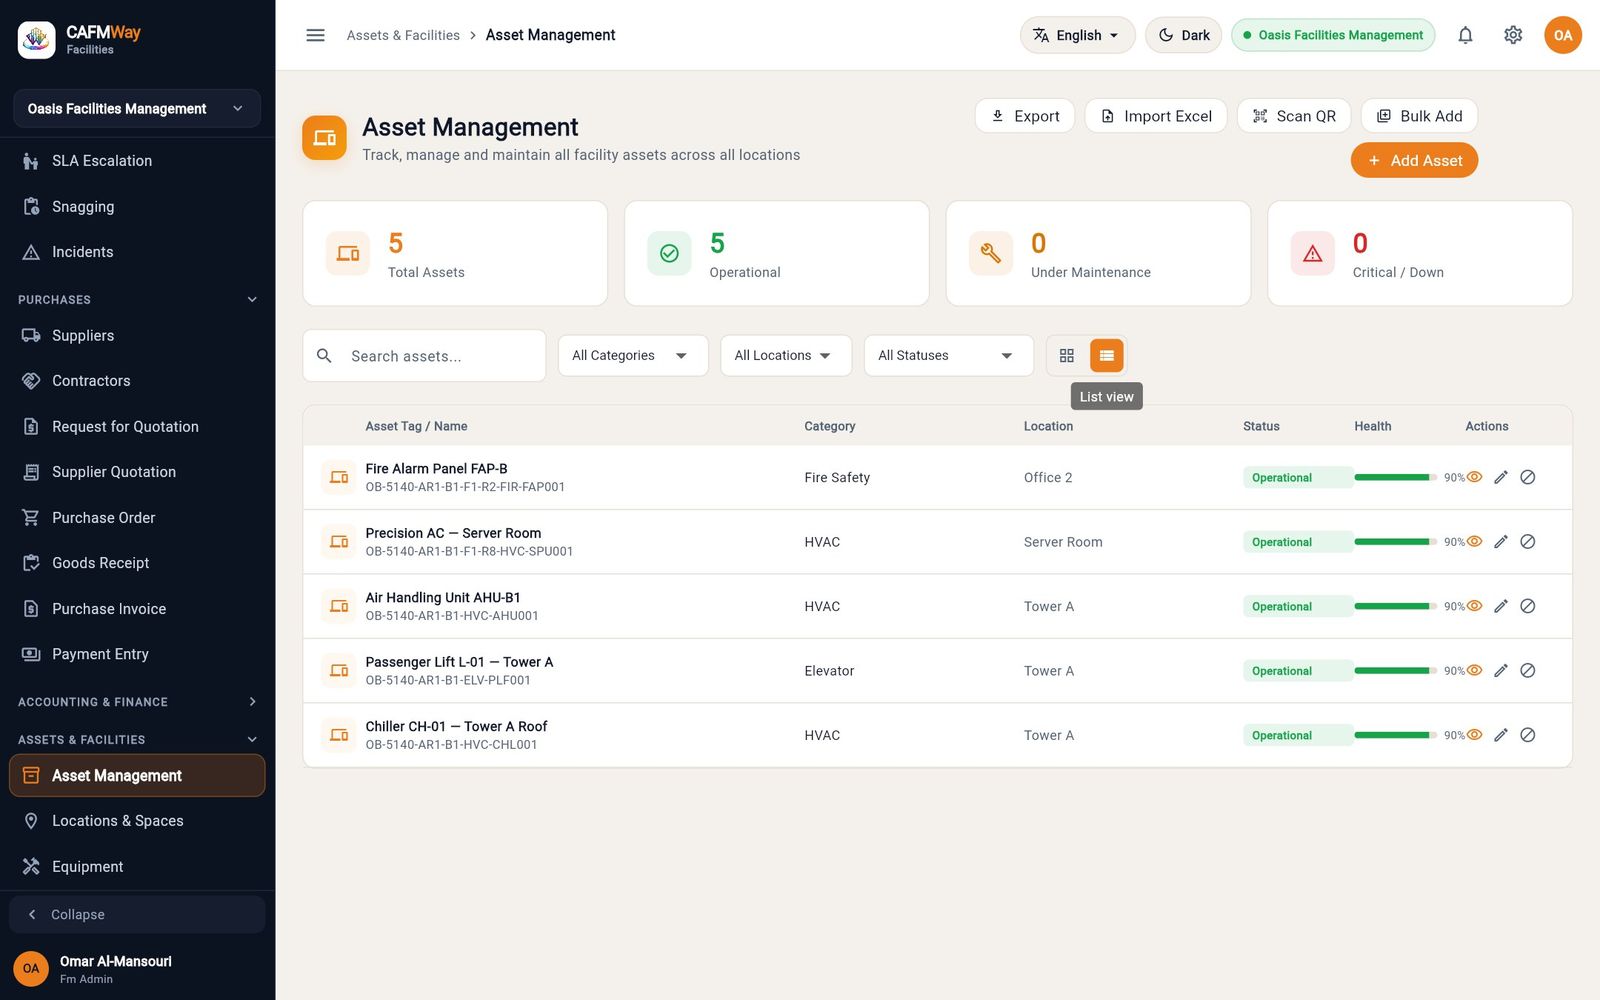
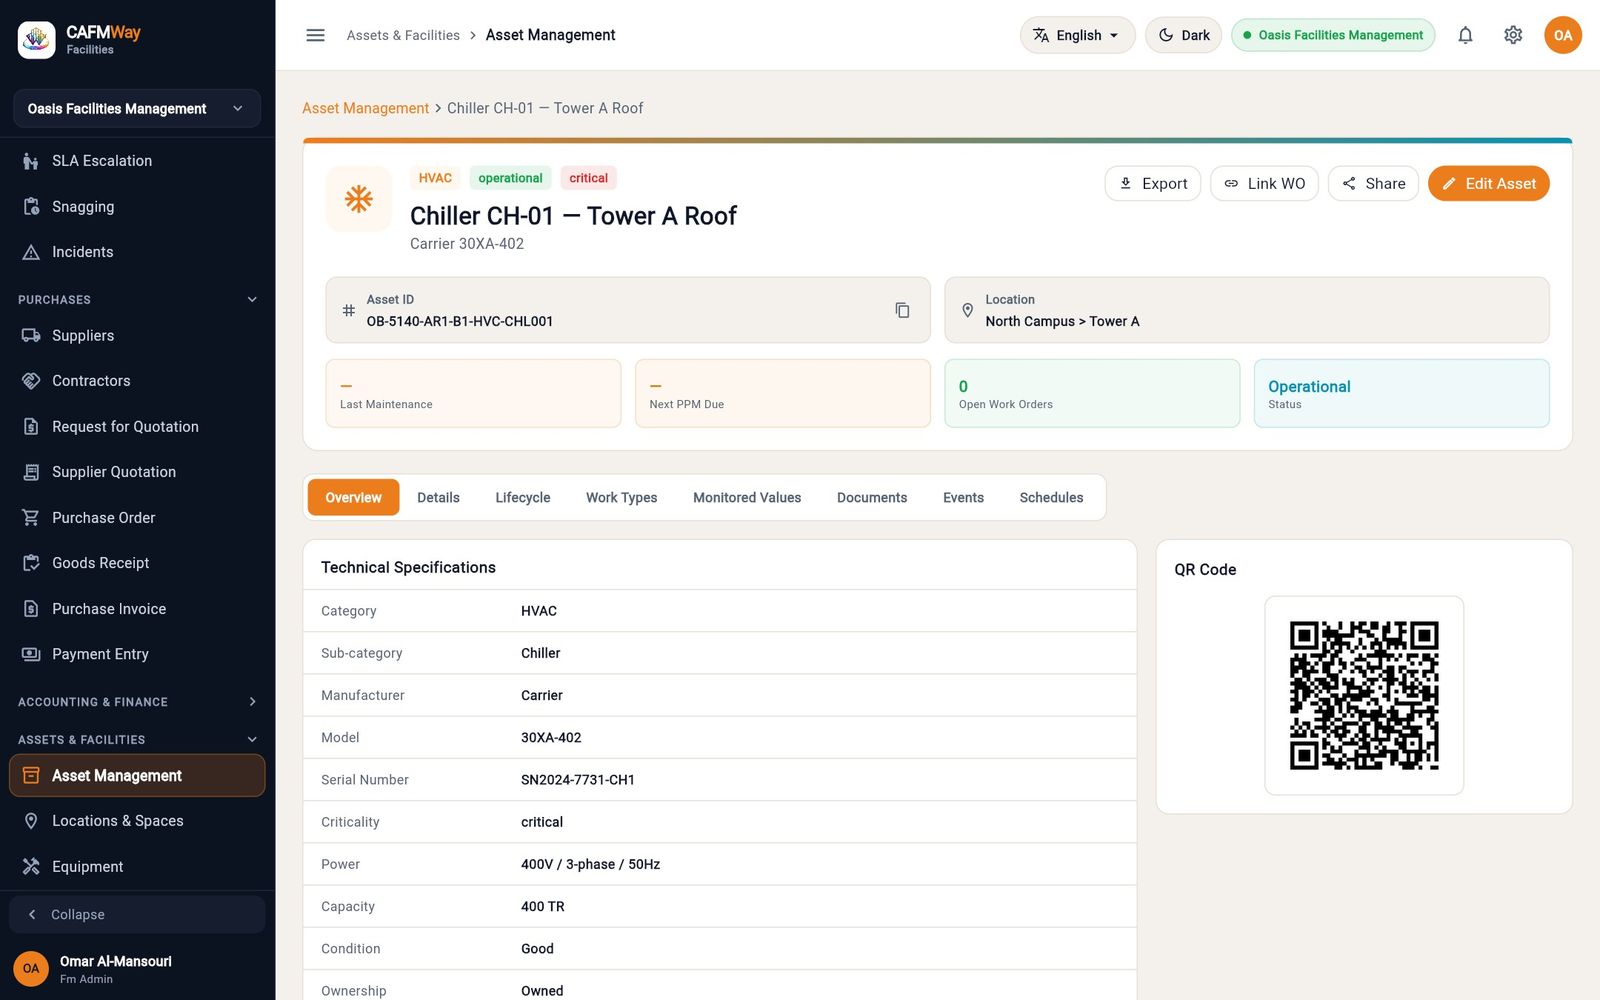
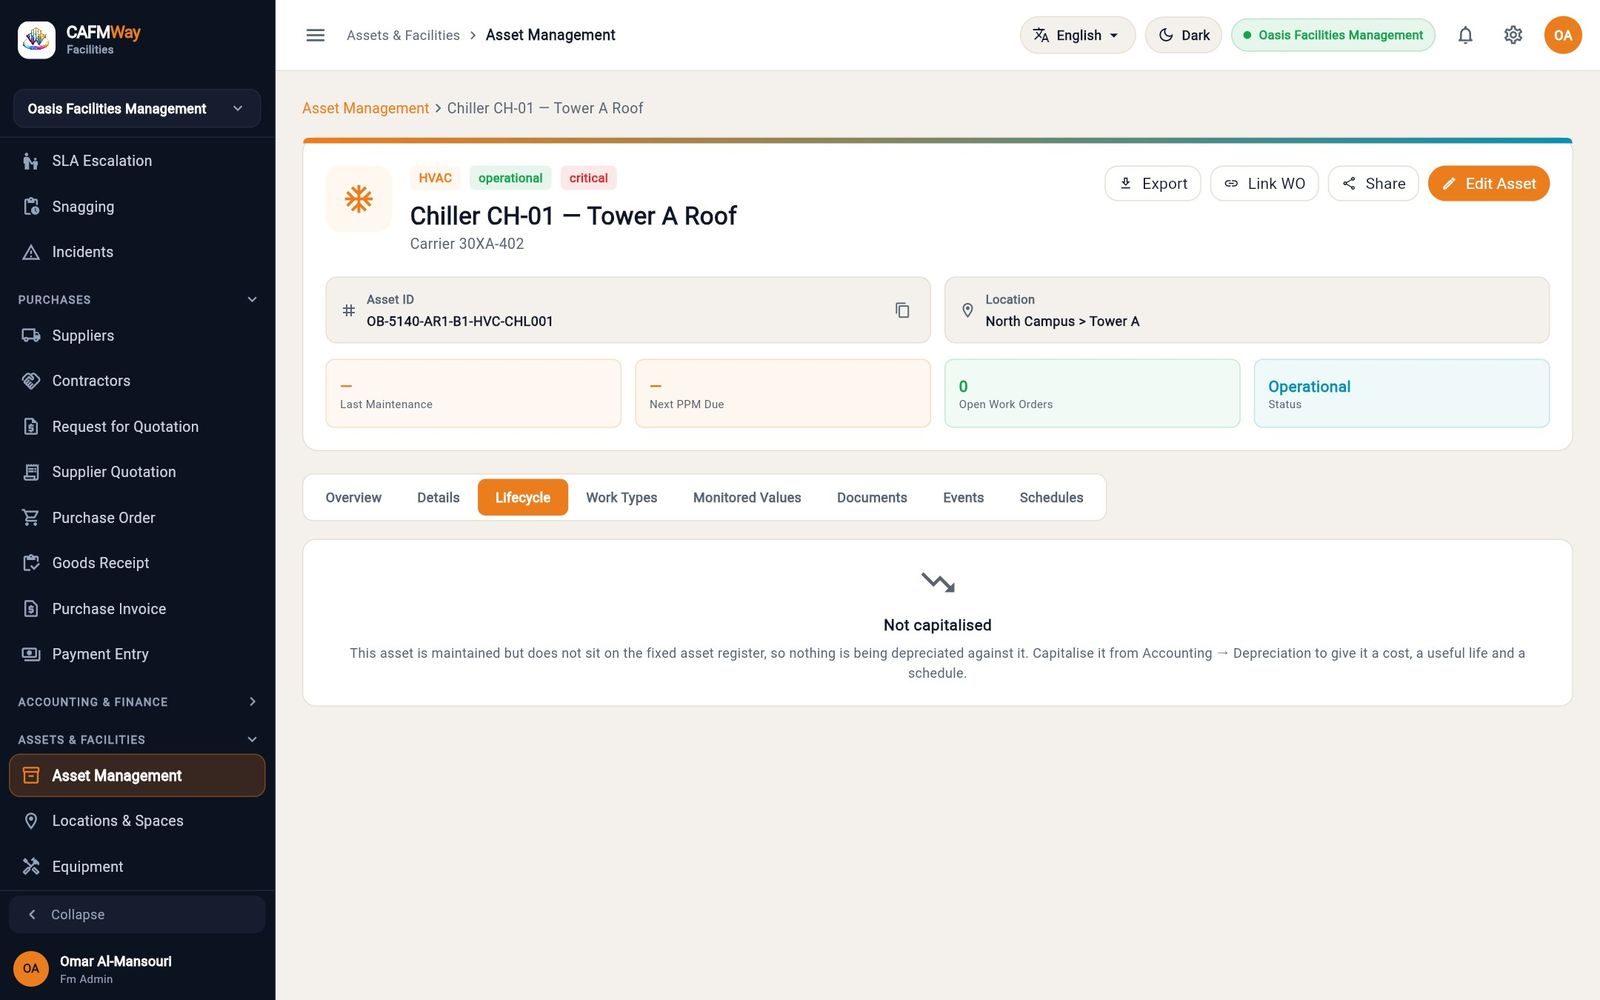
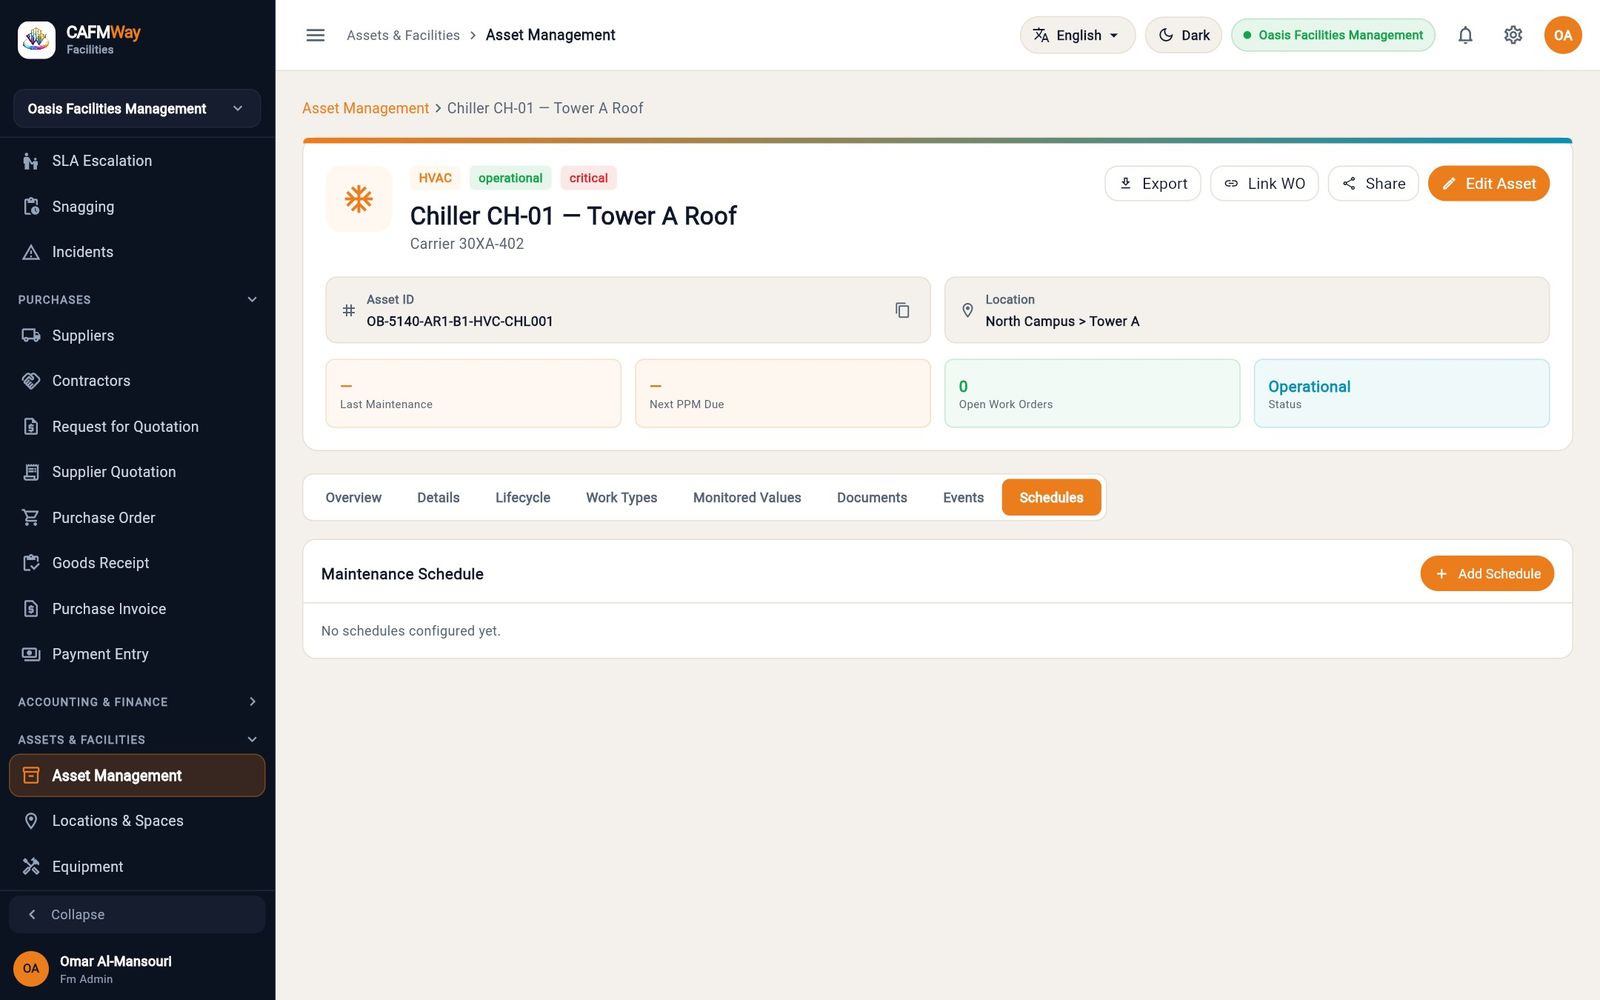
Click an asset to open it. The header shows its ID, location, last maintenance, next PPM, open work orders and status. The buttons are Export, Link WO (link a work order), Share and Edit Asset. The tabs are:
- Overview: technical specifications and the QR code
- Details
- Lifecycle: cost, depreciation and warranty over time
- Work Types: which categories of work apply
- Monitored Values: meter or sensor readings
- Documents
- Events: the asset's history
- Schedules: its PPM plans
Contractors
Contractors are outside companies that carry out part of your work: lift maintenance, fire systems, specialist HVAC. In CAFM Way a contractor is a company record with contracts, SLA and penalty rules, and its own users, who work in the Technician app like your own staff.
flowchart TD
  A[Contractor company] --> B[Contract
category covered, dates, value]
  B --> C[SLA & penalty rules
per category]
  A --> D[Responsible persons
= contractor users]
  B --> E[Work orders in the covered
category route to the contractor]
  E --> F[Contractor technician works
in the Technician app]
  F --> G[SLA breach → penalty
on the contractor account]
The contractors list
- Who: FM administrators, managers, procurement
- Where: PURCHASES → Contractors
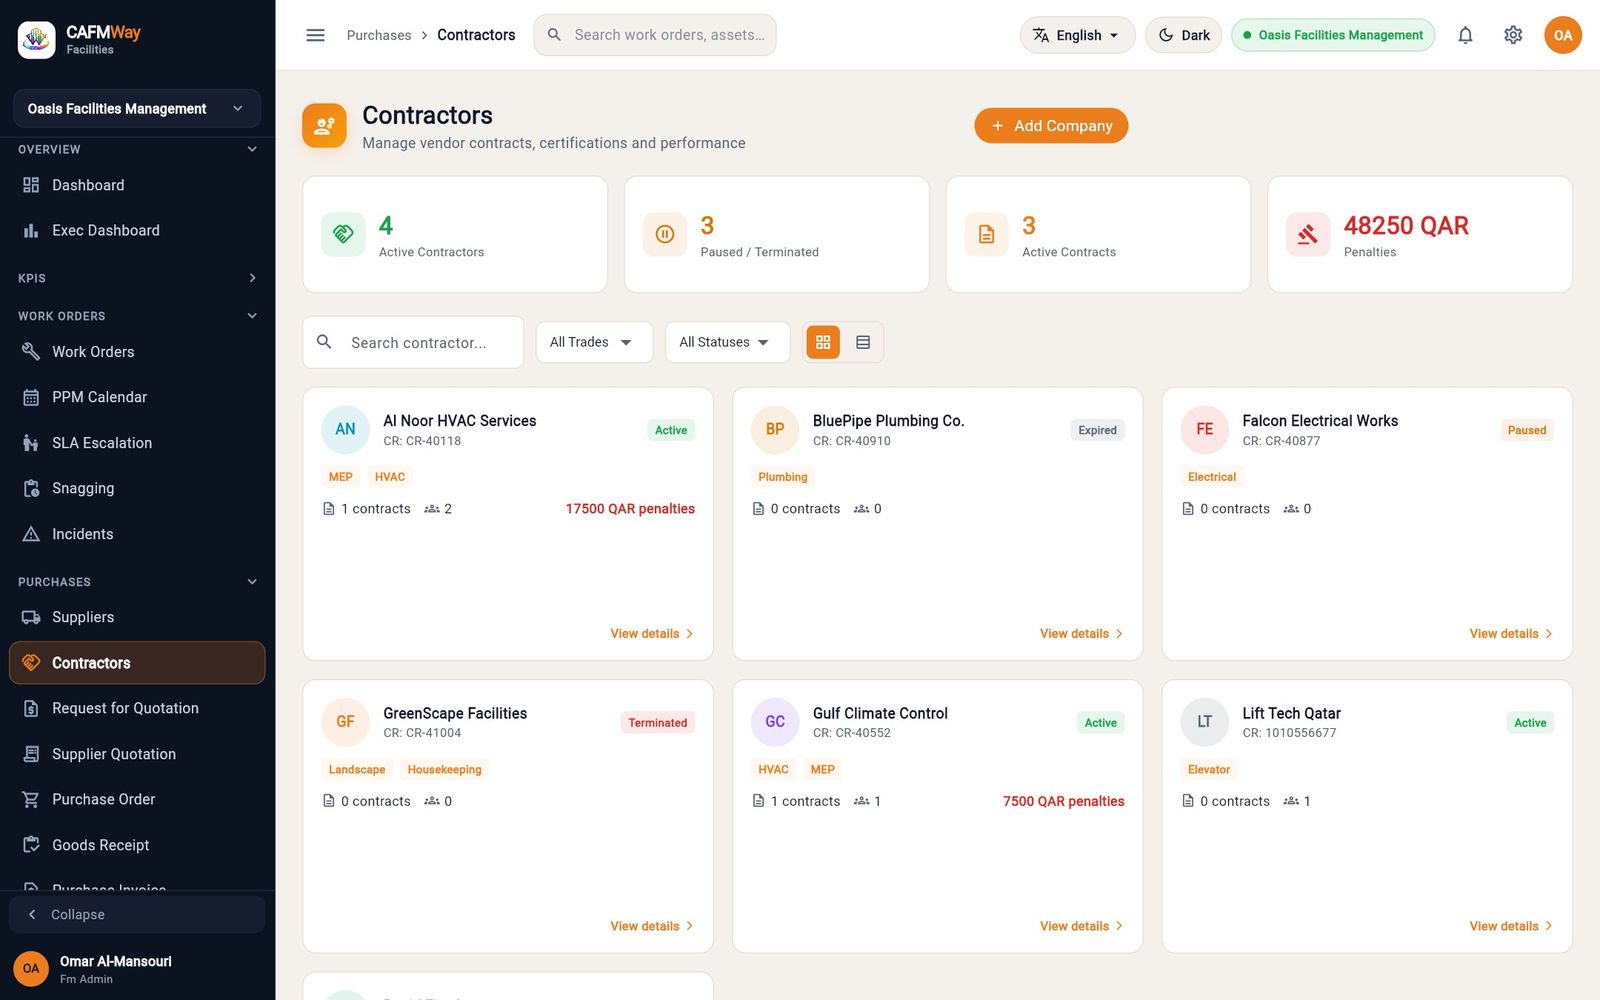
Each card shows the company, its commercial registration number, status (Active, Paused, Expired, Terminated), trades, number of contracts, responsible persons and contract value. Search by name, or filter by trade and status.
Add a contractor company and its first contract
Adding a contractor is one guided form in four steps.
Step 1: Company and responsible persons
Click Add Company.
Enter the company name, CR number, account manager, phone, email, website and address.
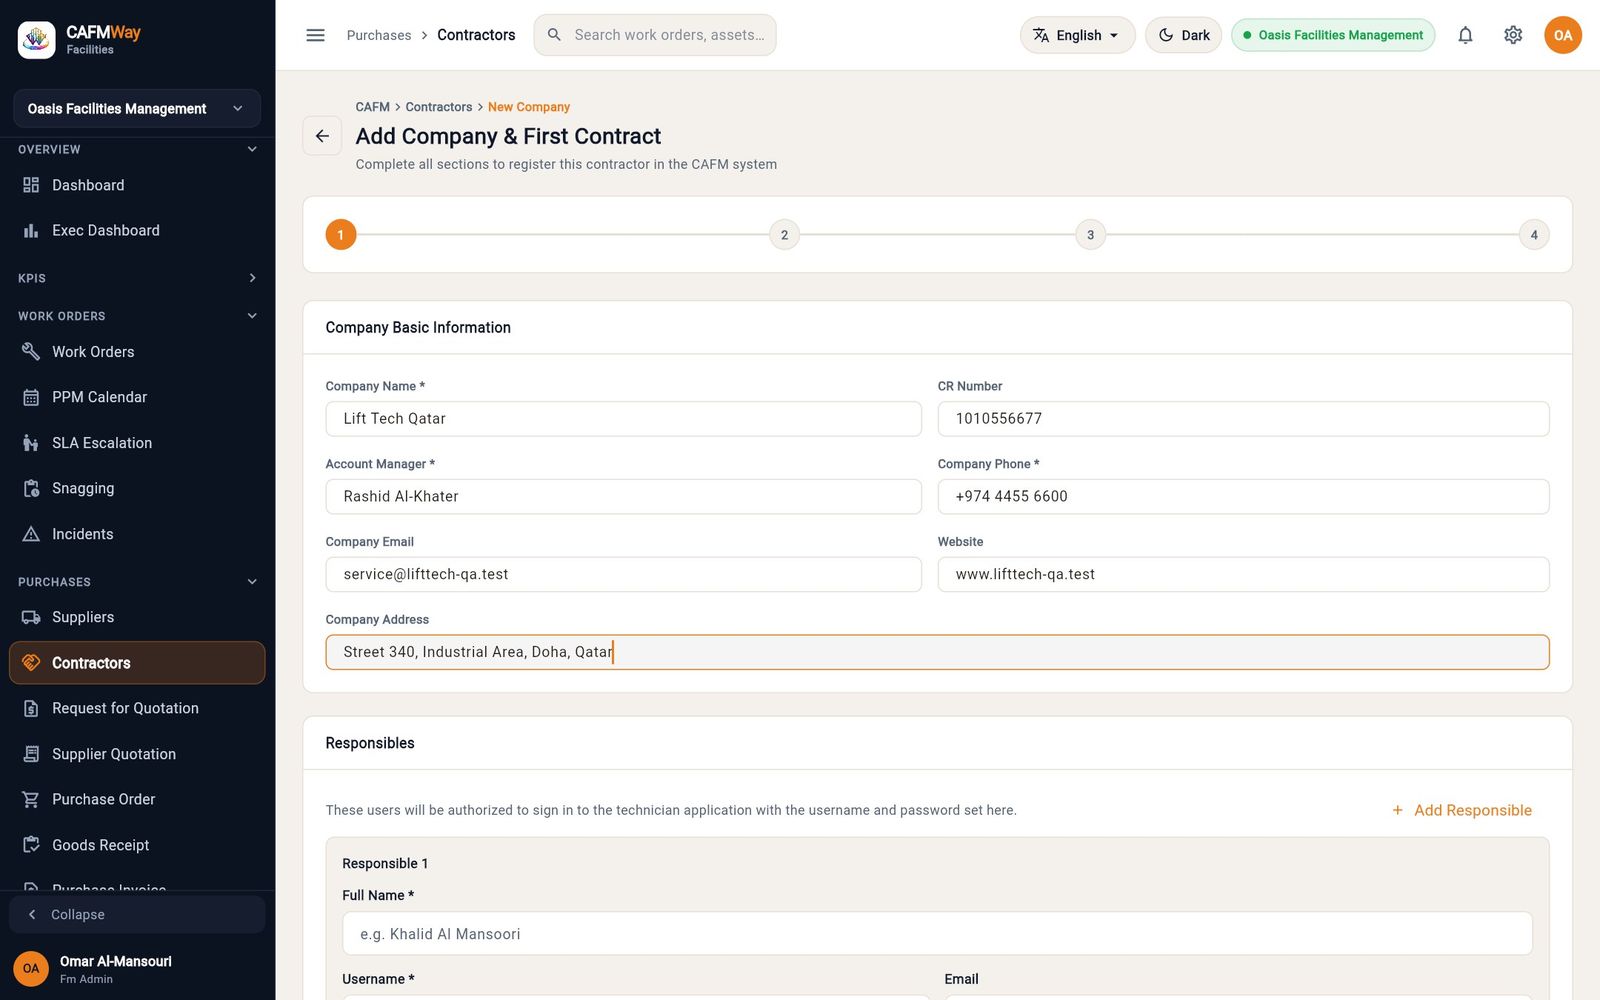
Figure 39 Company details Under Responsibles, enter the first person. Each responsible person is a user who signs in to the Technician app:
- the full name, Username and Email
- a password, entered twice, and the phone number
- the Role, as in the table below
Tick Will receive service request for the people who should be notified of new requests and work orders for this contractor.
Click Add Responsible to add more people now, or add them later from the company page. Then click Continue.
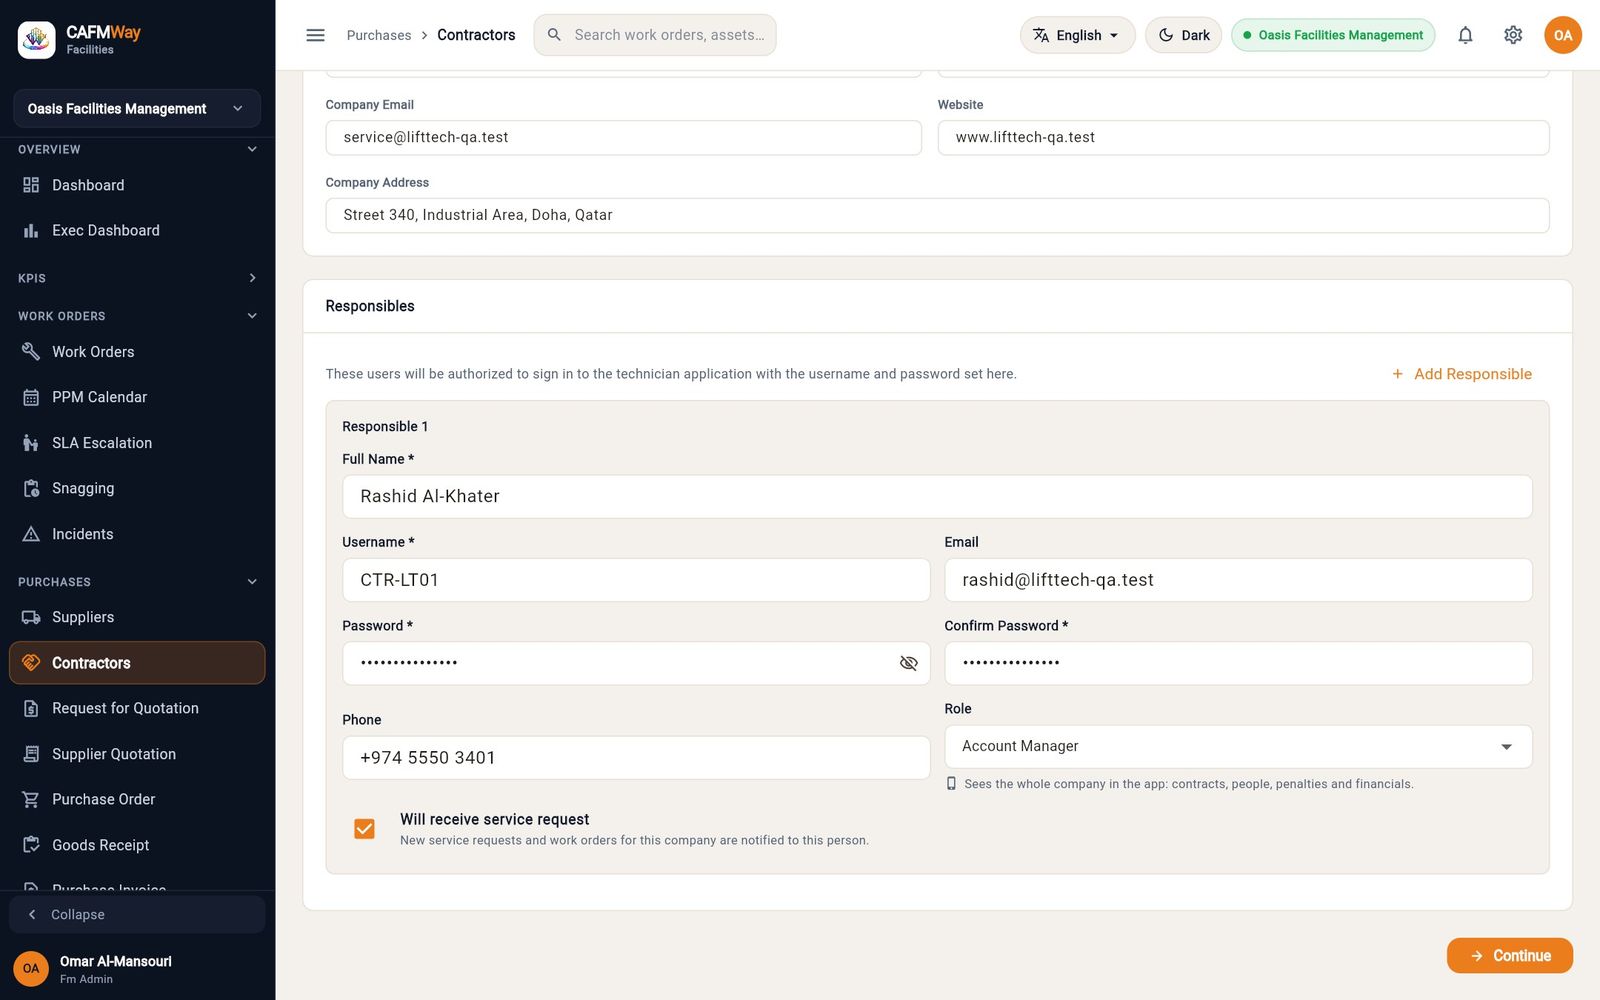
Figure 40 The first responsible person, who will sign in to the Technician app
| Contractor role | Sees in the app |
|---|---|
| Technician | Their own assigned jobs |
| Supervisor | The team's jobs |
| Account Manager | The whole company: contracts, people, penalties and financials |
| Coordinator | Scheduling and dispatch for the company |
| Engineer | Technical review of the company's jobs |
Step 2: Contract
- Enter the contract number, a title, and the start and end dates. The date field has a keyboard icon to type the date instead of picking it.
- Choose the category and sub-category the contract covers.
- Attach the signed contract (PDF or image). Afterwards, check on the Contracts tab that the file is there. If it isn't, add it with Attach file on the contract card.
- Enter the contract value and, optionally, a ceiling on all penalties.
- Write the penalty clause (quoted on every penalty raised under this contract) and the scope: terms, inclusions and exclusions.
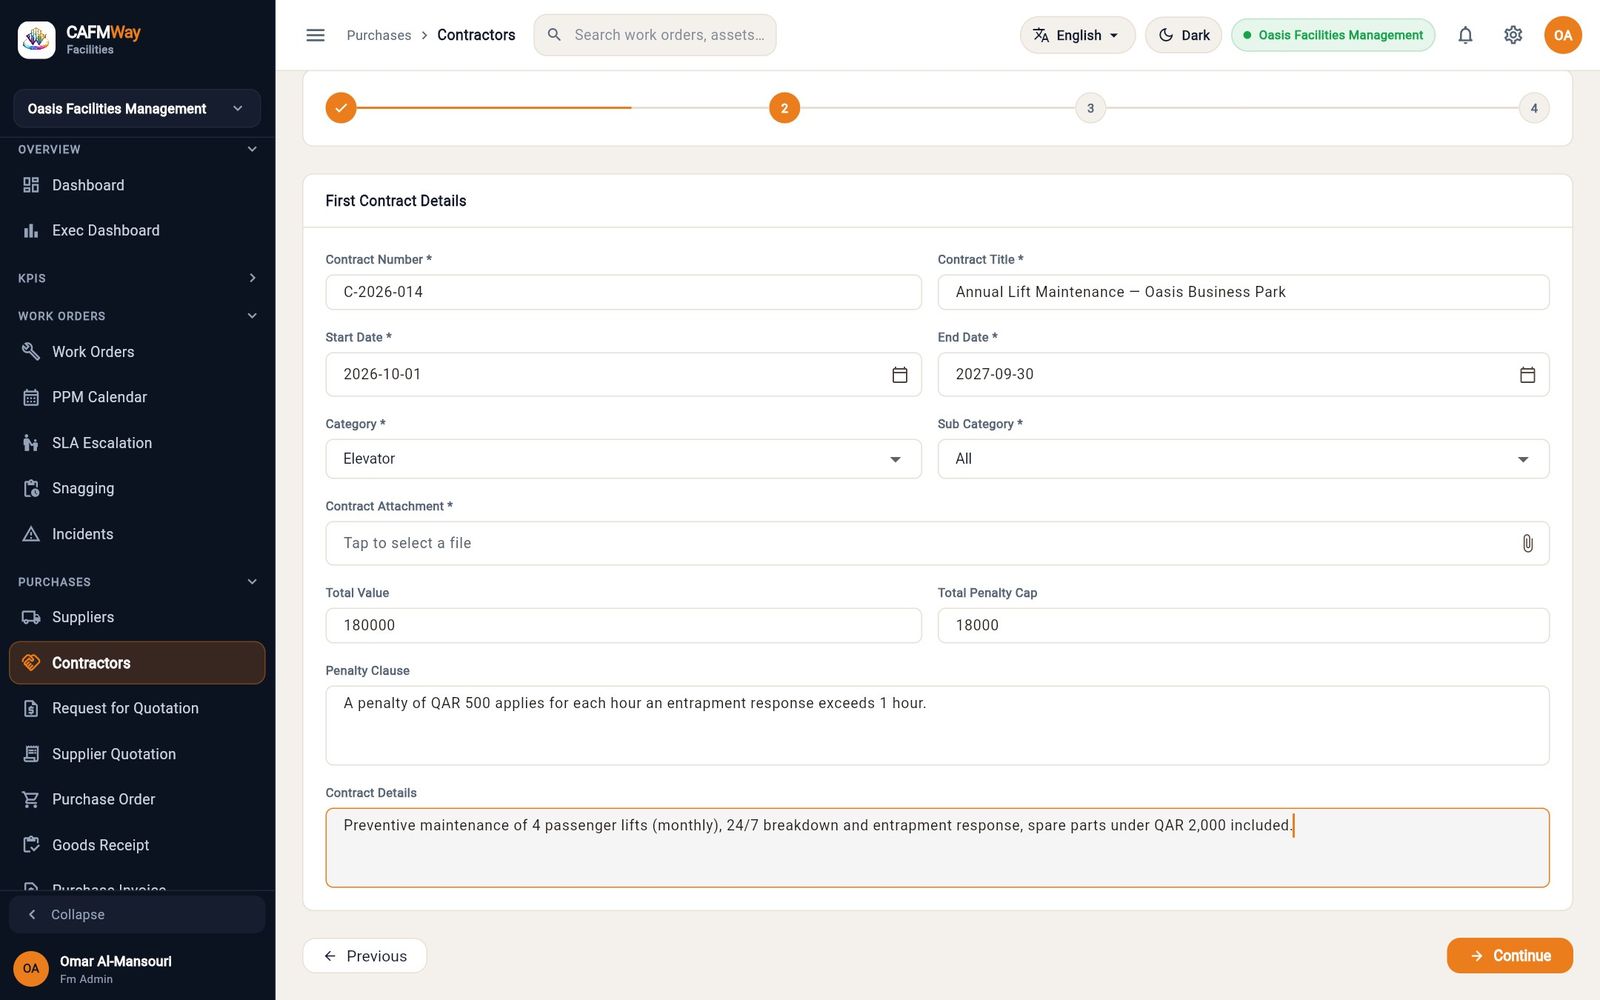
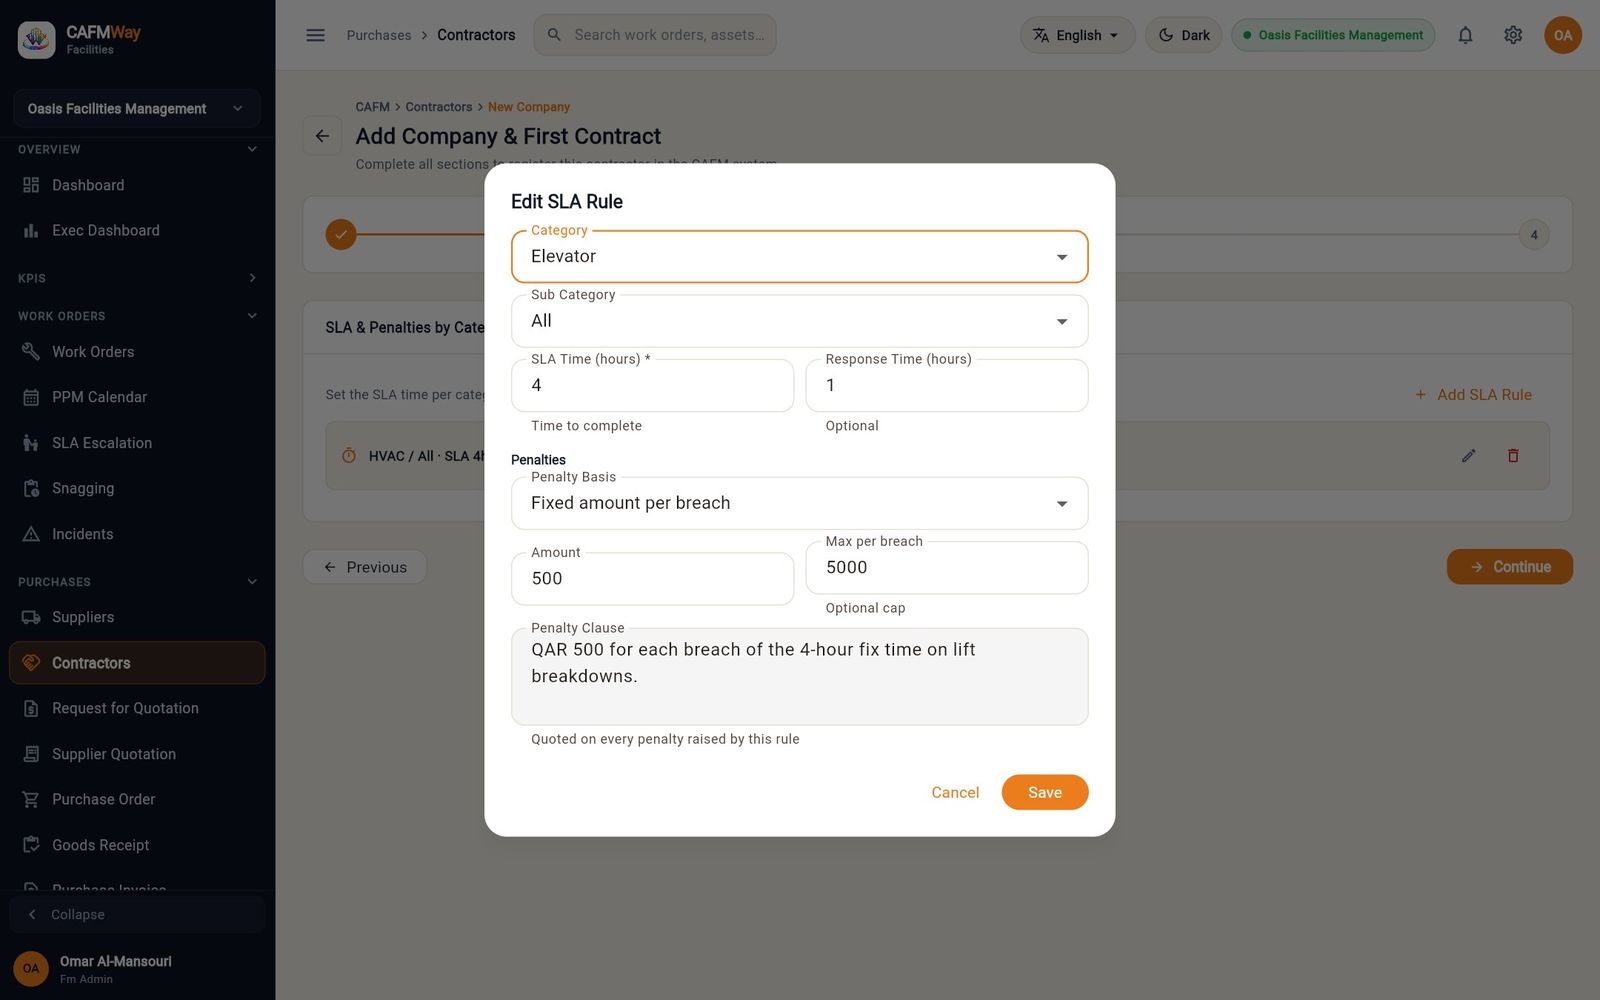
Step 3: SLA & penalties per category. For each category the contract covers, click Add SLA Rule (or edit the proposed rule):
- SLA Time (hours): the fix time
- Response Time (hours)
- Penalty Basis: for example a fixed amount per breach
- Amount and Max per breach
- the penalty clause
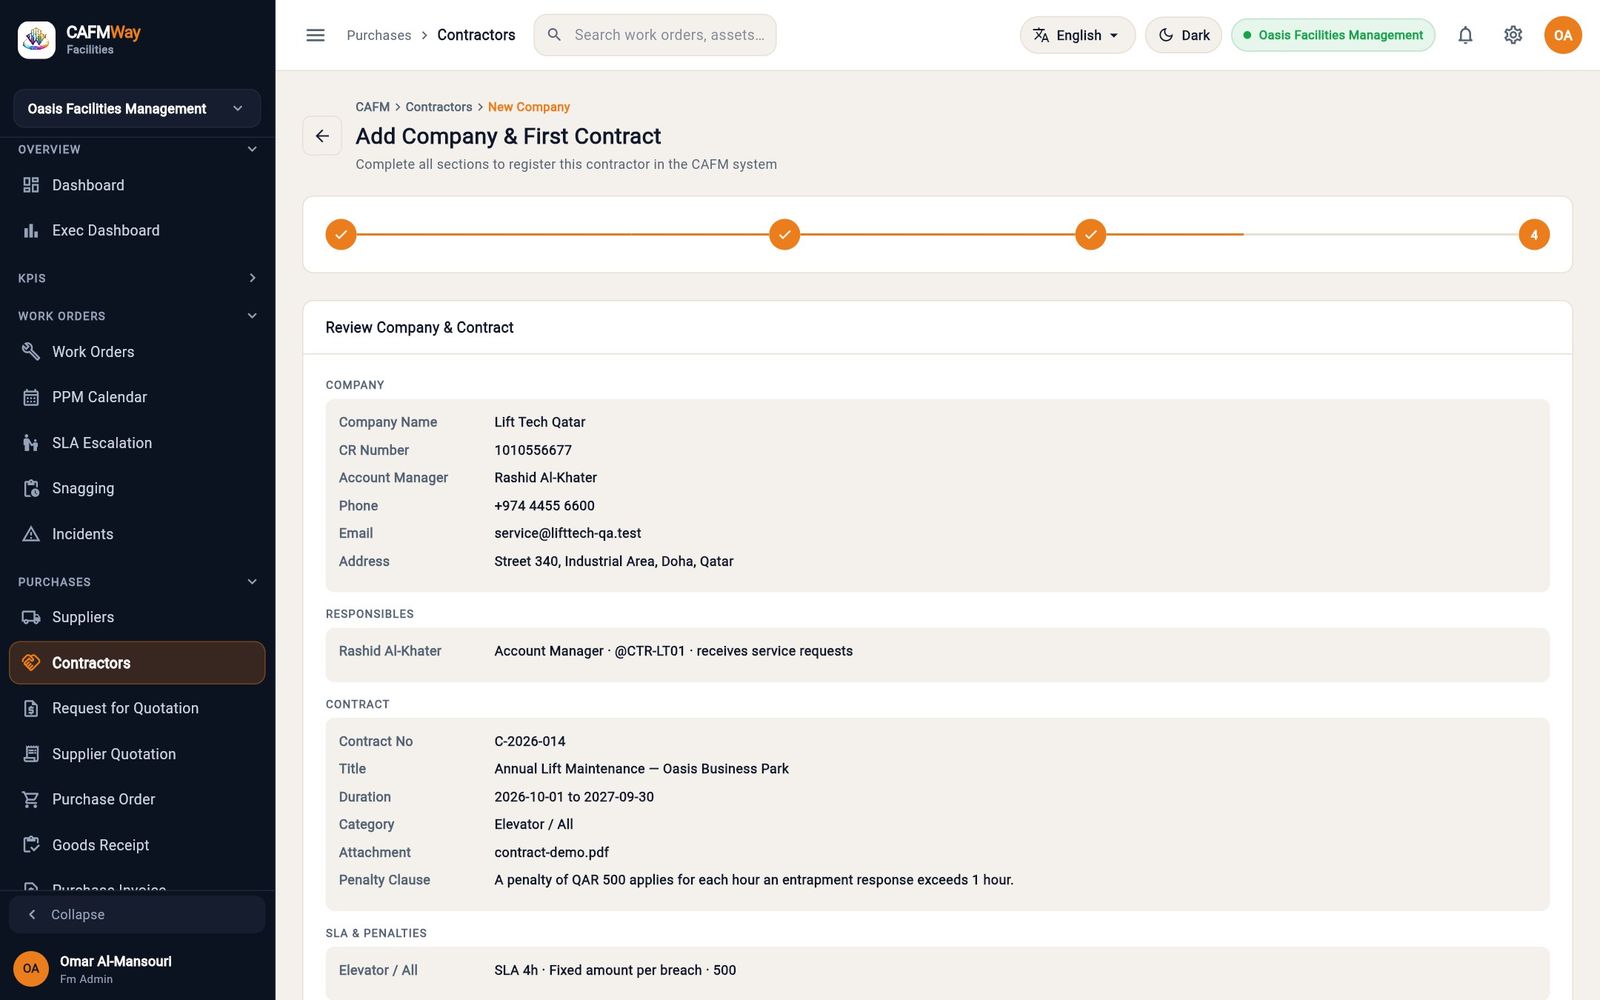
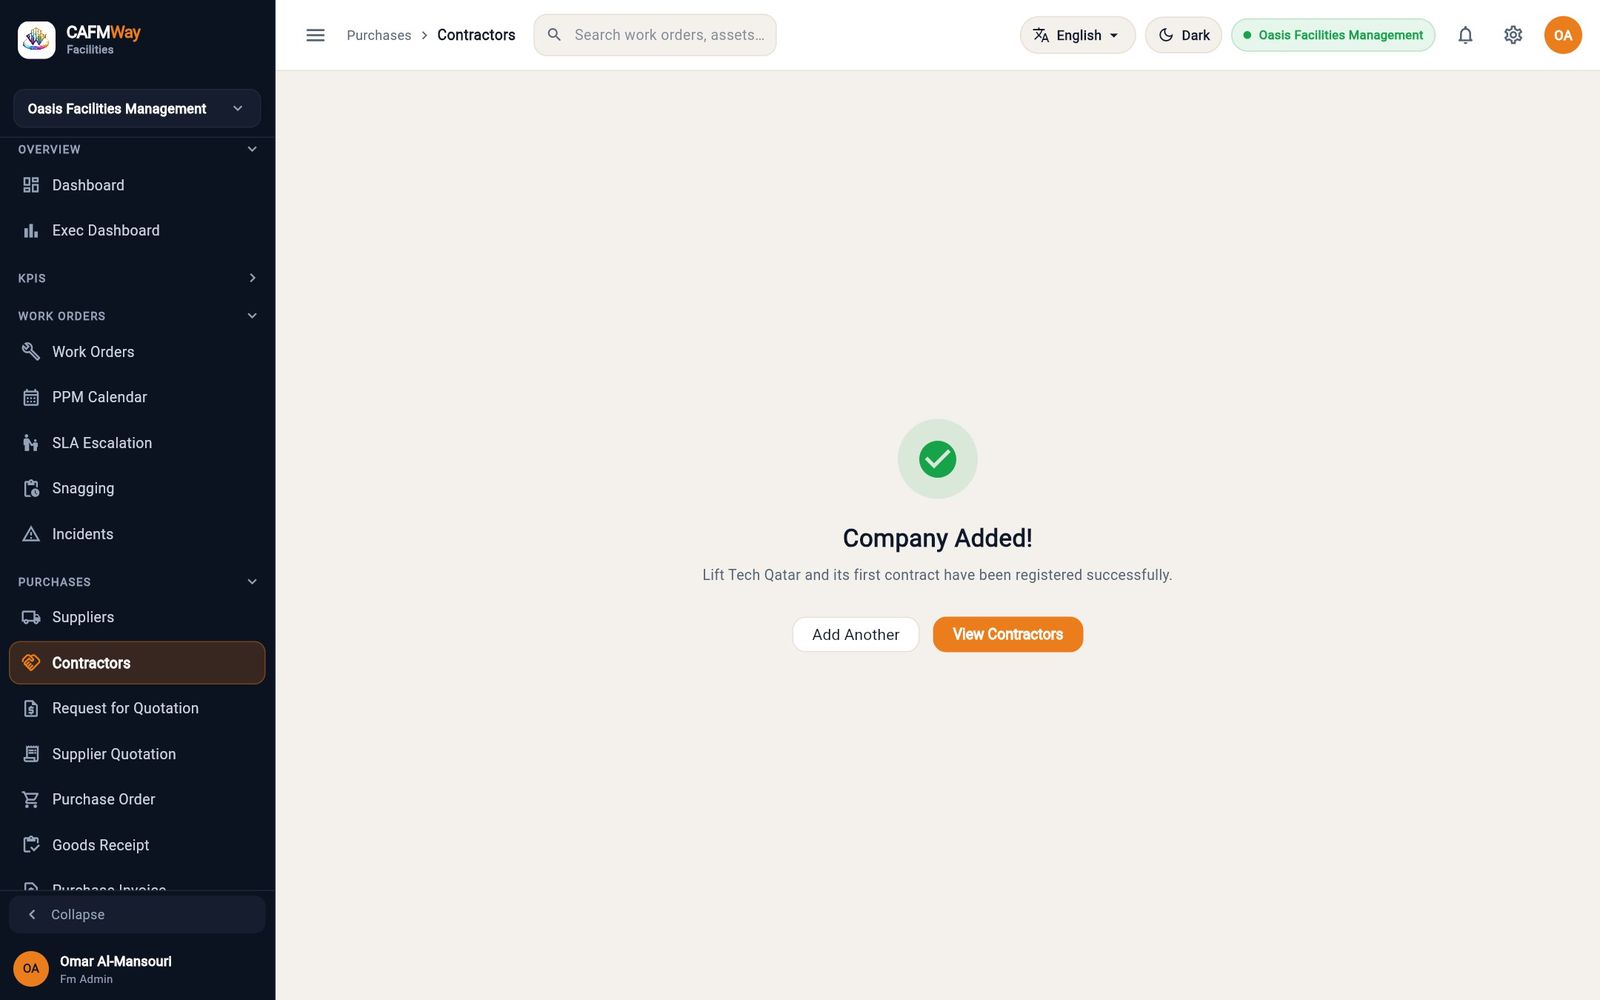
Step 4: Review. Check everything, then click Save Company.
Route work to the contractor: covered classifications
The contract says which trade the contractor does. Covered classifications make CAFM actually send work to them. You add them by editing the contract after you save the company.
- Open the contractor, go to Contracts and click the pencil on the contract.
- Under Covered Classifications, click Add Classification.
- Choose the work category, and optionally one sub-category, then click Save.
- Check that the contract's start date is today or earlier and its status is active, then click Save Changes.
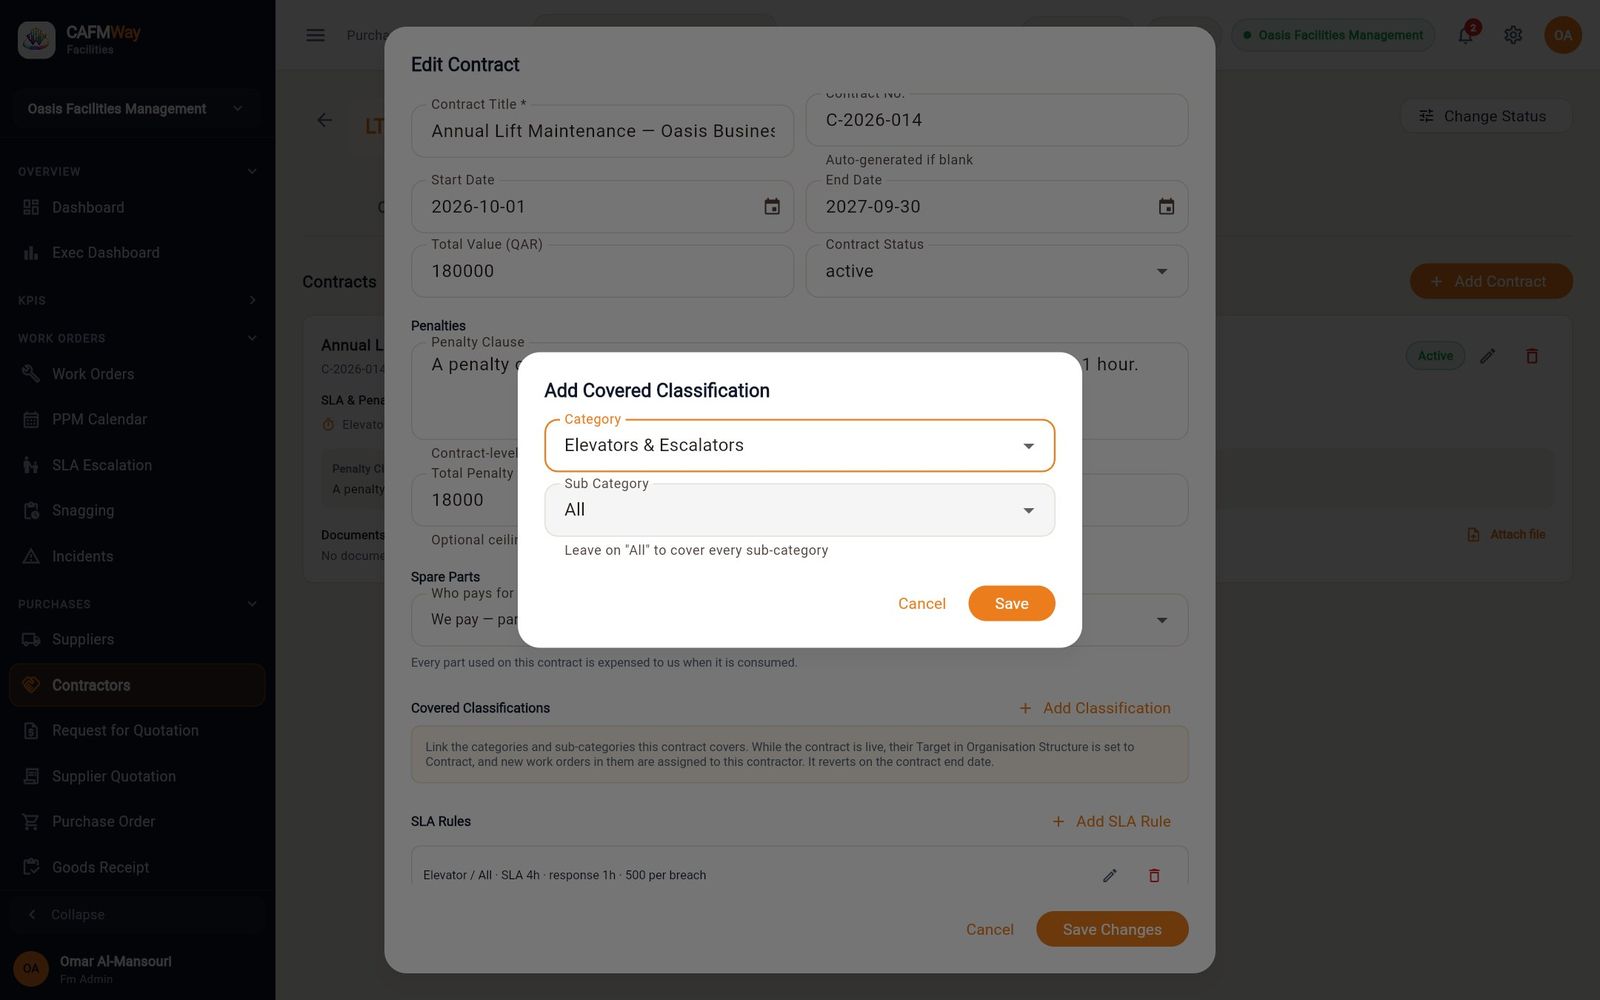
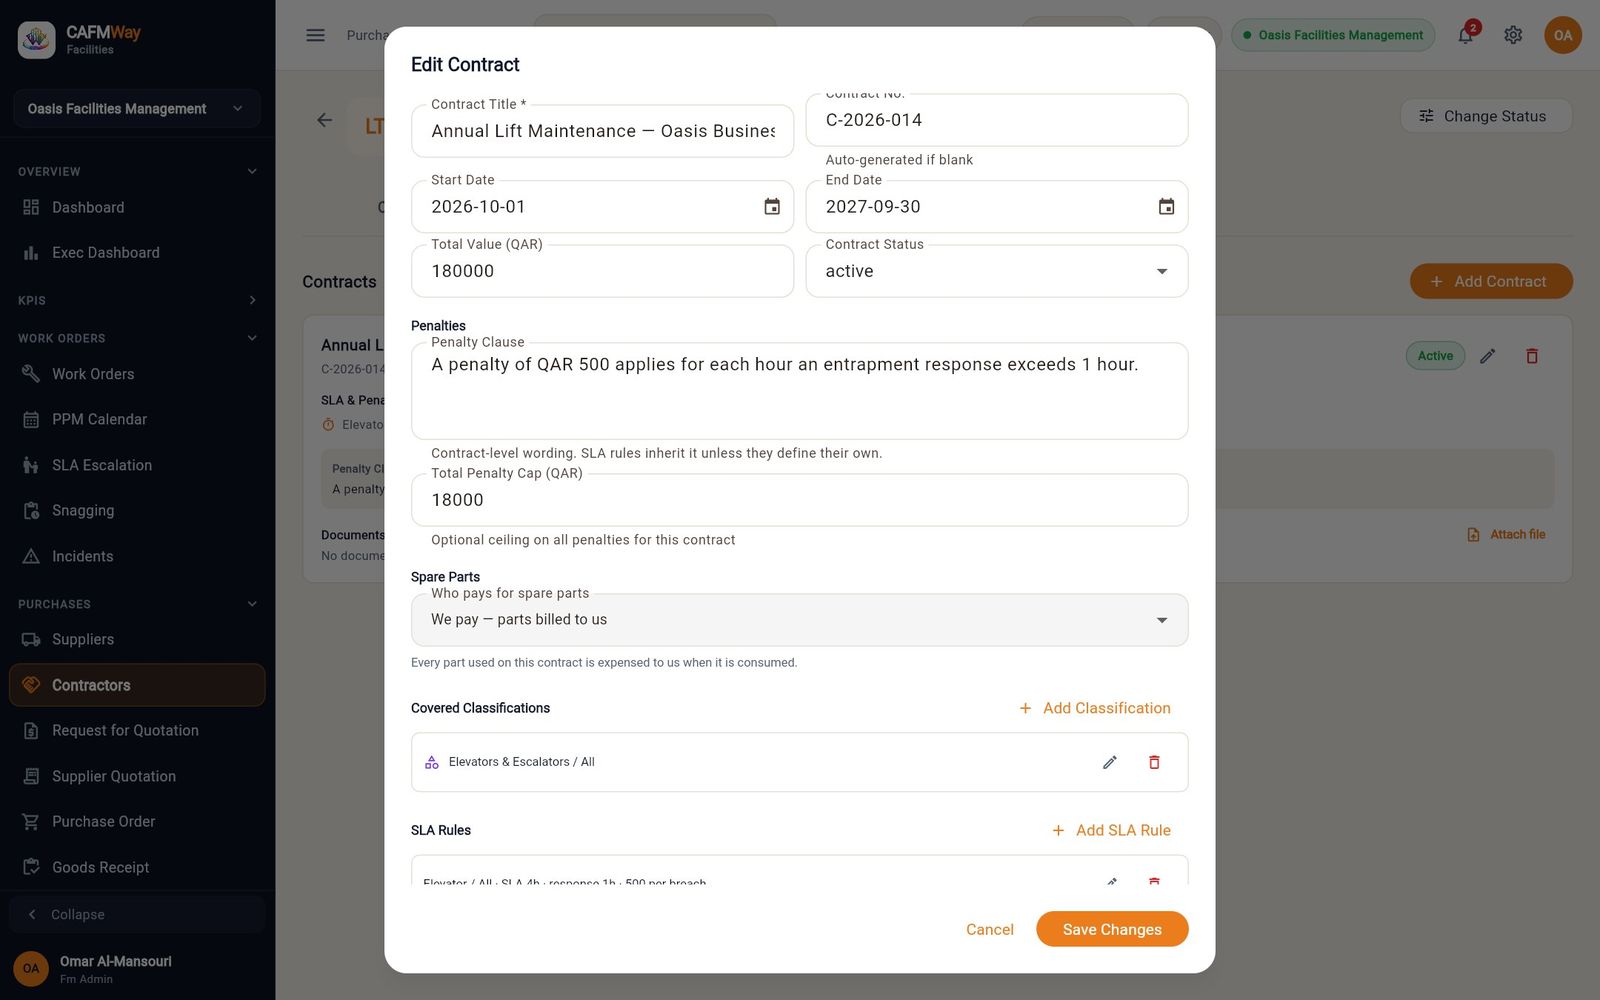
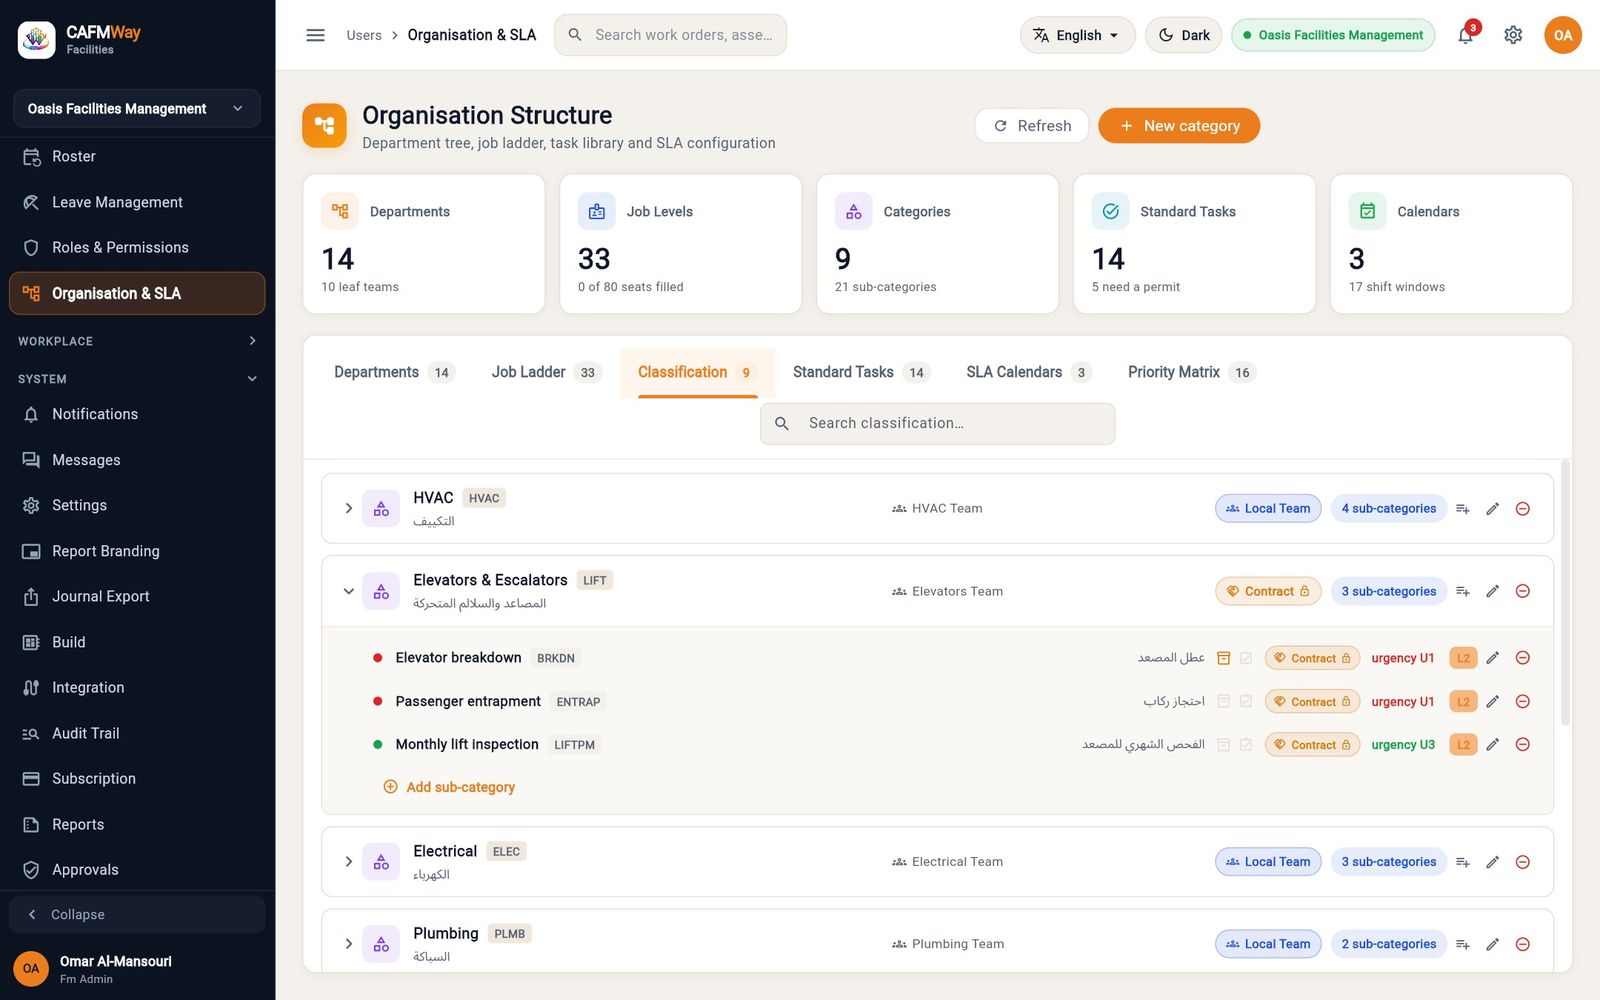
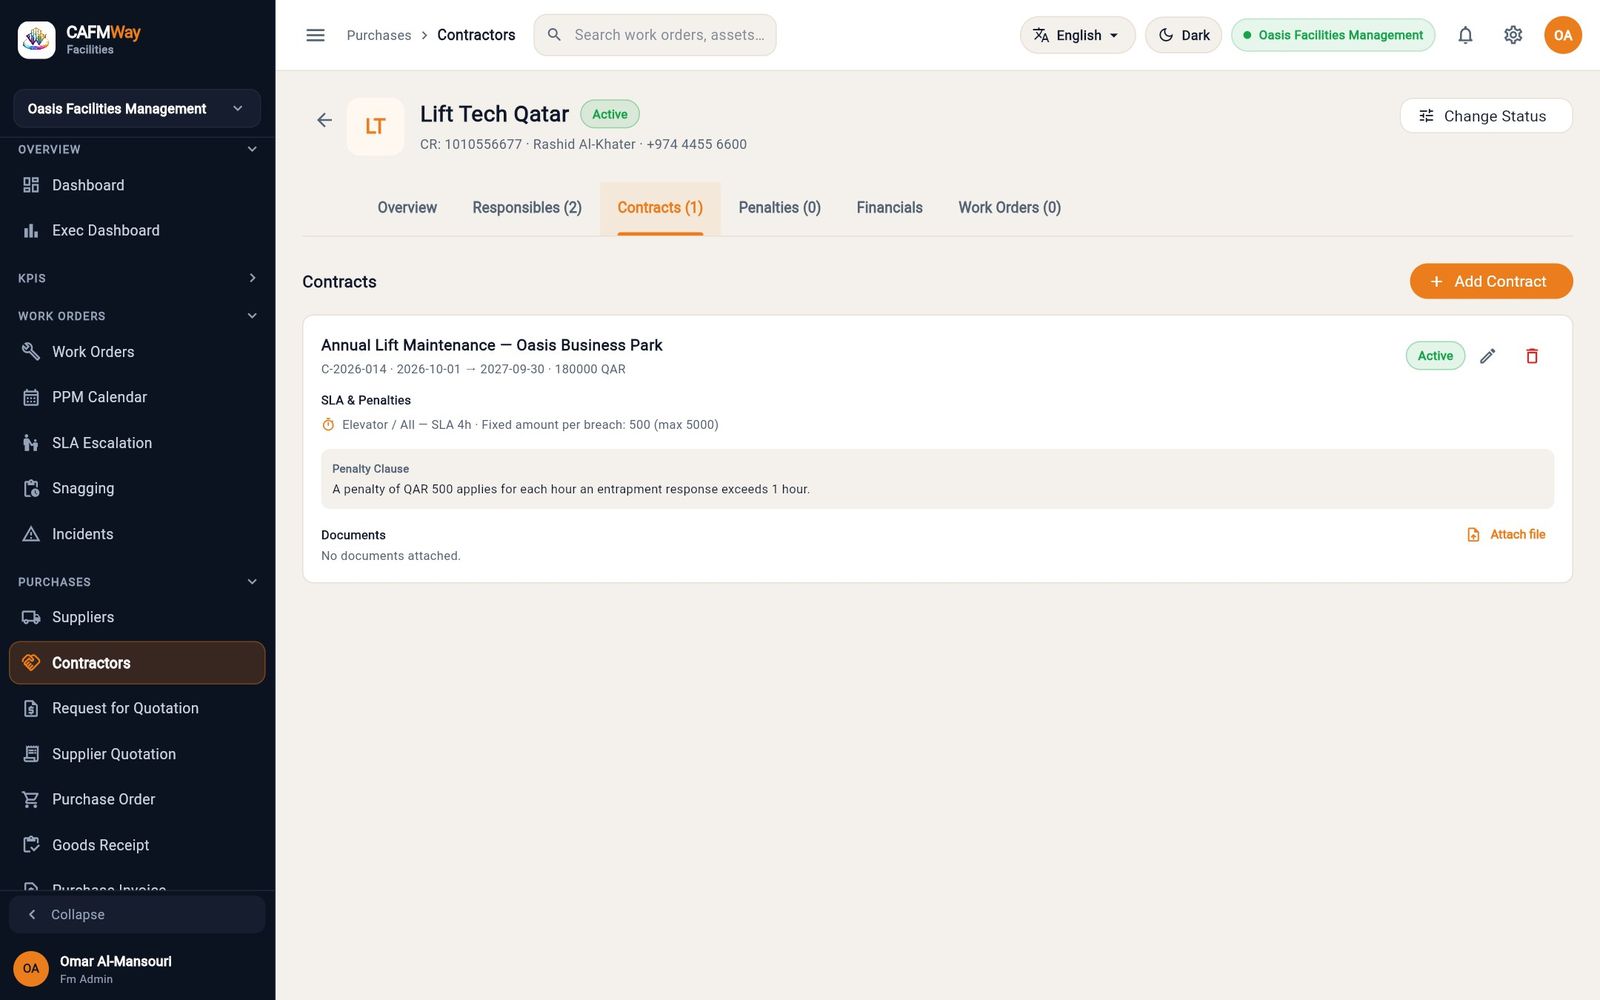
While the contract is active and within its dates, the category's executor changes from Local Team to Contract, with a lock and the note "Set by contract C-2026-014 · Lift Tech Qatar · until 2027-09-30. Reverts to Local Team when the contract ends." New work orders in that category are routed to the contractor.
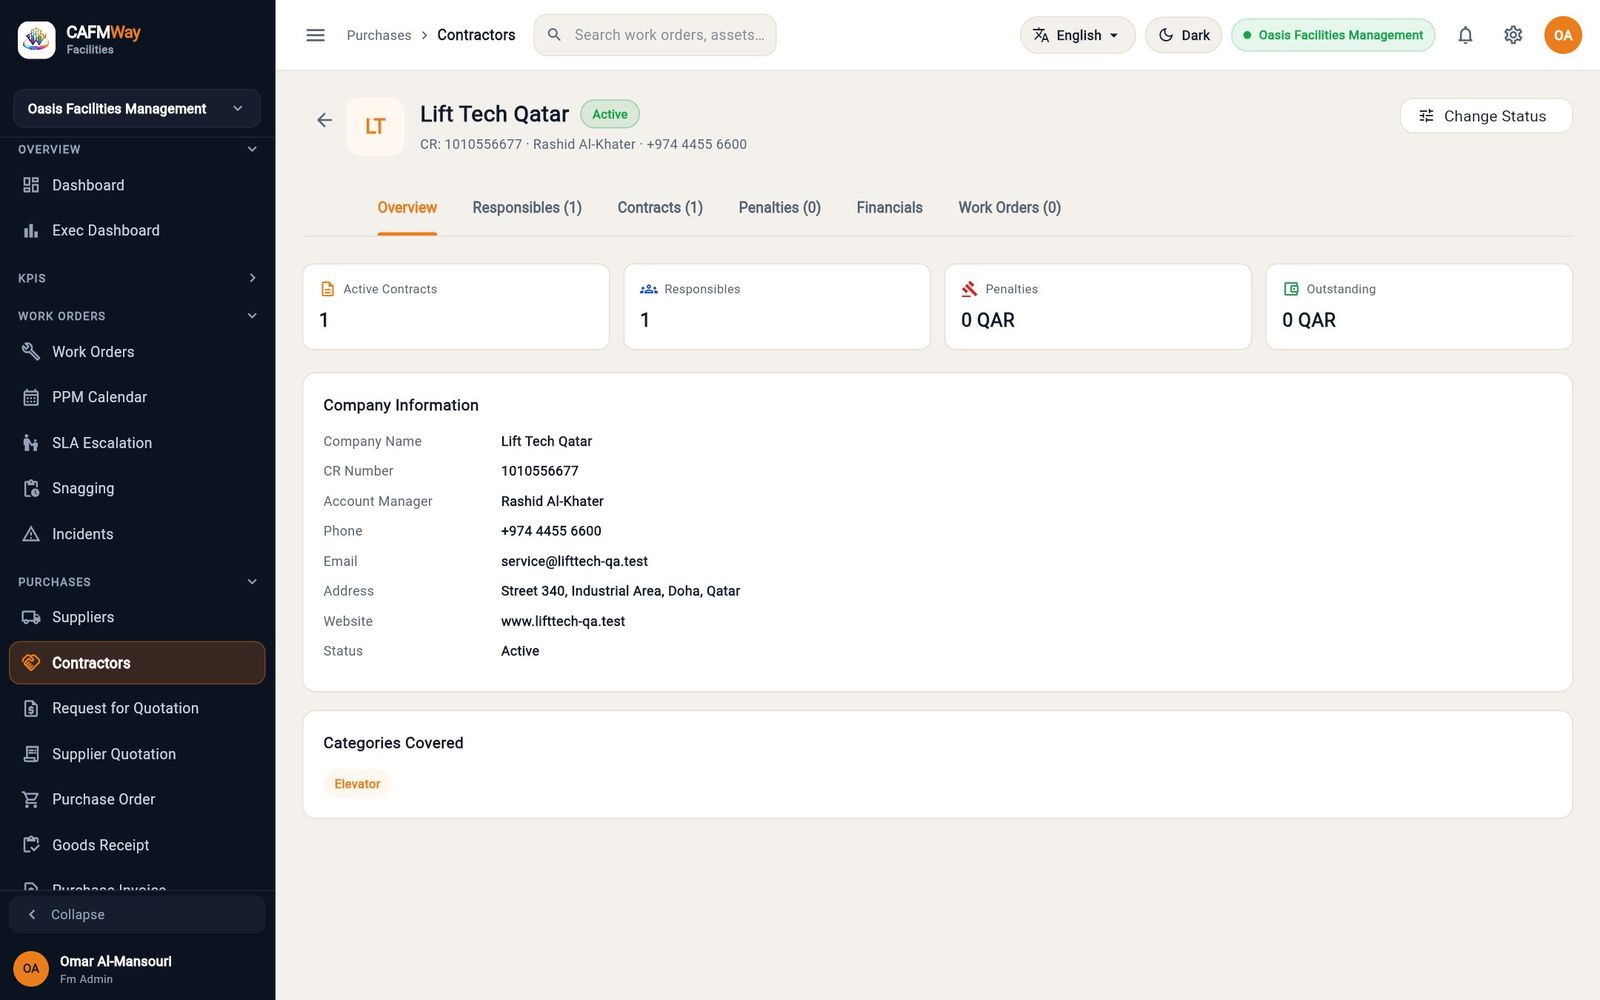
The contractor's page
Click a contractor to open its page. Change Status at the top pauses, reactivates, expires or terminates the company. The tabs:
| Tab | Shows |
|---|---|
| Overview | Active contracts, responsible persons, penalties and amount outstanding; company information; categories covered |
| Responsibles | The contractor's users, with Add Responsible and Edit |
| Contracts | Every contract with its dates, value and file. Add Contract adds another, for example a second category |
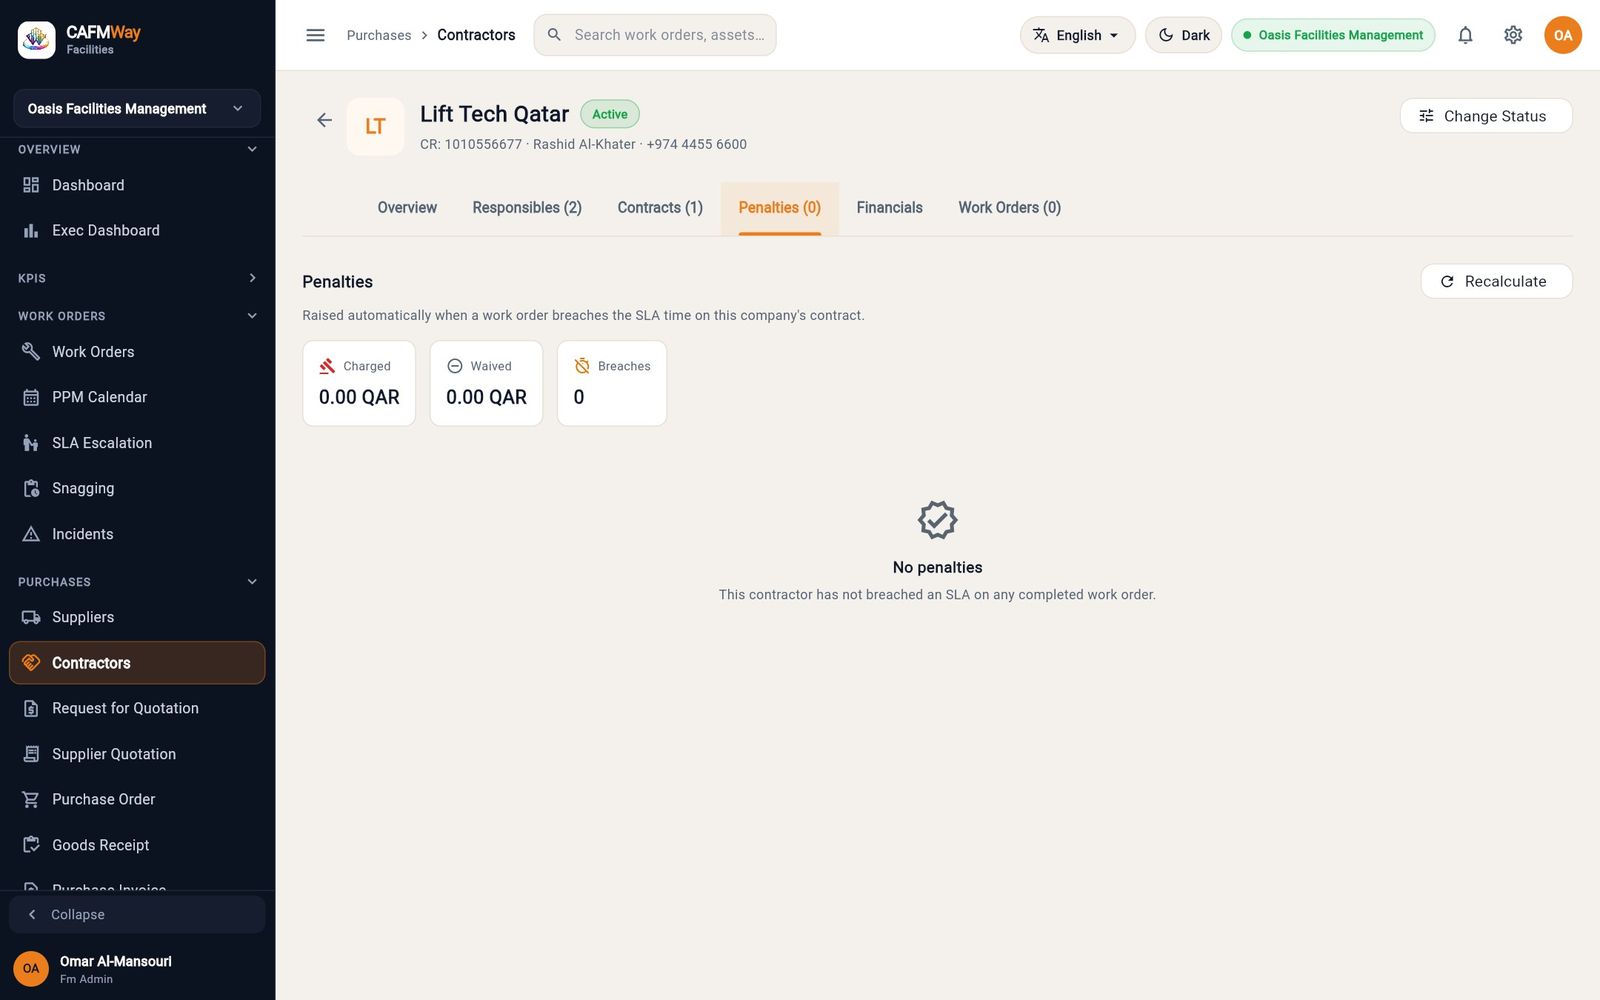
| Penalties | Penalties raised for SLA breaches under this contractor's contracts |
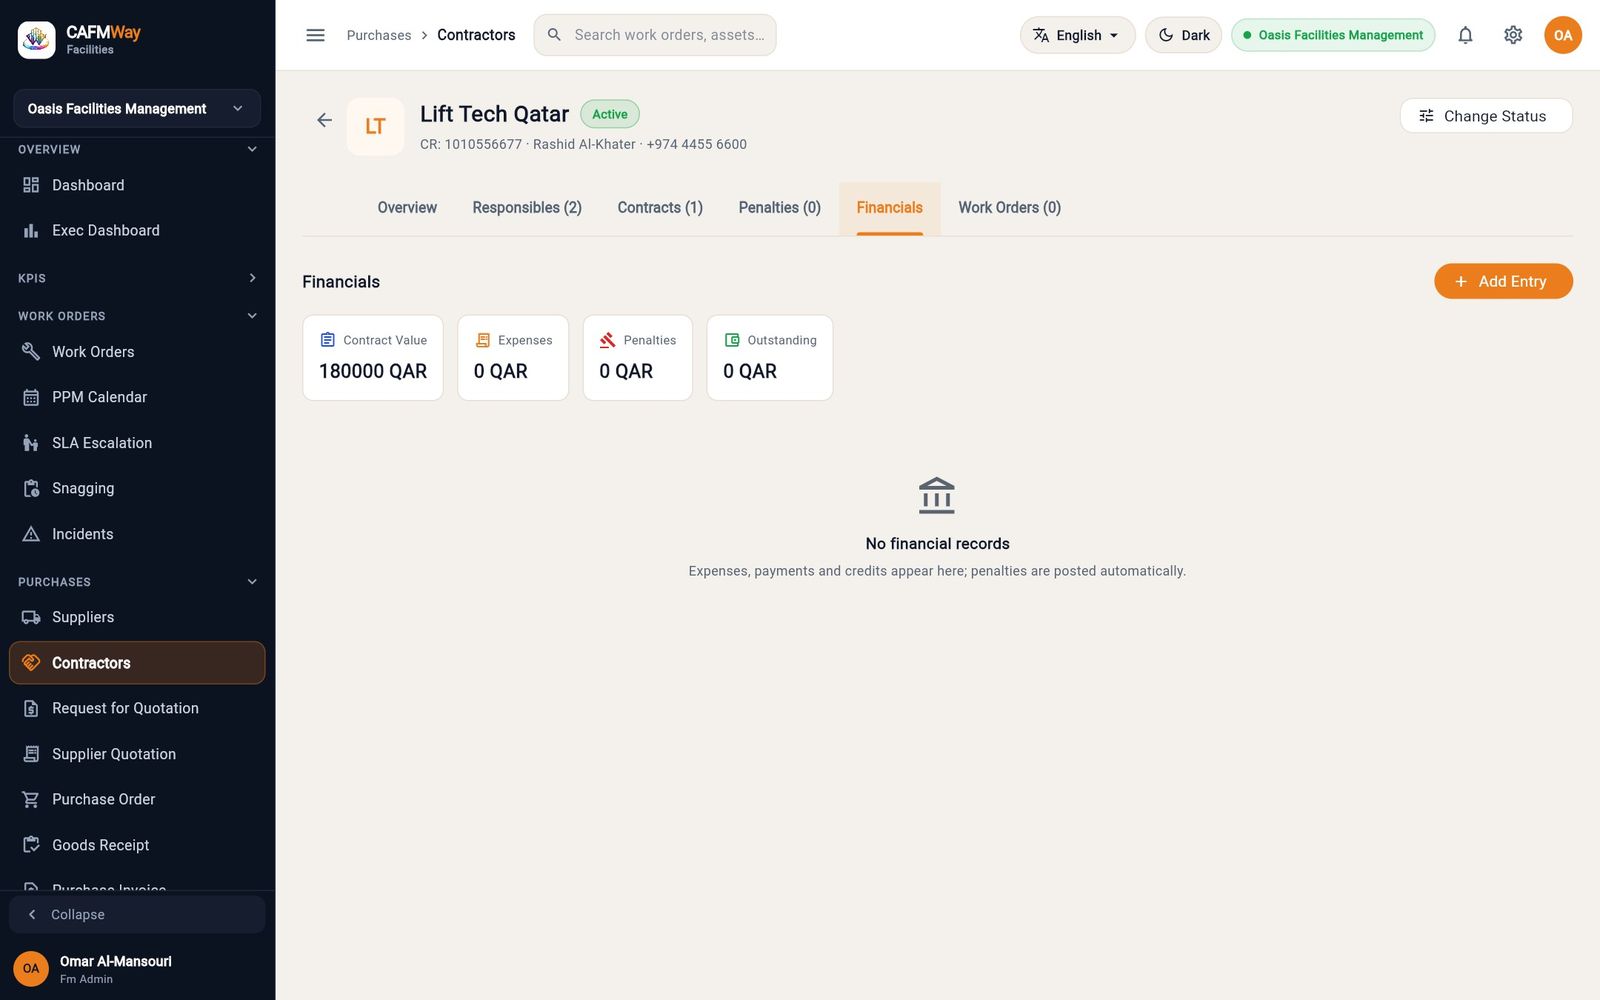
| Financials | Contract values, penalties and what is outstanding |
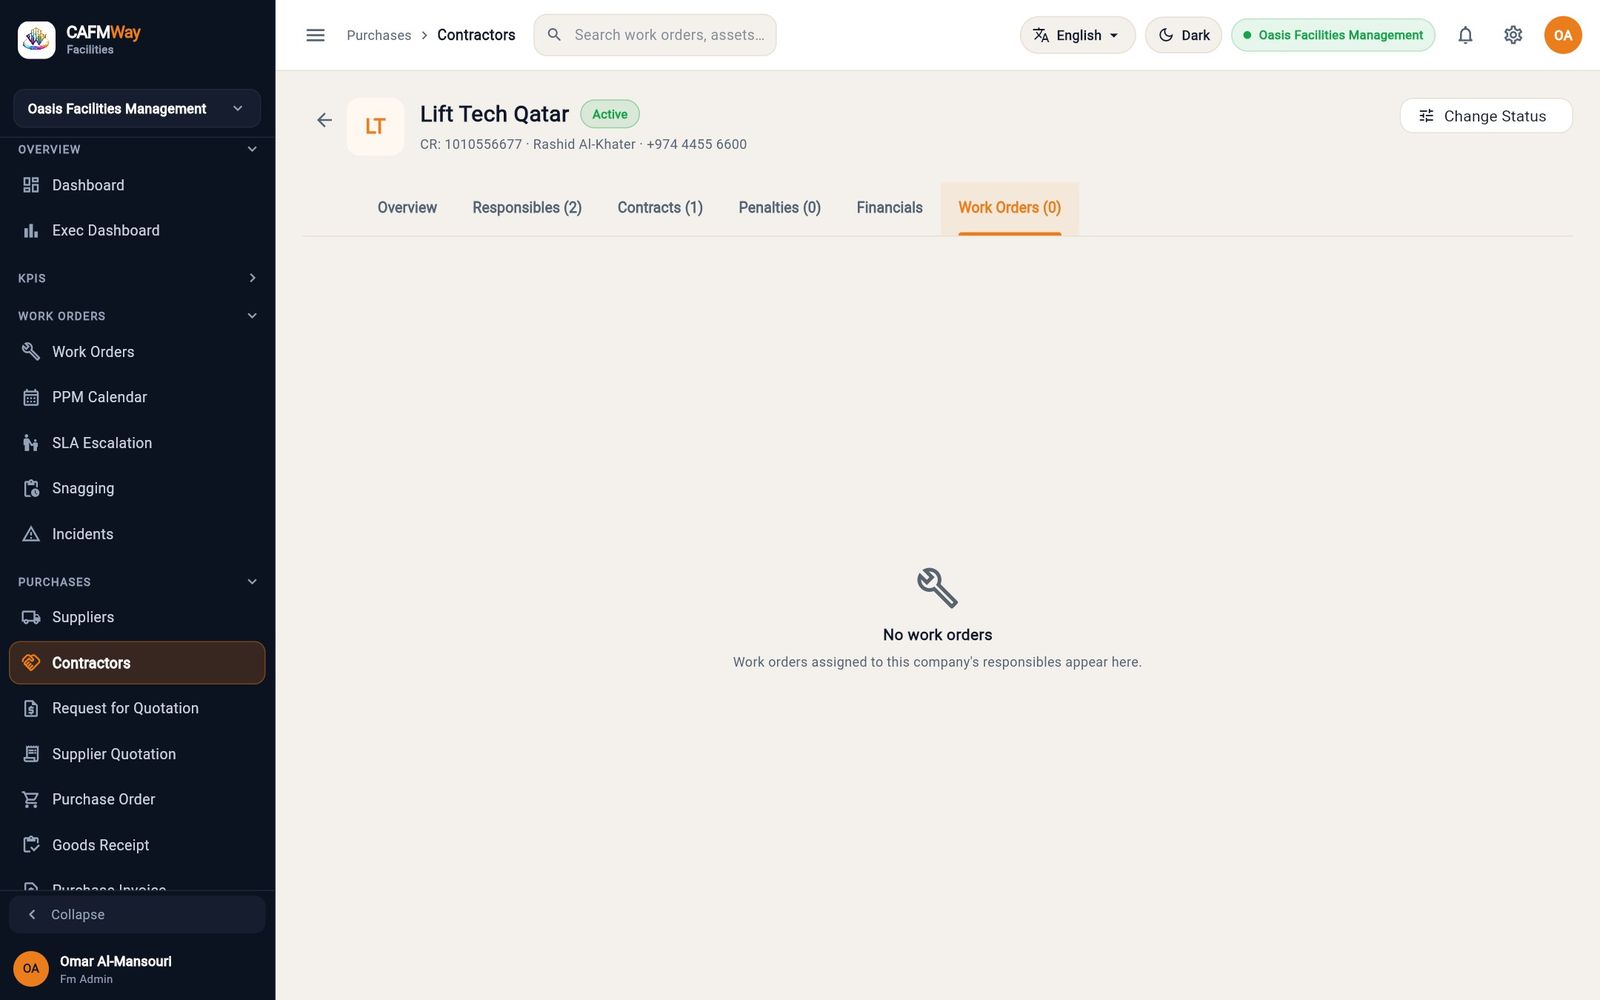
| Work Orders | The work orders routed to this contractor |
Contractor users
Contractor staff sign in to the Technician app with the username or email and password set here. They only see work for their own company.
- Open the contractor and go to Responsibles.
- Click Add Responsible.
- Enter the name, username, email, password (twice) and phone, and choose the role.
- Tick Will receive service request if this person should be notified of new work.
- Click Add Responsible.
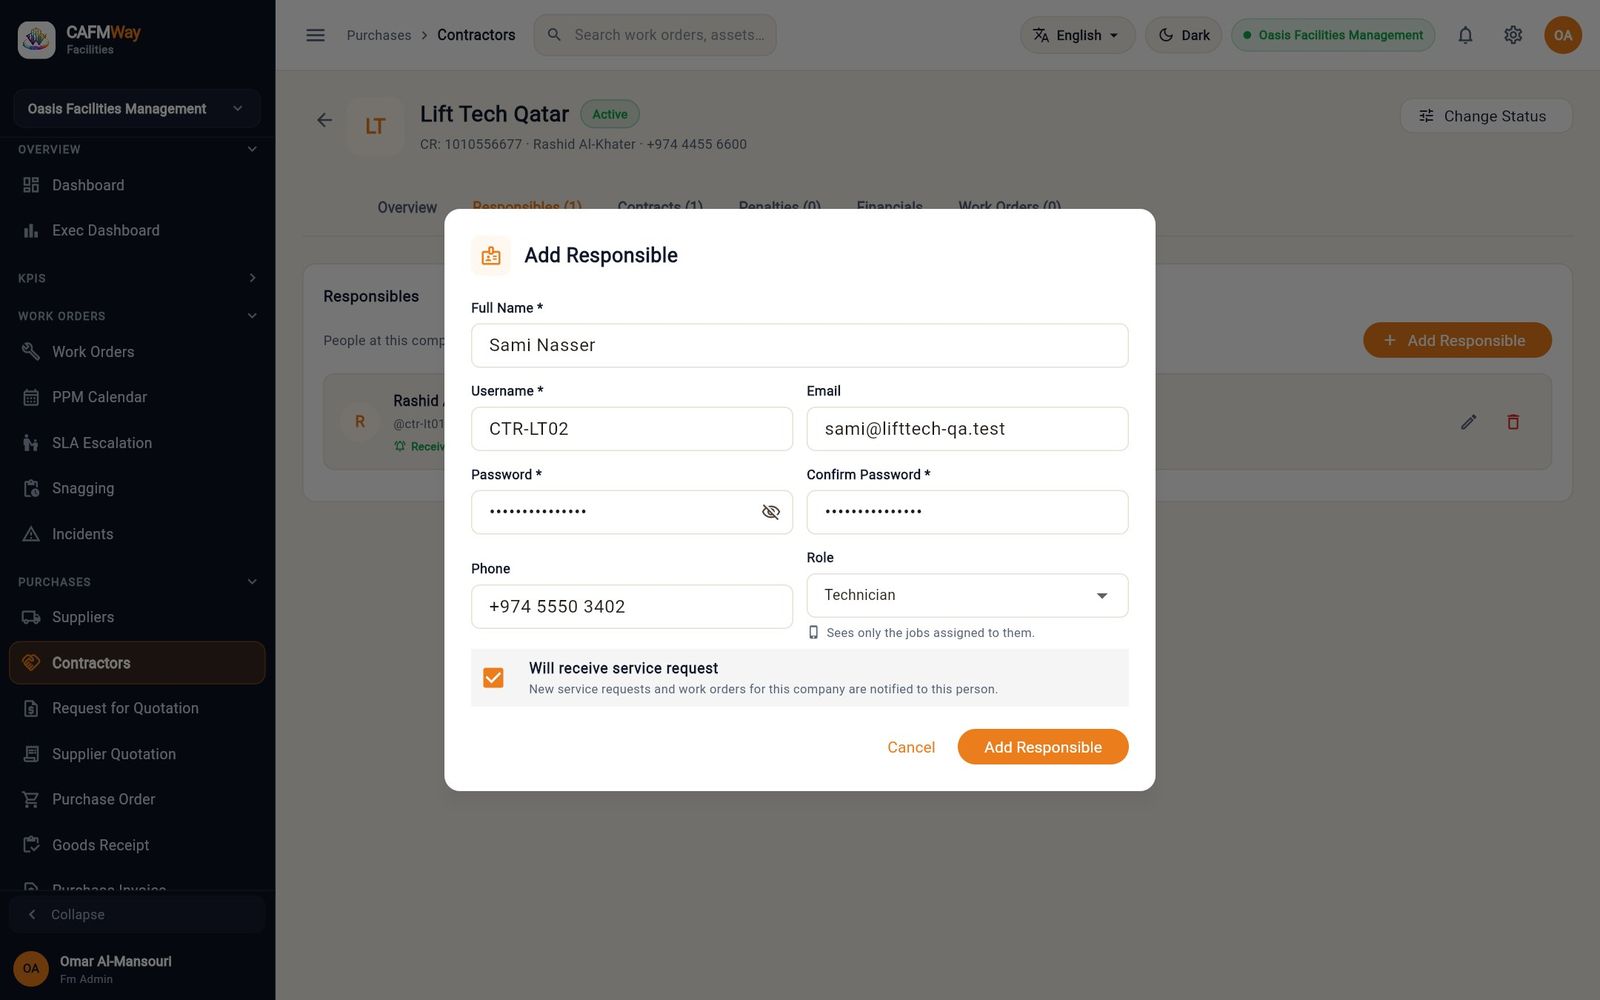
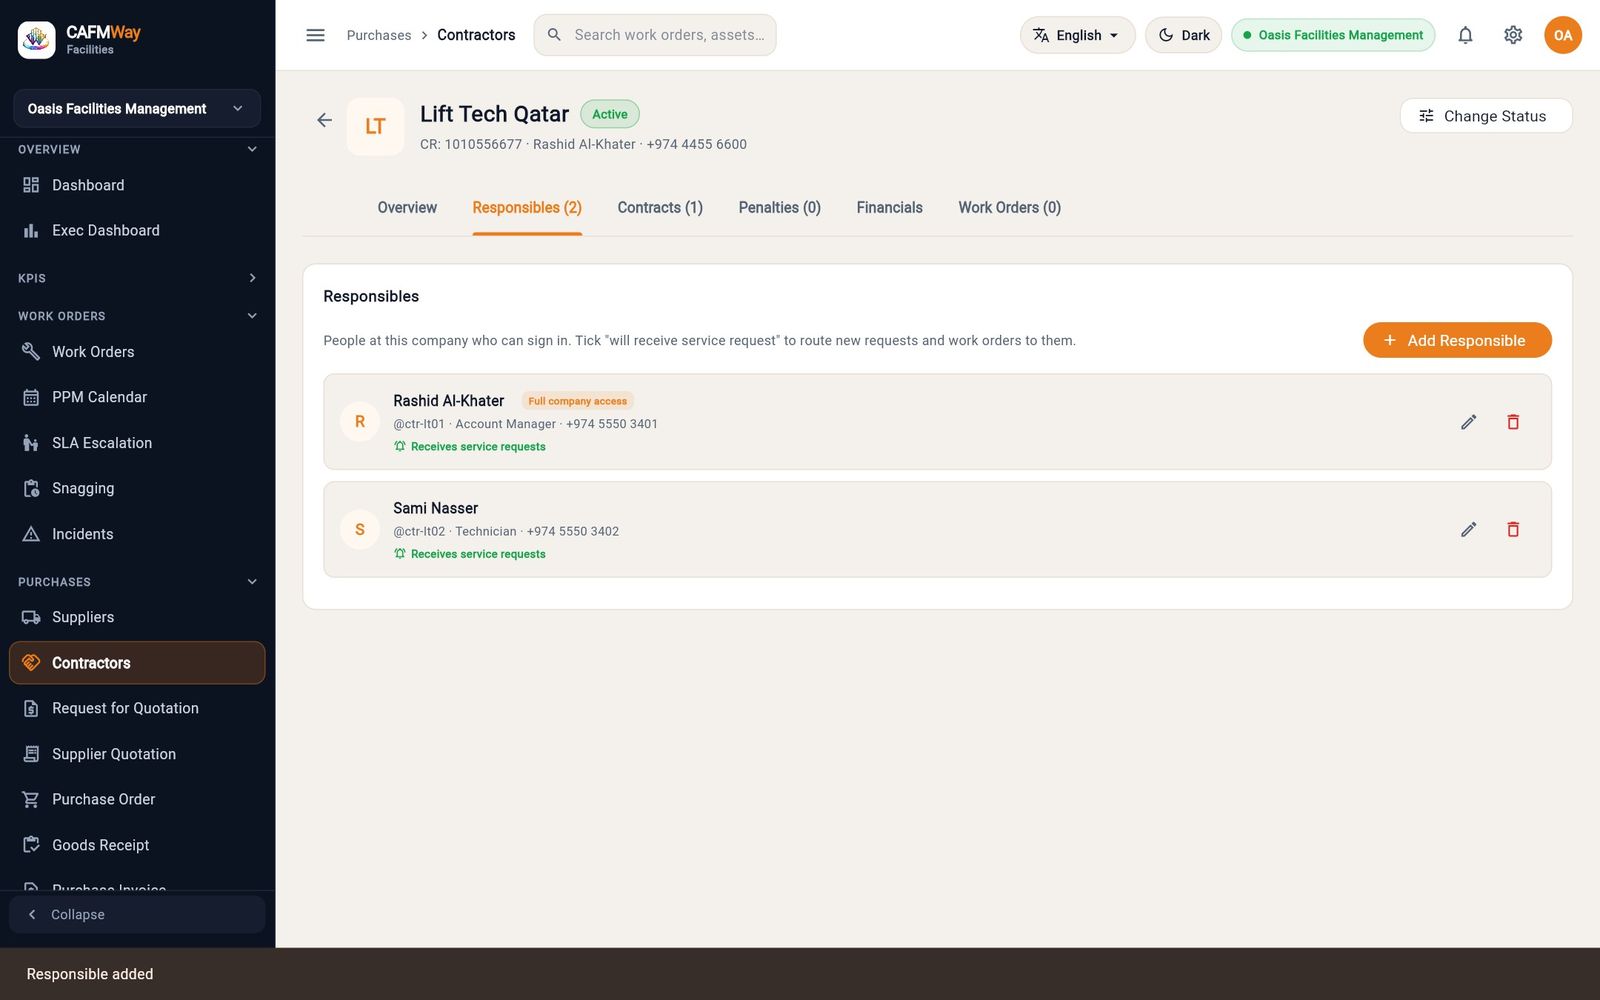
Each contractor user also appears under Users & Roles with the role Contractor and a CTR employee number, for example CTR-9129, and uses one of your subscription's user seats. To stop a person's access, edit them here or deactivate them in Users & Roles.
Work orders, helpdesk, PPM and SLA
This part covers maintenance work in the tenant web app: helpdesk tickets, work orders from creation to closure, contractor work, the SLA clock and its escalations, planned preventive maintenance (PPM), approvals, snags and incidents. It is written for helpdesk agents, supervisors, FM managers and FM administrators. Technicians and requesters do their part of the job in the mobile apps; see the Technician app guide and the Requestor app guide.
Work orders at a glance
- Who: everyone who raises, dispatches or follows maintenance work
- Where: Sidebar → WORK ORDERS → Work Orders, PPM Calendar, SLA Escalation, Snagging, Incidents; Dashboard → Quick Actions
A work order is one job for one location or asset. It can start in five places:
- a helpdesk agent raises it from a ticket or directly in the web app,
- a requester raises a request in the Requestor app (a ticket and a work order are created together),
- a PPM plan generates it on its due date,
- an incident creates it as a corrective action,
- a technician raises it in the Technician app.
Every new work order starts in Assigned, even when nobody is assigned yet. From there it moves as shown below.
flowchart TD
    N[New work order] --> G{Approval rule on?}
    G -- No --> A[Assigned]
    G -- Yes --> H[Held for approval]
    H -- Approved --> A
    H -- Rejected --> X[Cancelled]
    A --> AC[Accepted]
    AC --> IP[In Progress]
    A --> IP
    AC -- Technician declines --> R[Rejected]
    IP --> PV[Pending Verification]
    PV -- Close WO --> C[Completed]
    IP -- Close WO --> C
    IP -- Update Status --> X
C -. Reopen with Update Status .-> IP| Status on screen | Meaning | Who moves it, and where |
|---|---|---|
| Assigned | The job exists and is waiting for the technician, team or contractor. It is also the status of an unassigned job. | Created by the web wizard, the Requestor app, a PPM plan or an incident. |
| Accepted | The technician has accepted the job but not started. | The technician taps Accept in the Technician app. In the web app, Update Status. |
| In Progress | Work has started. The first start is recorded as the response time for the SLA. | The technician taps Start Work in the Technician app. In the web app, Update Status. |
| Pending Verification | The technician says the work is done and asks for it to be checked. | The technician sends the job to the supervisor in the Technician app. In the web app, Update Status. |
| Completed | The job is closed. The SLA result is fixed and contractor penalties are worked out. | Close WO in the web app, Confirm Complete in the Technician app, or Update Status. |
| Cancelled | The job will not be done. Stock held for it is released. | Update Status in the web app, or an approver rejects a held work order. |
| Rejected | The technician declined the job, with a reason. | The technician declines in the Technician app. In the web app, Update Status. |
Work order list
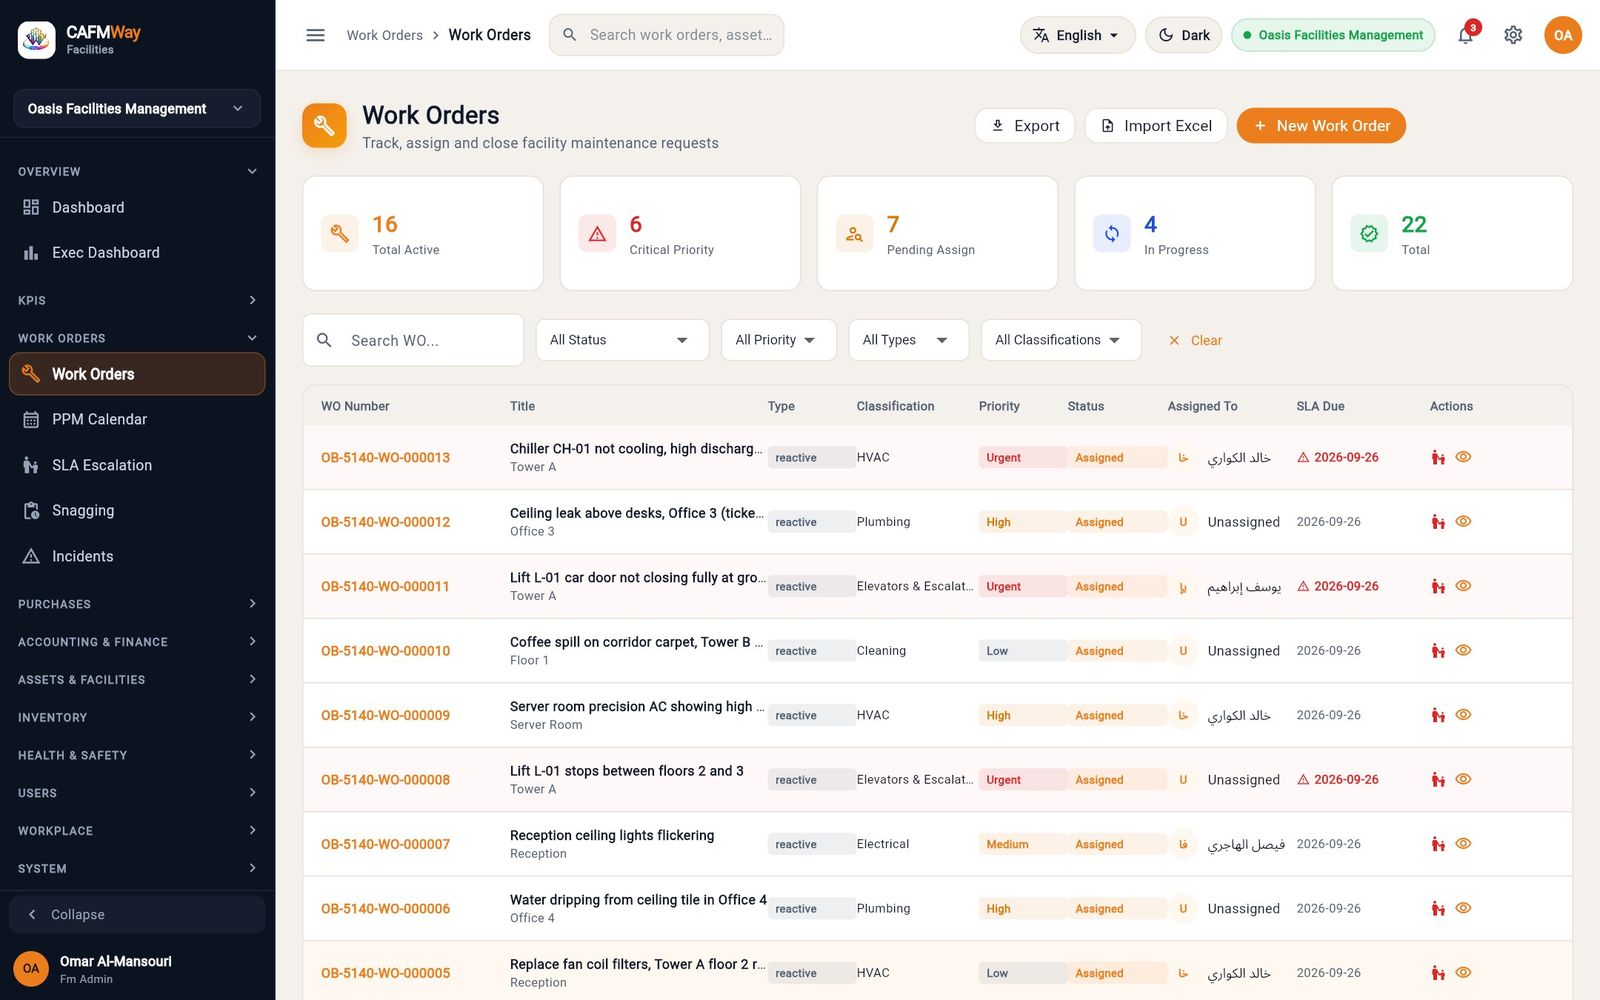
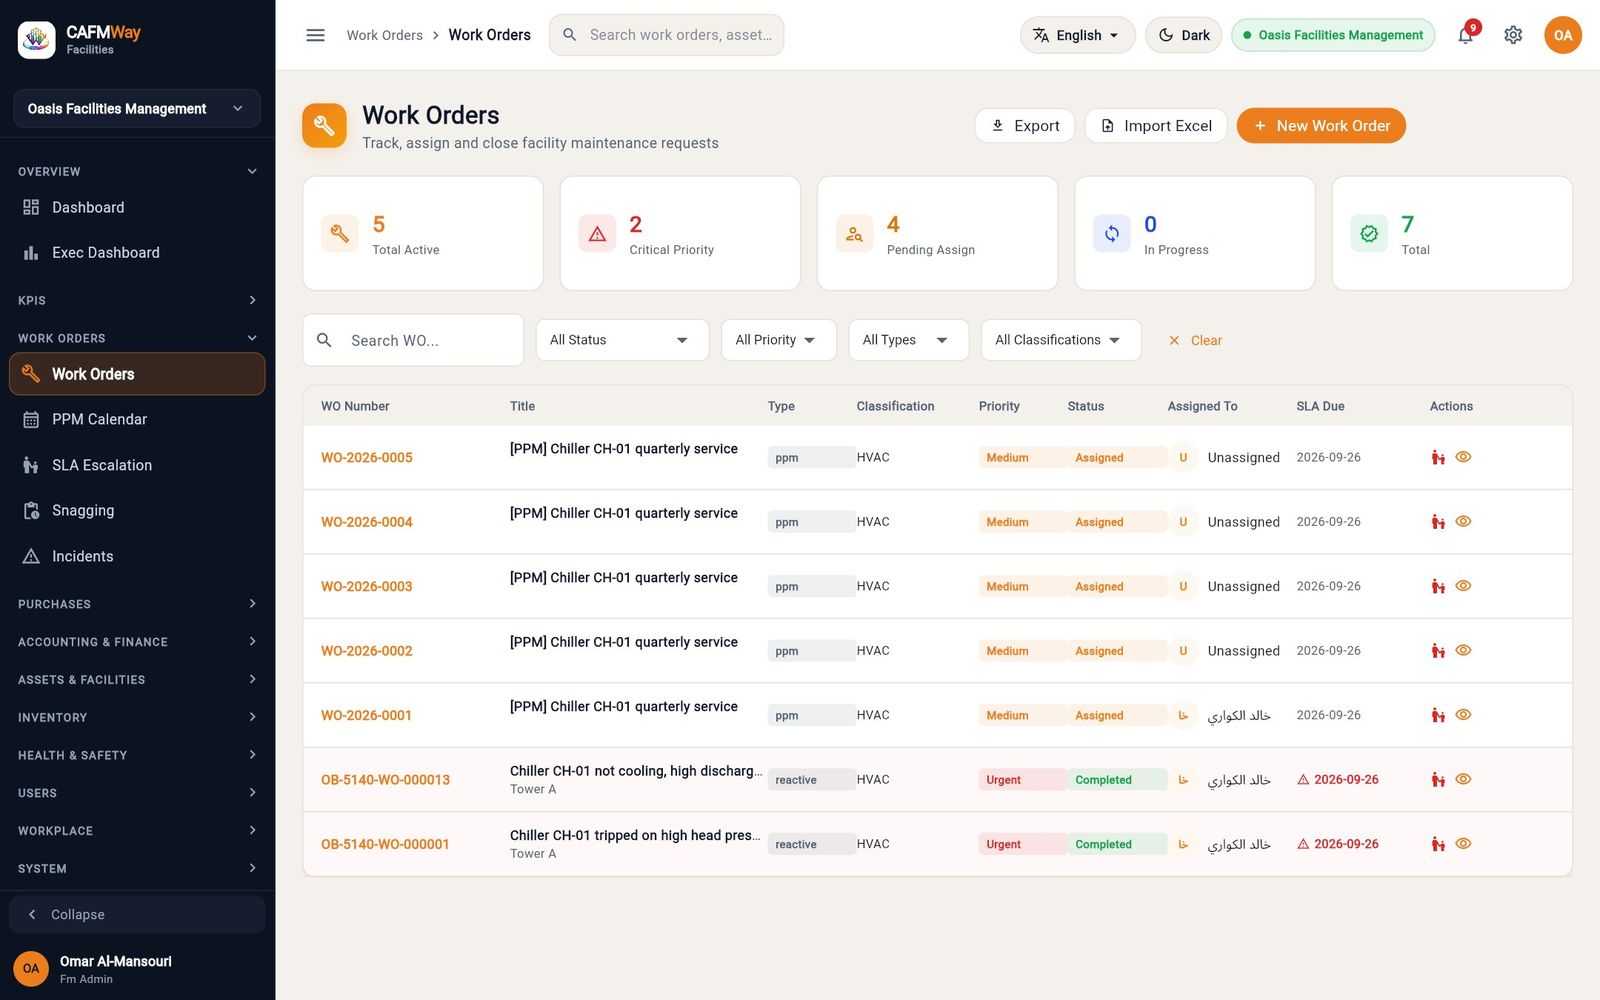
The list shows the number, title, type, classification, priority, status, assignee and SLA due date of each job. The tiles at the top count Total Active, Critical Priority, Pending Assign, In Progress and Total. Use Search WO... to find a job by number, title or location, and the status, priority and classification filters to narrow the list. Click the eye icon (View) to open a job.
Raise and triage a helpdesk ticket
- Who: Helpdesk Agent, Supervisor, FM Manager, FM Administrator
- Where: Dashboard → Quick Actions → Raise Ticket
A ticket records what an occupant reported, before anyone decides what work is needed. The helpdesk logs it, replies to the requester, raises the work order that fixes the problem and resolves the ticket when the work is done. Tickets have no sidebar entry; you reach the list from the ticket form or from global search.
Log the ticket
On the Dashboard, under Quick Actions, click Raise Ticket. The Raise New Helpdesk Ticket form opens with four steps.
On Request Details, fill Subject *, choose Category *, Priority * and Urgency, and describe the problem in Description. Click Continue.
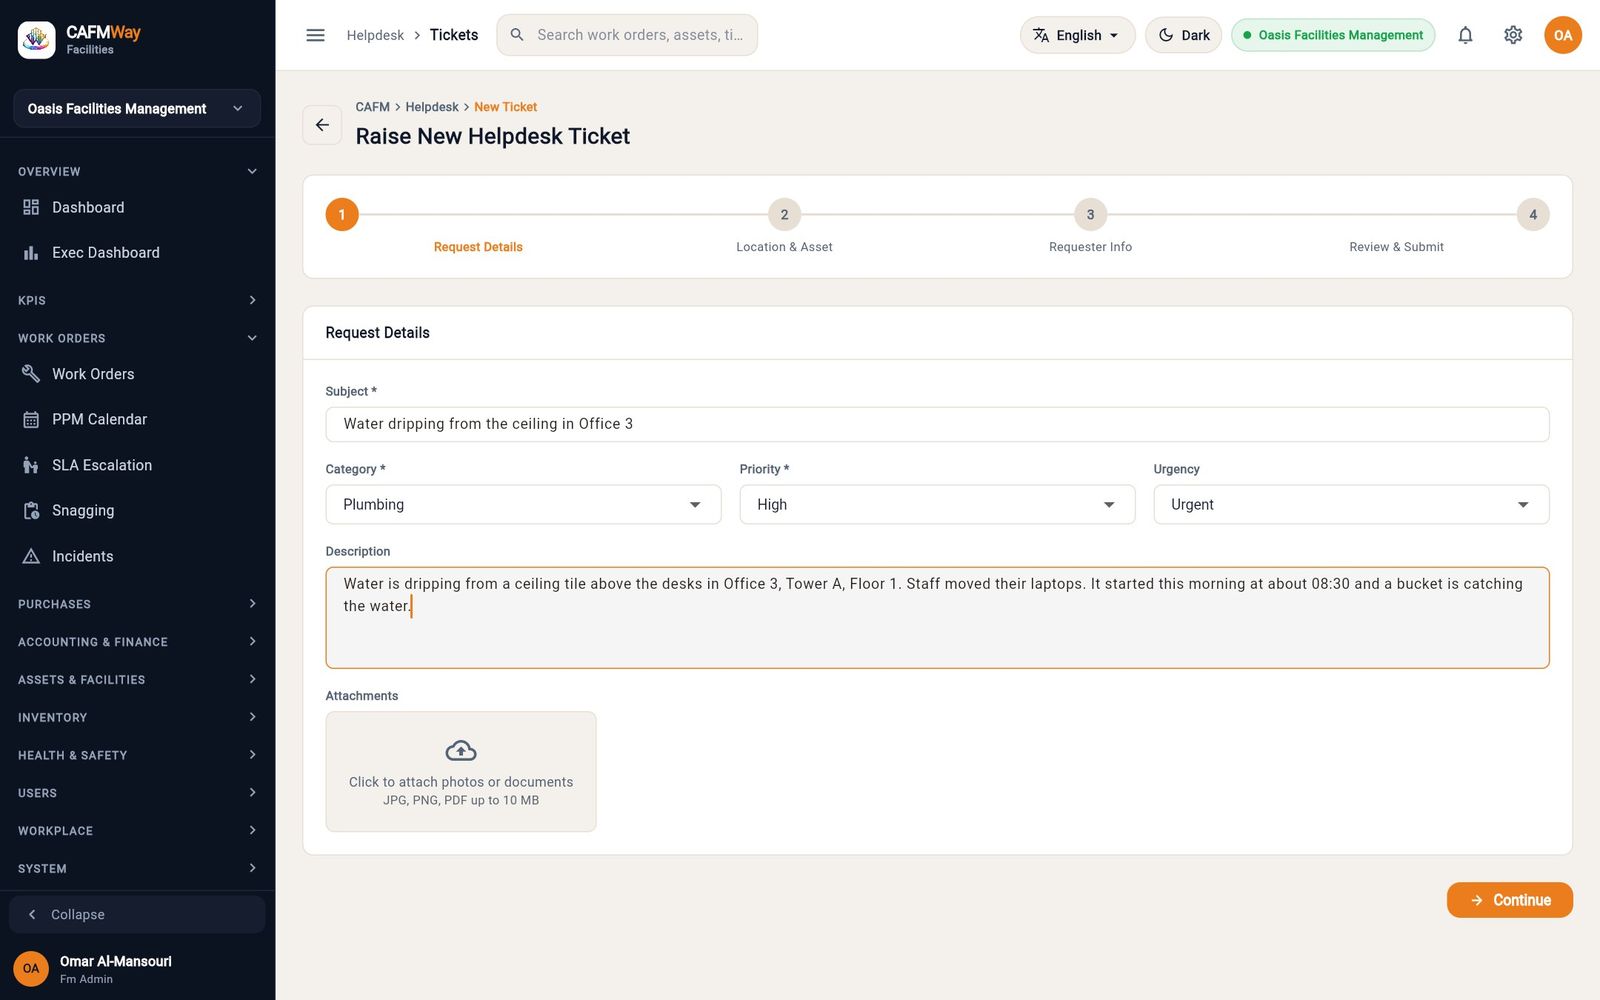
Figure 56 Step 1 of a new ticket for a ceiling leak, with category Plumbing, priority High and urgency Urgent. On Location & Asset, pick the room in Building / Floor / Zone *. If one asset is involved, type its code in Asset ID (optional) or click Scan QR. Choose the Impact / Affected Area. Click Continue.
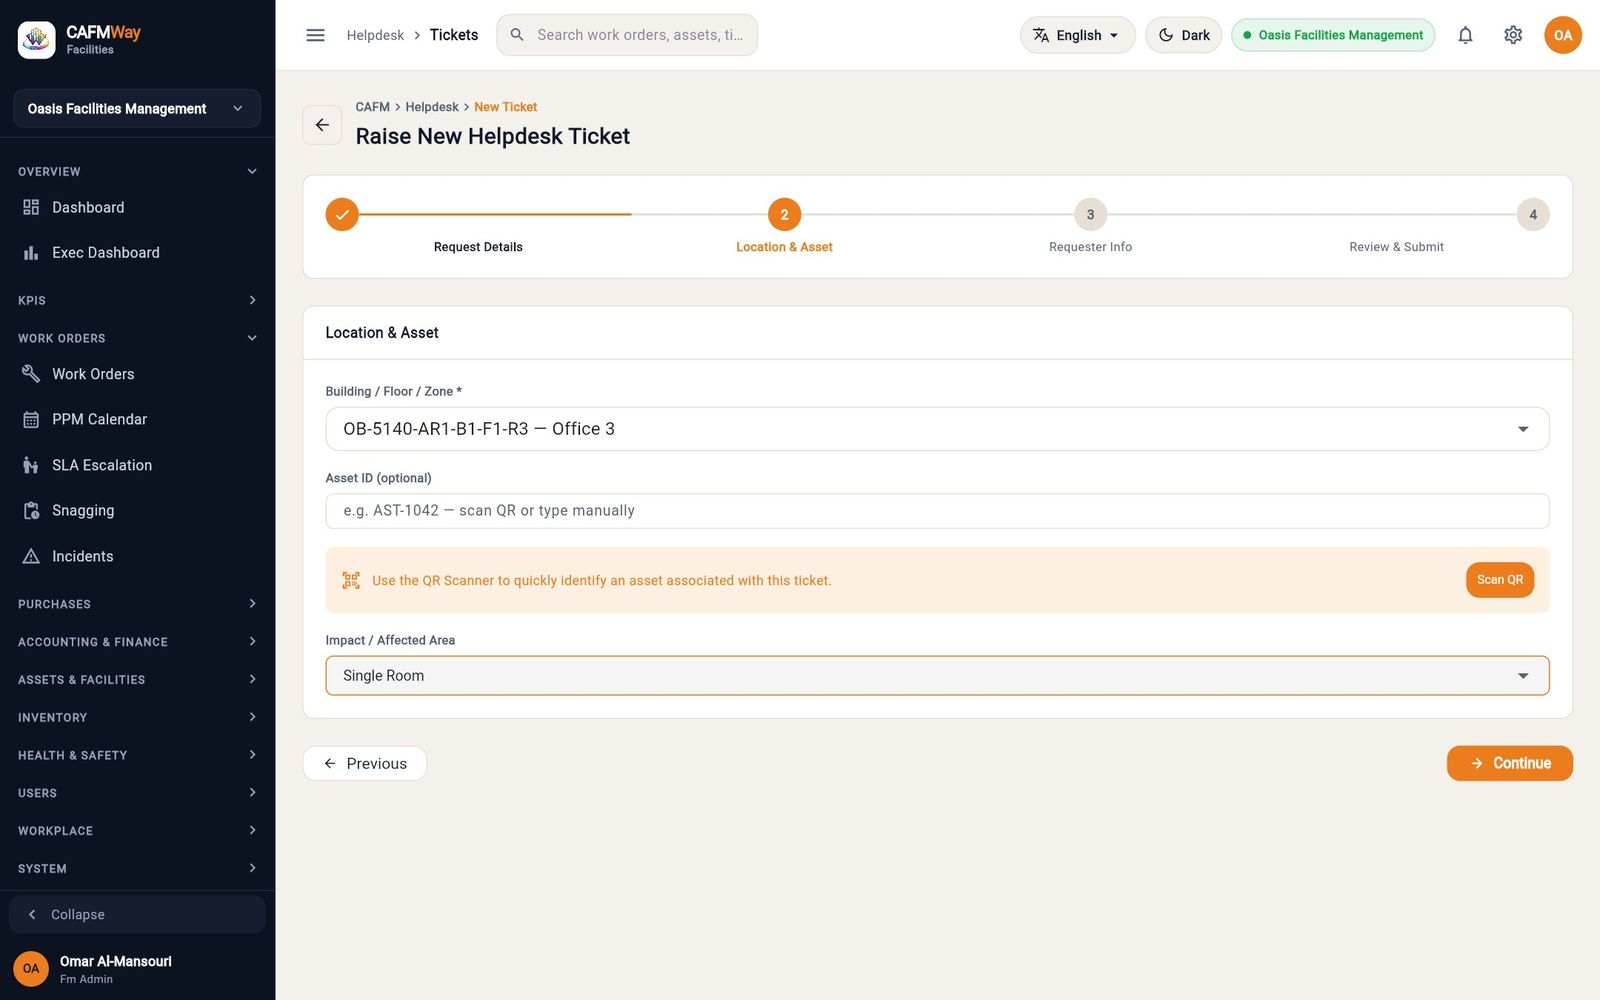
Figure 57 Step 2 with Office 3 on Tower A Floor 1 selected and the impact set to a single room. On Requester Info, enter the person who reported it: Full Name *, Email Address, Phone Number, Department and Preferred Contact Method. Click Continue.
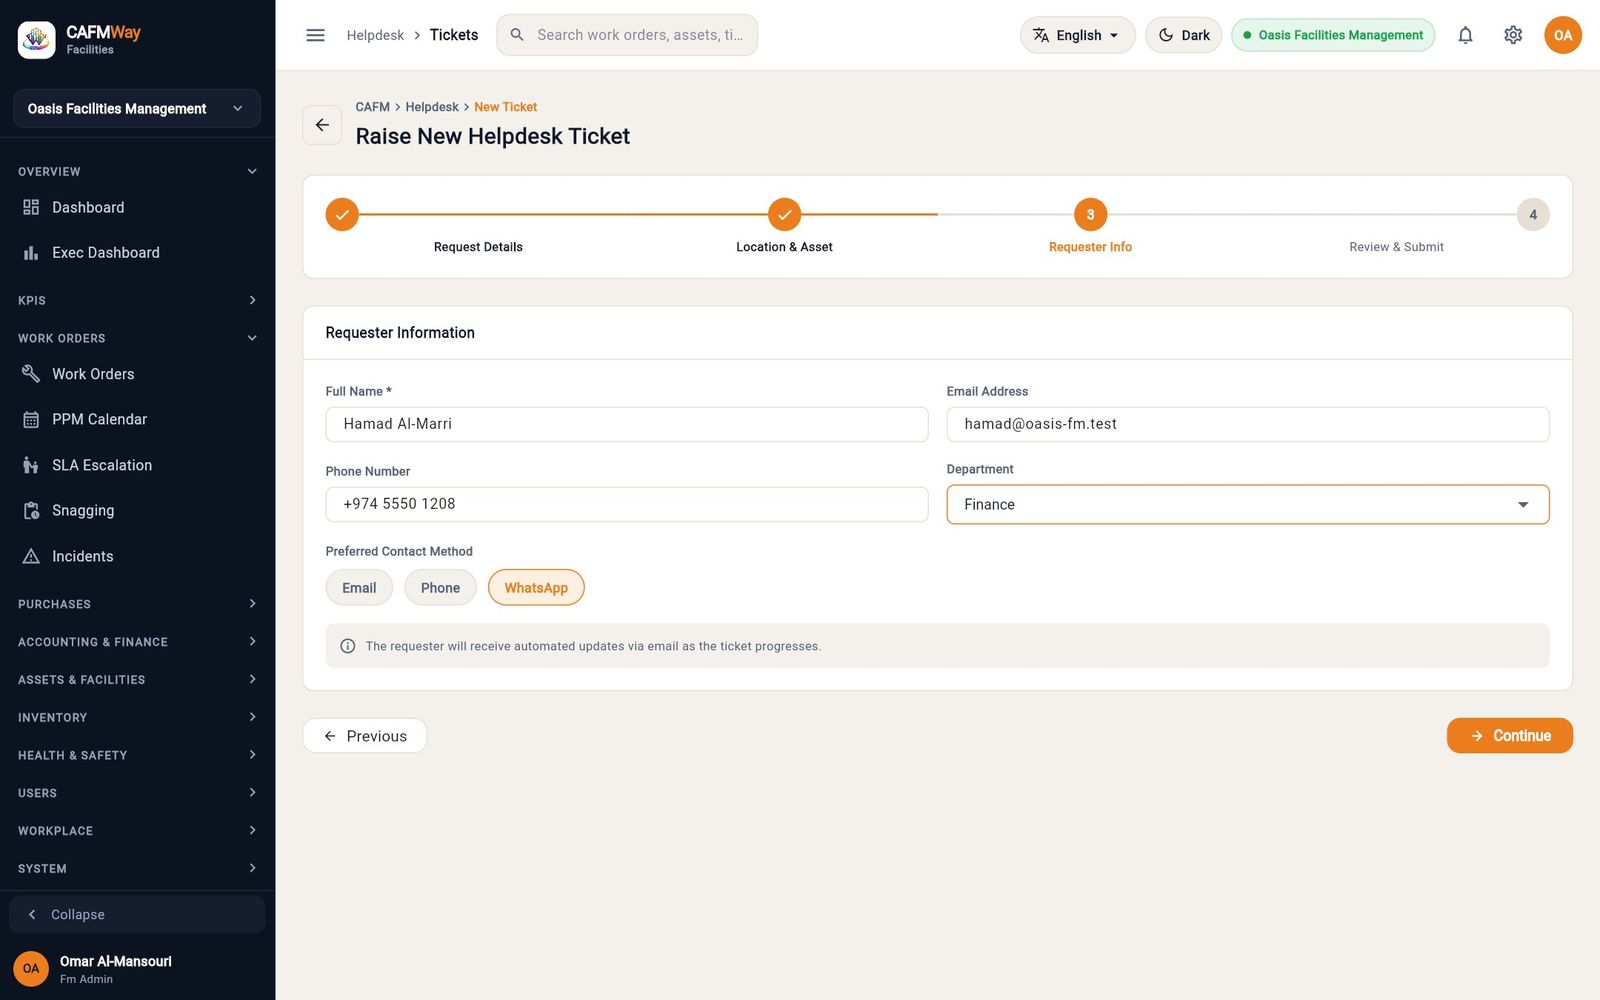
Figure 58 Step 3 with the requester Hamad Al-Marri from Finance, who prefers WhatsApp. Check the summary on Review & Submit. The Expected SLA Response box shows the response and resolution times for the chosen priority. Click Submit Ticket.
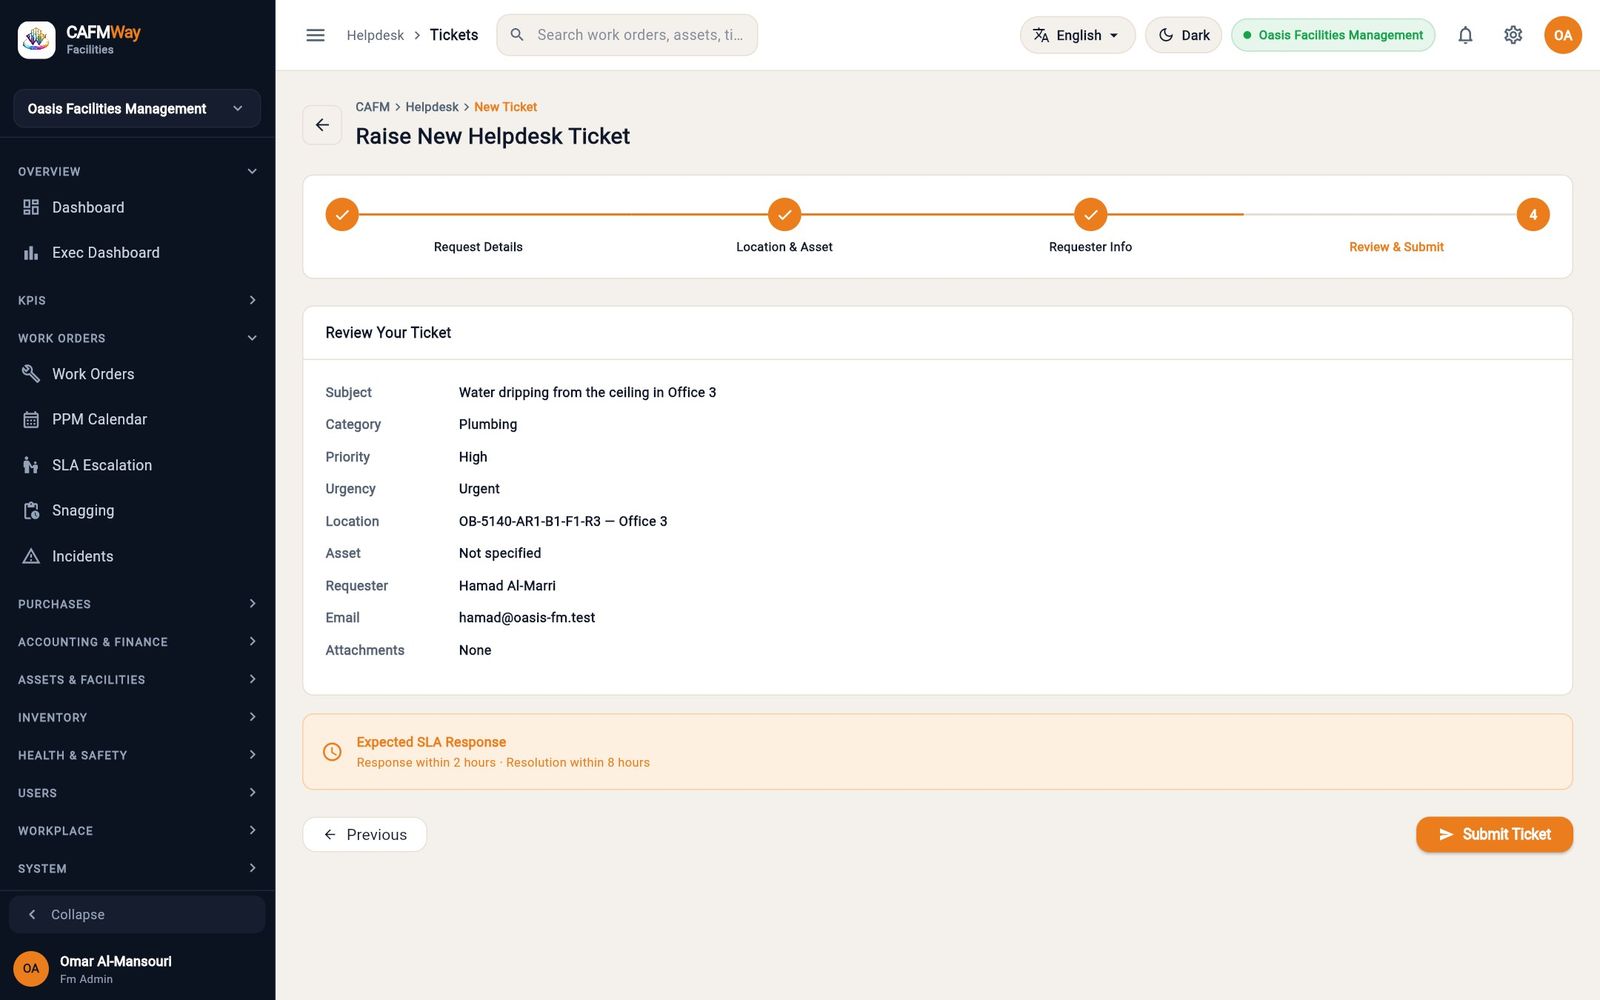
Figure 59 The review step with the expected SLA response for a High priority ticket. Ticket Submitted! shows the ticket number, for example
SR-2026-0002. Click Raise Another for the next call, or View All Tickets.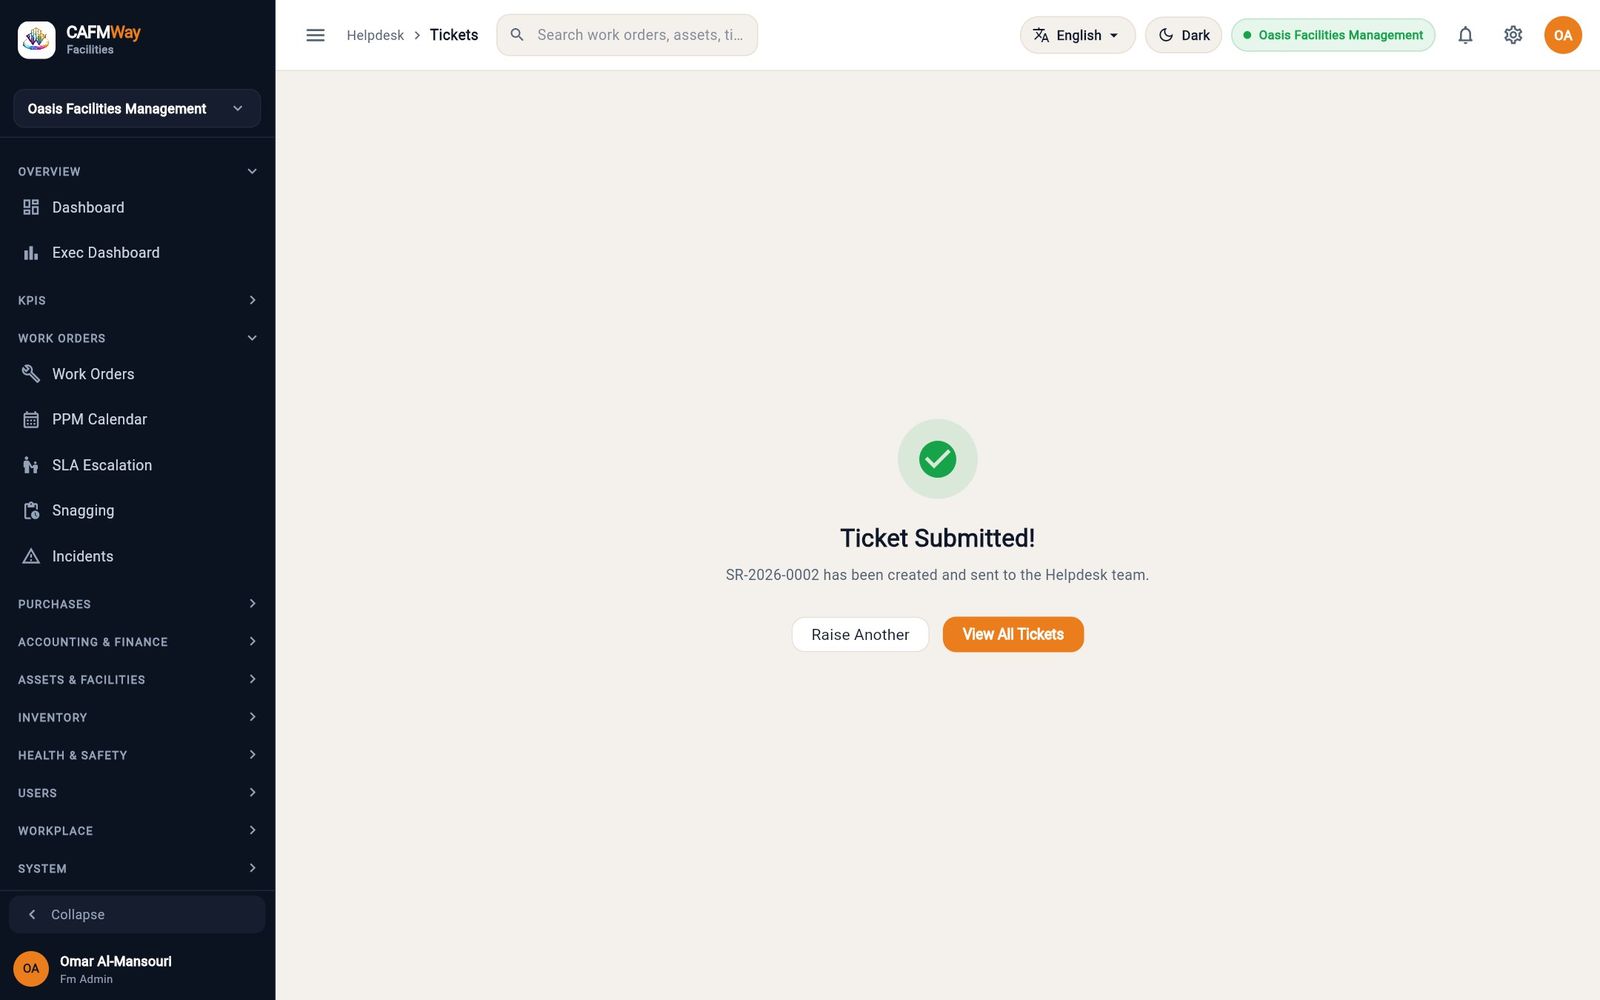
Figure 60 The confirmation after SR-2026-0002 was submitted.
The helpdesk team is notified and the requester receives a "We received your request" email.
Work the ticket
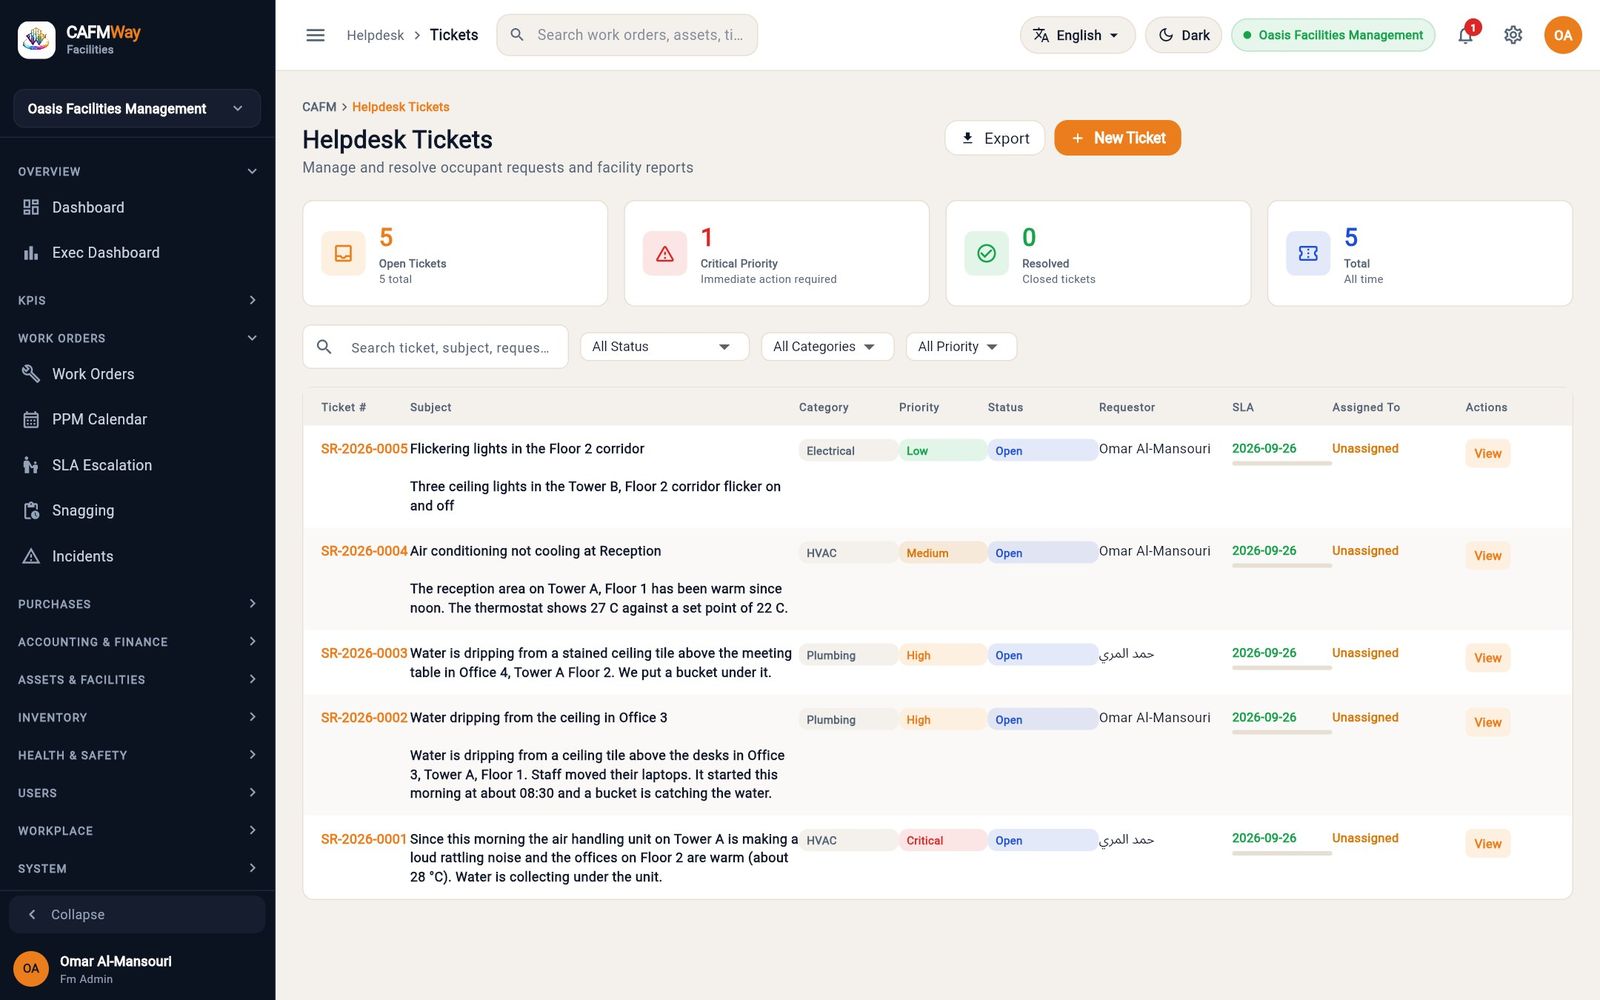
- On Helpdesk Tickets, find the ticket with Search ticket, subject, requestor… or the status, category and priority filters, and click View.
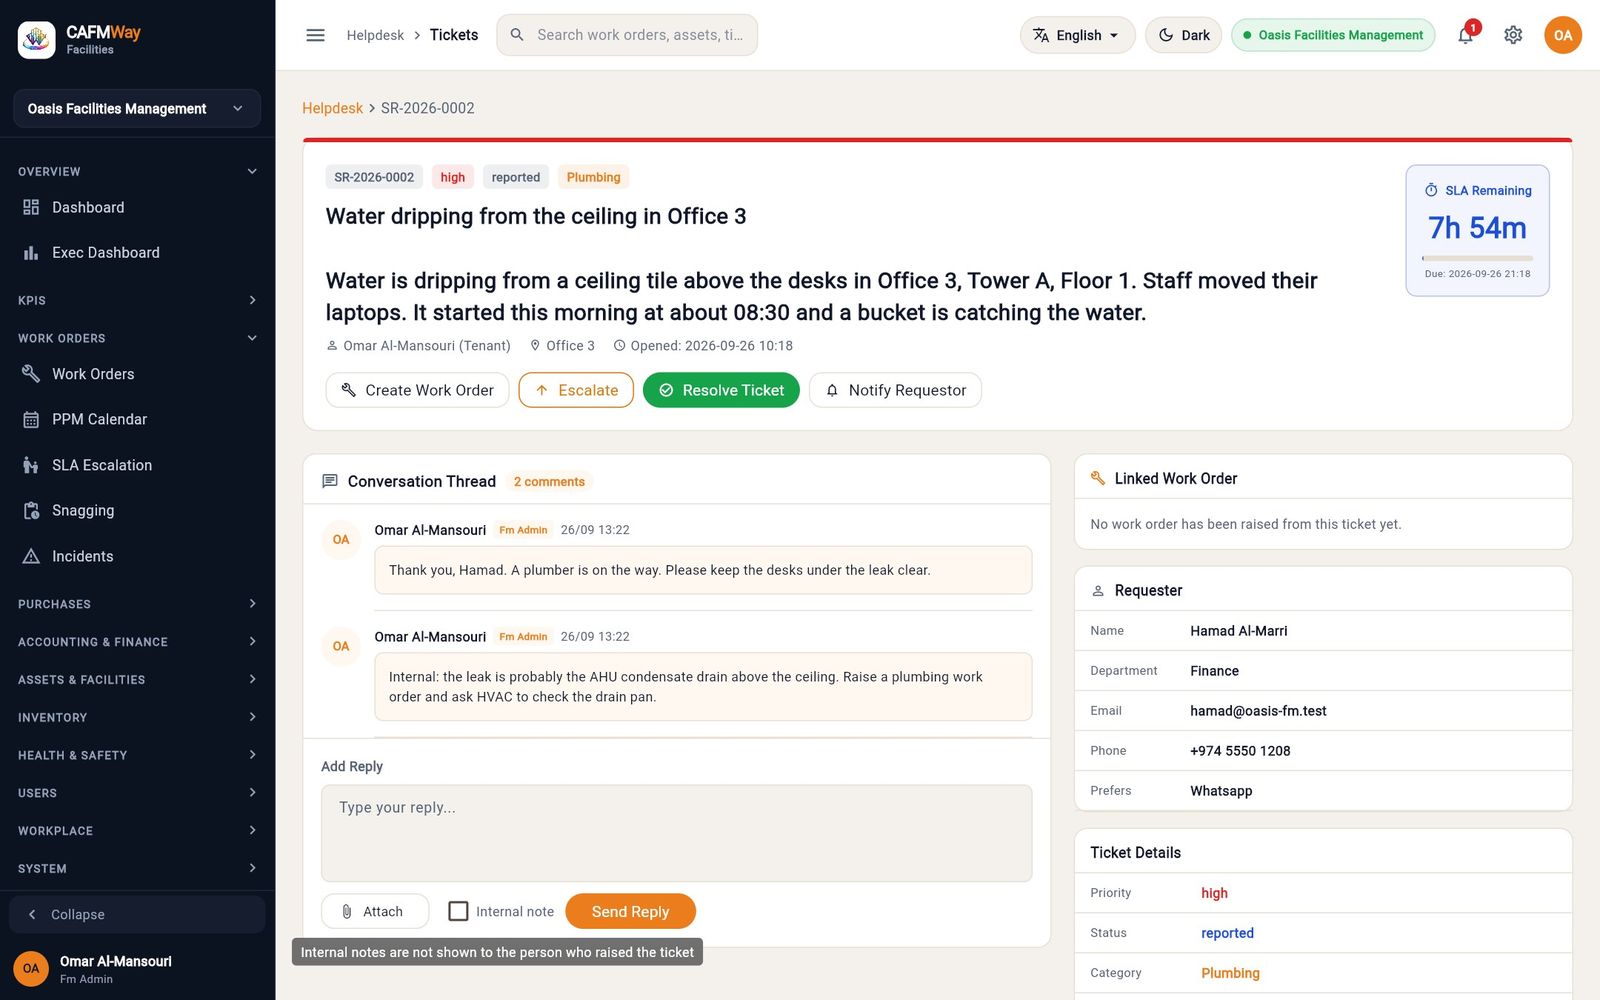
- The ticket page shows the priority, status and category, the SLA Remaining timer, the Requester card and the Conversation Thread.
- To answer the requester, type in Add Reply and click Send Reply. The reply appears in the thread and in the requester's app.
- To leave a note for colleagues only, tick Internal note before you click Send Reply. Internal notes are marked INTERNAL and are hidden from the person who raised the ticket.
Raise the work order
- On the ticket page, click Create Work Order. The work order wizard opens empty.
- Complete the wizard as described in "Create a work order". Put the ticket number in the title or description, for example
Ceiling leak above desks, Office 3 (ticket SR-2026-0002), so the two can be found together. - After the work order is created you return to the ticket. Add a reply with the work order number, for example "Work order OB-5140-WO-000012 has been raised for the Plumbing Team."
Resolve the ticket
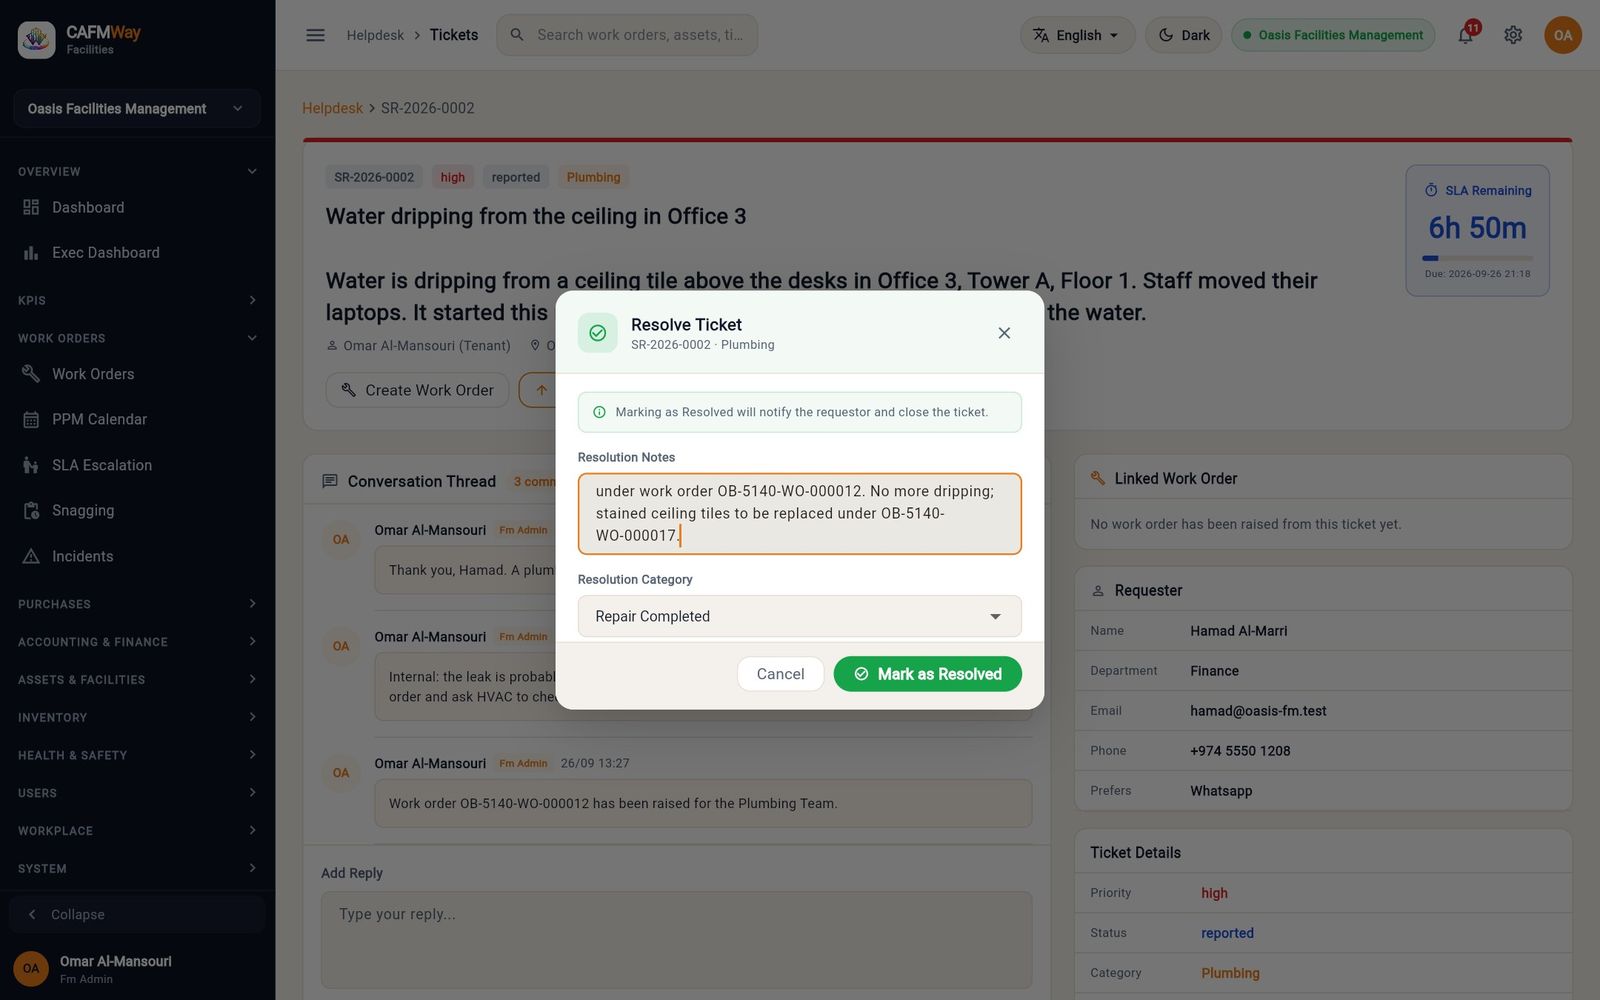
- When the work order is completed, open the ticket and click Resolve Ticket.
- Describe the fix in Resolution Notes and choose a Resolution Category: Repair Completed, Replaced Equipment, No Issue Found, User Training or External Contractor.
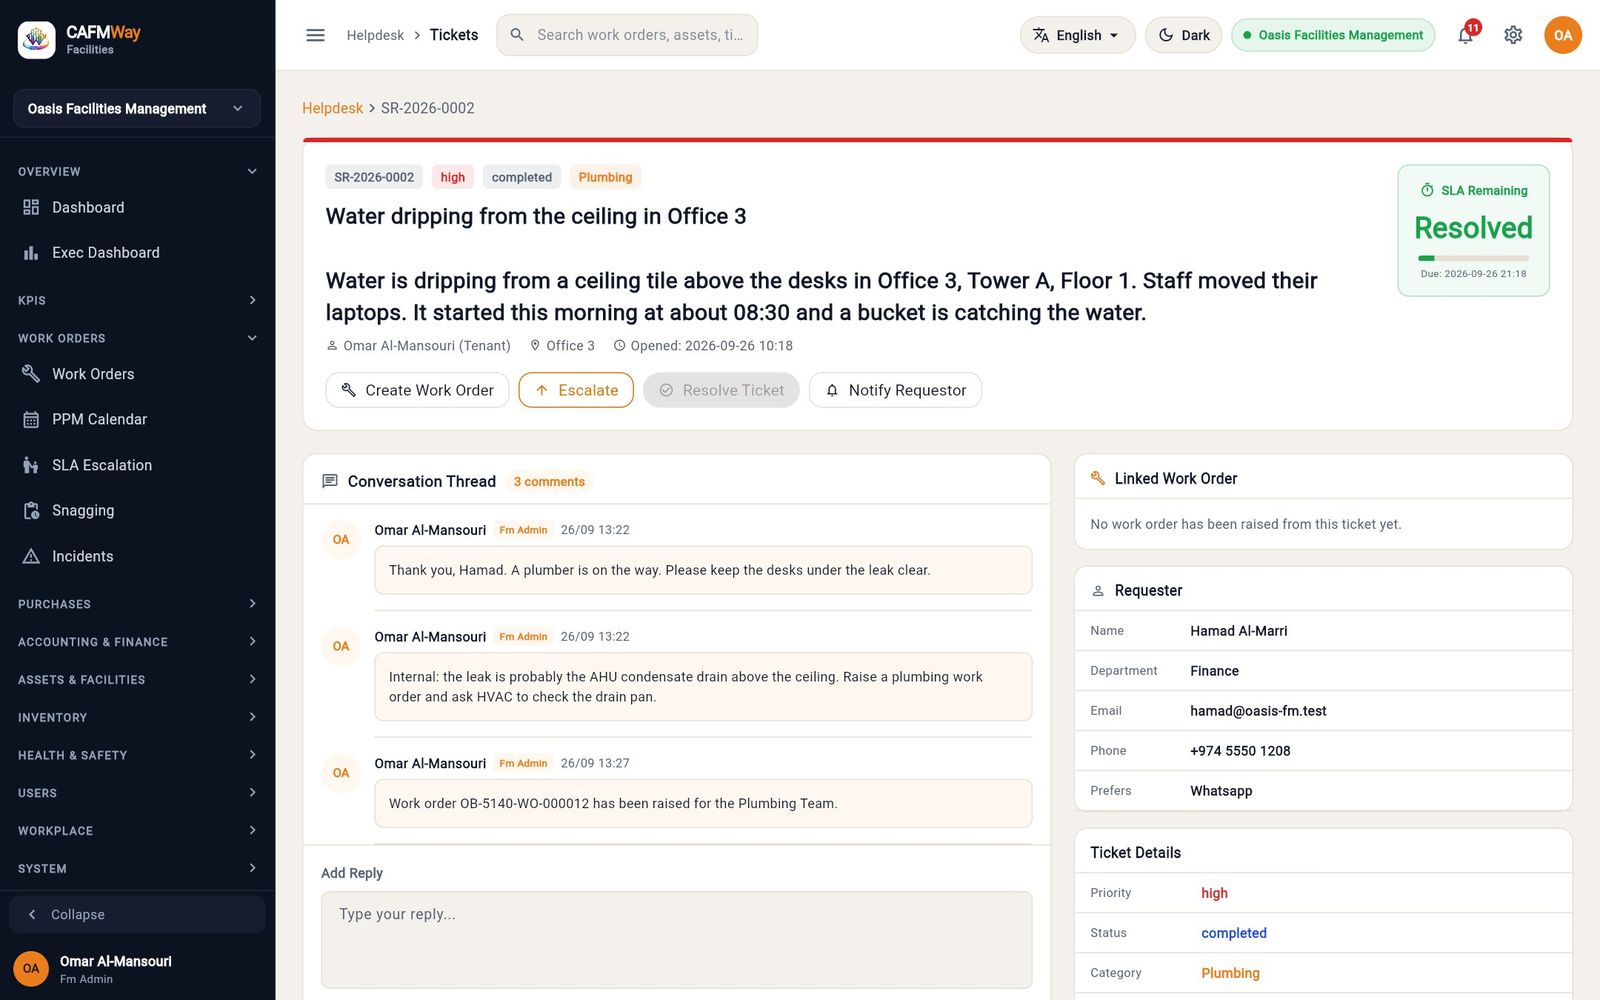
- Click Mark as Resolved. The ticket becomes Resolved, the SLA box shows Resolved, and the requester is notified by email and can rate the service in the Requestor app.
Create a work order
- Who: anyone with the Work Order Create permission (Helpdesk Agent, Supervisor, FM Manager, FM Administrator)
- Where: Sidebar → WORK ORDERS → Work Orders → New Work Order, or Dashboard → Quick Actions → New Work Order
The wizard has four steps: Basic Info, Assignment, Schedule and Review. The example raises a job on the Tower A chiller.
Step 1: Basic Information
Click New Work Order. The Create Work Order wizard opens.
Click Scan / Lookup in the Scan Asset Or Location QR box. In the dialog, scan the asset's QR label, type its code and click Lookup, or pick it from the Assets or Locations tab.
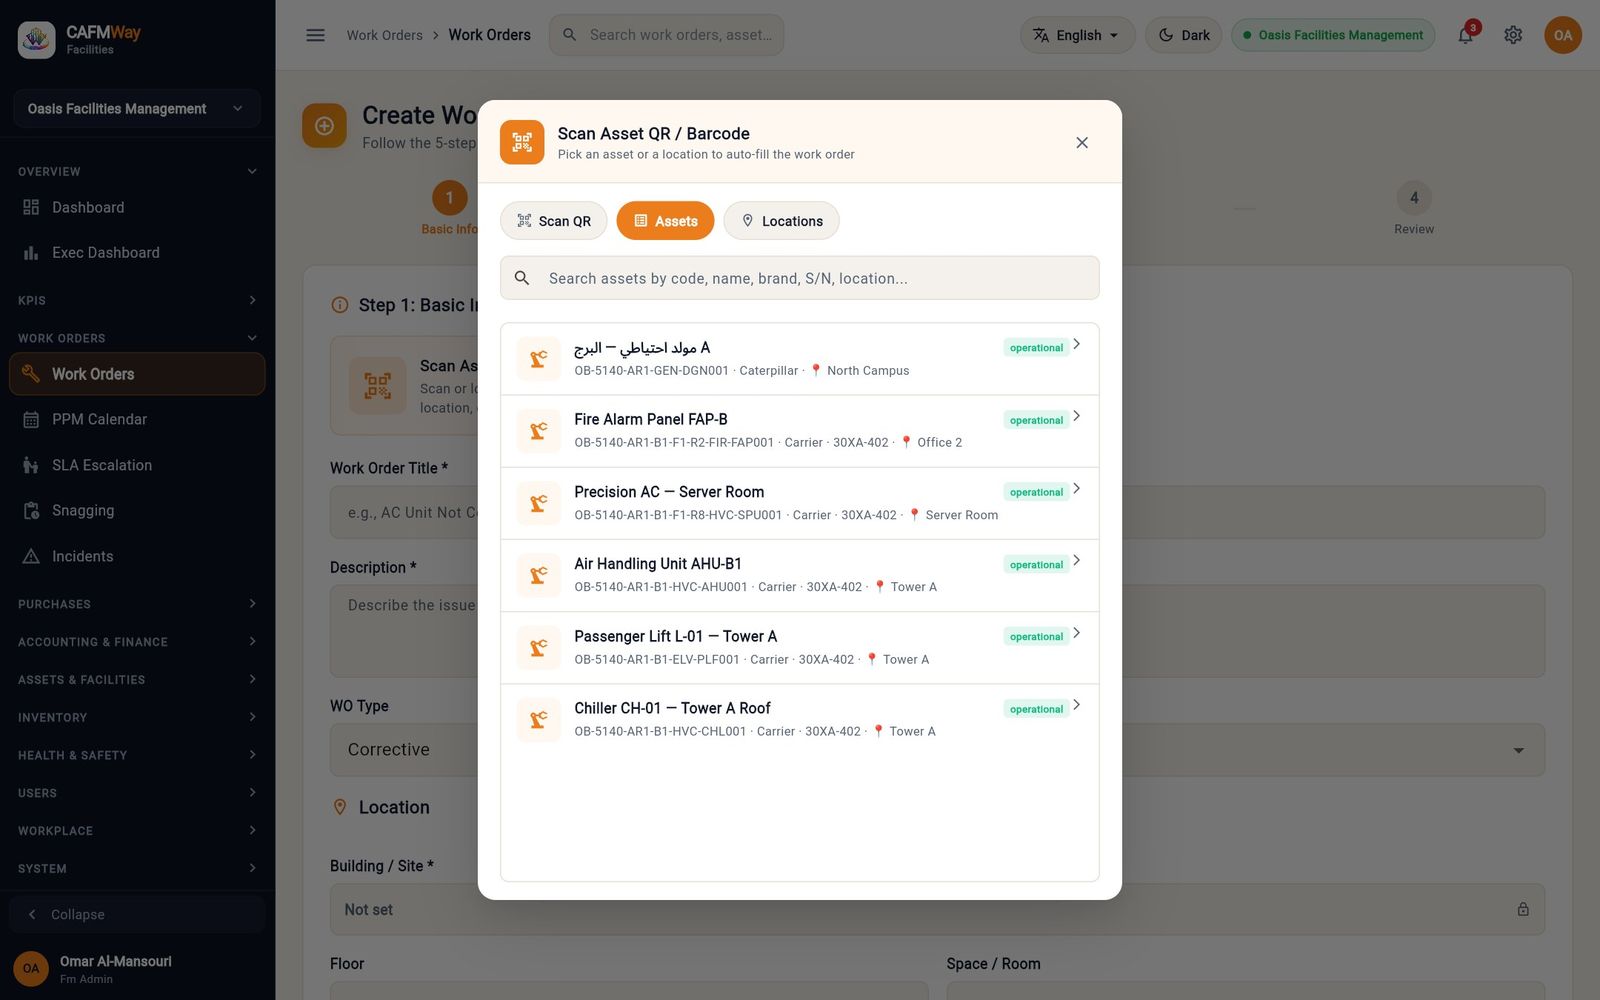
Figure 65 The asset picker with the Tower A assets, including Chiller CH-01 on the roof. Picking an asset fills the title, description, location and priority for you, and shows ASSET SCANNED with the asset code. Picking a location shows LOCATION SELECTED and a "Service Required" title. Click Change to pick again.
Rewrite Work Order Title * and Description * so the technician knows what to do.
Choose the WO Type: Corrective, Preventive, Emergency or Inspection.
Choose the Priority: Low, Medium, High or Critical. Critical is shown as Urgent on the list.
The Location fields (Building / Site *, Floor, Space / Room, GPS / QR Tag) are filled from the asset or location and cannot be typed in.
Click Next Step.
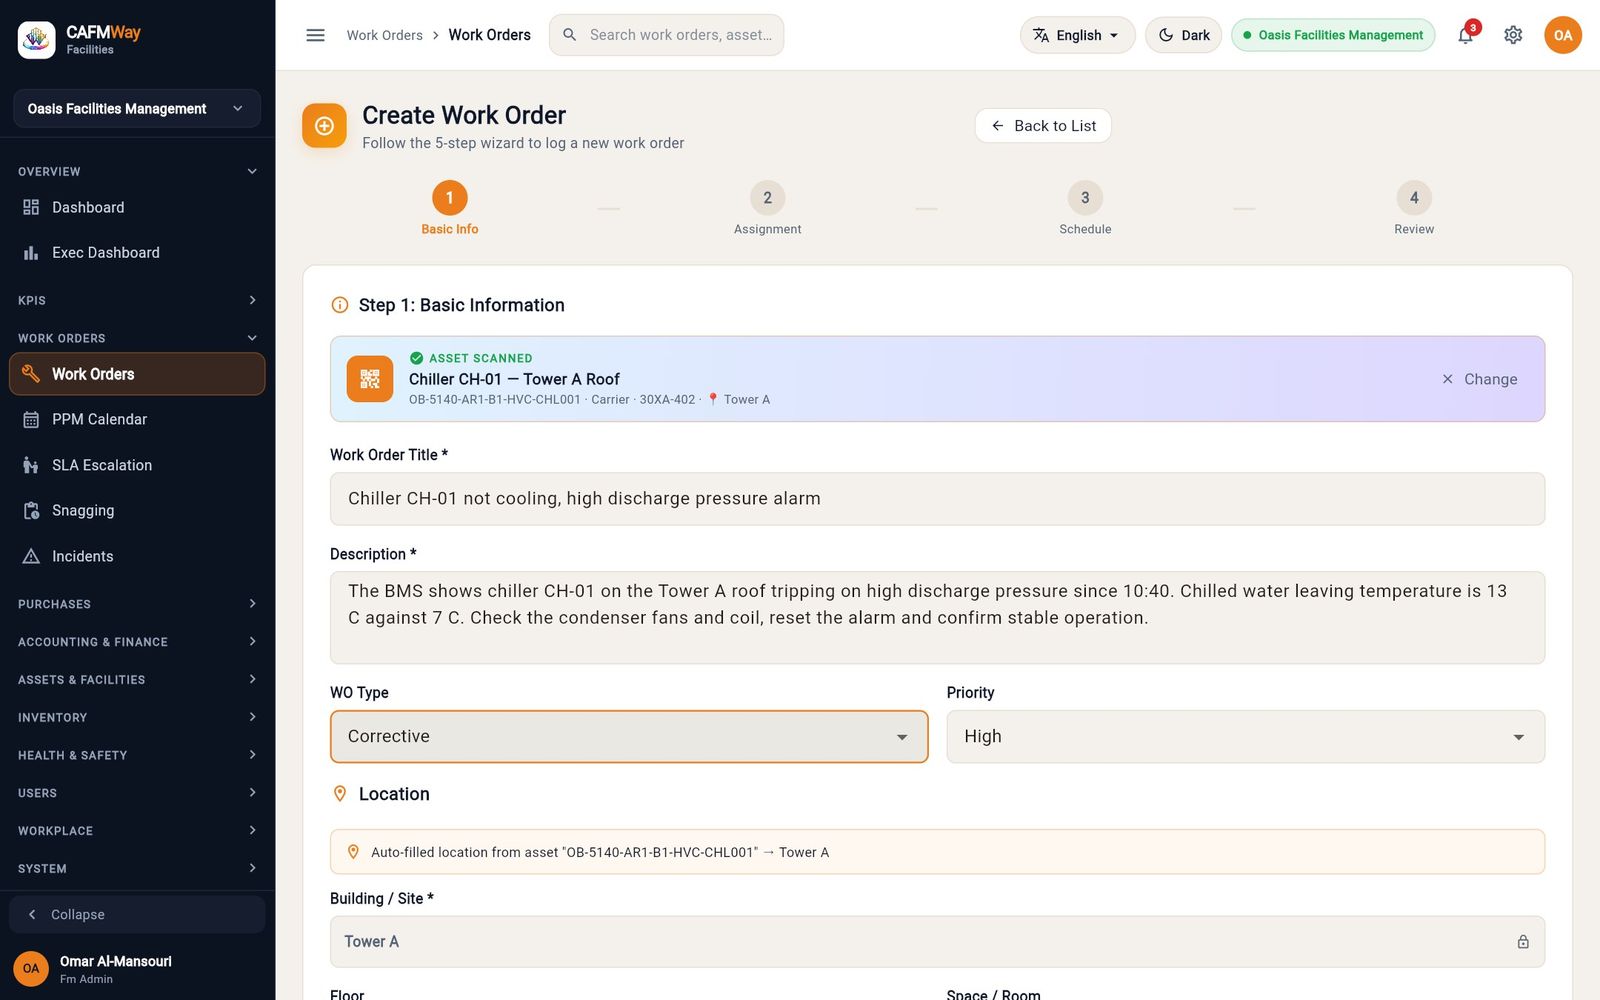
| Field | What it does |
|---|---|
| Work Order Title * | Short name of the job, shown on every list. Required. |
| Description * | What is wrong and what to do. Required. |
| WO Type | Corrective and Emergency are saved as corrective work, Preventive as PPM work, Inspection as an inspection. |
| Priority | Sets the SLA targets (see "SLA targets, holds and breaches"). |
| Building / Site *, Floor, Space / Room | Come from the scanned asset or picked location. A job needs one of them. |
| GPS / QR Tag | The code of the asset or location. |
| Attachments | Not available yet. Add photos on the Before & After tab after the job is created. |
Step 2: Assignment
The category and sub-category decide who may do the job. Each sub-category has a target that is shown as a chip next to Assign To:
| Chip | Who is offered in Assign To |
|---|---|
| Local Team | Your own maintenance teams for that category and their members. A person without a skill record for the category is marked "· no skill record". |
| Contract | Active contractor companies that cover the category. |
| Both | Teams, technicians and contractors. |
The target is set in Organisation & SLA. A live contract that covers the category overrides it: while the contract runs, the chip reads Contract, and it returns to the category's own setting when the contract ends.
Choose the Category / Trade *, for example HVAC.
Choose the Sub-category, for example No cooling. The chip and the list in Assign To update.
Open Assign To and pick a team or a person. The green note under the fields says how many qualified technicians and teams can take the sub-category.
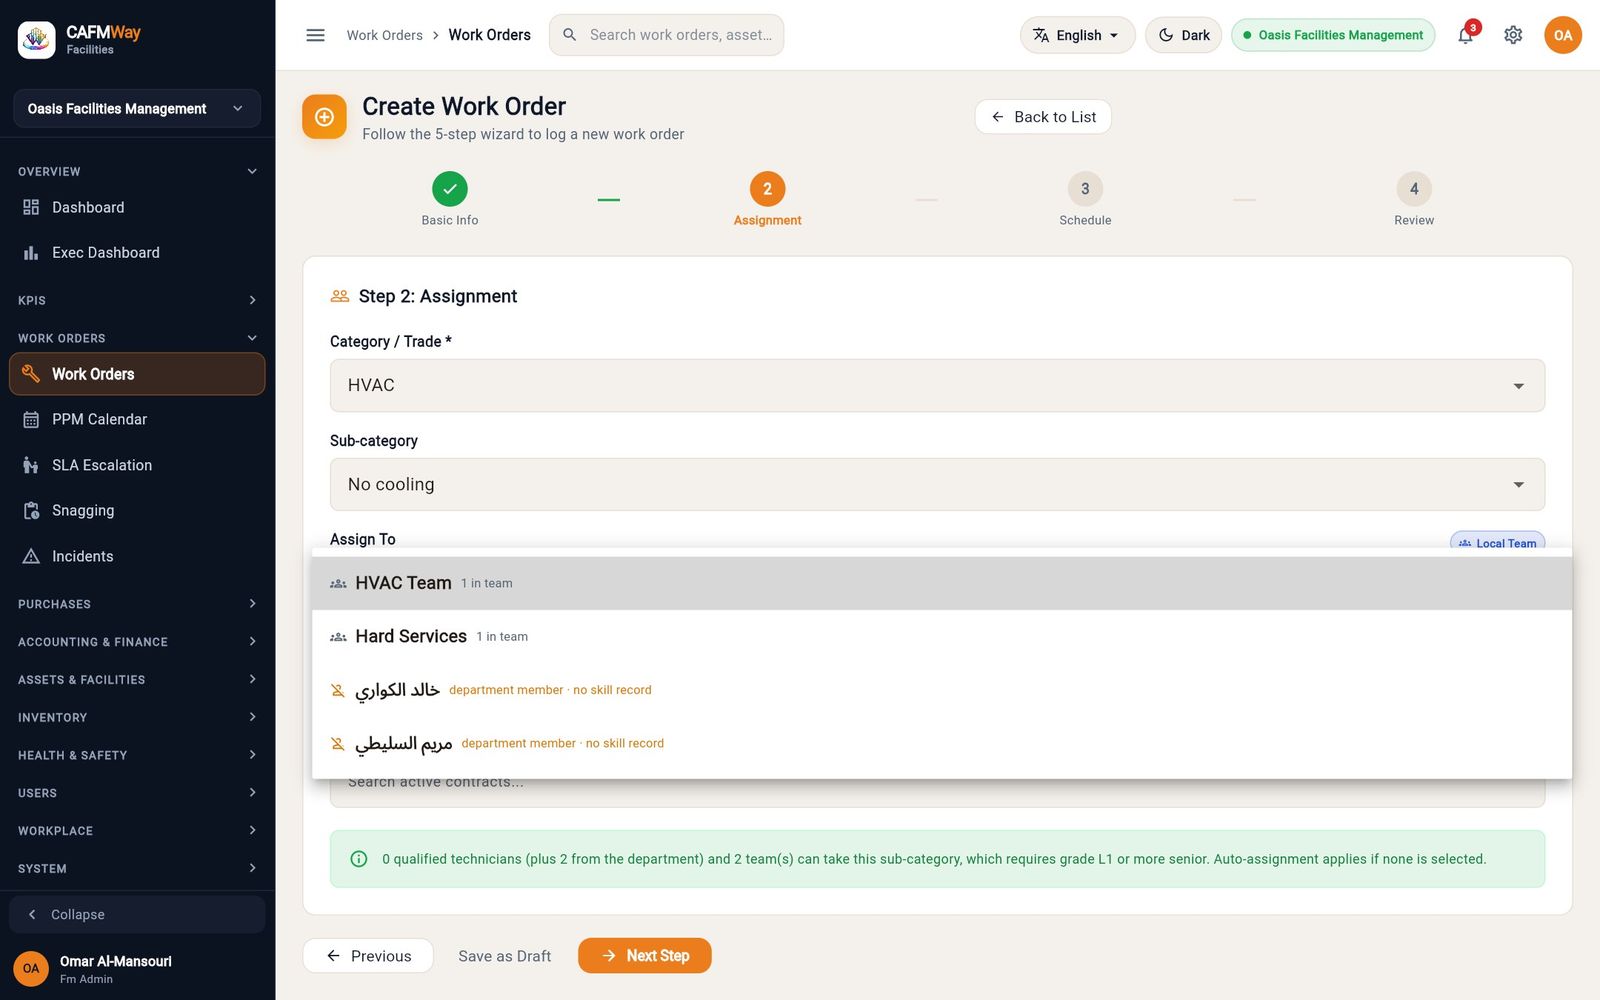
Figure 67 The Assign To list for HVAC, No cooling: the HVAC Team, Hard Services and two department members. Leave Assign To empty to let the system choose: it picks a technician with a skill for the category who has the fewest open jobs. If nobody qualifies, the job waits unassigned for a supervisor.
Click Next Step.
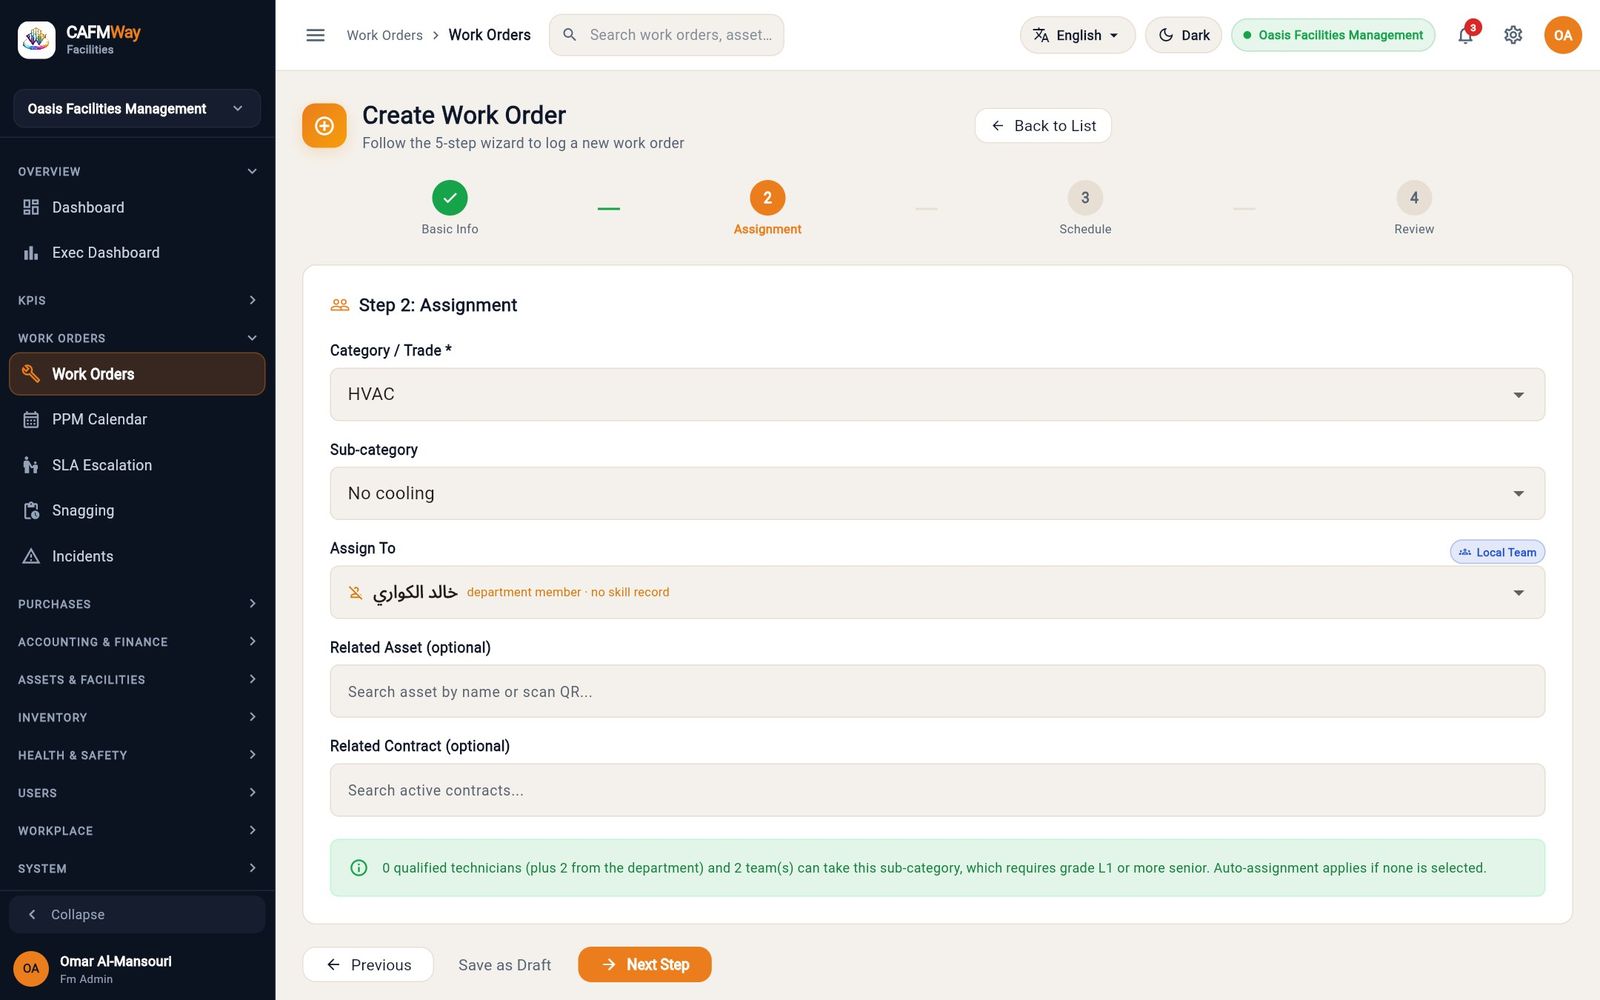
Step 3: Schedule & SLA
- Set Due Date *, the day the work is planned for.
- Estimated Duration shows the time from the sub-category's standard task, for example "1.5h on site".
- SLA Profile and SLA Timeline Preview are for information. The real targets come from the priority (and, for contractors, from the contract's SLA rule).
- Click Next Step.
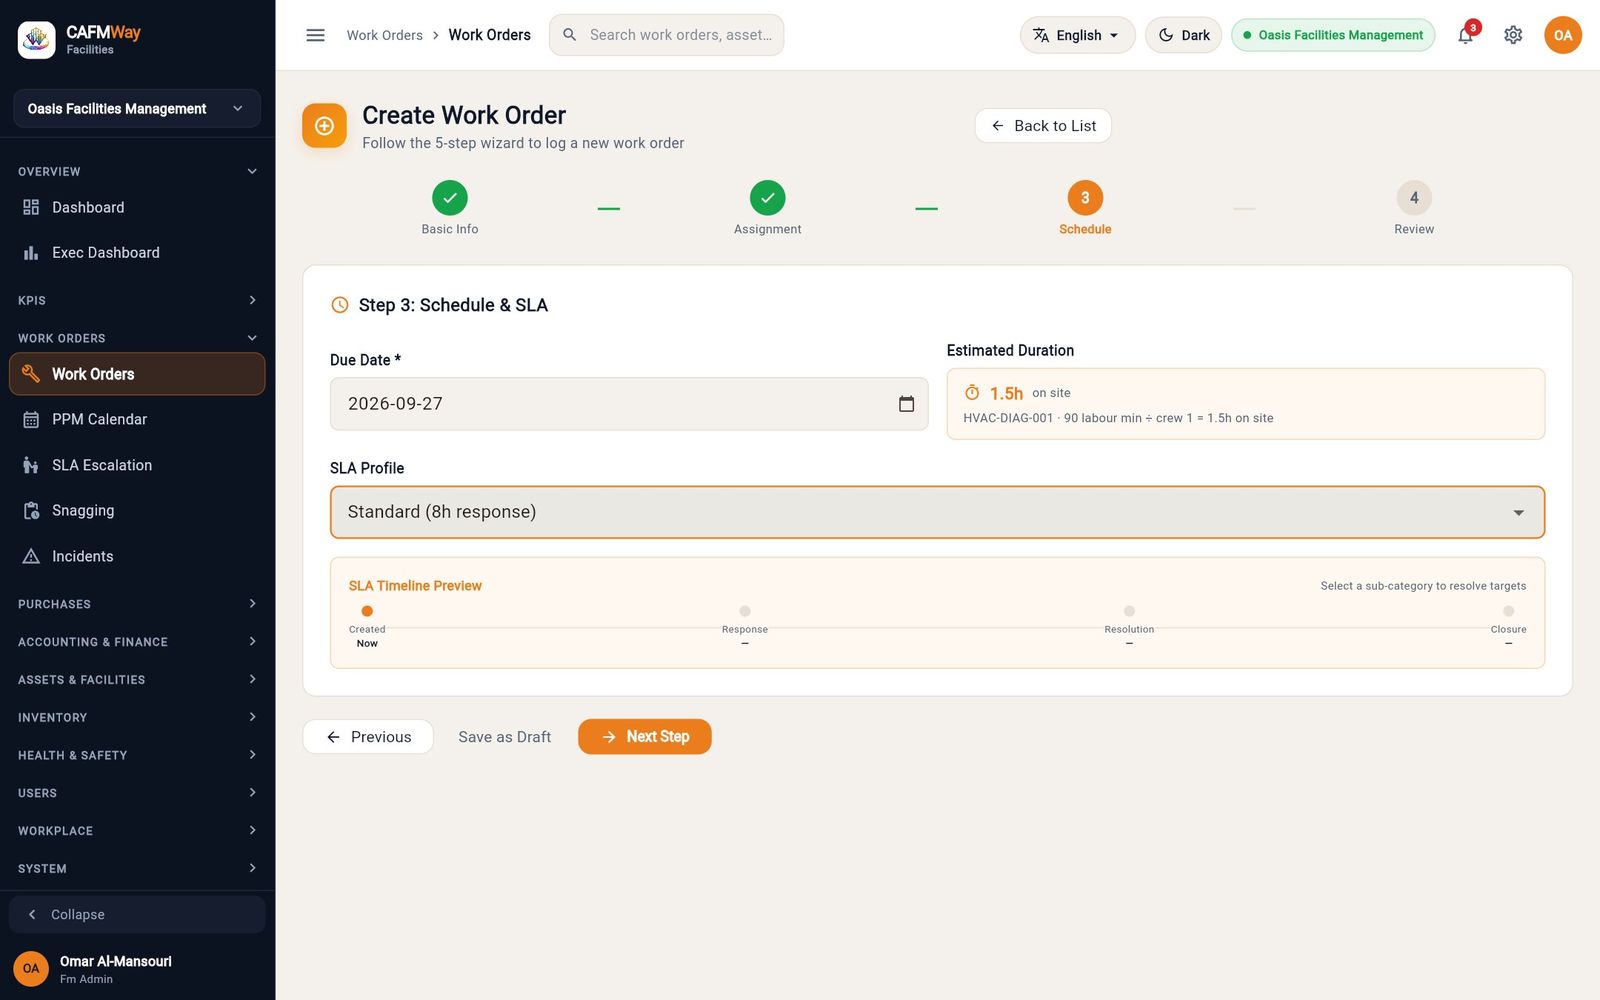
Step 4: Review & Confirm
- Check the summary: title, type, priority, category, sub-category, location, assignee and due date. If Assign To was empty, the assignee reads "Auto-assign".
- Click Create Work Order. "Work order created successfully" appears and the job is at the top of the list with the status Assigned.
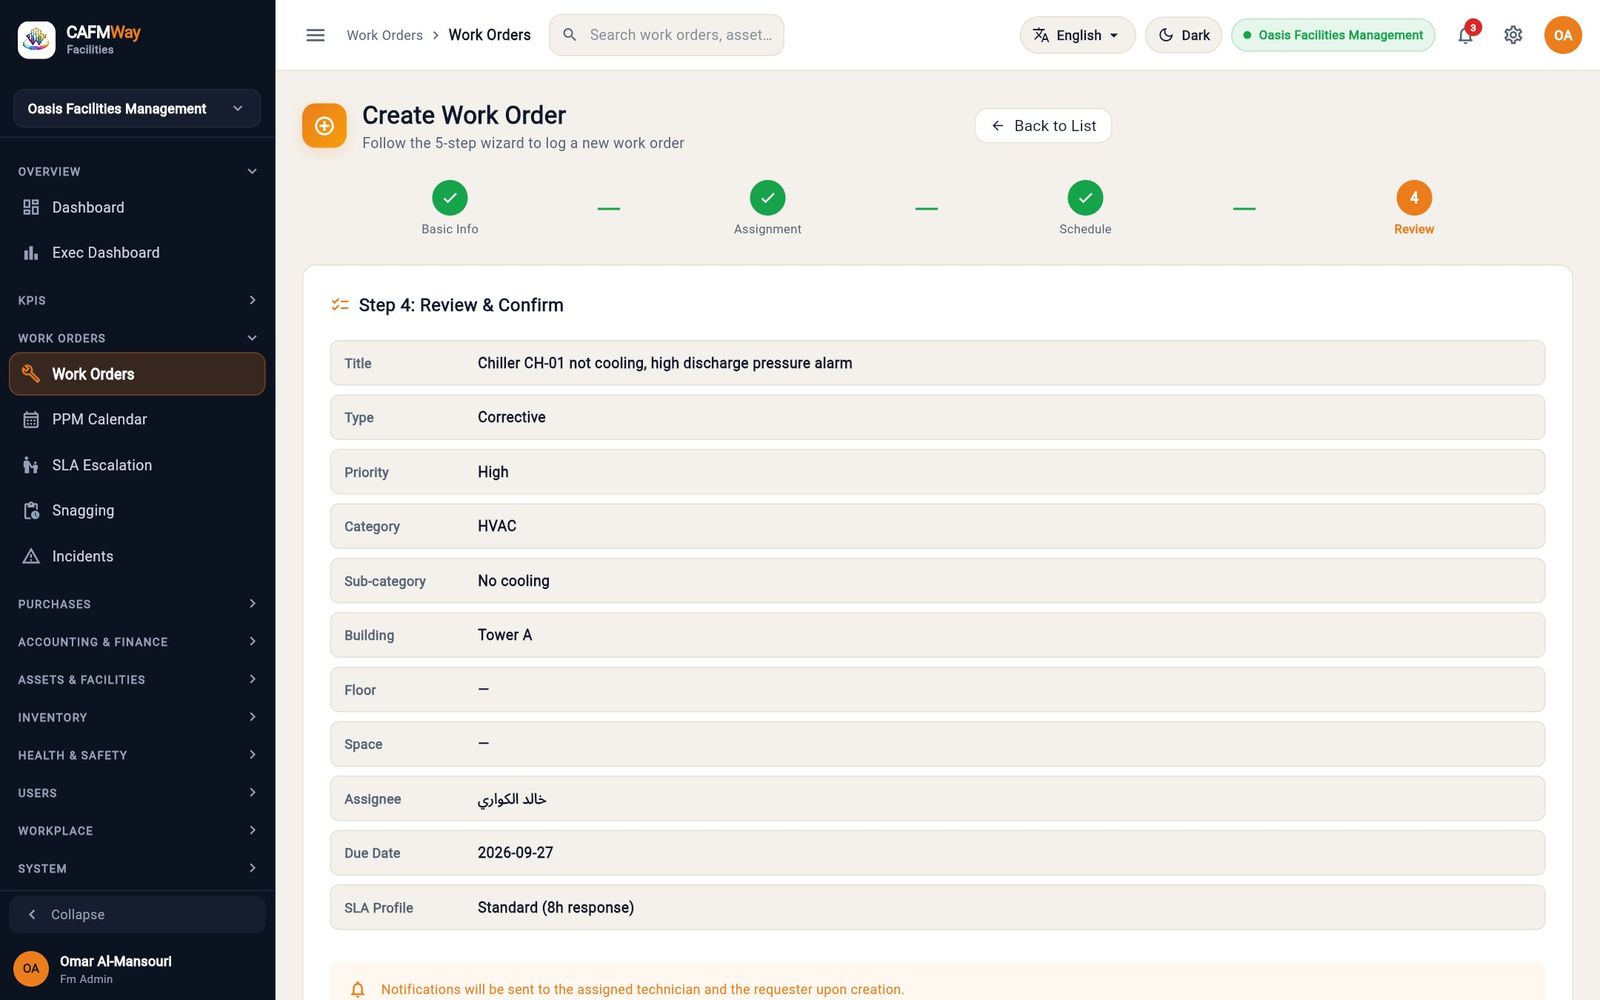
The job is numbered from the project code, for example OB-5140-WO-000013. The assigned technician receives a "New work order assigned" notification. An unassigned job notifies the supervisors and managers who dispatch work.
Internal path: assign, work and close
- Who: Supervisor, FM Manager, FM Administrator; the technician in the Technician app
- Where: Work Orders → open a job
This is the life of a job done by your own staff, using the chiller fault OB-5140-WO-000013 assigned to Khalid Al-Kuwari (HVAC Team).
Assign. Pick the technician in Assign To when you create the job (see "Create a work order"). Khalid is notified and the job appears in his Technician app.
Reassign. To give the job to someone else, open it and click Reassign. Search by name, job title or team, pick the person, write a Reason (optional) and click Reassign. The new person is notified and the reason is kept on the timeline. Choose Unassign — return to the queue to take the job away from everyone.
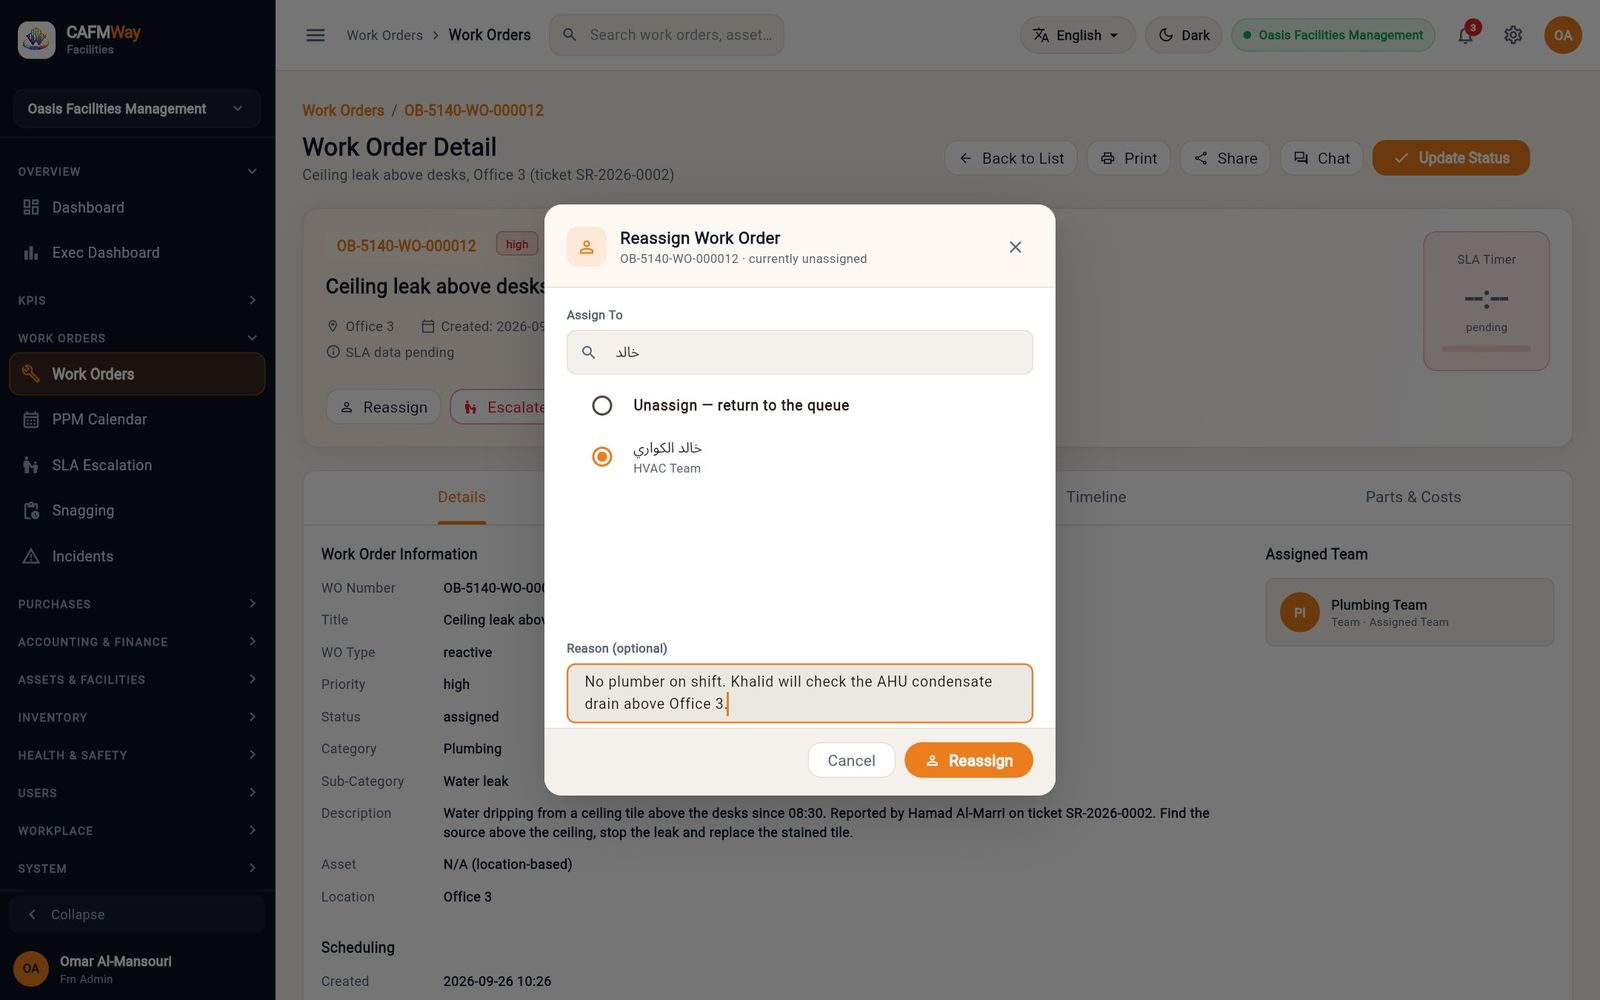
Figure 71 The Reassign Work Order dialog, moving the Office 3 leak to Khalid because no plumber is on shift. Accept and start. Khalid accepts and starts the job in the Technician app; see the Technician app guide. The status becomes Accepted, then In Progress. If a technician cannot update the app, a supervisor can do it in the web app: click Update Status, choose In Progress in New Status, write a Status Note and click Update Status.
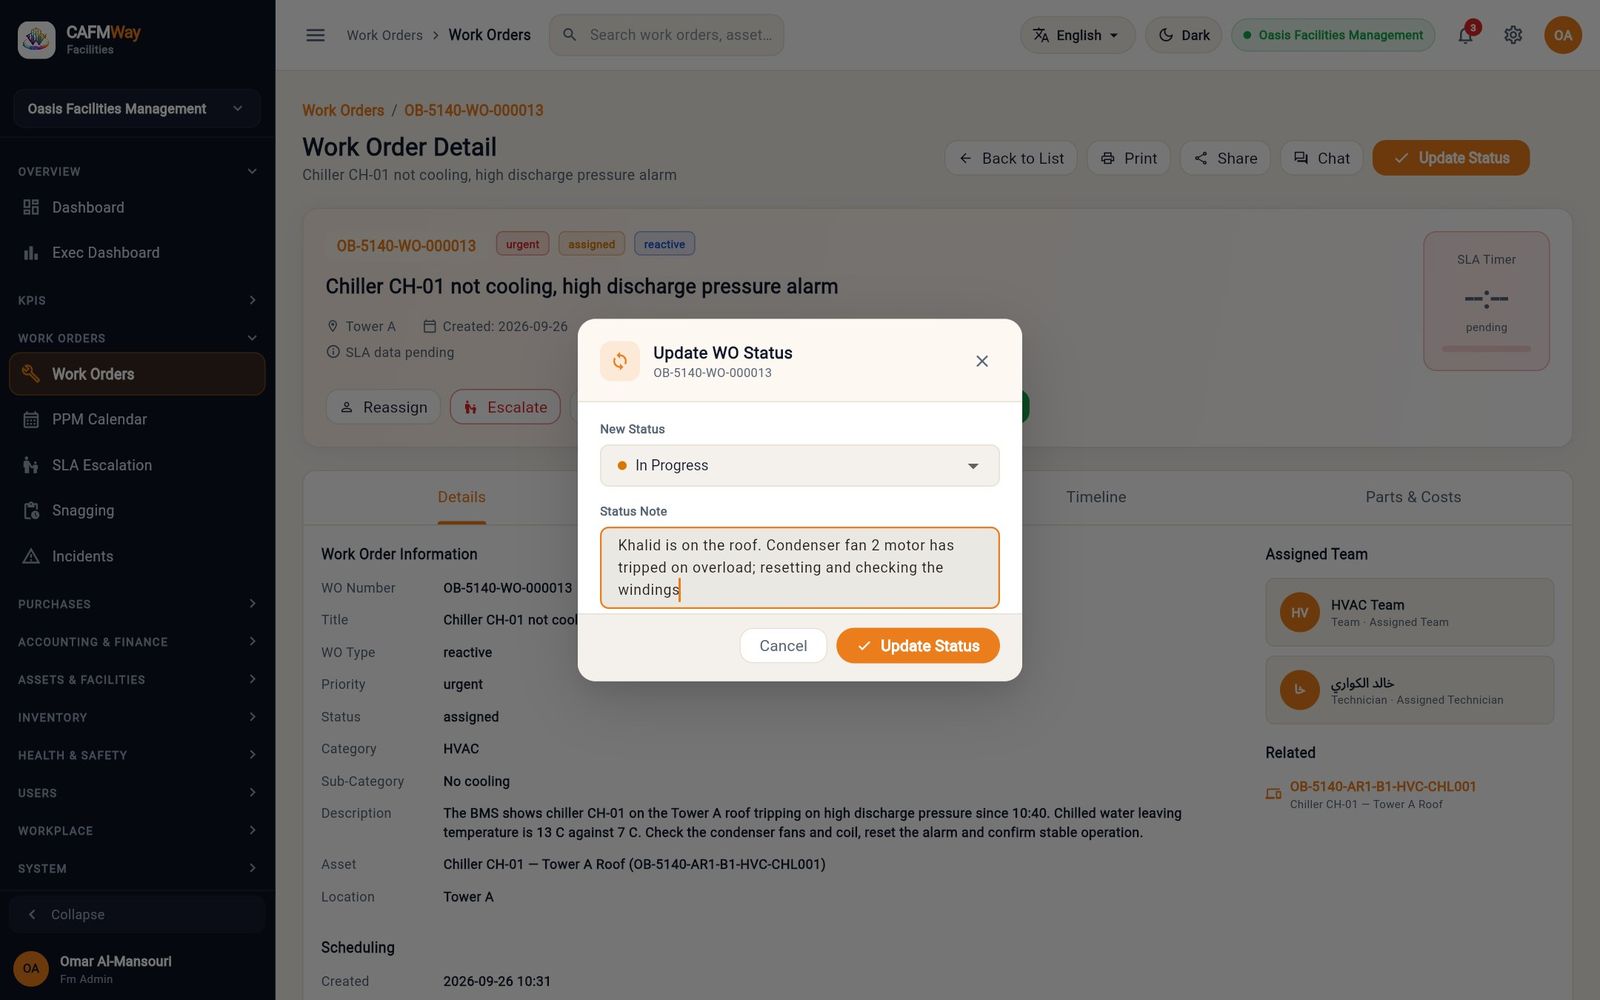
Figure 72 The Update WO Status dialog moving the chiller job to In Progress with a note from site. Record progress. On the Timeline tab, click Add Action to add a note such as test results. Every status change, reassignment and note appears here with the person and time.
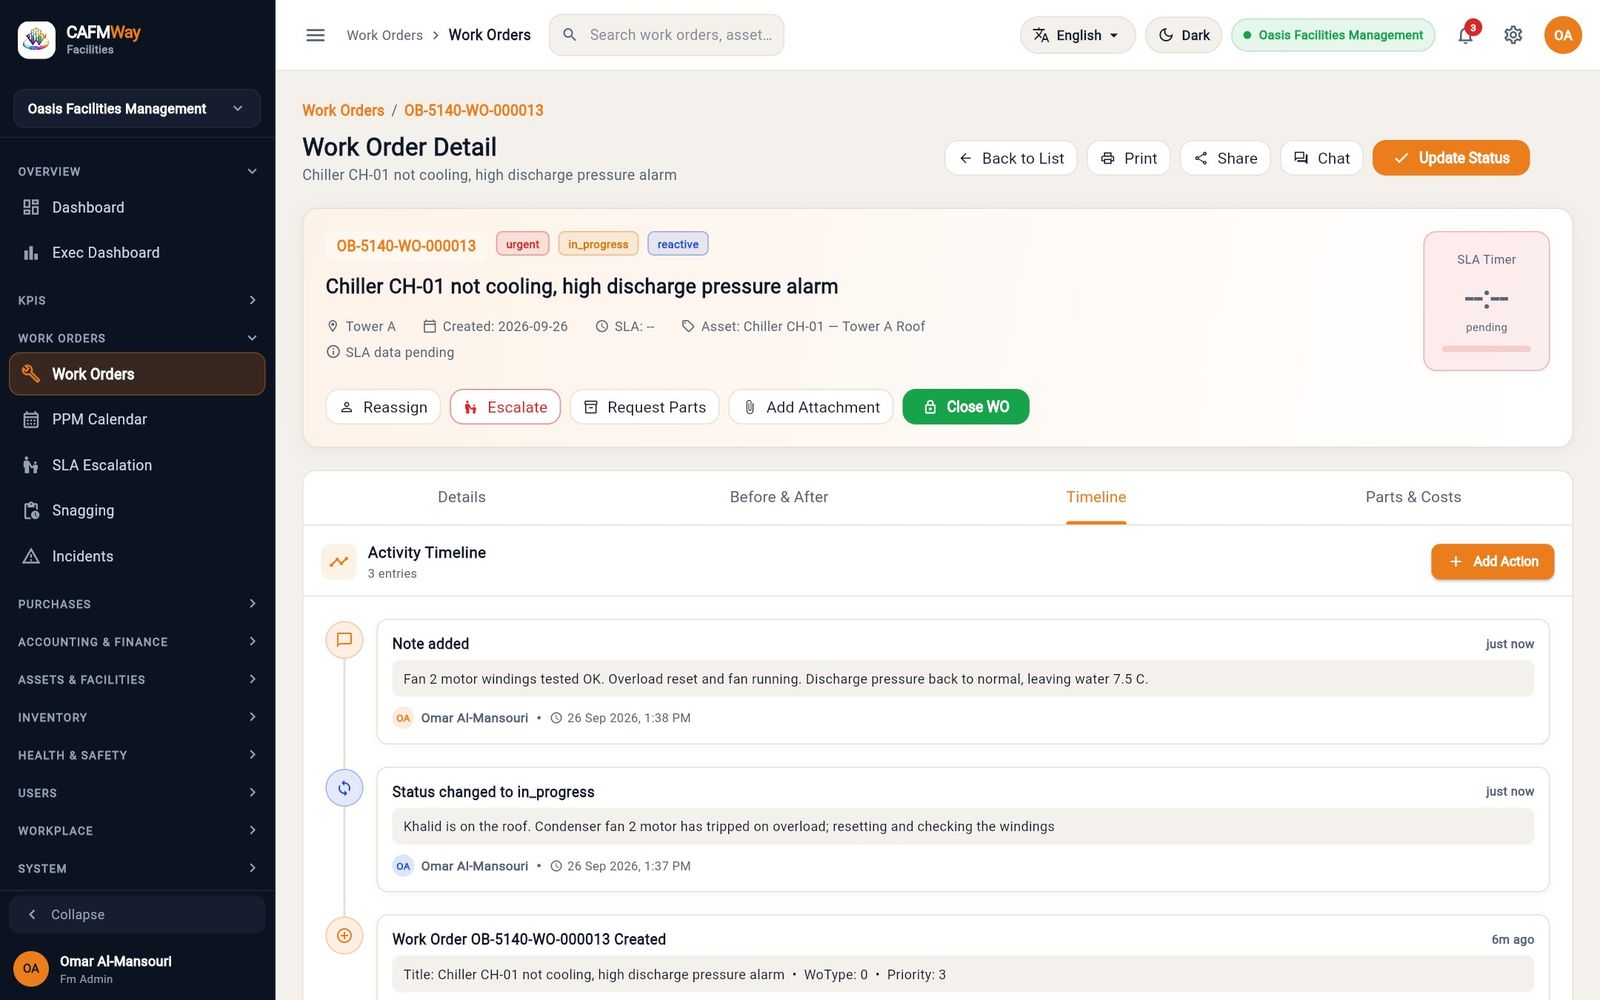
Figure 73 The chiller job's timeline with the creation, the status change and a progress note. Photos. On the Before & After tab, add the before and after pictures with Camera. On a computer, Camera opens the file picker, so you can choose a saved photo. The technician usually takes them in the app.
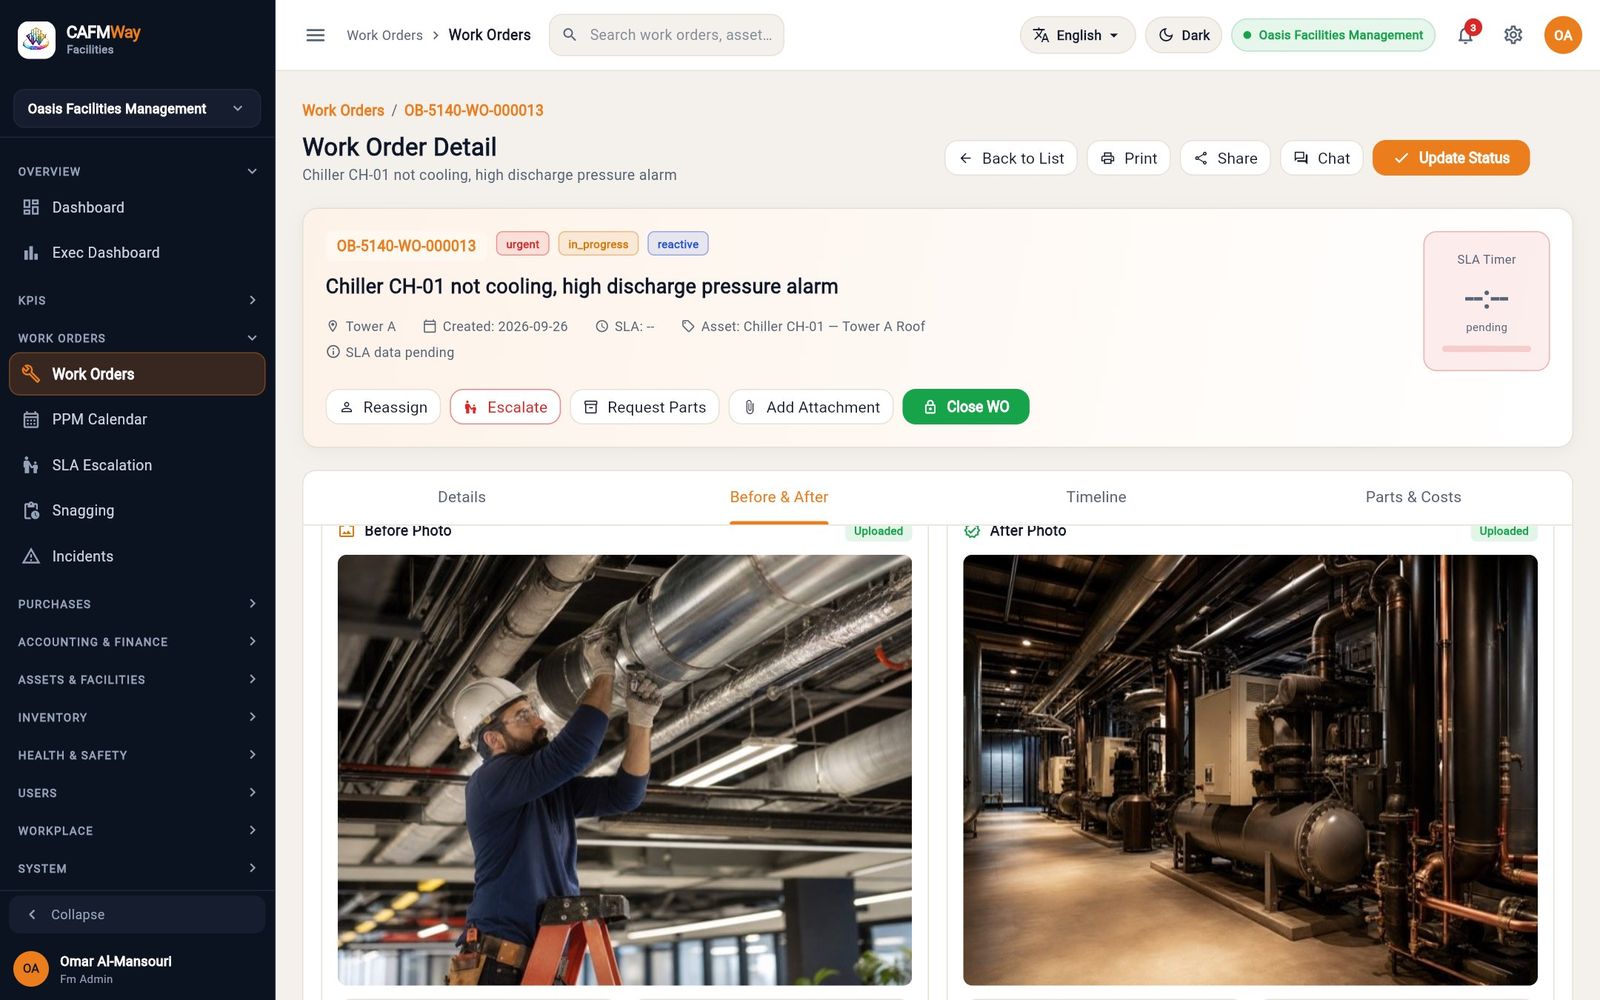
Figure 74 The Before & After tab with the before and after photos of the chiller job. Verification. When the technician finishes, the job may come back as Pending Verification. The supervisor checks the work (here on the BMS) and closes it.
Close. Click Close WO. Describe the fix in Resolution Notes; Close Time (Auto) is set by the server. Click Confirm & Close. The message "Work order closed now. Actual time: … (within SLA)" confirms the close and the status becomes Completed.
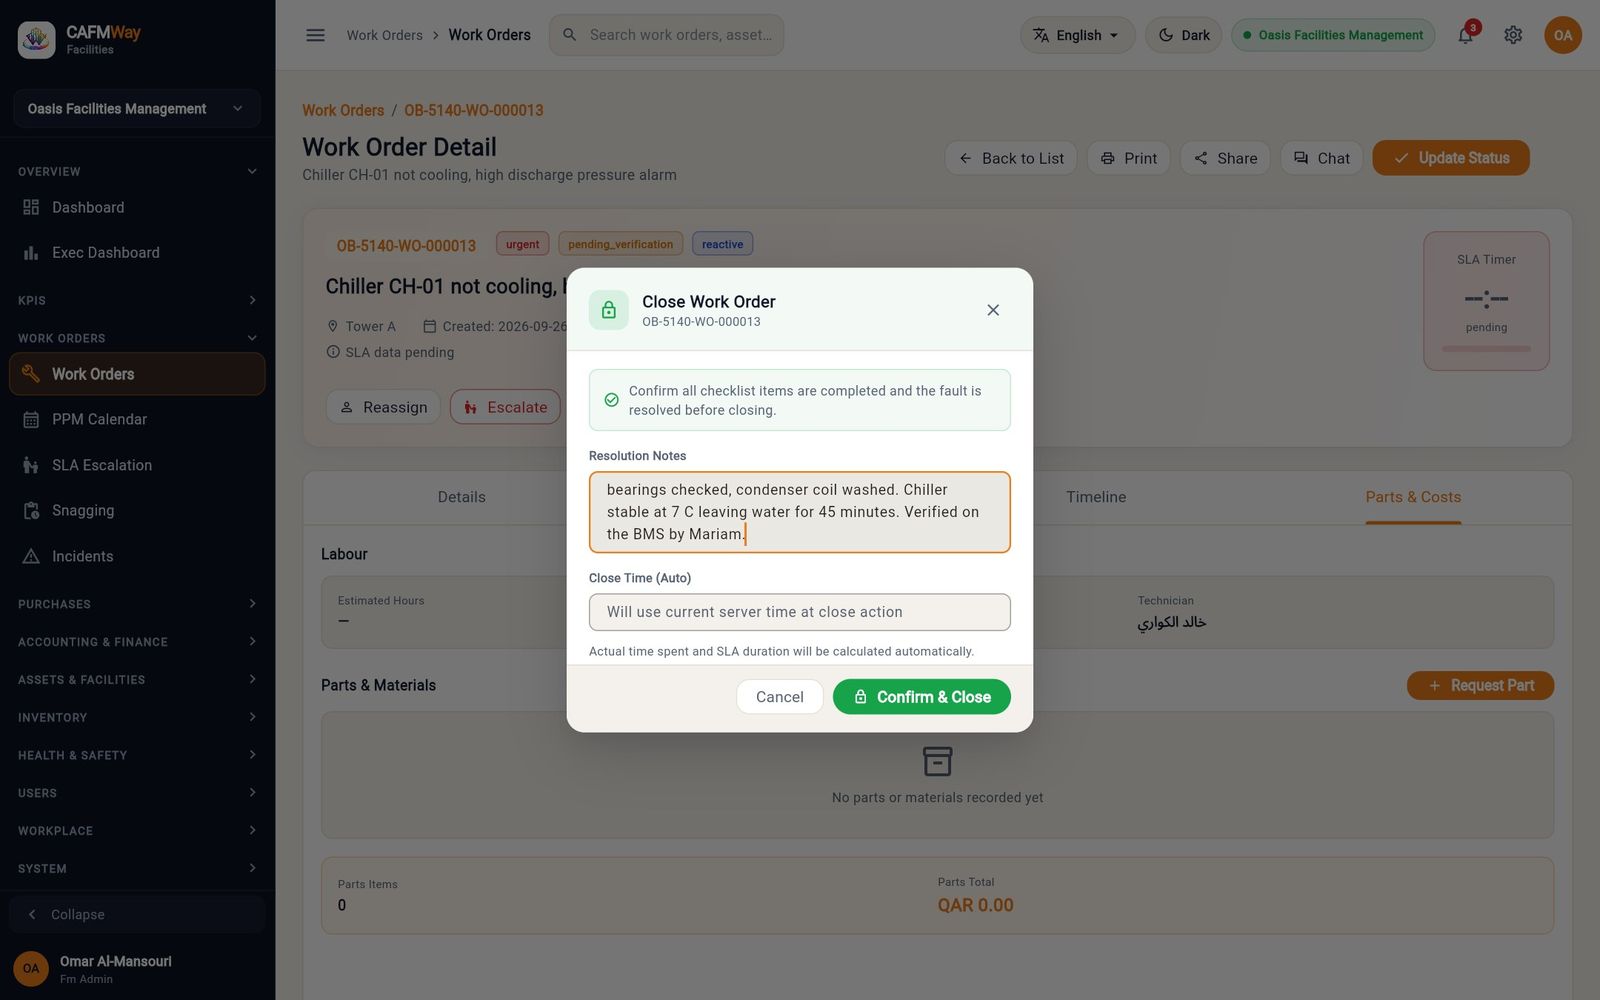
Figure 75 The Close Work Order dialog with the resolution notes for the chiller.
Closing a job stops the SLA clock and fixes the result, closes the technicians' time logs, notifies the requester and works out any contractor penalty.
Contractor path: a lift breakdown
- Who: Helpdesk Agent, Supervisor, FM Manager, FM Administrator; the contractor in the Technician app
- Where: Work Orders → New Work Order
Lift Tech Qatar maintains the lifts under contract C-2026-014 (Annual Lift Maintenance — Oasis Business Park). The contract covers the lift category (Elevator, code LIFT), promises a 1-hour response and a 4-hour fix for breakdowns, and charges QAR 500 for each breach. While the contract runs, lift work goes to Lift Tech, not to your own Elevators Team.
How the system decides who does the work
Each category and sub-category has a target: Local Team, Contract or Both. You set it under USERS → Organisation & SLA → Classification. A live contract that covers a category overrides the setting: the category shows Contract with the note "Set by contract C-2026-014 · Lift Tech Qatar · until 2027-09-30. Reverts to Local Team when the contract ends." When the contract ends, the category goes back to its own target without anyone editing it.
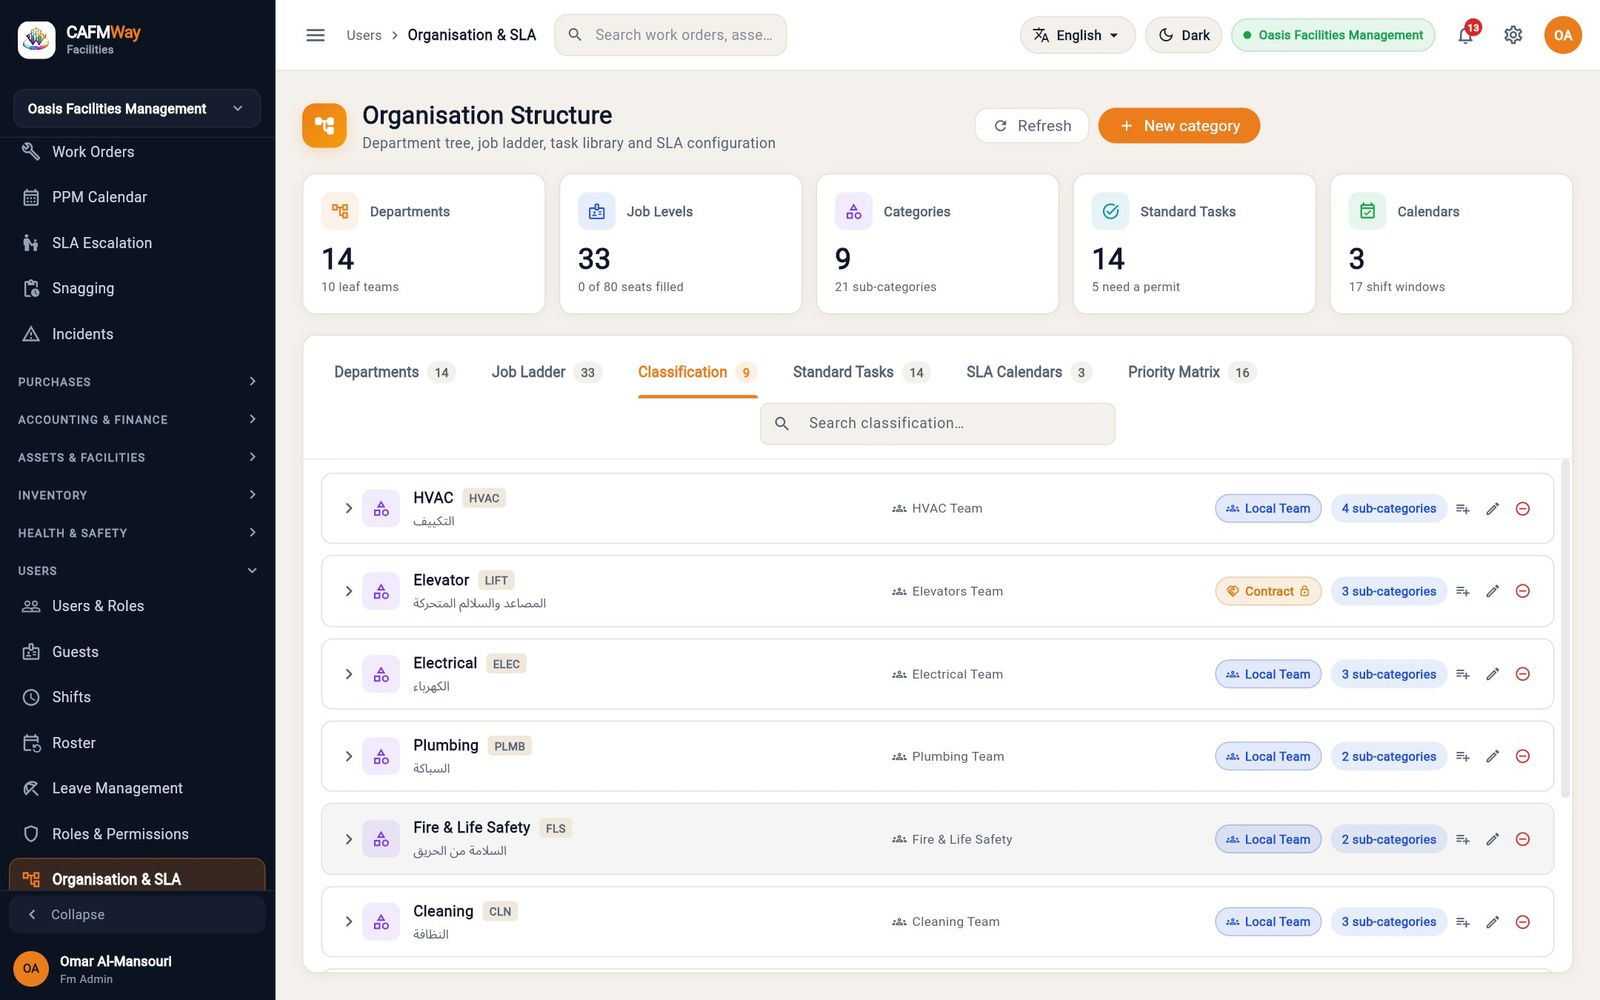
Raise the lift work order
Click New Work Order, click Scan / Lookup and pick Passenger Lift L-01 — Tower A.
Write the title and description, for example
Passenger Lift L-01 doors not closing, lift out of service. The lift is a critical asset, so the job is saved as Urgent. Click Next Step.Choose the category Elevator and the sub-category Elevator breakdown. The chip next to Assign To reads Contract, and Assign To offers only the contractors that cover lifts: Lift Tech Qatar. Pick it.
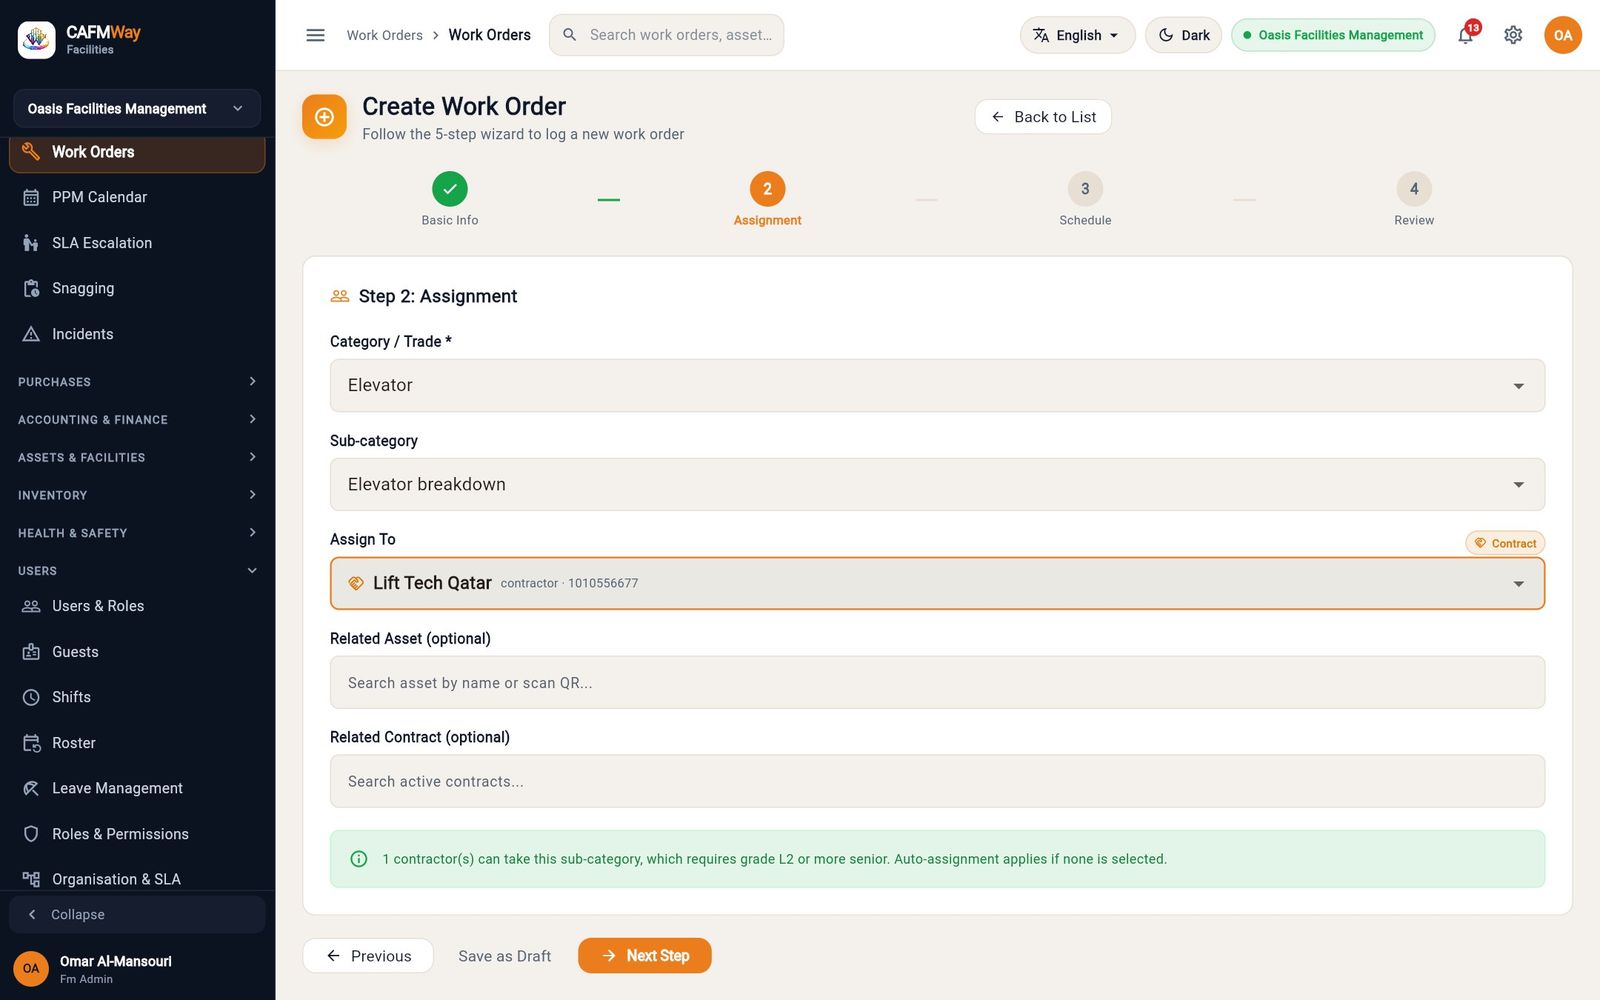
Figure 77 Step 2 for the lift: the Contract chip, with Lift Tech Qatar as the only choice. On Step 3: Schedule & SLA, the SLA Profile now shows the contract (Annual Lift Maintenance — Oasis Business Park · C-2026-014, 1h response, 4h resolution, 500 fixed) and the SLA Timeline Preview reads "From contract C-2026-014". Estimated Duration shows the contracted resolution time.
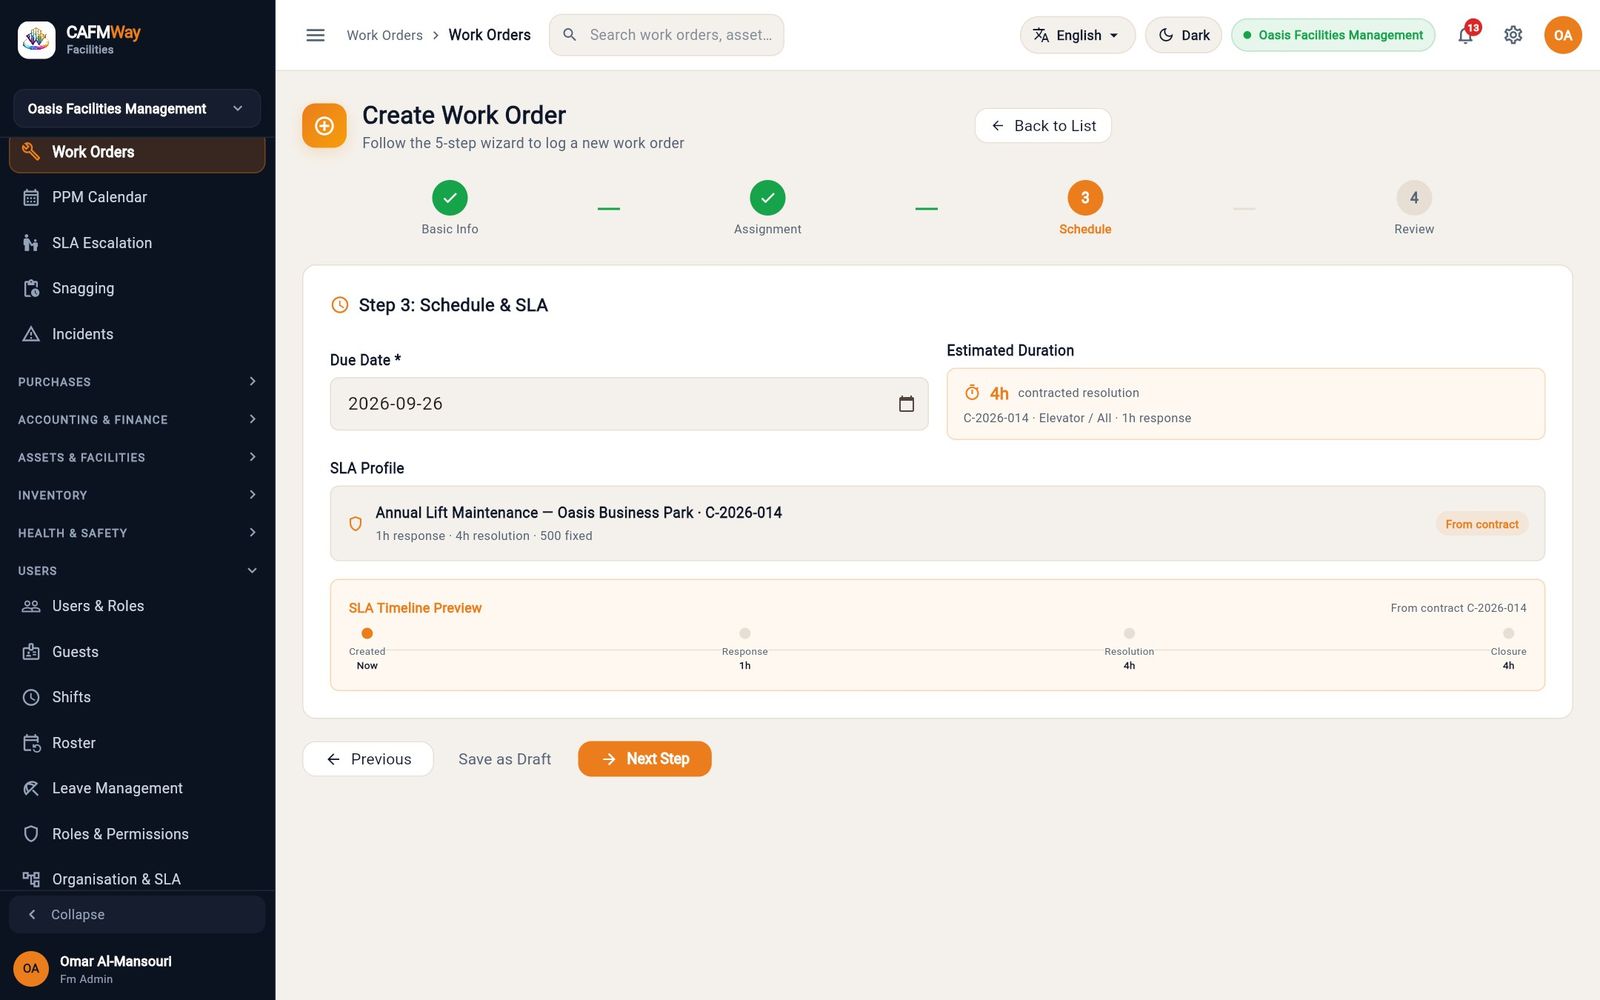
Figure 78 Step 3 with the lift contract's SLA: respond in 1 hour, resolve in 4 hours. Click Next Step, check the review and click Create Work Order. The job, here
OB-5140-WO-000020, is created for Lift Tech Qatar. Nobody at Oasis is assigned; the dispatch pool and Lift Tech's people are notified.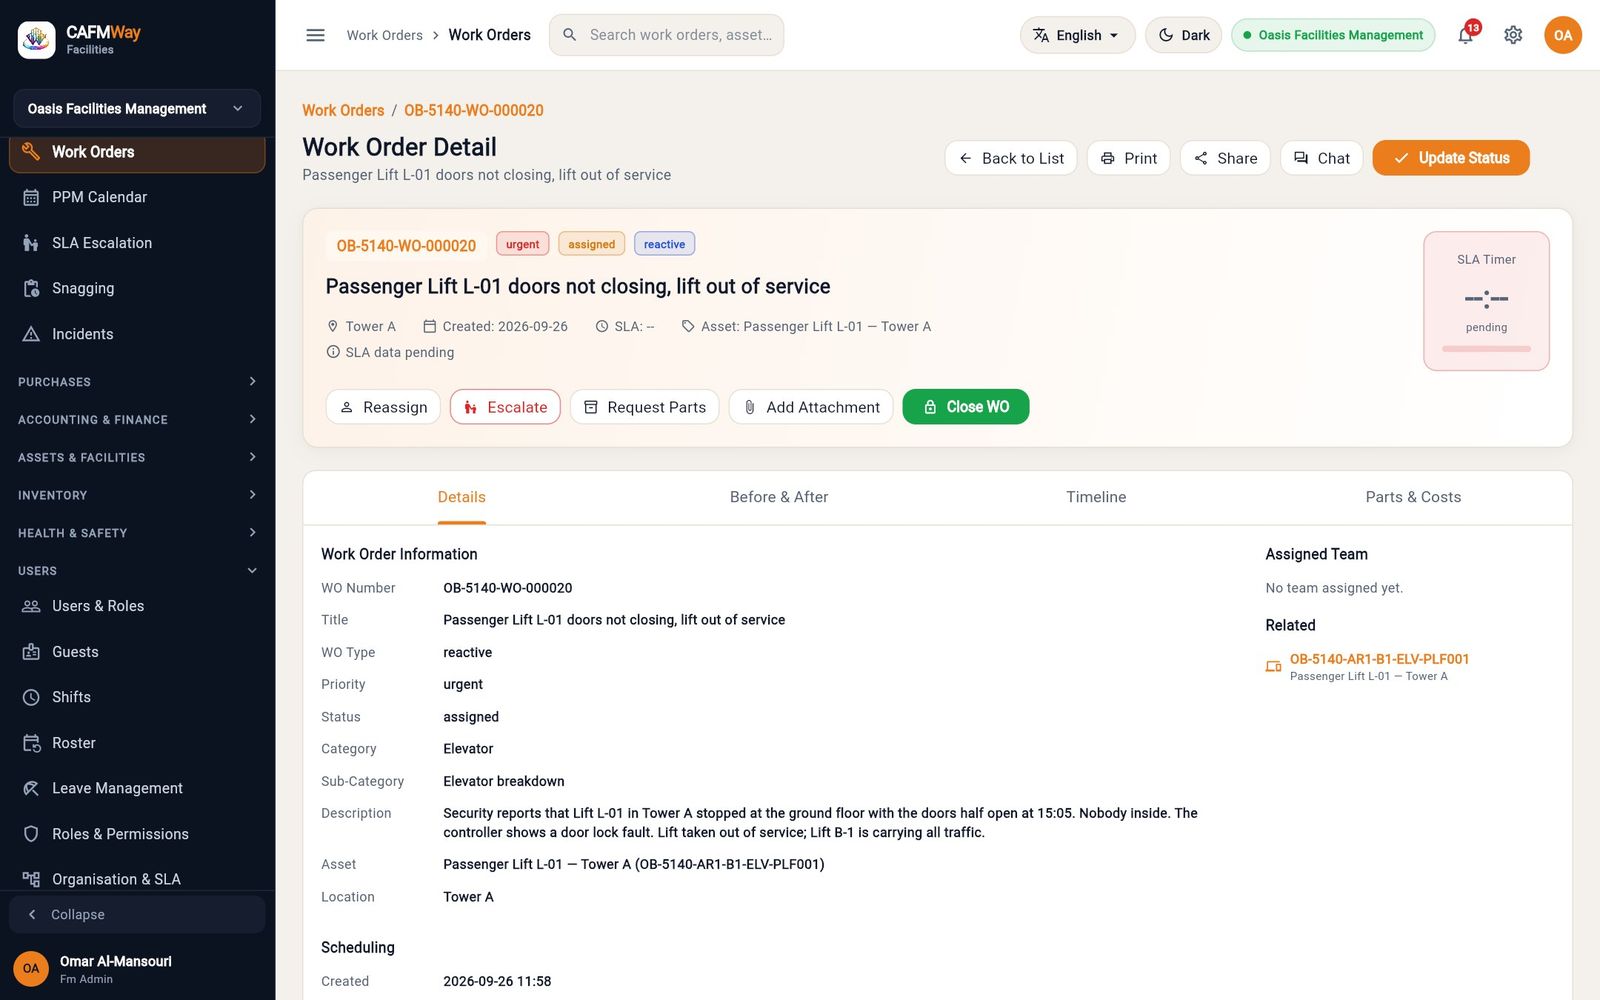
Figure 79 The lift work order after it was created for Lift Tech Qatar.
What the contractor does
Lift Tech's account manager, Rashid Al-Khater, sees the company's jobs in the Technician app and hands this one to his technician, Sami Nasser. Sami accepts, starts and finishes it there, with photos and the customer's sign-off; see the Technician app guide. You follow the job on the Work Orders list and on the SLA Escalation board. If Lift Tech is waiting for a part, put the job on hold with the reason Waiting for spare parts (see "SLA targets, holds and breaches").
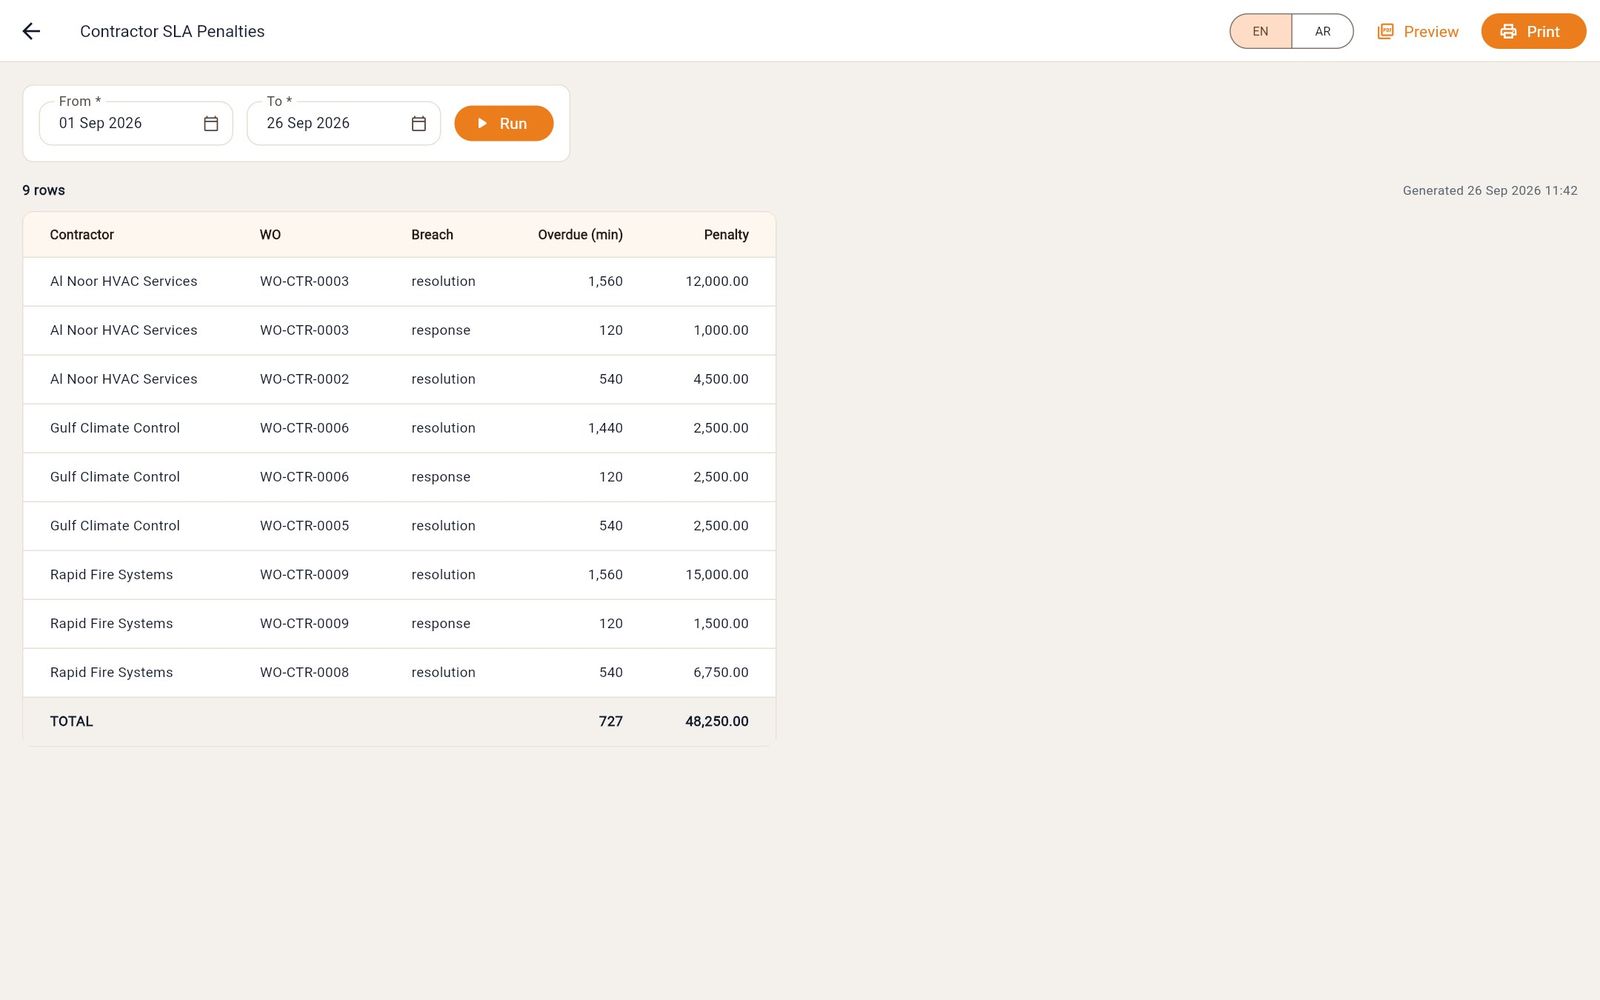
When the job is completed, the system compares the response and completion times with the contract's SLA rule. A breach becomes a penalty against the contractor (here QAR 500 per breach). Penalties appear on the contractor's Penalties tab and in the Contractor SLA Penalties report.
Cancel and reopen a work order
- Who: Supervisor, FM Manager, FM Administrator
- Where: Work Orders → open a job → Update Status
Cancel
- Open the job and click Update Status.
- In New Status, choose Cancelled. Write why in Status Note.
- Click Update Status. The job becomes Cancelled, any stock reserved for it goes back to the store, and the technician's app shows the change.
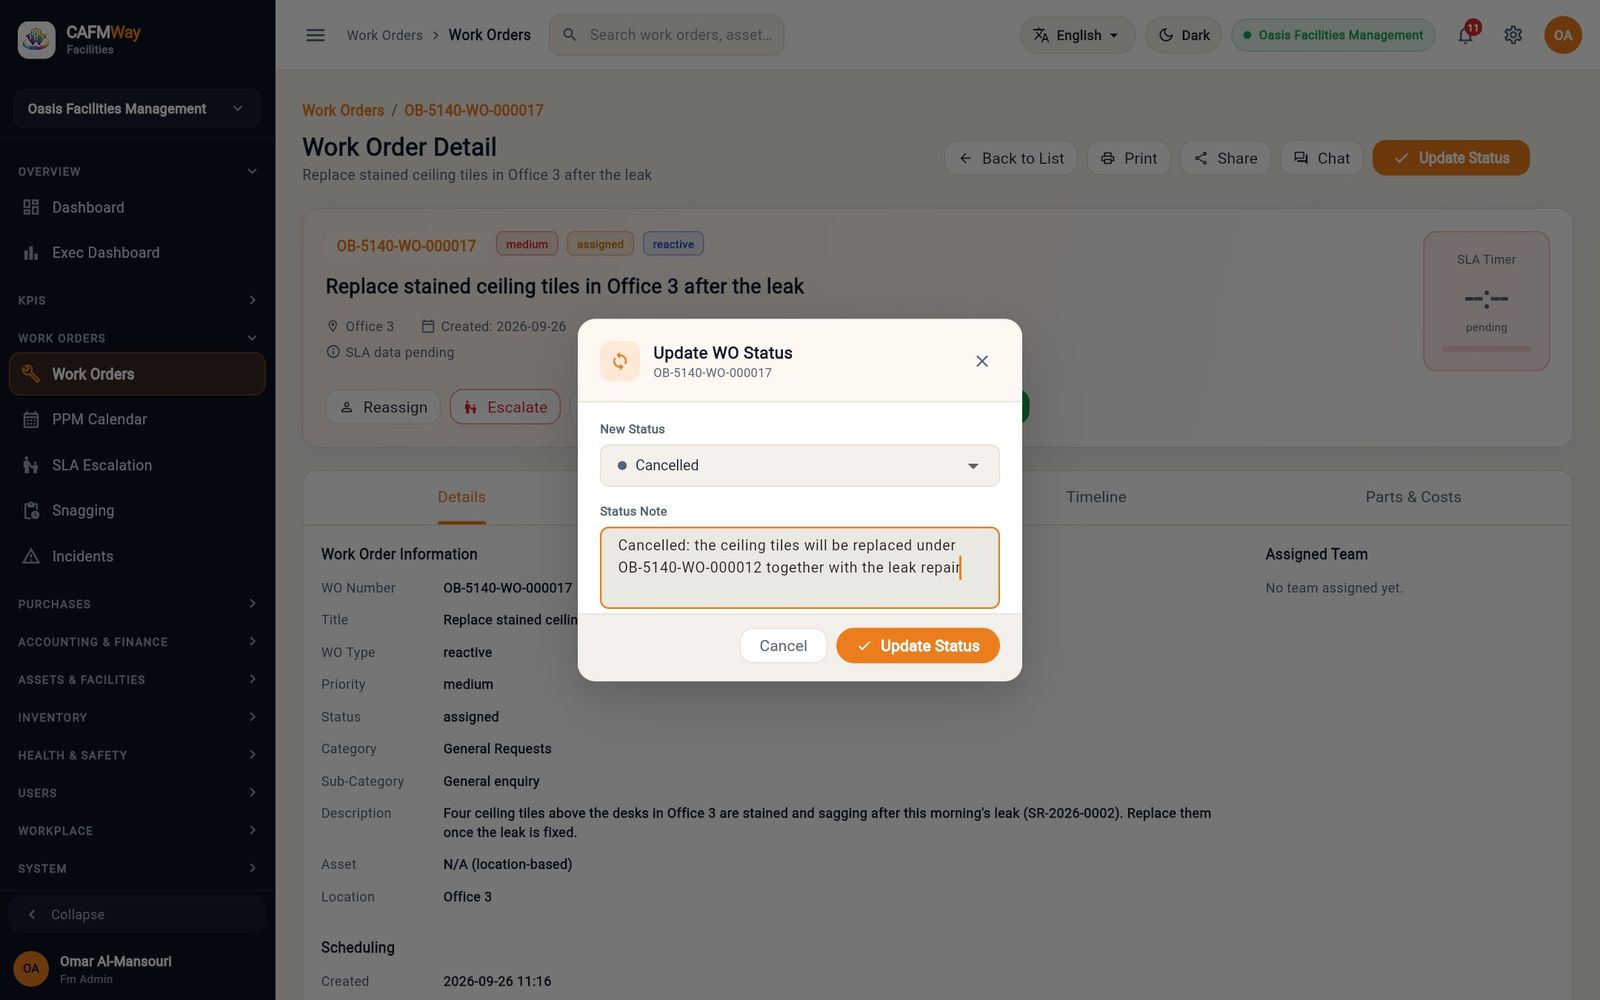
Reopen
- Open the cancelled, rejected or completed job and click Update Status.
- Choose the status the job should go back to, usually Accepted (the technician must restart it) or In Progress.
- Write why in Status Note and click Update Status.
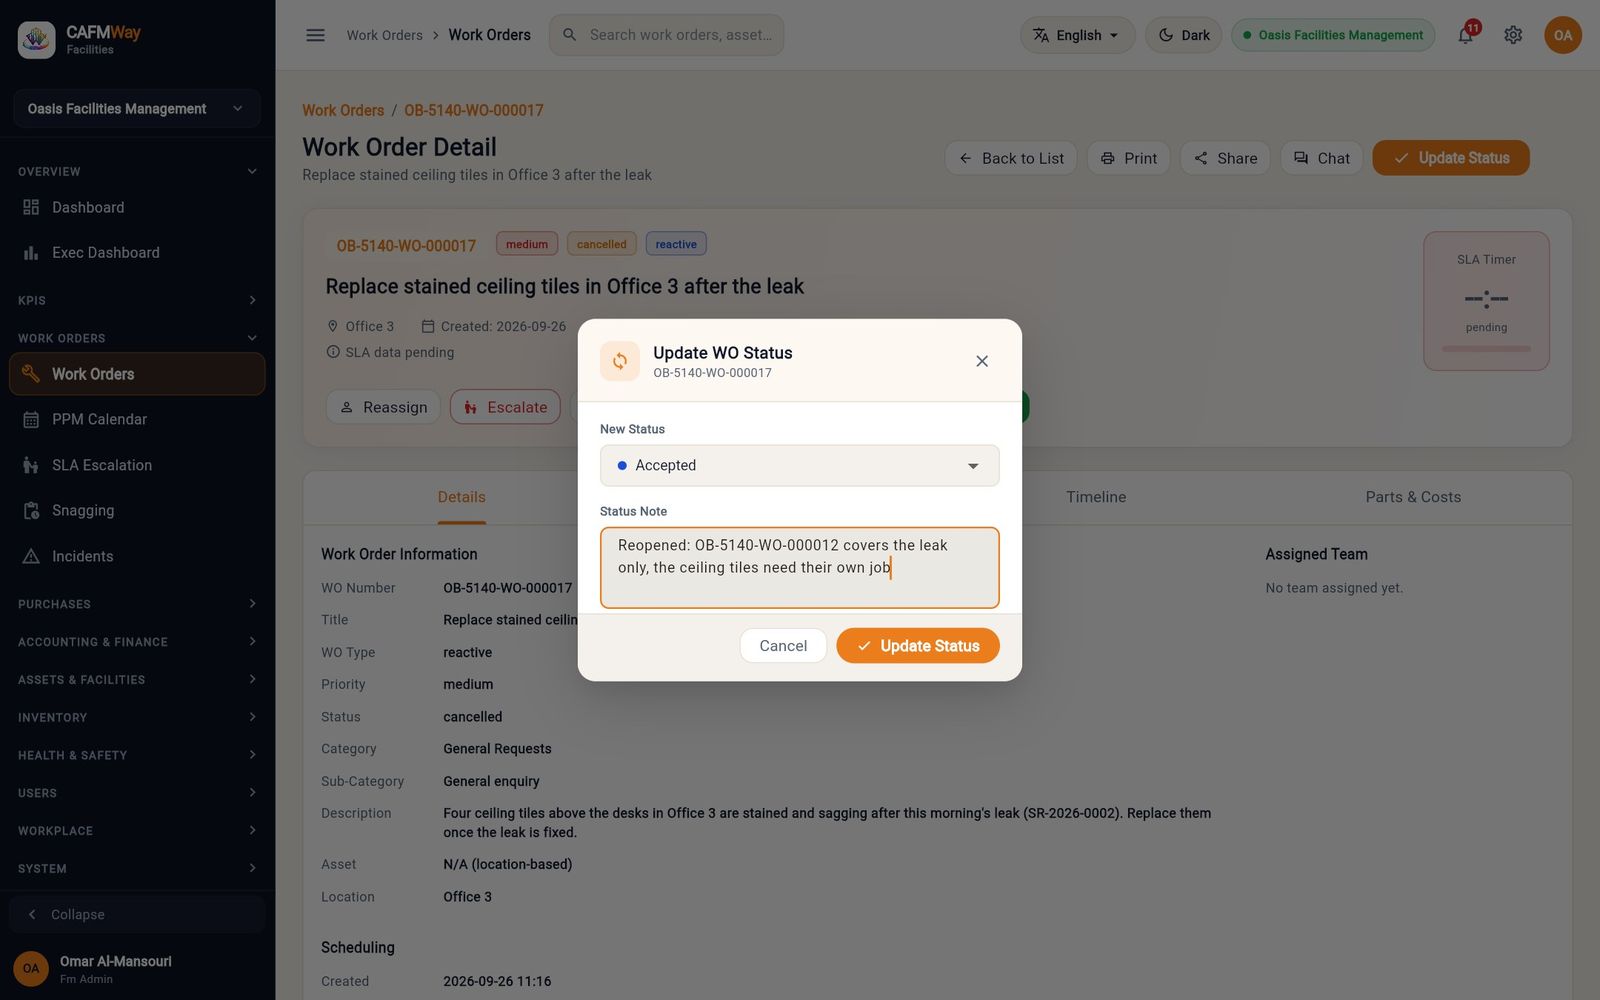
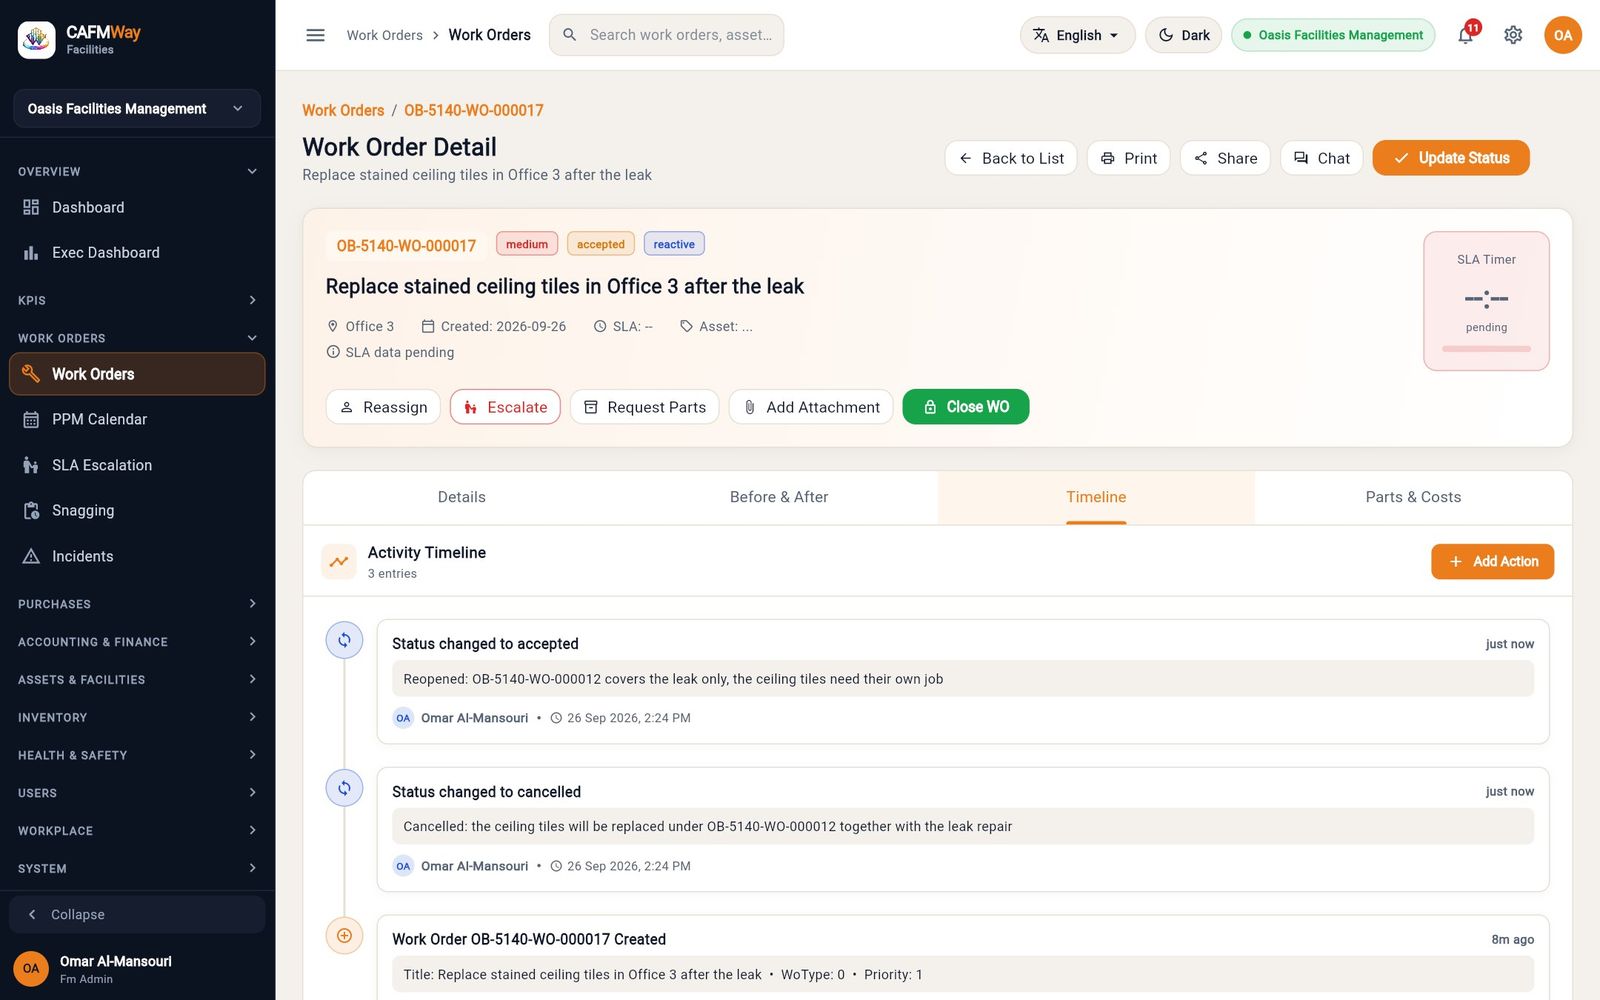
The work order detail page
- Who: anyone who can read work orders
- Where: Work Orders → View (eye icon)
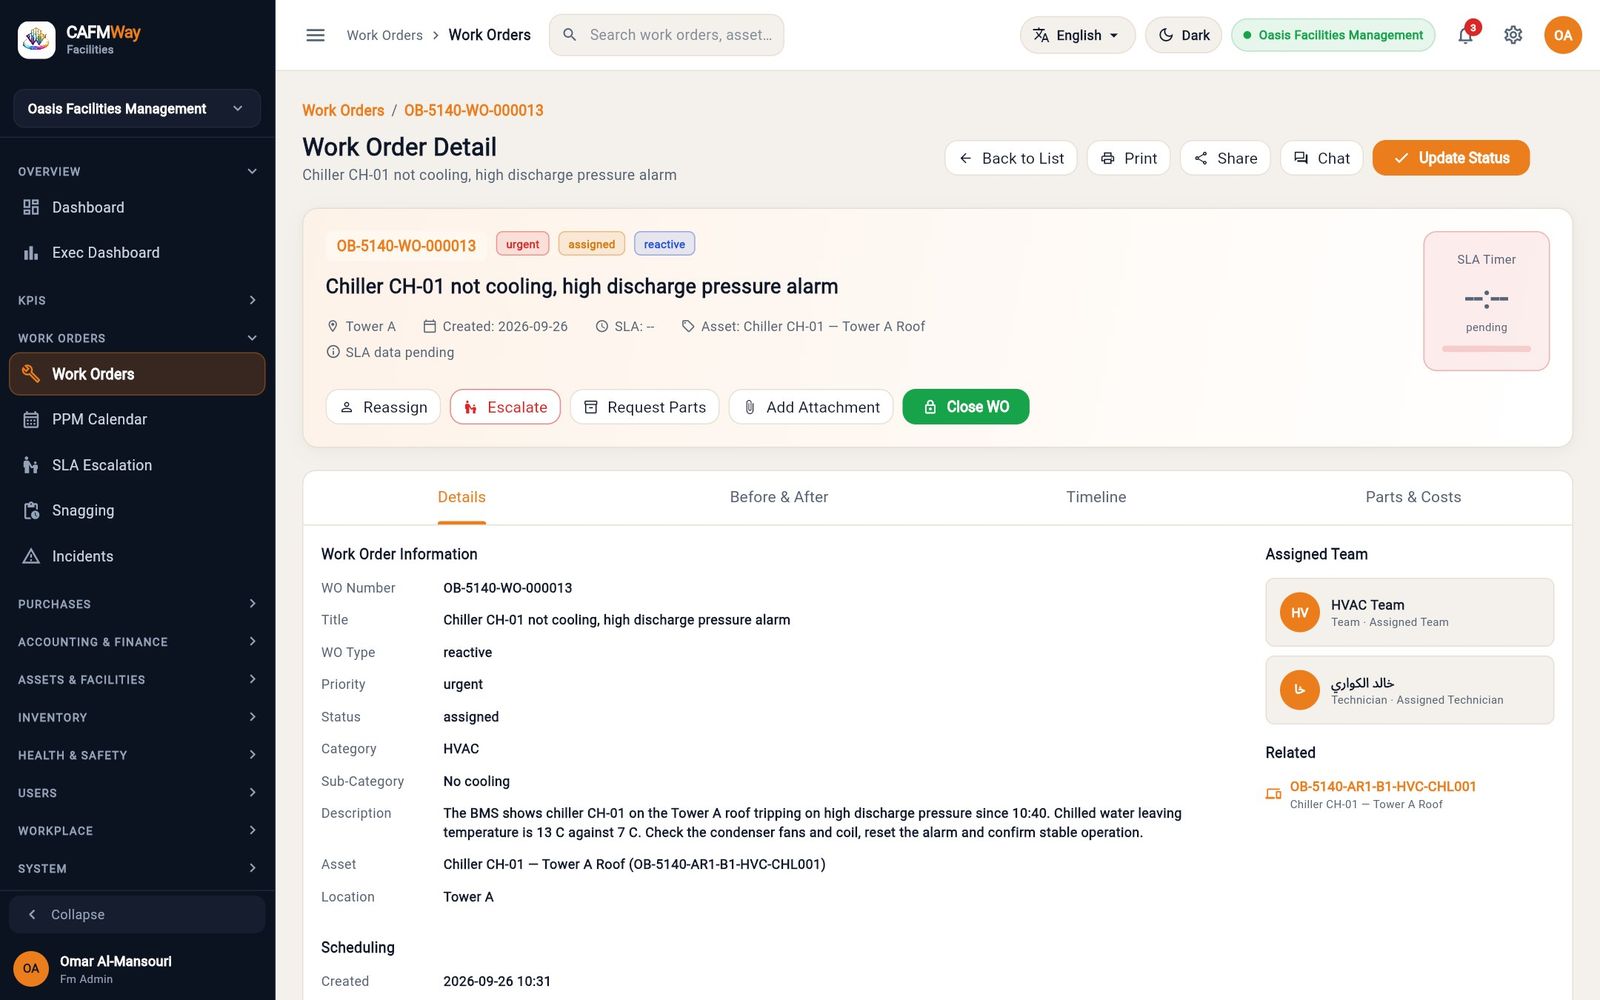
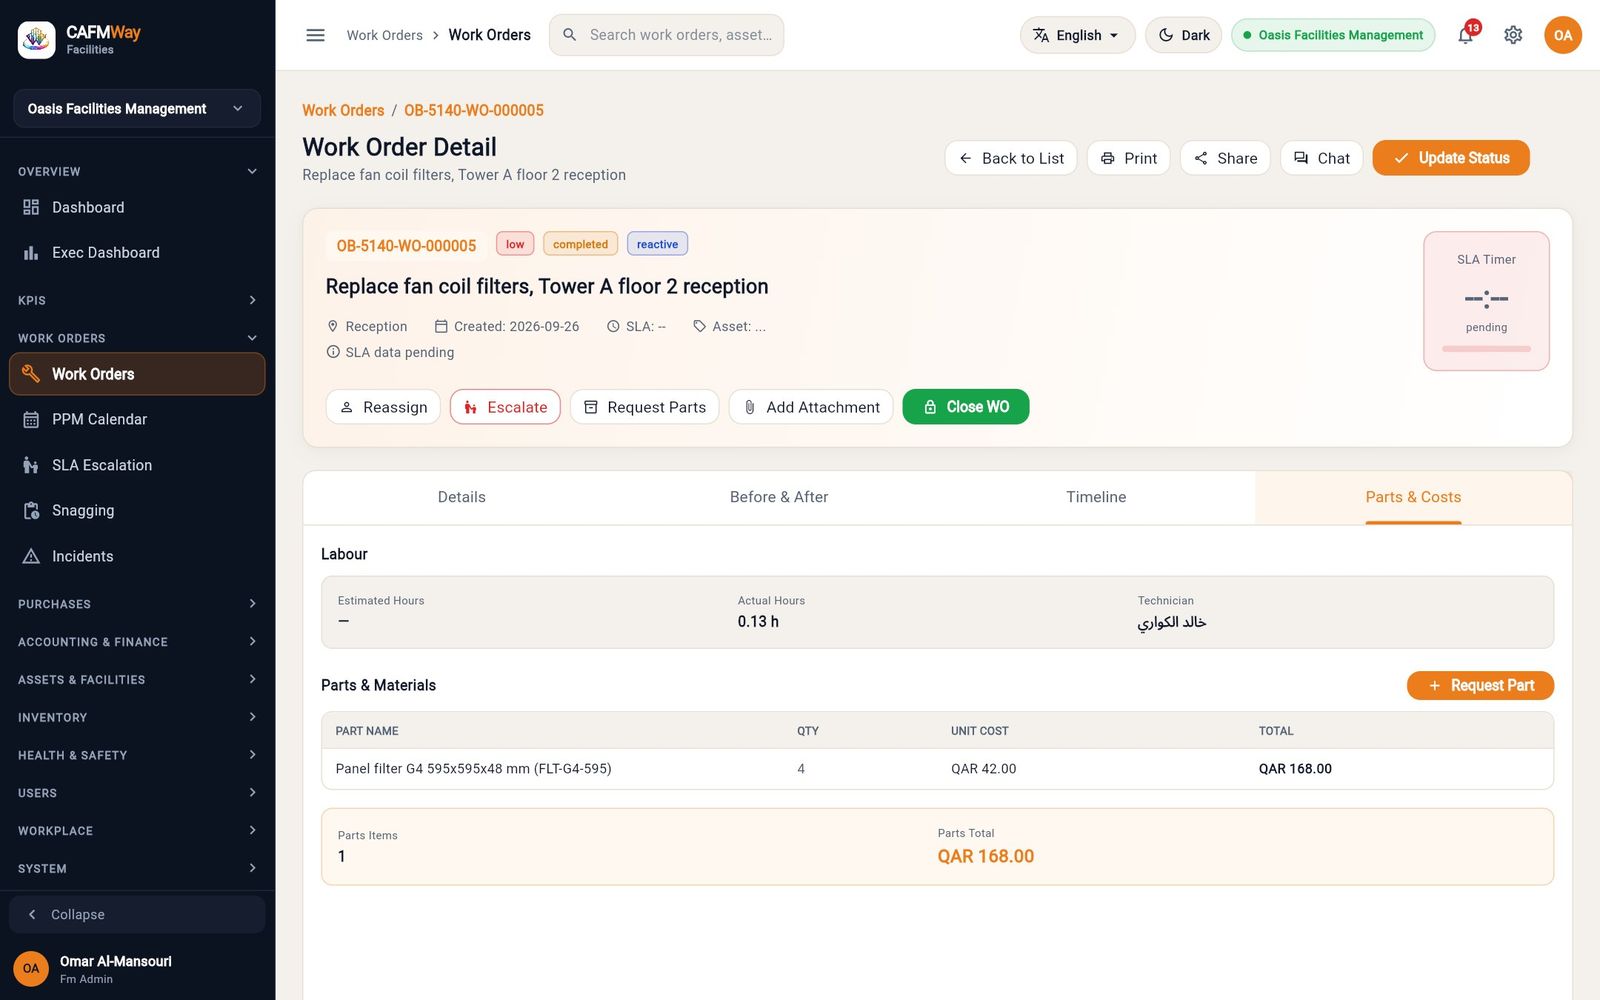
The header shows the number, status, priority and type, the location, the creation date and the asset. The buttons along the top are:
| Button | What it does |
|---|---|
| Back to List | Returns to the list. |
| Prints the Work Order Completion Certificate (see "Print and report work orders"). | |
| Share | Gives another user read, write, submit or share rights on this one job. |
| Chat | Opens a conversation about the job with the assigned technician. |
| Update Status | Moves the job to any status, with a note. |
| Reassign | Hands the job to another person or back to the queue. |
| Escalate | Adds an escalation note to the timeline. |
| Add Attachment | Opens the Before & After tab. |
| Close WO | Completes the job with resolution notes. |
The tabs:
- Details — the work order information, the scheduling dates (Created, Scheduled, SLA Deadline, estimated and actual hours), the assigned team and technician, the linked ticket and asset, and Additional fields if your company added custom fields for work orders.
- Before & After — the before and after photos and the customer's sign-off, which the technician collects in the app.
- Timeline — every event on the job; Add Action adds a note.
- Parts & Costs — labour hours and the parts issued to the job, with their unit cost and total. Parts are requested by the technician in the Technician app and approved and issued under INVENTORY → Material Requests.
Print and report work orders
- Who: anyone who can read work orders; reports need the Report permission
- Where: work order detail → Print; Sidebar → Reports
Completion certificate
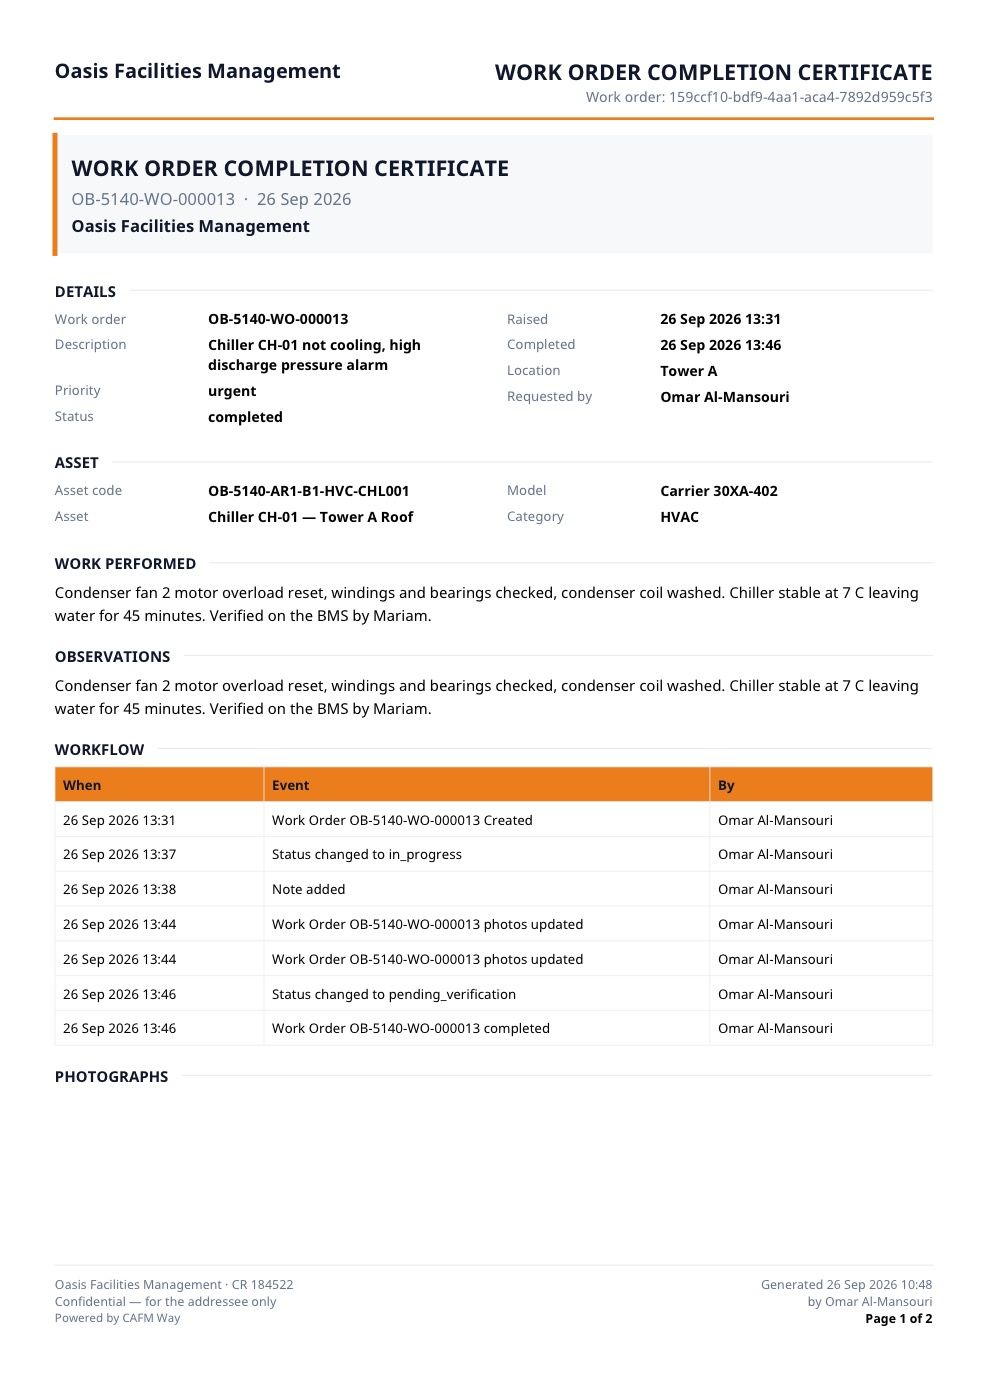
On the detail page, click Print. The app builds the Work Order Completion Certificate on your company letterhead and opens the browser's print dialog, where you can print it or save it as PDF. The certificate lists the job details, the asset, the work performed, the observations, every step of the workflow with who did it and when, and the photographs.
Work order reports
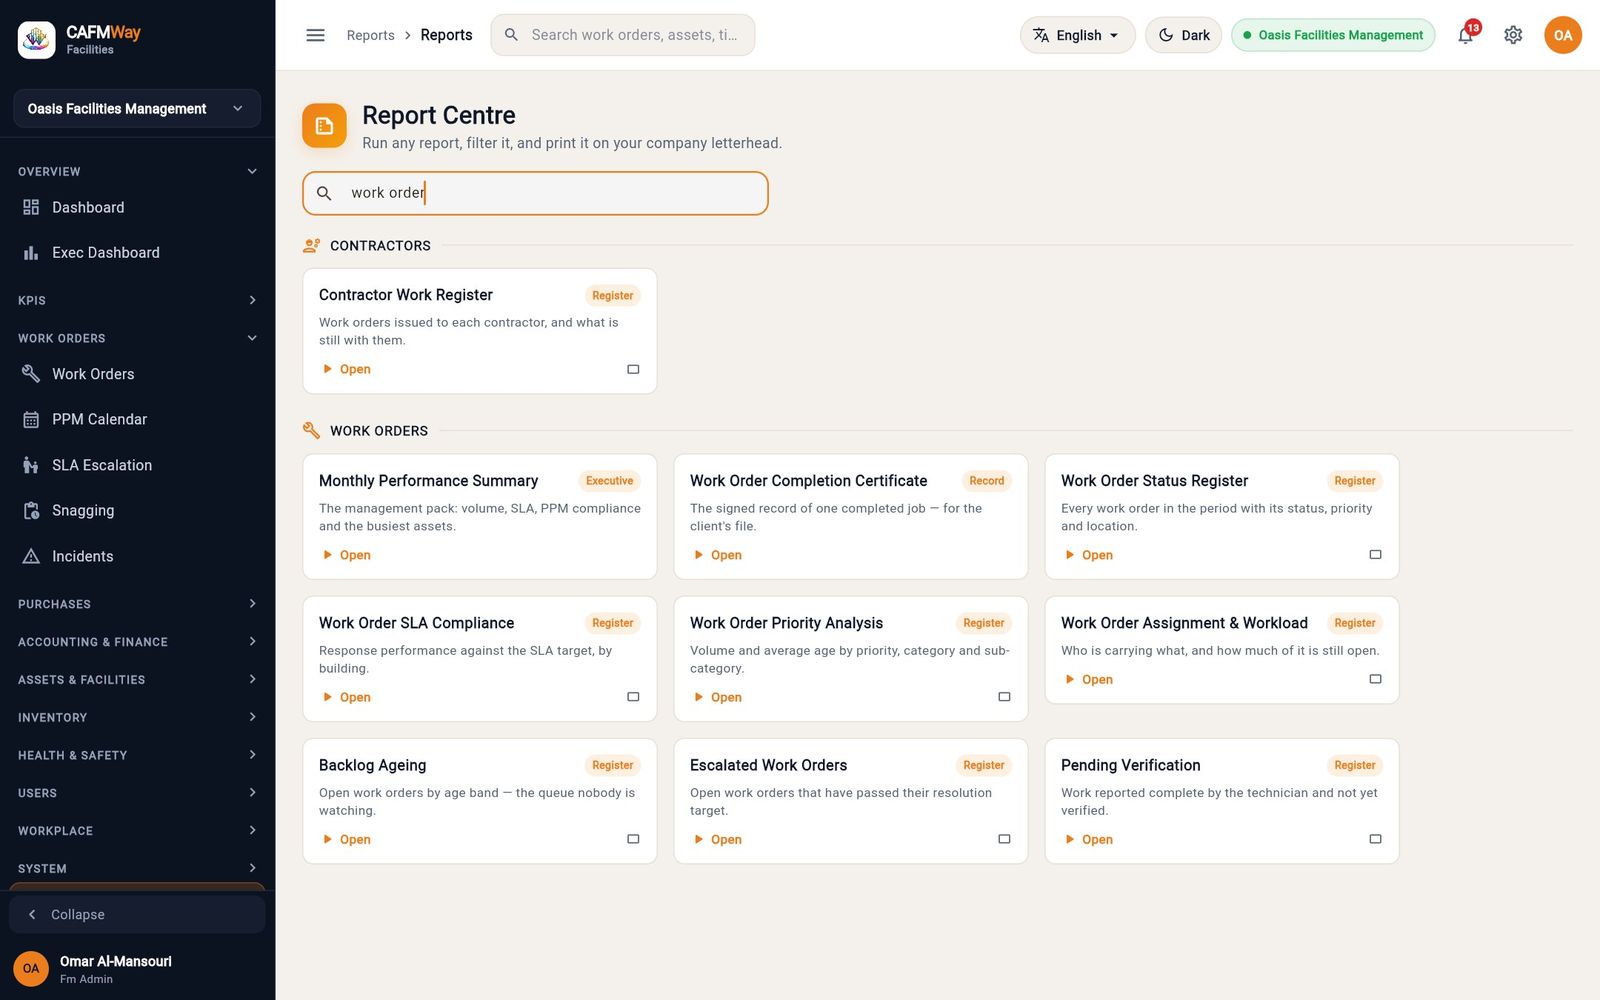
Open Reports and type work order in Search reports…. The work order reports are:
| Report | What it shows |
|---|---|
| Monthly Performance Summary | Volume, SLA, PPM compliance and the busiest assets for management. |
| Work Order Completion Certificate | The record of one completed job. |
| Work Order Status Register | Every work order in the period with status, priority and location. |
| Work Order SLA Compliance | Response performance against the SLA target, by building. |
| Work Order Priority Analysis | Volume and average age by priority, category and sub-category. |
| Work Order Assignment & Workload | Who is carrying what and how much is still open. |
| Backlog Ageing | Open work orders by age band. |
| Escalated Work Orders | Open work orders past their resolution target. |
| Pending Verification | Work reported complete and not yet verified. |
| Contractor Work Register | Work orders issued to each contractor. |
| Contractor SLA Penalties | Breaches charged against contractors, by contract. |
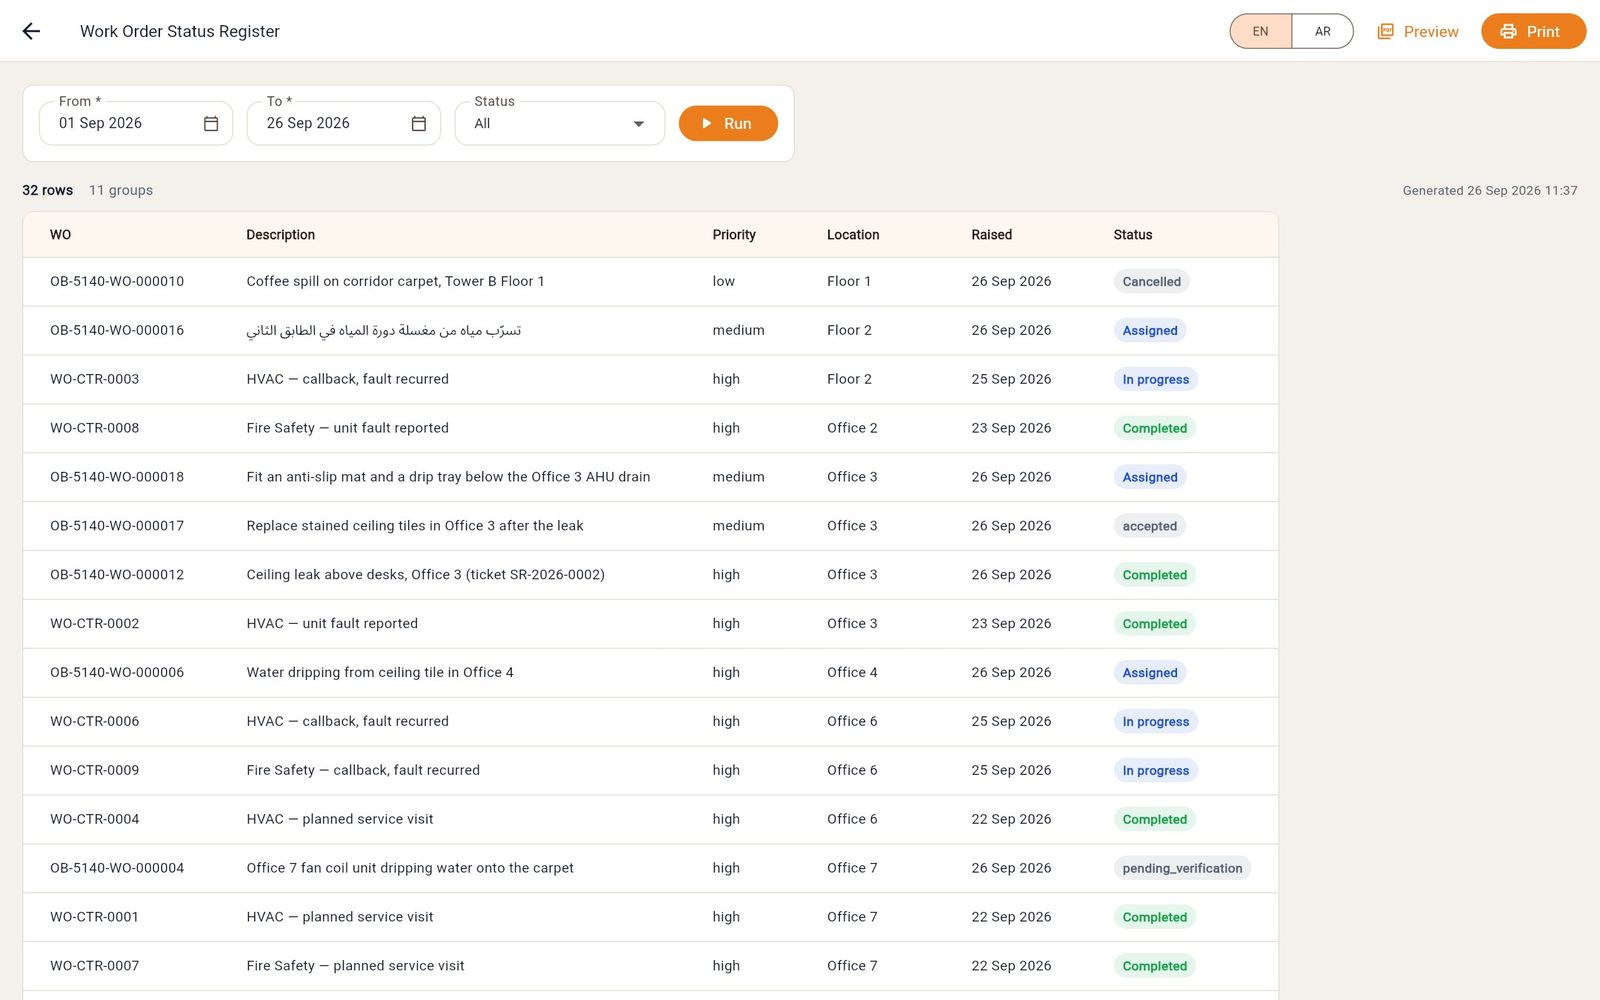
- Click Open on a report.
- Set the filters, for example From *, To * and Status, and click Run.
- Switch the report language with EN / AR, check it with Preview, and click Print to print or save it as PDF.
SLA targets, holds and breaches
- Who: Supervisor, FM Manager, FM Administrator
- Where: Sidebar → WORK ORDERS → SLA Escalation
Every work order gets two targets when it is created: a time to respond (the technician starts work) and a time to resolve (the job is completed). The clock runs around the clock from the moment the job is raised. It stops when the job is completed, cancelled or rejected, and pauses while the job is on hold.
Choosing the priority: the priority matrix
The company's rule for choosing a priority is kept under USERS → Organisation & SLA → Priority Matrix. Priority = impact × urgency: impact is how much of the site is affected (1 is the most), urgency is how fast the problem gets worse (1 is the fastest). The cell where they meet gives the priority: P1 Critical, P2 High, P3 Medium, P4 Low. Click a cell to change it. The same tab lists the SLA pause reasons.
Targets by priority
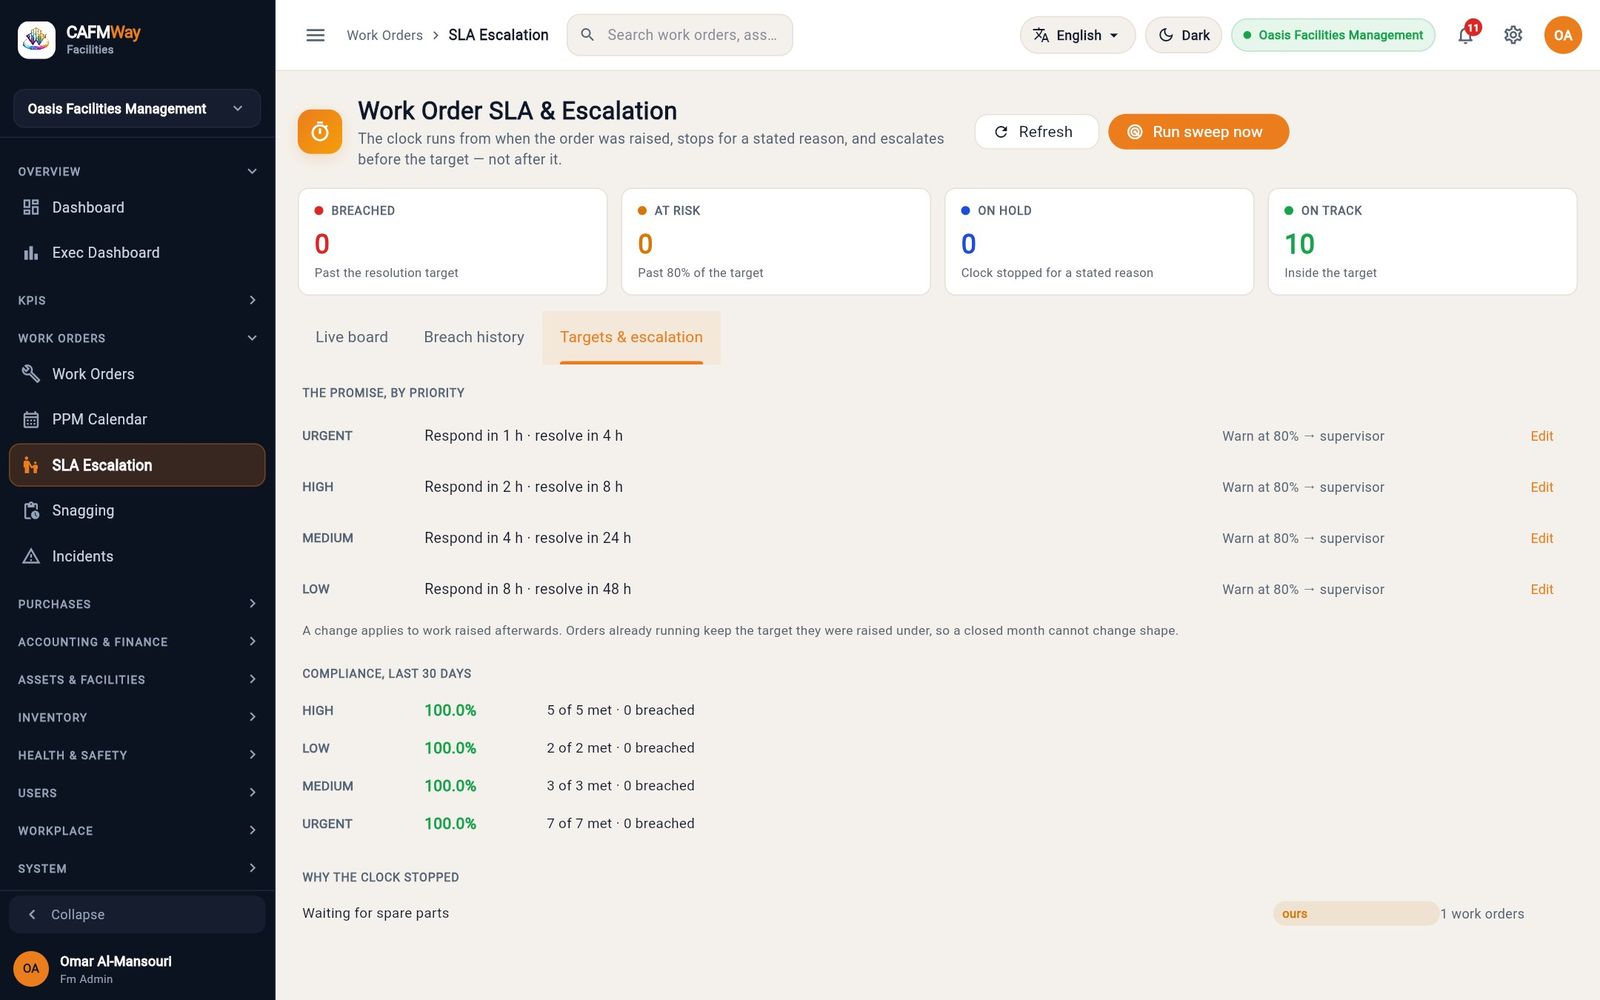
Open the Targets & escalation tab. THE PROMISE, BY PRIORITY lists the targets:
| Priority | Respond within | Resolve within | Warn at | Escalate to |
|---|---|---|---|---|
| Urgent (Critical on the wizard) | 1 h | 4 h | 80% | Supervisor |
| High | 2 h | 8 h | 80% | Supervisor |
| Medium | 4 h | 24 h | 80% | Supervisor |
| Low | 8 h | 48 h | 80% | Supervisor |
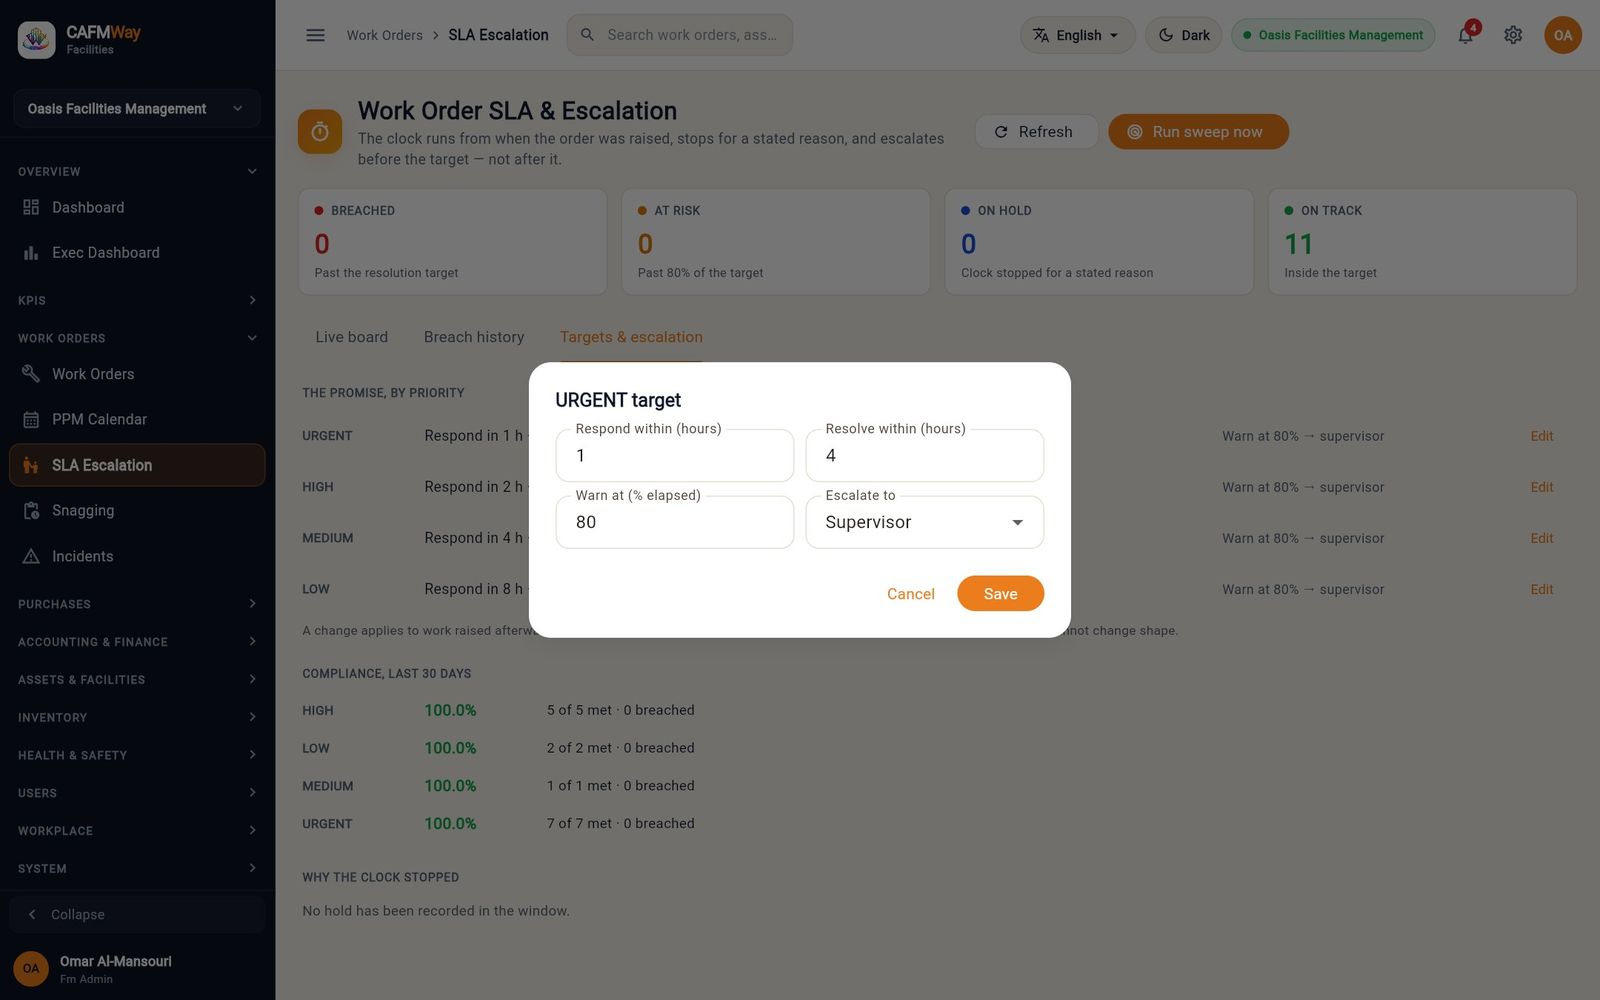
To change a priority's targets, click Edit, change Respond within (hours), Resolve within (hours), Warn at (% elapsed) and Escalate to (Supervisor, FM Manager or FM Admin), and click Save.
Live board
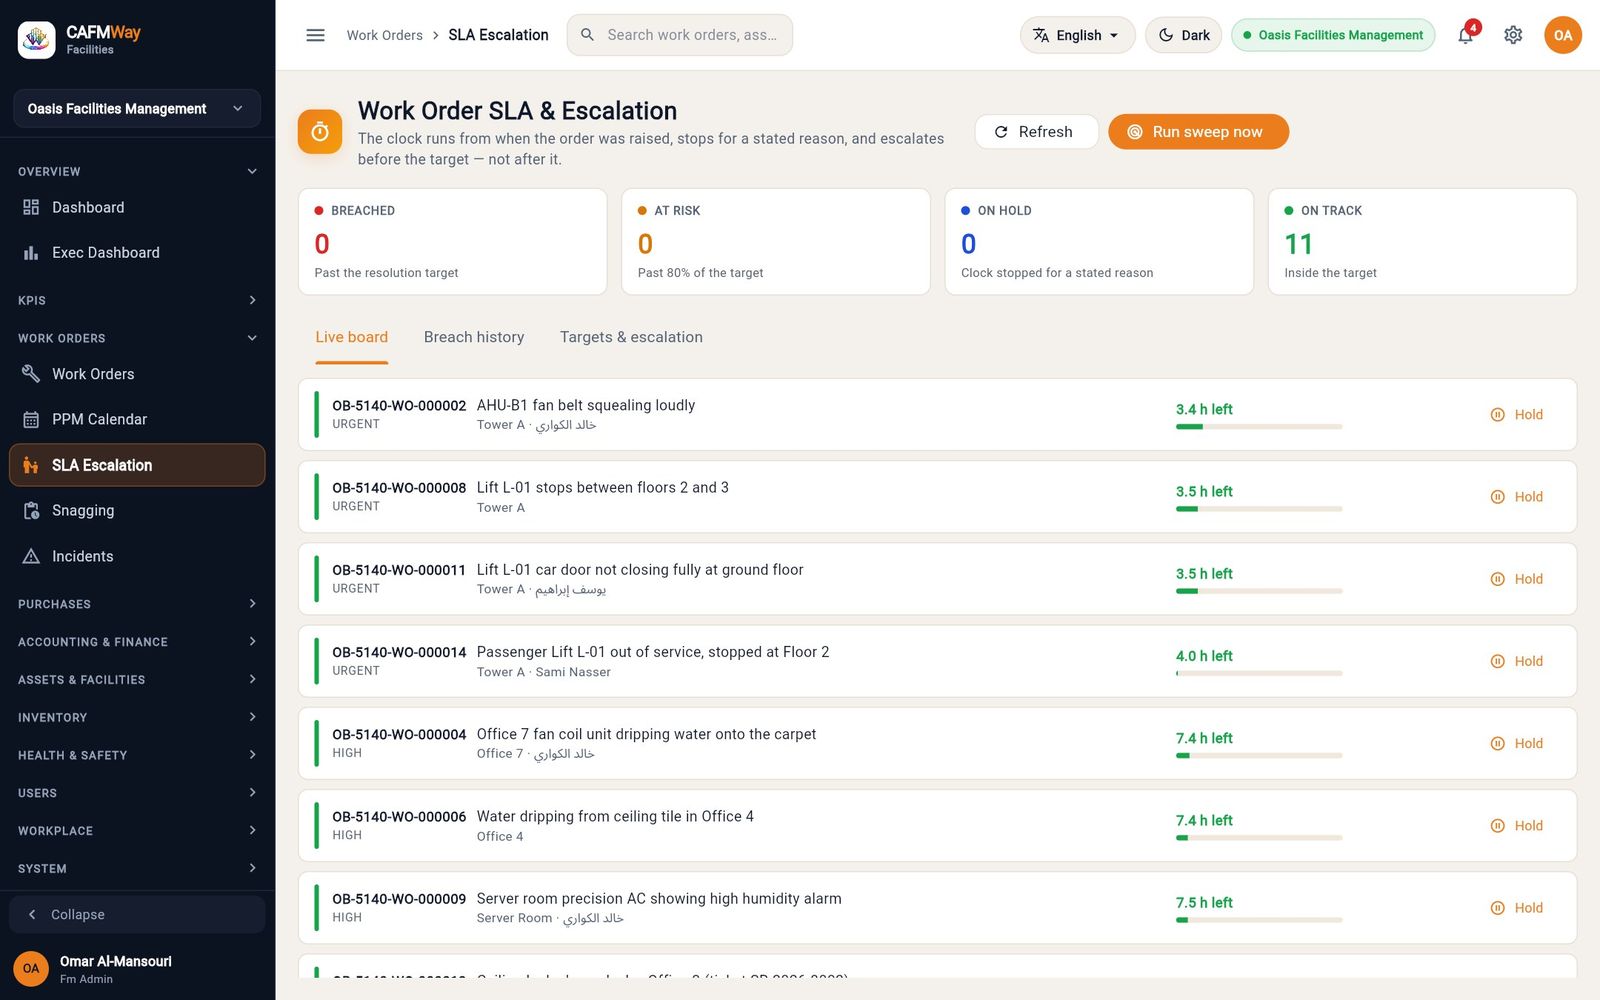
The Live board tab lists open jobs with the time left, most urgent first. The tiles count BREACHED (past the resolution target), AT RISK (past the warning percentage), ON HOLD and ON TRACK.
Put a job on hold
When a job cannot move for a reason outside the technician's control, stop its clock:
On the Live board, click Hold on the job.
In Stop the clock on …?, choose the Reason. Each reason says who carries the delay: ours (the service provider), client or force majeure. The reasons are Safety hold, Waiting for quotation approval, Waiting for client access, Waiting for spare parts, Waiting for permit issue and Adverse weather stand-down.
Add a Note (optional) and click Hold.
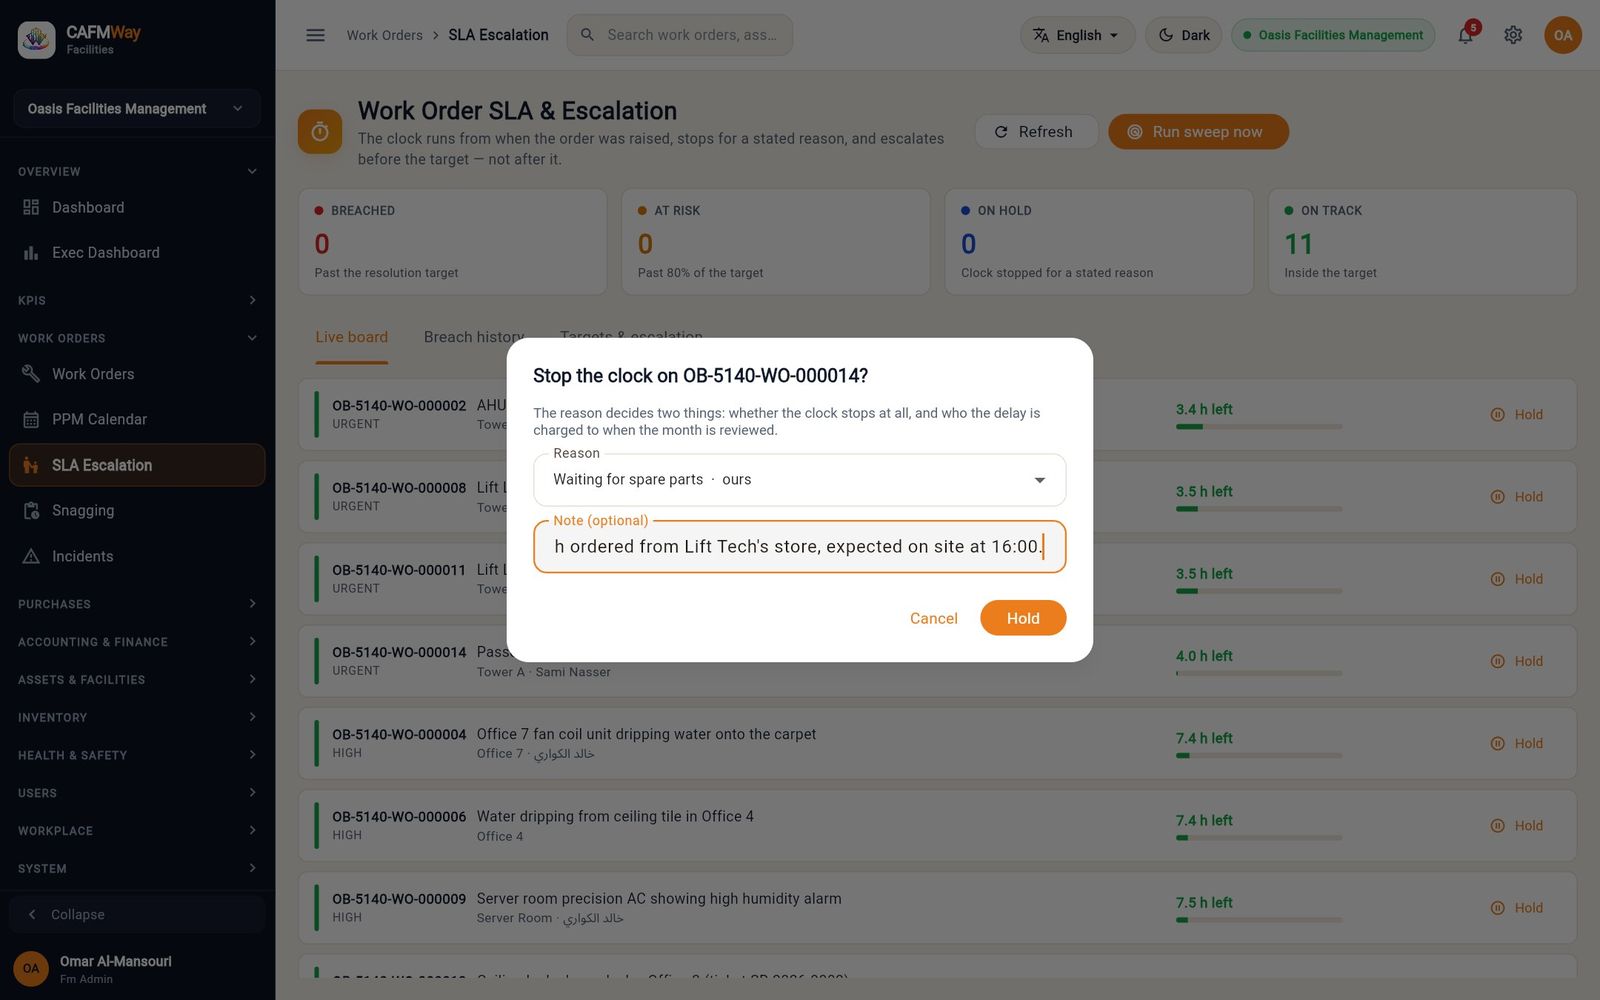
Figure 93 Holding the lift job while the door lock switch is on its way. The job shows On hold with the reason, and the ON HOLD tile goes up.
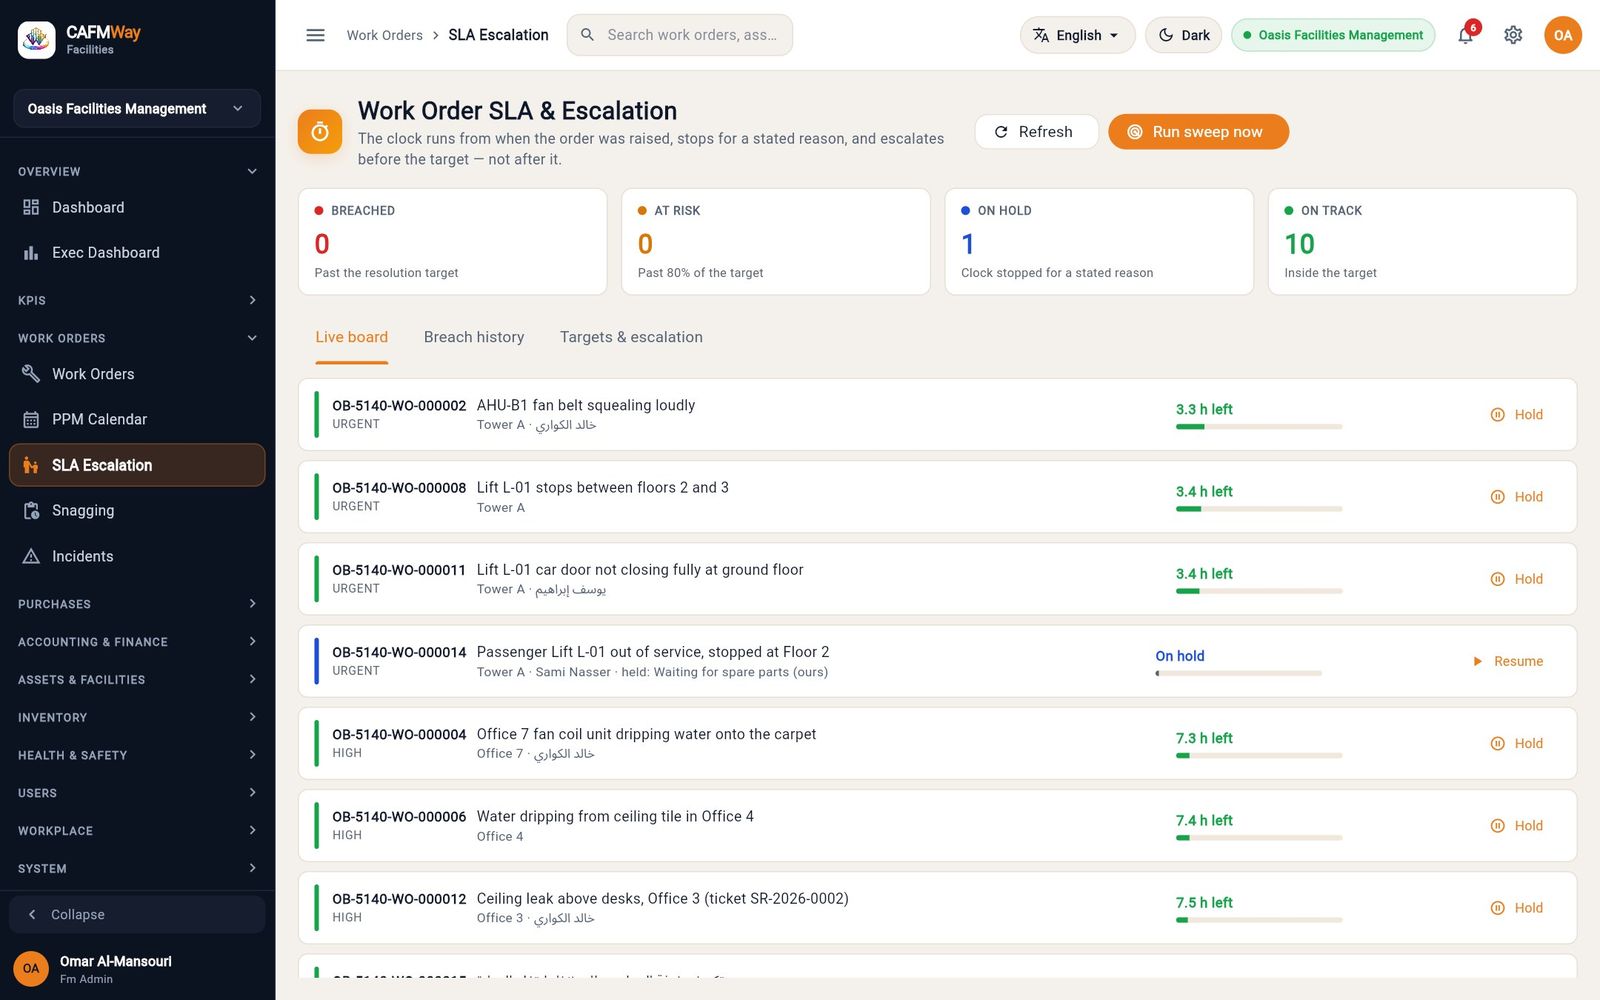
Figure 94 The live board with the lift job on hold for spare parts. When work can continue, click Resume. The targets move out by the time the job was on hold ("Clock restarted. Targets moved out by …").
WHY THE CLOCK STOPPED on the Targets & escalation tab sums the holds by reason for the month.
Breaches and escalation
The system checks all open jobs every 15 minutes (Run sweep now checks at once):
| Level | When | Who is told |
|---|---|---|
| At risk | The warning percentage of the resolution time has passed | The technician and the supervisor |
| L1 | A target has passed (response or resolution) | The technician, the supervisor and the escalation role |
| L2 | Still open after a further step (half the resolution time, at least one hour) | The FM Manager |
| L3 | Still open after another step | The FM Administrator |
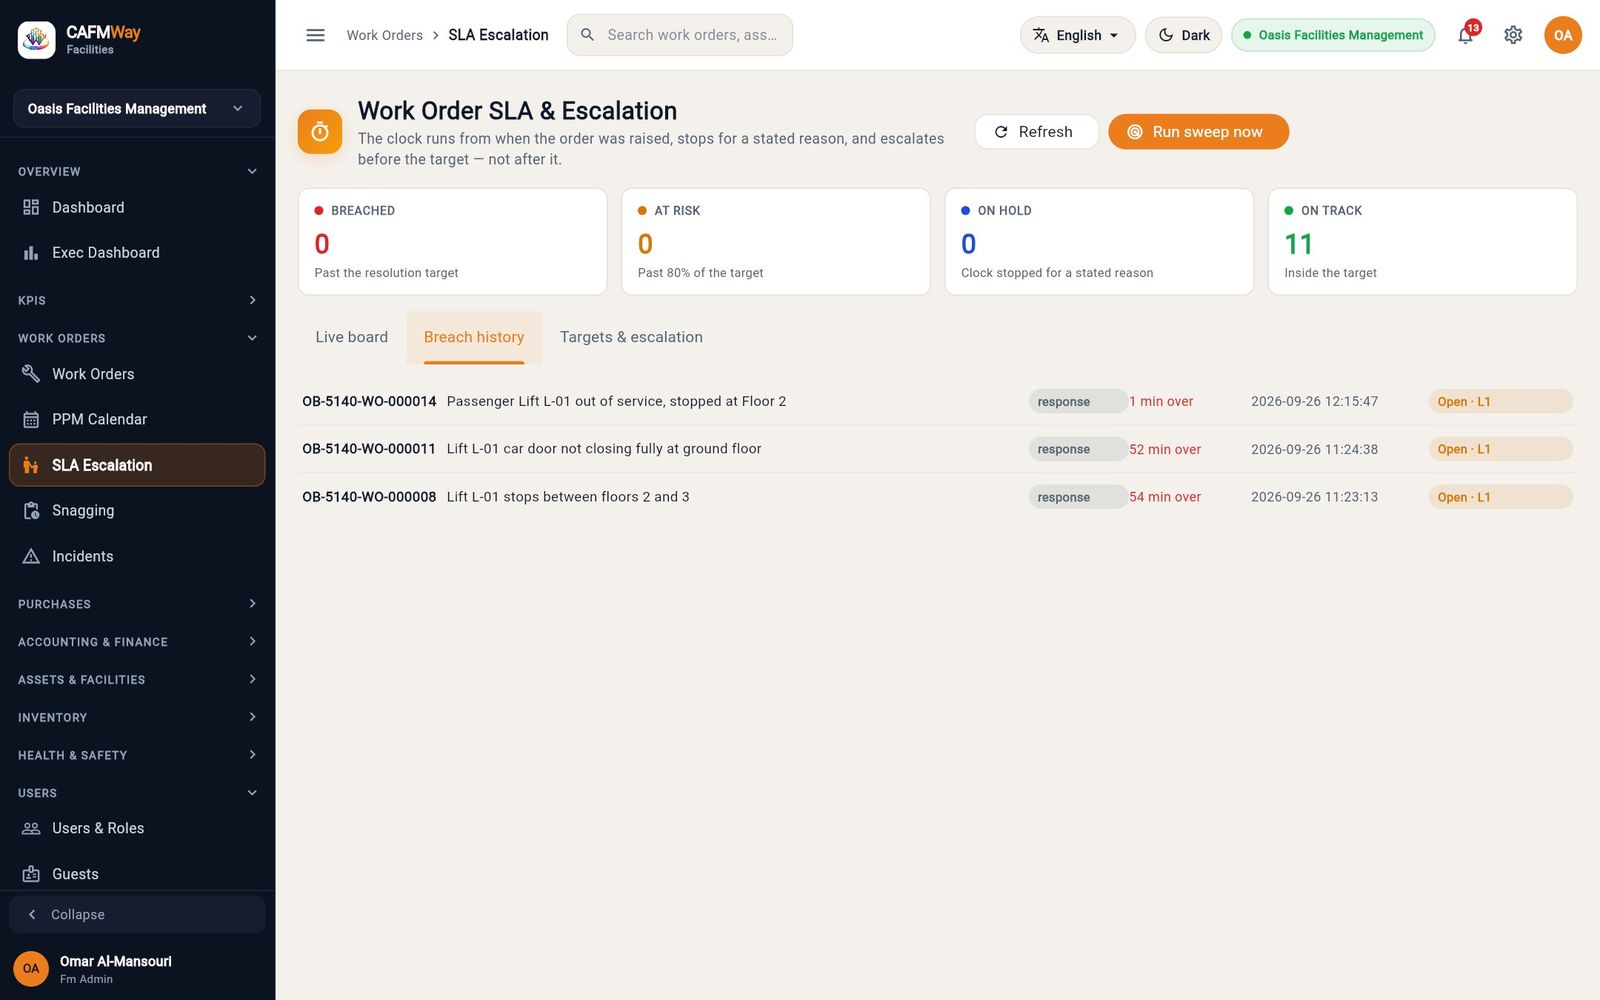
Each breach is kept on the Breach history tab with its type (response or resolution), how late it is and its level. When a job passes its resolution target, the Live board shows it as breached with a Take it button: click it to acknowledge the breach, and the escalation stops climbing. Notifications appear in the bell menu.
Planned preventive maintenance
- Who: FM Manager, FM Administrator, Supervisor
- Where: Sidebar → WORK ORDERS → PPM Calendar; Dashboard → Quick Actions → Schedule PPM
A PPM plan repeats a service on a set of assets or locations. Creating the plan generates the first work orders at once; the system then adds each new occurrence when its date comes.
Create a plan
The example services Chiller CH-01 every quarter.
- On PPM Calendar, click Schedule PPM. The Schedule PPM dialog opens.
- Type the PLAN NAME, for example
Chiller CH-01 quarterly service. - Choose the CATEGORY and SUB-CATEGORY, for example HVAC and Chiller planned service. Technicians and contractors qualified for this classification see the plan.
- In REPEATS, choose Daily, Weekly, Monthly, Quarterly, Every 6 months, Yearly, or Every N days (then type the number of days).
- Set FIRST DUE, GENERATE AHEAD (how many occurrences to create now, 1 to 60) and DURATION (MIN).
- Under TARGETS, type part of a code or name in the filter and tick the assets or locations. The orange box shows how many work orders will be generated and on which dates.
- Click Create & generate.
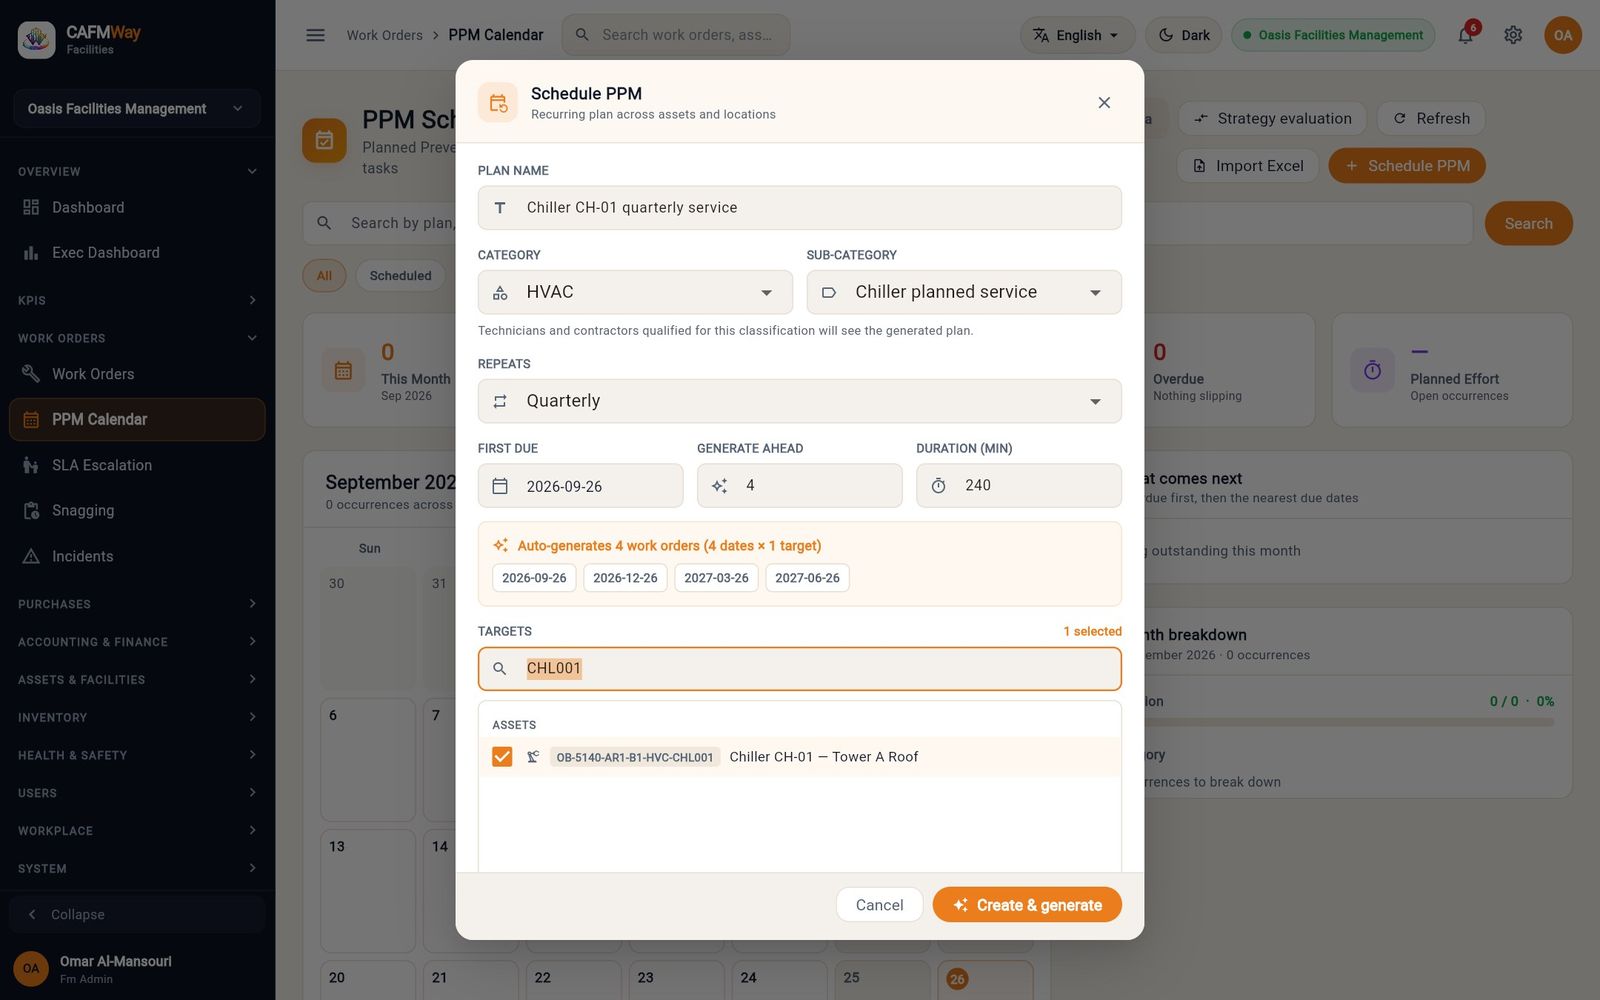
Each date and target gets a work order titled [PPM] Chiller CH-01 quarterly service, with type Preventive, priority Medium and status Assigned, numbered in a separate series (WO-2026-0001). The technician, the plan's owner and the dispatch pool are reminded three days before and on the due date ("PPM due today: …"), and the job is reported as overdue after the date.
Use the calendar
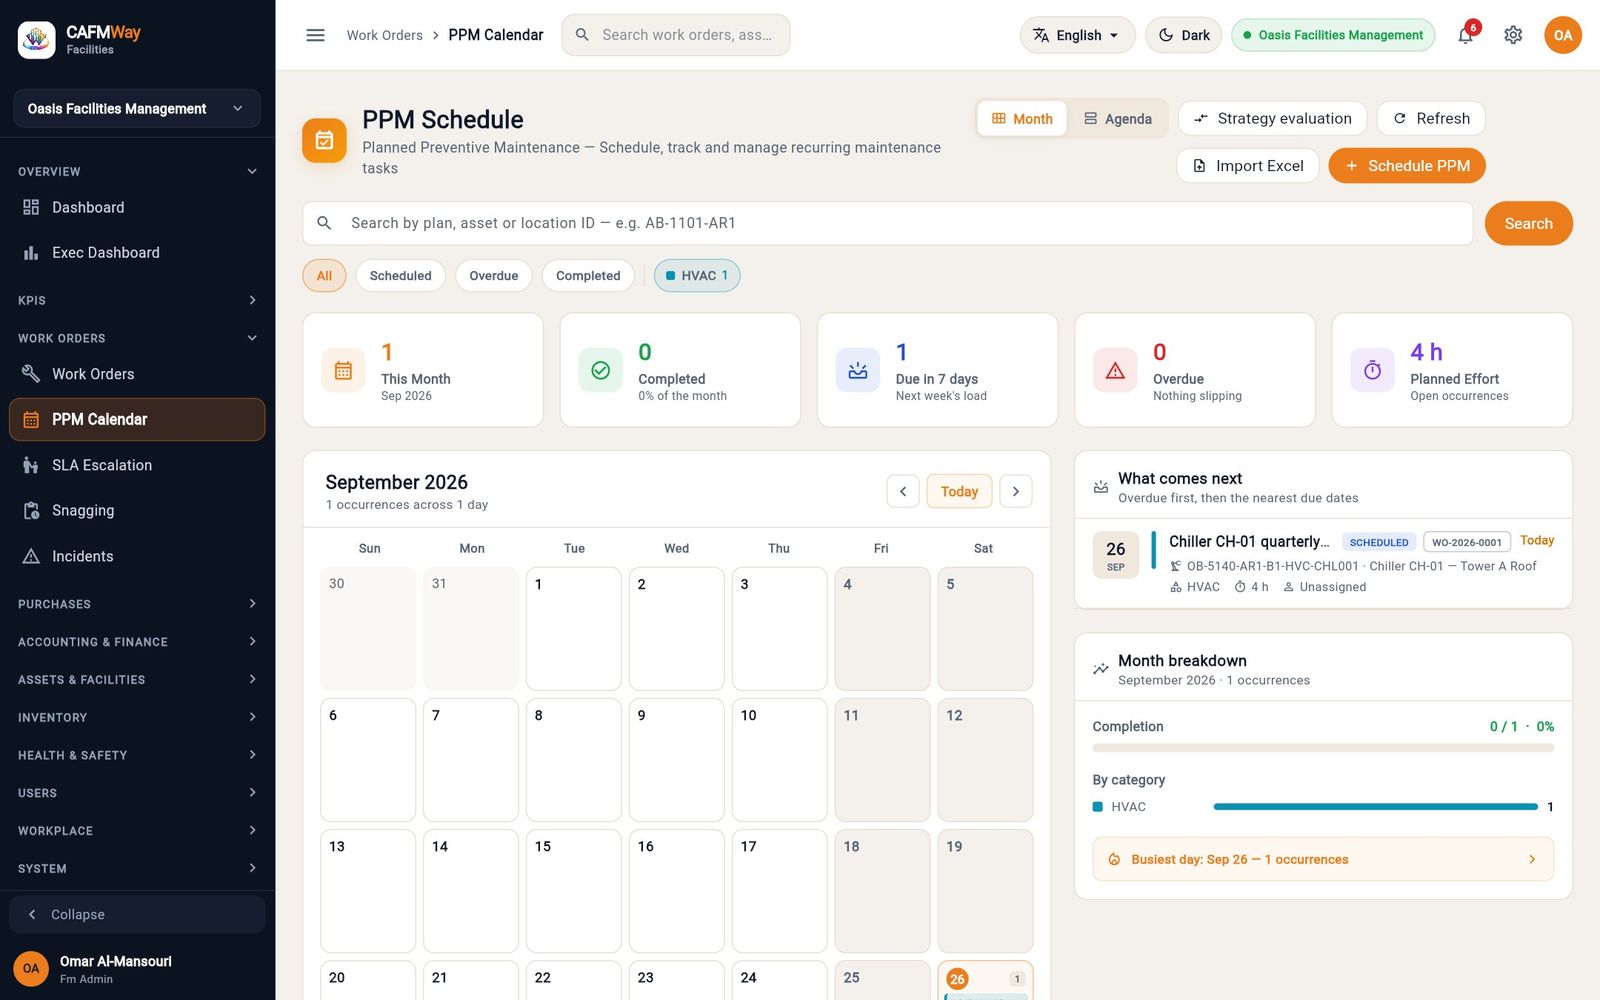
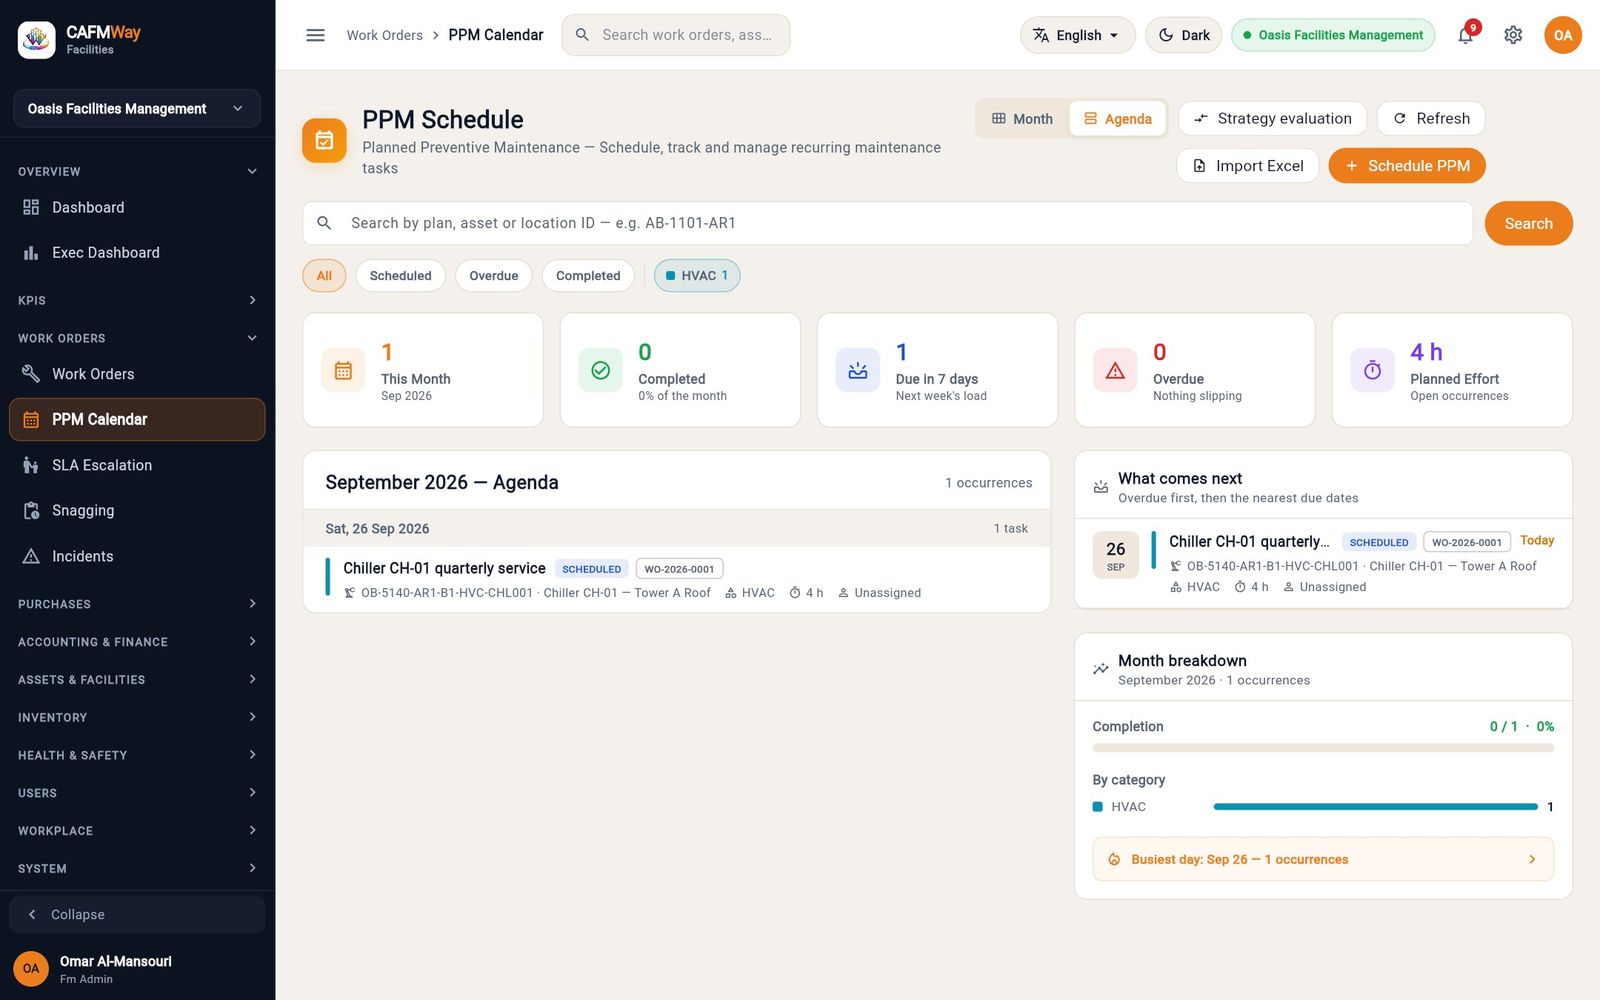
- Month shows the occurrences on a grid; Agenda lists them by day.
- The tiles show This Month, Completed, Due in 7 days, Overdue and Planned Effort.
- What comes next lists overdue visits first, then the nearest ones. Month breakdown shows completion and the split by category.
- Use the search box and the All, Scheduled, Overdue and Completed chips to filter.
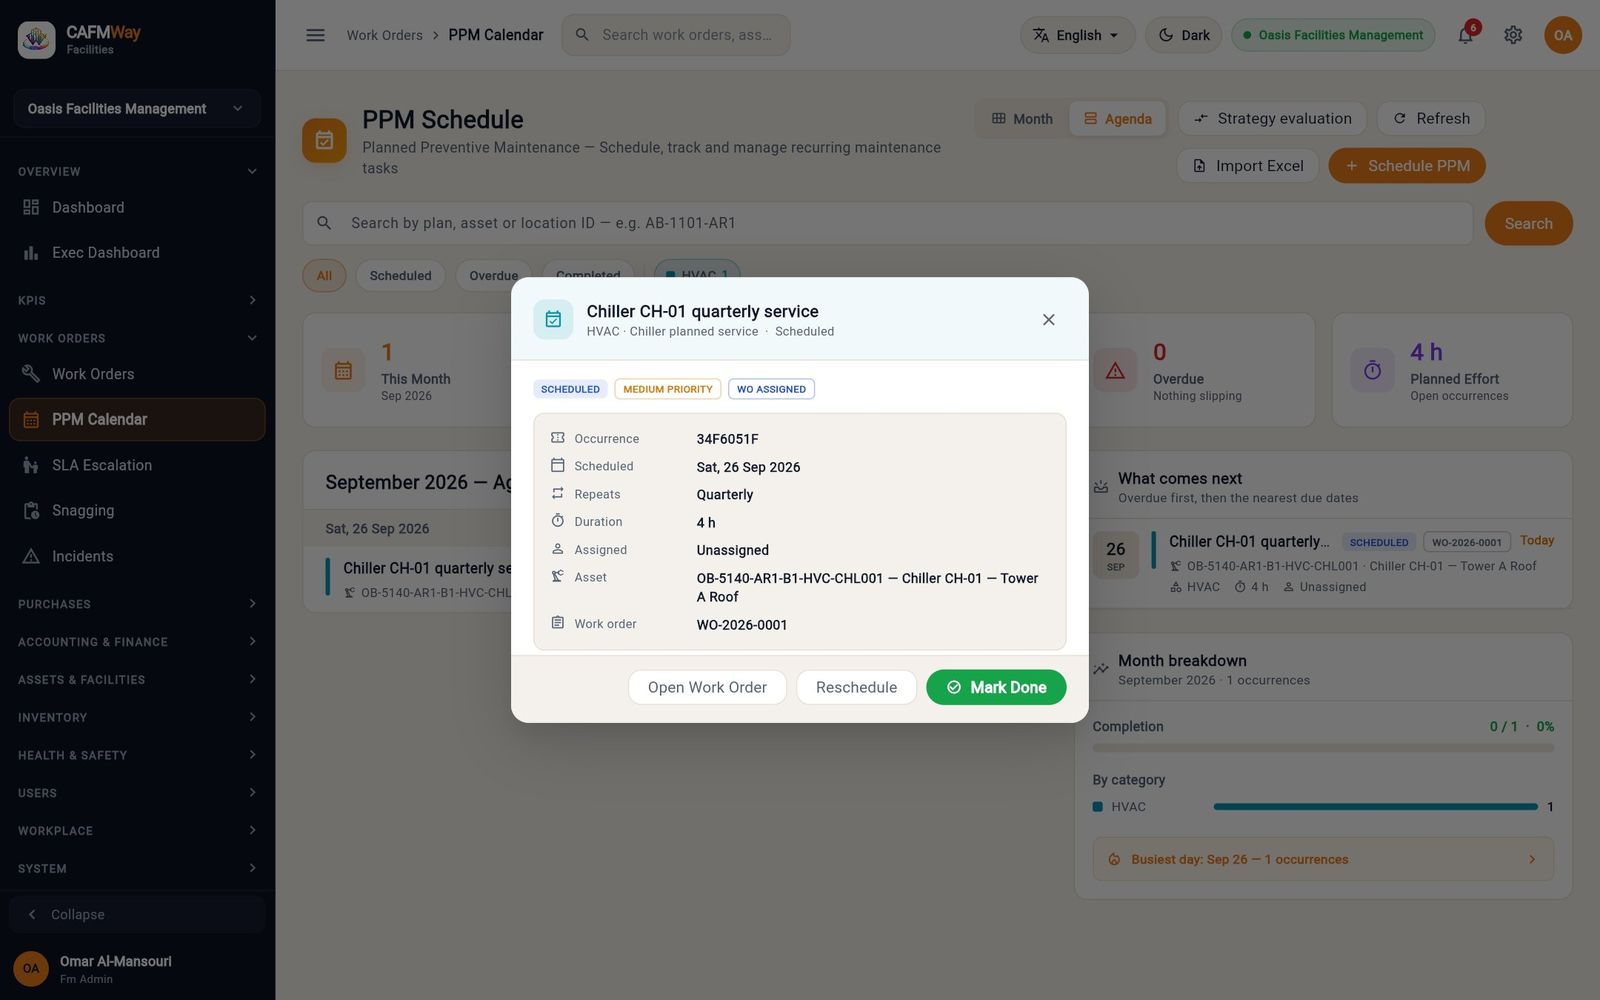
Click an occurrence to open it. The dialog shows the schedule, duration, asset and work order, and offers:
- Open Work Order — opens the generated work order, for example to reassign it.
- Reschedule — moves only this visit to another date, with a reason. The plan keeps its own rhythm.
- Mark Done — marks the visit as completed.
Request for Approval on work orders
- Who: FM Administrator (rules); the named approvers (decisions)
- Where: Sidebar → SYSTEM → Settings → Approvals tab; Sidebar → Approvals
Nothing needs approval until an administrator switches a rule on. With Work order — raising on, a work order raised by anyone who is not an approver is held: it exists but cannot be started, updated, reassigned or completed until an approver releases it.
Switch the rule on
Open Settings and click the Approvals tab. The Request for Approval section lists the actions that can be held, grouped by module.
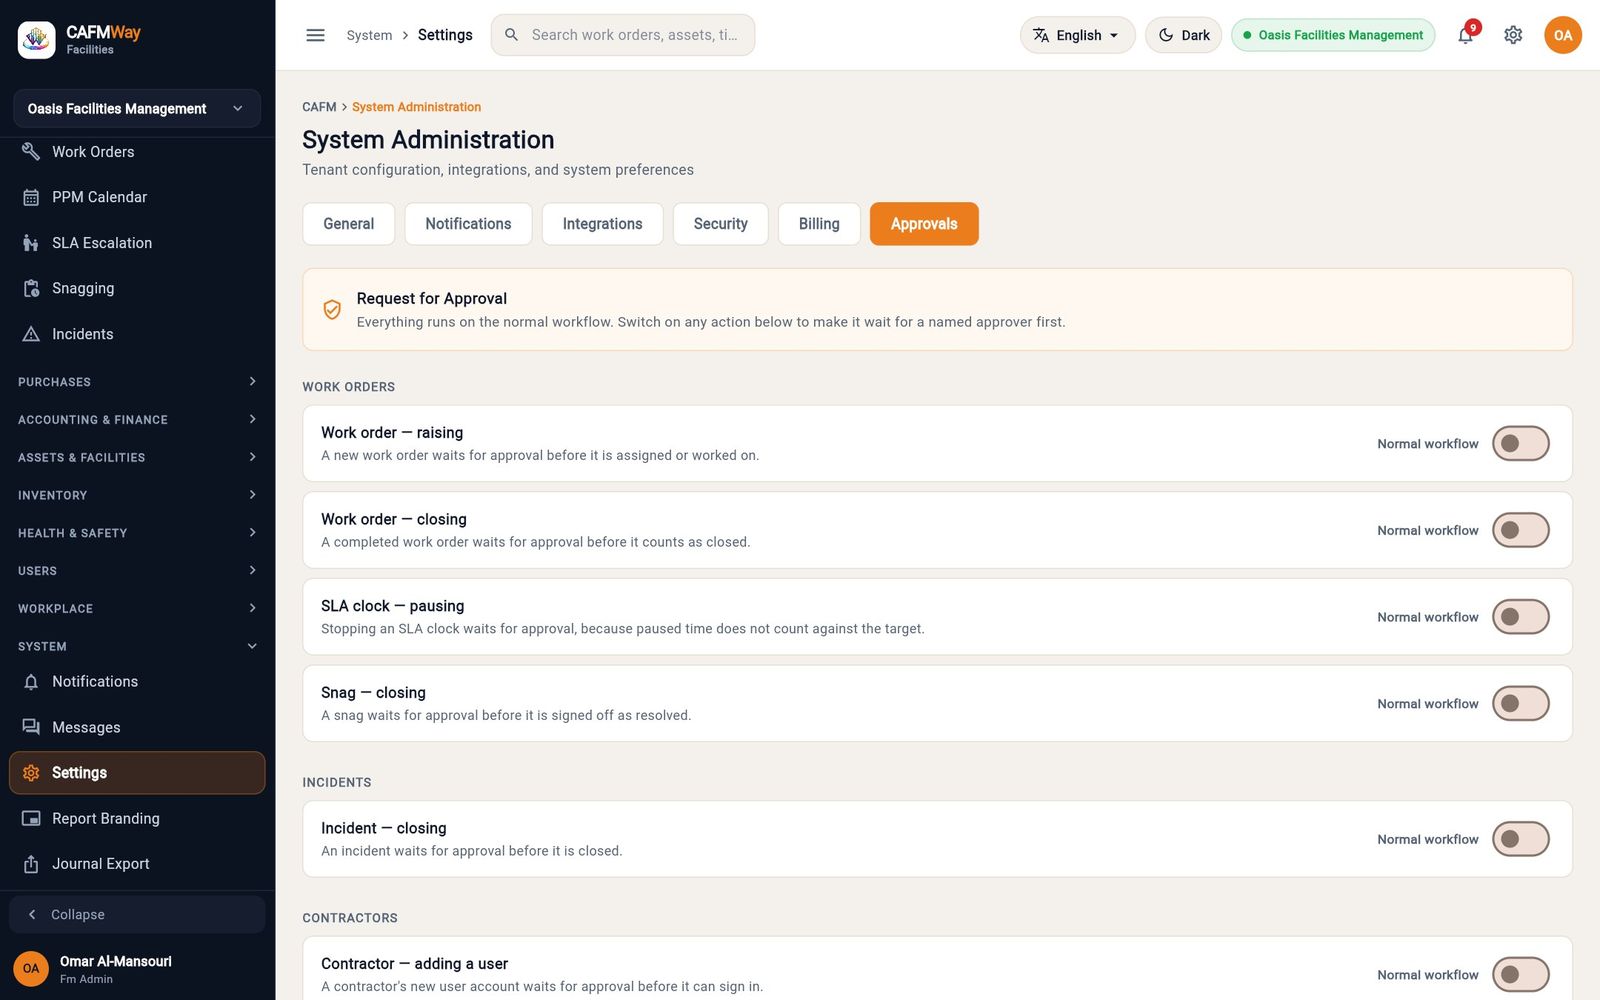
Figure 101 The Approvals tab of Settings with the work order rules. Turn on the switch of Work order — raising. The rule editor opens.
Under Who approves, tick one or more people. Any one of them can release an item.
Optionally write a Note for the requester (optional).
Click Require approval.
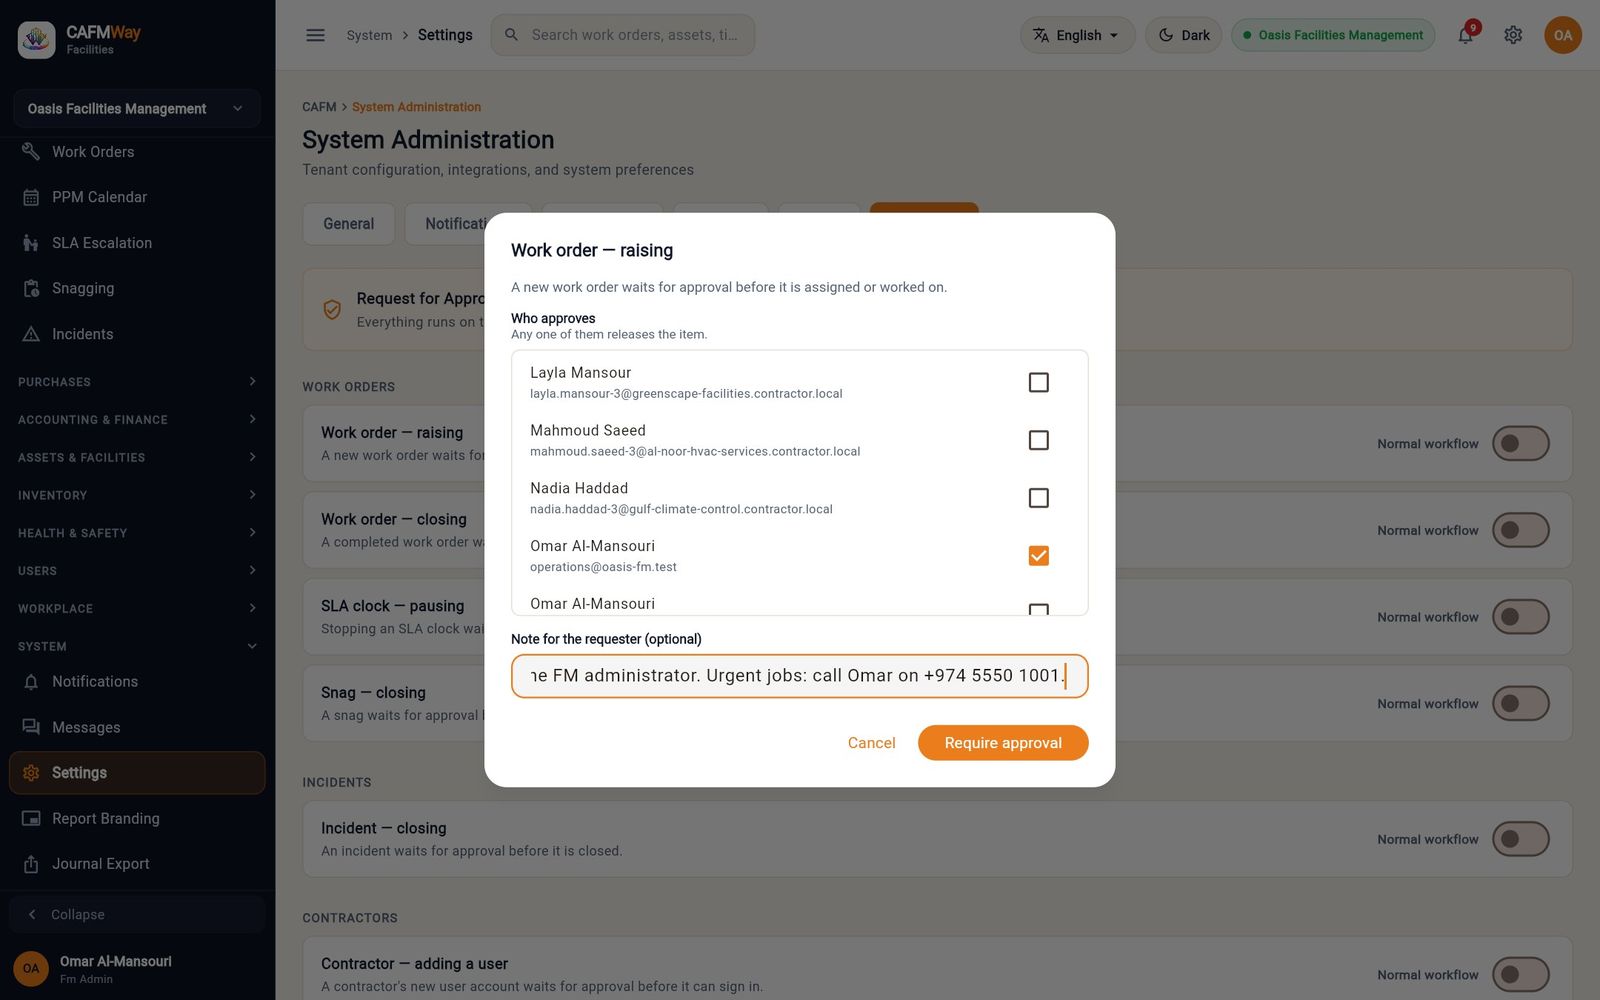
Figure 102 The rule editor with Omar Al-Mansouri as approver and a note for the requester.
Other work order rules work the same way: Work order — closing holds the close until approved, and SLA clock — pausing holds a hold request. Once a rule is on, Add department rule lets one department follow a different rule from the rest of the company.
Raise a held work order
The helpdesk agent Noura Al-Kaabi raises Replace stained ceiling tiles in Office 3 after the leak in the usual way. The work order is created and numbered, but it is held. Noura can follow it under Approvals → Sent by me, where it shows Waiting.
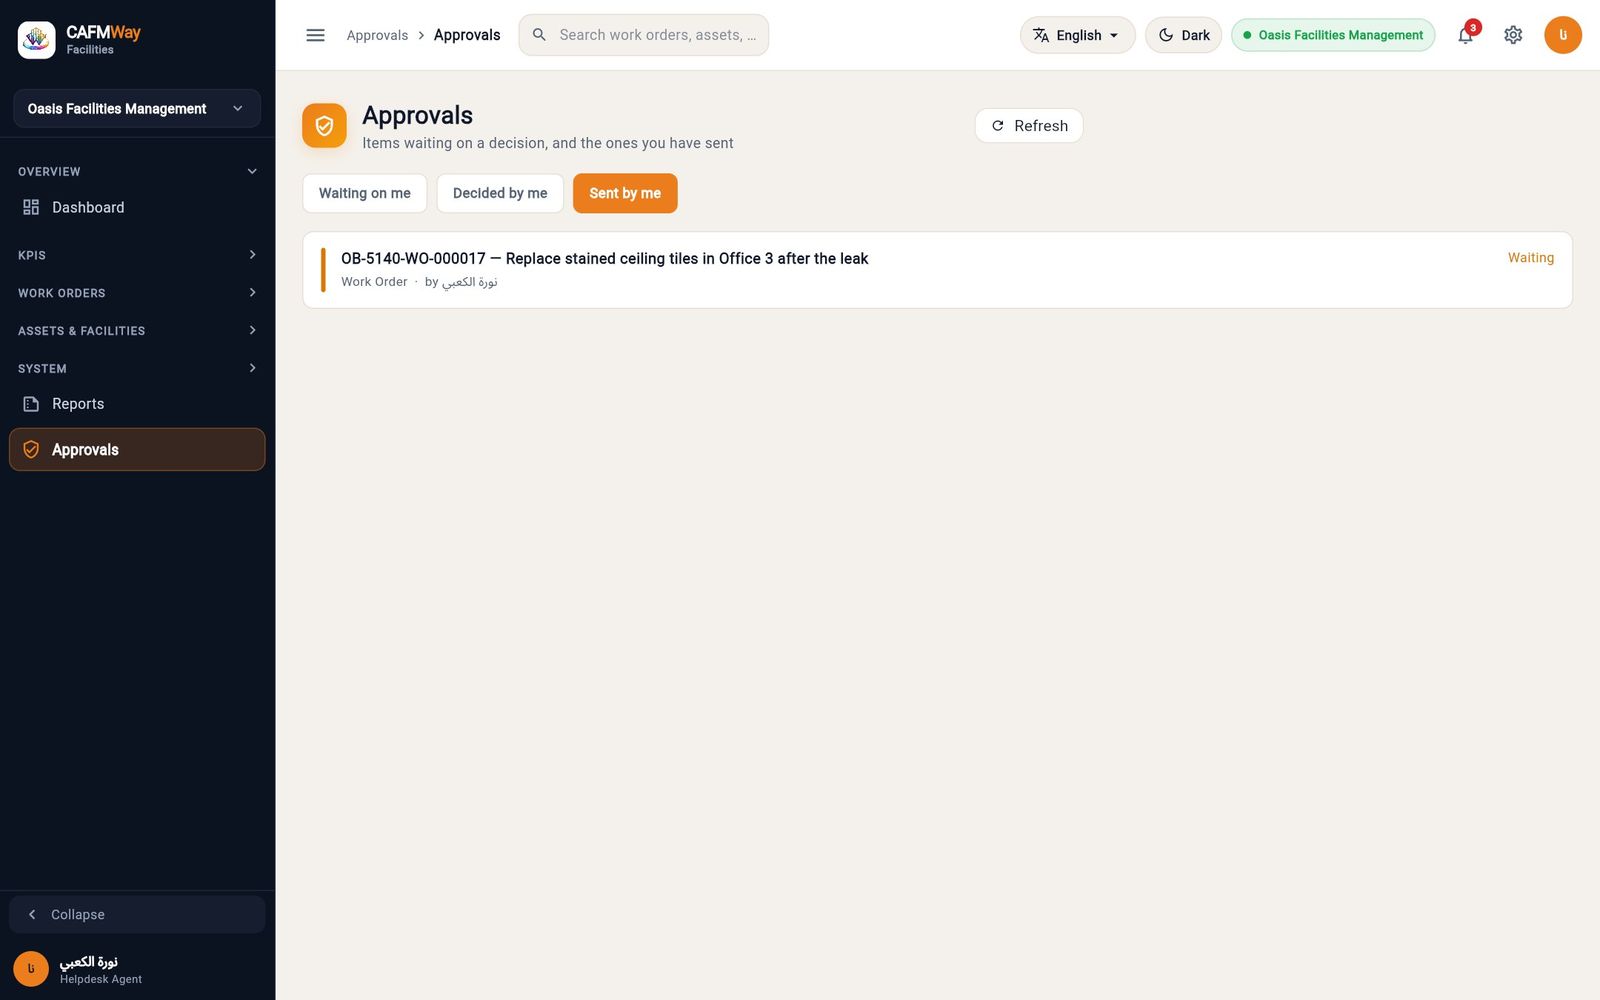
The approvers get an "Approval needed" notification. In the Technician app the job shows an "Awaiting approval" banner; in the Requestor app it shows "Awaiting approval".
Approve or reject
As an approver, open Approvals in the sidebar. Waiting on me shows the items you can decide, with a count.
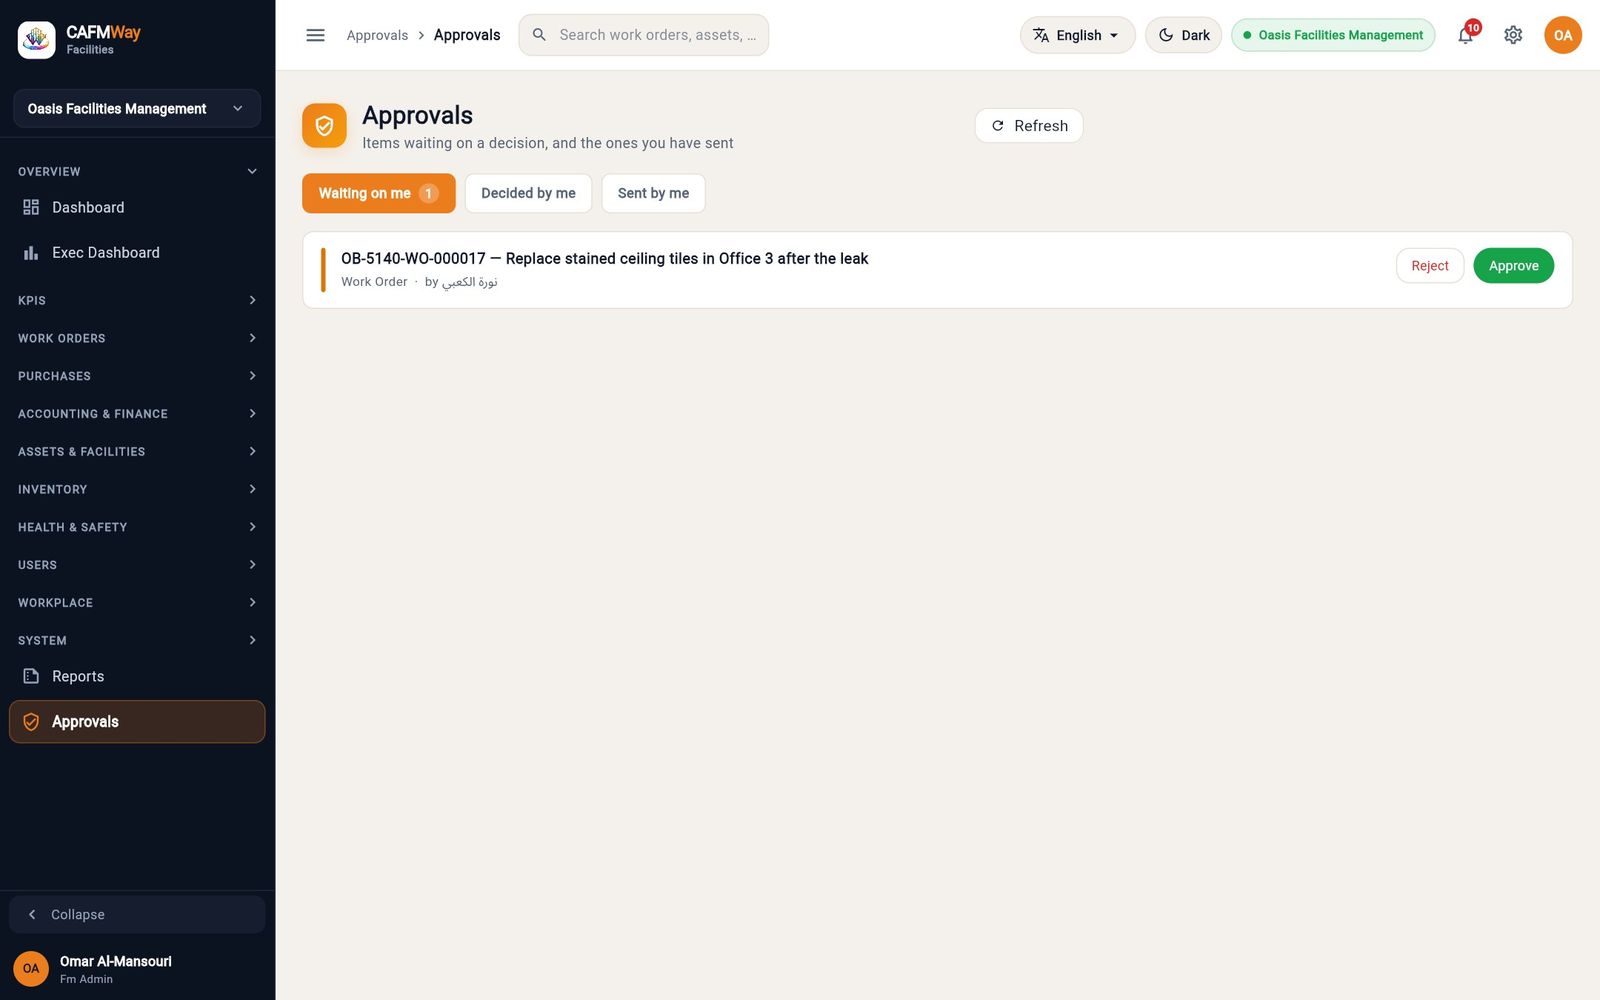
Figure 104 The approver's Waiting on me list with the ceiling-tile work order. Click Approve. In Approve this?, add a Note (optional) and click Approve.
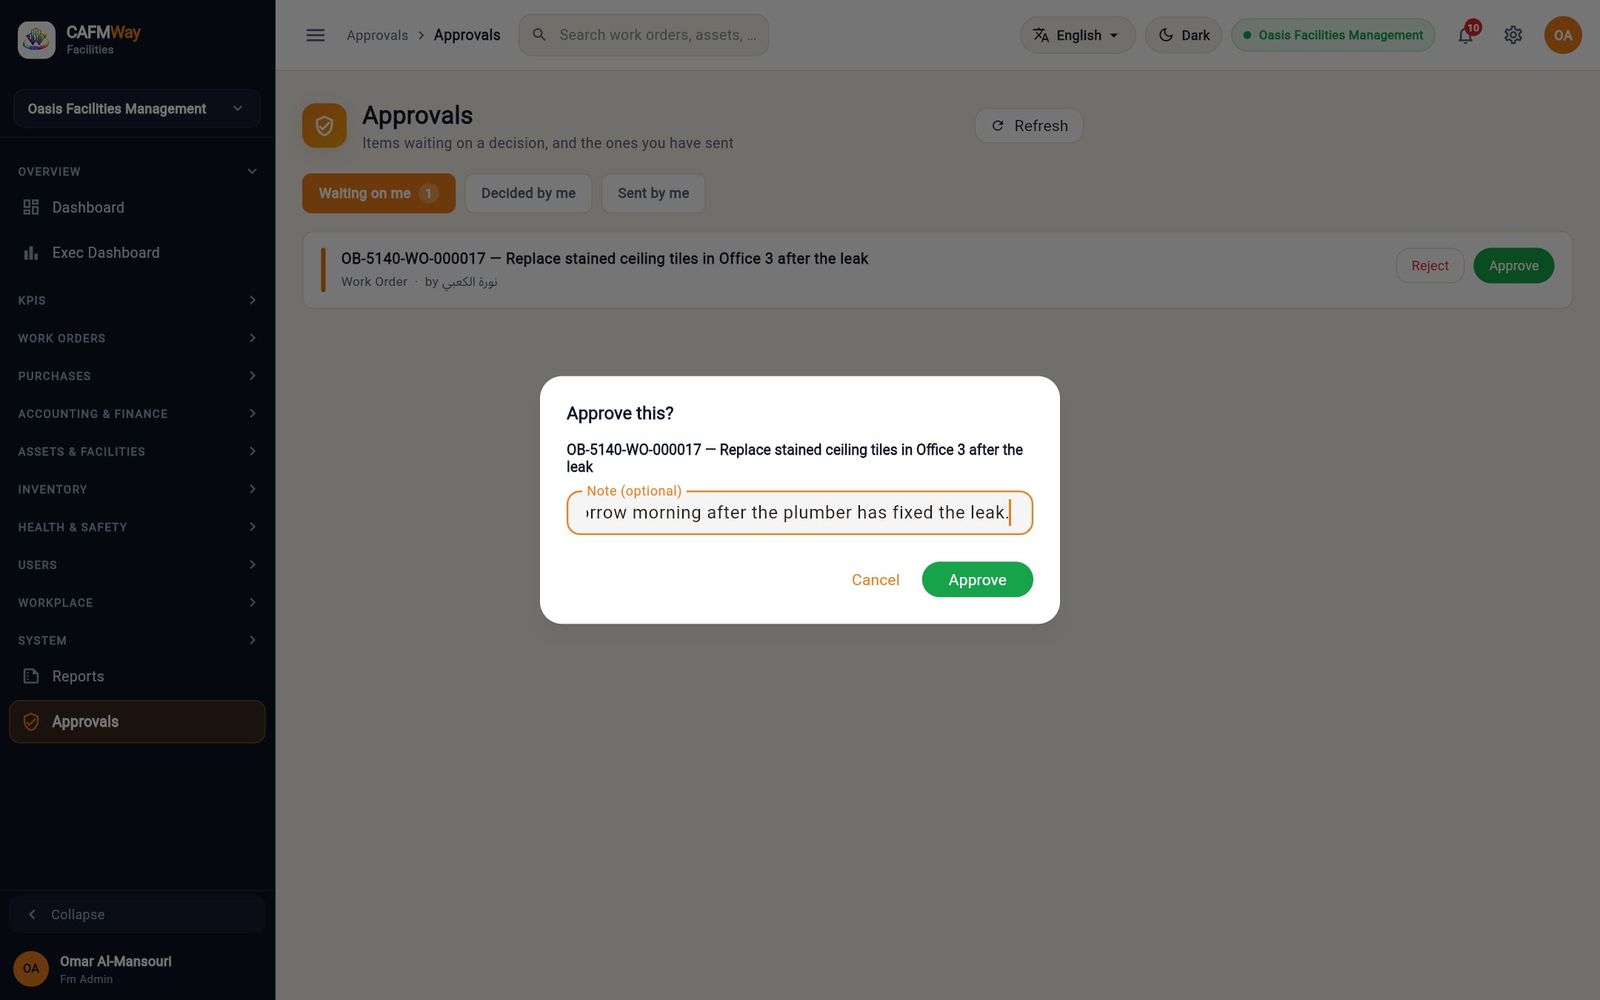
Figure 105 Approving the held work order with a note. The item moves to Decided by me with your name and note. The requester is notified, the SLA clock starts from the approval and the technician can start work.
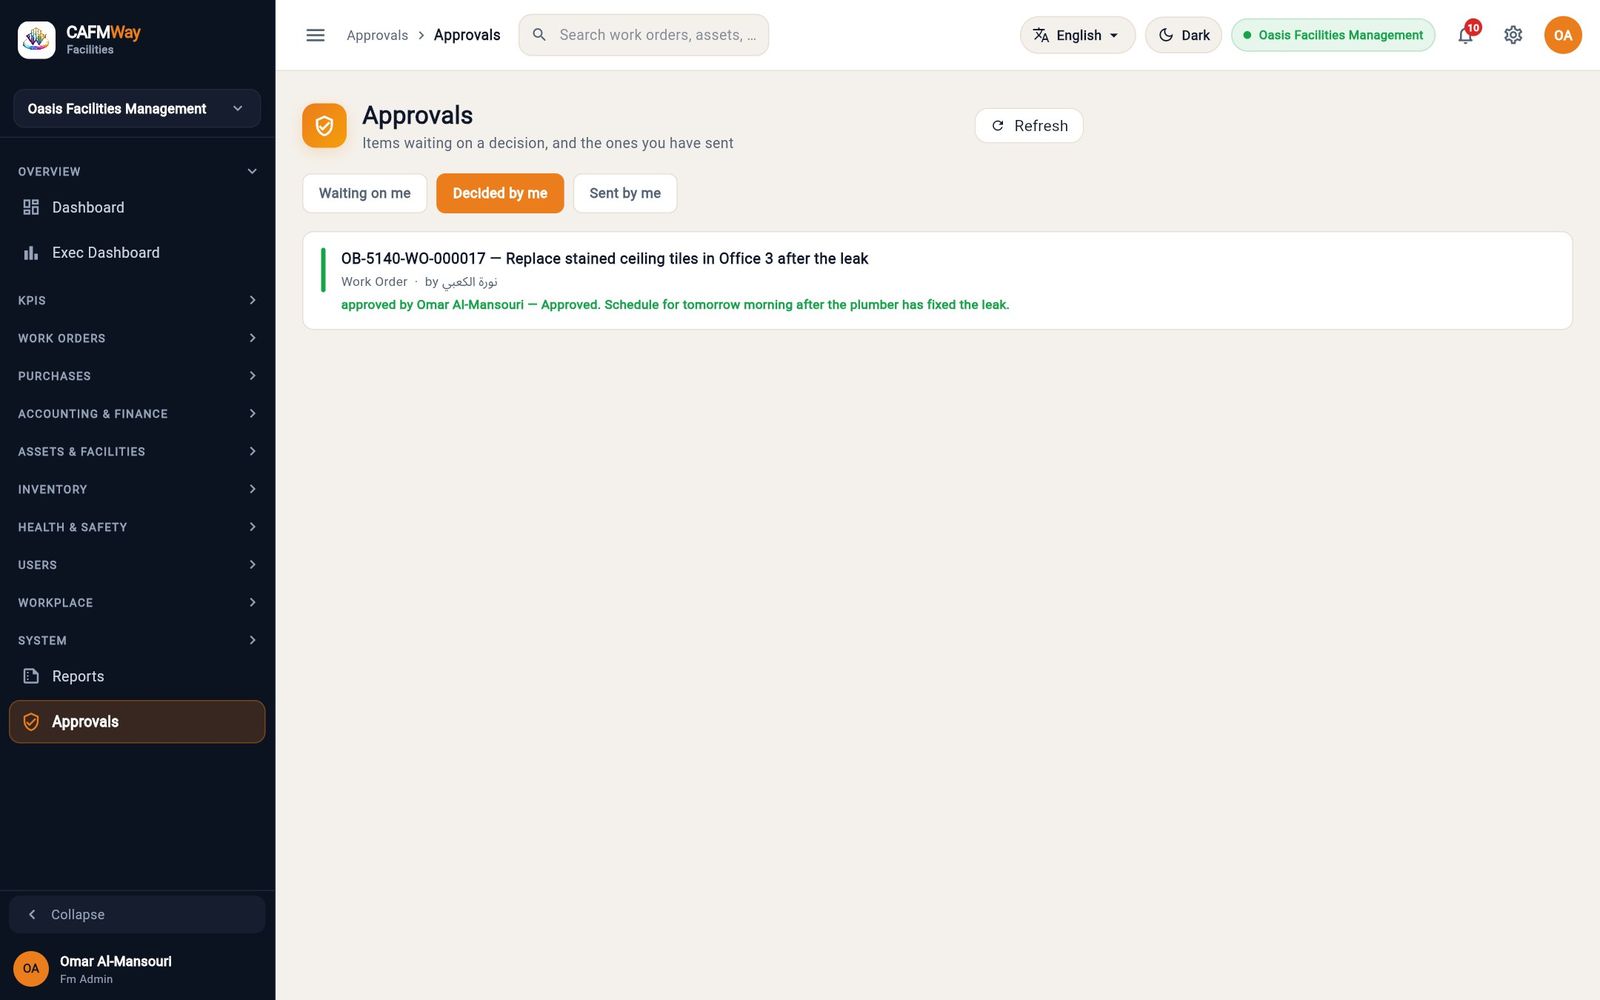
Figure 106 The decided item with the approver's note.
To refuse, click Reject and give a Reason. A rejected work order is cancelled.
Snagging
- Who: Supervisor, FM Manager, FM Administrator
- Where: Sidebar → WORK ORDERS → Snagging
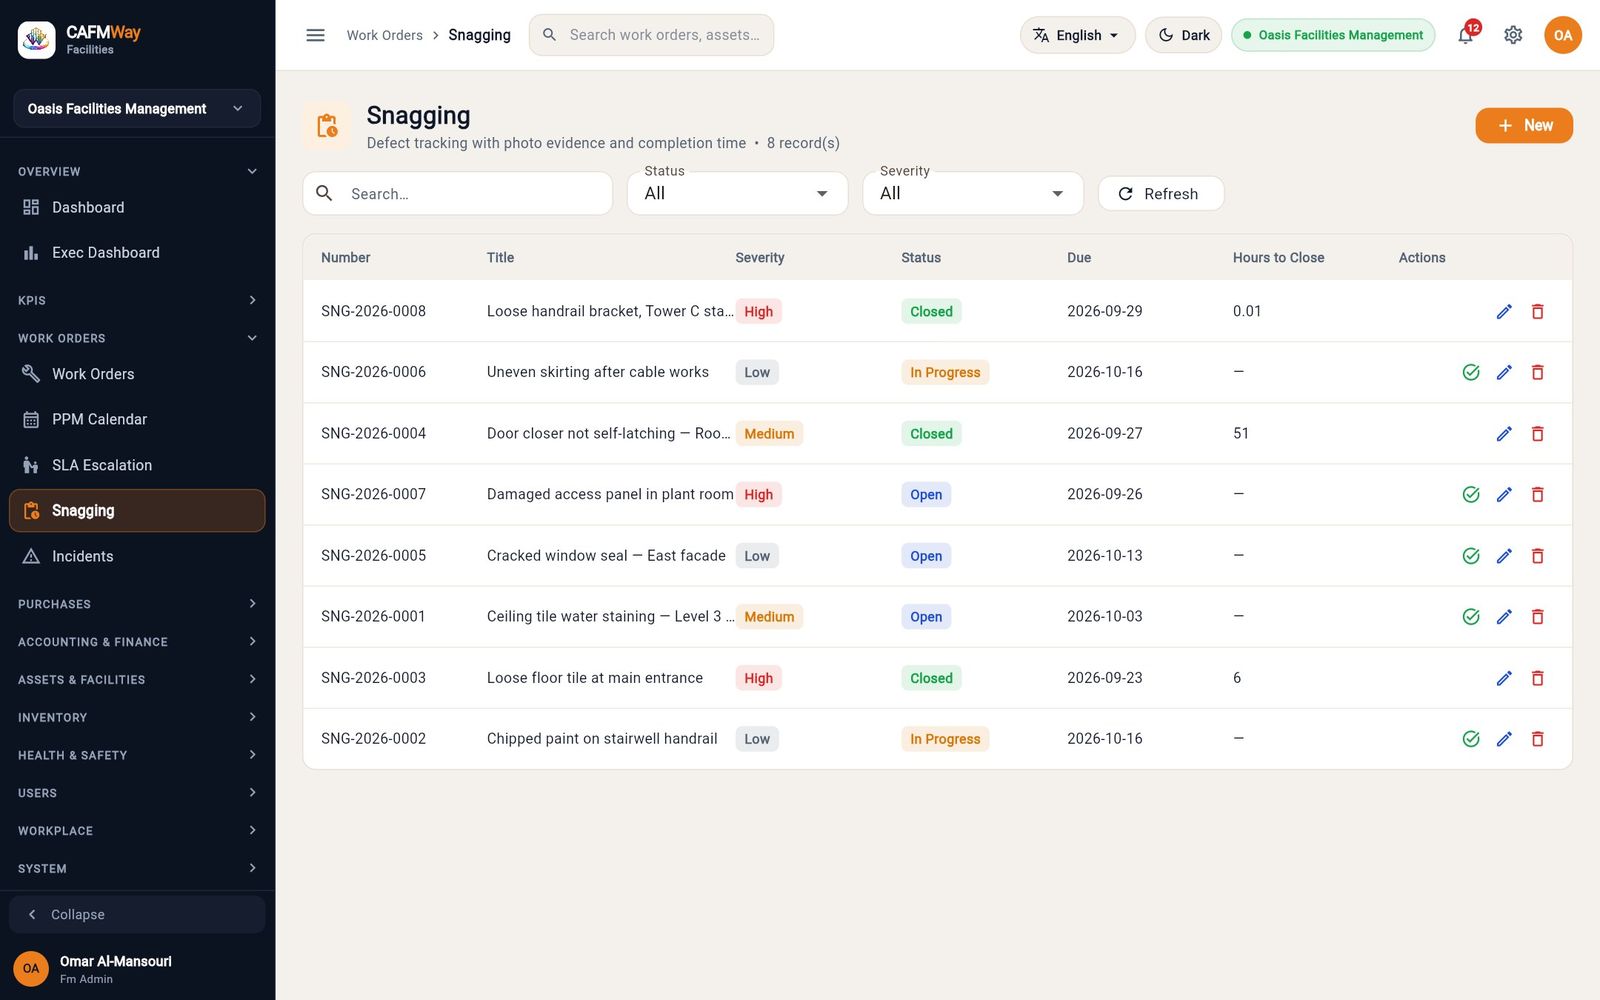
Snags are defects found at handover or inspection that the builder or contractor must put right. Each snag has a number (SNG-2026-0008), a severity, a due date and, once closed, the hours it took to close.
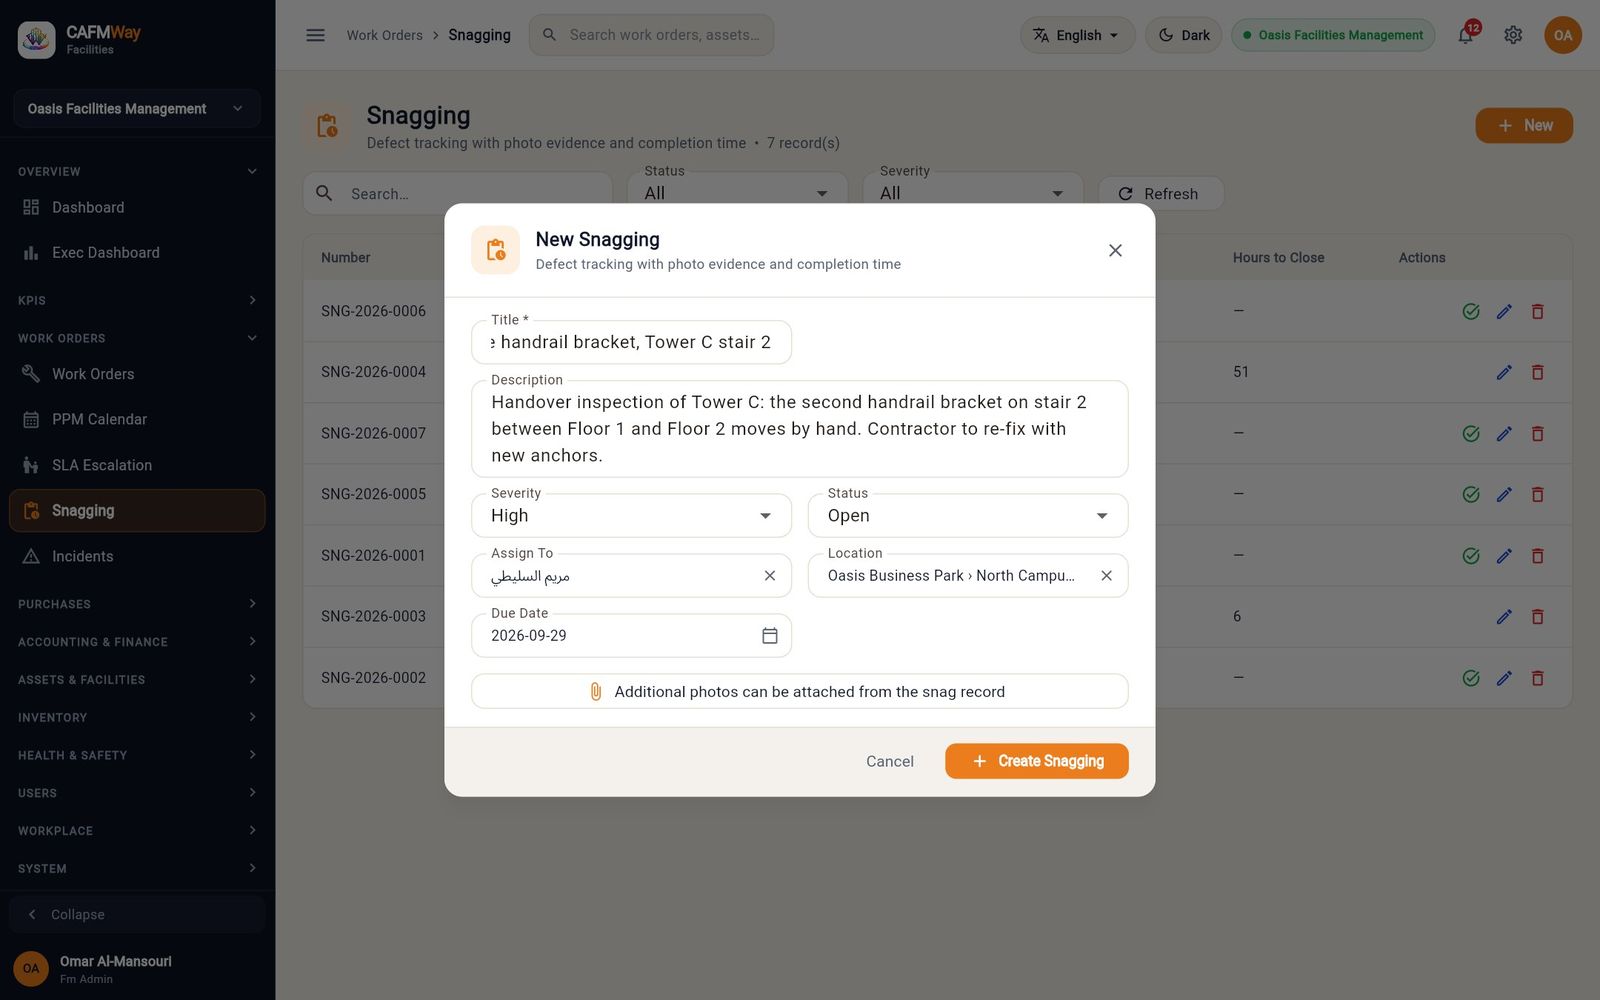
- Click New.
- Fill Title * and Description.
- Choose the Severity (Low, Medium, High) and the Status (Open, In Progress, Closed).
- Pick the person in Assign To, the place in Location and the Due Date.
- Click Create Snagging. "Saved" appears and the snag is added to the list.
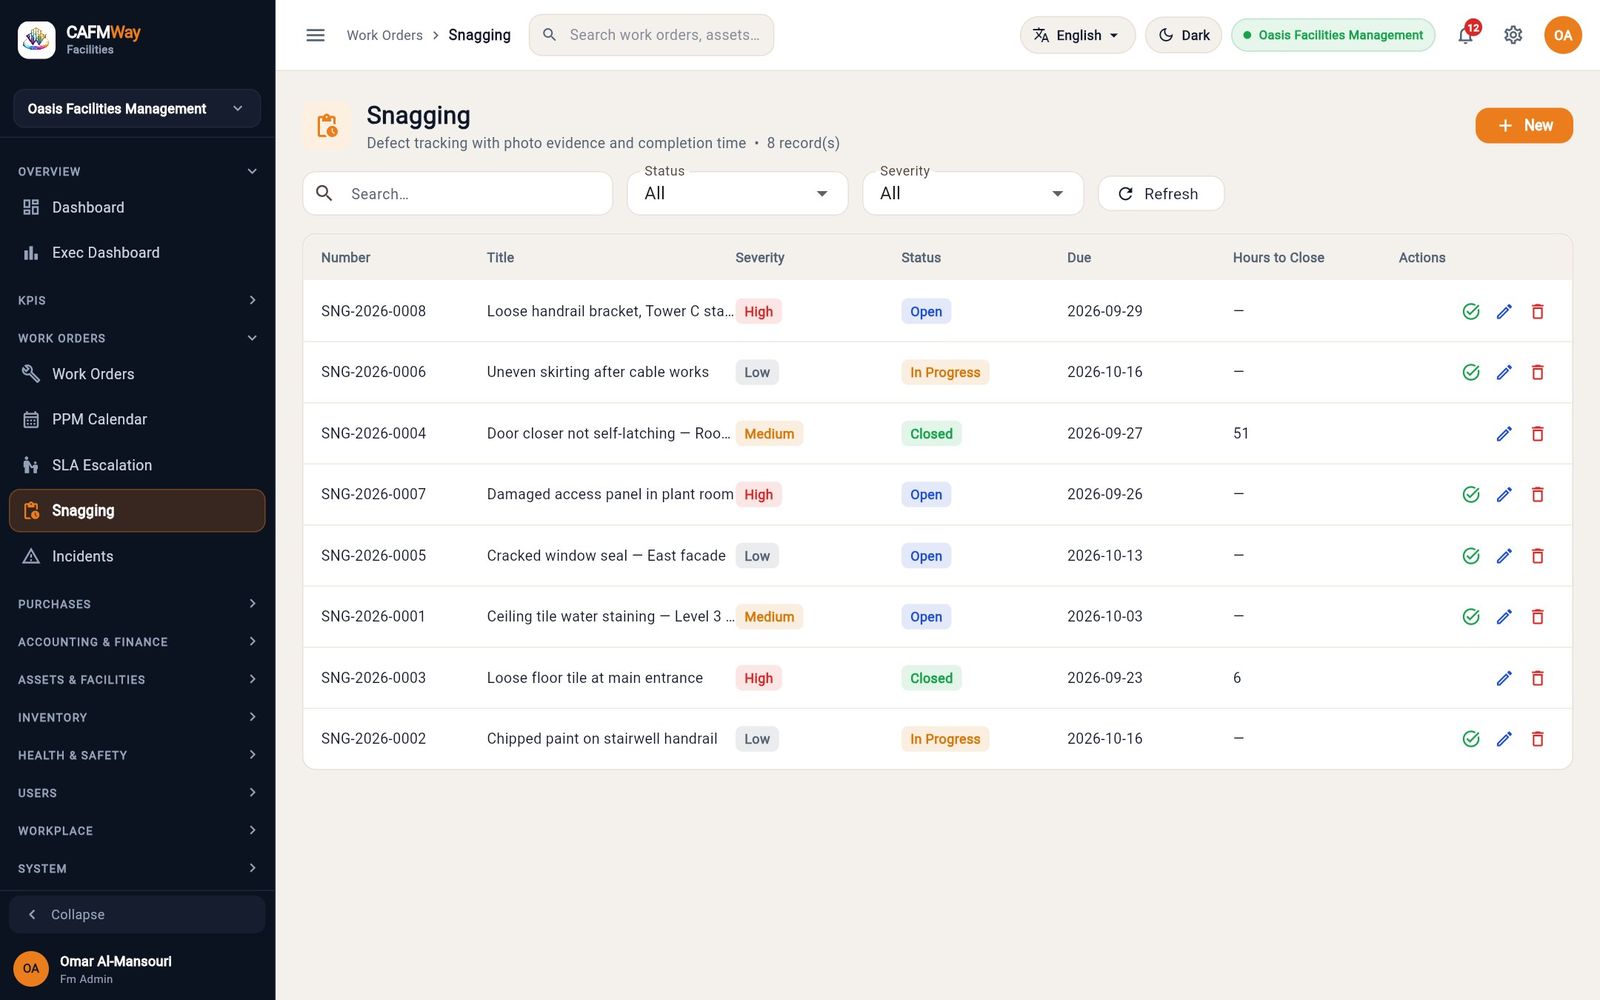
To close a snag, click the green tick in Actions. It closes at once and Hours to Close shows the time since it was raised. Use the pencil to edit a snag and the bin to delete it.
Incidents
- Who: Supervisor, FM Manager, FM Administrator, safety staff
- Where: Sidebar → WORK ORDERS → Incidents
The incident register records accidents, near misses and other events, and the corrective work orders that follow from them.
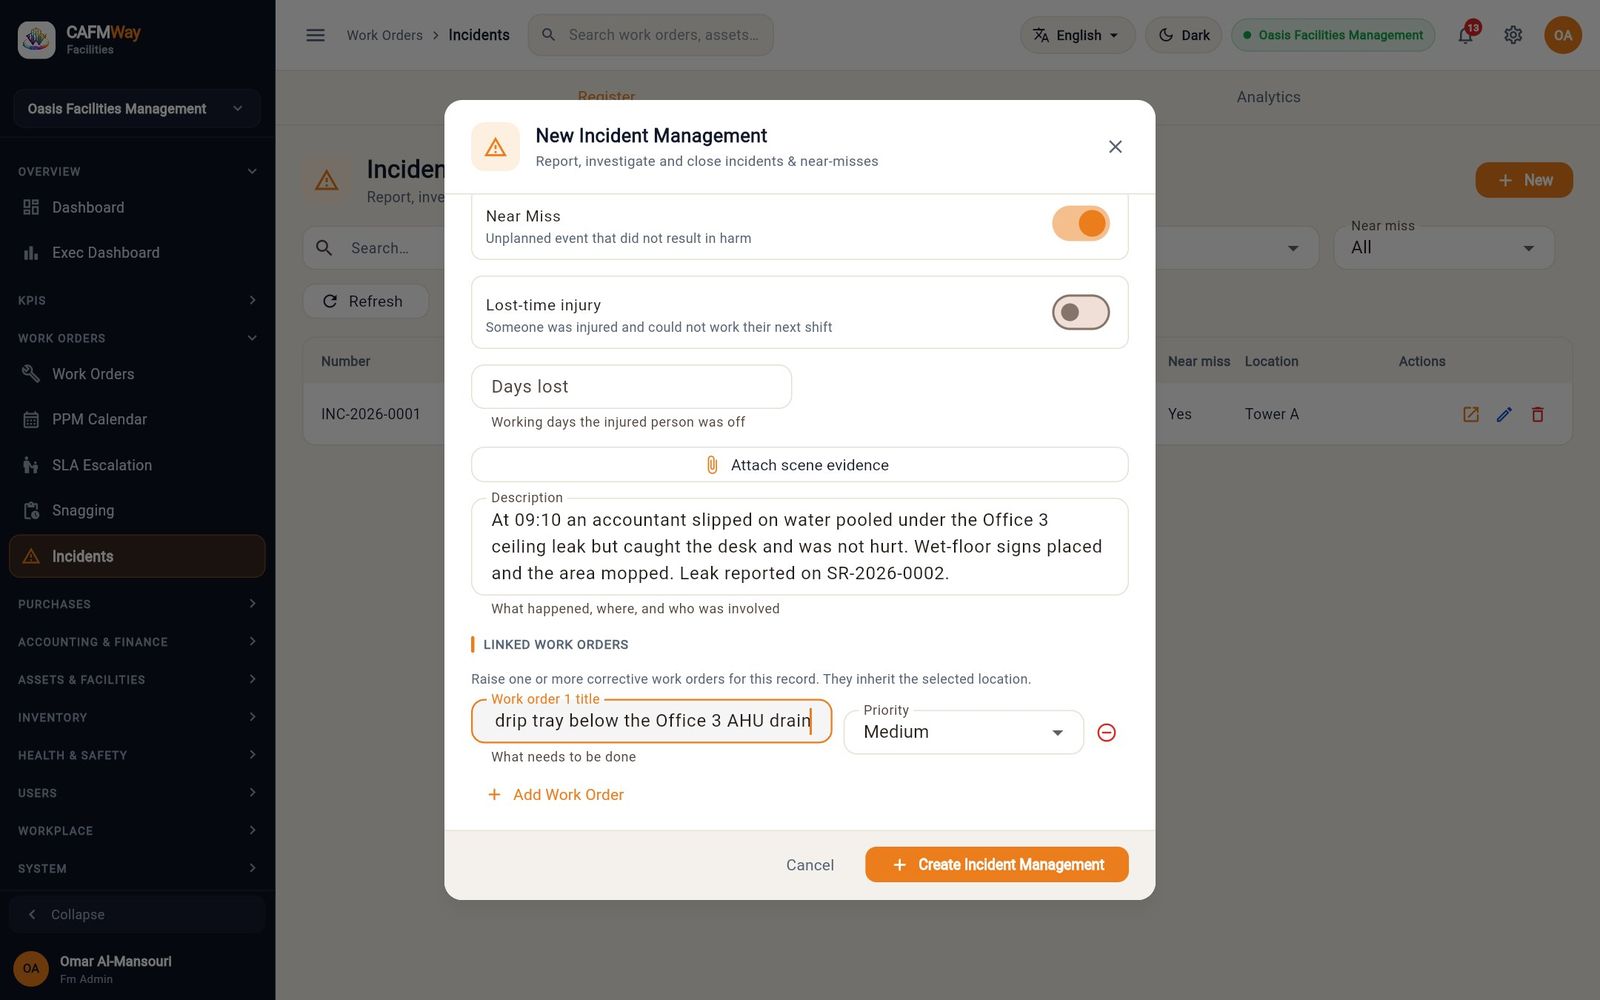
- On the Register tab, click New.
- Fill Incident Title *, choose the Type (Operational, Safety, Security, Environmental), the Severity and the Status, and set Occurred On.
- Pick the Location and, if relevant, the Asset.
- Turn on Near Miss if nobody was hurt, or Lost-time injury and Days lost if someone could not work.
- Describe what happened in Description.
- Under LINKED WORK ORDERS, click Add Work Order, type what needs to be done and choose its Priority. Add as many as needed; each becomes a work order at the incident's location.
- Click Create Incident Management. The incident is numbered, for example
INC-2026-0002.
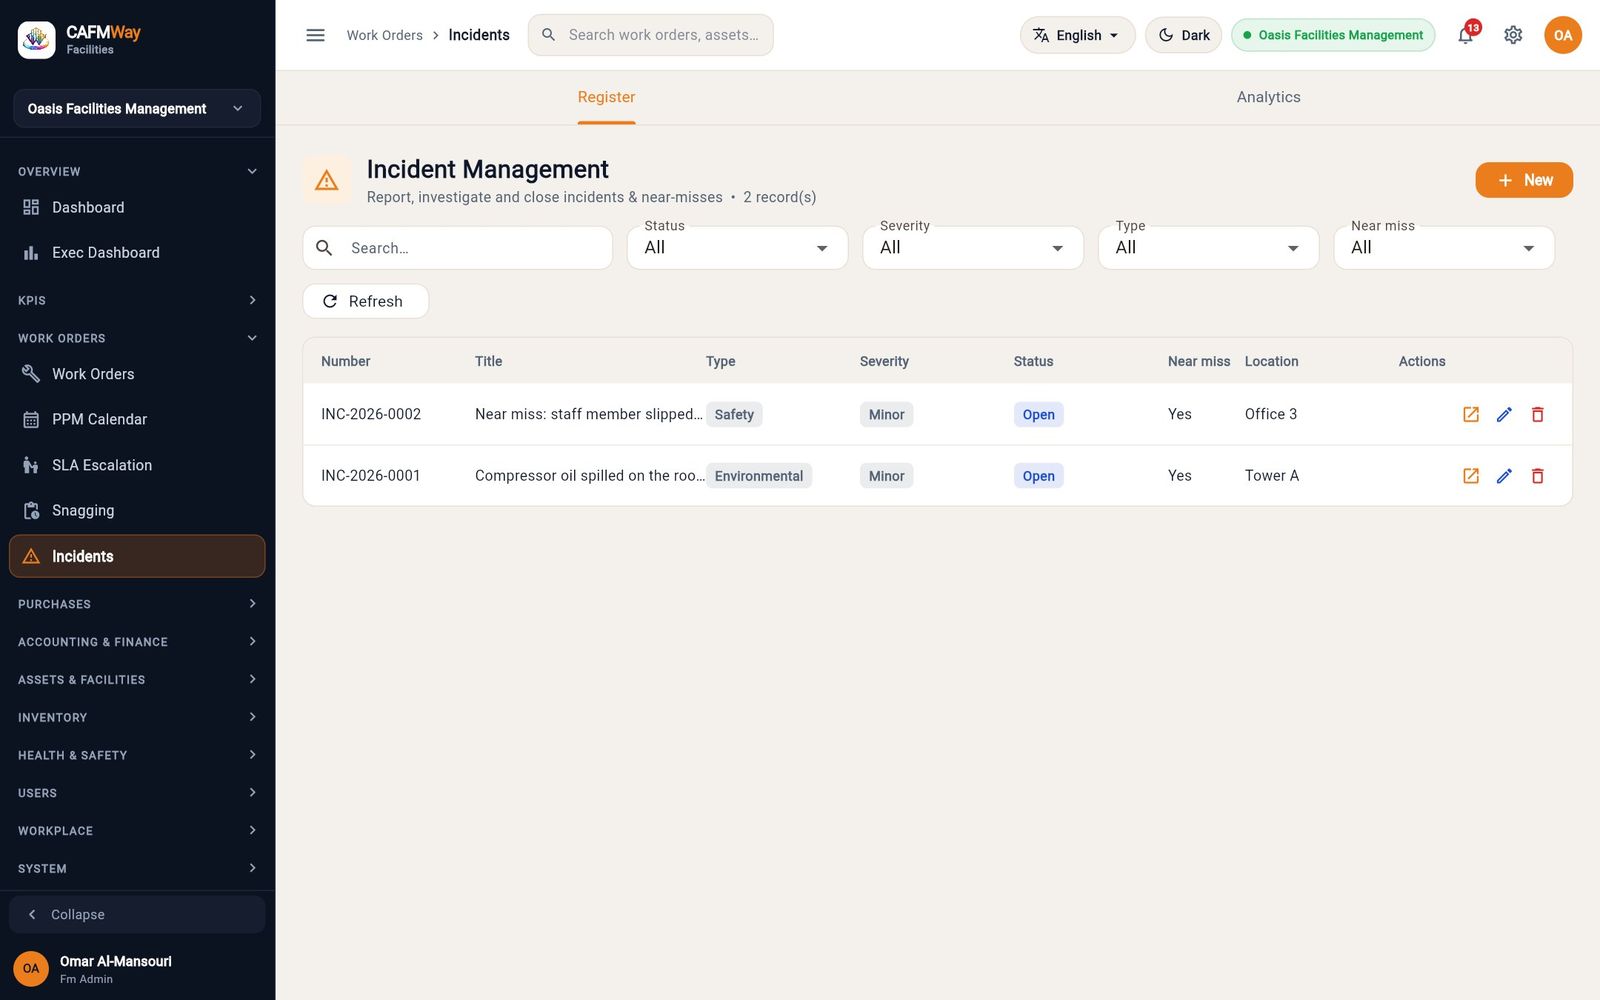
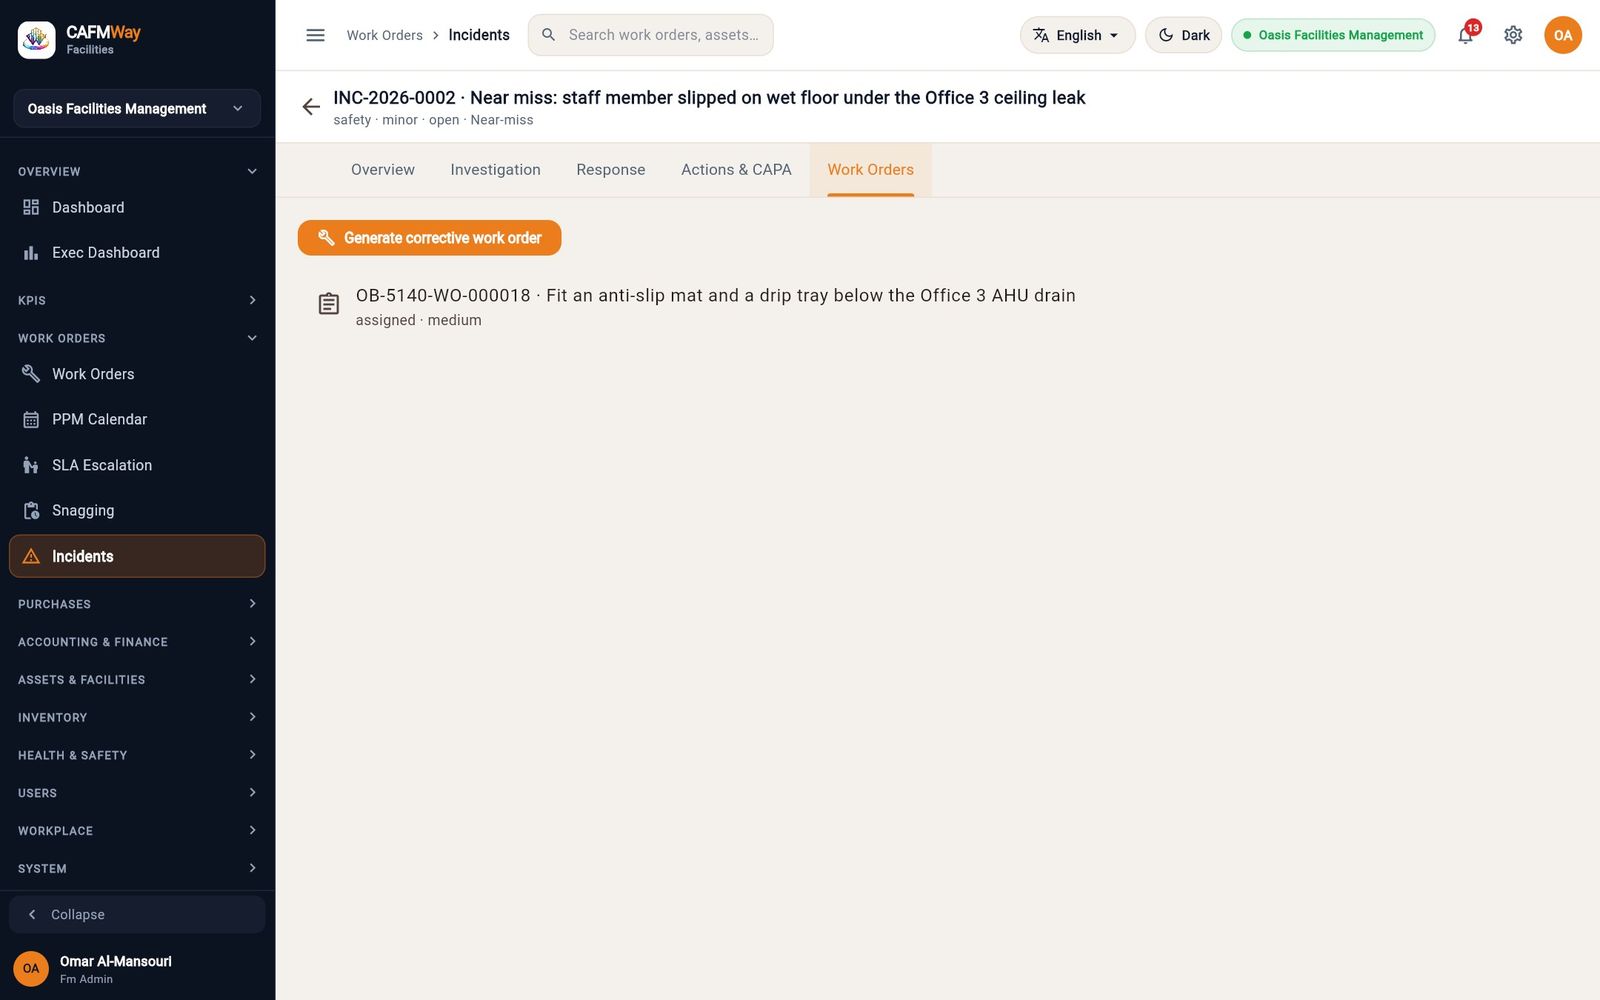
Open an incident with the arrow icon to see its Overview, Investigation, Response, Actions & CAPA and Work Orders tabs. On Work Orders, Generate corrective work order raises another job; the linked jobs are listed with their status.
Purchasing and stores
This part covers buying and holding spare parts: units of measure, the item catalogue, warehouses and technician vans, suppliers, the procure-to-pay chain from request for quotation to payment, and the stores work that follows (issues to work orders, transfers, counts, valuation and replenishment). It is written for storekeepers, buyers, FM managers and the company administrator.
Procure-to-pay at a glance
- Who: FM Administrator and FM Manager (everything); Procurement Officer (suppliers, items, warehouses, RFQs, quotations, purchase orders, stock documents); Finance Officer (purchase invoices and payments); Supervisor (material requests, counting)
- Where: Sidebar → PURCHASES and INVENTORY
The examples in this part follow one story at Oasis Facilities Management. The stores team loads its opening stock into the Main Store - Industrial Area, tops up the technicians' vans, and buys a quarter's worth of AHU filters, compressor capacitors and V-belts for the PPM programme:
flowchart TD
  MR[Material request from a work order] --> ISS[Issue from stock]
  MR -->|store cannot cover it| APO[Purchase order raised automatically]
  RFQ[Request for quotation] --> SQ[Supplier quotations]
  SQ -->|Award| PO[Purchase order]
  APO --> PO
  PO --> APP[Approve]
  APP --> ORD[Mark ordered]
  ORD --> GR[Goods receipt into a warehouse]
  GR --> REC[Receive the purchase order]
  REC --> PI[Purchase invoice]
  PI --> PE[Payment entry]
  GR --> WH[Stock in the warehouse]
  WH --> ISS
  WH --> TR[Transfer to a van]
Each document has its own statuses:
| Document | Number | Statuses, in order | Posts to the ledger |
|---|---|---|---|
| Material request | on the work order | Requested → Approved → Authorised → Issued; or Ordered → Received when the store could not cover it; Rejected, Cancelled | Issue: yes |
| Request for quotation | RFQ-2026-0001 | Draft → Submitted; Cancelled | No |
| Supplier quotation | SQ-2026-0002 | Draft → Submitted → Ordered; Lost, Cancelled | No |
| Purchase order | PO-2026-0001 | Pending Approval → Approved → Ordered → Received; Cancelled (rejected) | No |
| Goods receipt (stock document) | SE-2026-00005 | Draft → Submitted; Cancelled (reversed) | Yes |
| Purchase invoice | PINV-2026-0010 | Pending → Approved → Paid; Cancelled | Yes, on approval |
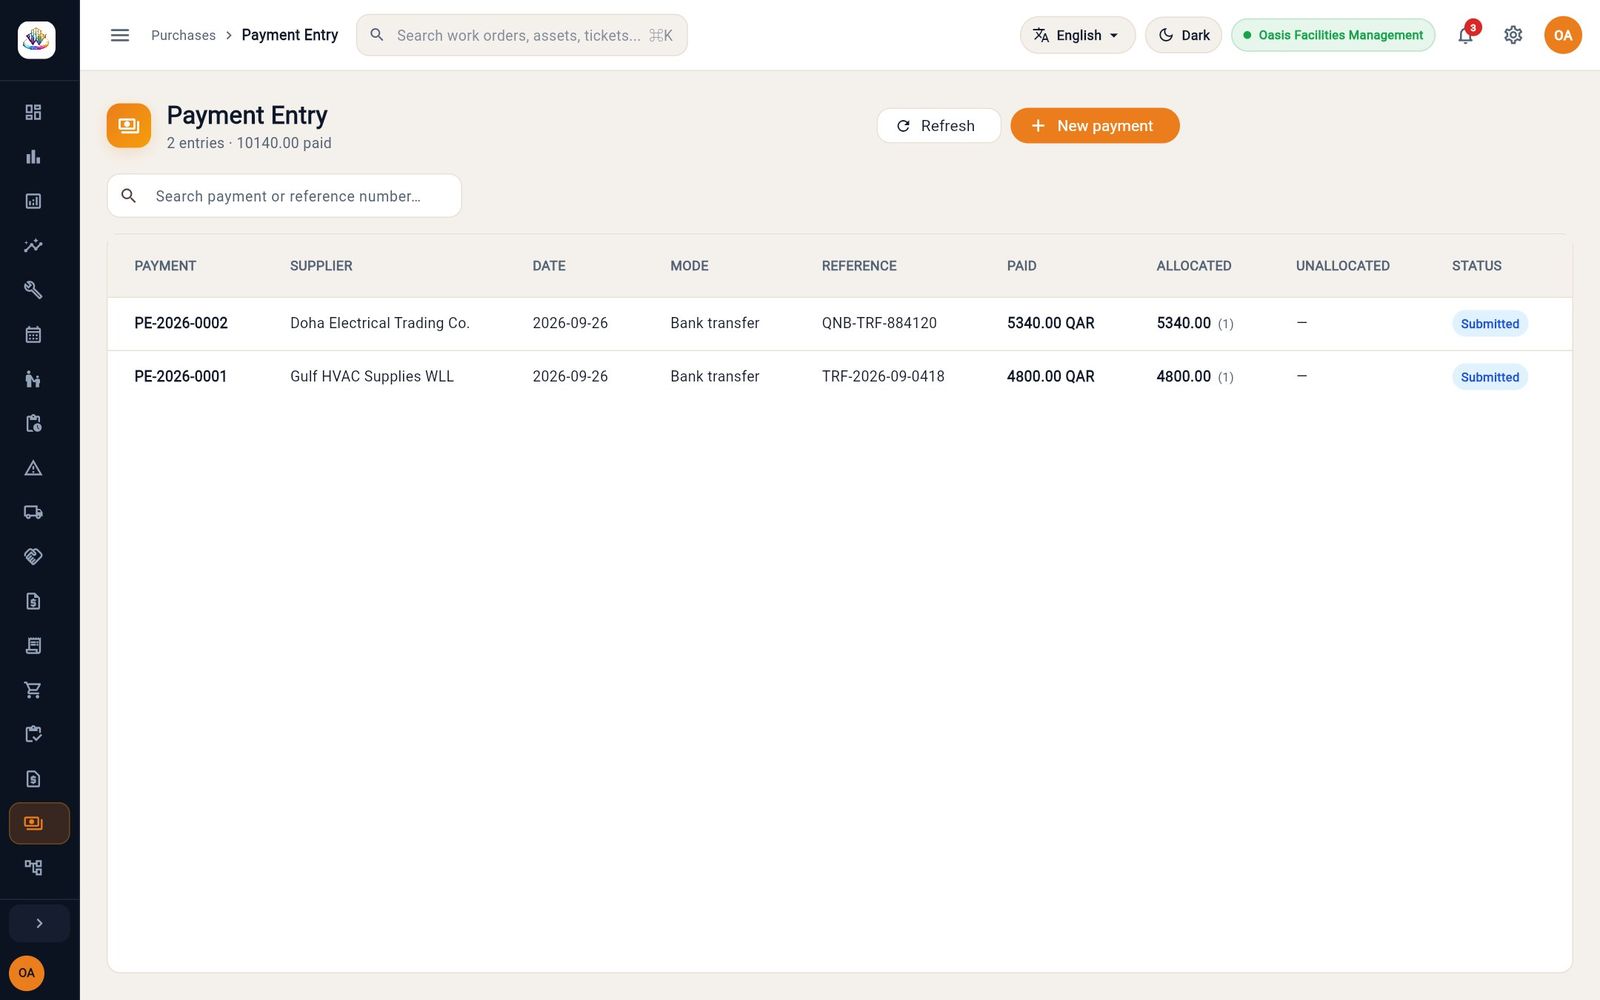
| Payment entry | PE-2026-0002 | Draft → Submitted; Cancelled | Yes, on posting |
| Stock count | SC-2026-00001 | Scheduled → Counting → Awaiting approval → Approved; Cancelled | Yes, on approval |
Suggested order for a new company:
- Units of measure, then suppliers, then items.
- Warehouses, including one van per technician who carries stock.
- Opening stock into the main store, then transfers to the vans.
- From then on, buy through RFQ → quotation → purchase order → goods receipt → invoice → payment, and issue parts against work orders.
Units of measure
- Who: FM Administrator, FM Manager, Procurement Officer
- Where: Sidebar → INVENTORY → Units of Measure
Units are grouped into categories (Count, Weight, Volume, Length, Area, Time, Other). Each category has one base unit, and every other unit in the category states how many base units it holds.
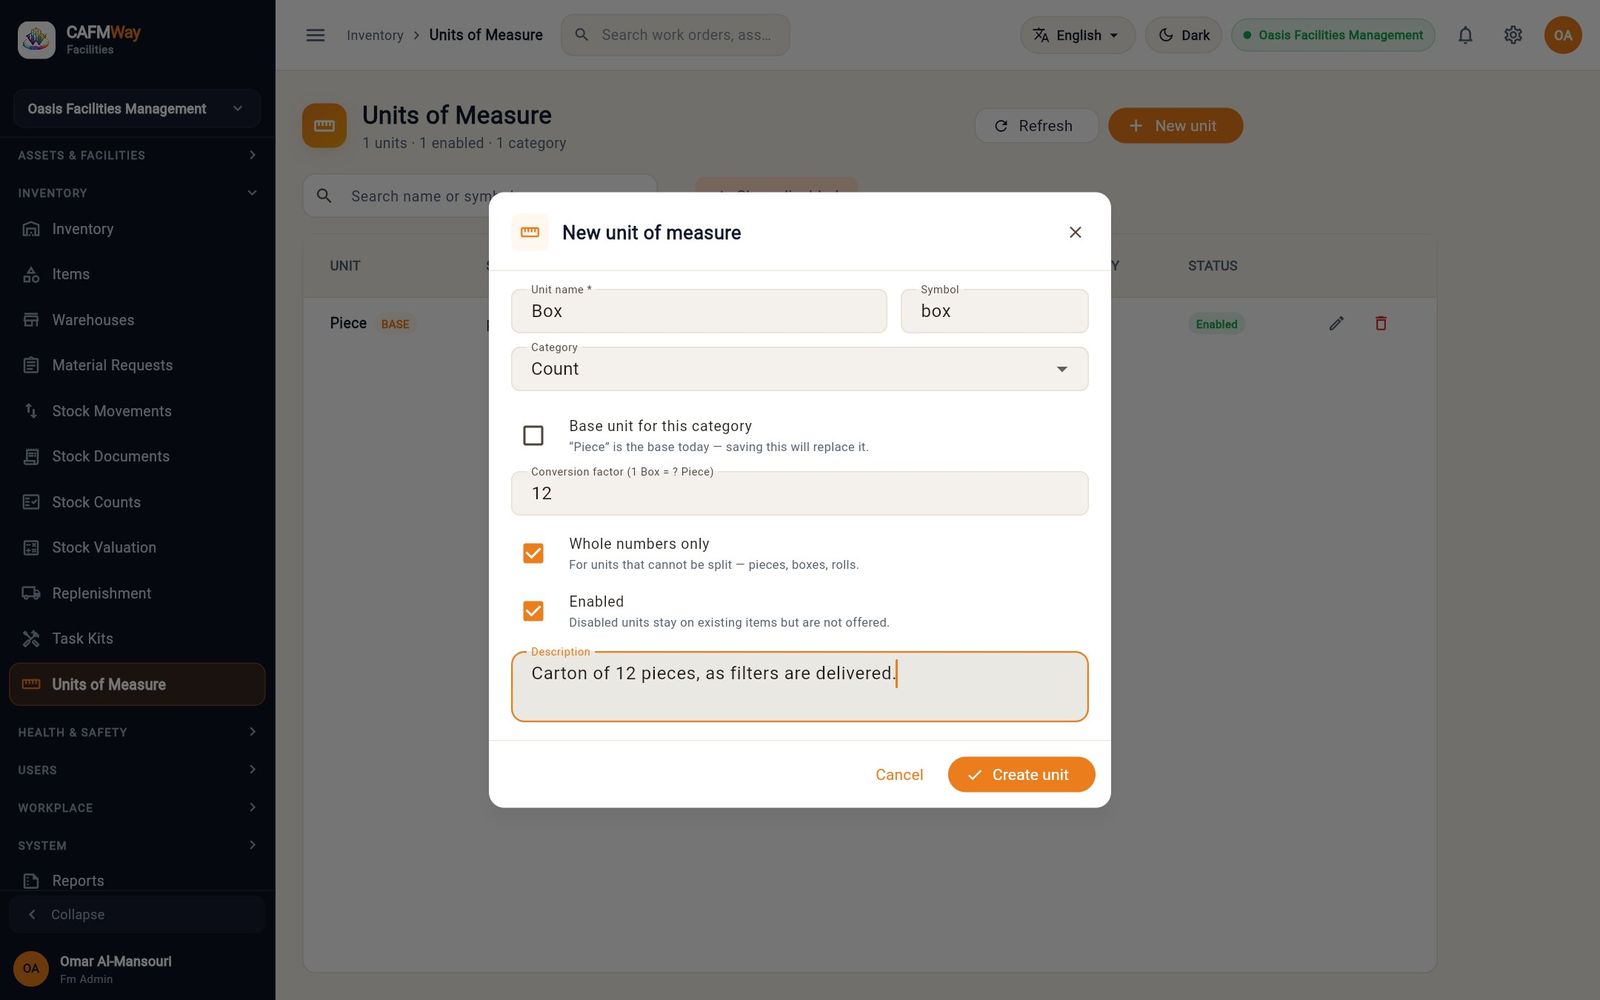
- Click New unit.
- Enter the Unit name and Symbol, and choose the Category.
- Tick Base unit for this category for the first unit of a category (for example Piece, Metre, Kilogram, Litre). For any other unit, enter the Conversion factor instead (1 Box = 12 Piece).
- Tick Whole numbers only for units that cannot be split, such as pieces, boxes and rolls.
- Add a Description and click Create unit.
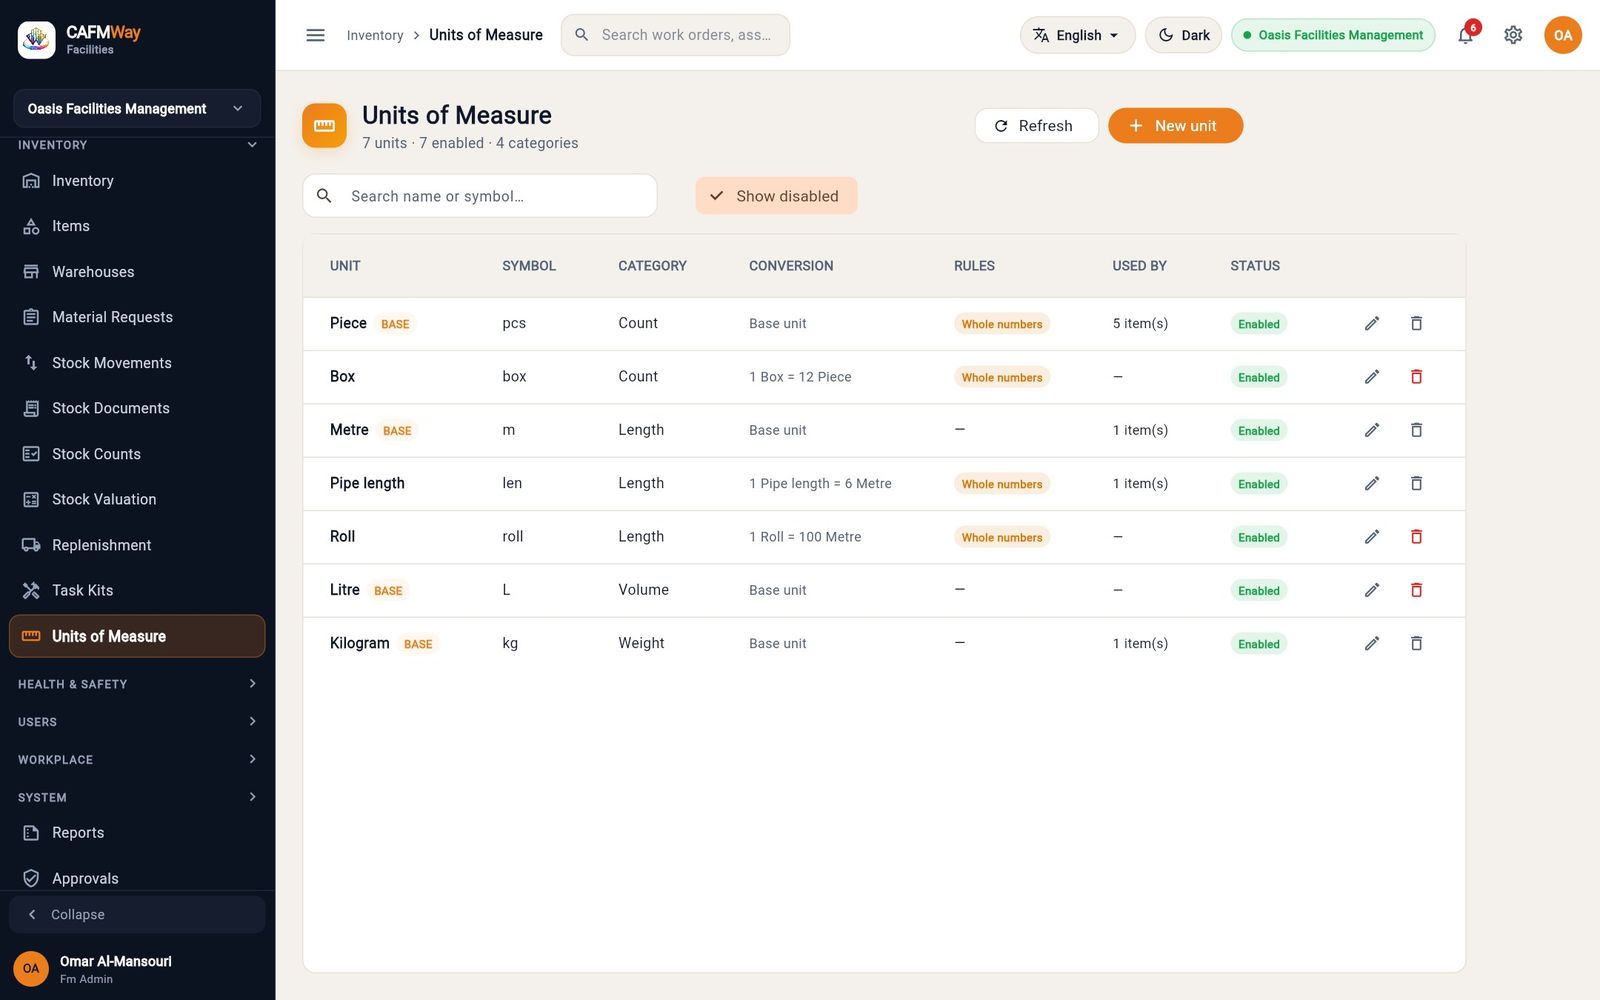
The list shows each unit's conversion, its rules and how many items use it.
Suppliers
- Who: FM Administrator, FM Manager, Procurement Officer, Finance Officer
- Where: Sidebar → PURCHASES → Suppliers
Suppliers are the companies you buy goods from. Service contractors are kept separately under Contractors.
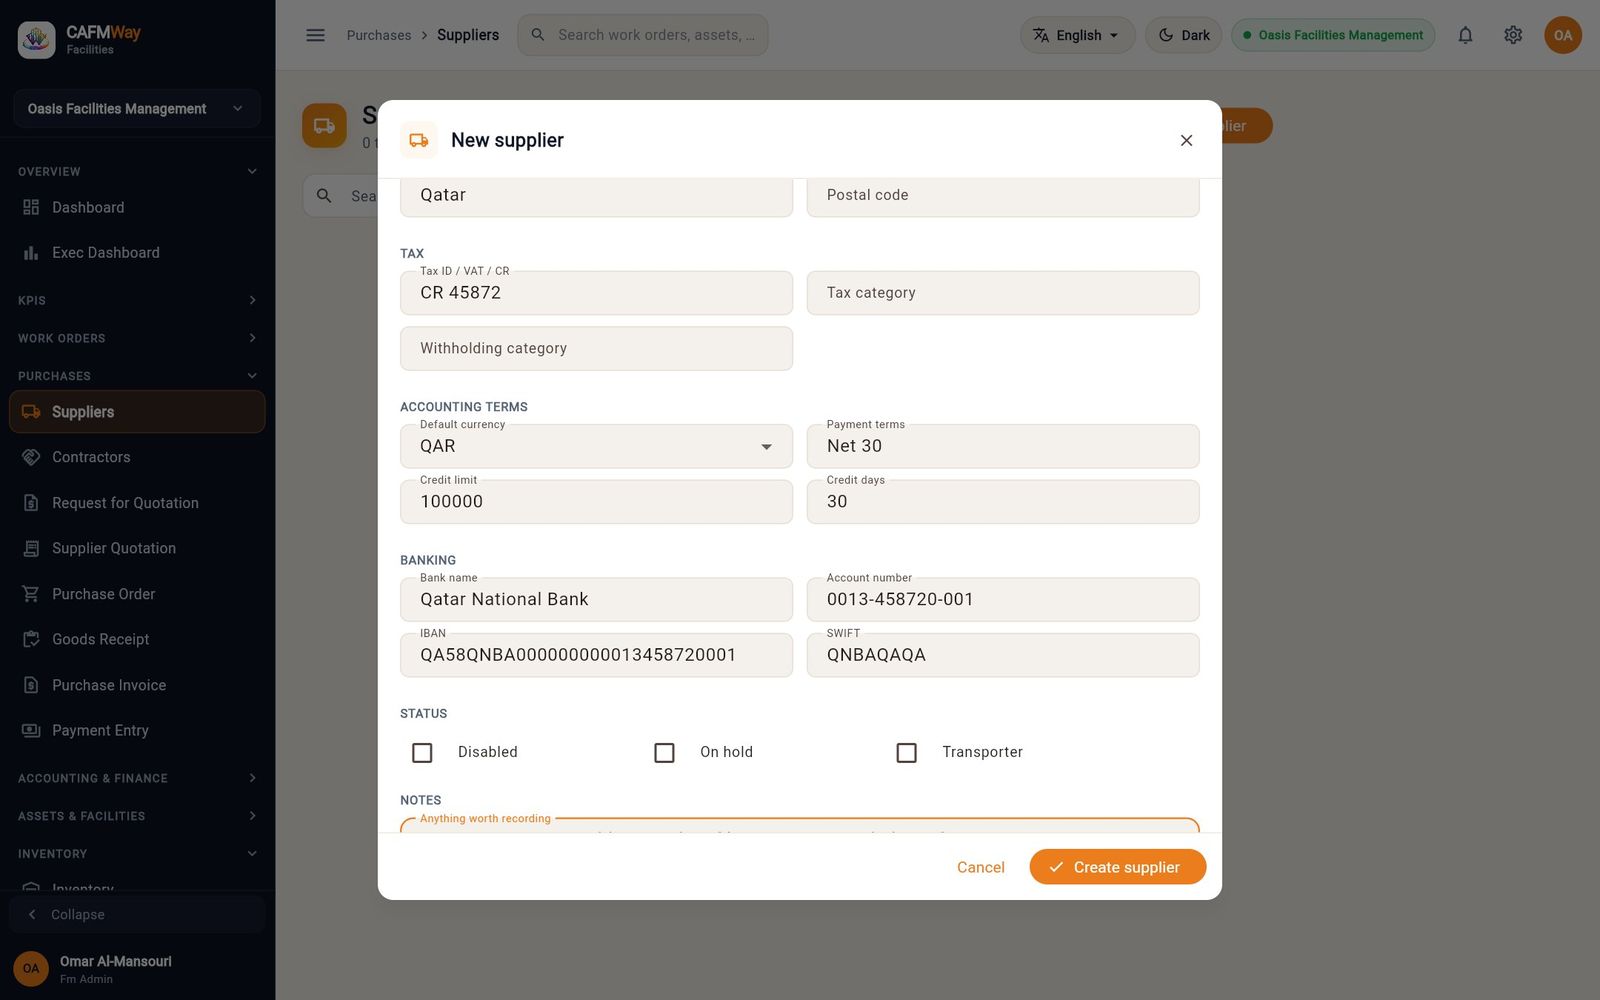
- Click New supplier.
- Under IDENTITY enter the Supplier name, a Supplier code (for example SUP-GHV) and a Supplier group (HVAC, Electrical, Plumbing).
- Fill in CONTACT and ADDRESS: primary contact, email, mobile, address, city and country.
- Under TAX enter the Tax ID / VAT / CR.
- Under ACCOUNTING TERMS keep Default currency at QAR and enter the Payment terms, Credit limit and Credit days.
- Under BANKING enter the bank name, account number, IBAN and SWIFT code.
- Click Create supplier.
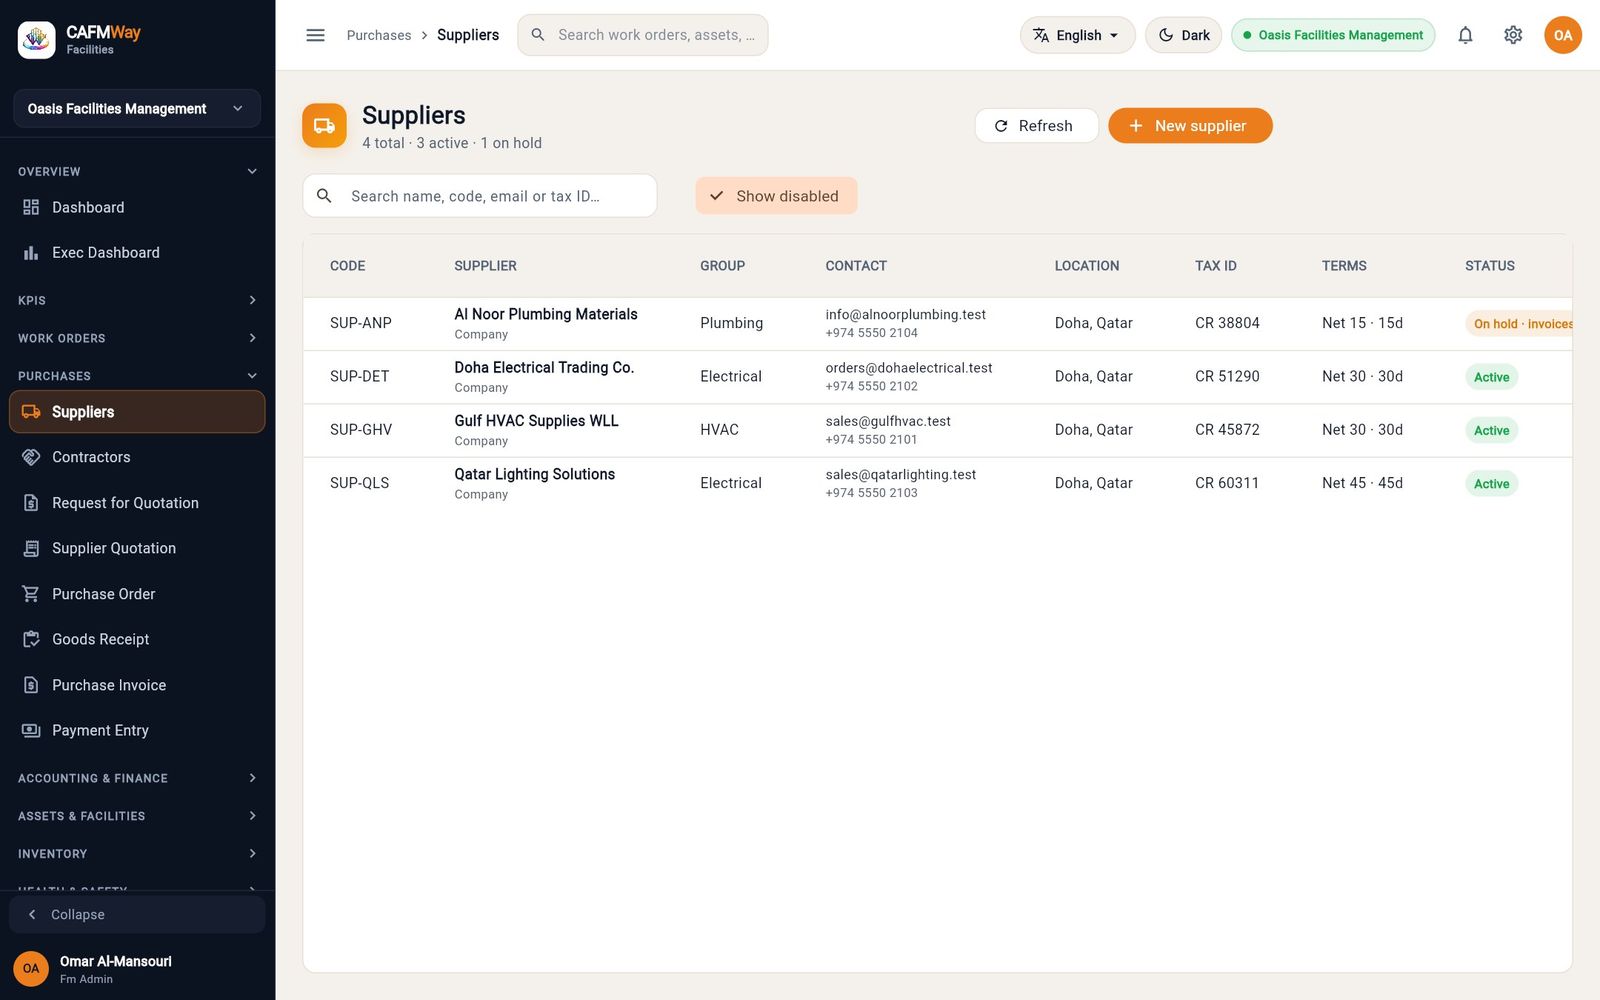
To stop buying from a supplier for a while, open it with the pencil icon, tick On hold and choose a Hold type (Block everything, Block invoices or Block payments). Al Noor Plumbing Materials is on hold while a pricing dispute is settled.
Items and spare parts
- Who: FM Administrator, FM Manager, Procurement Officer; Supervisor can edit
- Where: Sidebar → INVENTORY → Items
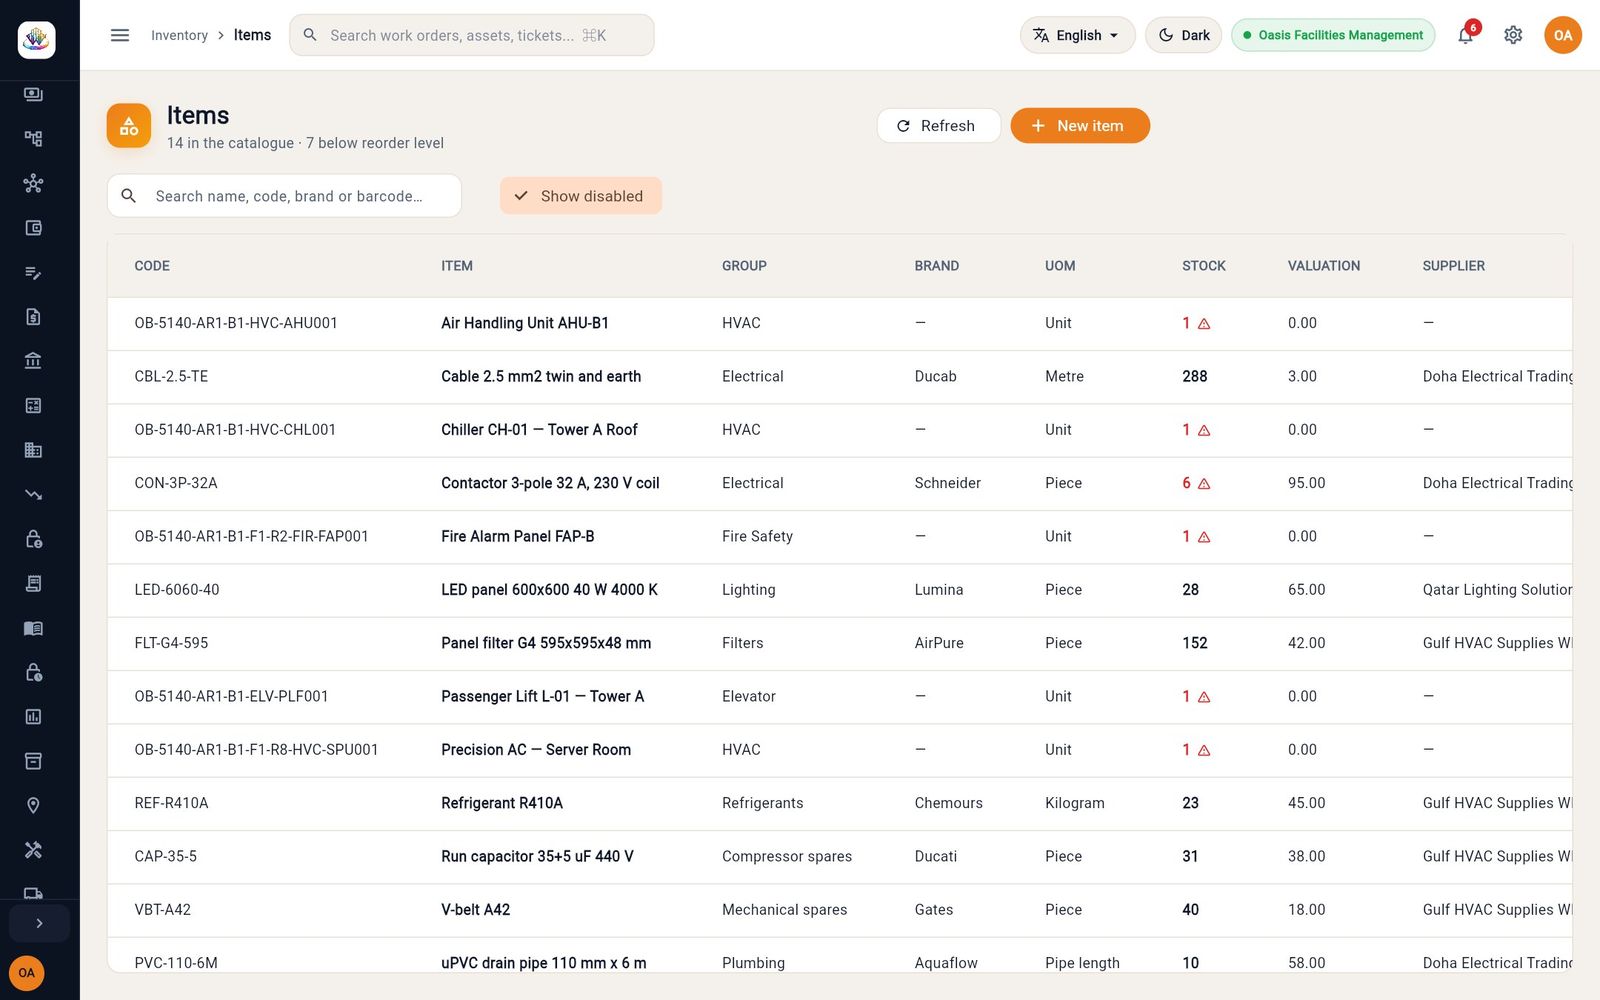
The item catalogue is used by every stock document, count and replenishment level. Oasis stocks eight parts:
| Code | Item | Unit | Reorder level | Default supplier | Valuation rate (QAR) |
|---|---|---|---|---|---|
| FLT-G4-595 | Panel filter G4 595x595x48 mm | Piece | 20 | Gulf HVAC Supplies WLL | 42 |
| CAP-35-5 | Run capacitor 35+5 uF 440 V | Piece | 8 | Gulf HVAC Supplies WLL | 38 |
| CON-3P-32A | Contactor 3-pole 32 A, 230 V coil | Piece | 6 | Doha Electrical Trading Co. | 95 |
| LED-6060-40 | LED panel 600x600 40 W 4000 K | Piece | 15 | Qatar Lighting Solutions | 65 |
| PVC-110-6M | uPVC drain pipe 110 mm x 6 m | Pipe length | 6 | Doha Electrical Trading Co. | 58 |
| REF-R410A | Refrigerant R410A | Kilogram | 20 | Gulf HVAC Supplies WLL | 45 |
| VBT-A42 | V-belt A42 | Piece | 10 | Gulf HVAC Supplies WLL | 18 |
| CBL-2.5-TE | Cable 2.5 mm2 twin and earth | Metre | 150 | Doha Electrical Trading Co. | 3 |
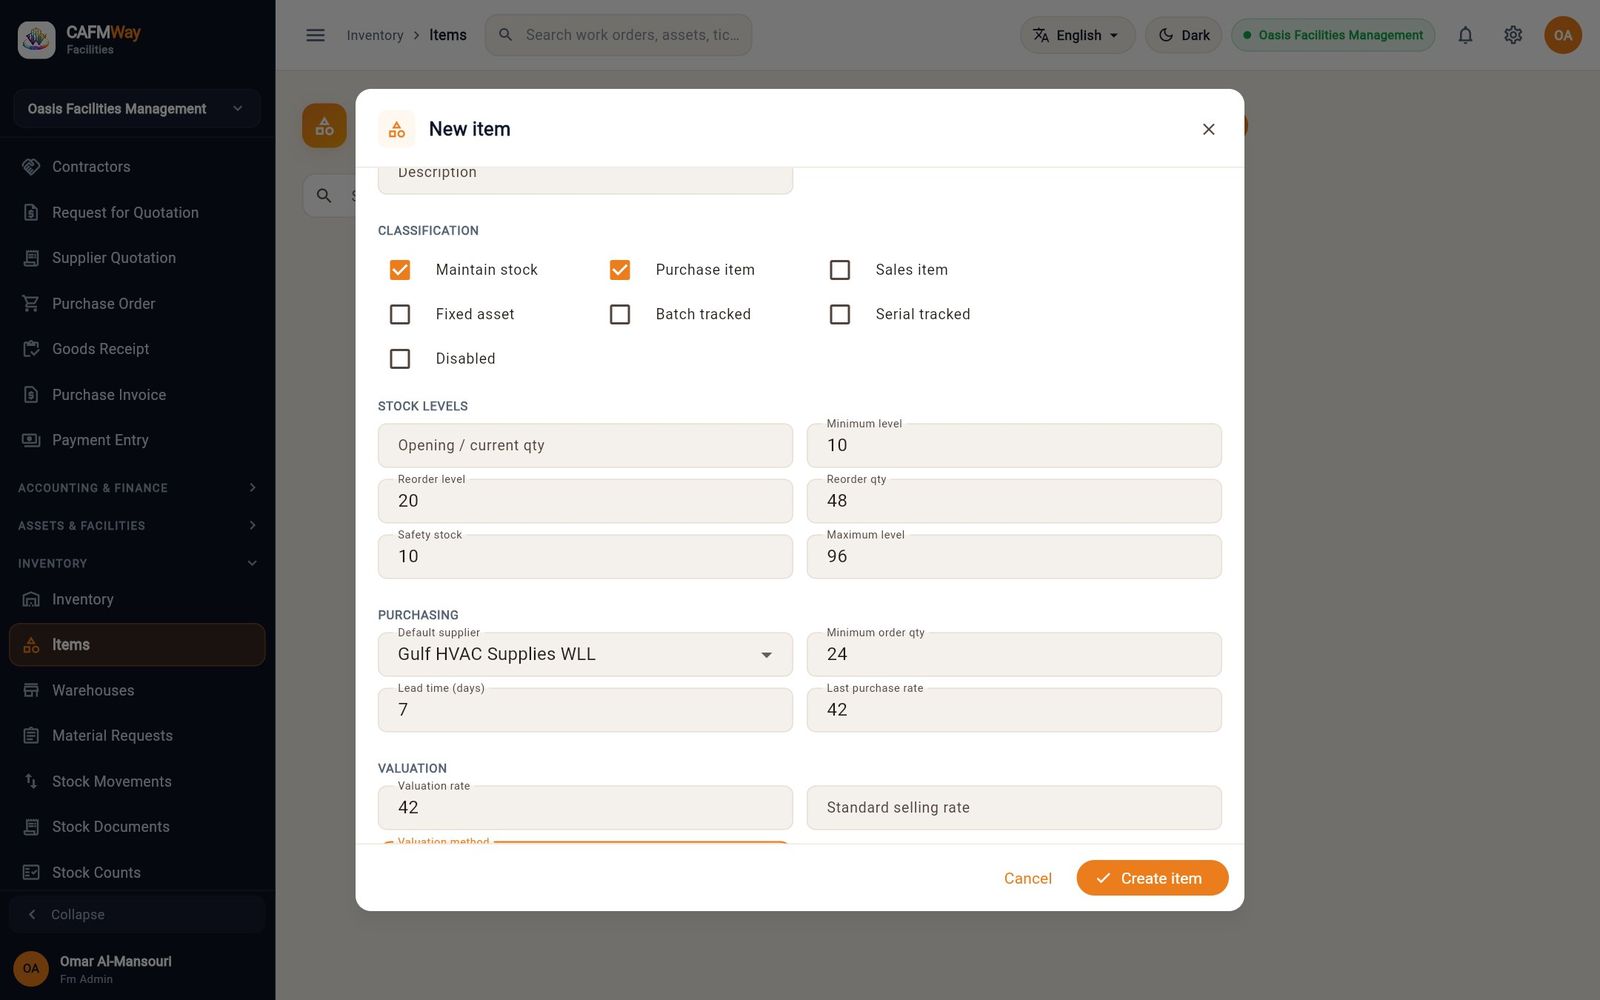
- Click New item.
- Under IDENTITY enter the Item code, Item name, Item group, Brand and Stock UOM. Pick the unit from the suggestions that appear as you type.
- Under CLASSIFICATION keep Maintain stock and Purchase item ticked for spare parts.
- Under STOCK LEVELS enter the Minimum level, Reorder level, Reorder qty, Safety stock and Maximum level. Leave Opening / current qty empty; opening stock is entered with a stock document (see Opening stock).
- Under PURCHASING choose the Default supplier and enter the Minimum order qty, Lead time (days) and Last purchase rate.
- Under VALUATION enter the Valuation rate and set Valuation method to Moving average.
- Click Create item.
The list shows the stock on hand across all warehouses. A red figure with a warning sign means the item is at or below its reorder level.
Warehouses and technician vans
- Who: FM Administrator, FM Manager, Procurement Officer create; Supervisor can edit
- Where: Sidebar → INVENTORY → Warehouses
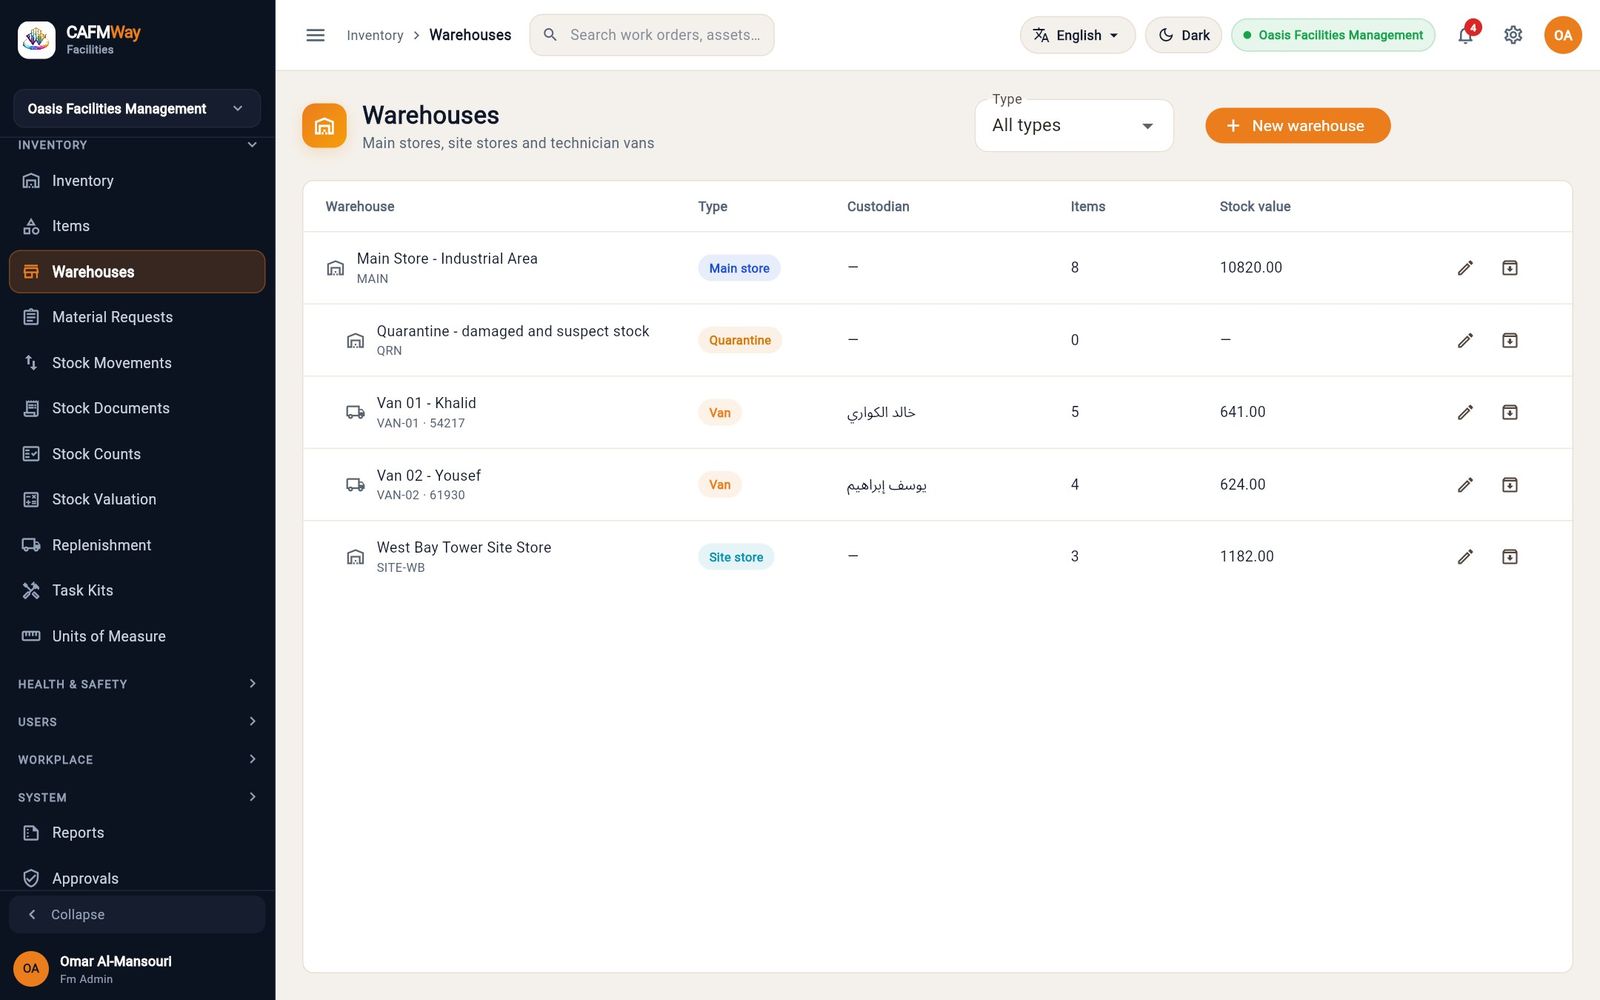
A warehouse is any place stock is kept: a main store, a site store, a quarantine area for damaged stock, or a technician's van. Oasis uses five:
| Code | Name | Type | Parent |
|---|---|---|---|
| MAIN | Main Store - Industrial Area | Main store | none |
| SITE-WB | West Bay Tower Site Store | Site store | MAIN |
| QRN | Quarantine - damaged and suspect stock | Quarantine | MAIN |
| VAN-01 | Van 01 - Khalid | Van | MAIN |
| VAN-02 | Van 02 - Yousef | Van | MAIN |
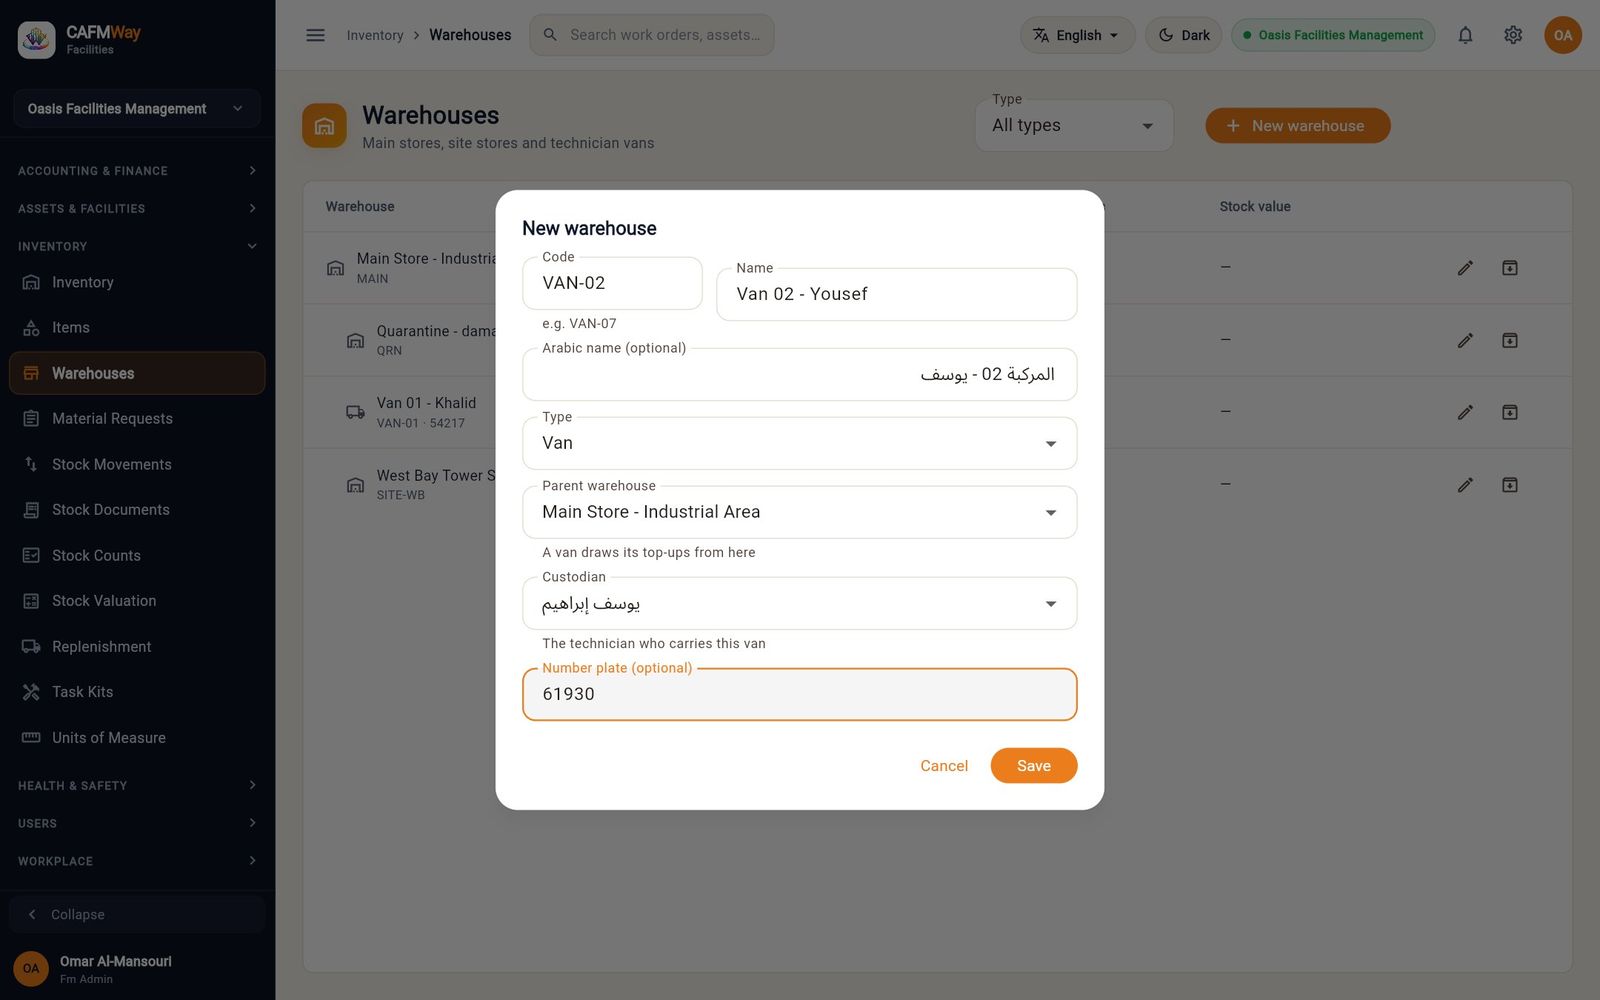
- Click New warehouse.
- Enter the Code (it cannot be changed later), the Name and the Arabic name (optional).
- Choose the Type: Main store, Site store, Building, Van, Quarantine, Repair or Scrap.
- Choose the Parent warehouse. A van draws its top-ups from its parent.
- For a van, choose the Custodian (the technician who carries it) and enter the Number plate (optional).
- Click Save.
The list shows the warehouses as a tree, with the number of items held and the stock value of each.
Opening stock
- Who: FM Administrator, FM Manager, Procurement Officer
- Where: Sidebar → INVENTORY → Stock Documents
Enter what is already on the shelves when you start using CAFM Way as an opening document, one per warehouse.
- Click New document.
- Set What happened to Opening — what was already there.
- Set To to the warehouse, for example Main Store - Industrial Area.
- Click Add a line for each item, pick the Item by code or name and enter the Qty.
- Enter Remarks (optional), for example the date of the stock-take.
- Keep Post it now ticked and click Post.
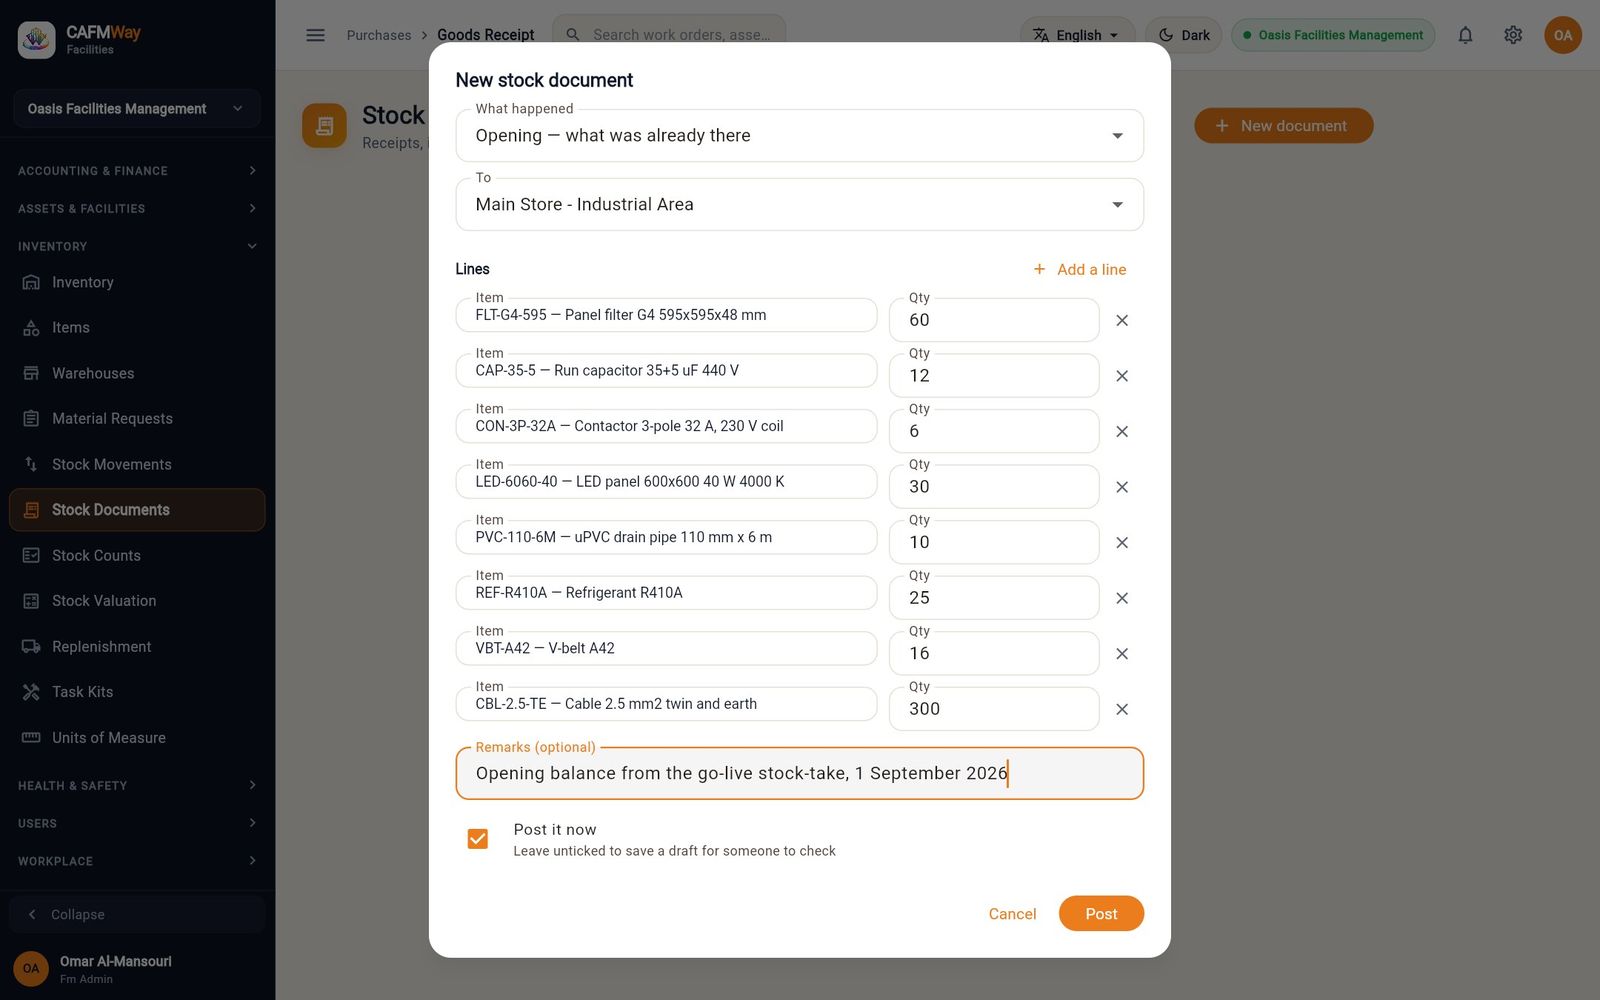
The opening lines are valued at each item's valuation rate, so the main store opens at 60 filters at QAR 42, 12 capacitors at QAR 38 and so on. The document posts to the ledger against retained earnings (see Accounting).
Material requests from work orders
- Who: Supervisor (approves up to QAR 5,000), FM Manager and FM Administrator (no limit); the storekeeper authorises and issues
- Where: Sidebar → INVENTORY → Material Requests
Technicians ask for parts from the Parts tab of a work order in the technician app (see the technician app part). The request lands here, where it is approved, authorised by the storekeeper and issued. If the stores hold the part, it is issued from stock; if not, a purchase order is raised automatically.
- Open Material Requests. Each row shows the material, the work order, the quantity, its value, who asked, any linked purchase order and the status.
- On a Requested row, click the tick icon (Approve). The stock is reserved for the job.
- On the Approved row, click Authorise.
- On the Authorized row, click Issue. The part leaves stock and is charged to the work order.
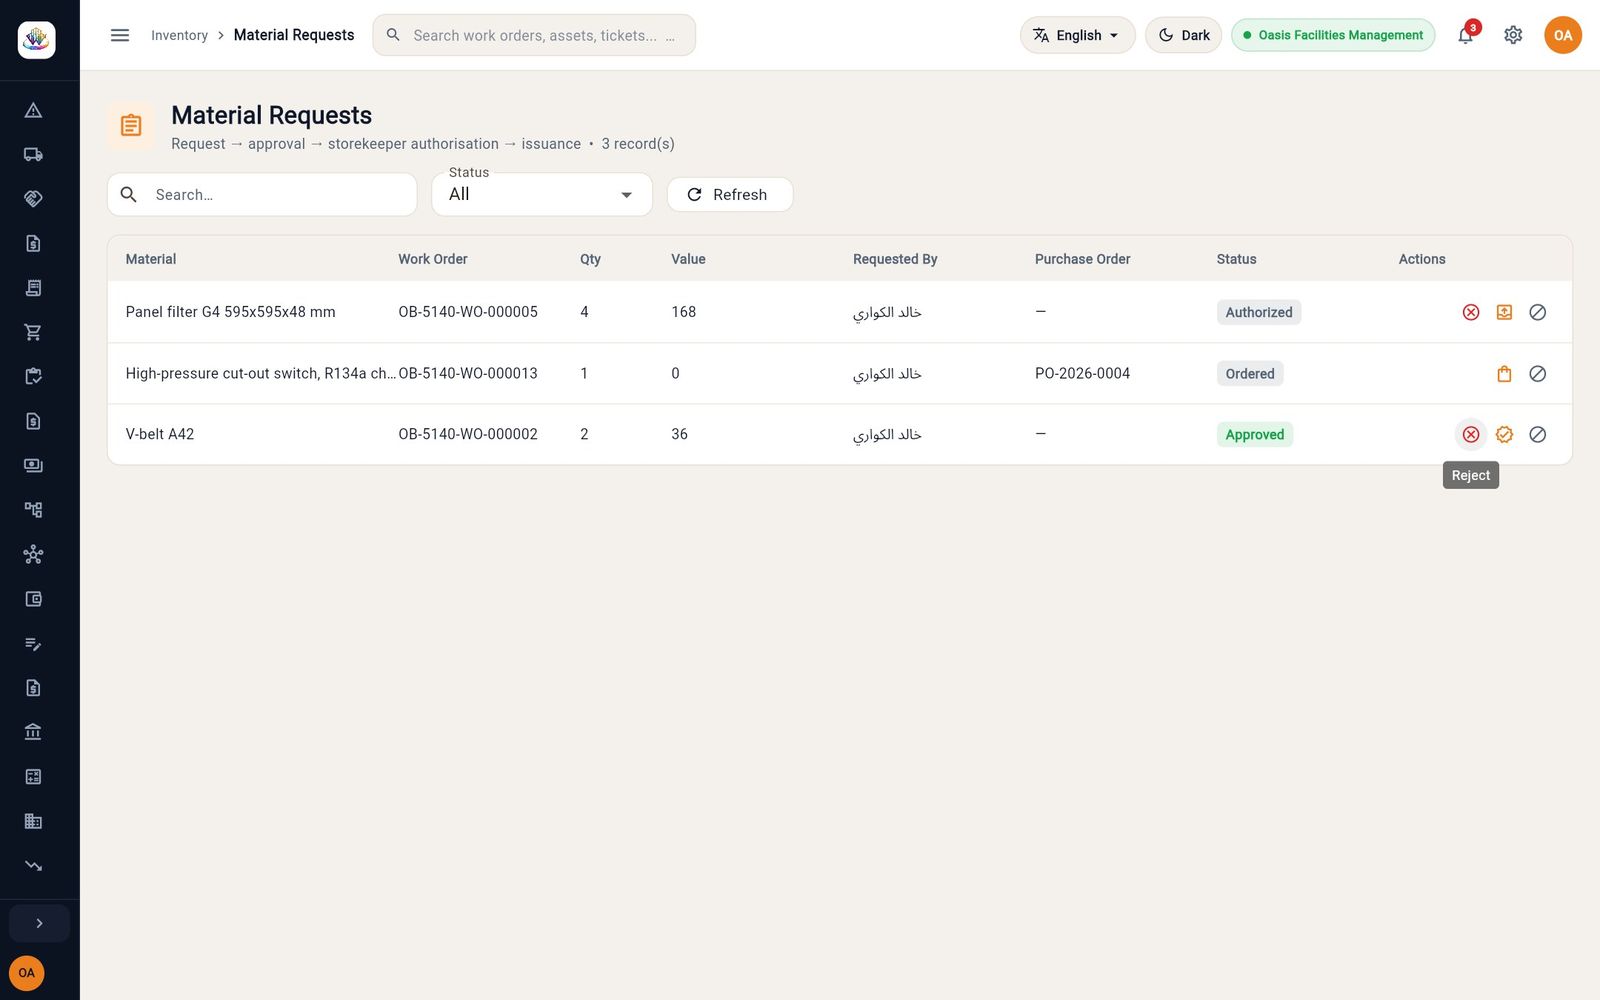
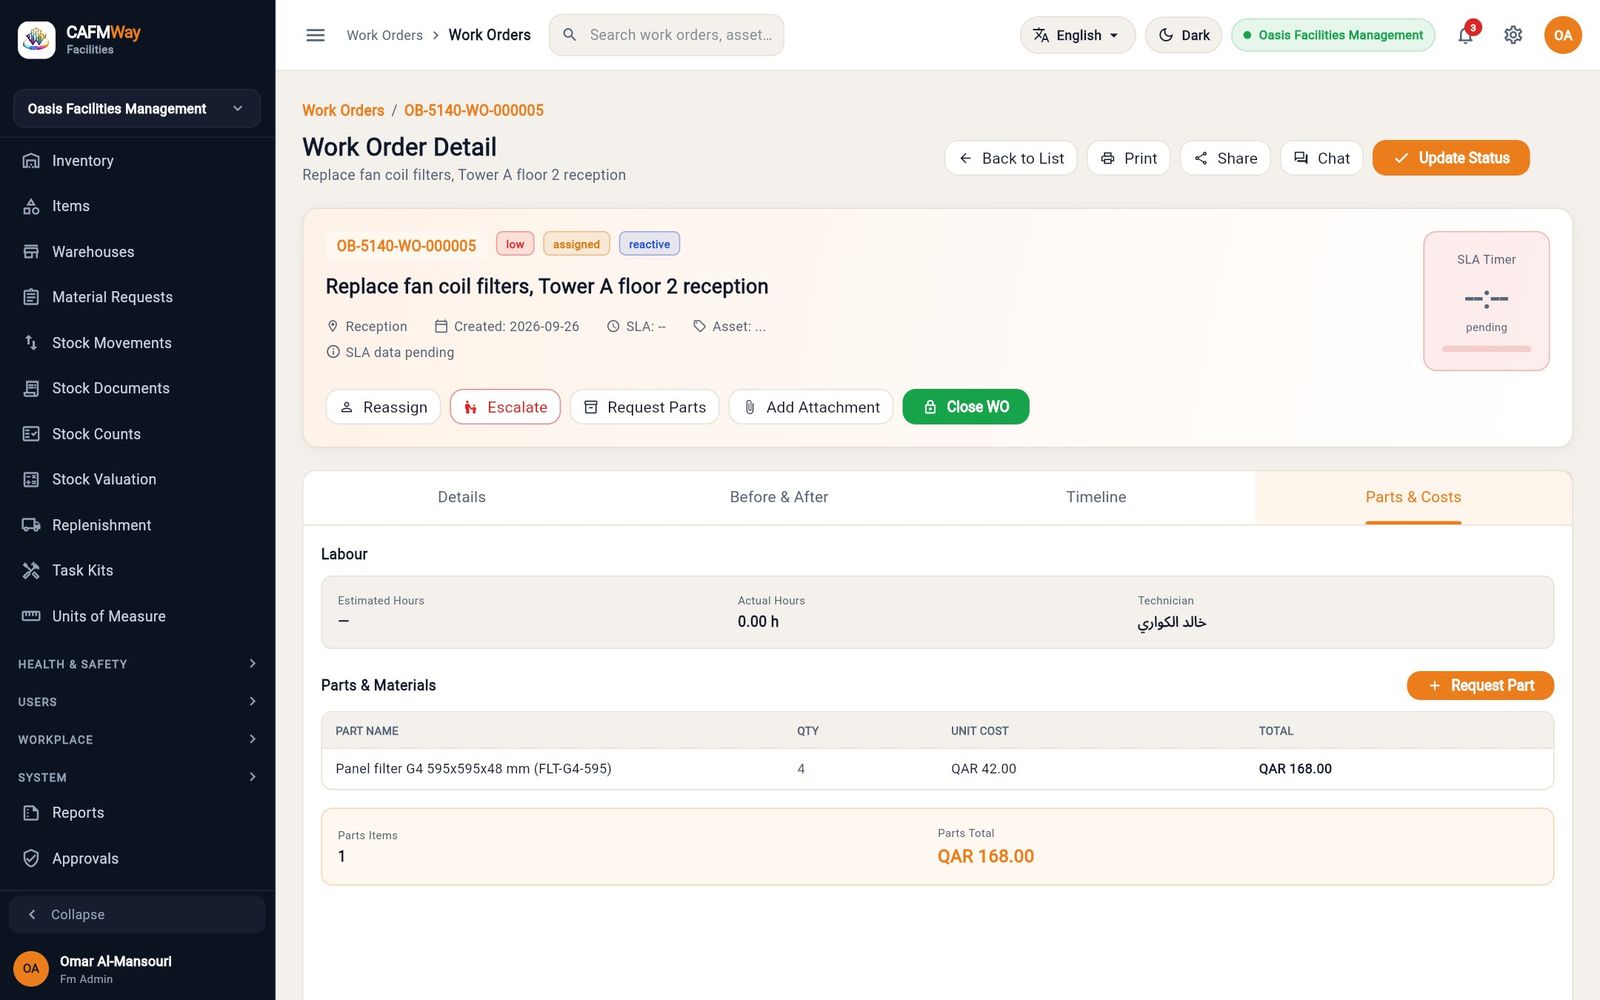
Khalid asked for four G4 filters on OB-5140-WO-000005. When the storekeeper issues them, CAFM Way takes them from Khalid's van (the van of the assigned technician comes first, then a site store at the job's location, then the main store) and posts issue document SE-2026-00006. The work order shows the part at the van's average cost:
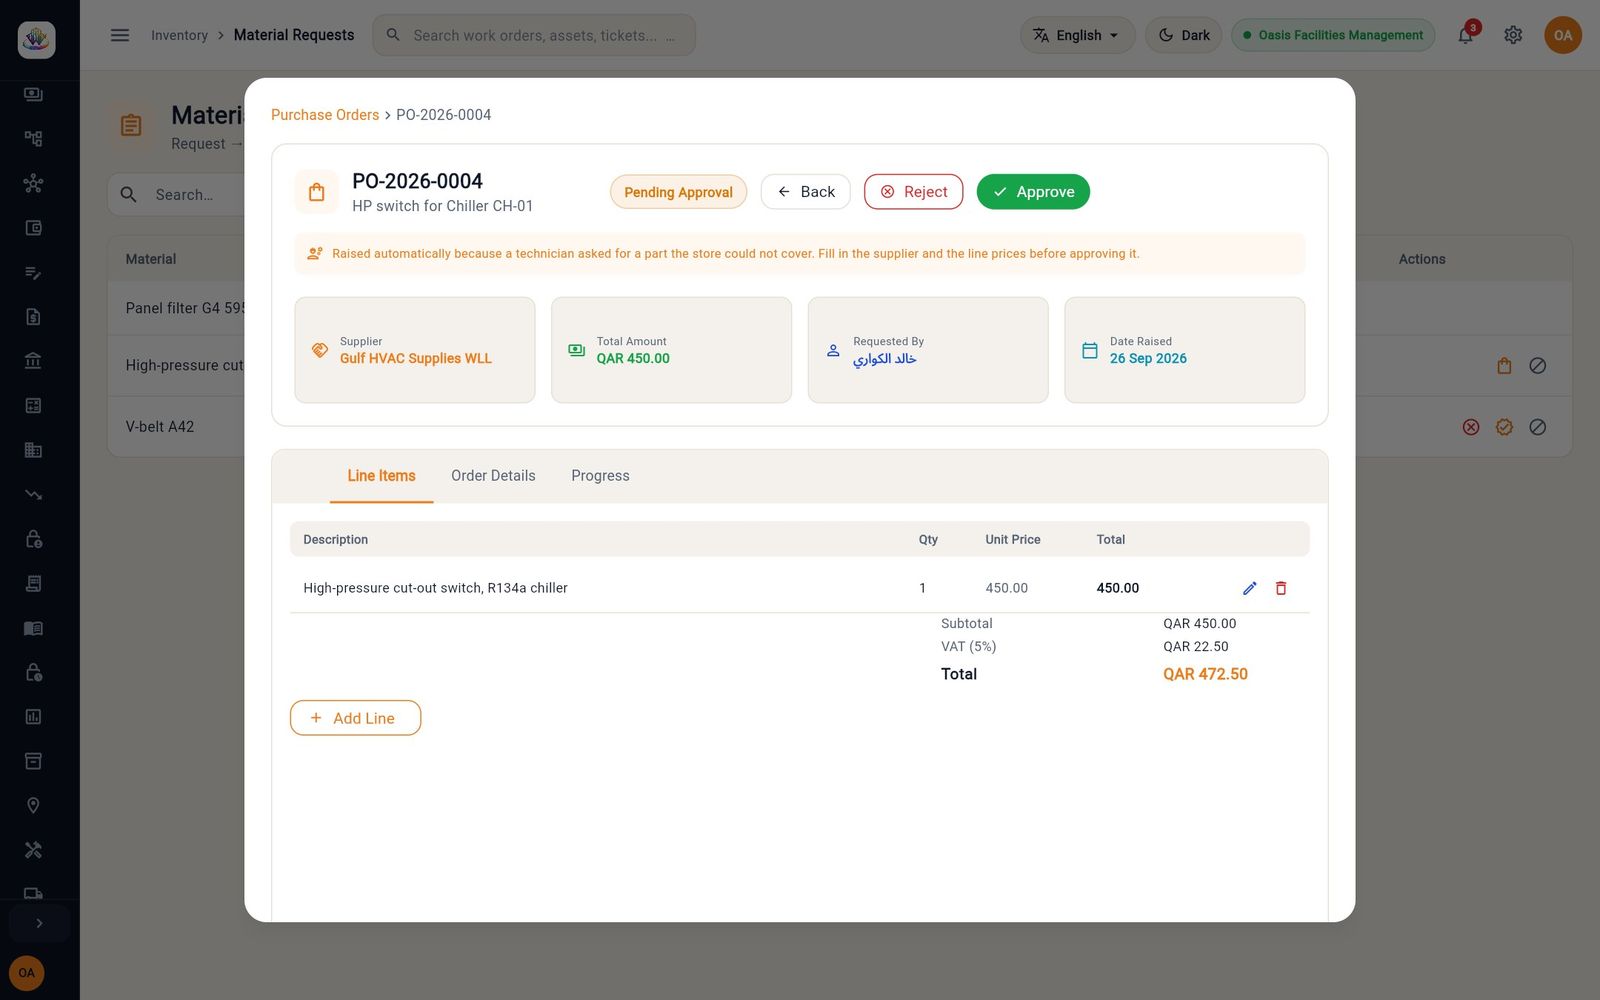
When the technician asks for a part that is not in stock, the request is marked Ordered and a purchase order is raised for it. Click Open Purchase Order on the row to complete it: fill in the supplier on Order Details and the price on the line, then approve it as described in Purchase orders.
Request for quotation
- Who: FM Administrator, FM Manager, Procurement Officer
- Where: Sidebar → PURCHASES → Request for Quotation
An RFQ asks several suppliers to price the same list of items.
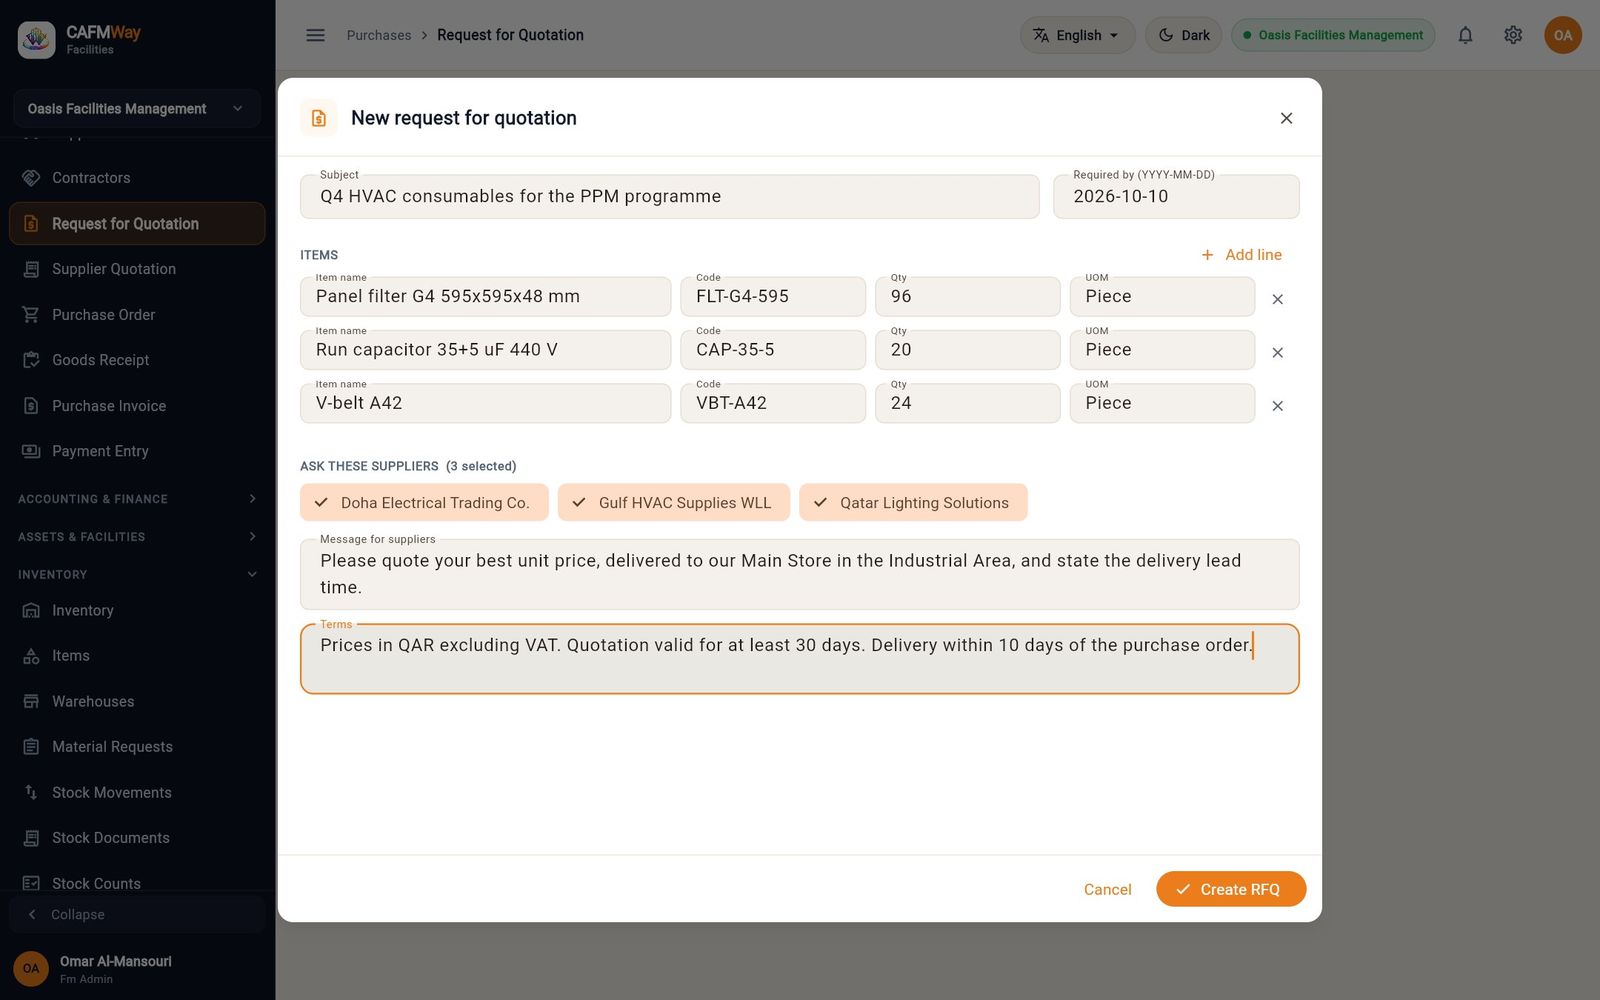
- Click New RFQ.
- Enter the Subject and the Required by (YYYY-MM-DD) date.
- Under ITEMS enter each line's Item name, Code, Qty and UOM. Click Add line for more lines.
- Under ASK THESE SUPPLIERS click each supplier you want to invite.
- Enter a Message for suppliers and the Terms.
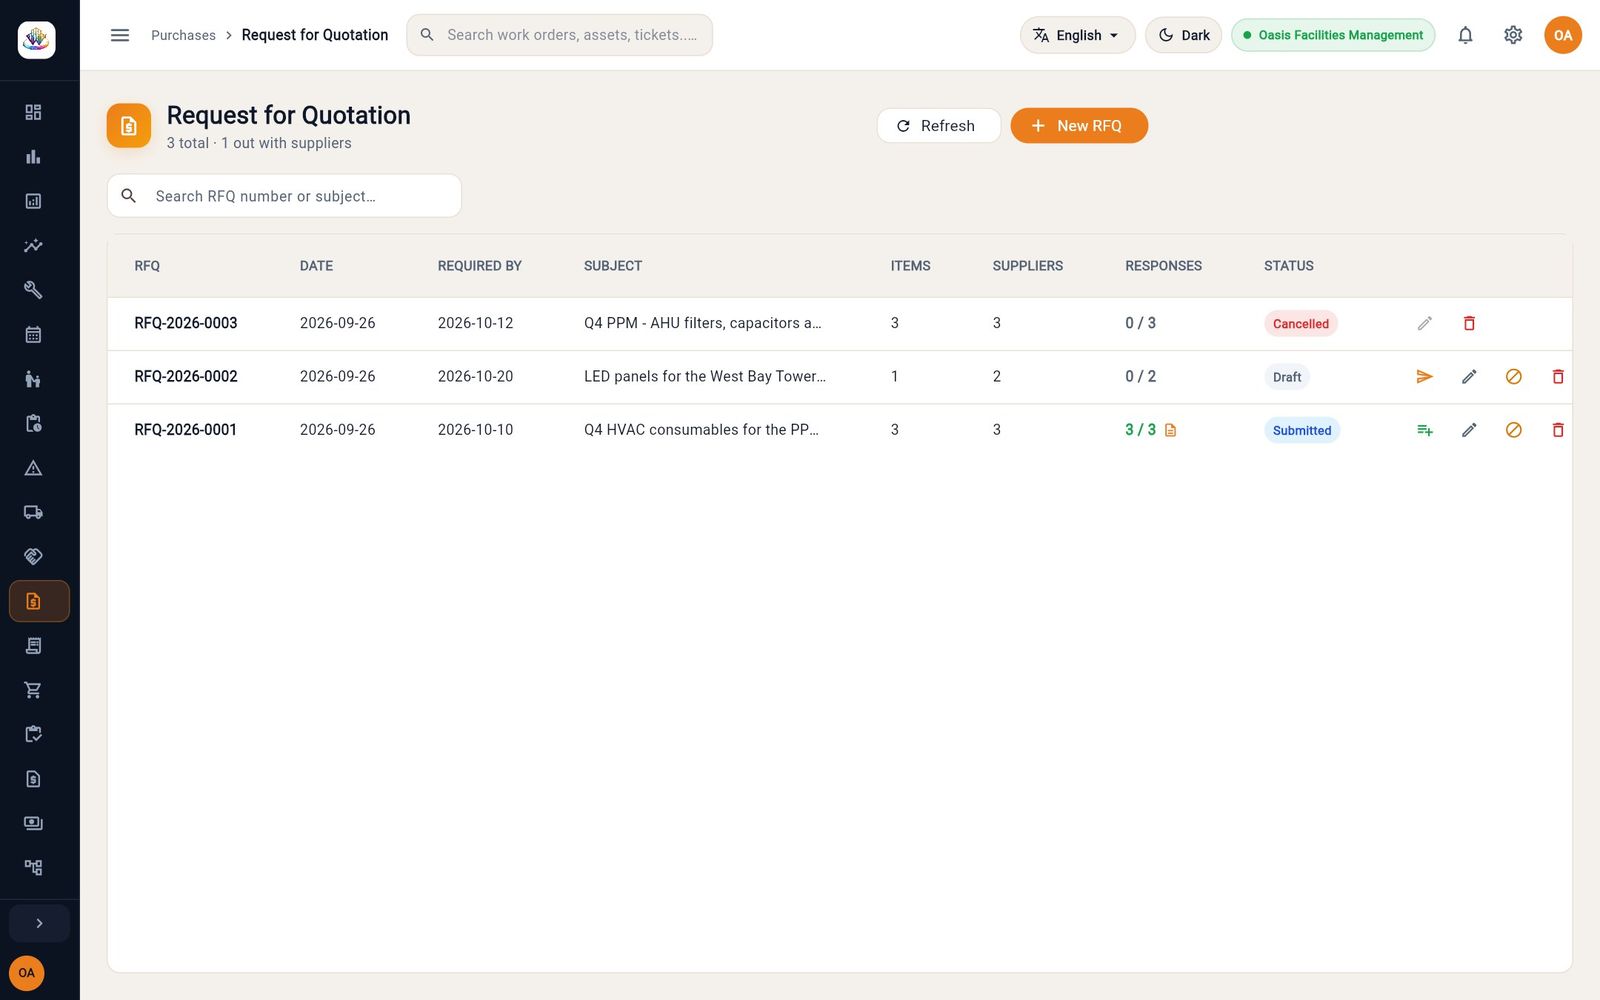
- Click Create RFQ. The RFQ is saved as a draft.
- On the draft row, click the paper-plane icon (Send to suppliers). The status becomes Submitted.
Supplier quotations and award
- Who: FM Administrator, FM Manager, Procurement Officer
- Where: Sidebar → PURCHASES → Request for Quotation and Supplier Quotation
Record each supplier's reply against the RFQ, compare them and award the order.
On the submitted RFQ, click the green icon (Record a supplier’s quote).
In Which supplier is quoting? choose a supplier marked Awaiting their quote.
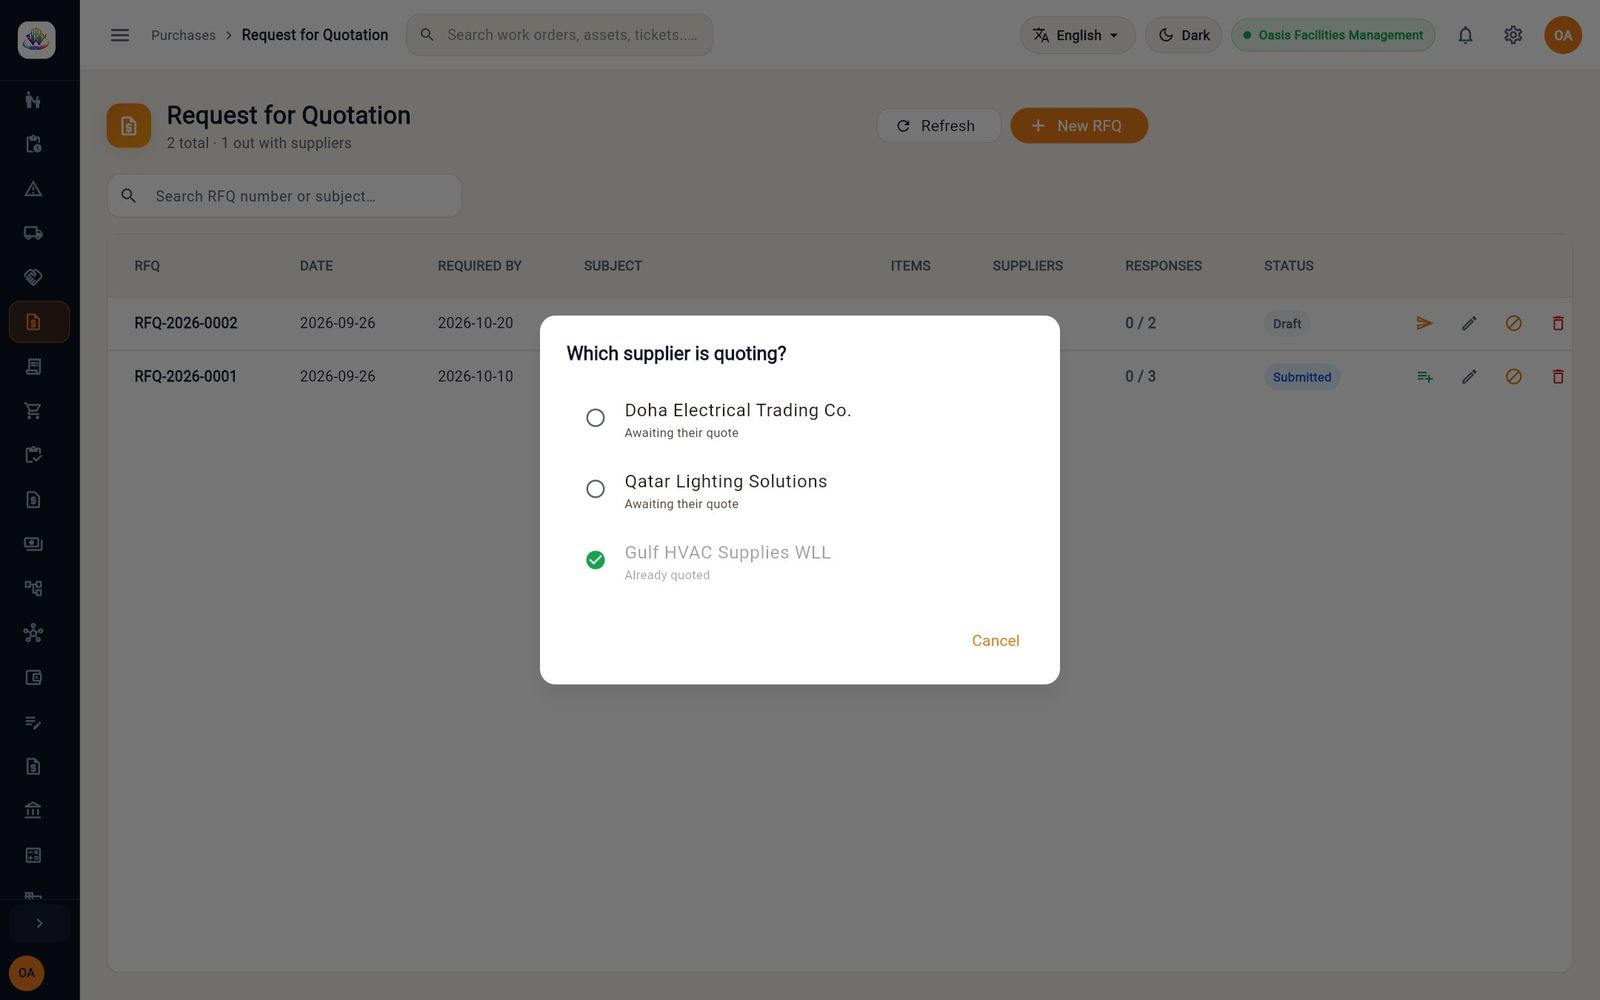
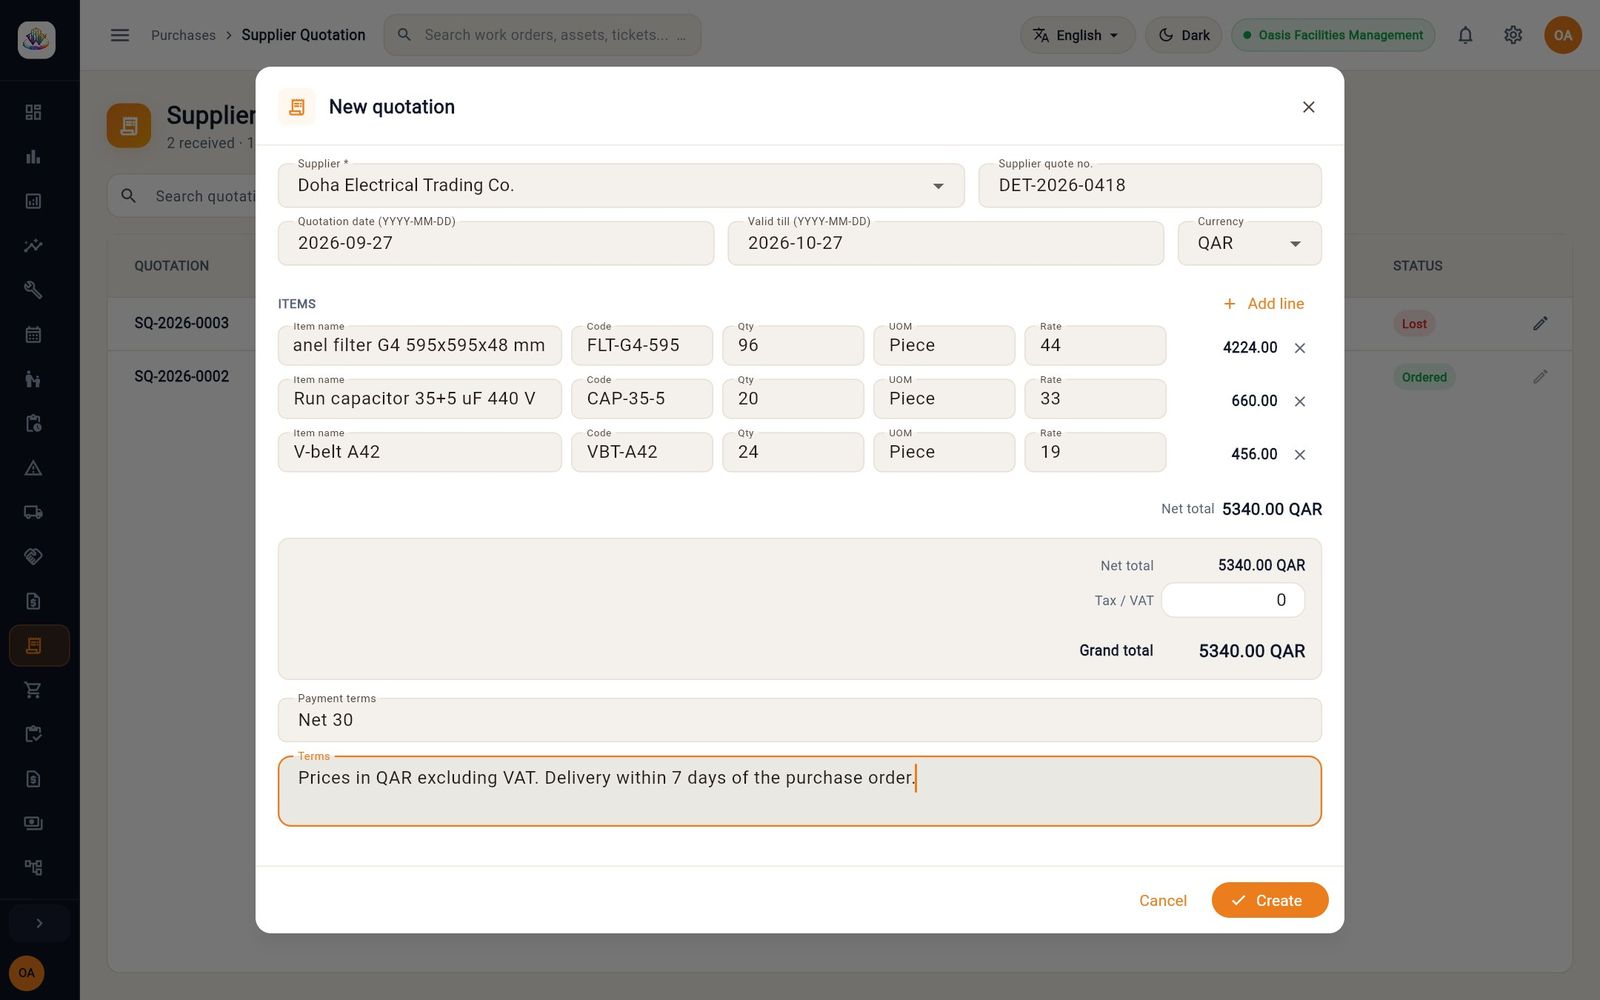
Figure 127 Choosing which supplier is quoting; Gulf HVAC has already quoted The RFQ lines are copied into the quotation. Enter the Supplier quote no., Quotation date, Valid till date, the Rate on each line and the Payment terms. The totals are worked out as you type.
Click Save changes.
- Repeat for each supplier. In Supplier Quotation, click Submit on each quotation once it is final.
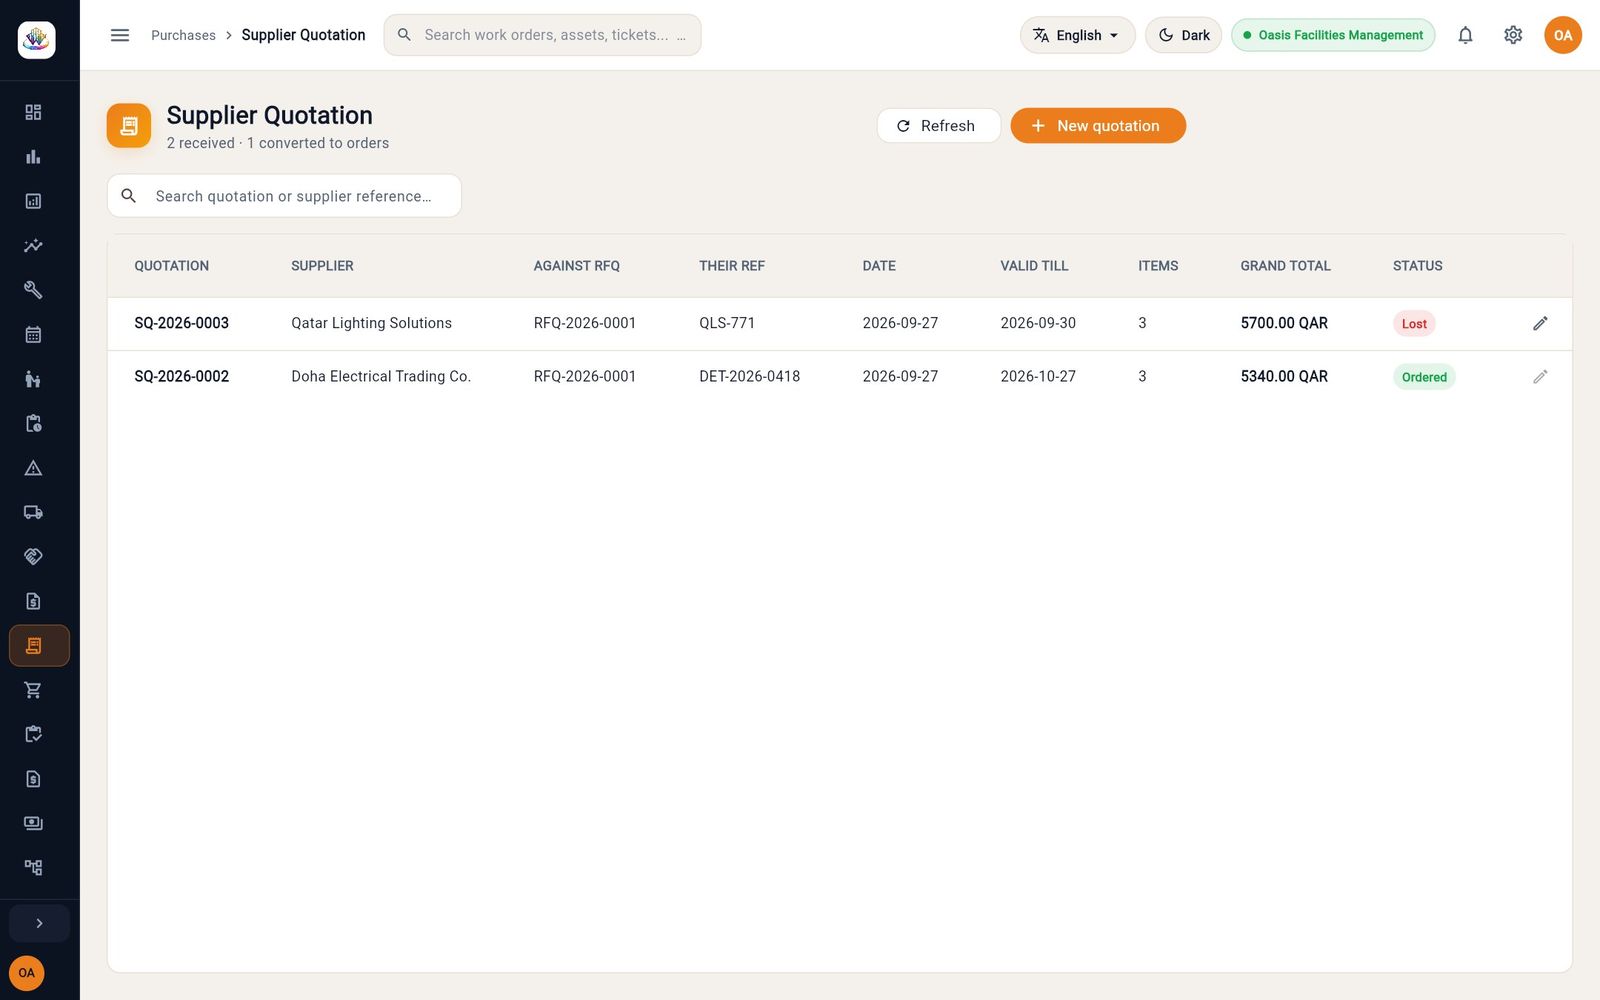
- Compare the grand totals in the list. On the winning quotation, click the cart icon (Award and raise a purchase order). The quotation becomes Ordered, the other quotations on the same RFQ become Lost, and a purchase order is created with the quotation's lines and prices.
Purchase orders
- Who: Procurement Officer raises and may approve up to QAR 50,000; FM Manager, FM Administrator and Finance Officer approve without limit
- Where: Sidebar → PURCHASES → Purchase Order
A purchase order is born in one of three ways: by awarding a quotation, automatically from a material request the store could not cover, or directly with New Purchase Order.
Raise a purchase order directly
- Click New Purchase Order.
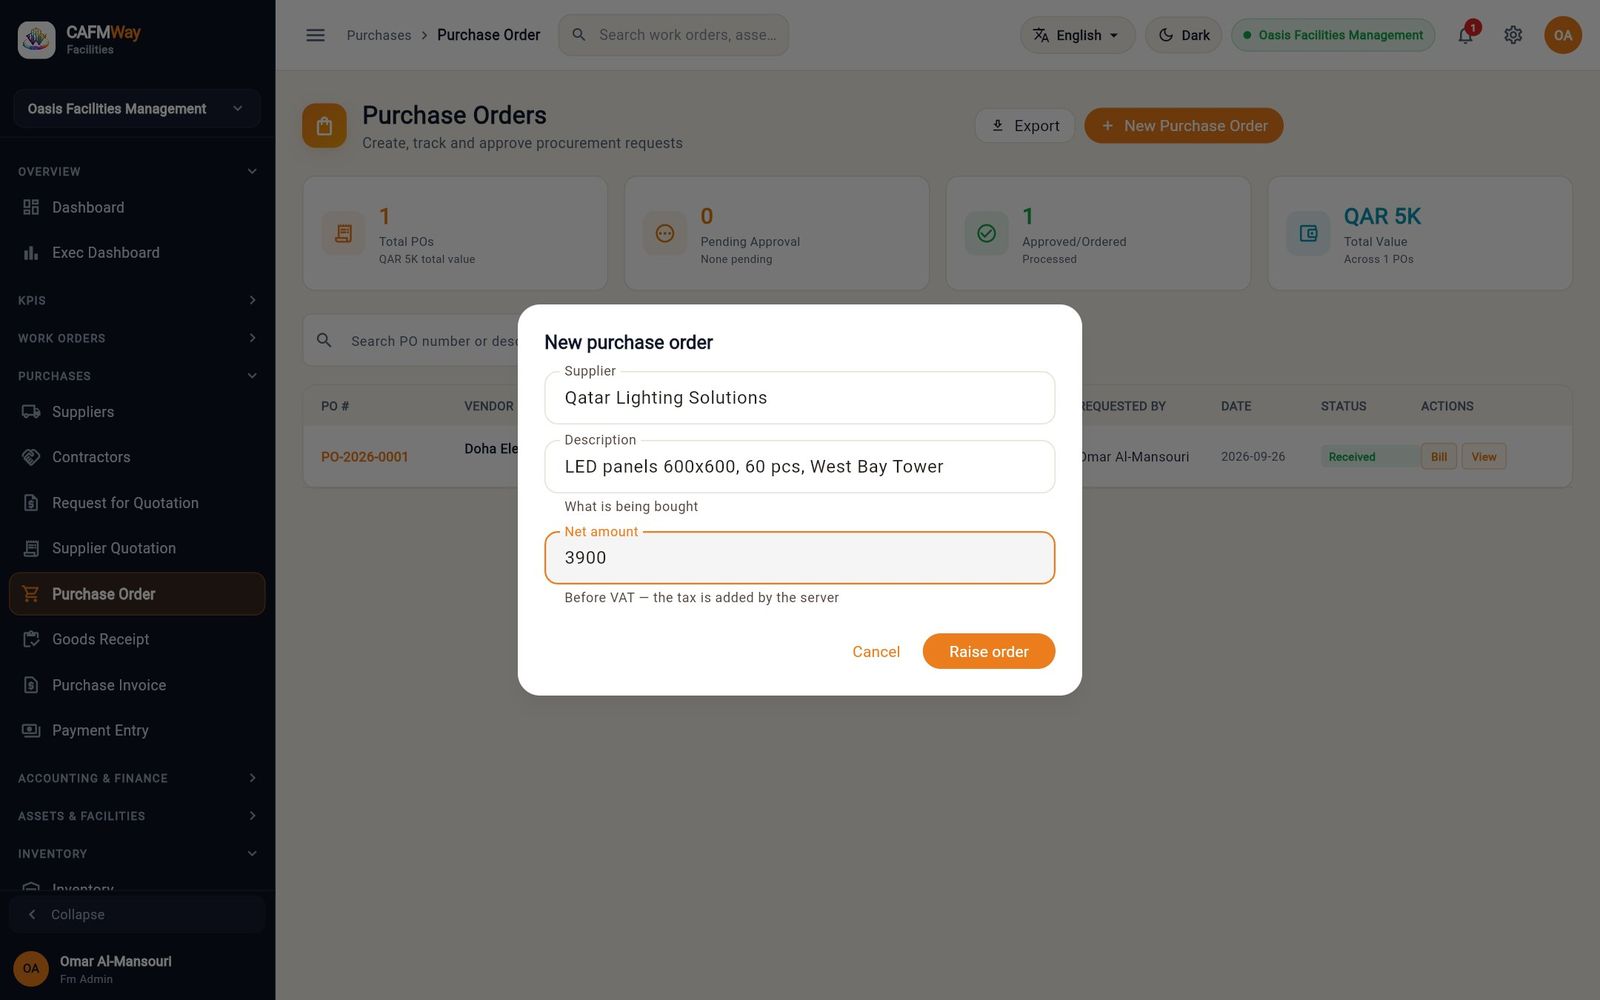
- Enter the Supplier, a Description of what is being bought and the Net amount.
- Click Raise order. The order is created as Pending Approval.
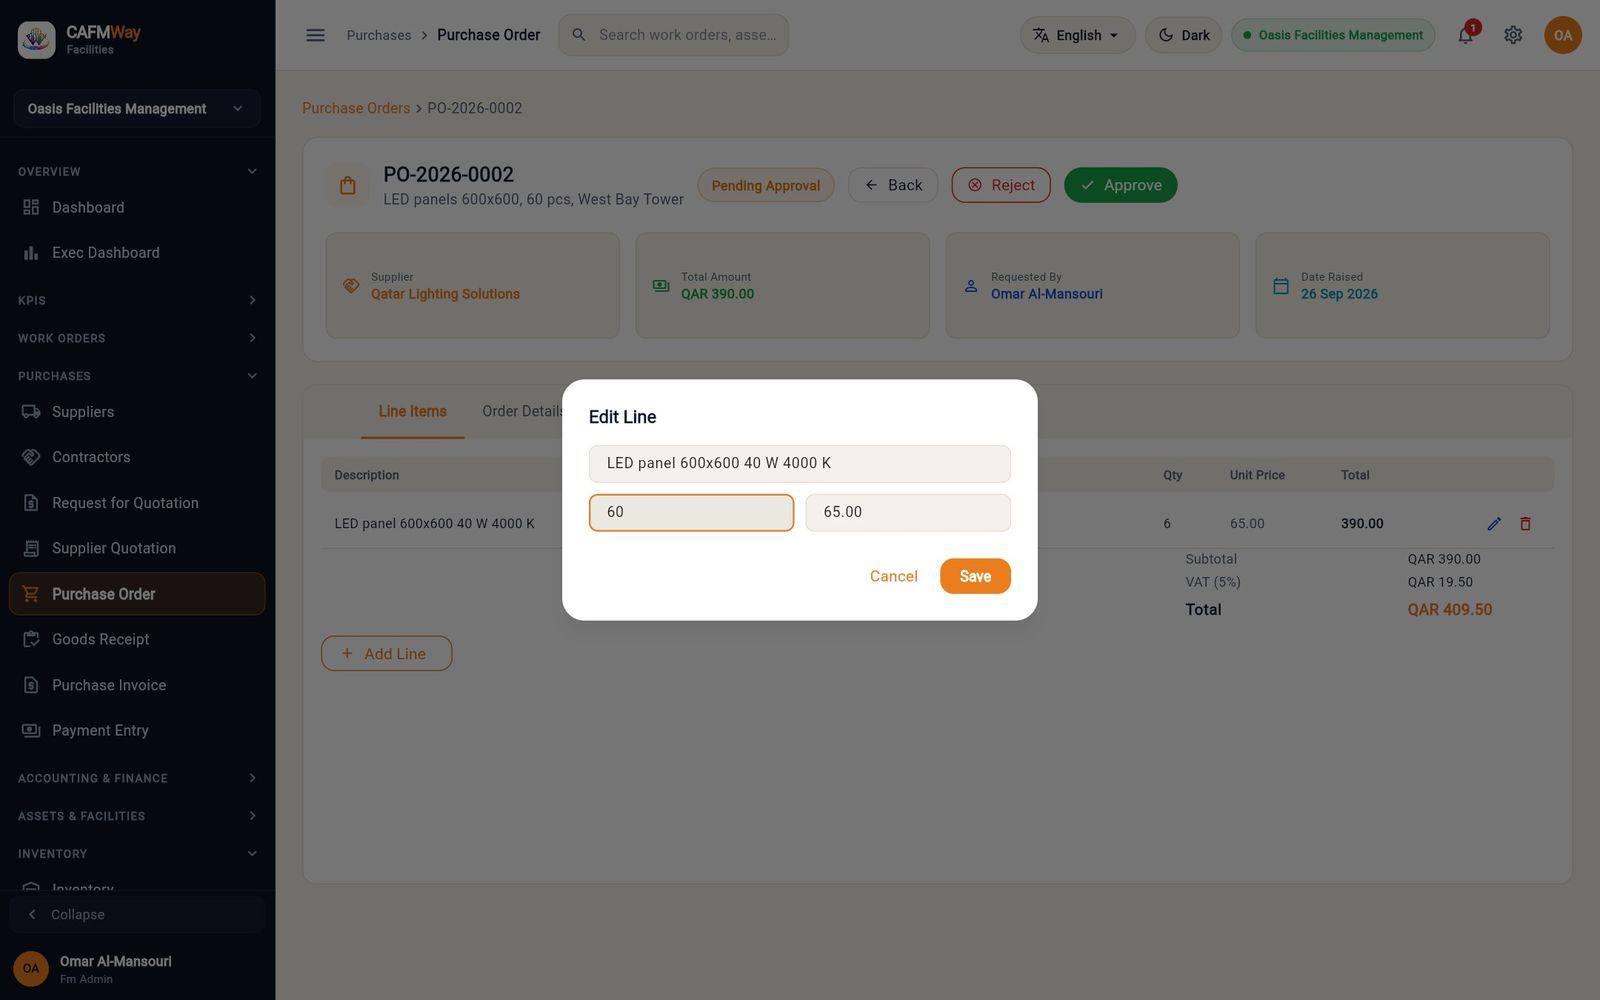
- Click View on the new order and, on Line Items, click the pencil icon (Edit line) to set the description, quantity and unit price. The total is recalculated.
Review and approve
Click View on the order. Line Items lists the lines; Order Details holds the supplier, title, notes, payment terms and terms and conditions (click Save Changes after editing them); Progress shows who raised, approved and ordered it.
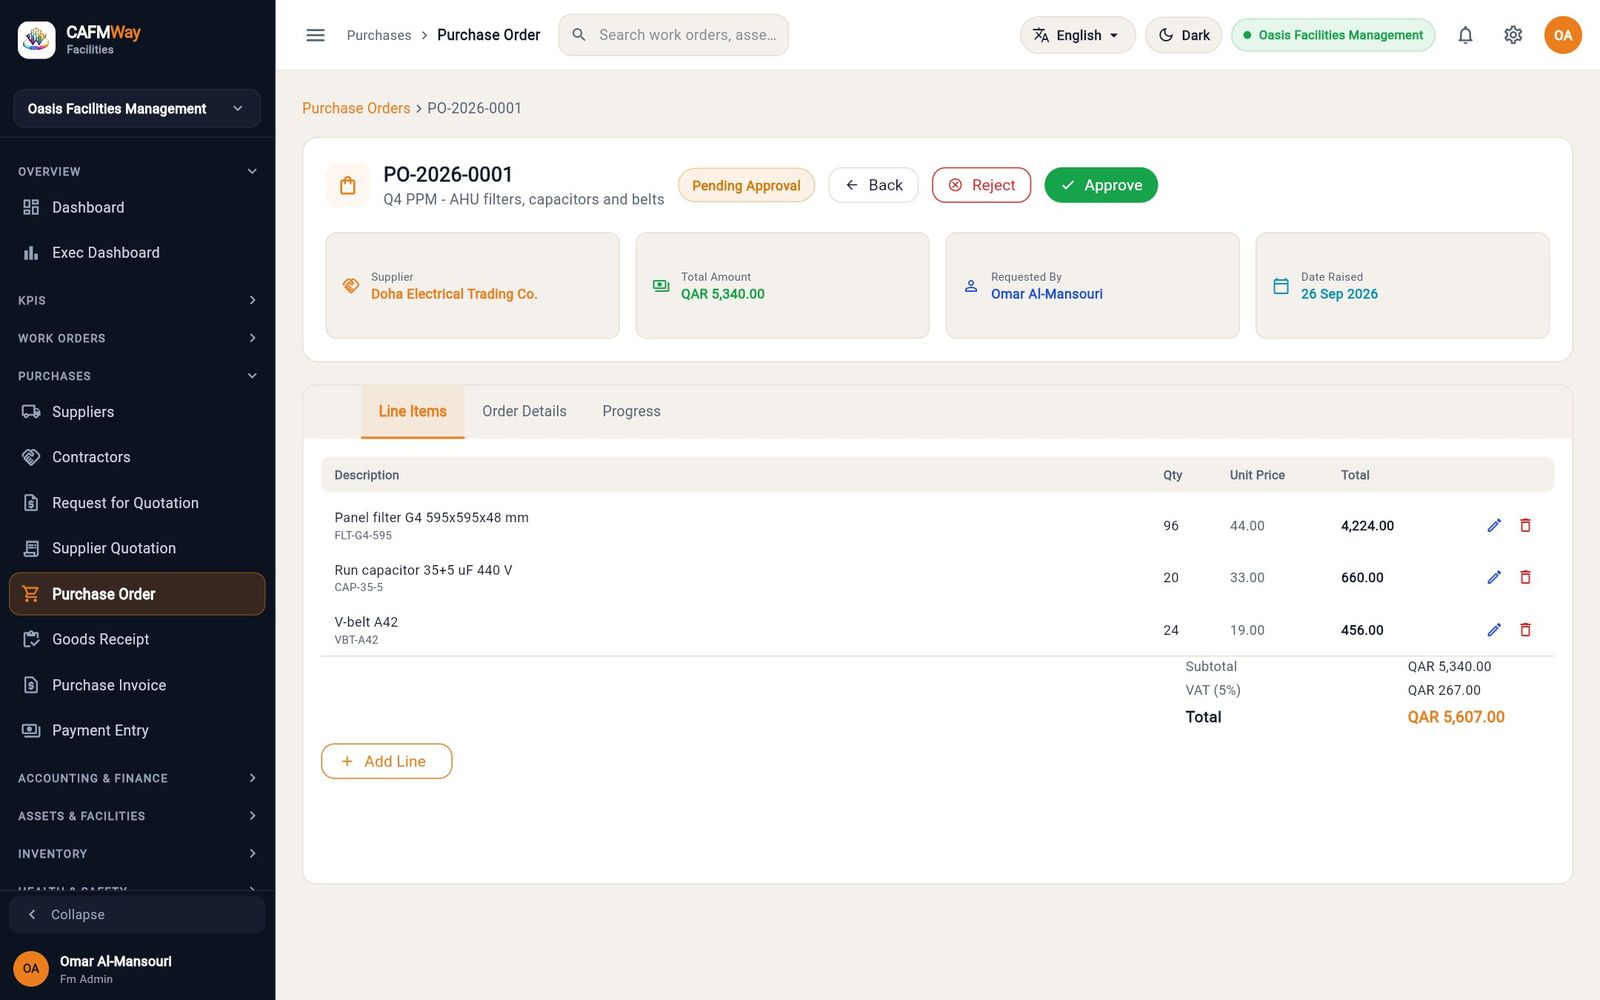
Figure 132 PO-2026-0001 from Doha Electrical, raised from quotation SQ-2026-0002, pending approval Click Approve and confirm. The order can no longer be edited.
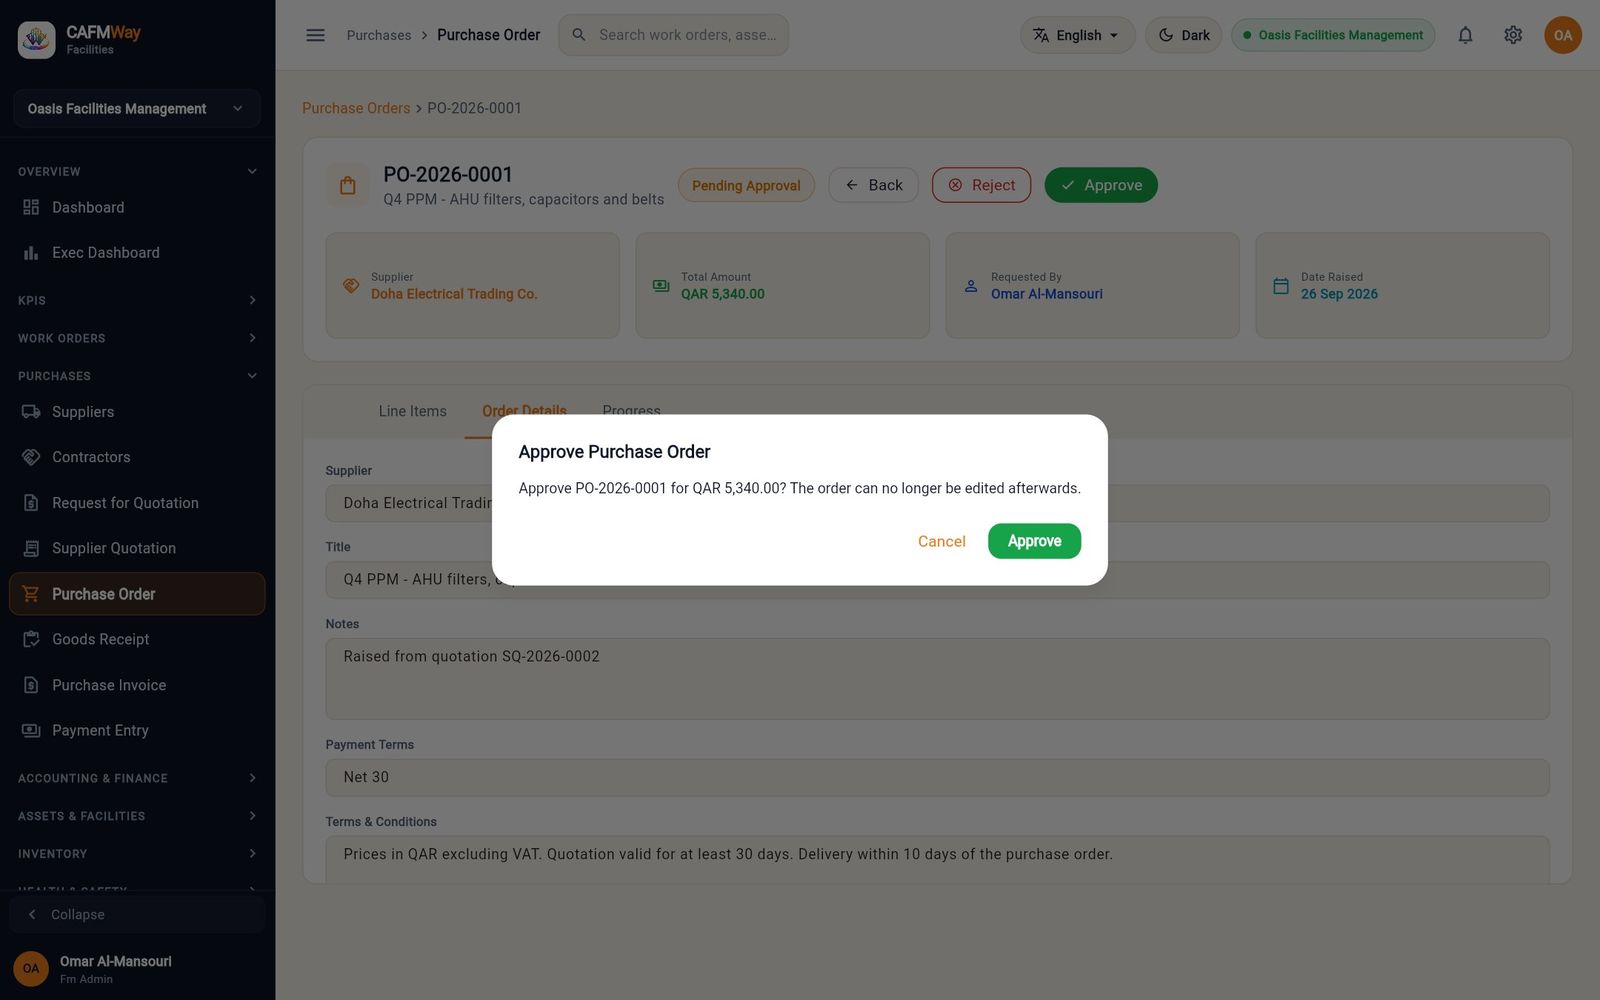
Figure 133 Confirming approval of PO-2026-0001 for QAR 5,340.00 To refuse an order instead, click Reject and confirm. The order is cancelled.
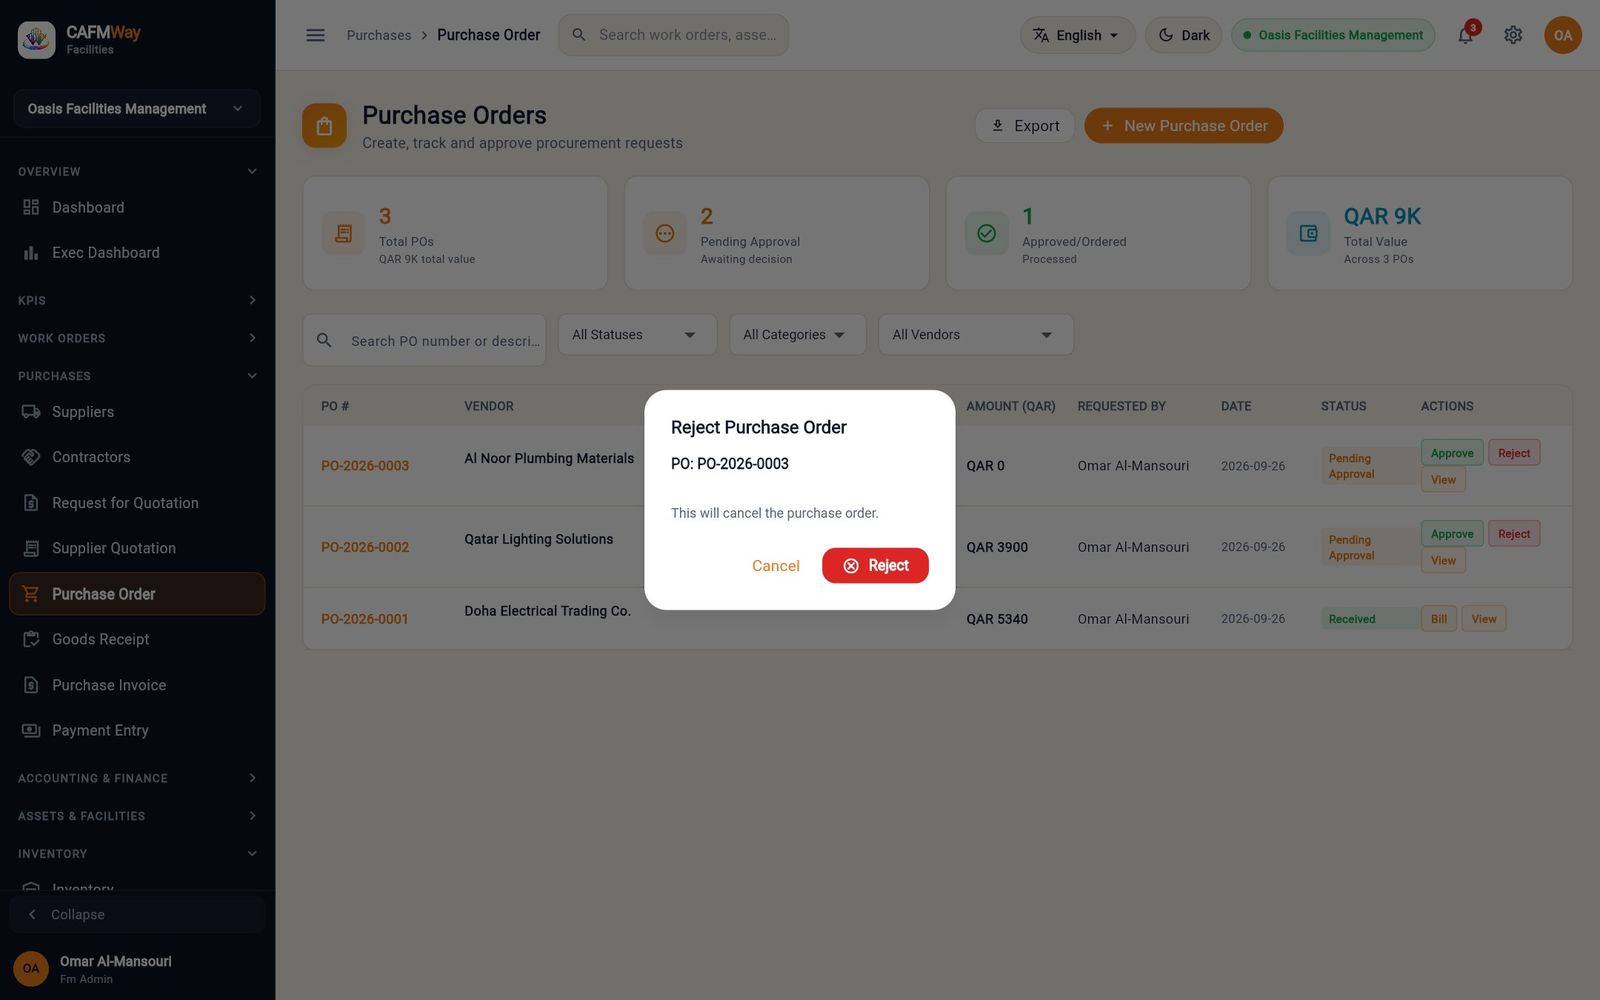
Figure 134 Rejecting a purchase order cancels it
Send it and receive it
Once the order has been sent to the supplier, click Mark Ordered and then Confirm Ordered.
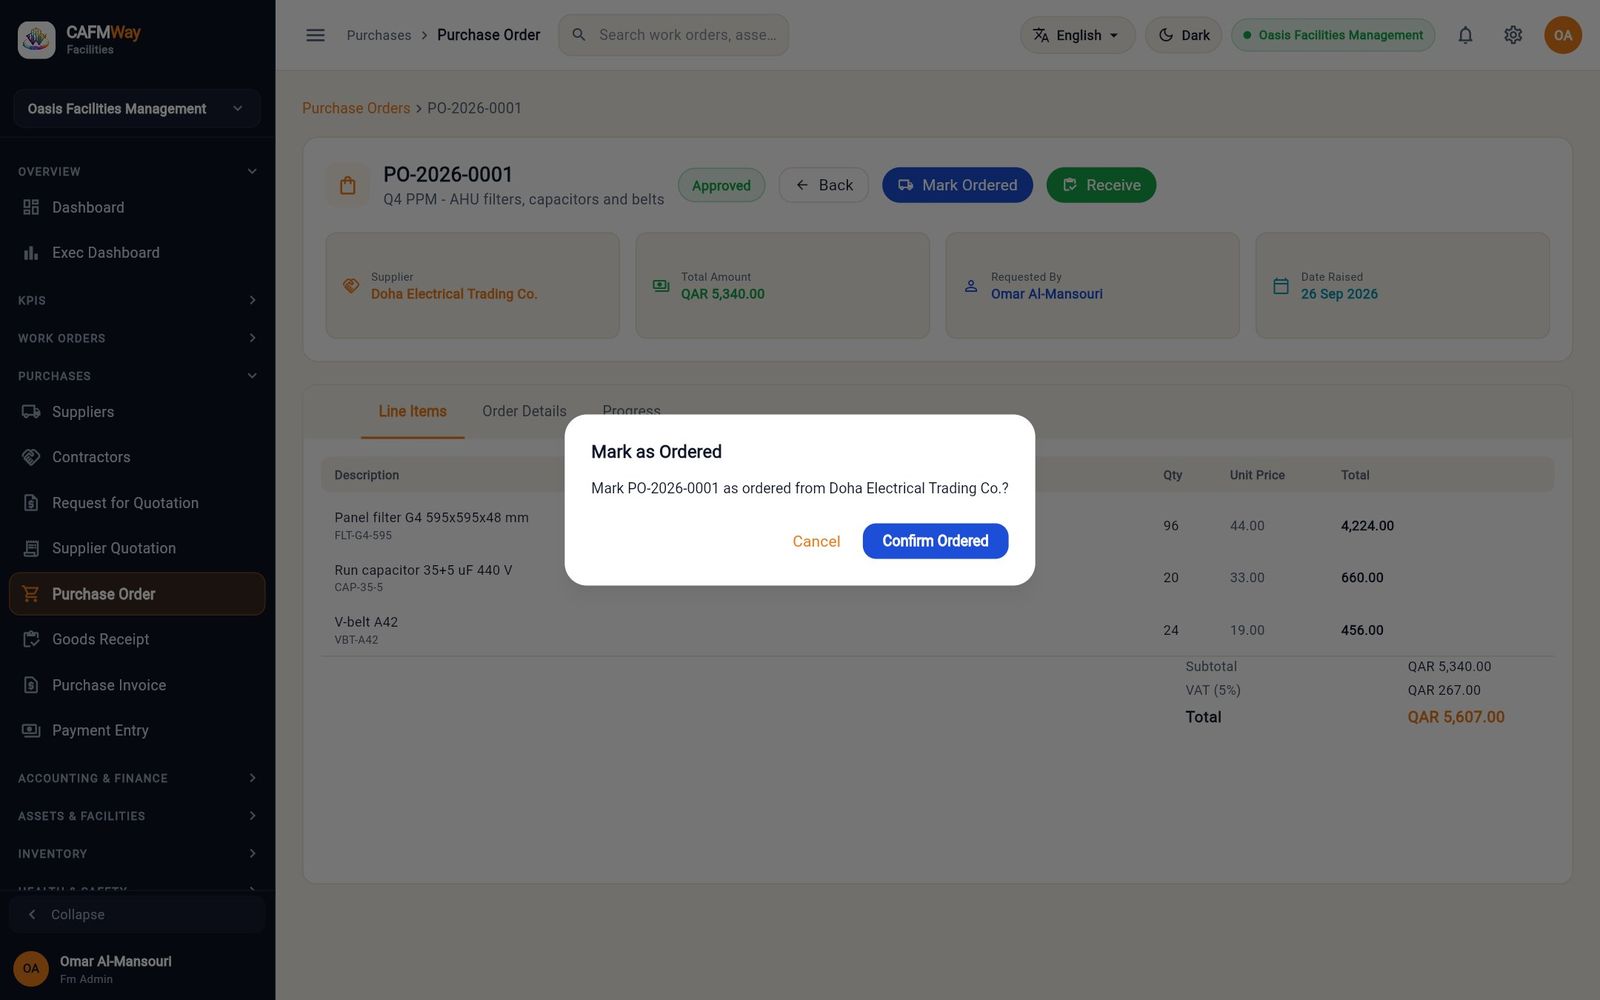
Figure 135 Marking PO-2026-0001 as ordered from Doha Electrical When the goods arrive, first post the goods receipt into the warehouse (next section). Then click Receive on the order and confirm. The order becomes Received and Progress is complete.
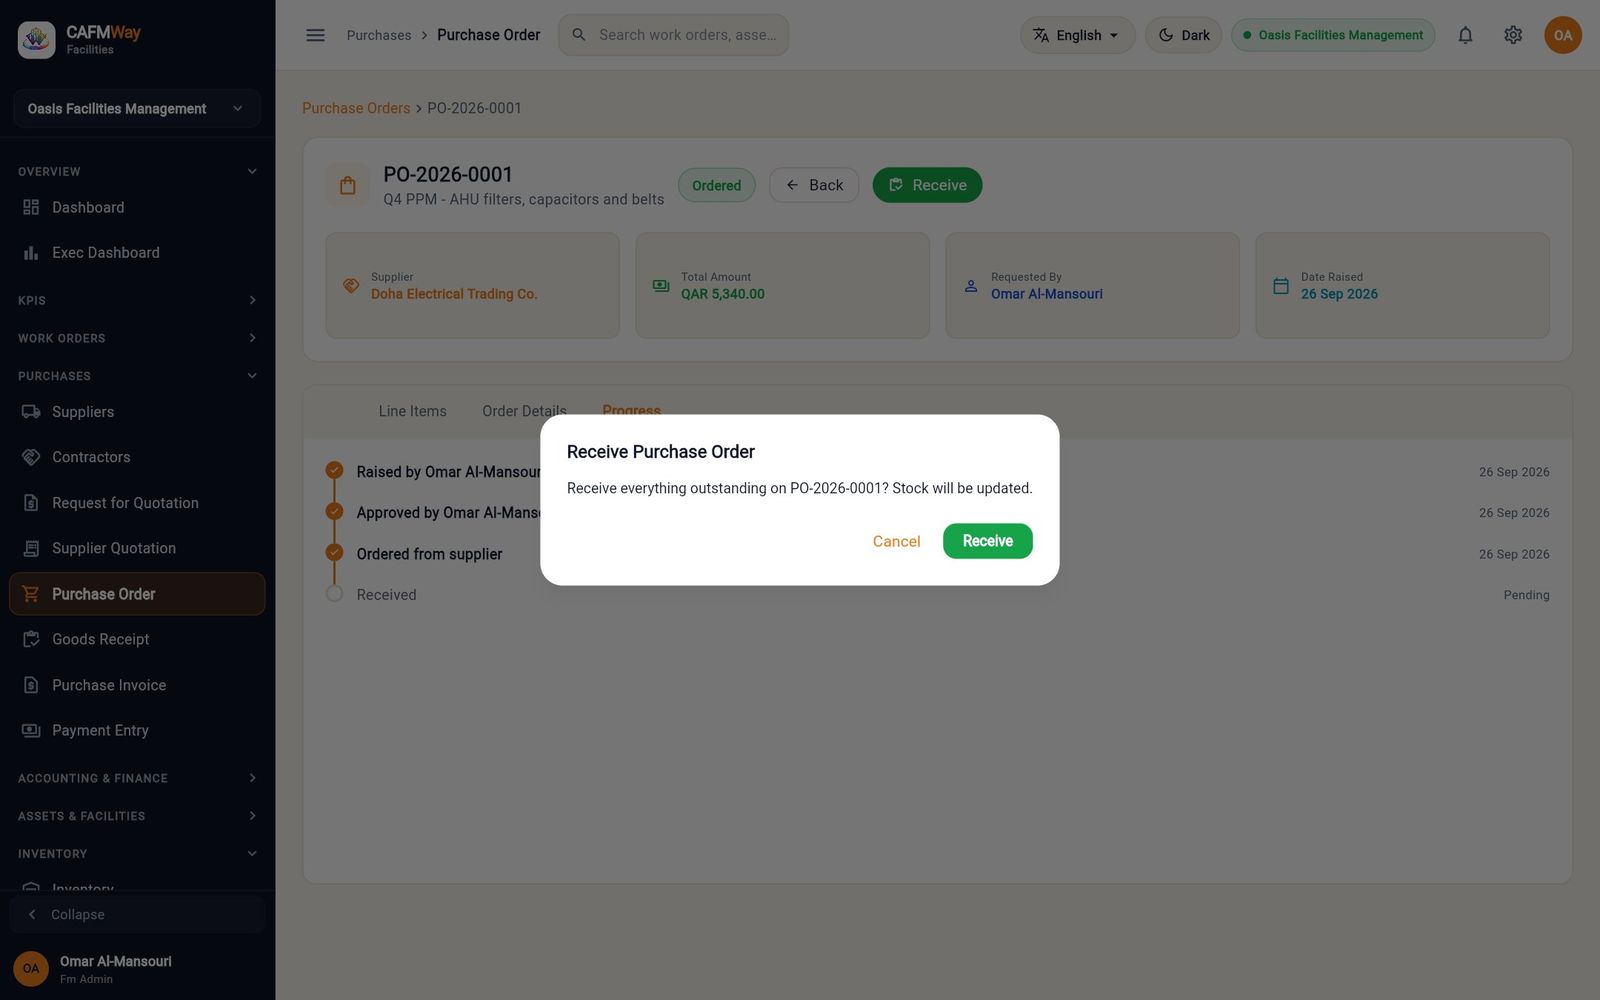
Figure 136 Receiving everything outstanding on PO-2026-0001 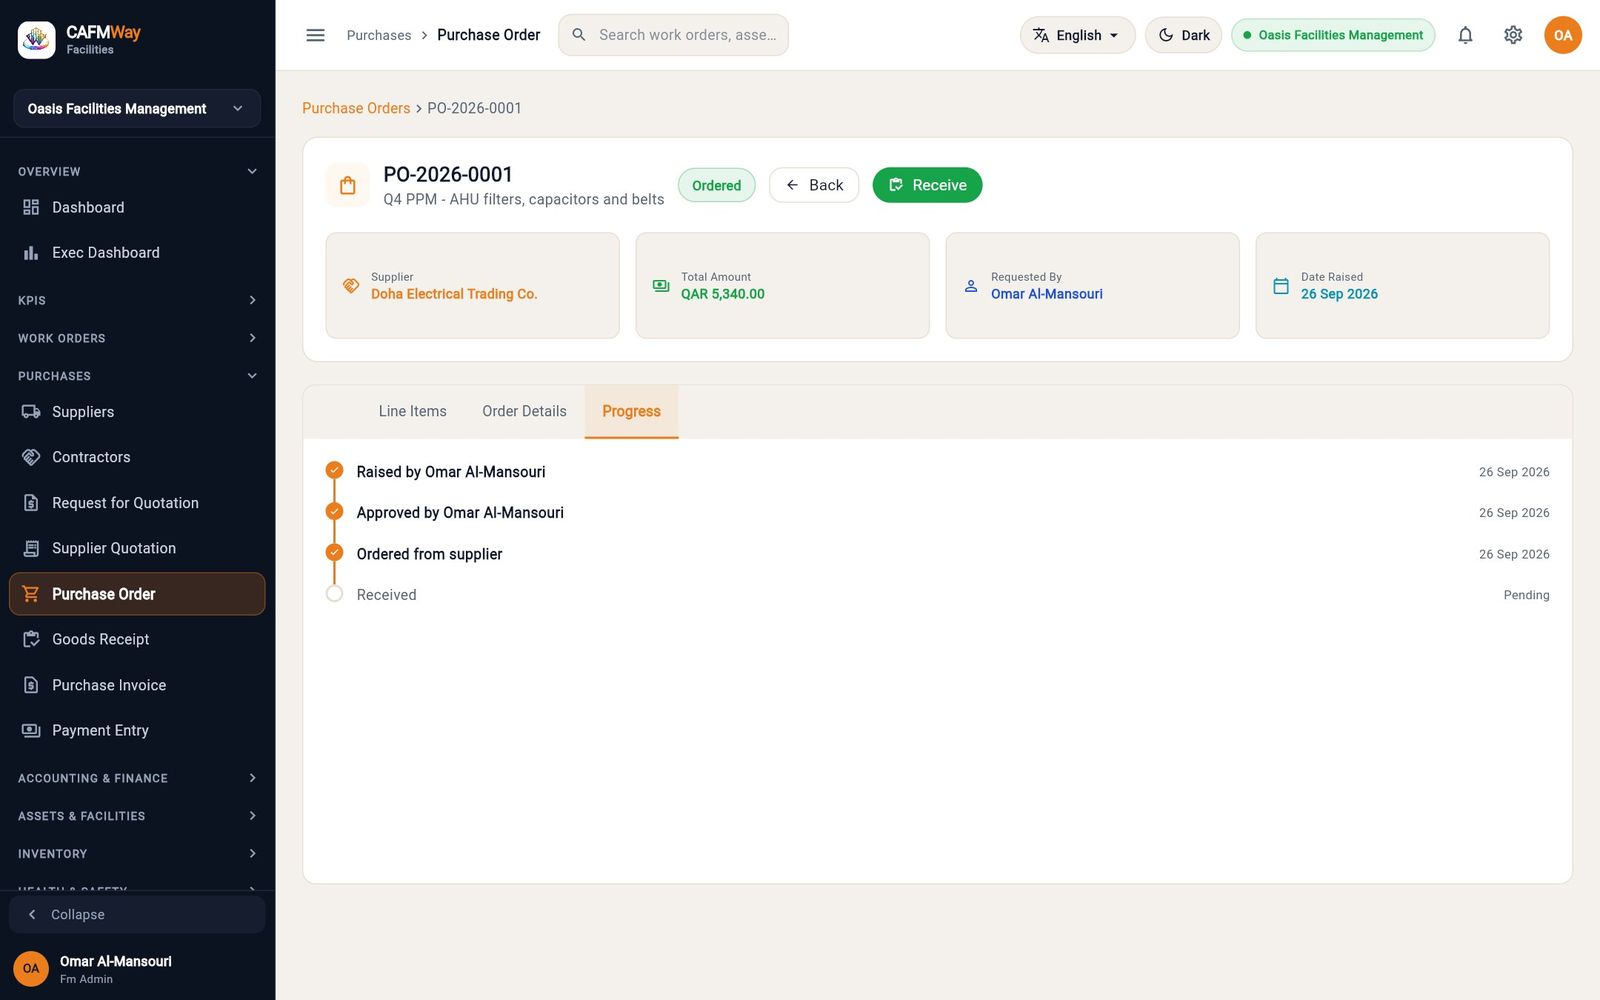
Figure 137 The order's progress: raised, approved, ordered, received Click Bill on the order row. A draft purchase invoice is created for what is ordered and not yet billed, and a message gives its number.
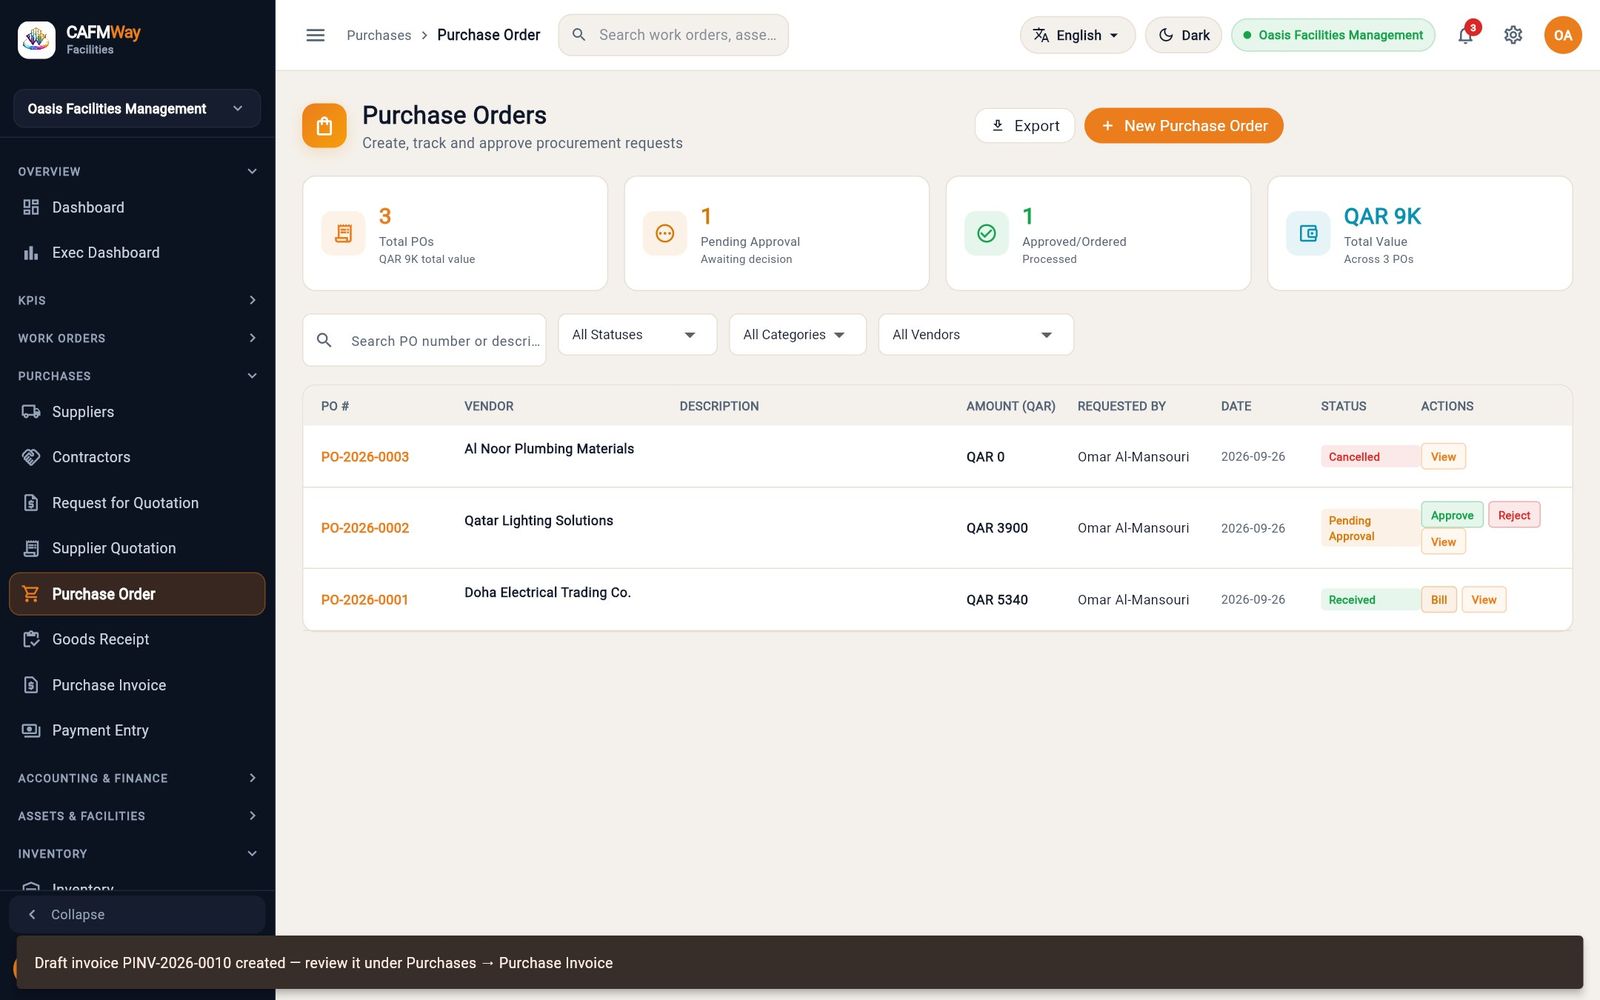
Figure 138 Draft invoice PINV-2026-0010 created from the purchase order
The list's cards count the orders by stage and total their value.
Goods receipt
- Who: FM Administrator, FM Manager, Procurement Officer
- Where: Sidebar → PURCHASES → Goods Receipt (the same page as INVENTORY → Stock Documents)
A goods receipt puts delivered goods into a warehouse at the price paid.
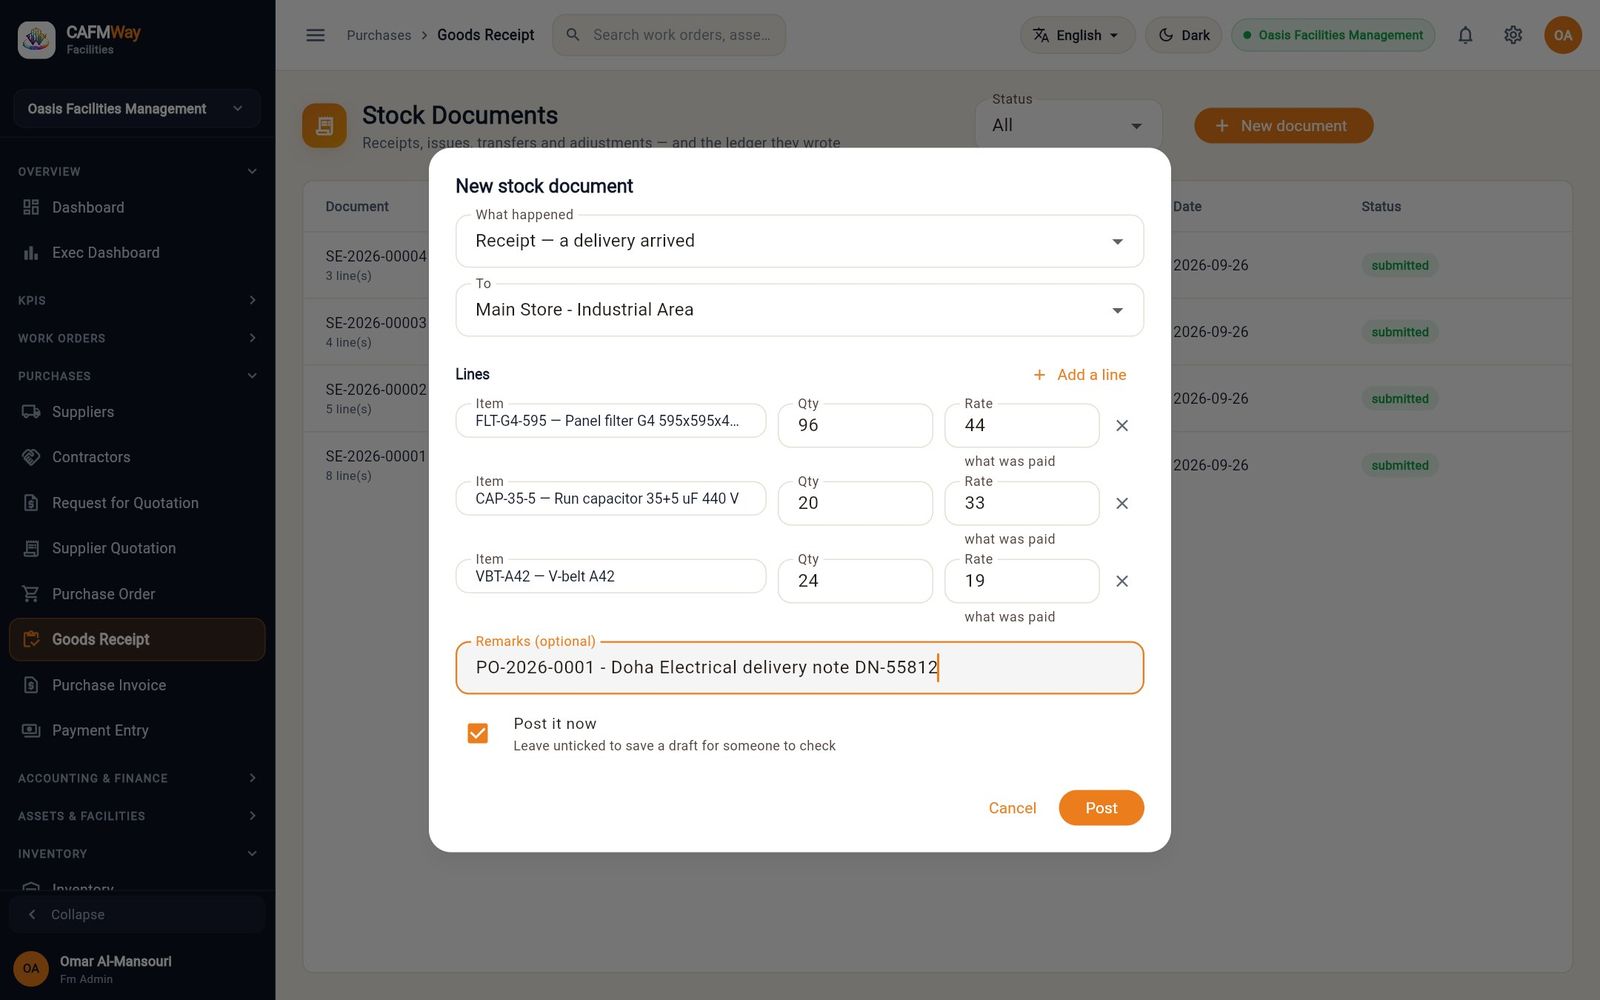
- Click New document. What happened is already set to Receipt — a delivery arrived.
- Set To to the receiving warehouse.
- Click Add a line for each item delivered, and enter the Qty and the Rate (what was paid per unit, from the purchase order).
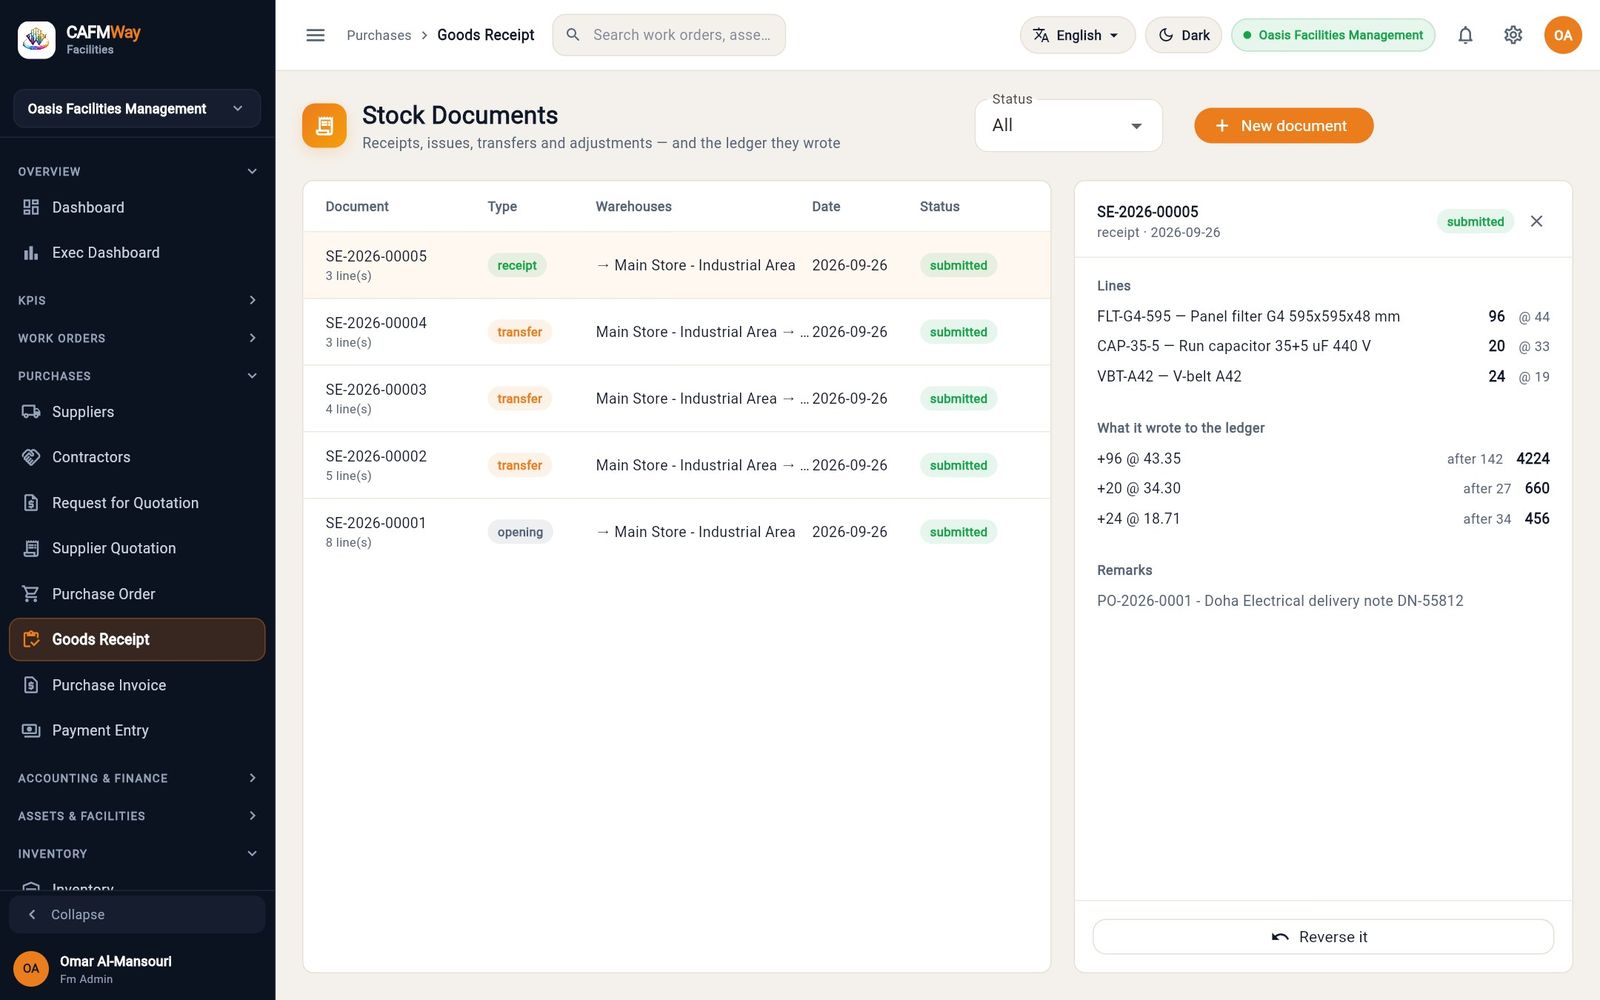
- In Remarks (optional) enter the purchase order and delivery note numbers, for example
PO-2026-0001 - Doha Electrical delivery note DN-55812. - Keep Post it now ticked and click Post. Untick it and click Save draft instead if someone else should check the receipt before it is posted.
Click the receipt in the list to see what it wrote to the stock ledger. Each line shows the quantity added, the new average cost, the quantity after the receipt and the value:
Purchase invoice
- Who: FM Administrator, FM Manager, Finance Officer
- Where: Sidebar → PURCHASES → Purchase Invoice
When the supplier's invoice arrives, complete the draft created by Bill and approve it.
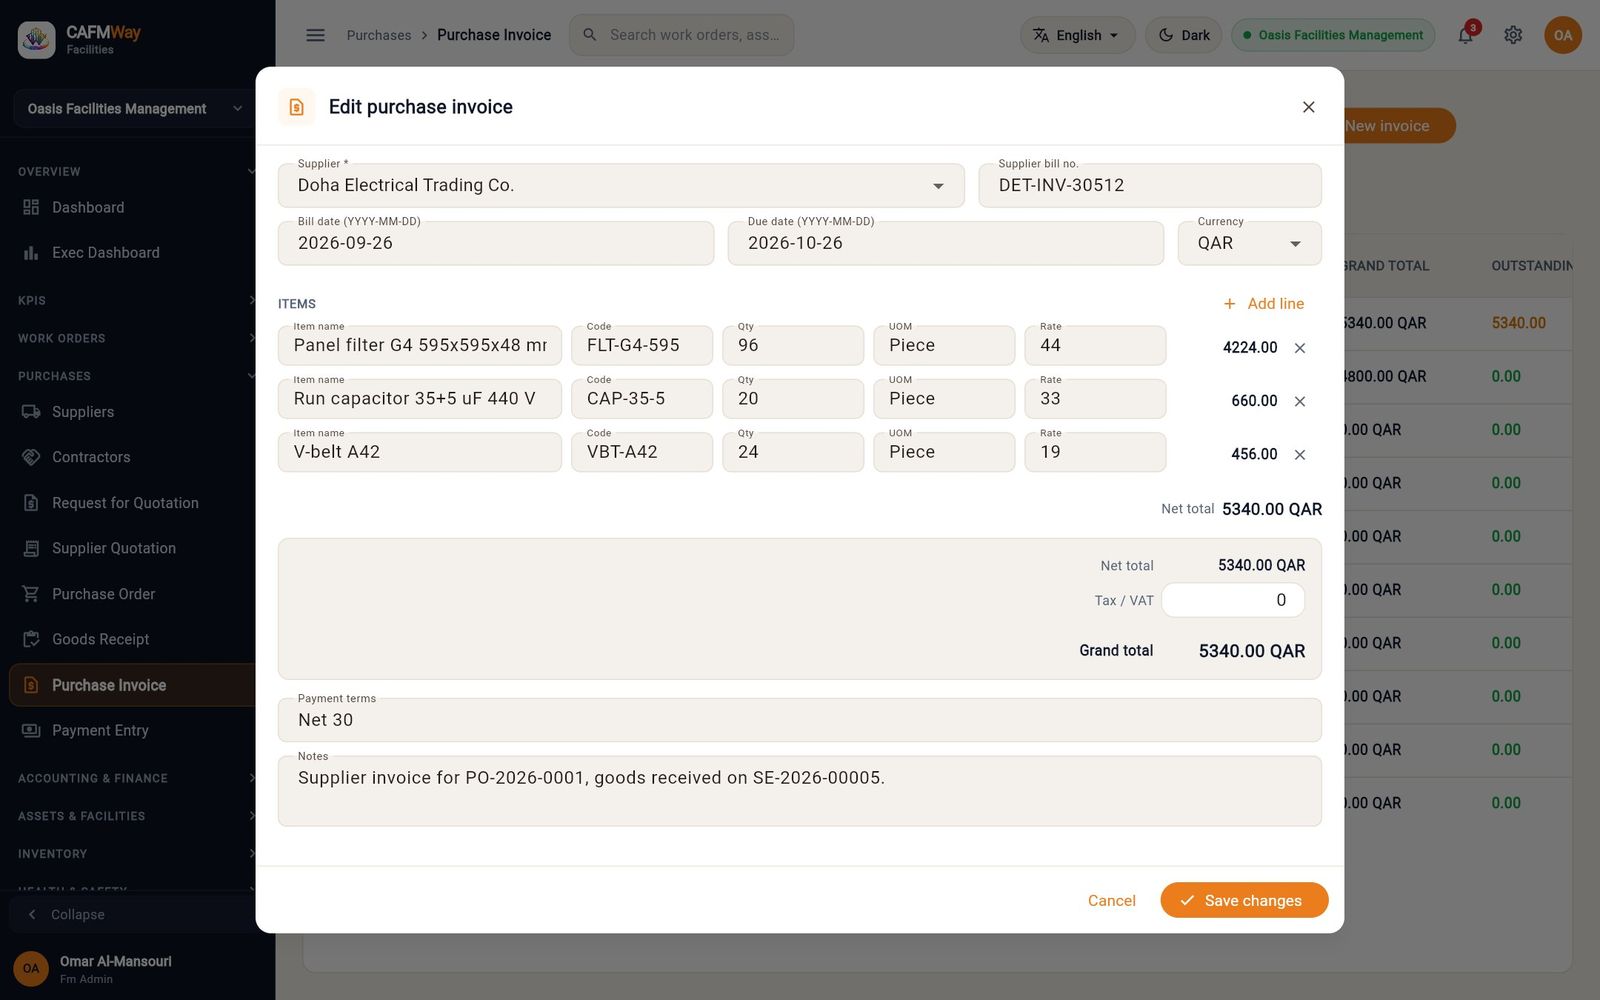
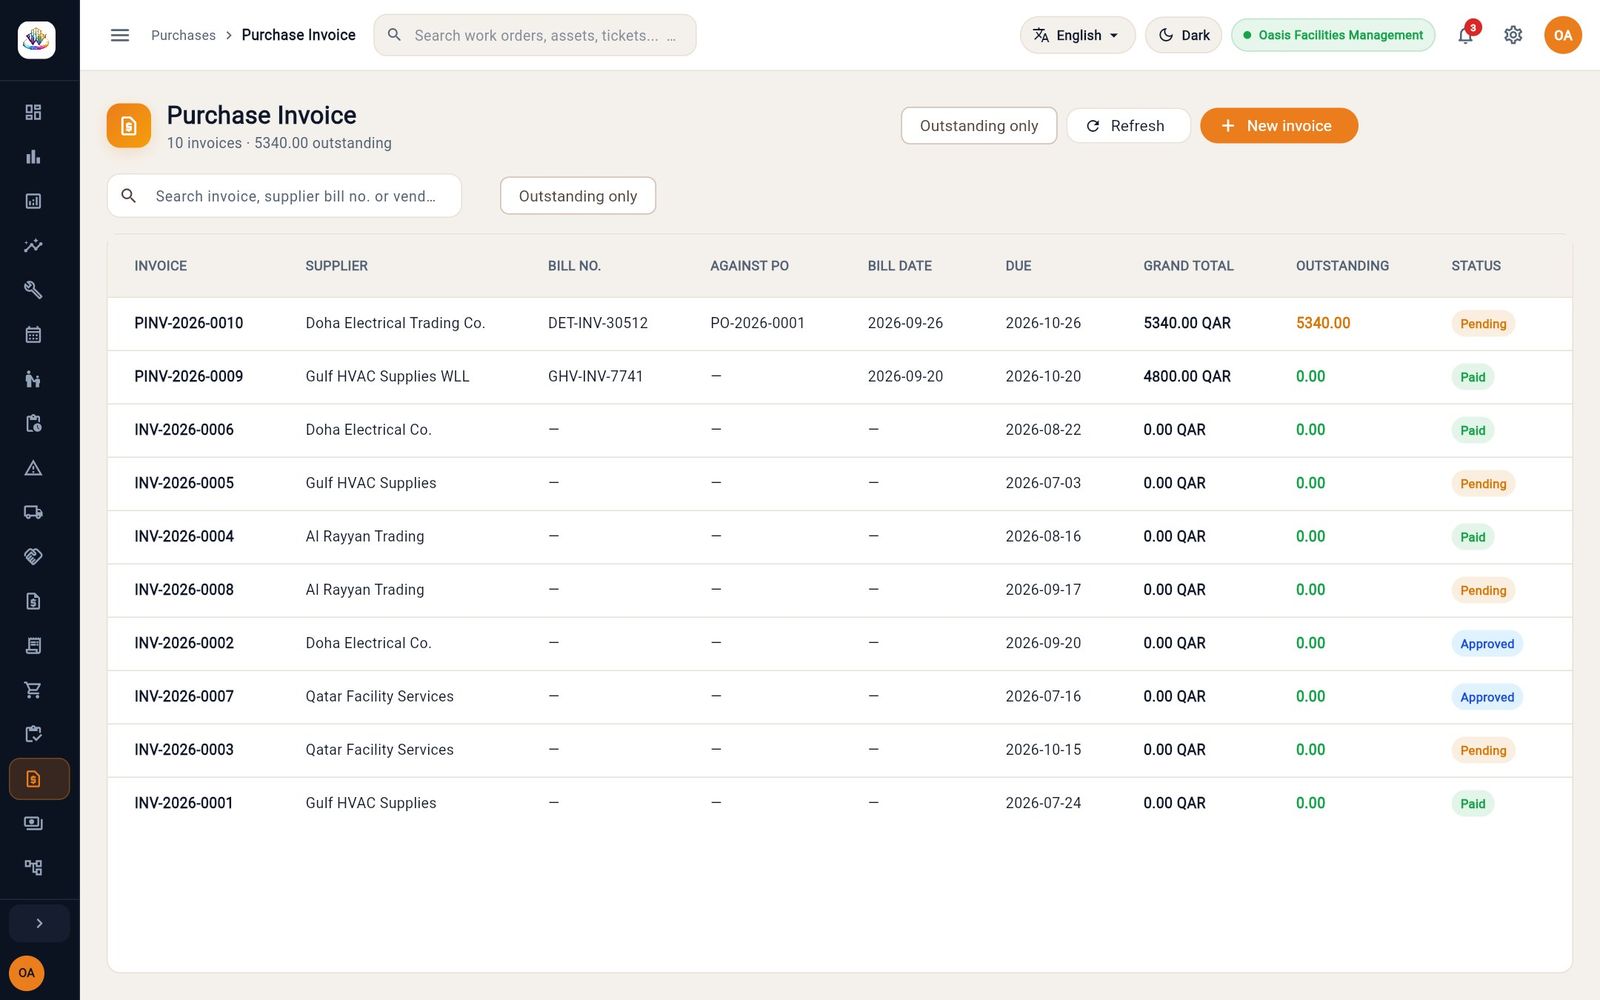
- Find the invoice (PINV-2026-0010, Against PO PO-2026-0001) and click the pencil icon.
- Enter the Supplier bill no., Bill date (YYYY-MM-DD) and Due date (YYYY-MM-DD). Check the lines and rates against the paper invoice and add any Tax / VAT.
- Click Save changes.
- Click the approve icon on the row. The invoice becomes Approved and is posted to accounts payable (see Accounting).
Payment entry
- Who: FM Administrator, FM Manager, Finance Officer
- Where: Sidebar → PURCHASES → Purchase Invoice and Payment Entry
- On the approved invoice, click the money icon (Pay this invoice). A draft payment is created for the outstanding amount.
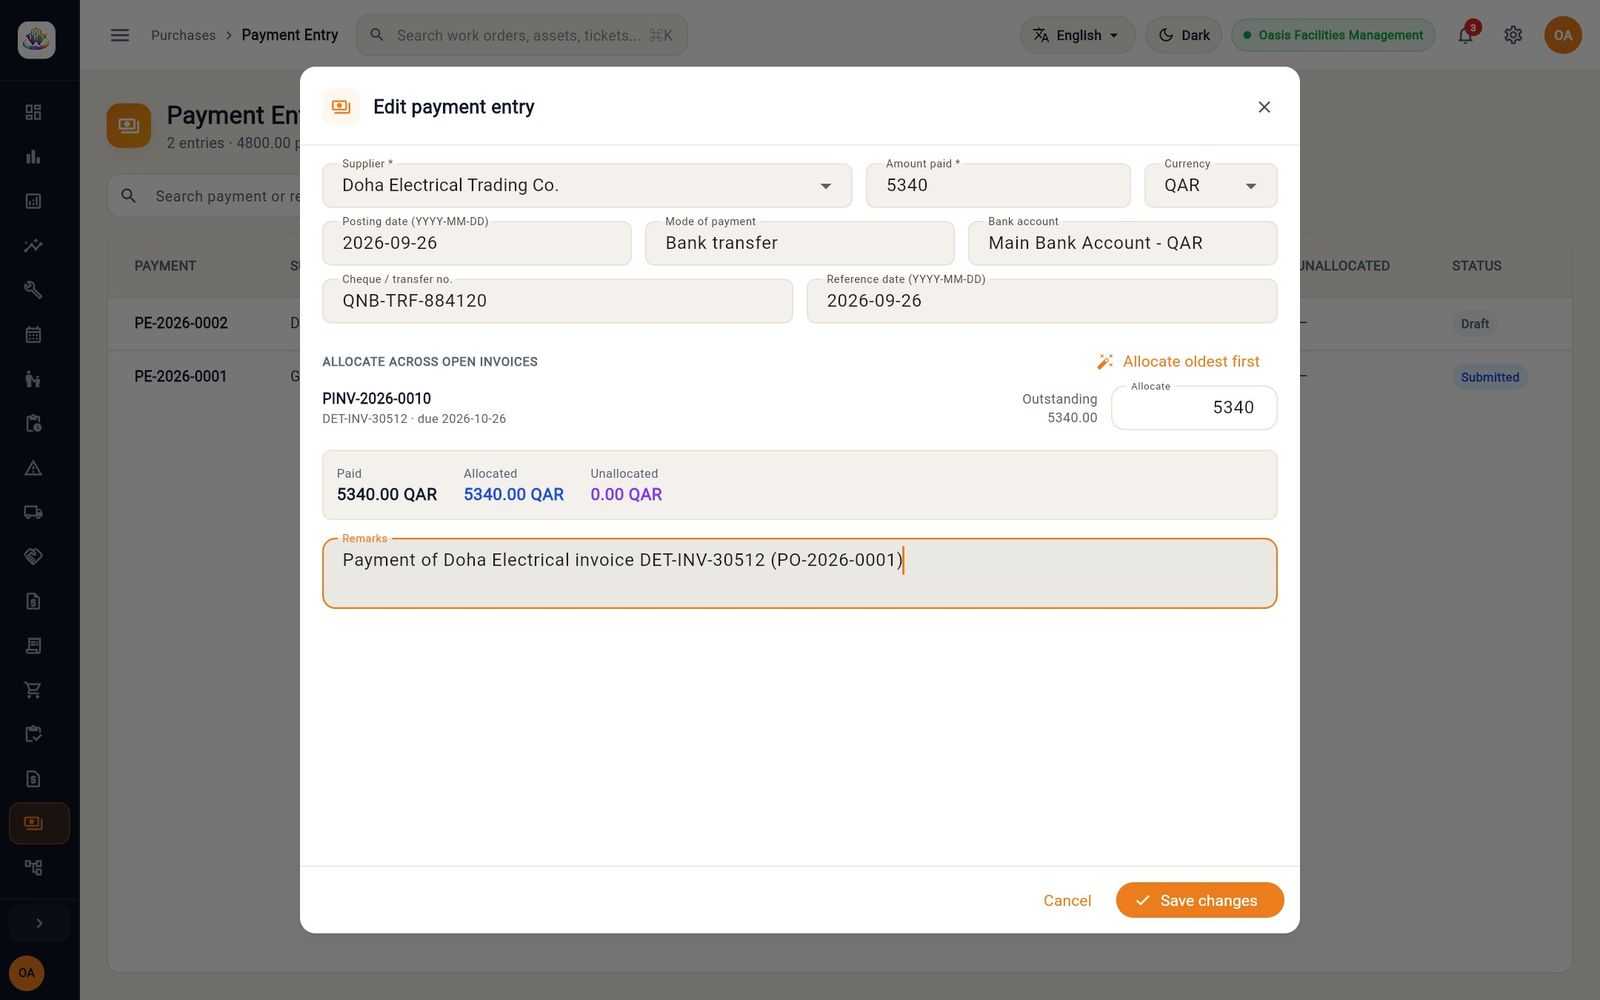
- Open Payment Entry and click the pencil icon on the draft.
- Enter the Mode of payment, Bank account, Cheque / transfer no. and Reference date (YYYY-MM-DD). Check the allocation under ALLOCATE ACROSS OPEN INVOICES; Allocate oldest first spreads the amount over the supplier's oldest invoices.
- Click Save changes.
- Click Post payment on the row. The payment becomes Submitted, the invoice becomes Paid, and the bank payment is posted (see Accounting).
Stock documents: transfers, adjustments, write-offs and reversals
- Who: FM Administrator, FM Manager, Procurement Officer; Supervisor can view
- Where: Sidebar → INVENTORY → Stock Documents
Every change in stock, apart from an issue to a work order, is recorded as a stock document. The list shows each document's type, the warehouses it moved stock between, its date and status.
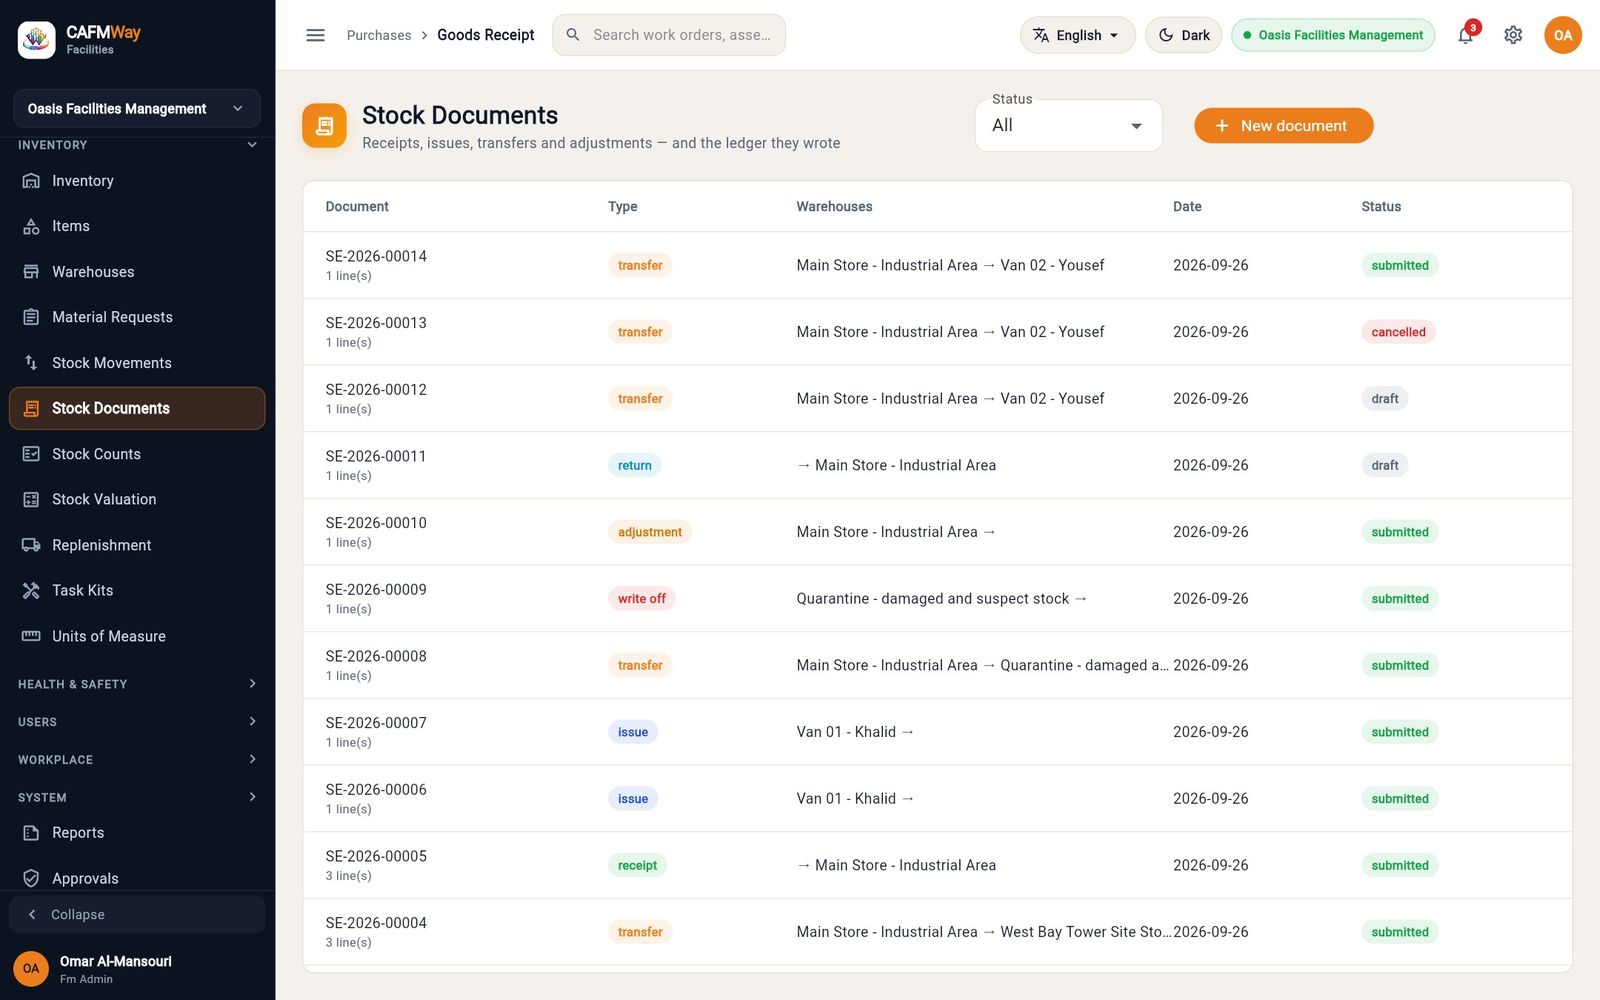
| What happened | Warehouses | Use it when |
|---|---|---|
| Receipt — a delivery arrived | To | Goods arrive from a supplier (see Goods receipt) |
| Transfer — stock moved between warehouses | From, To | You load a van or move stock to a site store |
| Adjustment — a count found a difference | From | A check finds more or less than recorded; enter a negative quantity for a shortfall |
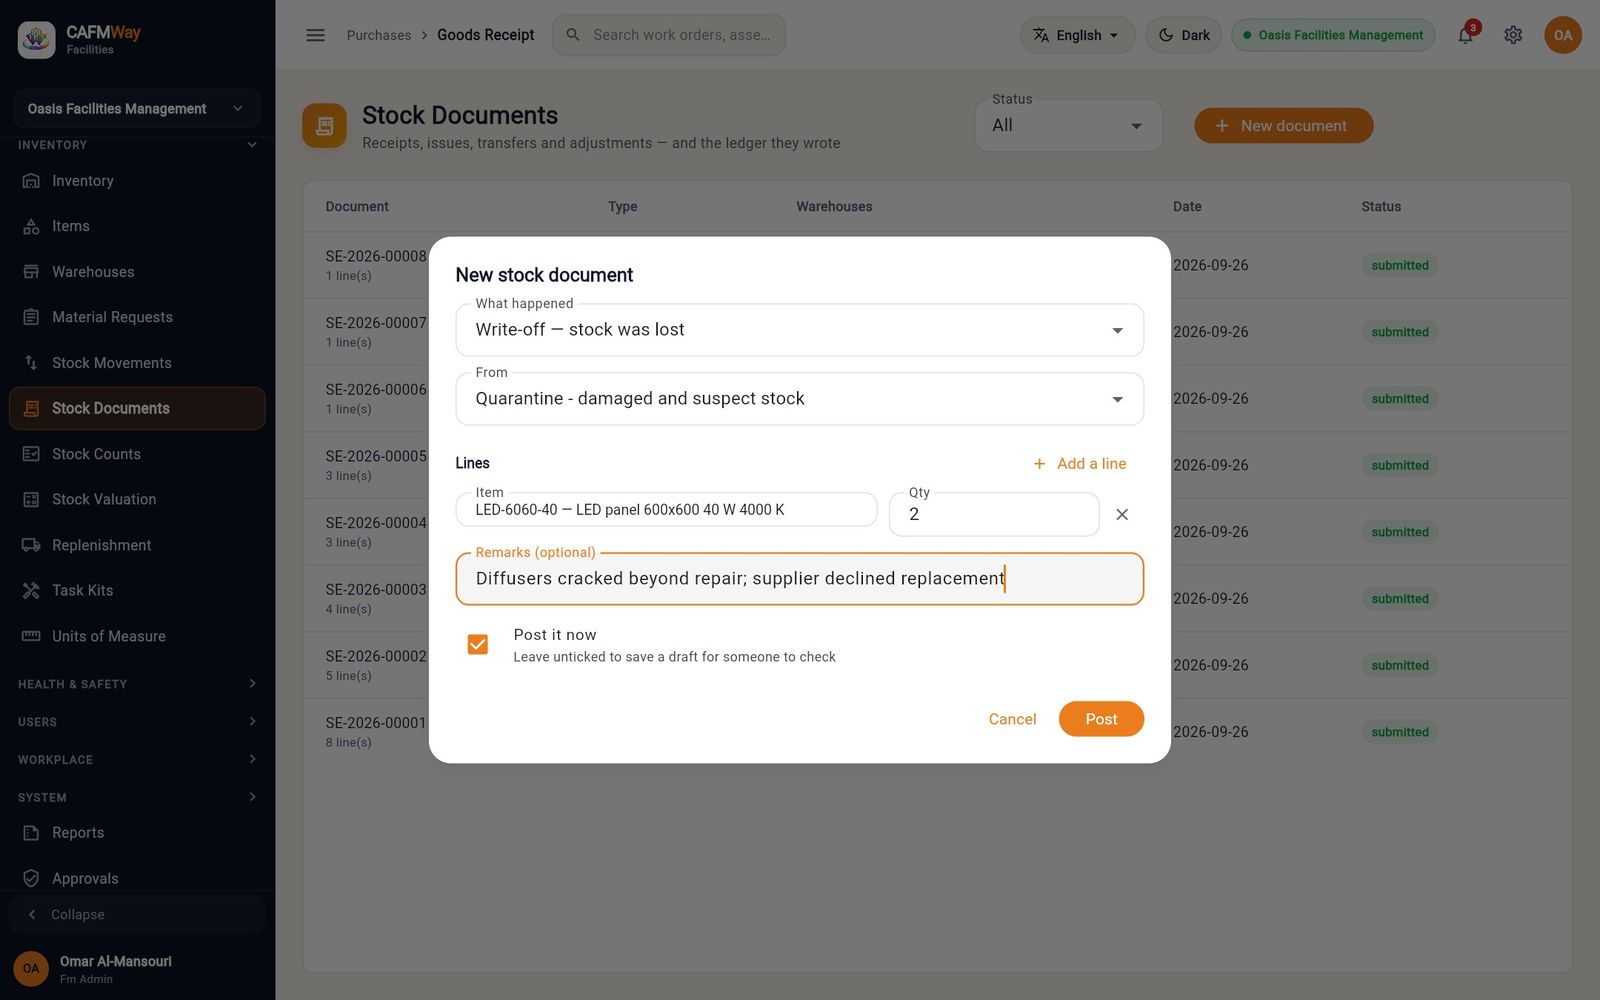
| Write-off — stock was lost | From | Stock is damaged beyond use, lost or stolen |
| Opening — what was already there | To | You start using CAFM Way (see Opening stock) |
| Return — a part came back | To | An unused part comes back from a job; returns are recorded from the technician app, which knows the work order |
Load a technician's van
- Click New document and set What happened to Transfer — stock moved between warehouses.
- Set From to Main Store - Industrial Area and To to the van.
- Add the lines and quantities, enter Remarks (optional) and click Post.
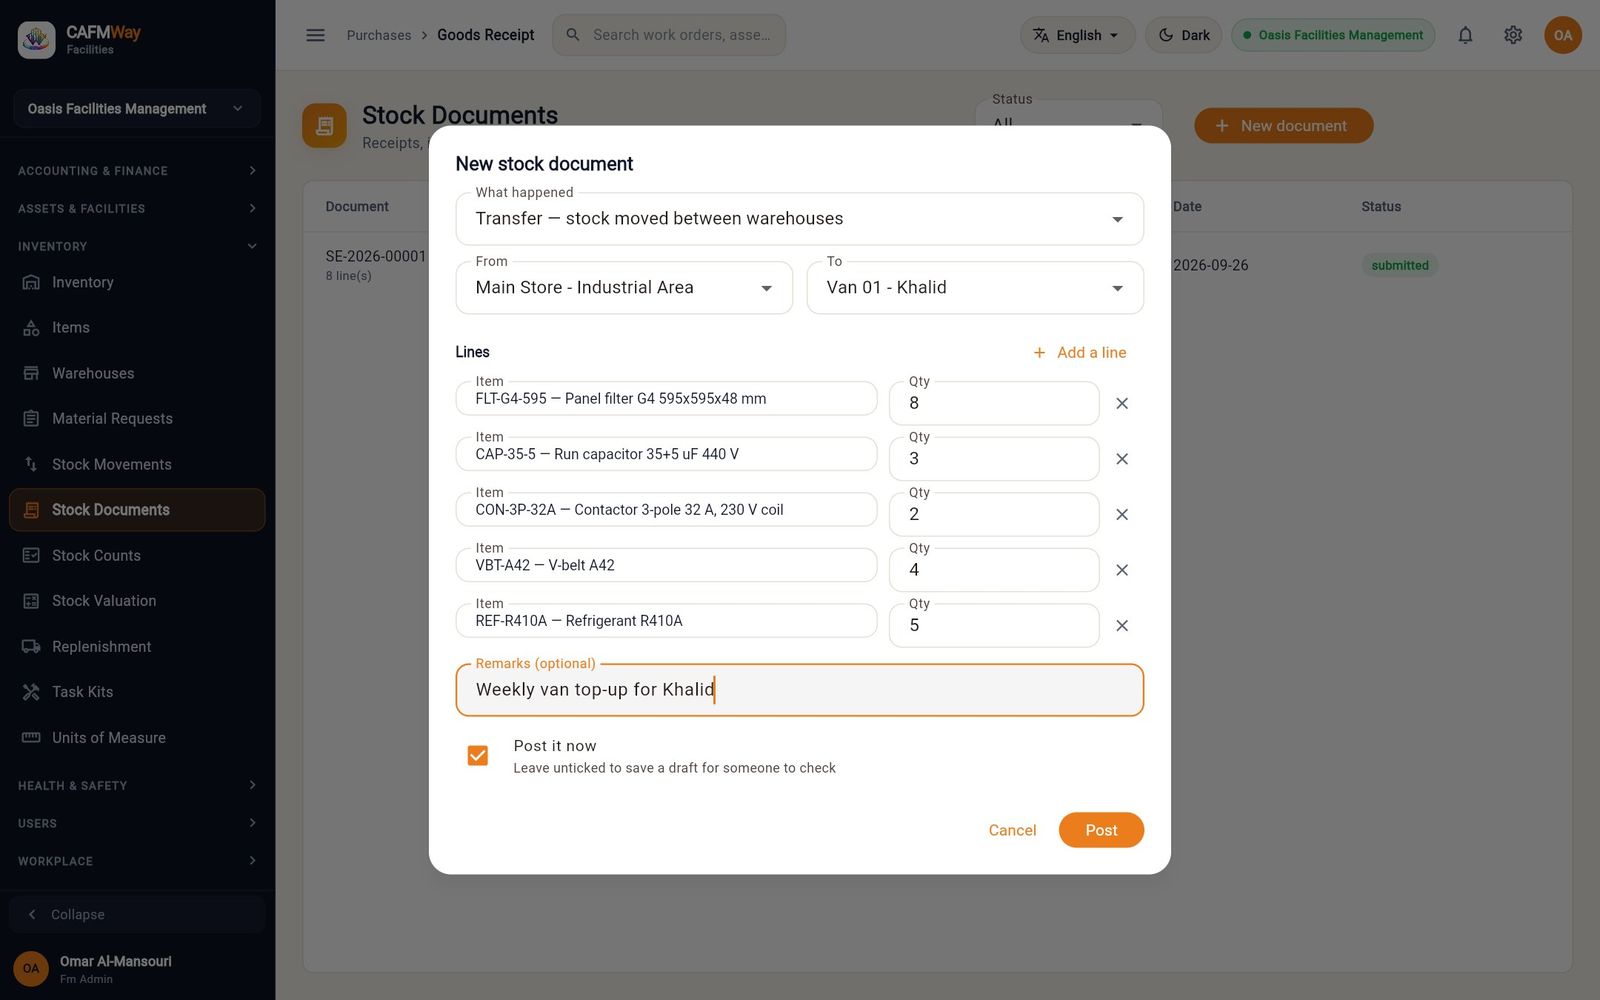
The stock moves at the main store's average cost. A transfer between two stores does not change the stock value, so it posts nothing to the ledger.
Write off damaged stock
Two LED panels arrived with cracked diffusers. They were first moved to the quarantine store with a transfer; when the supplier declined a replacement they were written off:
Correct a quantity
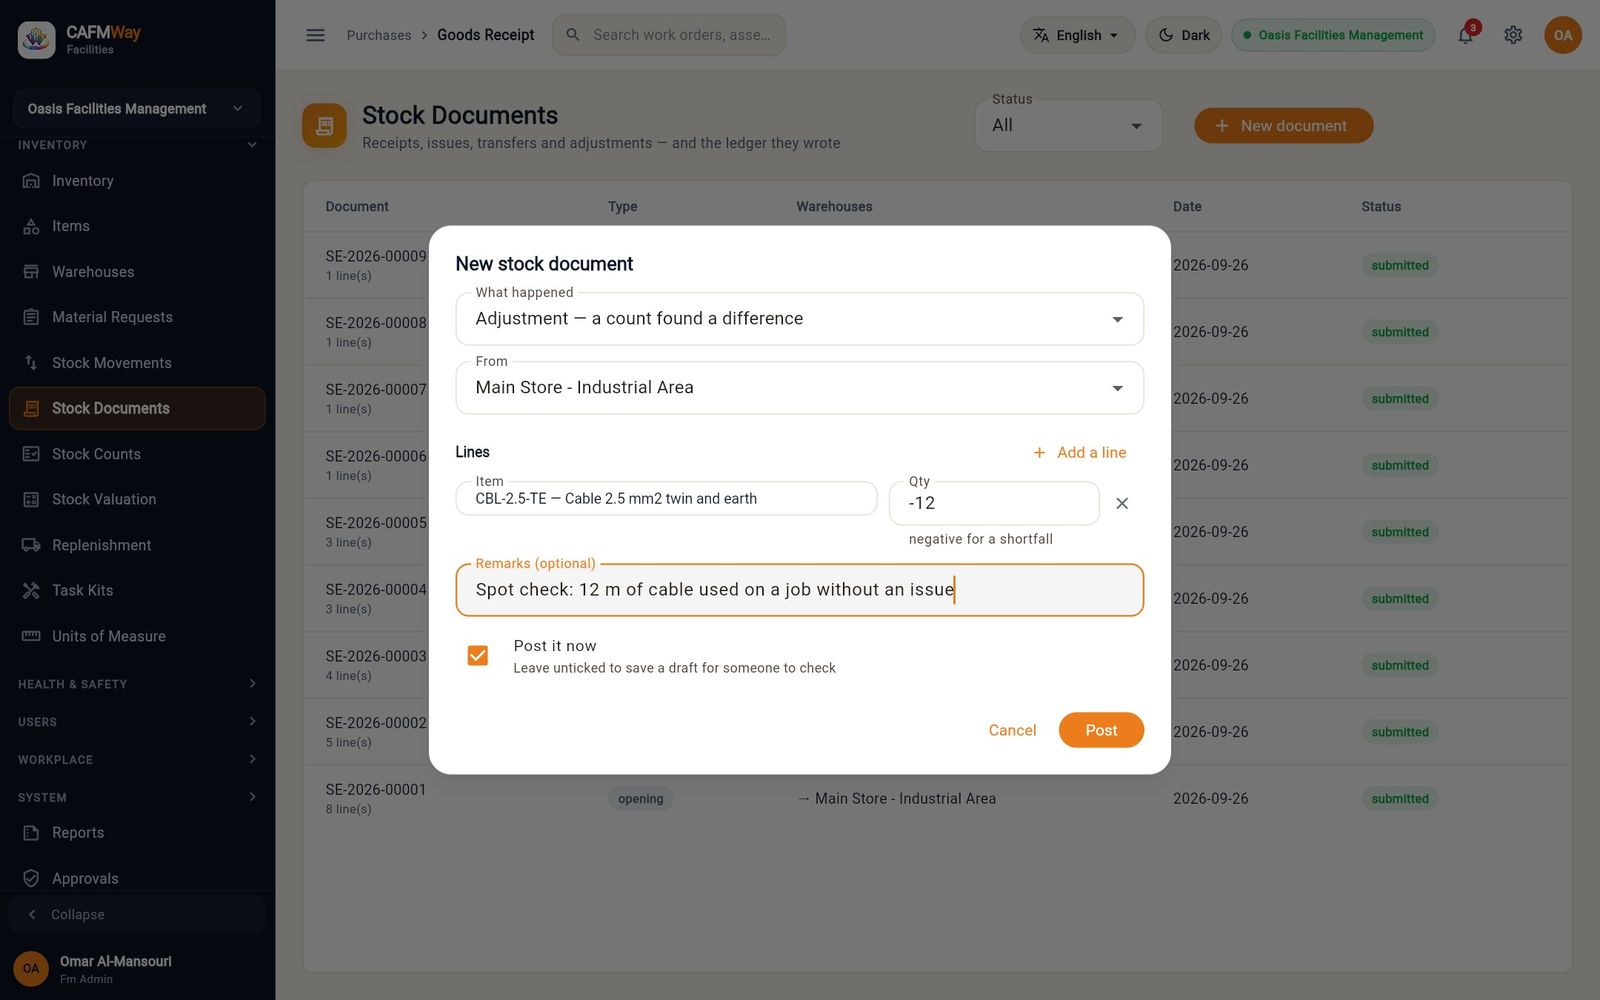
A spot check found 12 m of cable missing from the main store. Post an adjustment with a negative quantity:
Check and post a draft
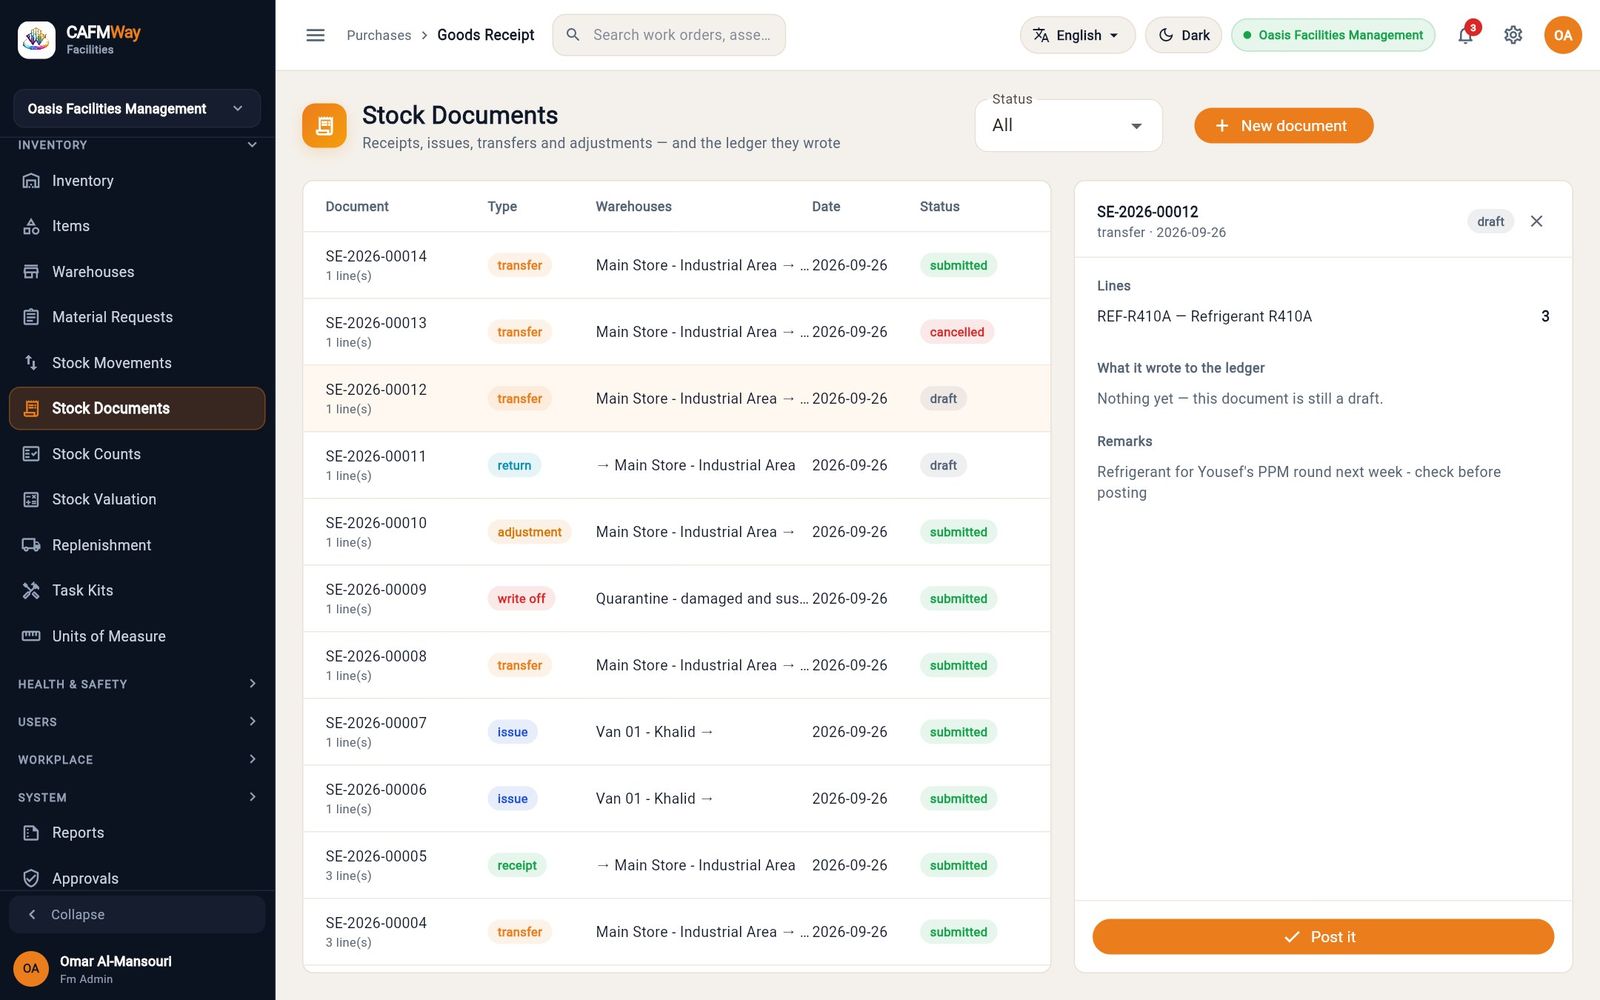
A document saved with Post it now unticked stays a draft and changes nothing. Click it in the list, check the lines and click Post it.
Reverse a posted document
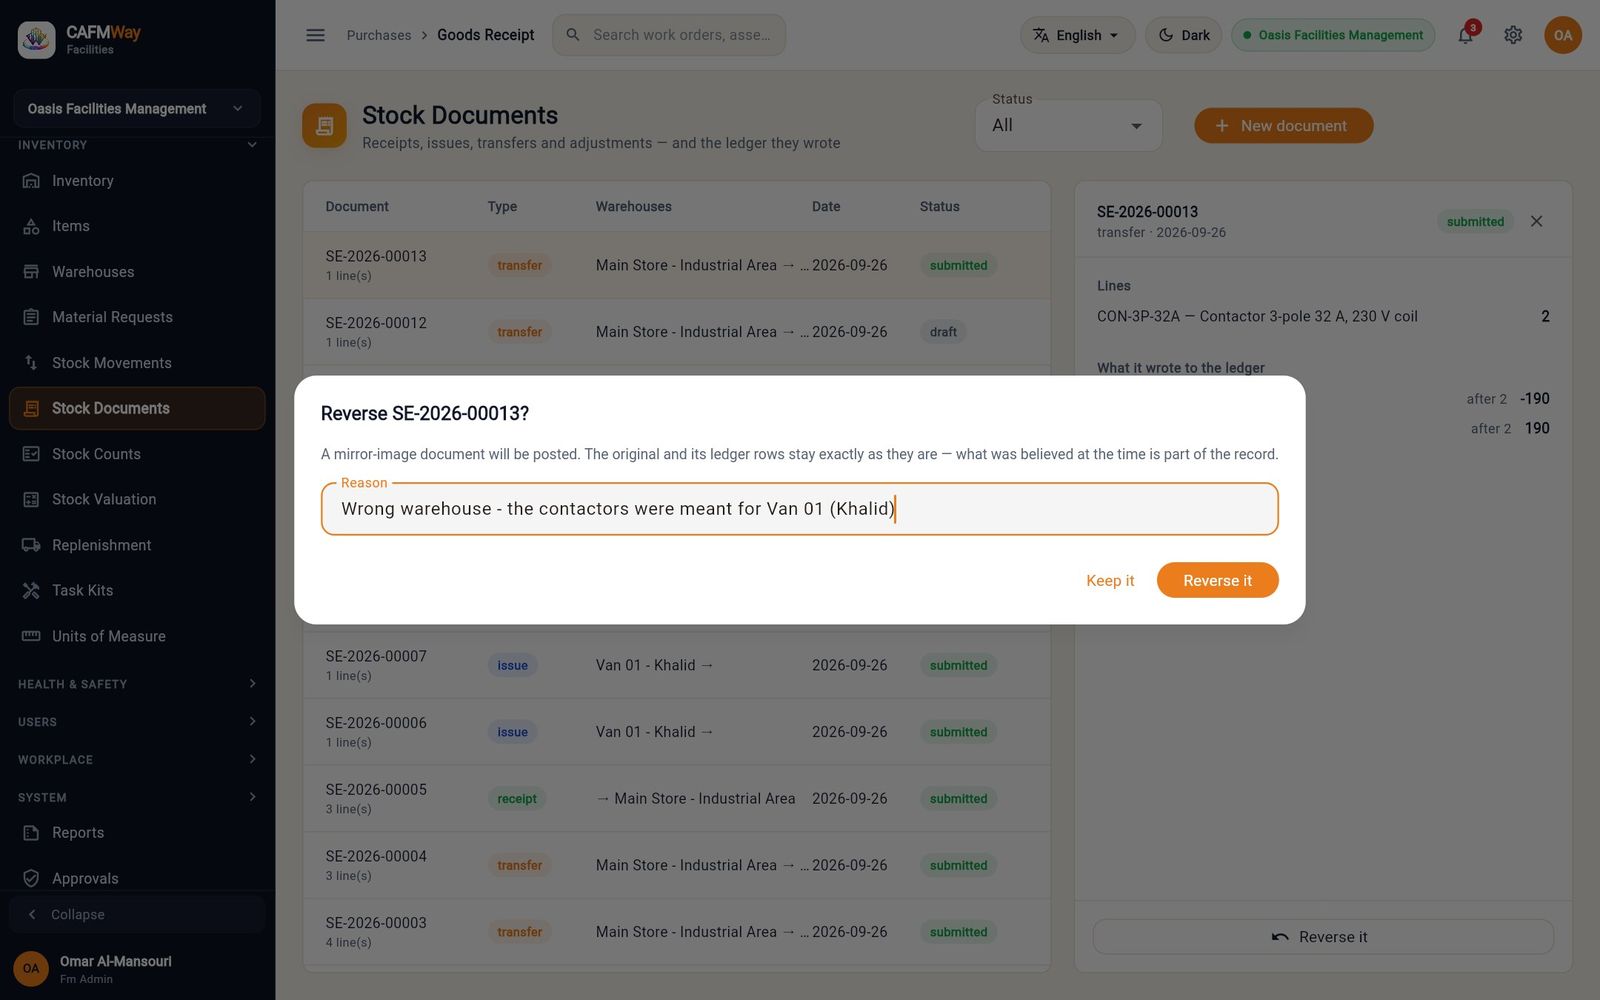
Posted documents are never edited or deleted. To undo one, click it, click Reverse it, enter the Reason and click Reverse it again. A mirror-image document is posted and the original is marked Cancelled.
The ledger entries for each type are listed in Accounting.
Stock counts
- Who: FM Administrator, FM Manager, Procurement Officer schedule and approve; Supervisor can count
- Where: Sidebar → INVENTORY → Stock Counts
A count compares what is on the shelf with what the system believes, and posts the approved difference as one adjustment. Counts are blind by default: the counter does not see the expected quantity.
Classify the items
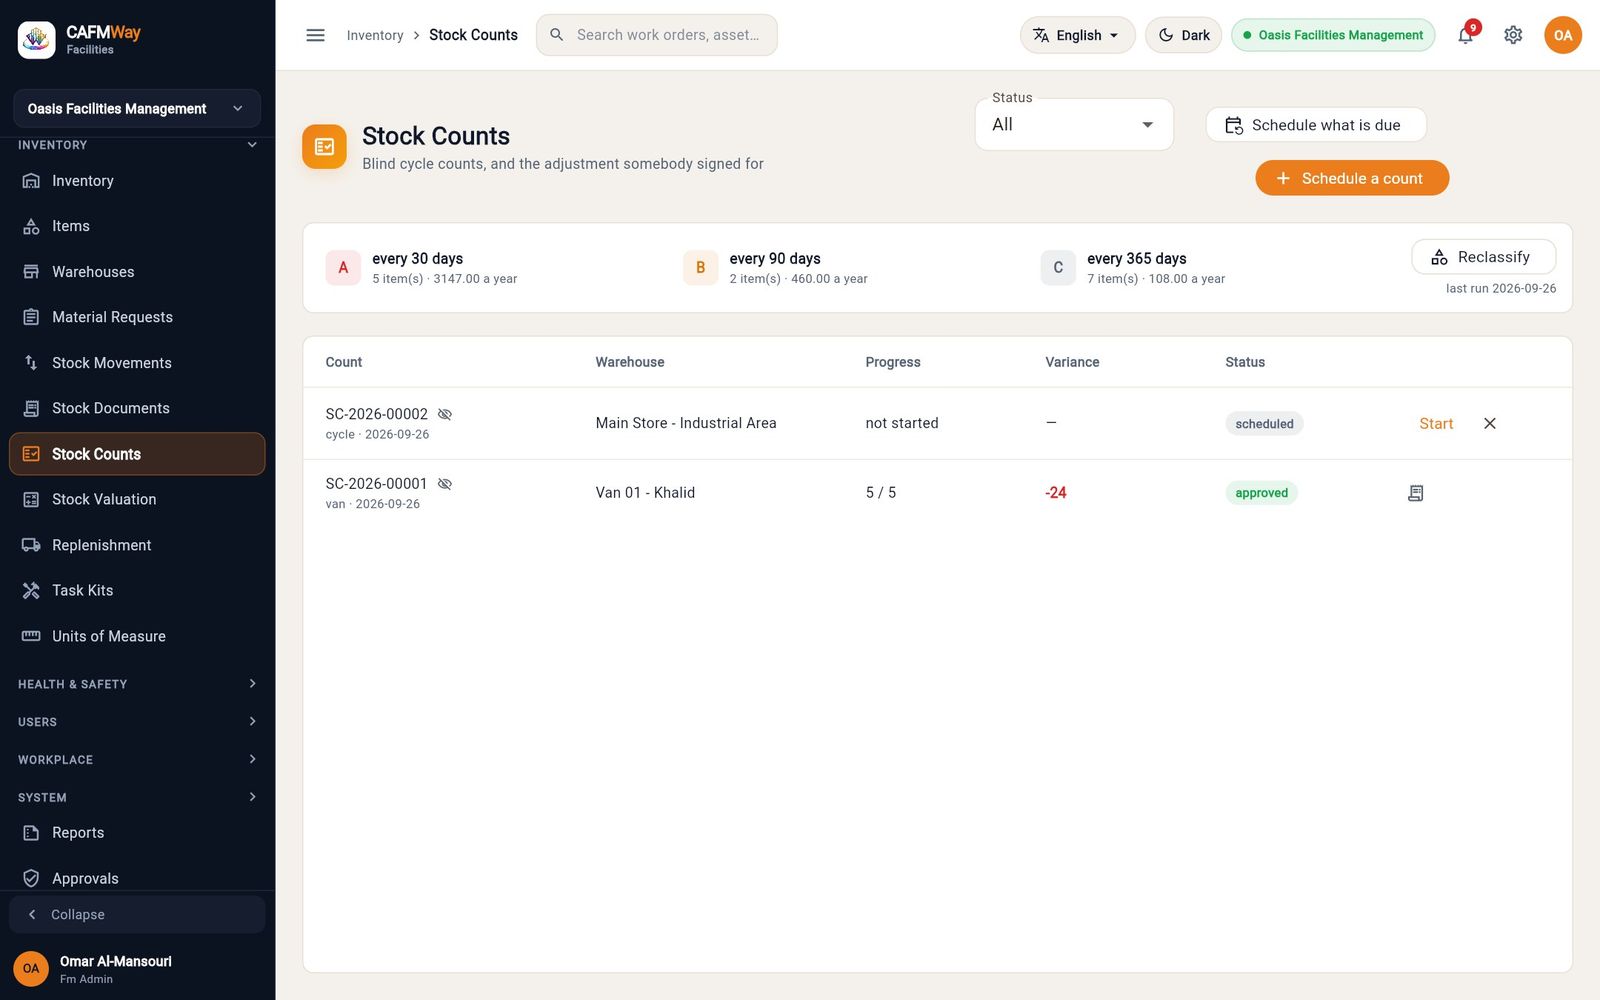
The panel at the top shows how often each class should be counted: A every 30 days, B every 90 days, C every 365 days. Click Reclassify and confirm to rank the items by the value they consumed over the last year. Schedule what is due then schedules every count that is due under these cycles.
Count a van
Click Schedule a count. Choose the Warehouse, the Type (Cycle — a slice of the warehouse, Full — everything, including nil, Spot — a quick check or Van — a technician’s stock), optionally an ABC class (optional), keep Blind count ticked and click Schedule.
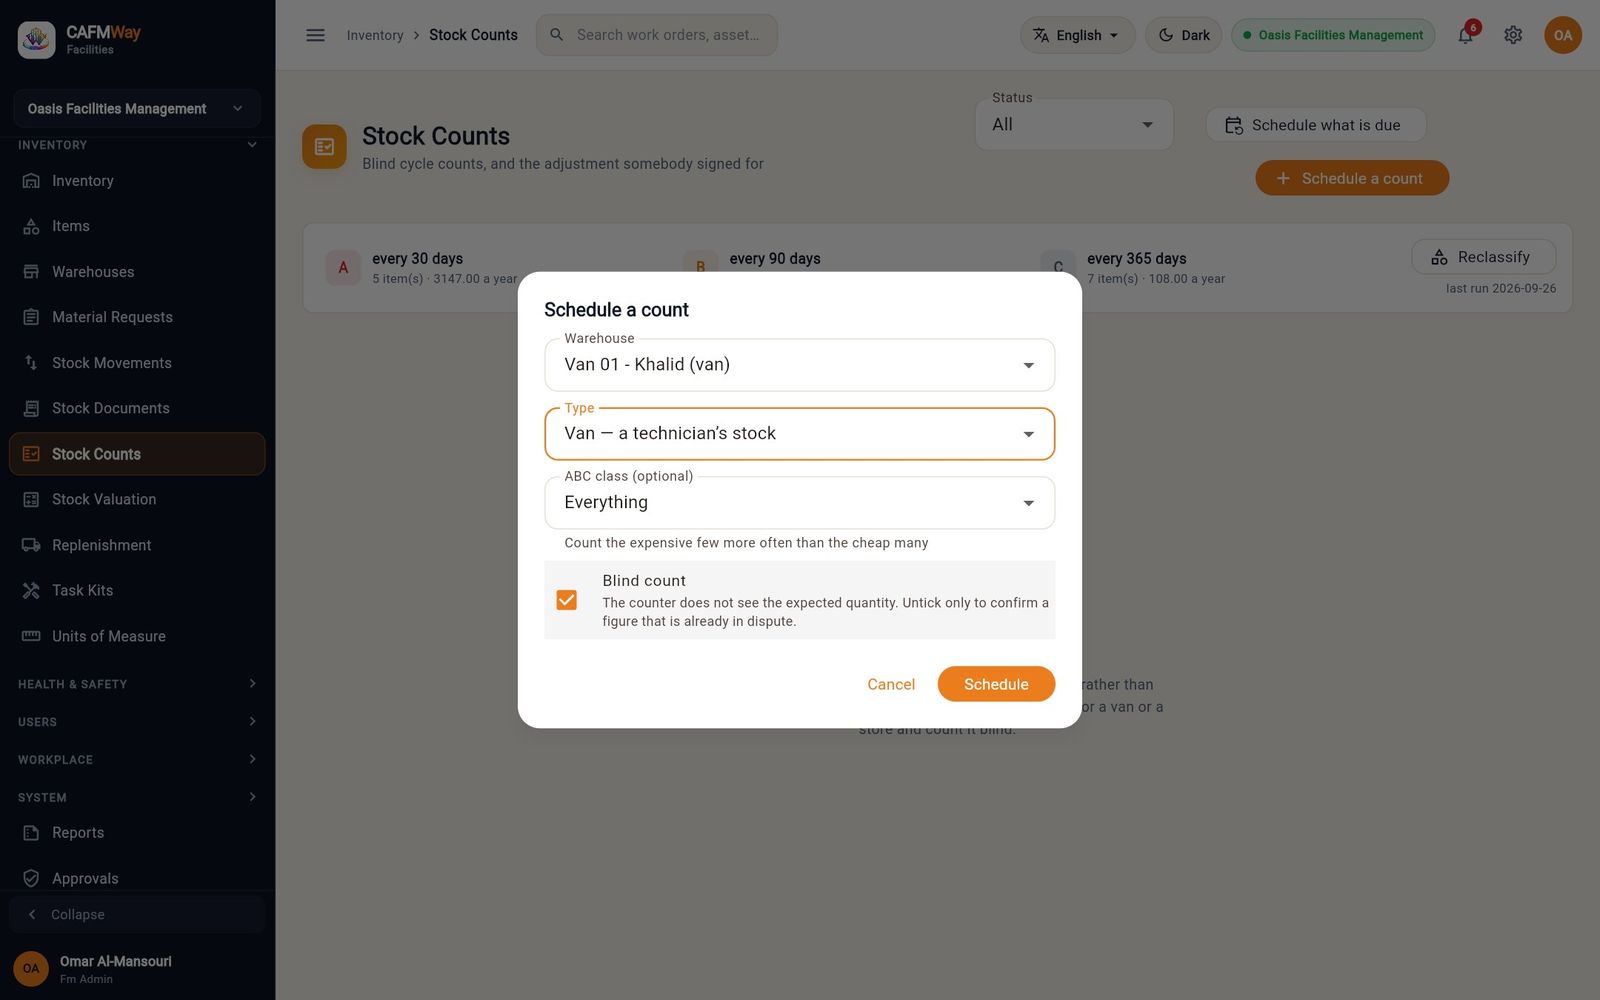
Figure 152 Scheduling a blind van count for Van 01 Click Start on the scheduled count and confirm. The system quantities are frozen at this moment.
Click the count to open the sheet. Enter the Counted quantity for each item and click Save progress as you go.
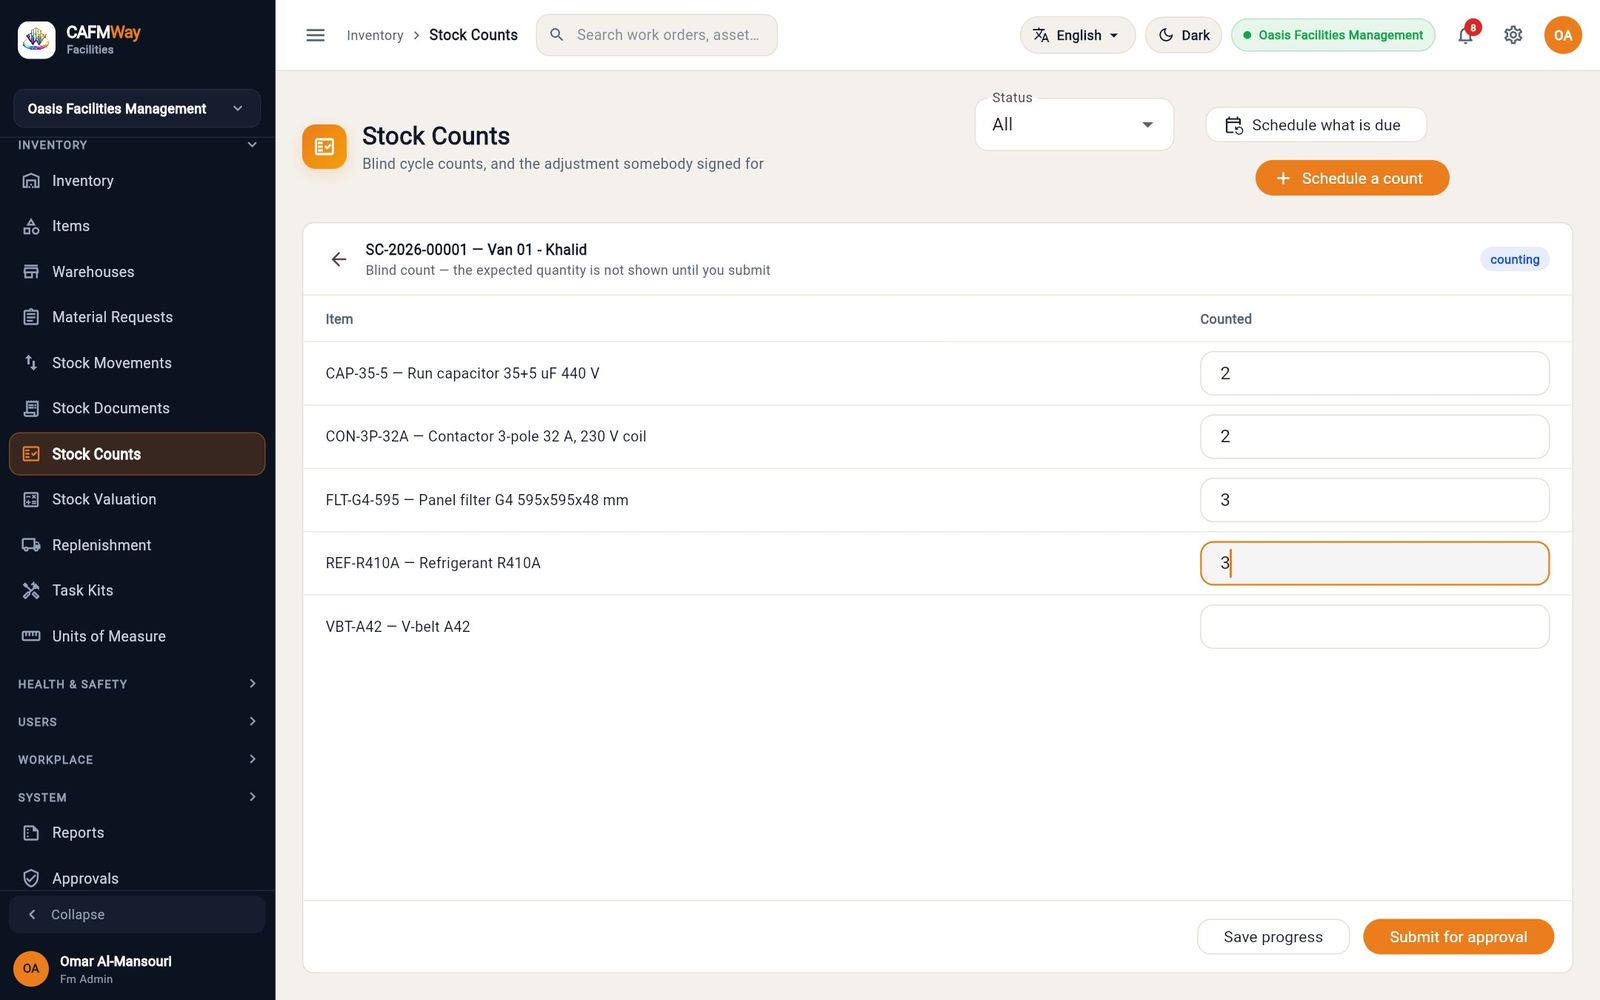
Figure 153 The blind count sheet for Van 01, with four of five lines counted When every line is counted, click Submit for approval. The sheet now shows Expected, Difference and Value for each line and the total variance.
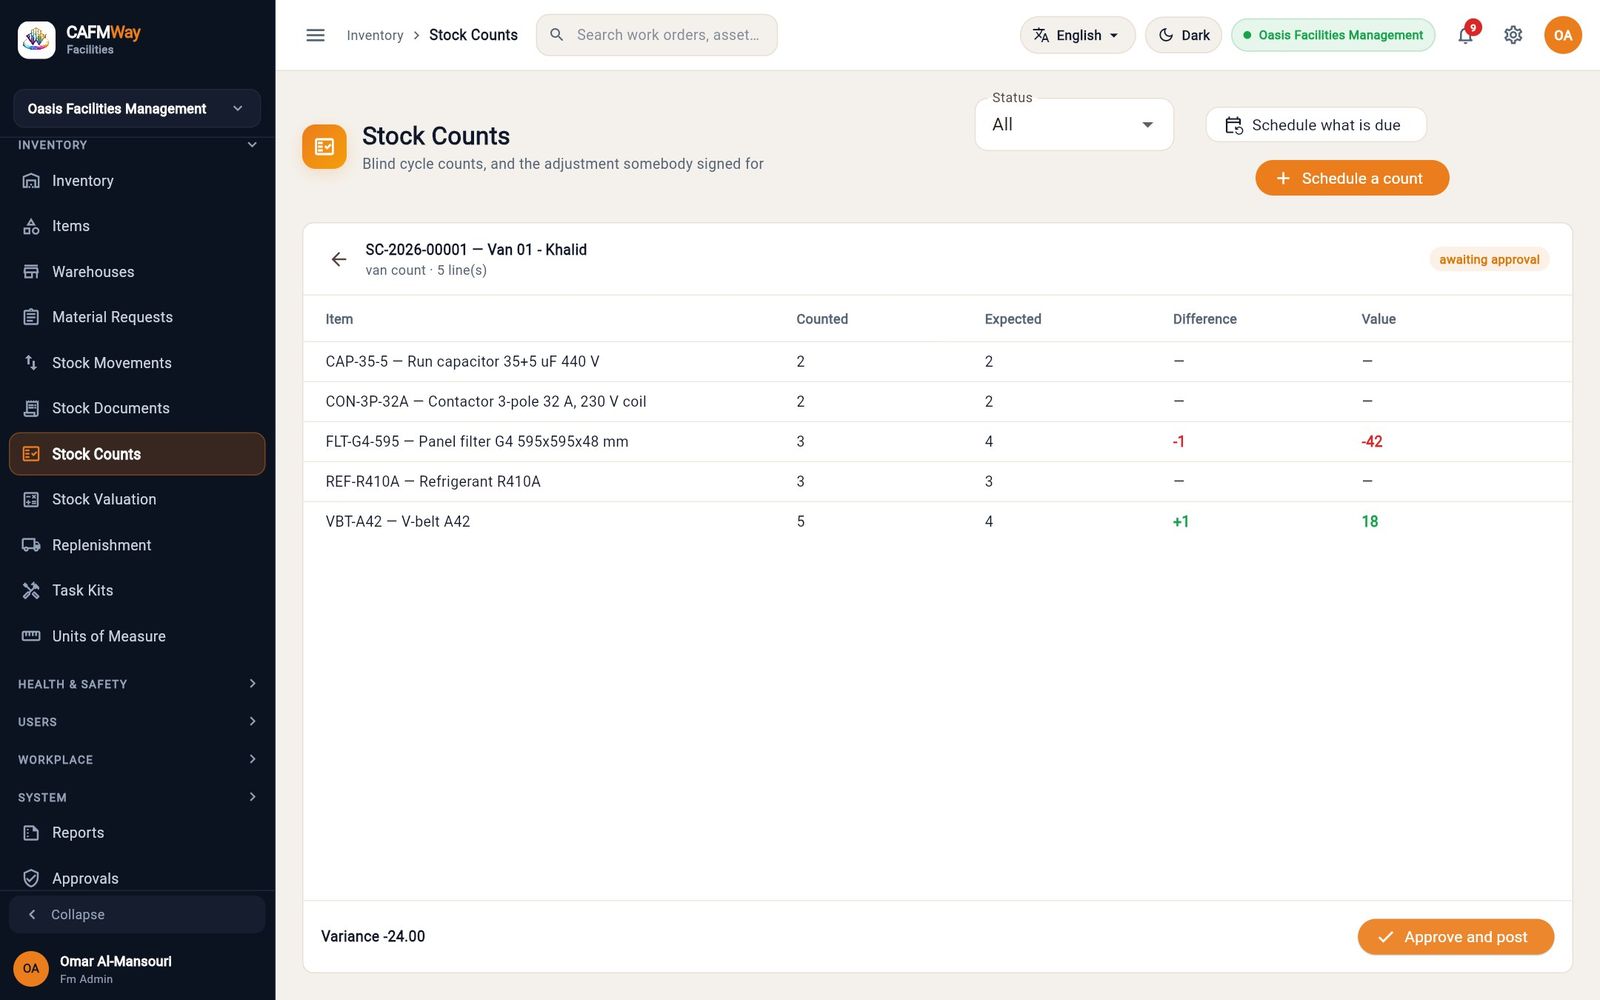
Figure 154 The submitted count: one filter short (−42) and one V-belt over (+18), variance −24.00 The approver clicks Approve and post and confirms. One adjustment document is posted for all the differences (SE-2026-00016, remark "Stock count SC-2026-00001") and the count becomes Approved.
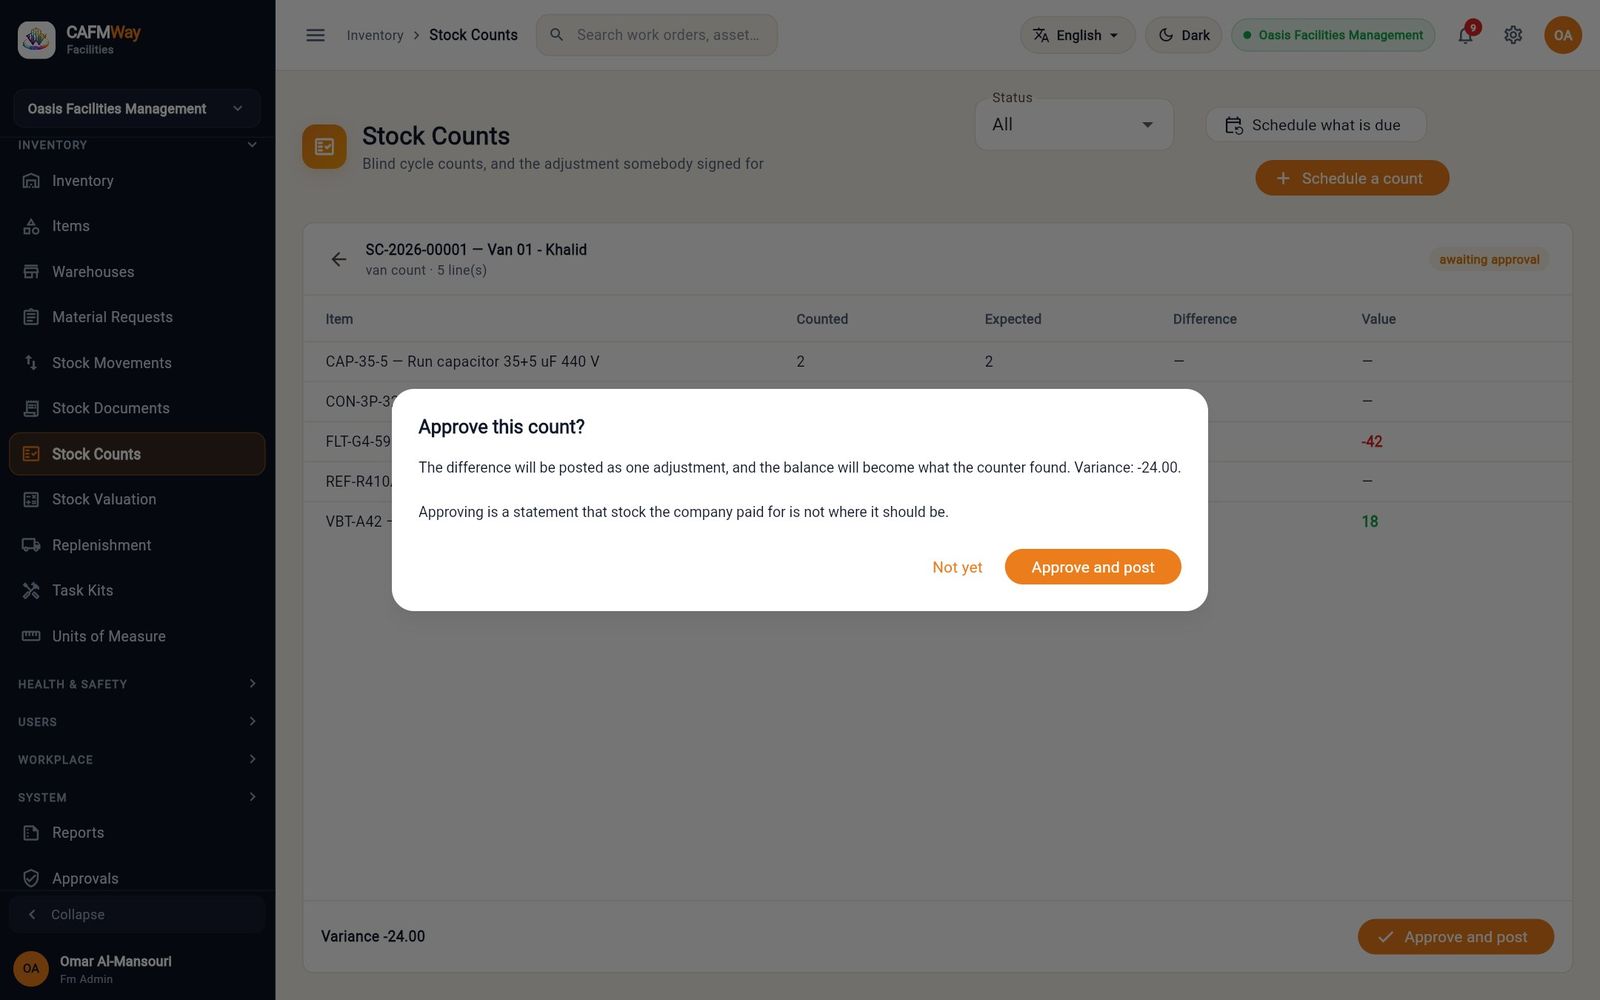
Figure 155 Confirming the count
Stock valuation
- Who: FM Administrator, FM Manager, Finance Officer, Auditor
- Where: Sidebar → INVENTORY → Stock Valuation
This screen shows what the stock is worth and how each value was reached. STOCK VALUE at the top is the total. The table lists every stock movement with its quantity, rate, the average after it and the value after it; CURRENT VALUATION on the right lists the current quantity, average and value of each item in each warehouse.
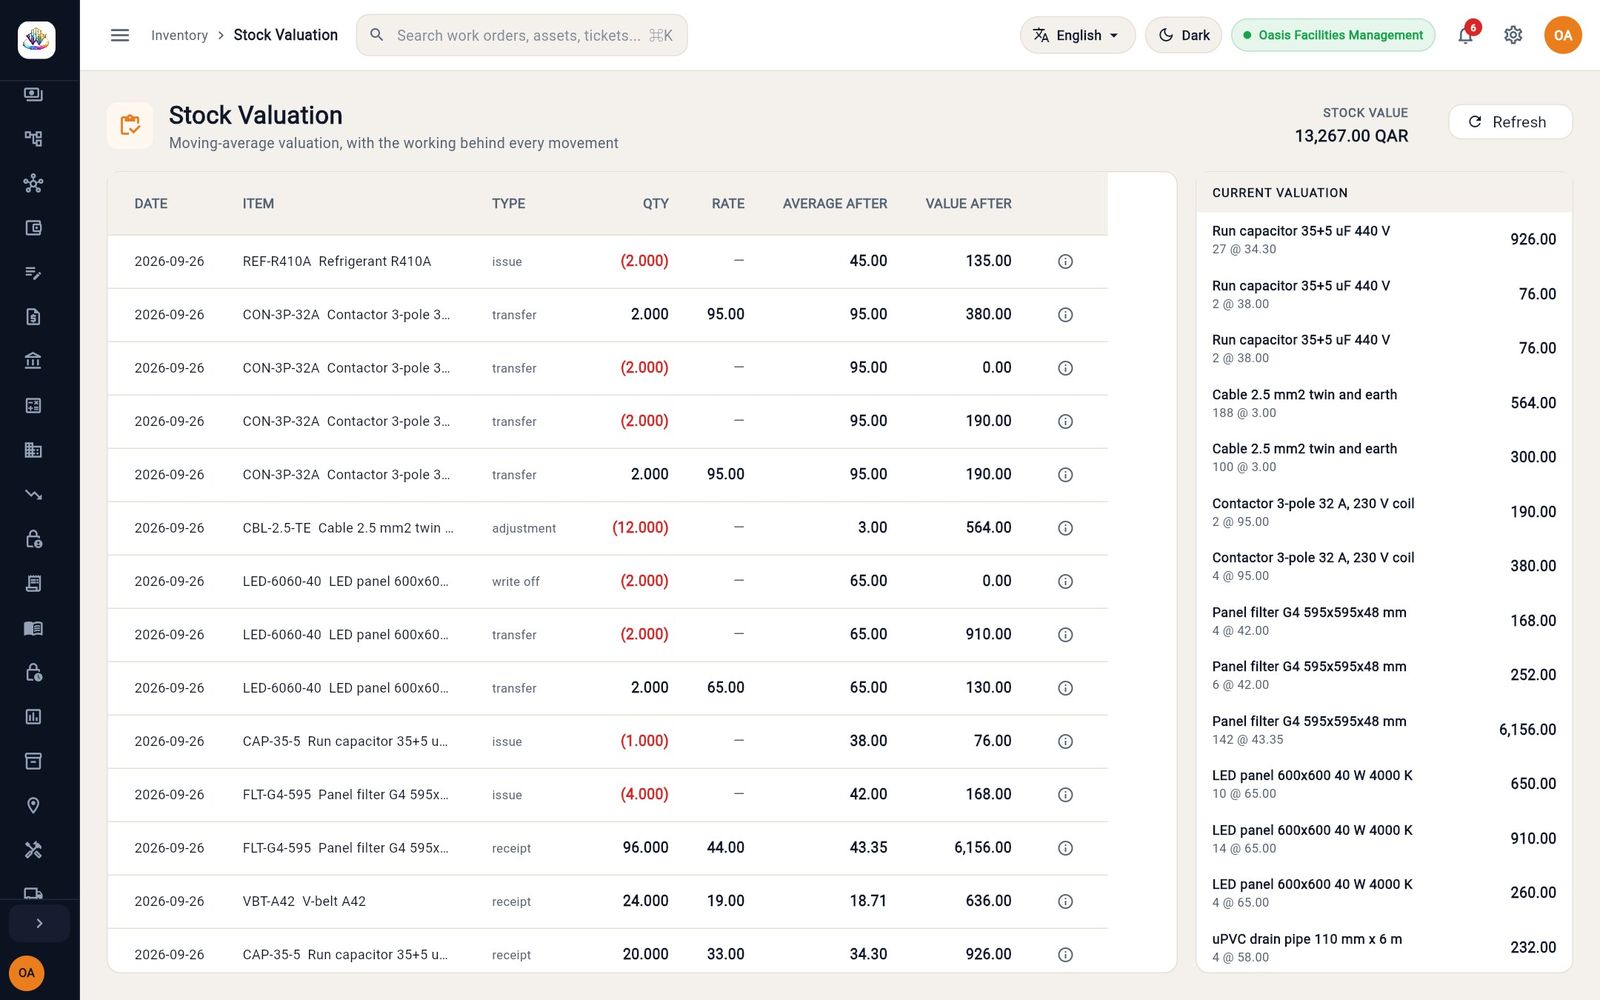
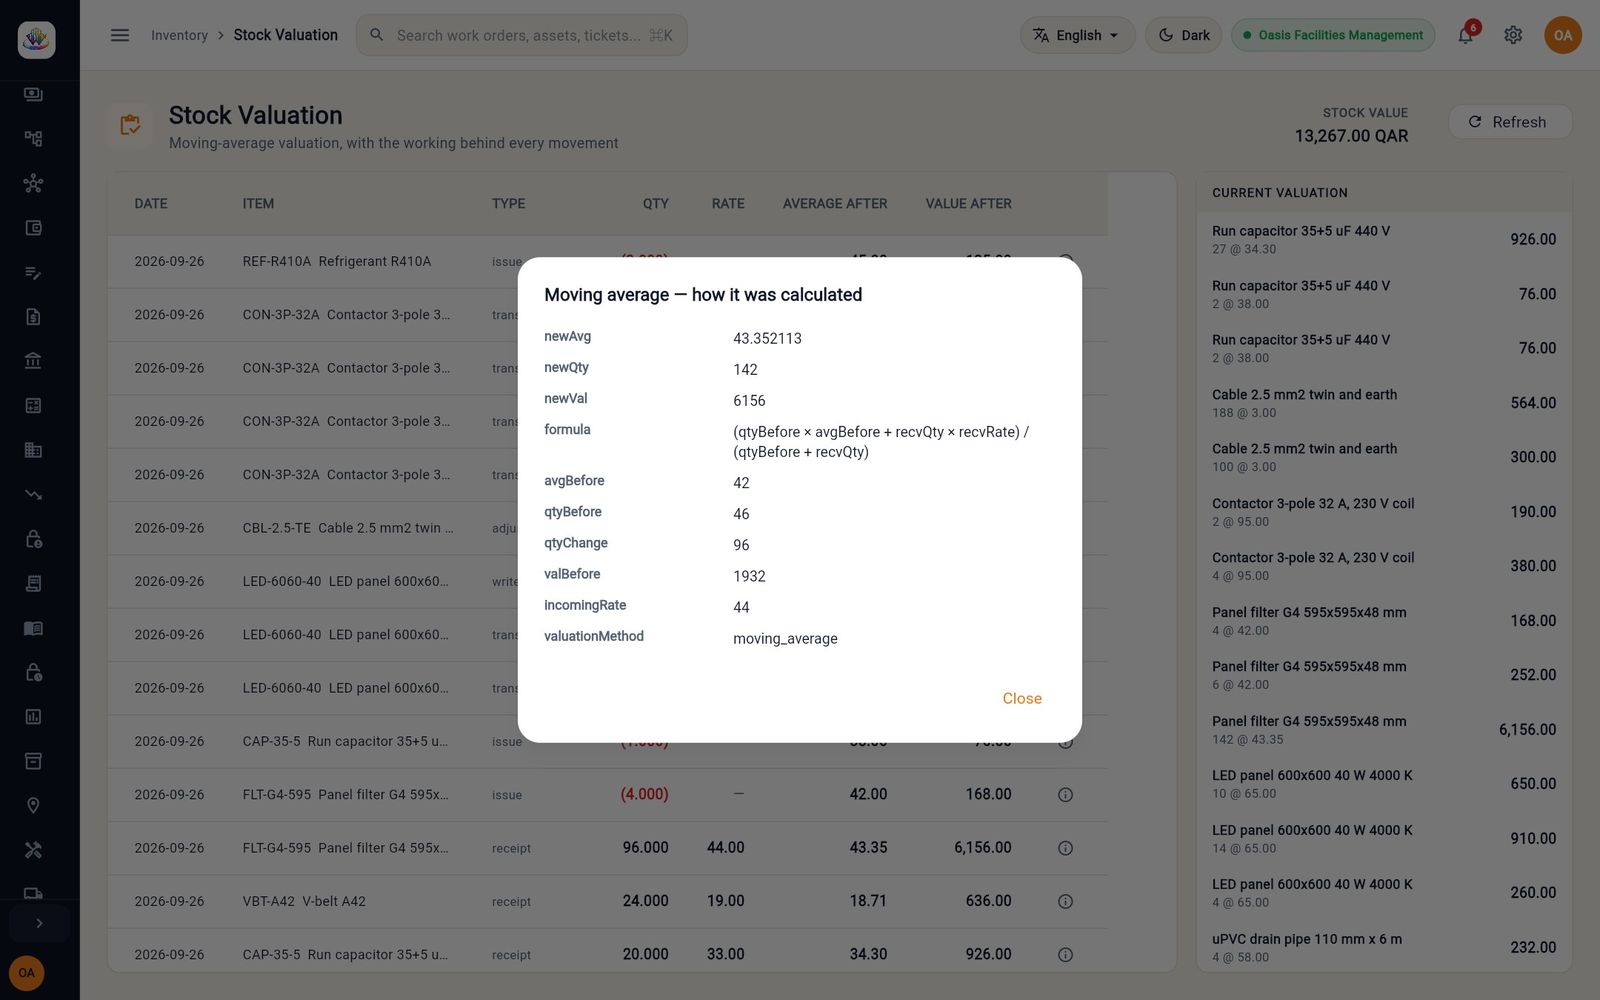
Click the information icon at the end of a row to see how the moving average was worked out for that movement.
Replenishment
- Who: FM Administrator, FM Manager; Supervisor
- Where: Sidebar → INVENTORY → Replenishment
Replenishment keeps vans and stores between a minimum and a maximum, and tells the storekeeper what to send.
Set the levels
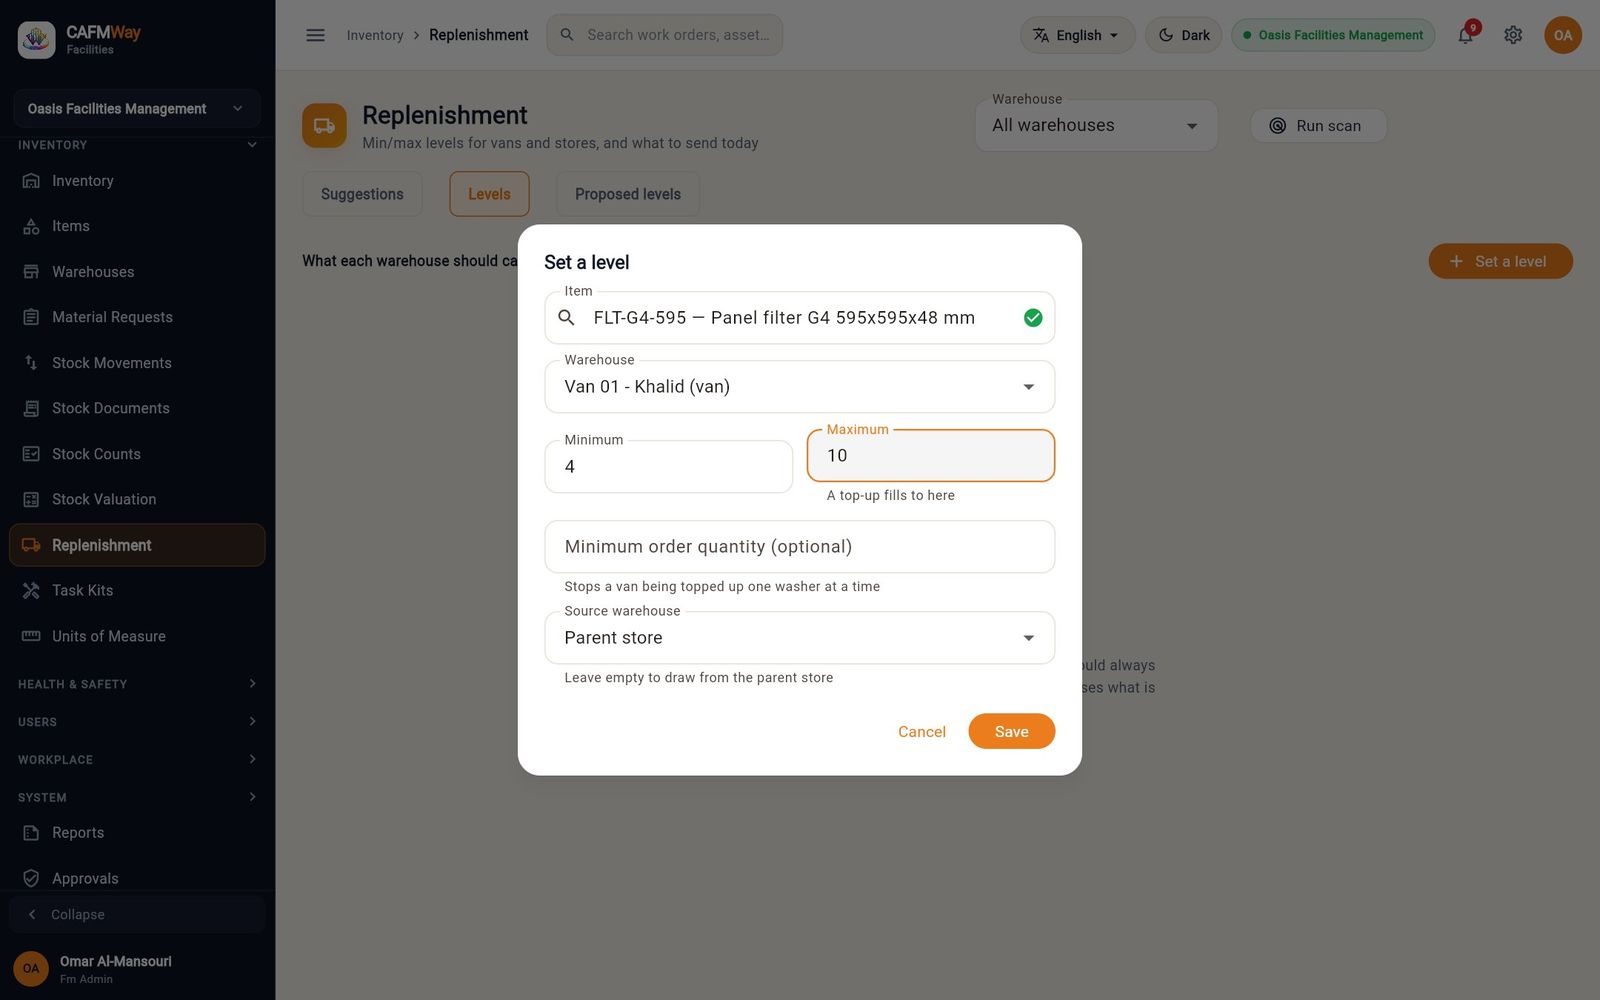
- Open the Levels tab and click Set a level.
- Pick the Item and the Warehouse, and enter the Minimum and the Maximum (a top-up fills to the maximum). Optionally enter a Minimum order quantity (optional) and a Source warehouse; leave it at Parent store to top up from the warehouse's parent.
- Click Save.
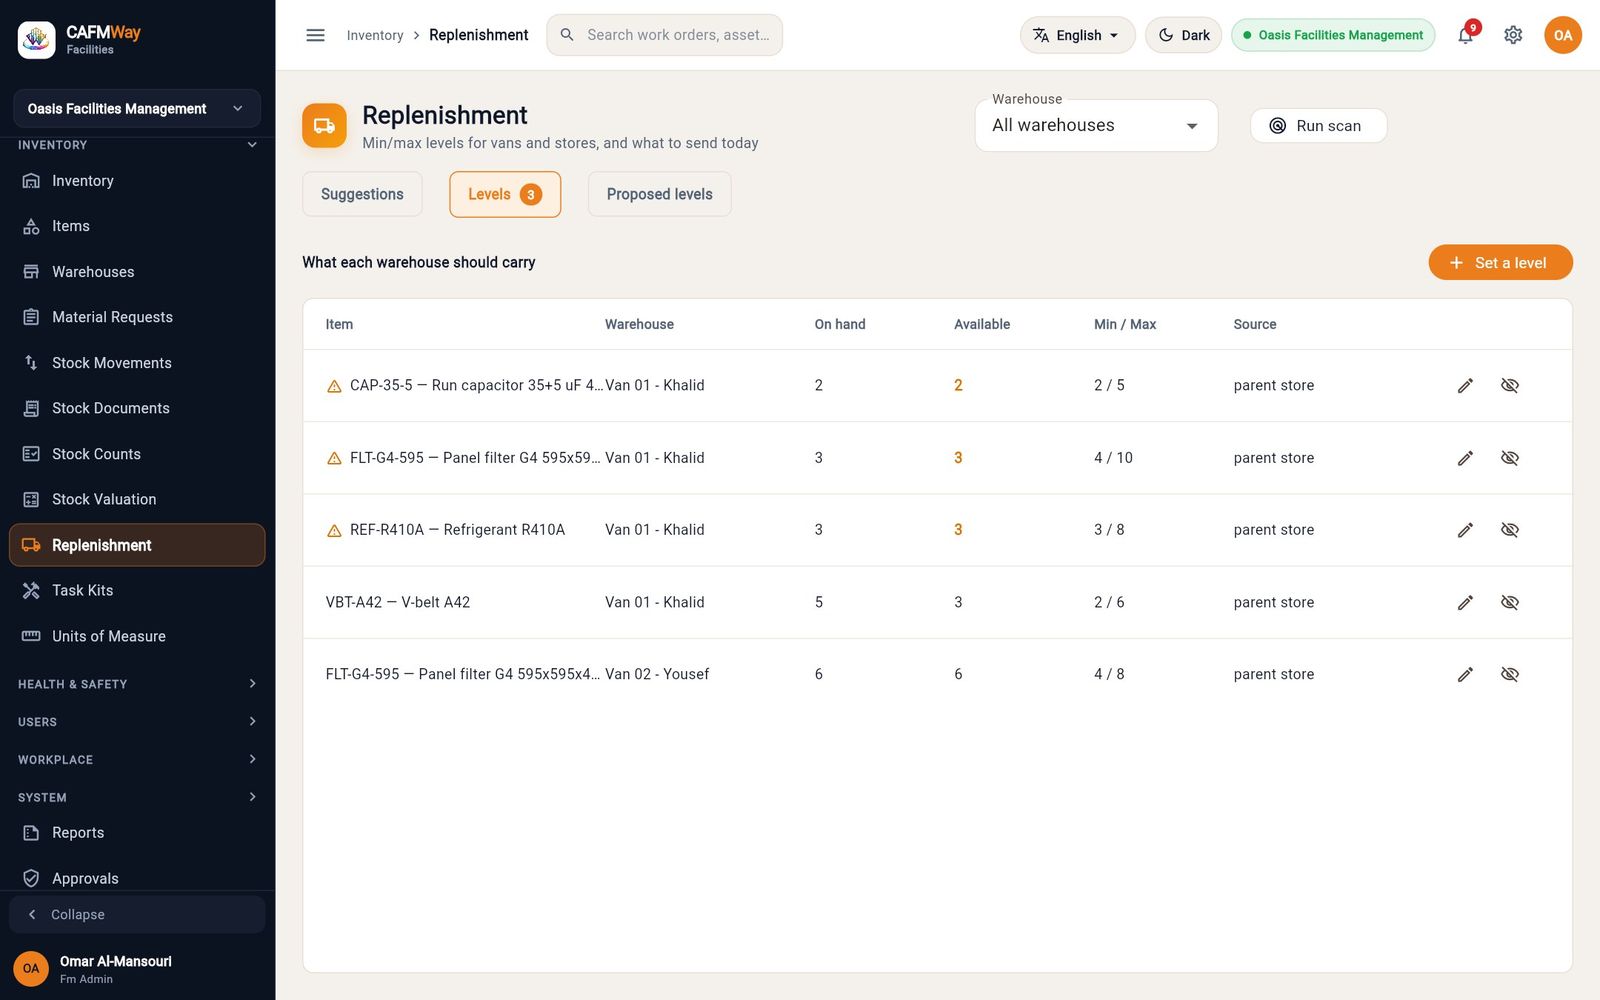
The Levels tab shows on-hand and available stock (on hand less anything reserved for jobs) against each level. A warning sign marks items at or below their minimum.
Scan and raise a request
Click Run scan. Each warehouse with items at or below their minimum gets a card on the Suggestions tab, for example "Van 01 - Khalid · 3 item(s) short — from Main Store - Industrial Area". The scan also runs every night.
Click Raise one request on the card and confirm with Raise request. One replenishment request (MR-2026-00001) is raised to move the shortfall from the source store to the van. It needs approval before anything moves.
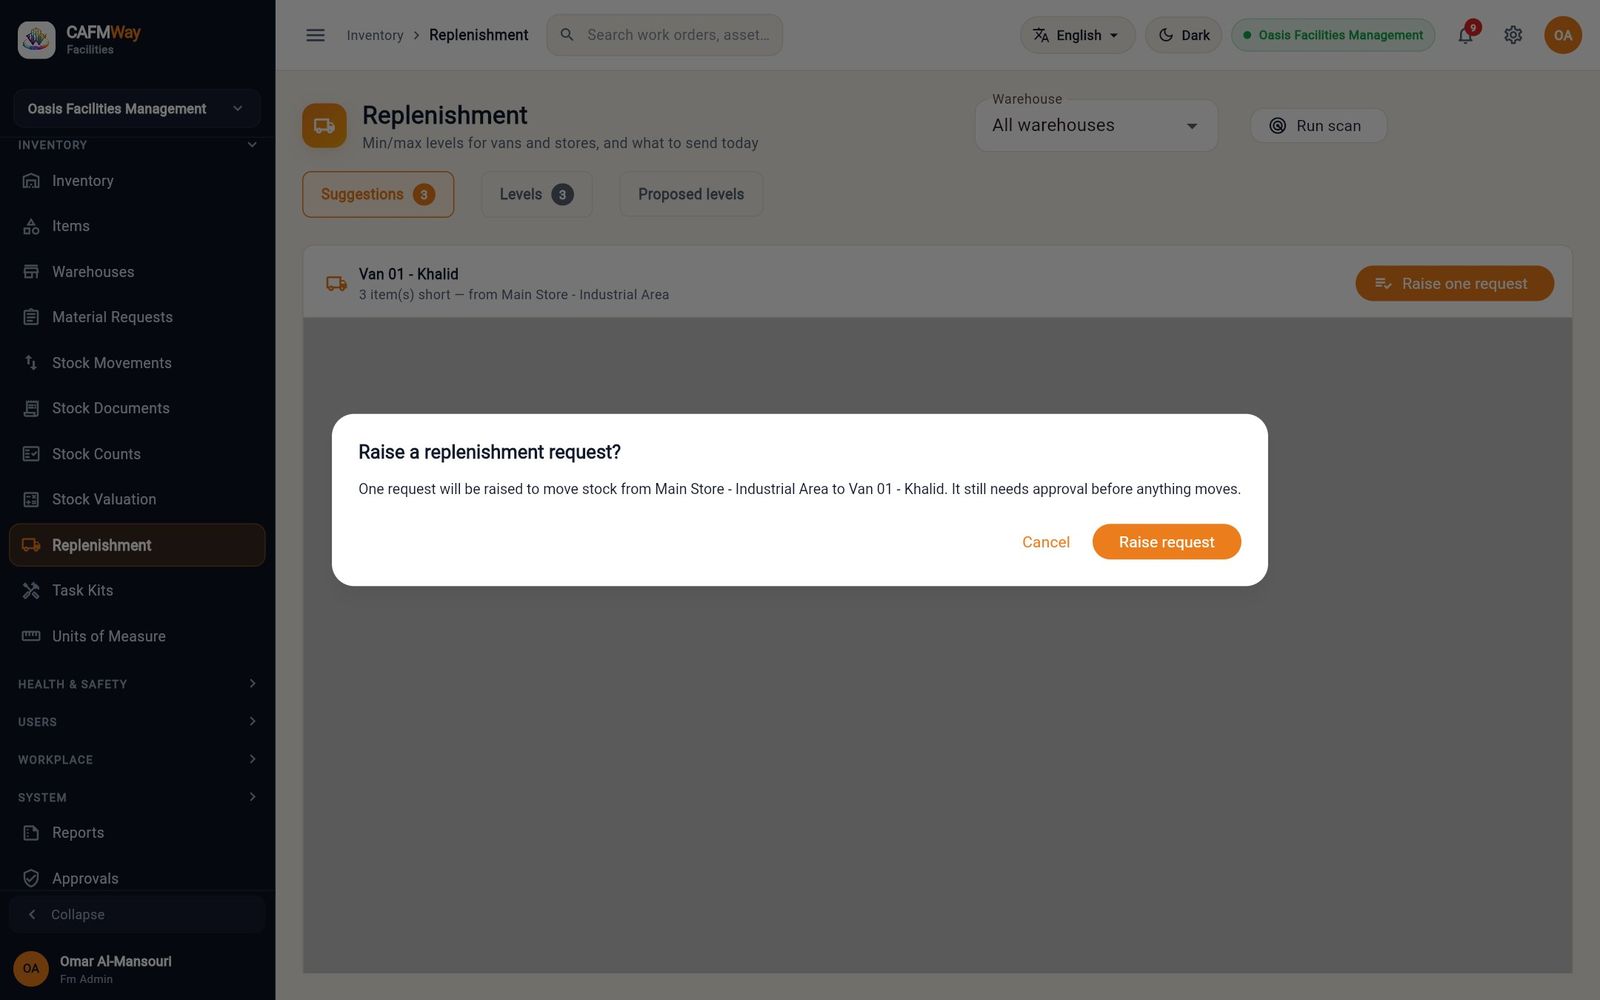
Figure 161 Raising one replenishment request for Van 01 When no warehouse is short, the tab shows Nothing is short.
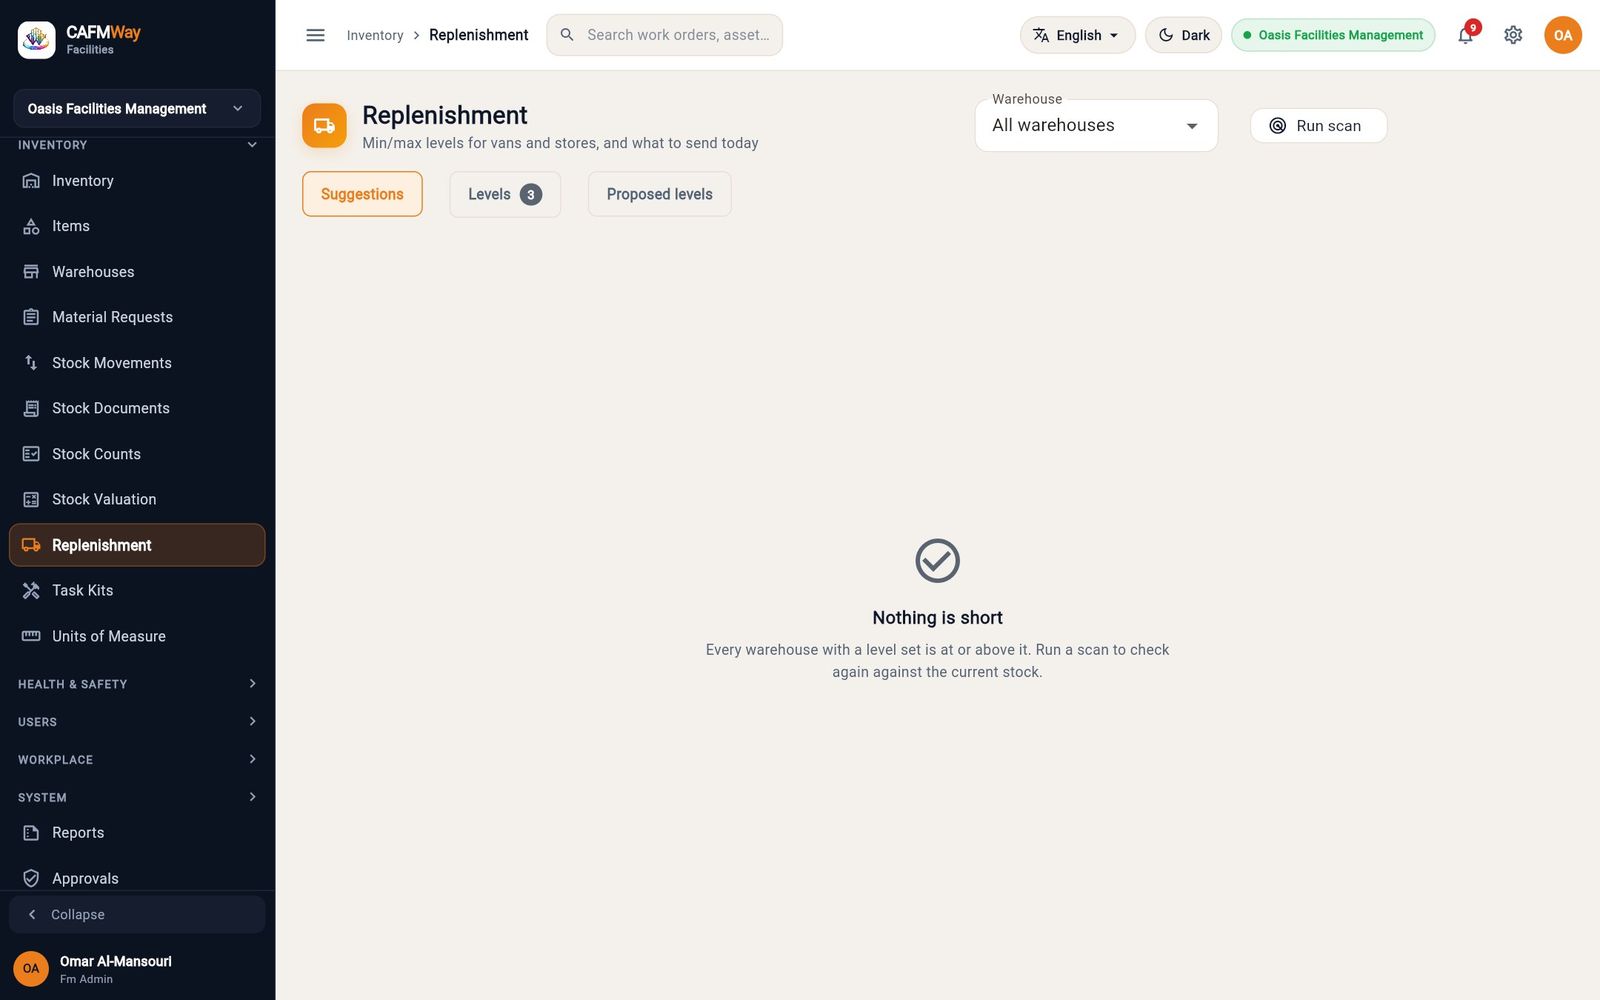
Figure 162 The Suggestions tab after the request was raised
Task kits
- Who: FM Administrator, FM Manager
- Where: Sidebar → INVENTORY → Task Kits
A task kit says which parts one standard job consumes, so that planned maintenance can be forecast. Standard tasks are set up in the organisation settings.
- On the Kits tab, click a task, for example Replace AHU filter set.
- Click Add a part, pick the Part, enter the Quantity for one job, and untick Always needed for a part that is only sometimes needed (it is forecast but never reserved).
- Click Add.
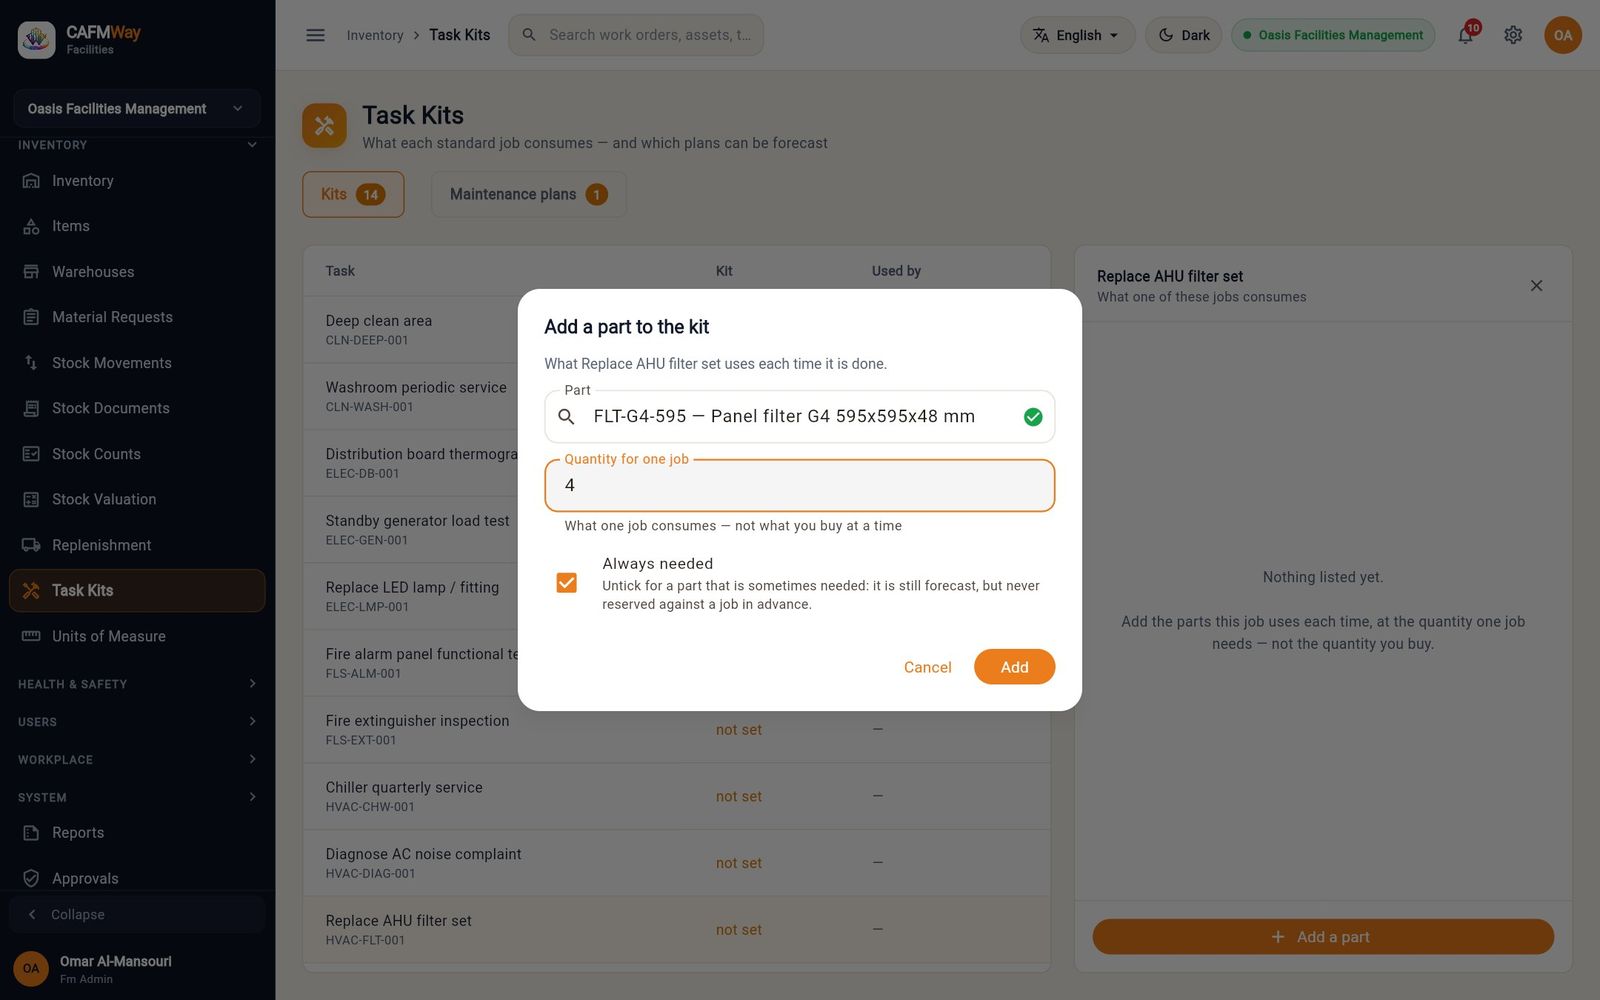
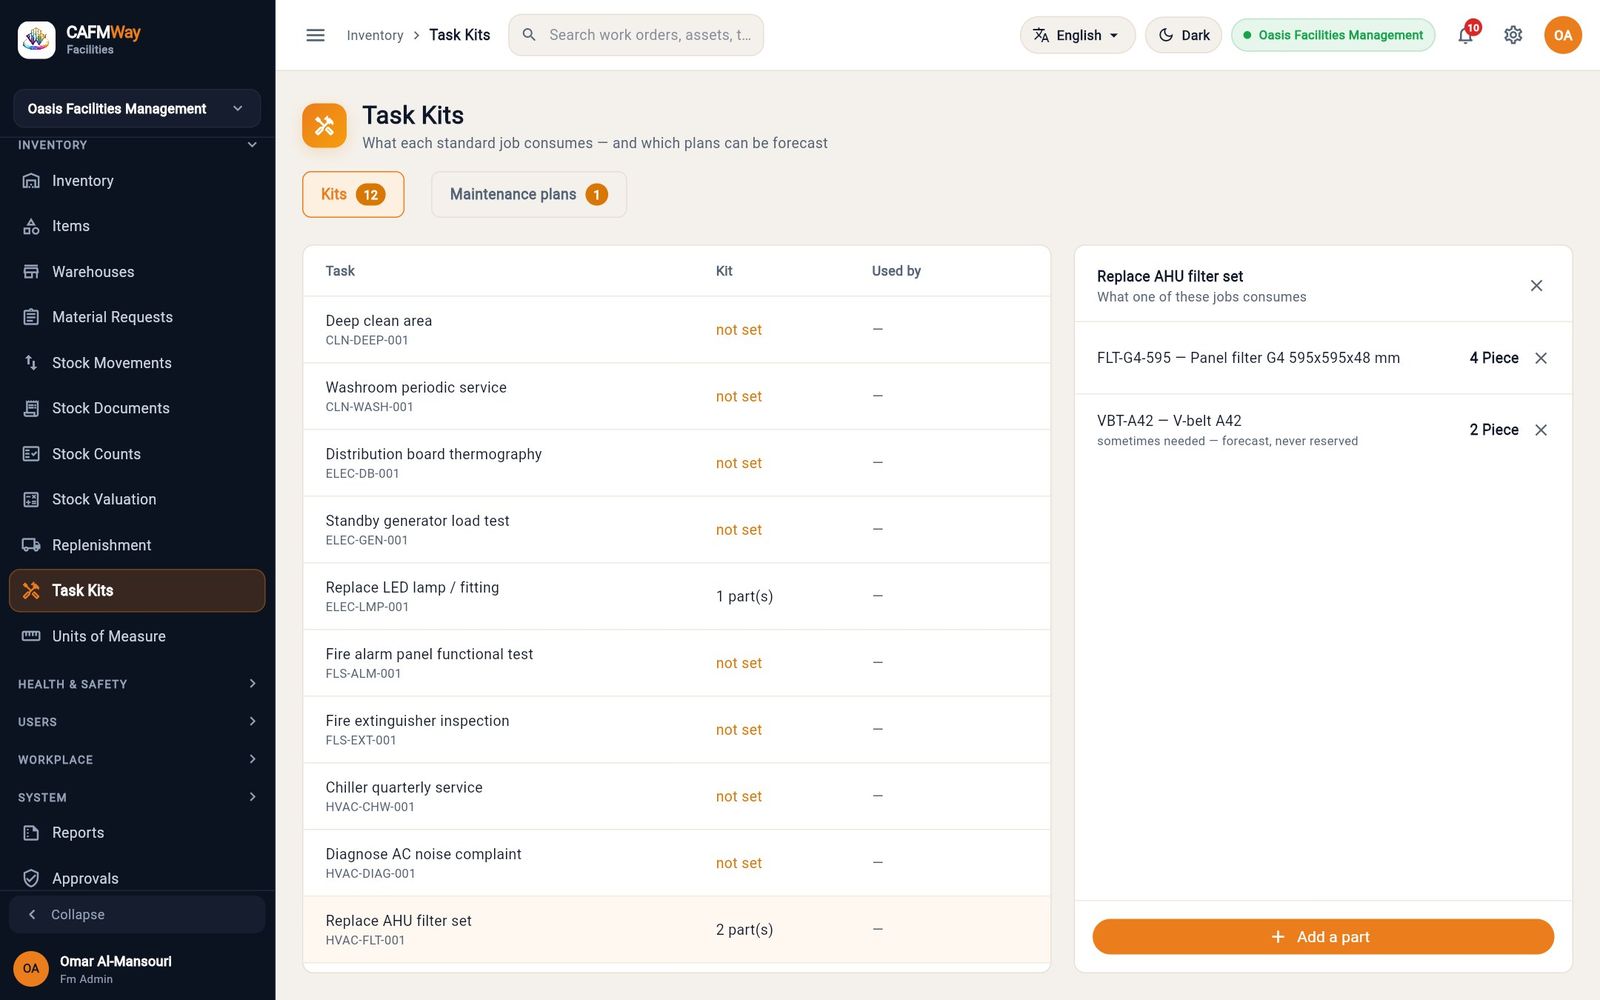
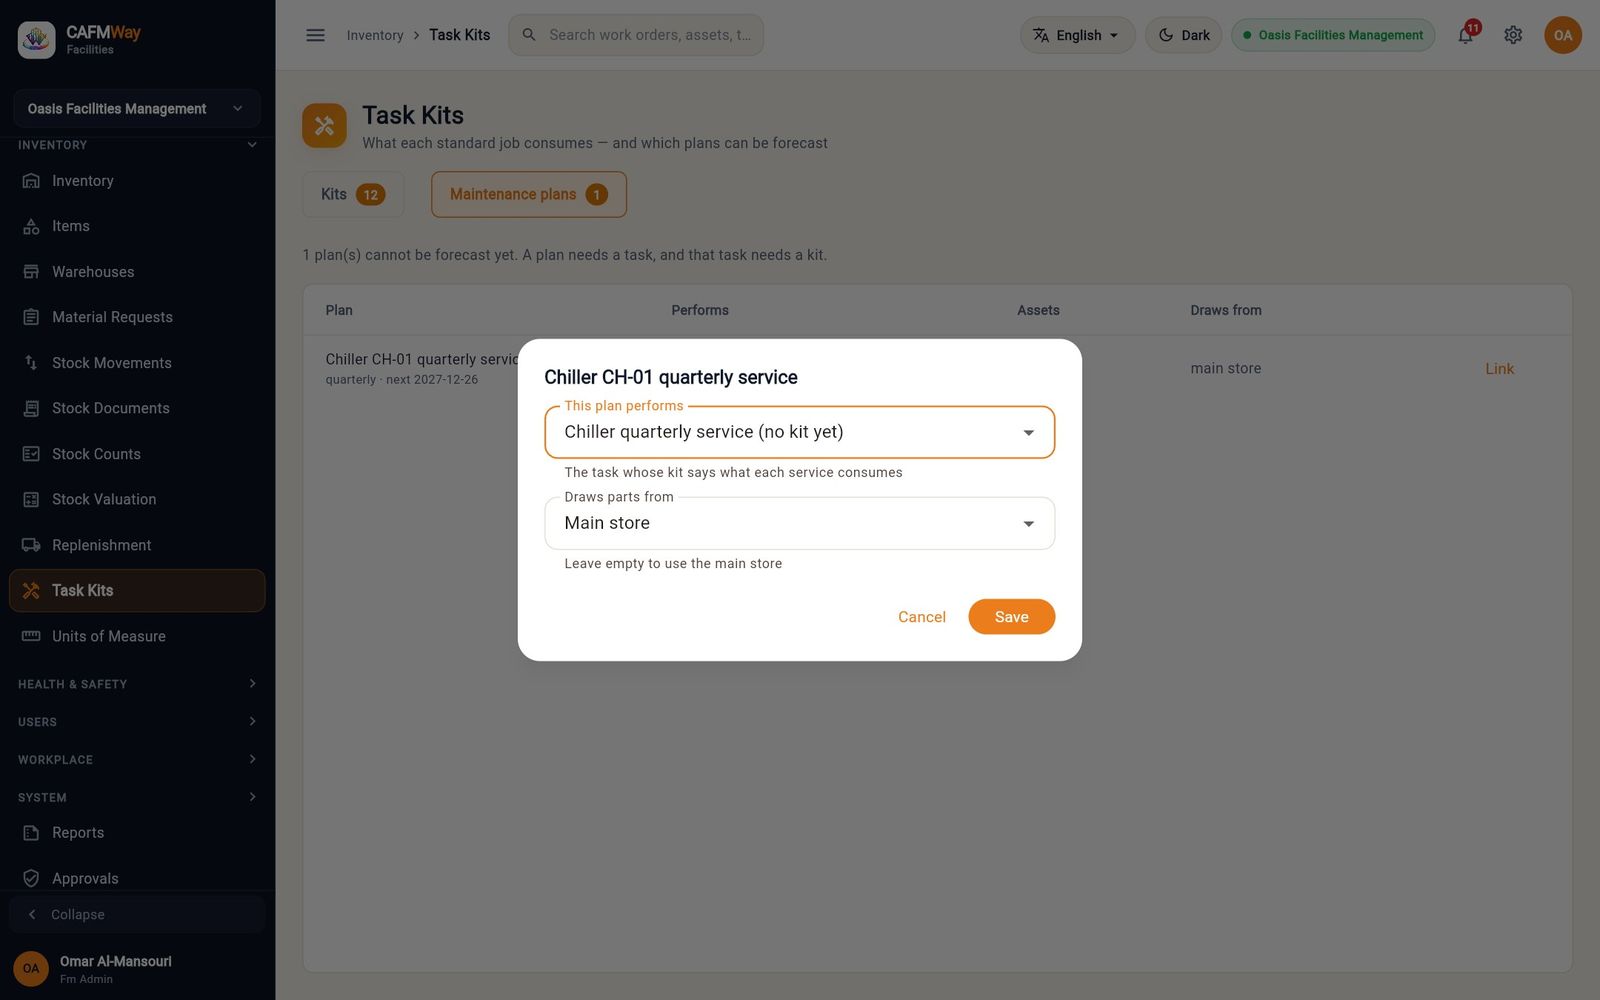
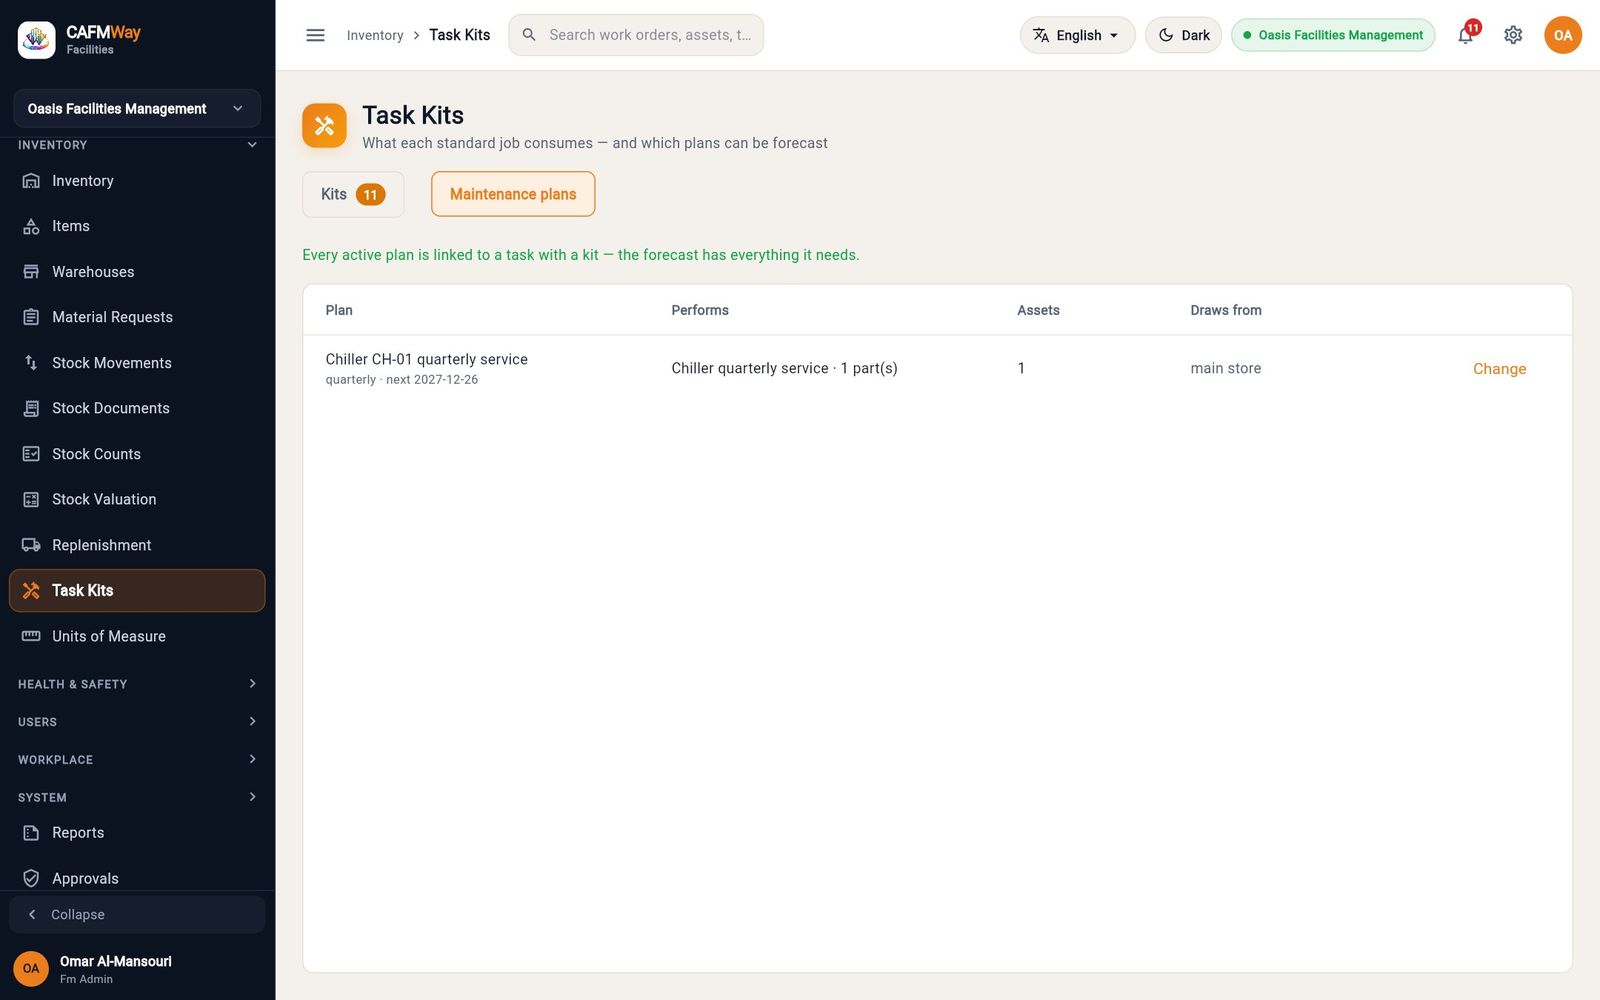
On the Maintenance plans tab, click Link (or Change) on a plan, choose the task in This plan performs and the warehouse in Draws parts from, and click Save. A plan can be forecast once its task has a kit.
Inventory overview and stock movements
- Who: anyone with access to Inventory
- Where: Sidebar → INVENTORY → Inventory and Stock Movements
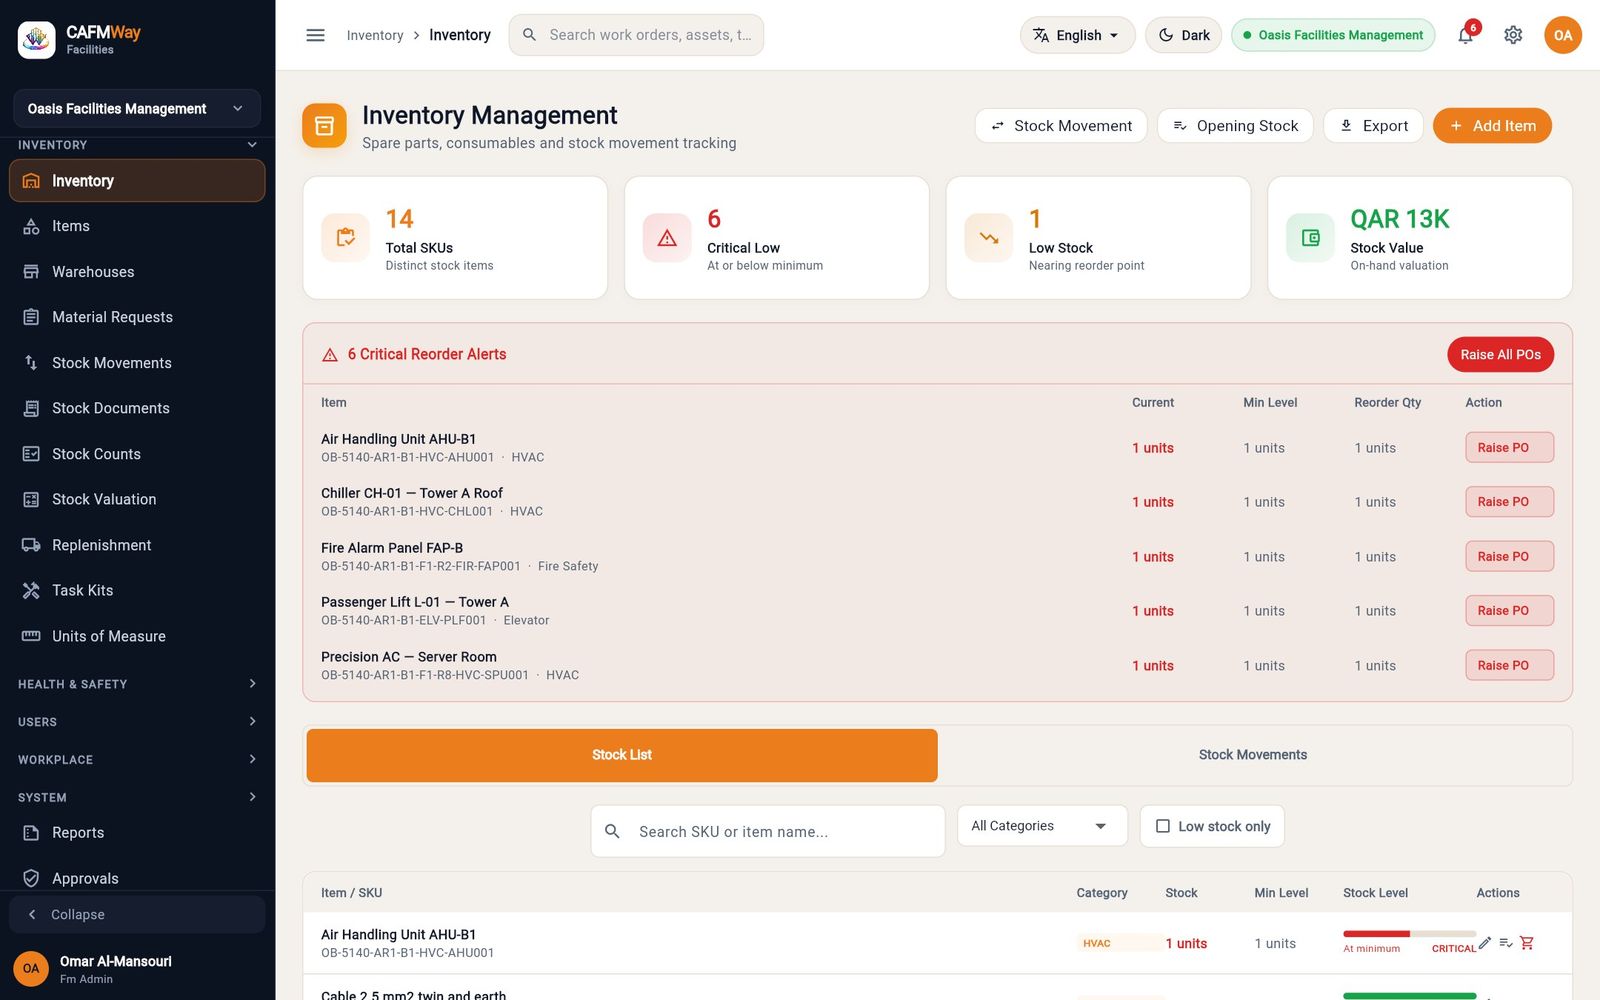
Inventory gives a quick overview: the number of items, how many are critically low or low, the stock value, and a list of items that have reached their reorder point. Stock List below lists every item with its stock level bar.
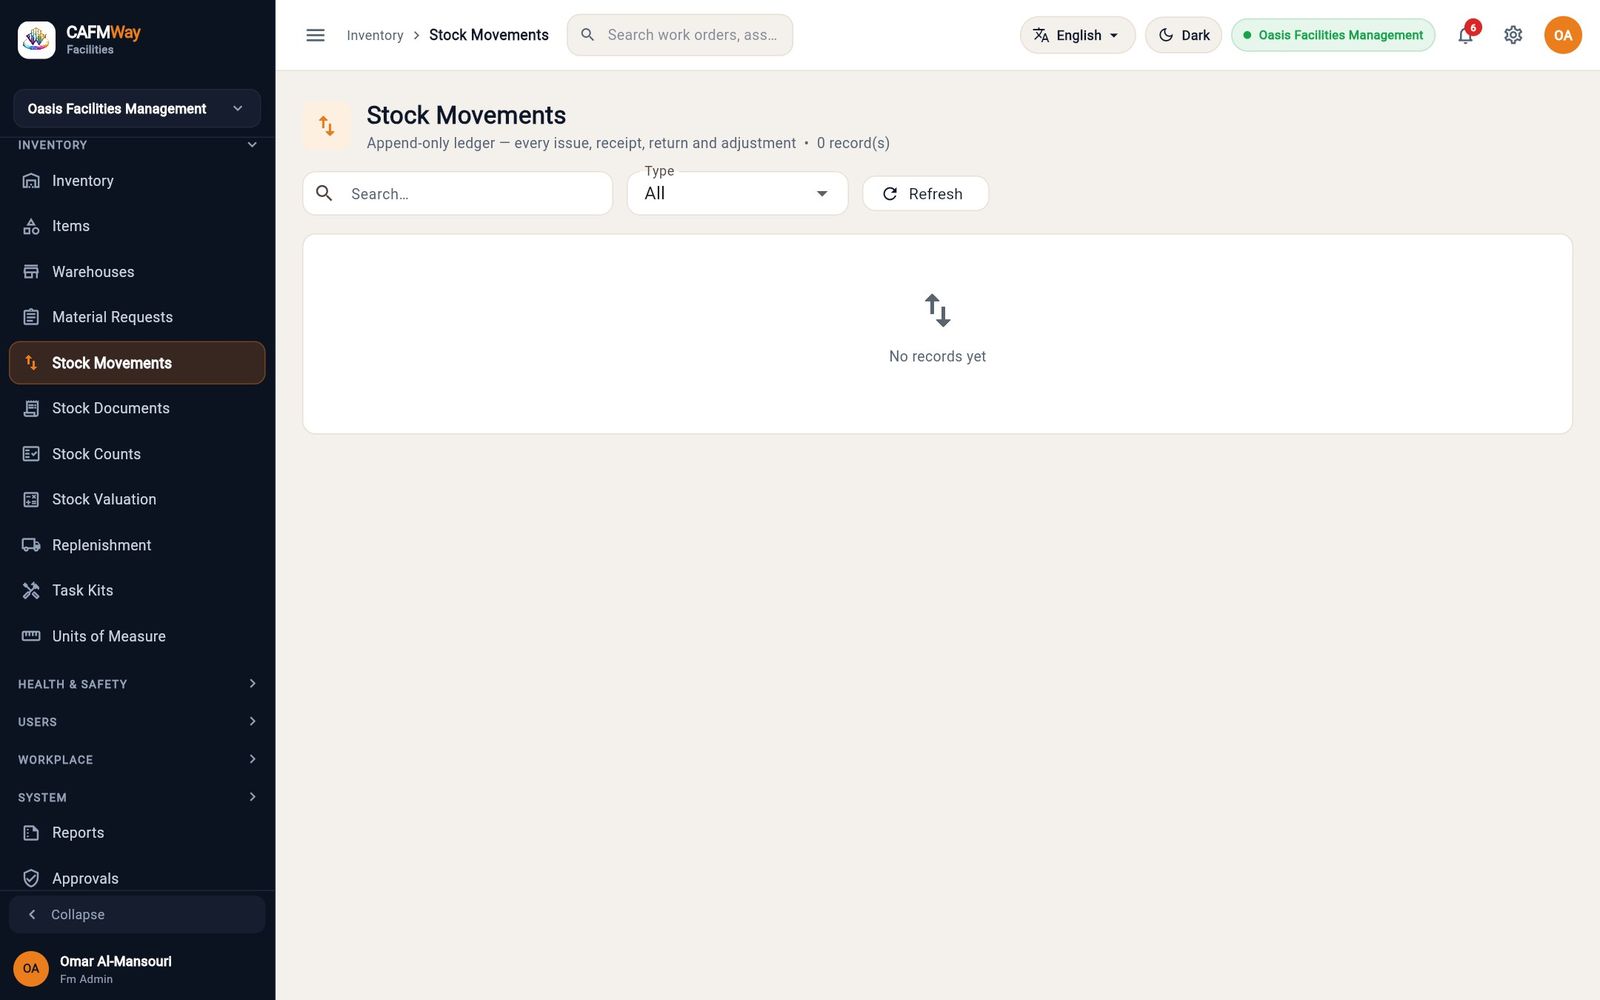
Stock Movements lists quantity changes made from the Inventory page. Movements recorded with stock documents, issues and counts are shown in Stock Documents and Stock Valuation instead.
Accounting and finance
This part covers the ledger that sits behind CAFM Way: the chart of accounts, cost centres and budget, manual journals, how purchase invoices, payments, stock and work-order costs reach the general ledger, the month-end close and the financial reports. It is written for finance officers, FM managers and the company administrator.
Accounting at a glance
- Who: FM Administrator, FM Manager, Finance Officer; Auditor (read only)
- Where: Sidebar → ACCOUNTING & FINANCE, plus PURCHASES (invoices and payments) and SYSTEM → Journal Export
CAFM Way keeps one double-entry general ledger (GL) per company. You rarely type into it directly. Each operational document posts its own entry at the moment it is approved or submitted, and the ledger refuses anything that does not balance. Manual journals are kept for the few things no document produces: opening balances, accruals and corrections.
flowchart TD
  PI[Purchase invoice approved] --> GL[(General ledger)]
  PE[Payment posted] --> GL
  SE[Stock entry submitted] --> GL
  JC[Work order costed] --> GL
  DEP[Depreciation run] --> GL
  JE[Manual journal posted] --> GL
  GL --> TB[Trial balance and reports]
  GL --> PC[Period close checks]
  GL --> EX[Journal export to ERP]
The rules below apply to every posting, whatever document it comes from:
| Rule | What it means for you |
|---|---|
| Balanced | Total debits must equal total credits. Differences of up to 0.02 QAR are moved to 7900 Rounding Adjustment; anything larger is refused. |
| Open period | The posting date must fall in an open fiscal month. A closed month refuses every posting. |
| Postable account | Group accounts (for example 2100 Current Liabilities) never take postings. Inactive accounts are refused. |
| Control accounts | Receivables (1120), inventory (1130), retention (1140, 2120), fixed assets (1210, 1220) and payables (2110) can only be posted by their own documents, never by a manual journal. |
| Dimensions | Some accounts demand a dimension. 5100 Direct Labour, 5200 Materials and Parts Consumed and 5300 Subcontractor Costs need a work order. |
| No editing | A posted entry is never changed or deleted. You correct it with a reversal, which posts a mirror-image entry. |
Suggested order for a new company:
- Review the chart of accounts and add the accounts you are missing.
- Create cost centres and check the budget.
- Post the opening balances as a journal entry.
- Let the day-to-day documents post: purchase invoices, payments, stock entries.
- At month end, post accruals, cost the completed work orders and run the period-close checklist.
- Read the trial balance, profit and loss and balance sheet, then close the month.
Chart of accounts
- Who: anyone with Journal Entry read access to view; create and write to add or edit accounts
- Where: Sidebar → ACCOUNTING & FINANCE → Chart of Accounts
Every company starts with a ready-made chart for a Qatari facilities-management contractor: about 60 accounts in seven groups (1000 Assets to 7000 Other), each with an English and an Arabic name. Control accounts carry a Control badge.
- Open Chart of Accounts. The tree shows each account's CODE, ACCOUNT, the dimensions it REQUIRES, its TYPE and current BALANCE.
- Click the arrow beside a group to expand it, or Collapse all to fold the tree.
- Type in Search by code or name… to find an account. Switch on Only accounts with a balance to hide the empty ones.
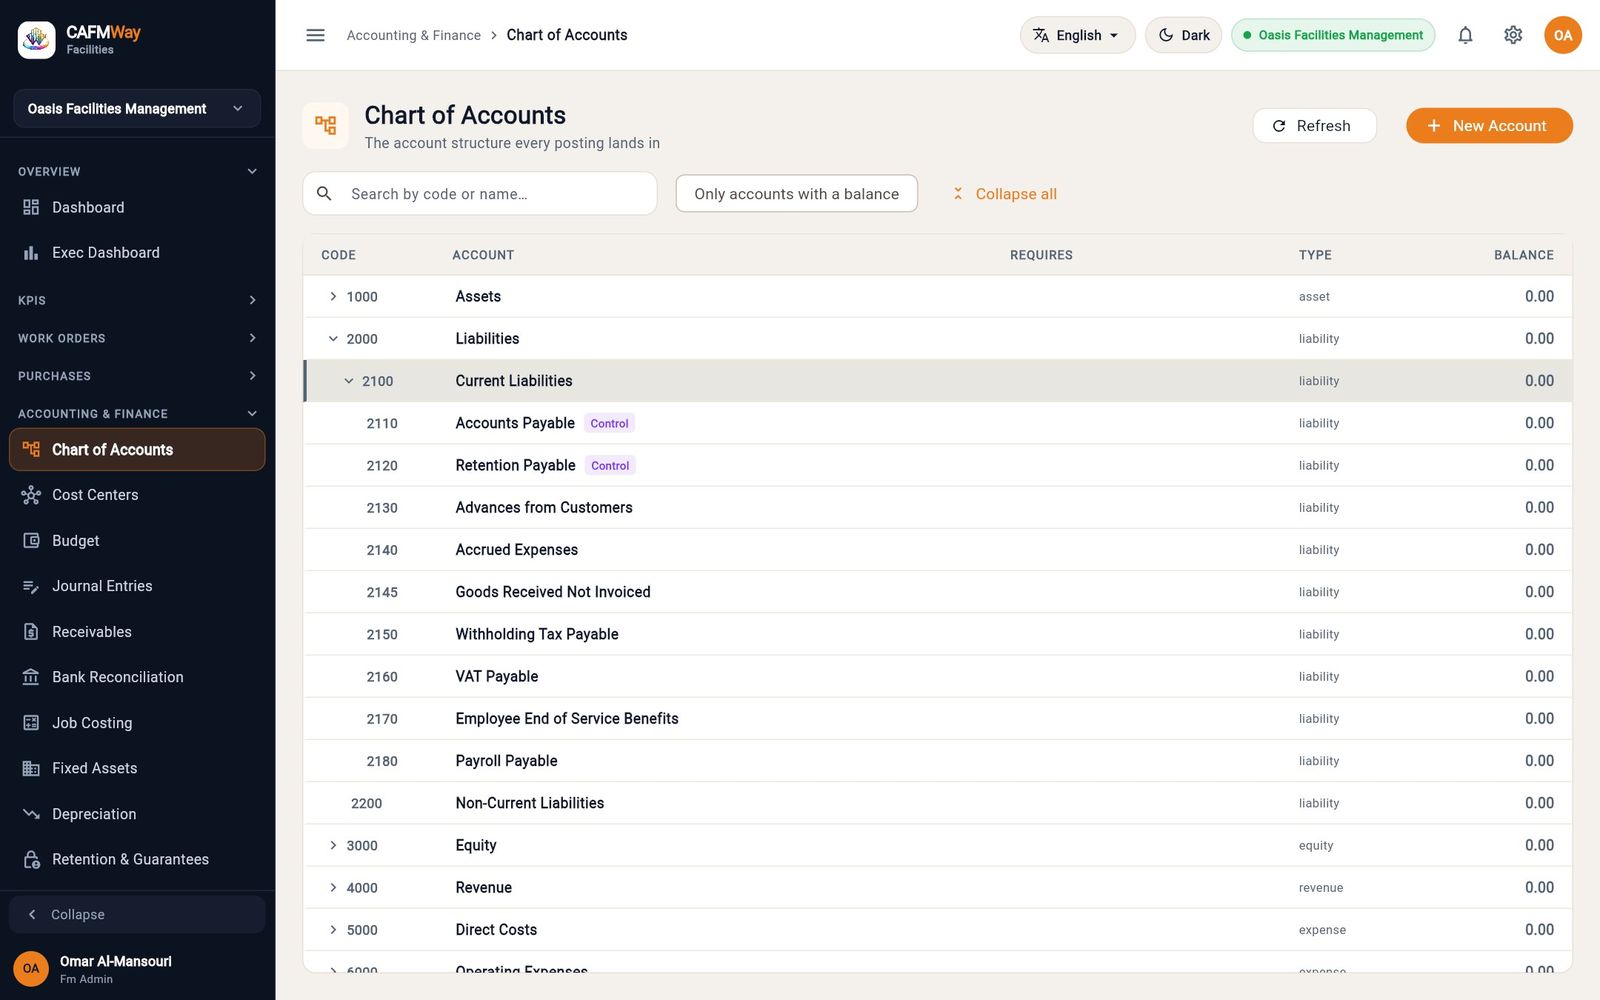
Add an account
- Click New Account.
- Choose the Parent group, for example 6000 Operating Expenses.
- Enter the Account code (6250), Name (English) and Name (Arabic).
- Leave Group account off for an account that will receive postings.
- Optionally choose Lock to currency so the account only accepts one currency.
- Under Mandatory dimensions, pick the dimensions every posting must carry: Department, Site, Contract, Work order or Asset.
- Click Save. The account appears in the tree under its parent.
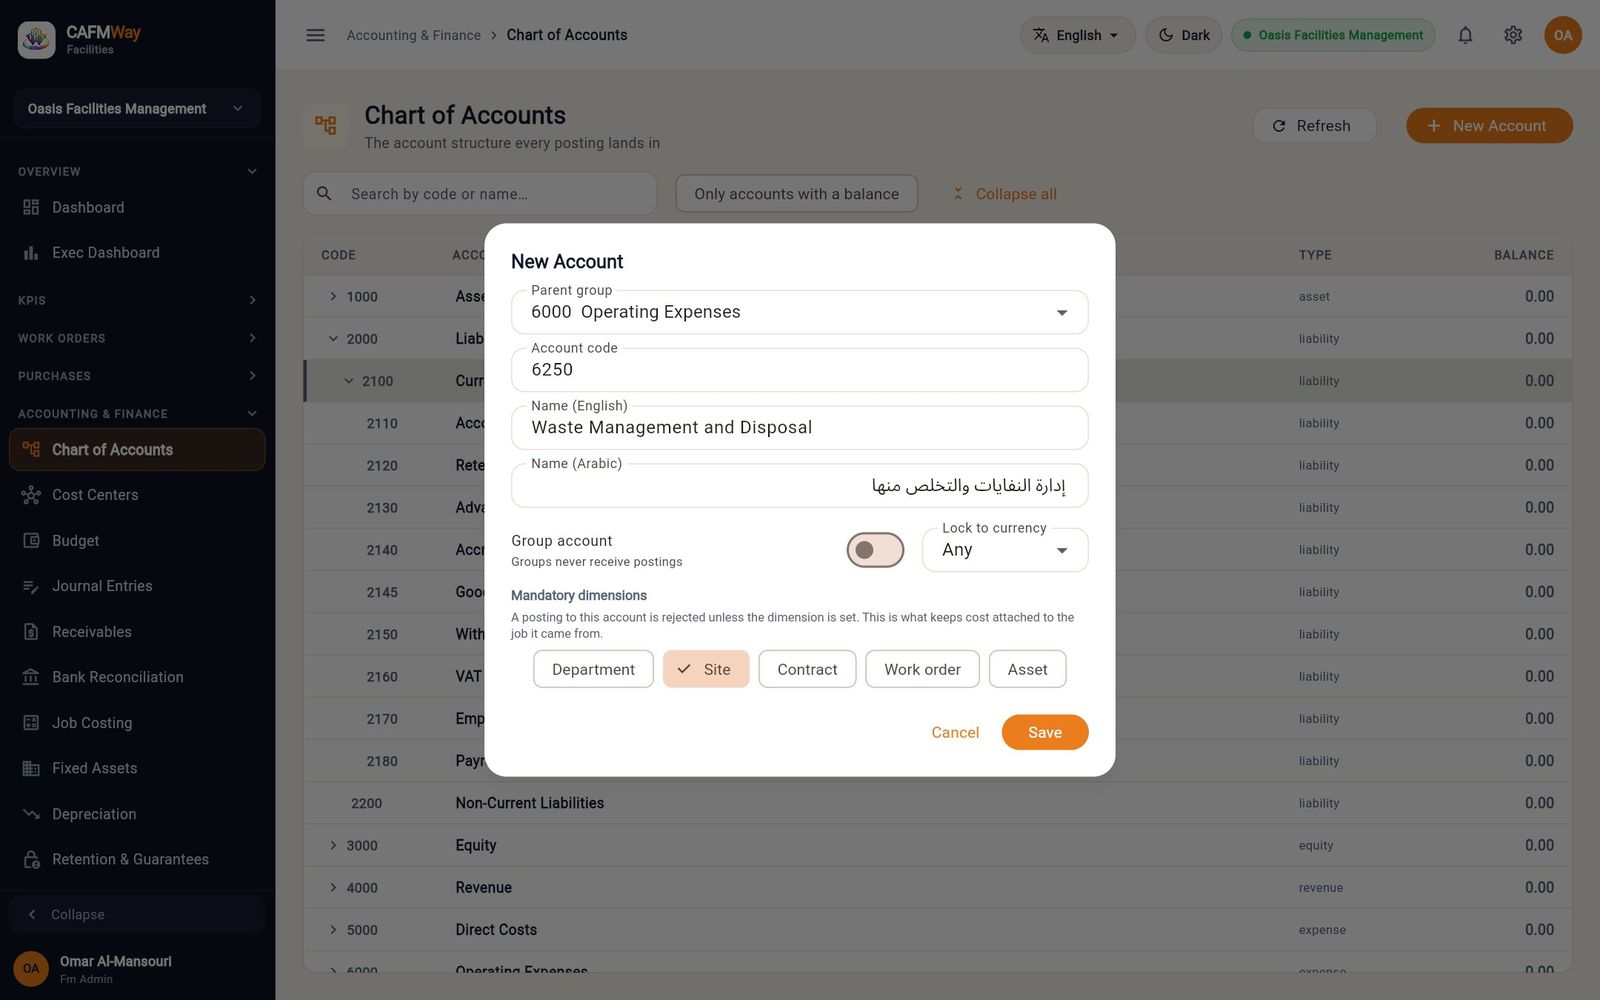
To change an account later, click its row. The dialog opens as Edit followed by the account code.
Cost centres
- Who: users with Cost Center access (FM Administrator, FM Manager, Finance Officer)
- Where: Sidebar → ACCOUNTING & FINANCE → Cost Centers
Cost centres are the organisational units your budget is split across, such as MEP & HVAC or Soft Services. Each card shows the centre's budget, what has been spent and how much of the budget is used.
- Click Add Cost Center.
- Enter a short Code and a Name.
- Click Create. The new centre appears as a card.
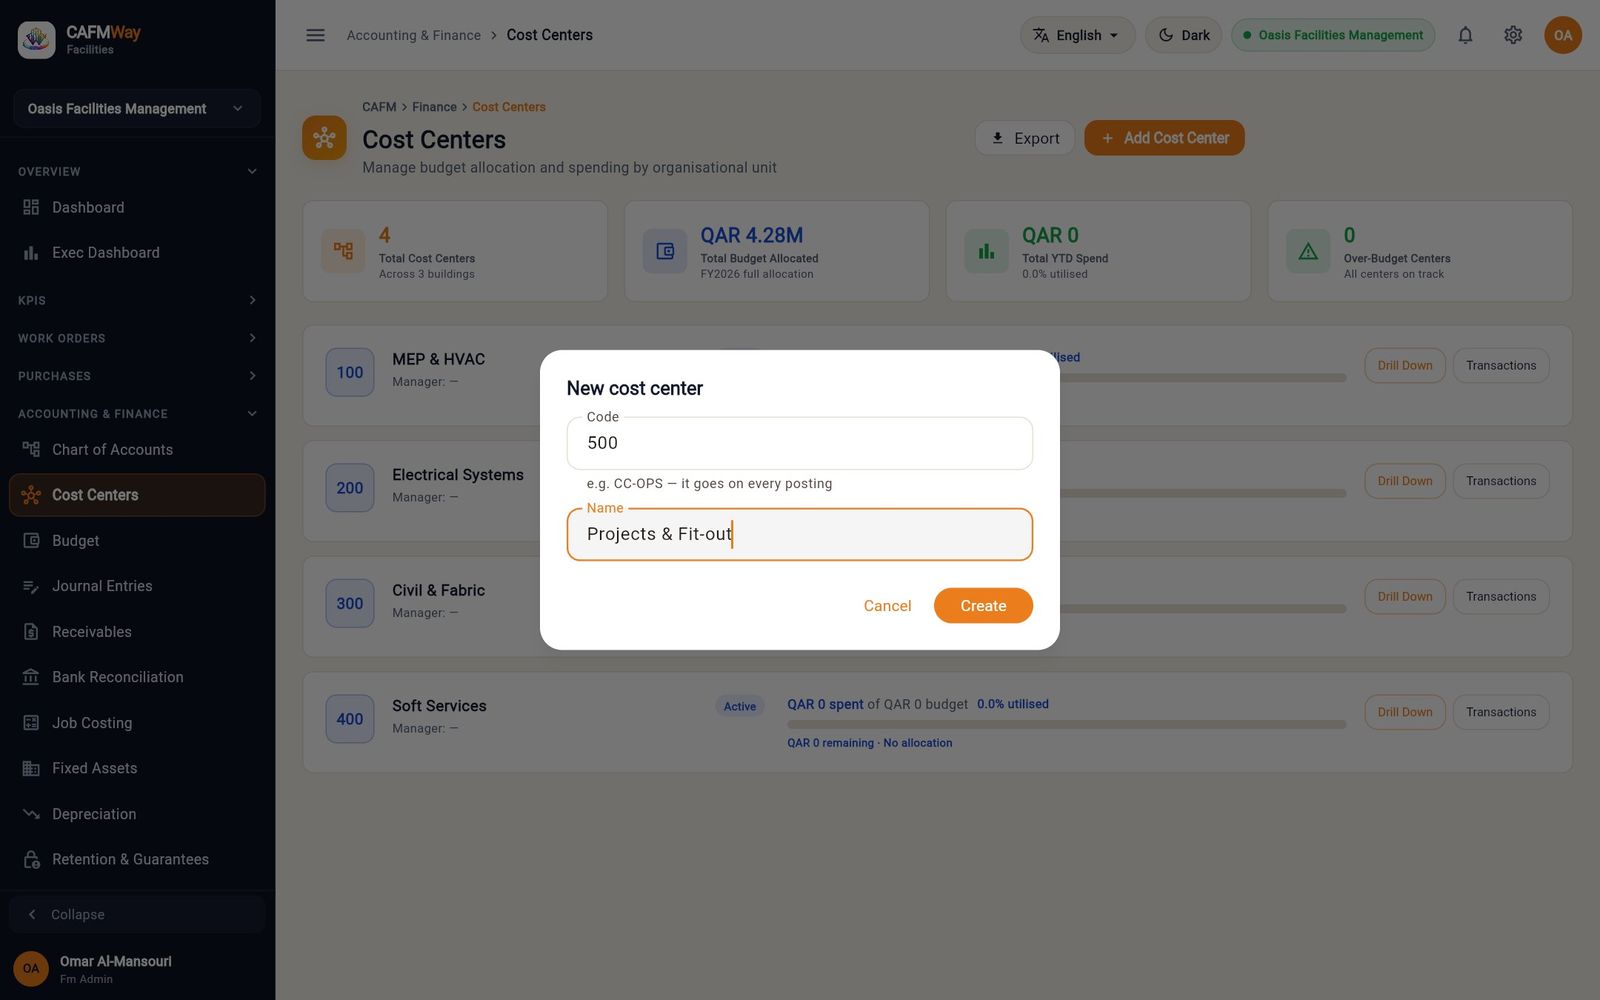
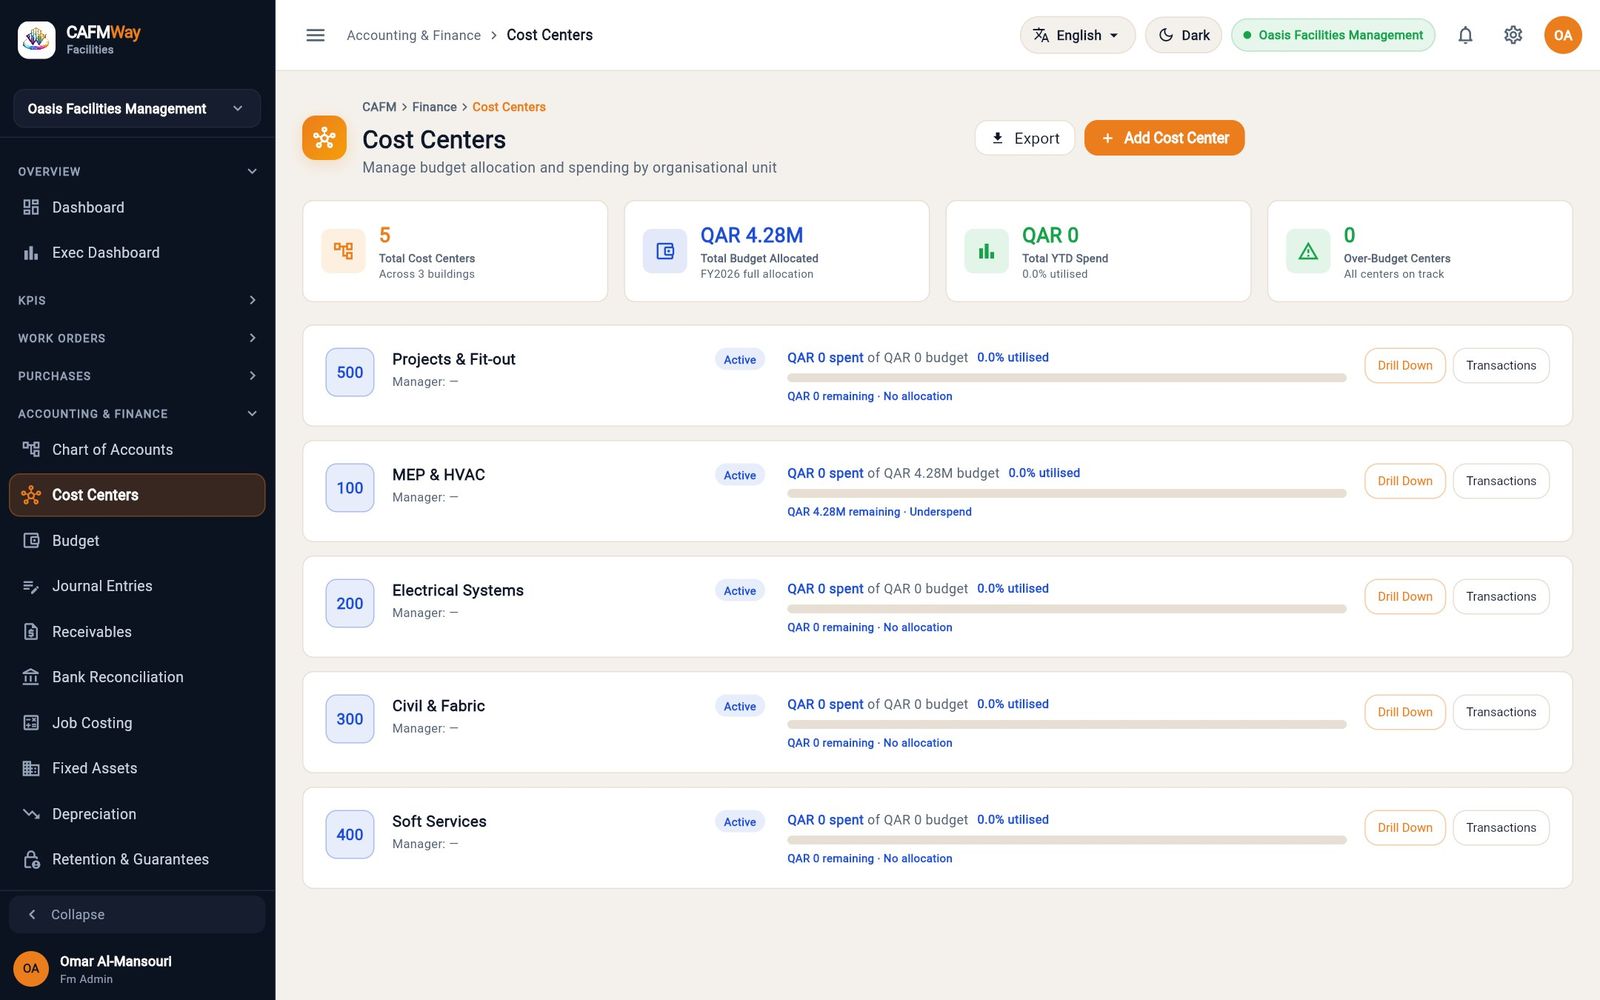
Click Drill Down on a card to see its budget, spend, remaining amount, utilisation and budget sub-items. Export downloads the list as a CSV file.
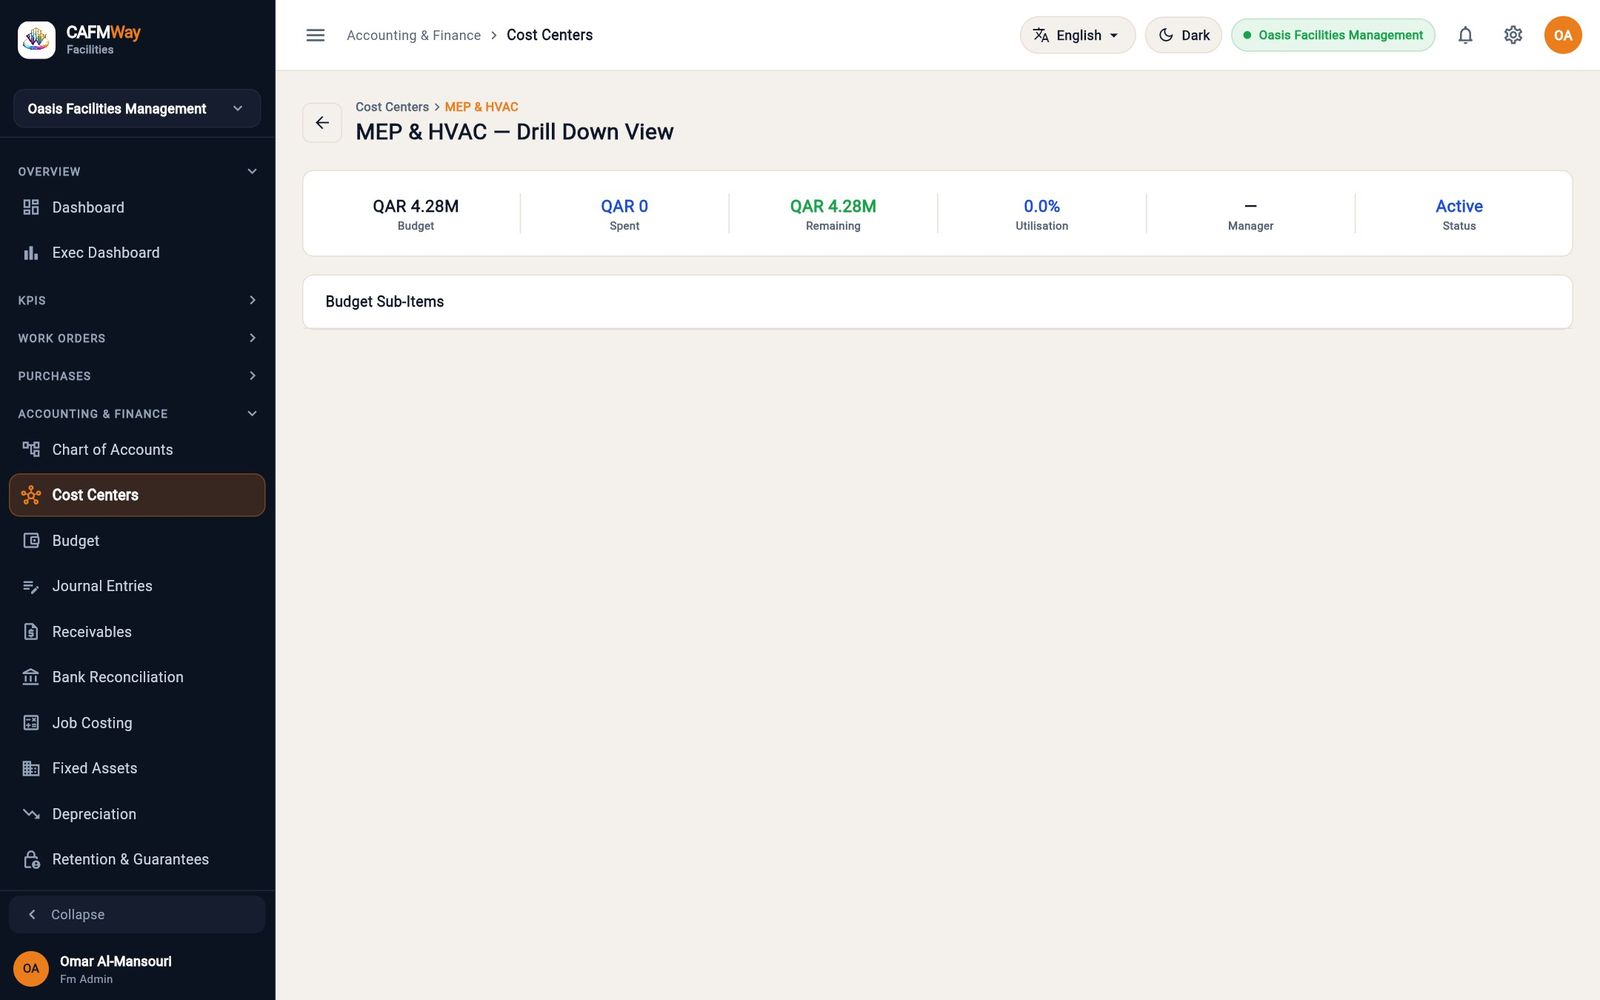
Budget and budget adjustments
- Who: Budget read access to view and request; Budget write access to approve or reject
- Where: Sidebar → ACCOUNTING & FINANCE → Budget
The Budget Management page tracks the year's facilities budget by category and by month, and compares it with actual spend. Actual spend counts goods received on purchase orders, materials issued from stores and approved supplier invoices. Purchase orders that are not yet received count as committed, not actual.
The tiles at the top show the total budget, actual spend to date, what remains and how many lines are over budget. Below them are Budget by Category, Monthly Spend vs Budget and Variance Analysis. Use Q1, Q2, H1 or YTD to change the period.
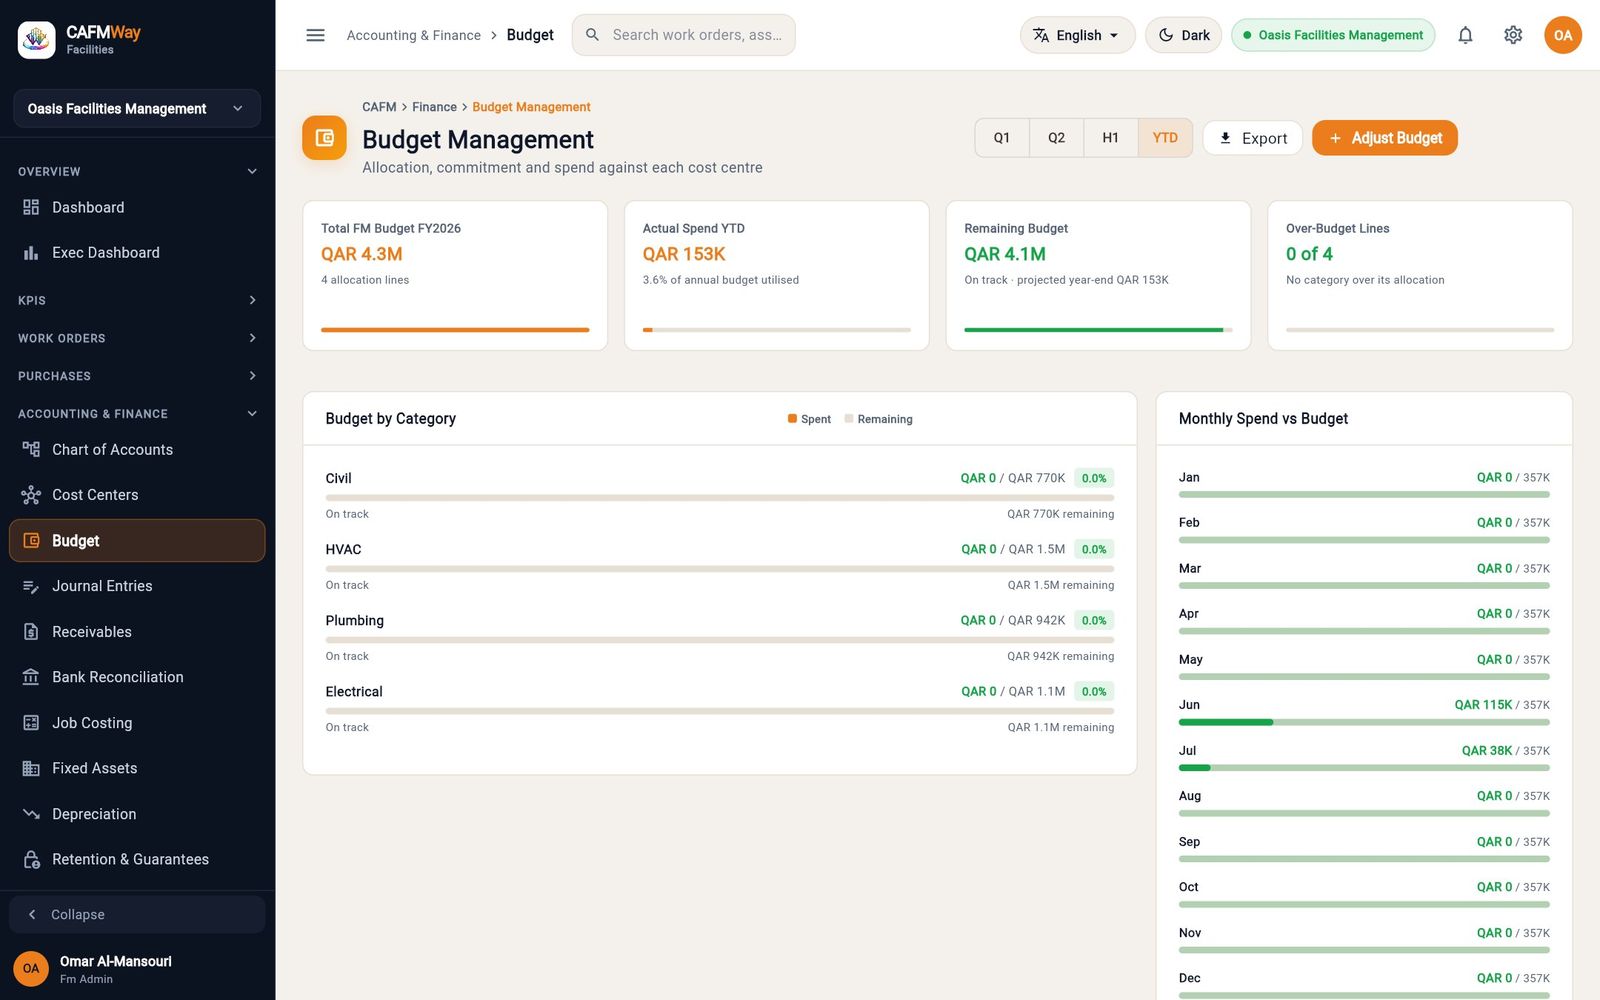
Request an adjustment
- Click Adjust Budget.
- Choose the Adjustment Type: Reallocation moves money between categories; Budget Increase Request and Emergency Approval raise the total.
- For a reallocation, choose From Category and To Category.
- Enter the Amount (QAR) and a Justification.
- Click Submit Request. Nothing changes until the request is approved.
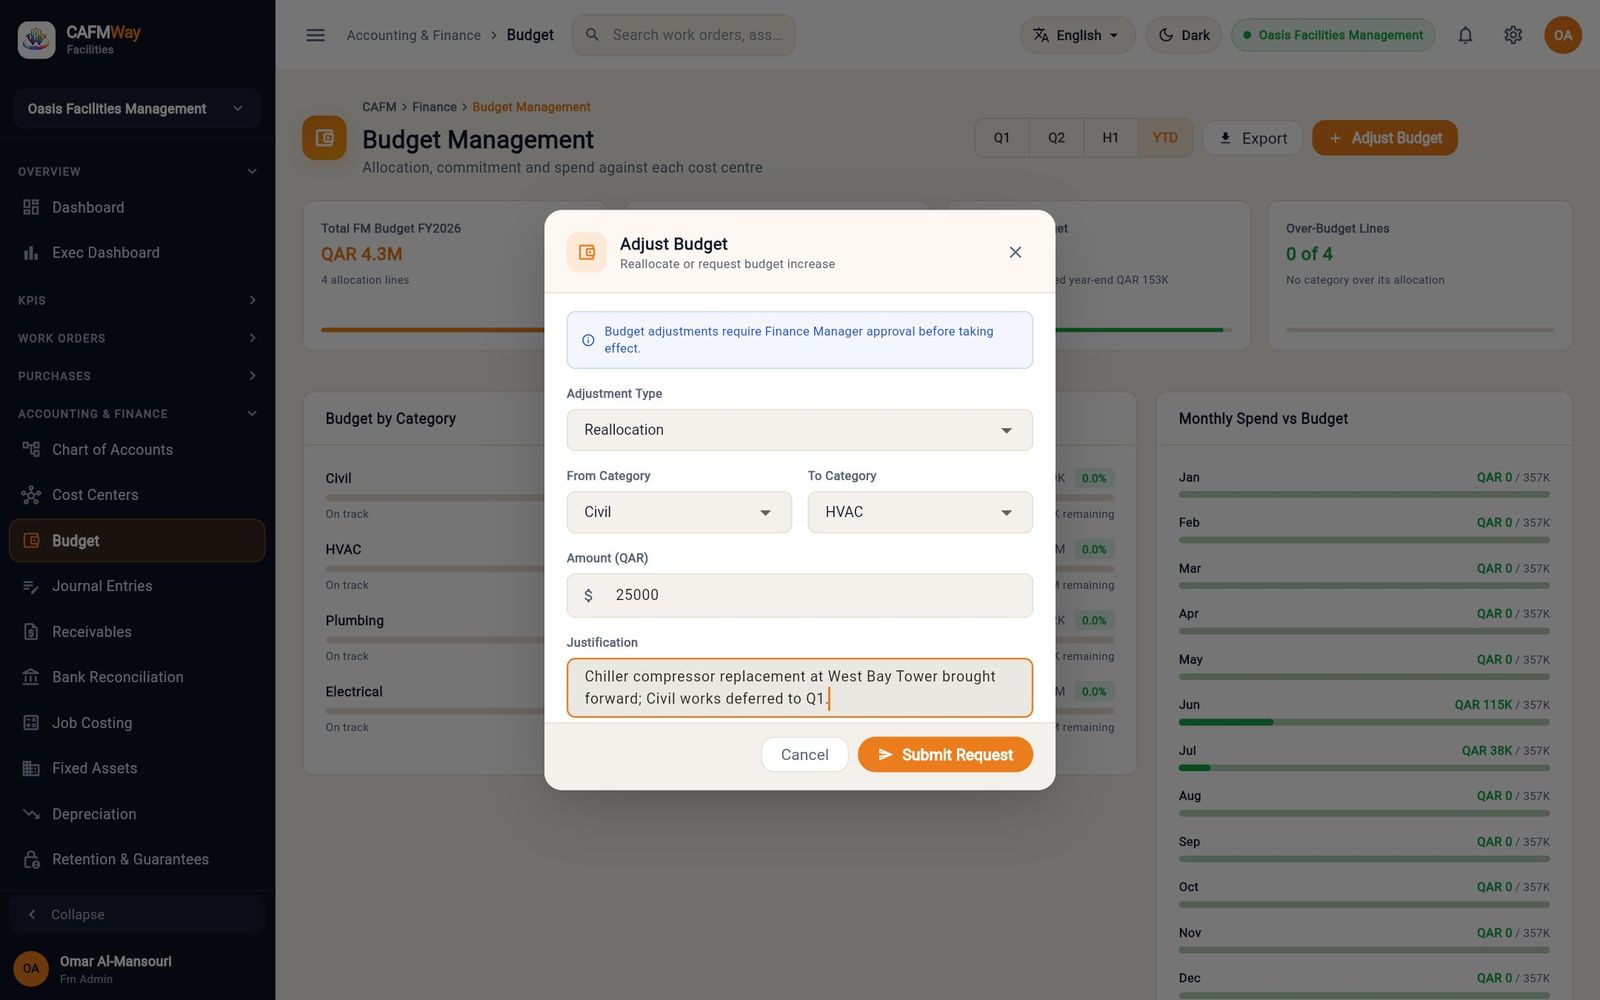
Approve or reject an adjustment
- Scroll to Budget Adjustments. Pending requests show a PENDING badge.
- Click Approve or Reject on the request.
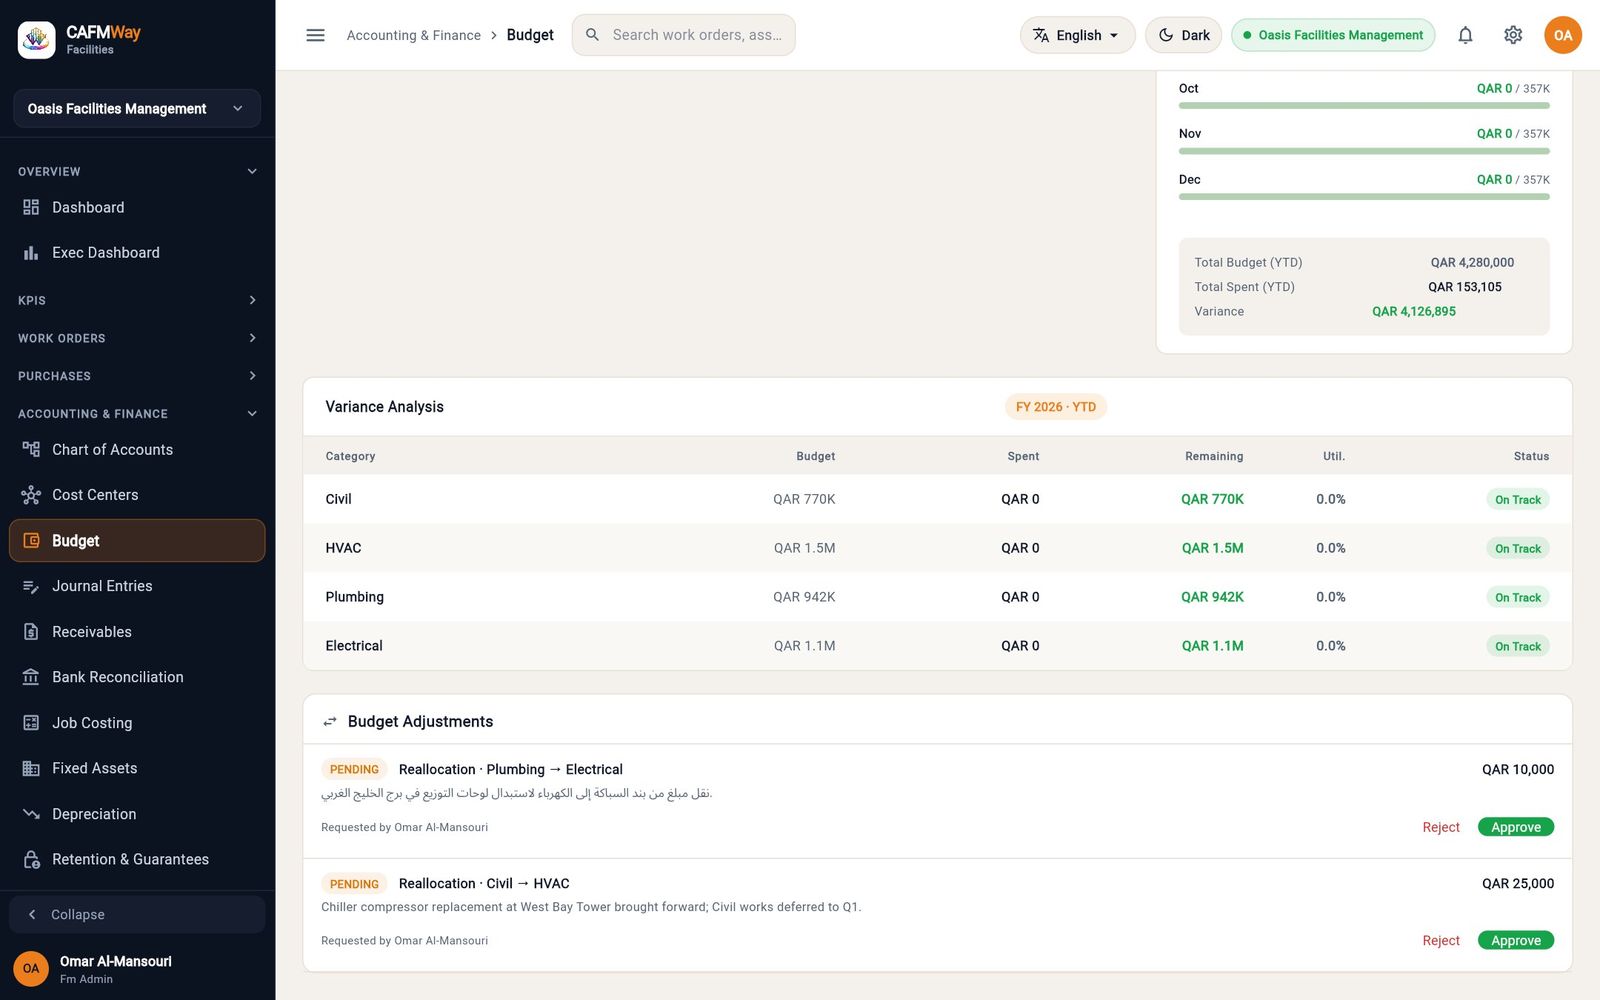
When you approve a reallocation, the amount moves between the two categories straight away. In the example, Civil drops from QAR 770K to QAR 745K and the request shows APPROVED with the approver's name.
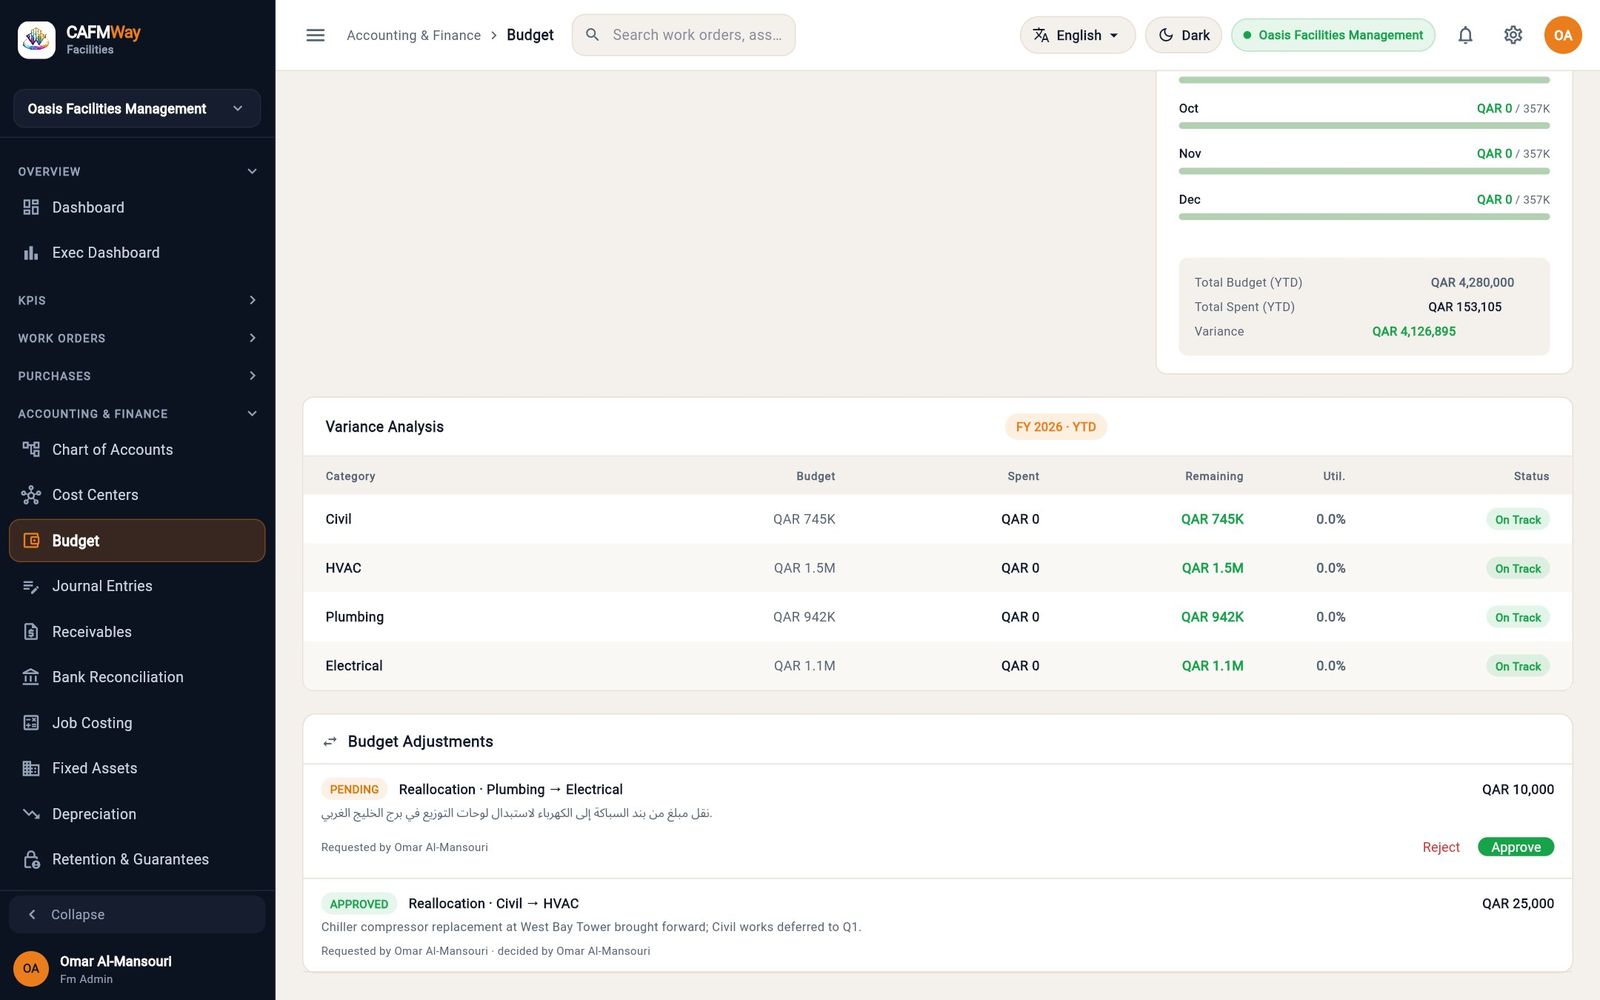
Journal entries: draft, post and reverse
- Who: Journal Entry create (new draft), write (edit a draft) and submit (post or reverse)
- Where: Sidebar → ACCOUNTING & FINANCE → Journal Entries
Use a journal entry only for what no other document produces: opening balances, accruals, reclassifications and corrections. The editor shows a live balance, so you see whether the entry balances before anything reaches the ledger.
Post the opening balances
- Click New Entry. The New Journal Entry editor opens with a Draft badge.
- Set the Posting date to the first day of your first open month, for example 01/01/2026.
- Set Entry type to Opening balance and keep Currency at QAR.
- Enter a Narration that says what the entry is for.
- For each line, choose the account in Select account and type the amount in Debit or Credit. Click Add line for more lines.
- Watch the badge in the bottom-left corner. It reads Balanced when debits equal credits, or tells you how far out the entry is.
- Click Save draft to keep it for later, or Submit & Post to post it now.
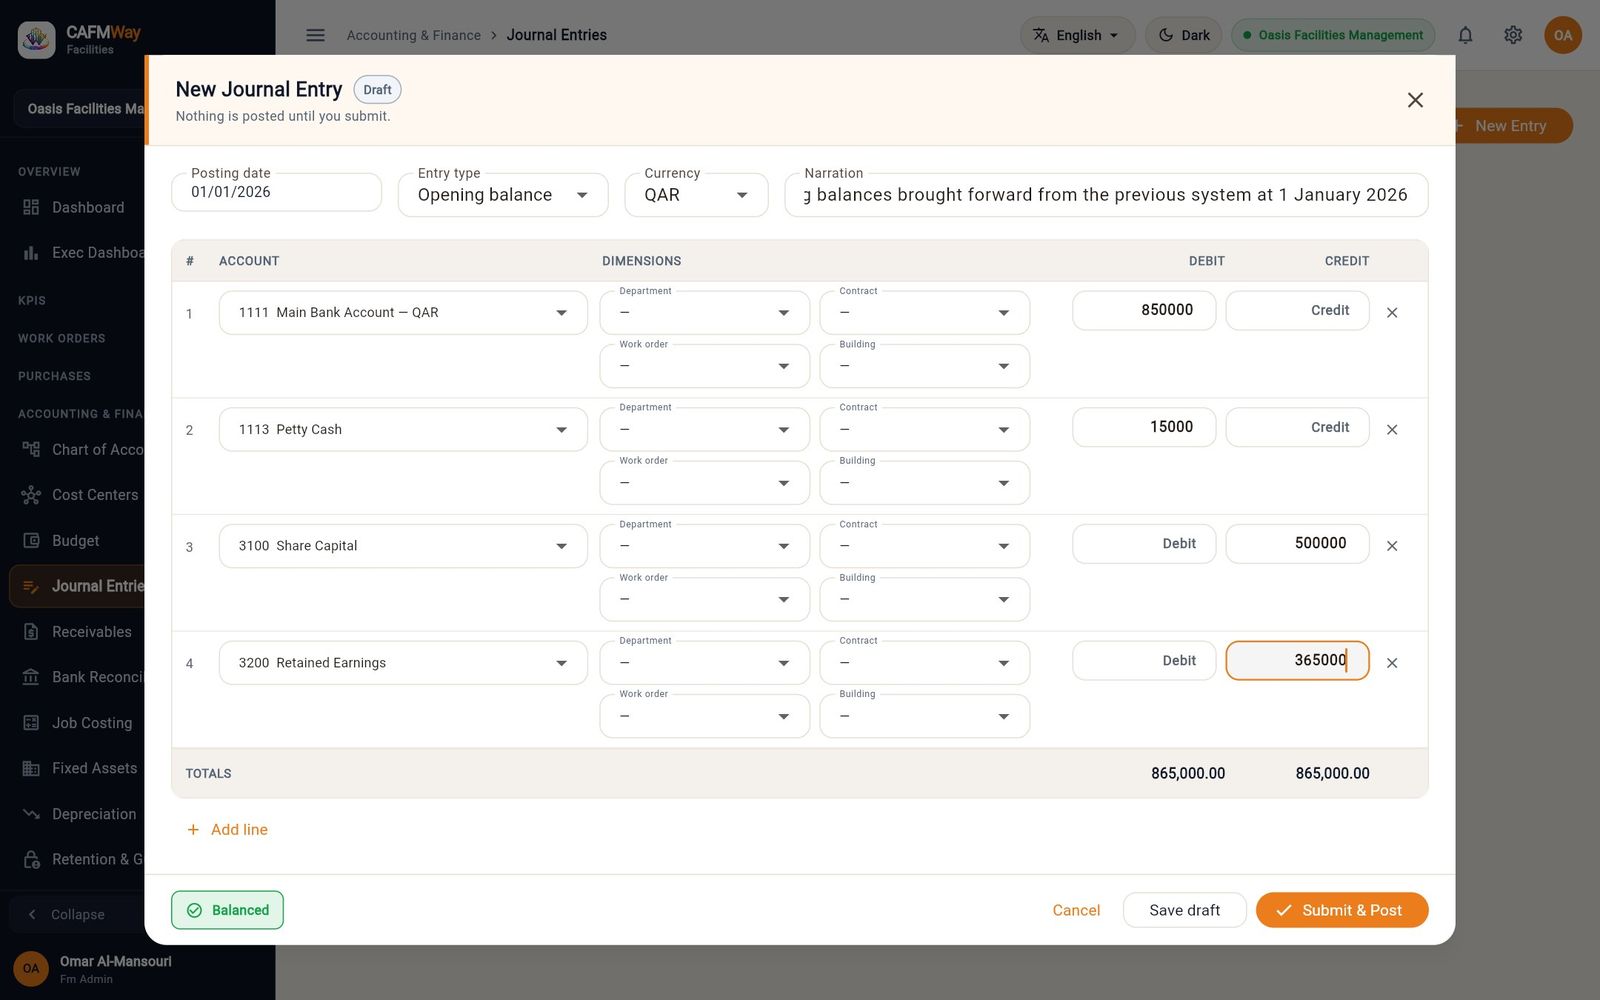
When the entry posts, a message confirms the voucher number and the row's status changes to Submitted.
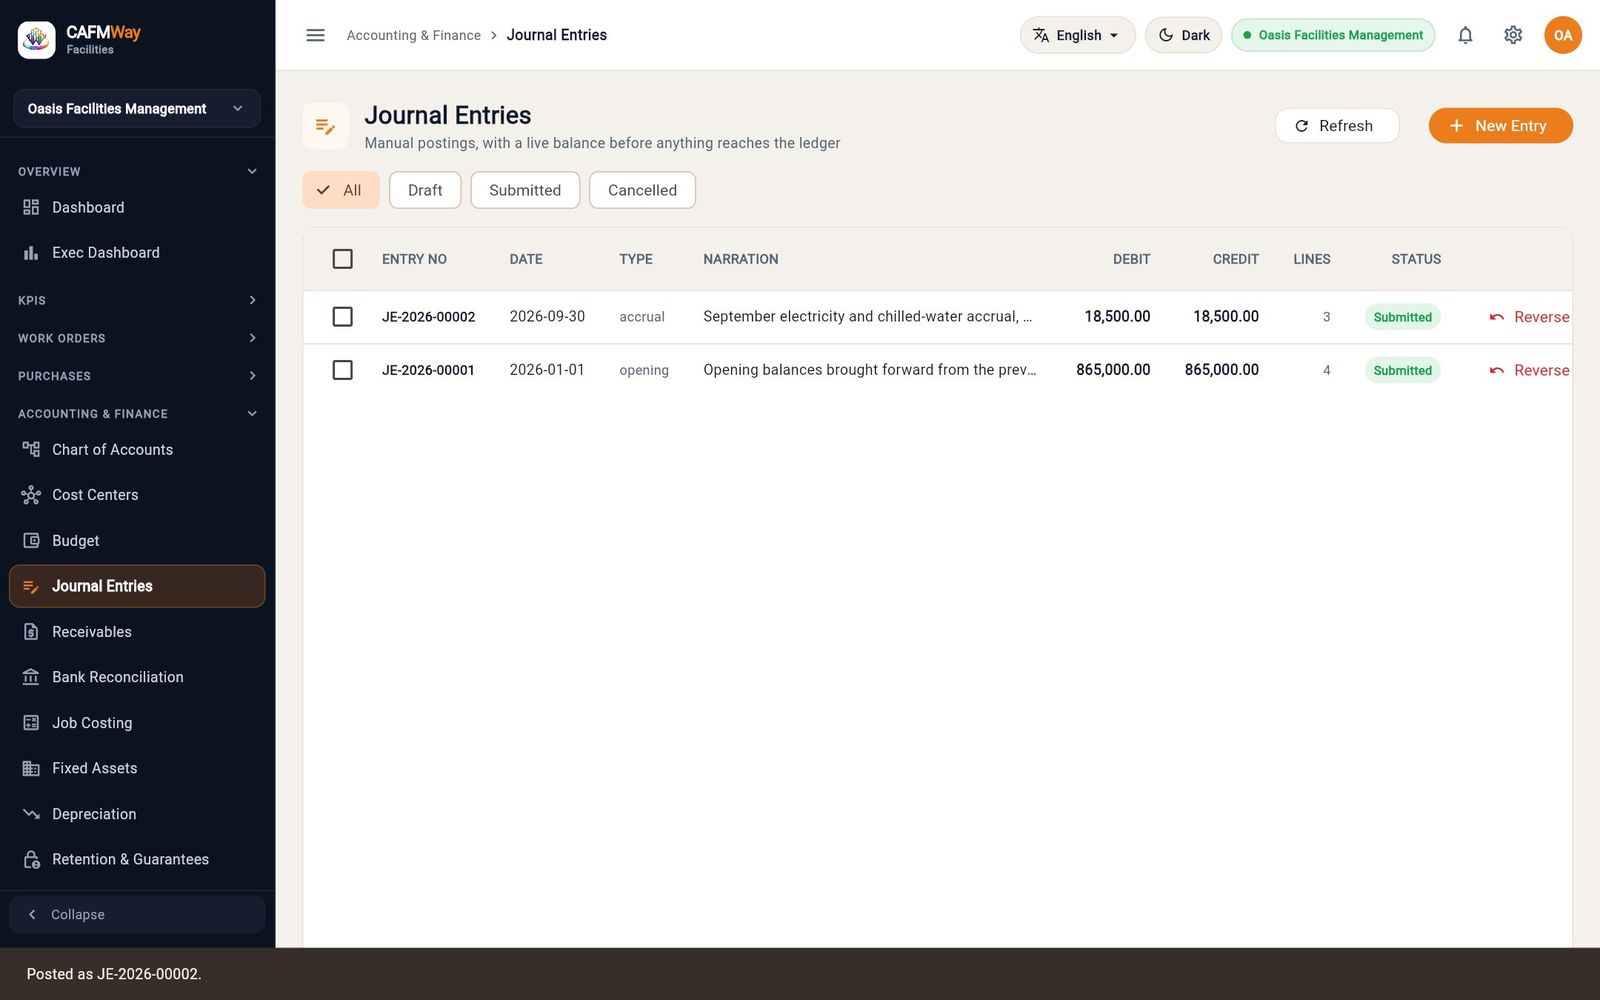
Post an accrual that reverses itself
At month end you often know a cost but have no invoice yet. Accrue it, and let the entry reverse on the first day of the next month so the real invoice is not counted twice.
- Click New Entry and set Entry type to Accrual.
- Set the Posting date to the last day of the month.
- Tick Auto-reversing and click Reverse on… to pick the reversal date. The button then shows the date, for example Reverses 01/10/2026.
- Add the lines. When an account needs a dimension, its picker is marked with an asterisk, for example Work order *.
- Click Submit & Post.
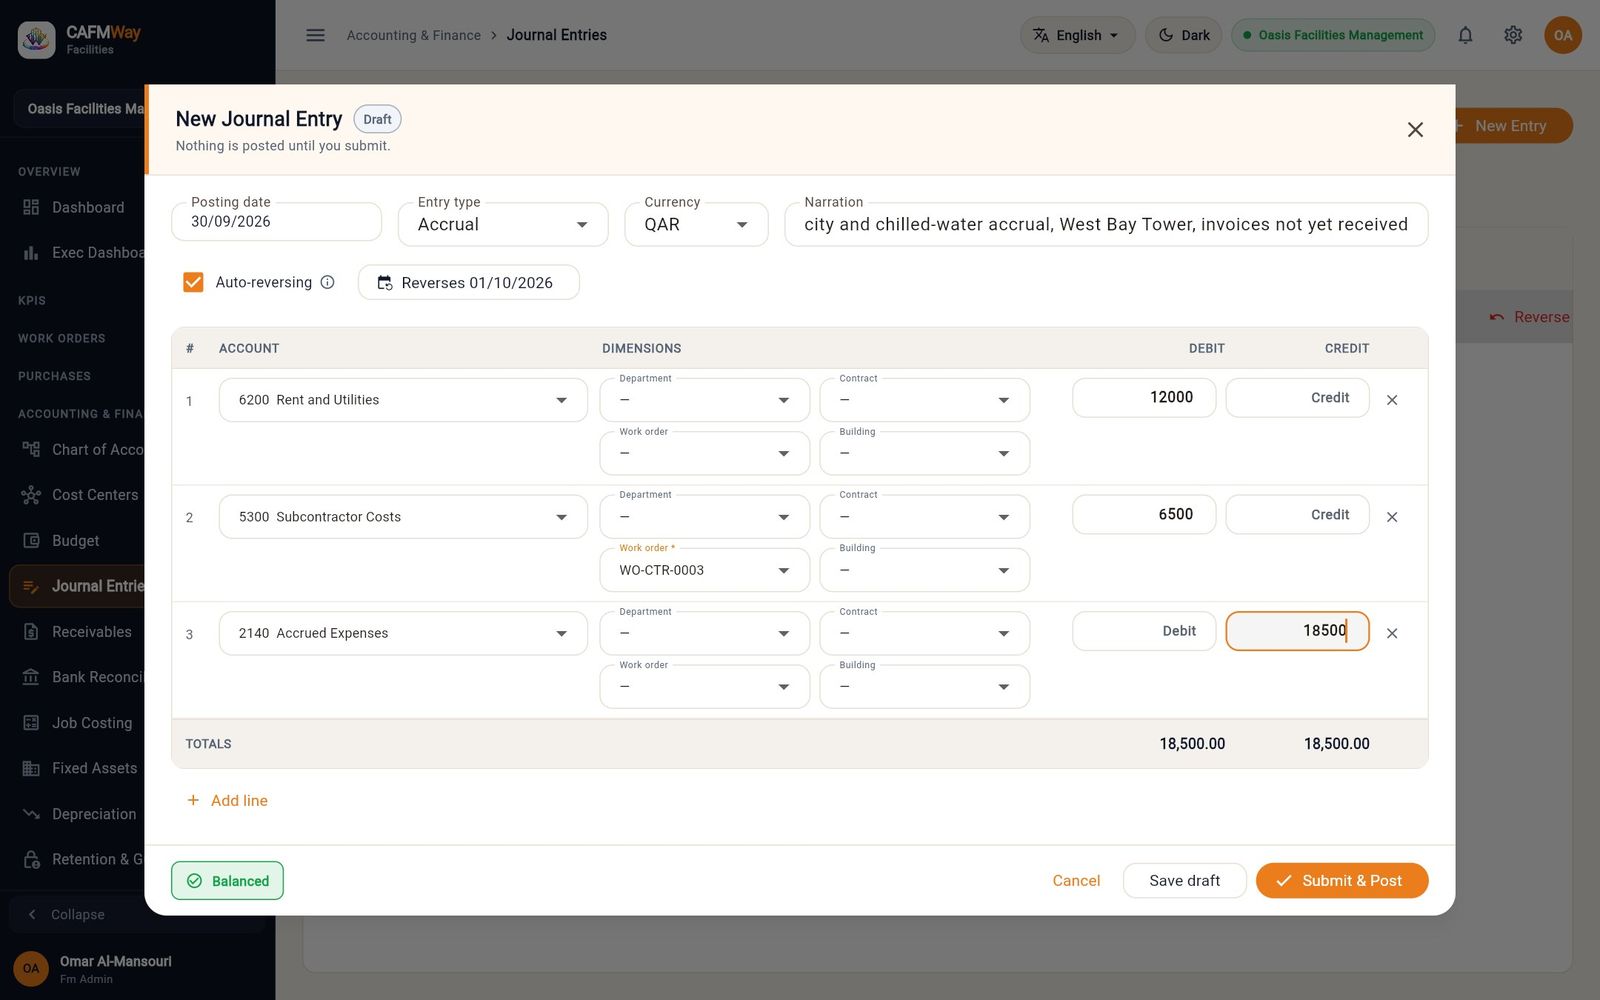
Click any posted row to open it read-only. The header says the entry is posted and can only be corrected by a reversal.
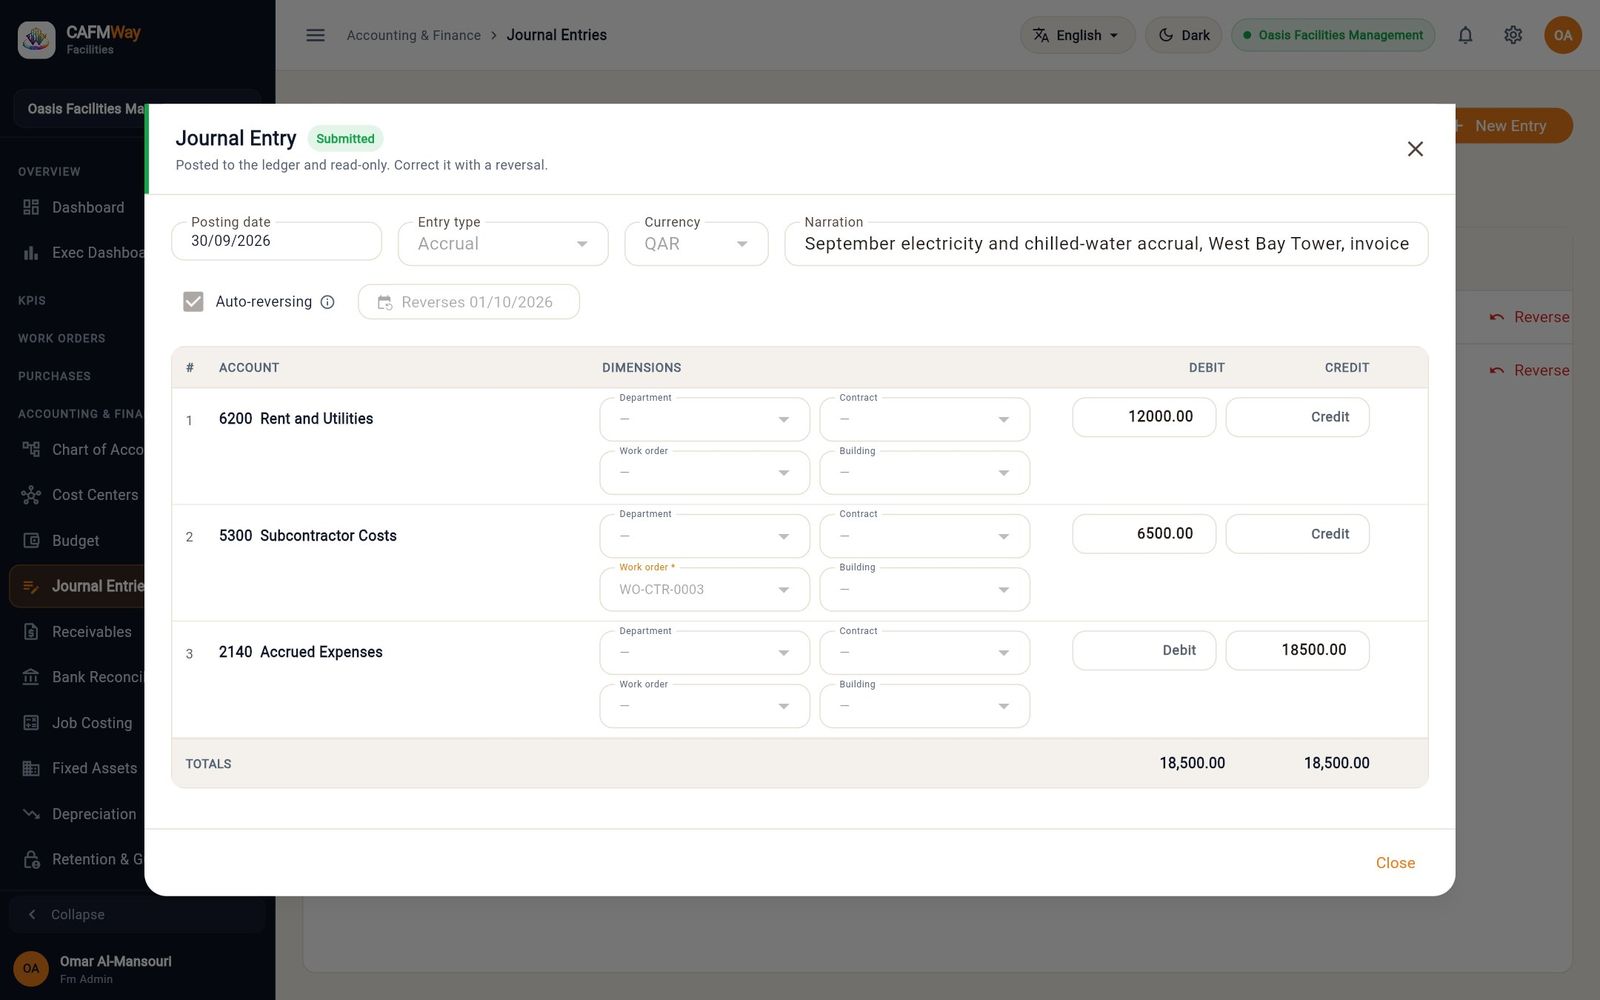
When the ledger refuses an entry
If an entry breaks a rule, Submit & Post stops and the Cannot post dialog names the problem, the line it is on and how to fix it. The most common case is a manual journal to a control account.
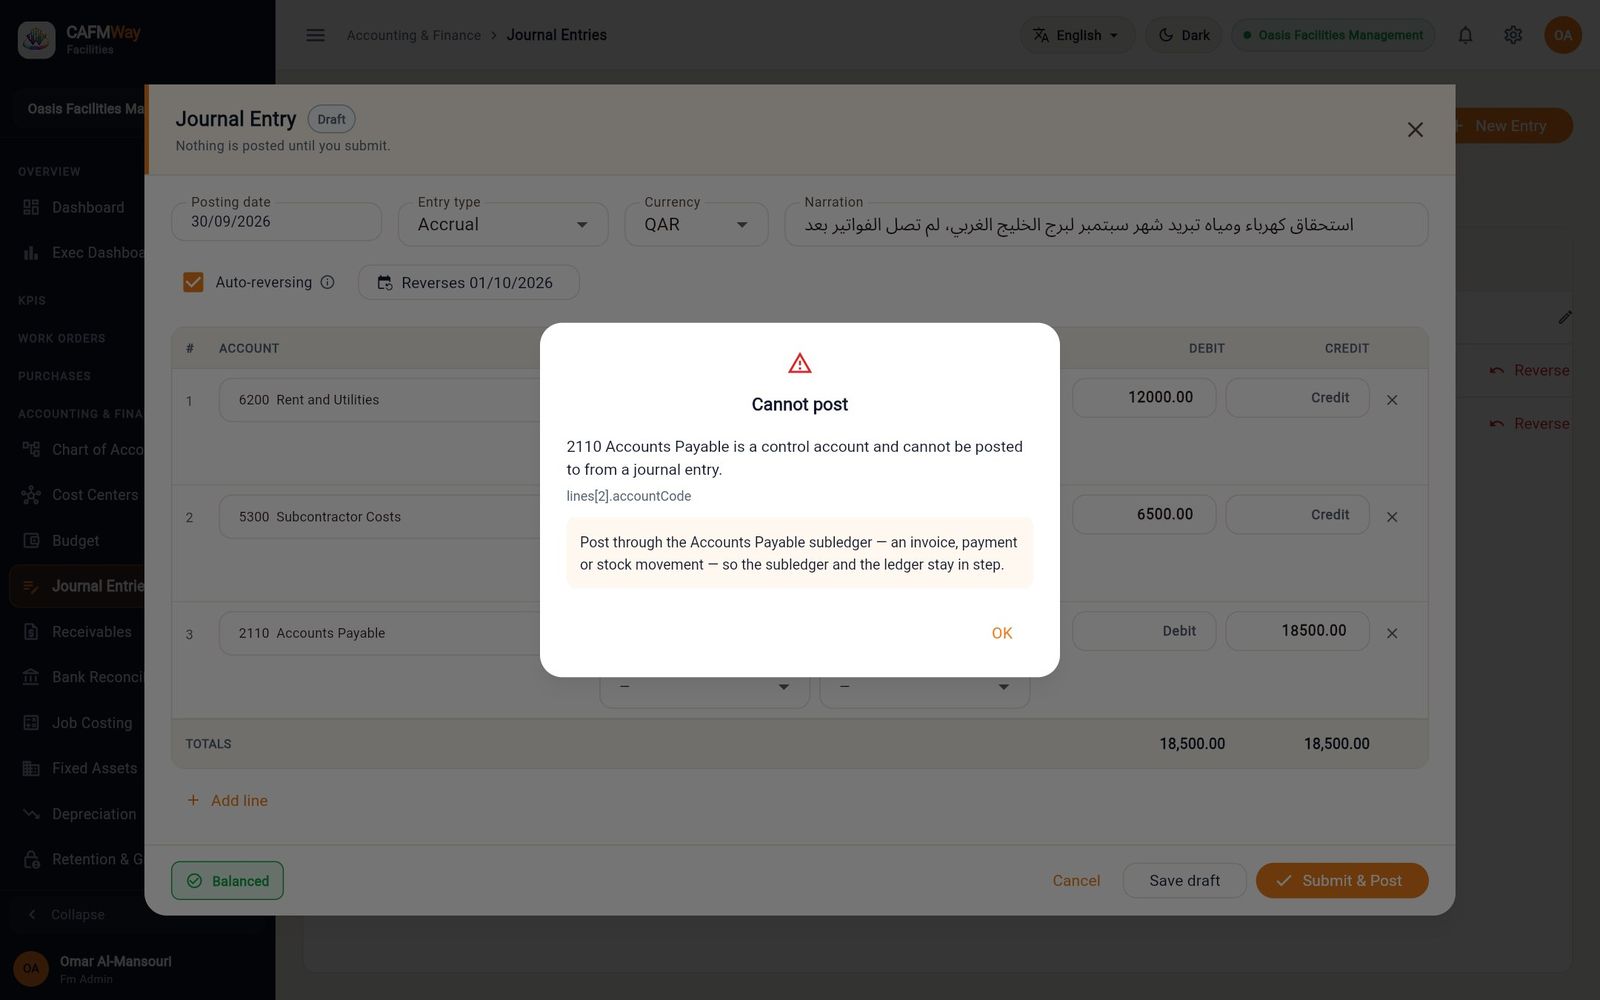
Reverse a posted entry
You never edit a posted entry. To correct one, reverse it and post the right entry.
- On the Journal Entries list, click Reverse on the row.
- In the Reason box, say why it is being reversed.
- Click Post reversal. A mirror-image voucher (numbered REV-…) is posted and the original shows Cancelled.
- Post a new entry with the correct accounts.
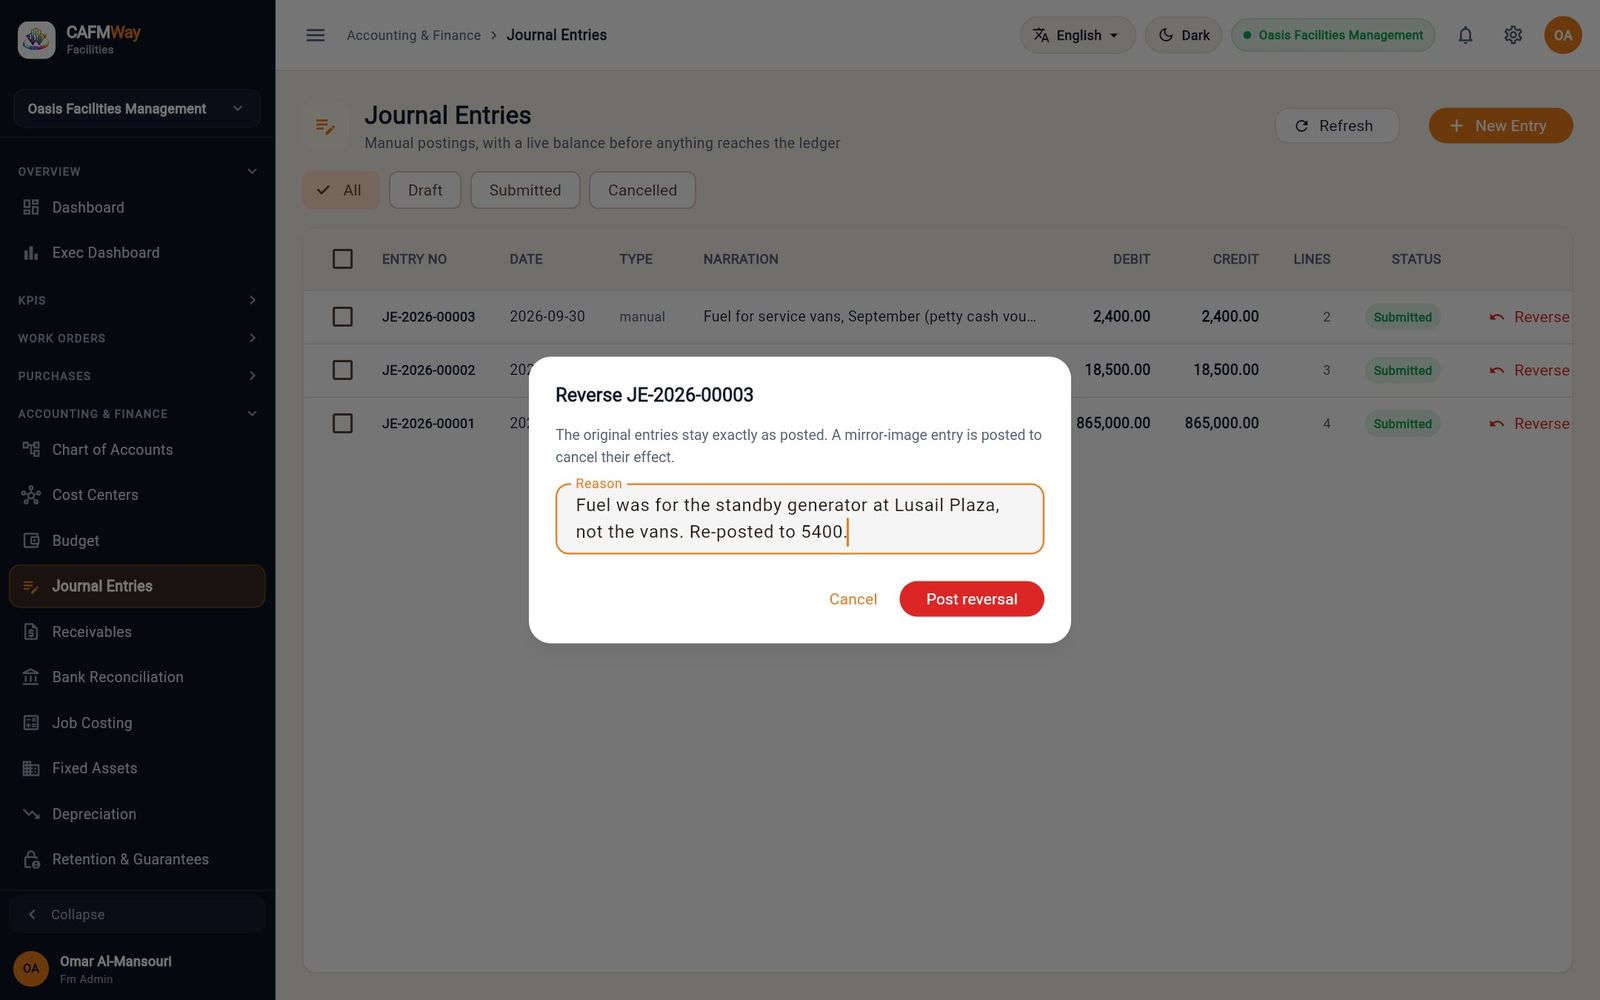
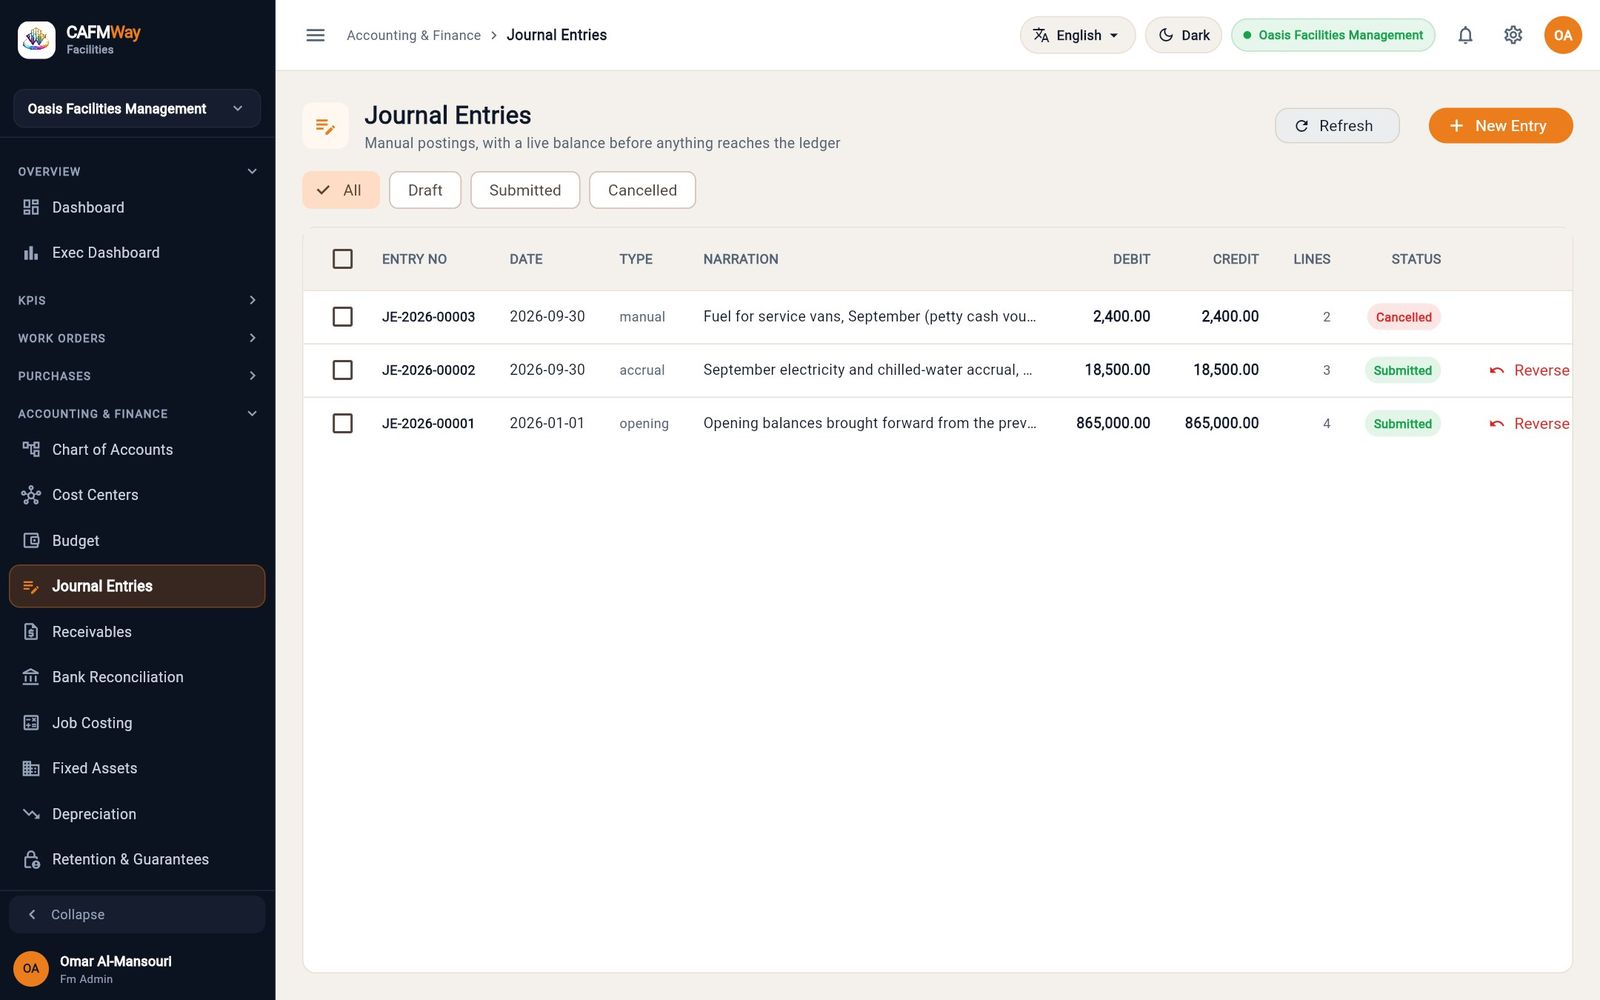
How operational documents reach the ledger
- Who: the people who approve each document; finance reads the result in the General Ledger
- Where: PURCHASES → Purchase Invoice and Payment Entry; INVENTORY stock entries; ACCOUNTING & FINANCE → Job Costing
The purchasing and stores screens are described in their own parts of this guide. This section shows what each step writes to the ledger, so finance can follow a supplier bill from receipt to payment.
flowchart TD
  PO[Purchase order] --> GR[Goods receipt]
  GR -->|Dr 1130 Inventory / Cr 2145 GRNI| GL[(General ledger)]
  PO --> PI[Purchase invoice approved]
  SV[Service bill, no PO] --> PI
  PI -->|Dr 6800 / Cr 2110 AP| GL
  PI --> PE[Payment posted]
  PE -->|Dr 2110 AP / Cr 1111 Bank| GL
  ST[Stock issued to a work order] -->|Dr 5200 / Cr 1130| GL
Purchase invoice approved
A purchase invoice posts when you click Approve on it in Purchase Invoice. It credits 2110 Accounts Payable for the gross amount, with the supplier recorded as the party. The debits are:
- The net amount is debited to 6800 Other Administrative. This is the case for service bills and, in the current version, also for invoices of goods received on a purchase order (goods receipts are not yet matched to invoices).
- Any VAT on the invoice is debited to 2160 VAT Payable.
Payment posted
A payment posts when you click Post payment in Payment Entry. It debits 2110 Accounts Payable and credits the bank. If Mode of payment is cash, the credit goes to 1113 Petty Cash; any other mode credits 1111 Main Bank Account — QAR. Each invoice it is allocated to has its outstanding amount reduced, and becomes Paid at zero.
Filter the General Ledger on 2110 Accounts Payable to see both sides: the invoice credit and the payment debit that clears it.
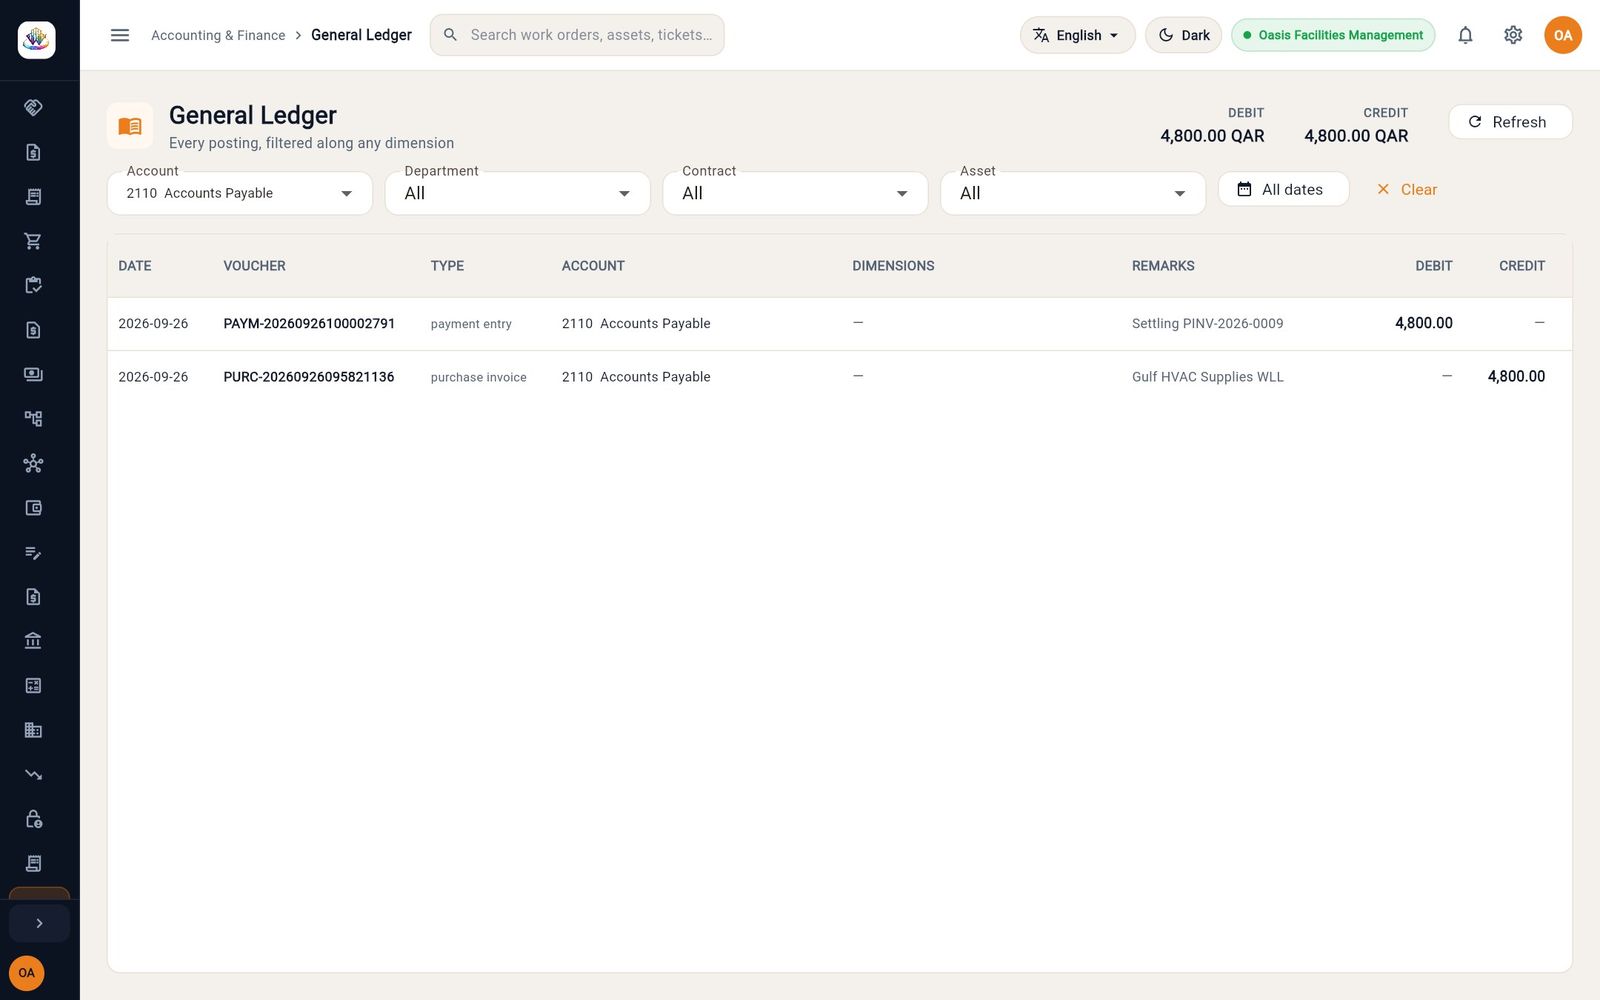
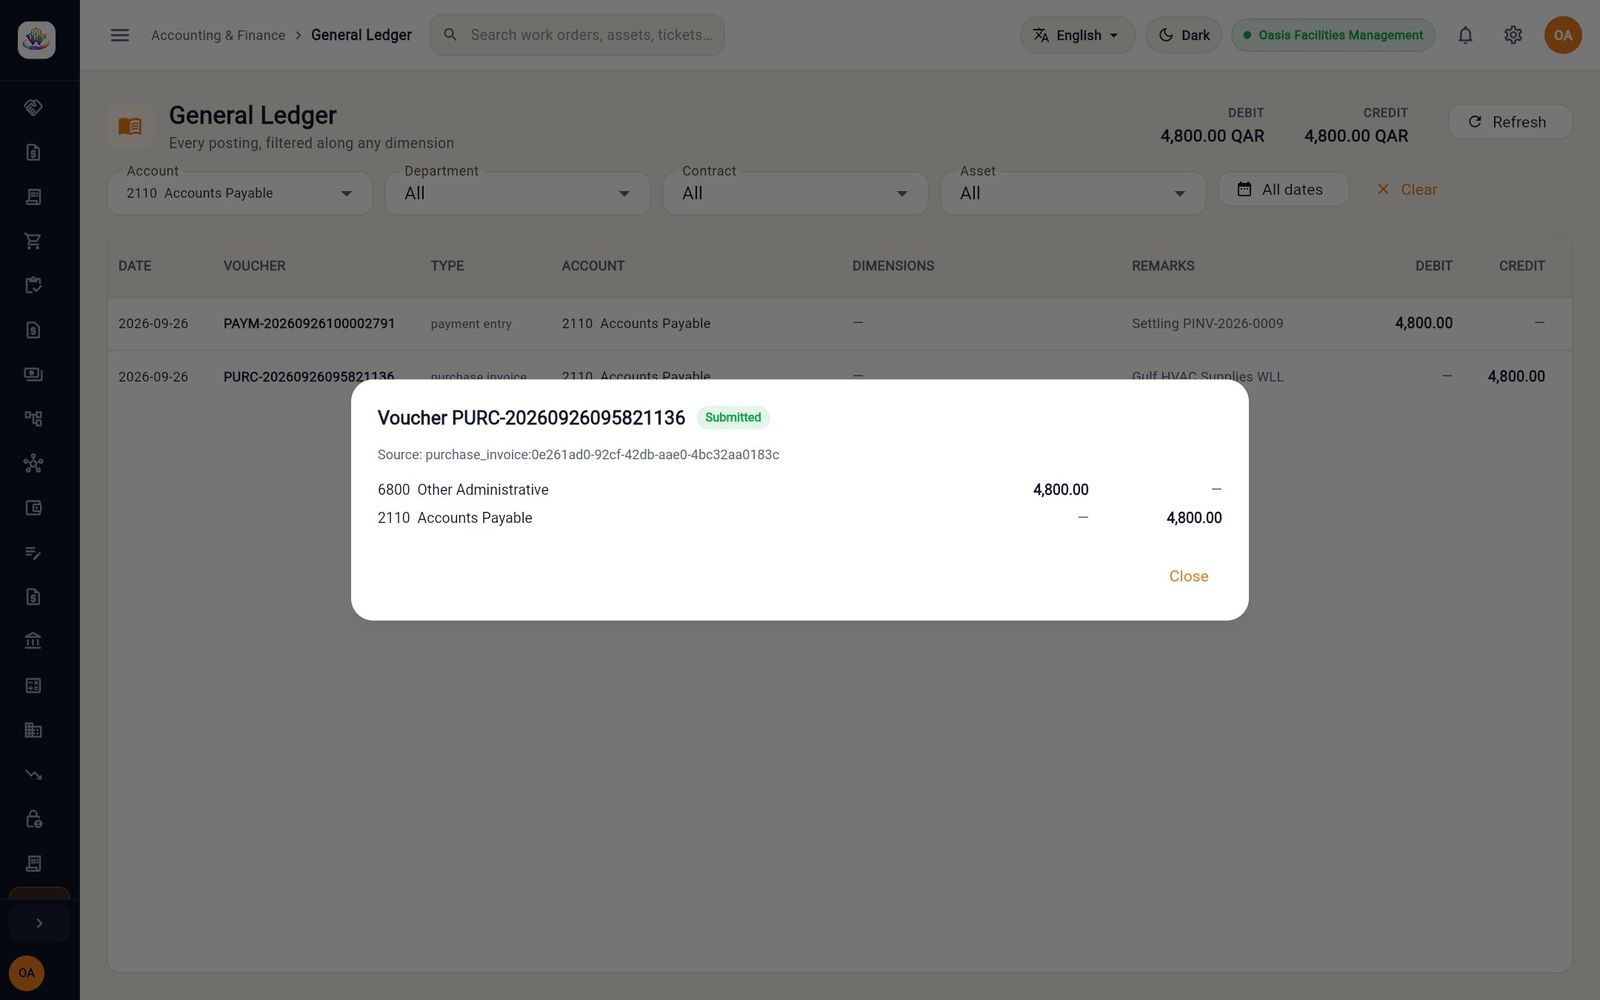
Stock movements
Every submitted stock entry posts at the value of the stock moved:
| Stock entry type | Debit | Credit |
|---|---|---|
| Opening stock | 1130 Inventory — Stores | 3200 Retained Earnings |
| Receipt against a purchase order | 1130 Inventory — Stores | 2145 Goods Received Not Invoiced |
| Issue to a work order | 5200 Materials and Parts Consumed (work order) | 1130 Inventory — Stores |
| Return from a work order | 1130 Inventory — Stores | 5200 Materials and Parts Consumed |
| Write-off | 6820 Stock Write-Off | 1130 Inventory — Stores |
| Count adjustment, gain | 1130 Inventory — Stores | 6810 Stock Count Adjustment |
| Count adjustment, loss | 6810 Stock Count Adjustment | 1130 Inventory — Stores |
| Rotable sent for repair | 1136 Rotables — Repair in Progress | 1130 Inventory — Stores |
| Transfer between stores | no ledger entry (same account) |
Materials issued to a work order are also written to that work order's cost, so they appear in Job Costing without further action.
Work order labour: job costing
- Who: Journal Entry report access
- Where: Sidebar → ACCOUNTING & FINANCE → Job Costing
Labour is costed from the time technicians log on a work order, at the hourly cost rate of their job title (the seeded rate cards are Technician 55, First Technician 85 and Supervisor 120 QAR per hour).
- Open Job Costing. The banner shows how many completed work orders are not yet costed.
- Filter with Work order number or title… or pick a Contract.
- Scroll the table to the right and click Cost on a work order. The labour is posted and the row fills in its LABOUR, MATERIAL, SUBCONTRACT, OTHER and TOTAL columns.
- Click a row to see the cost breakdown: actual against estimate, how each cost was calculated and the ledger postings.
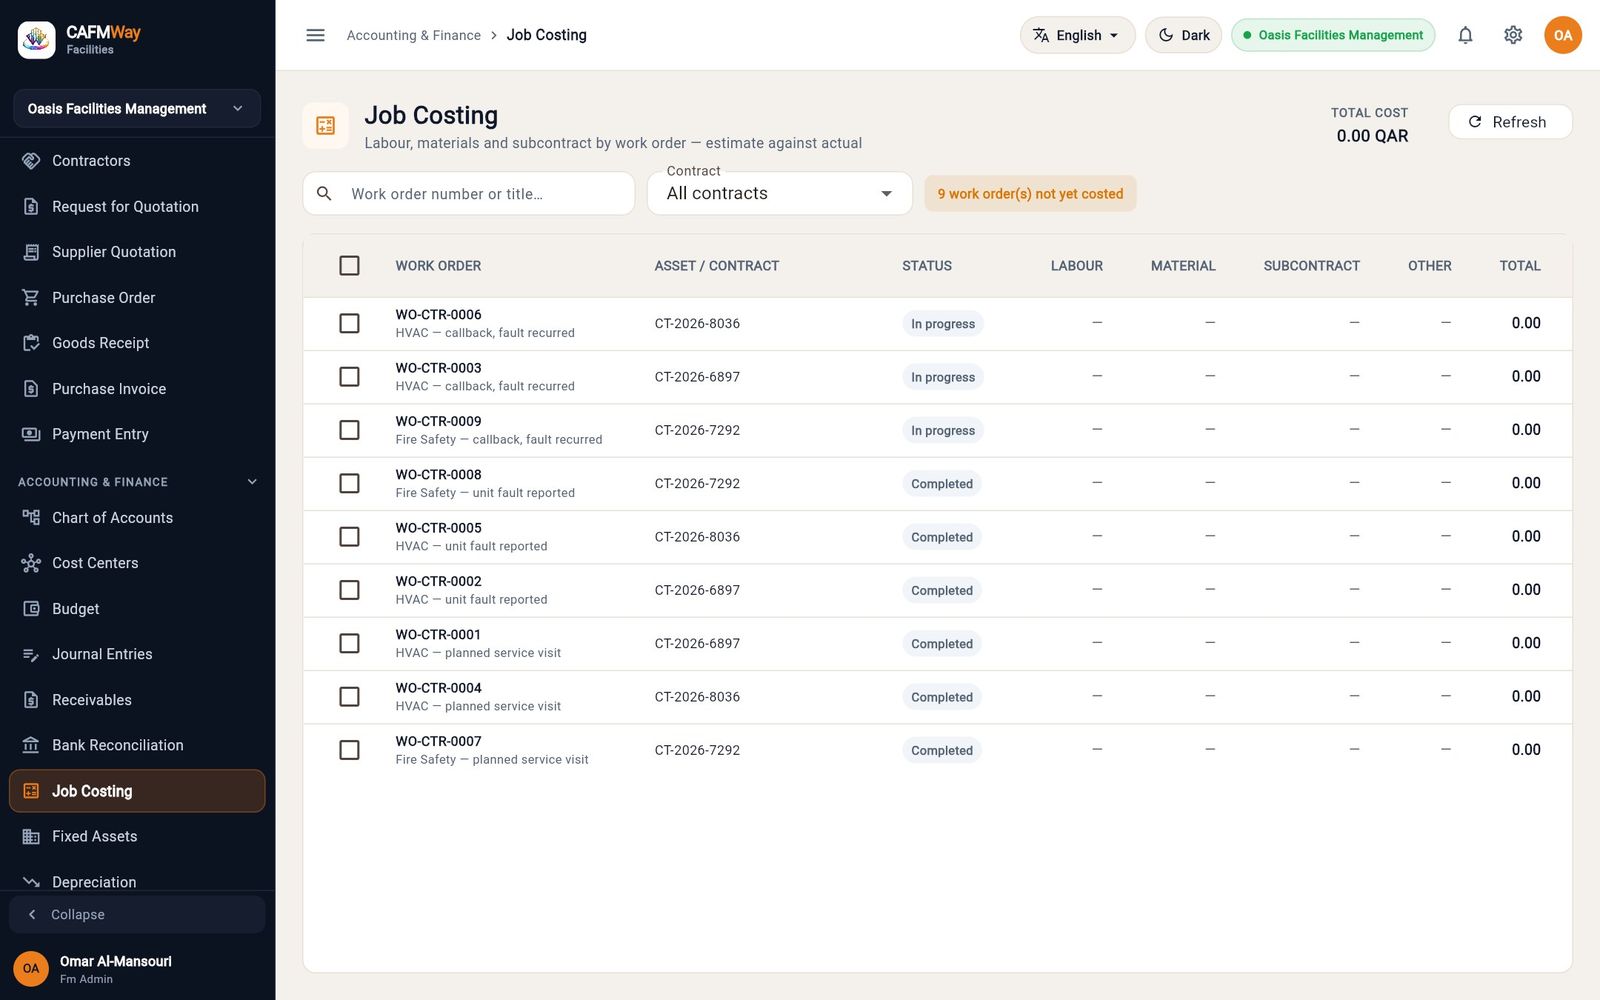
Contractor financials
Amounts owed to and paid to contractor companies are kept on the contractor's own account: PURCHASES → Contractors → open the contractor → Financials. The tab shows contract value, expenses, penalties raised by the SLA engine and the outstanding balance. Use Add Entry to record an expense, a payment or a credit note.
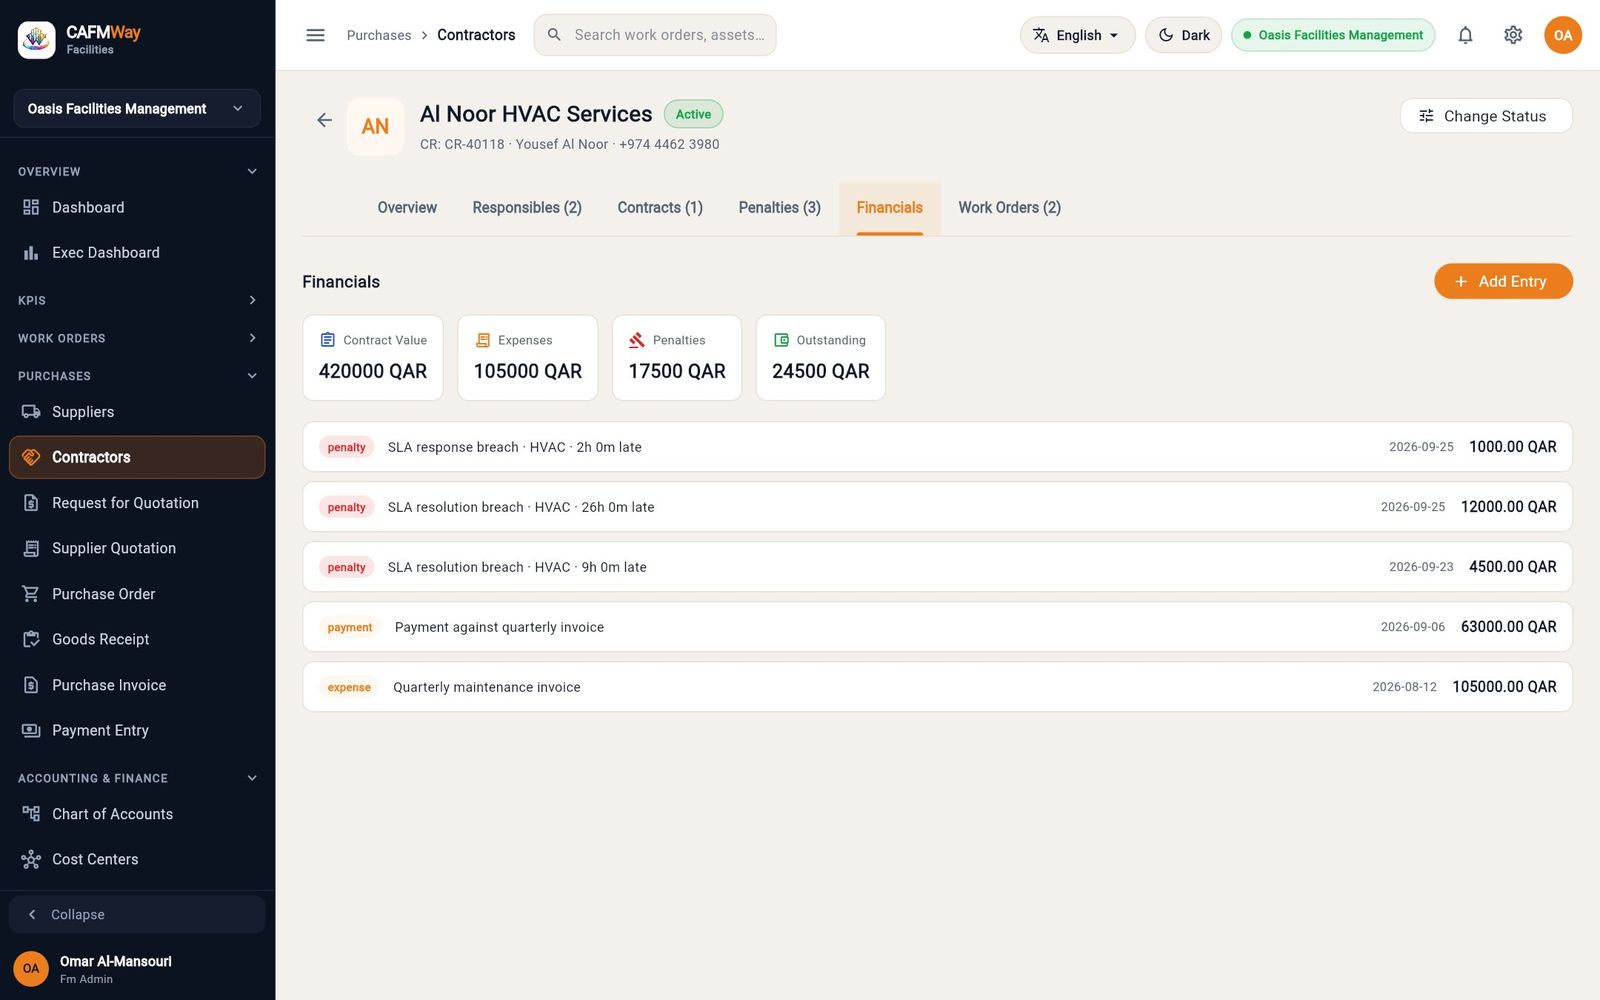
General ledger enquiry
- Who: Journal Entry read access
- Where: Sidebar → ACCOUNTING & FINANCE → General Ledger
The General Ledger lists every posting line, newest first, with its date, voucher, type, account, dimensions, remarks and amount. The totals at the top show the debits and credits of what is currently listed.
- Filter with Account, Department, Contract and Asset, or pick a date range with All dates.
- Click Clear to remove the filters.
- Click a line to open its voucher. The voucher shows every line of the entry, the source document it came from and, if it was reversed, Reversed by and the reversal number.
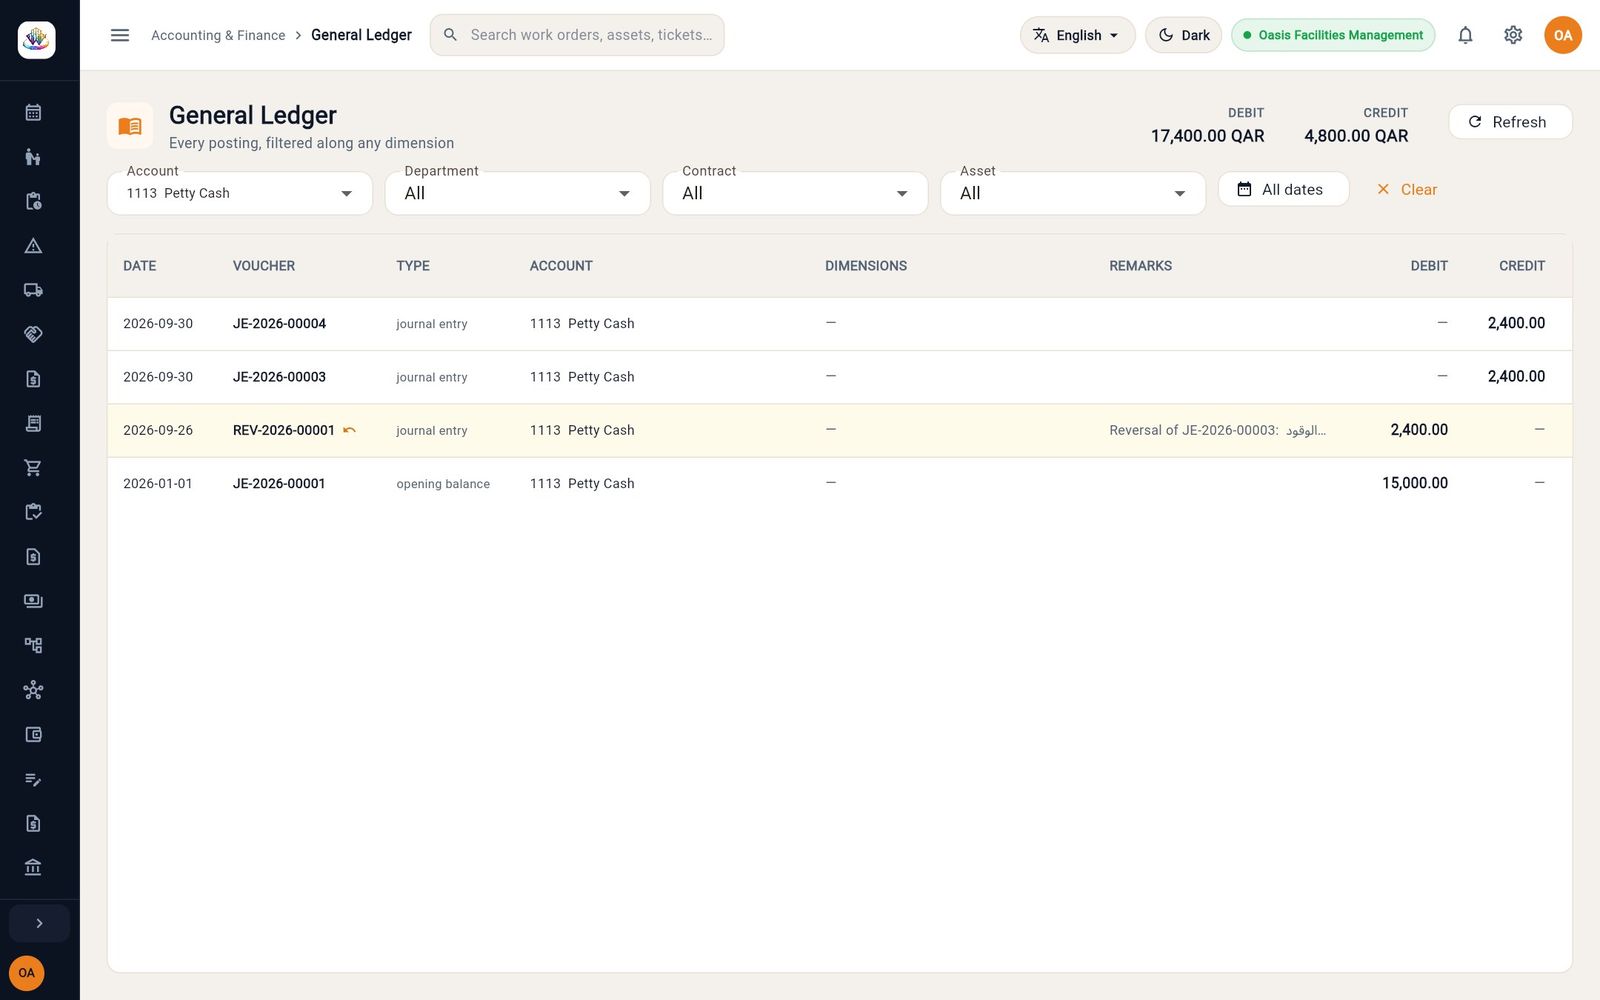
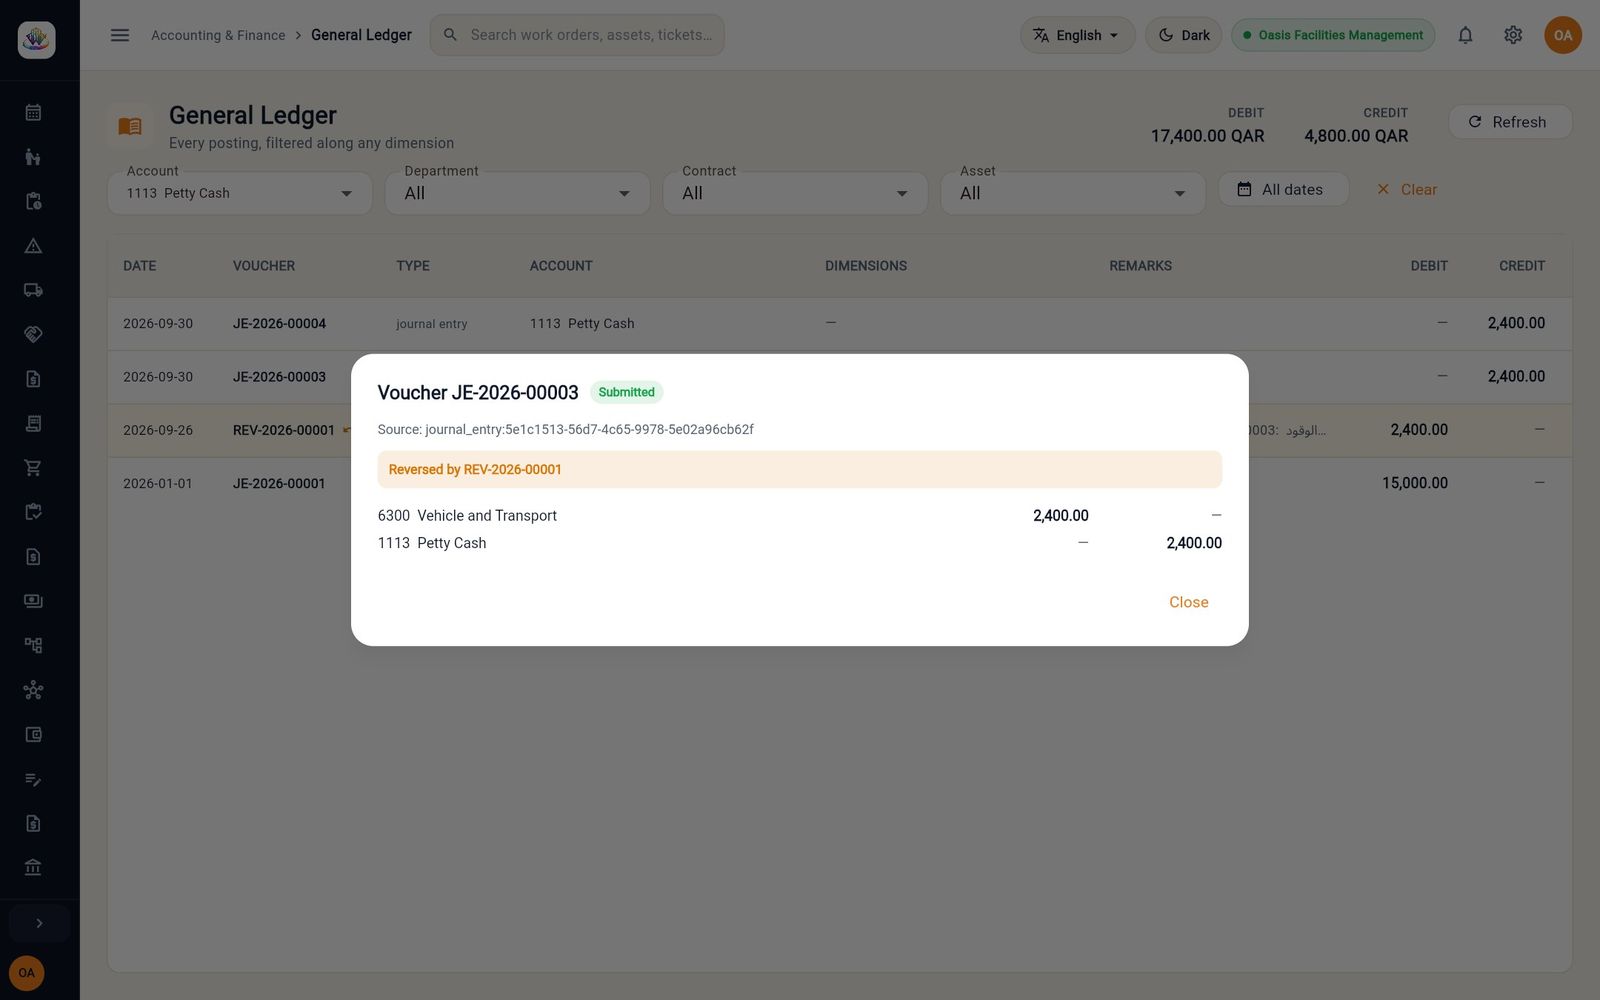
Fixed assets and depreciation
- Who: Journal Entry report access plus Company write access (FM Administrator)
- Where: Sidebar → ACCOUNTING & FINANCE → Depreciation and Fixed Assets
The Fixed Assets register lists capitalised assets with their gross cost, accumulated depreciation and net book value. The Depreciation page shows the charges due up to a date and posts them.
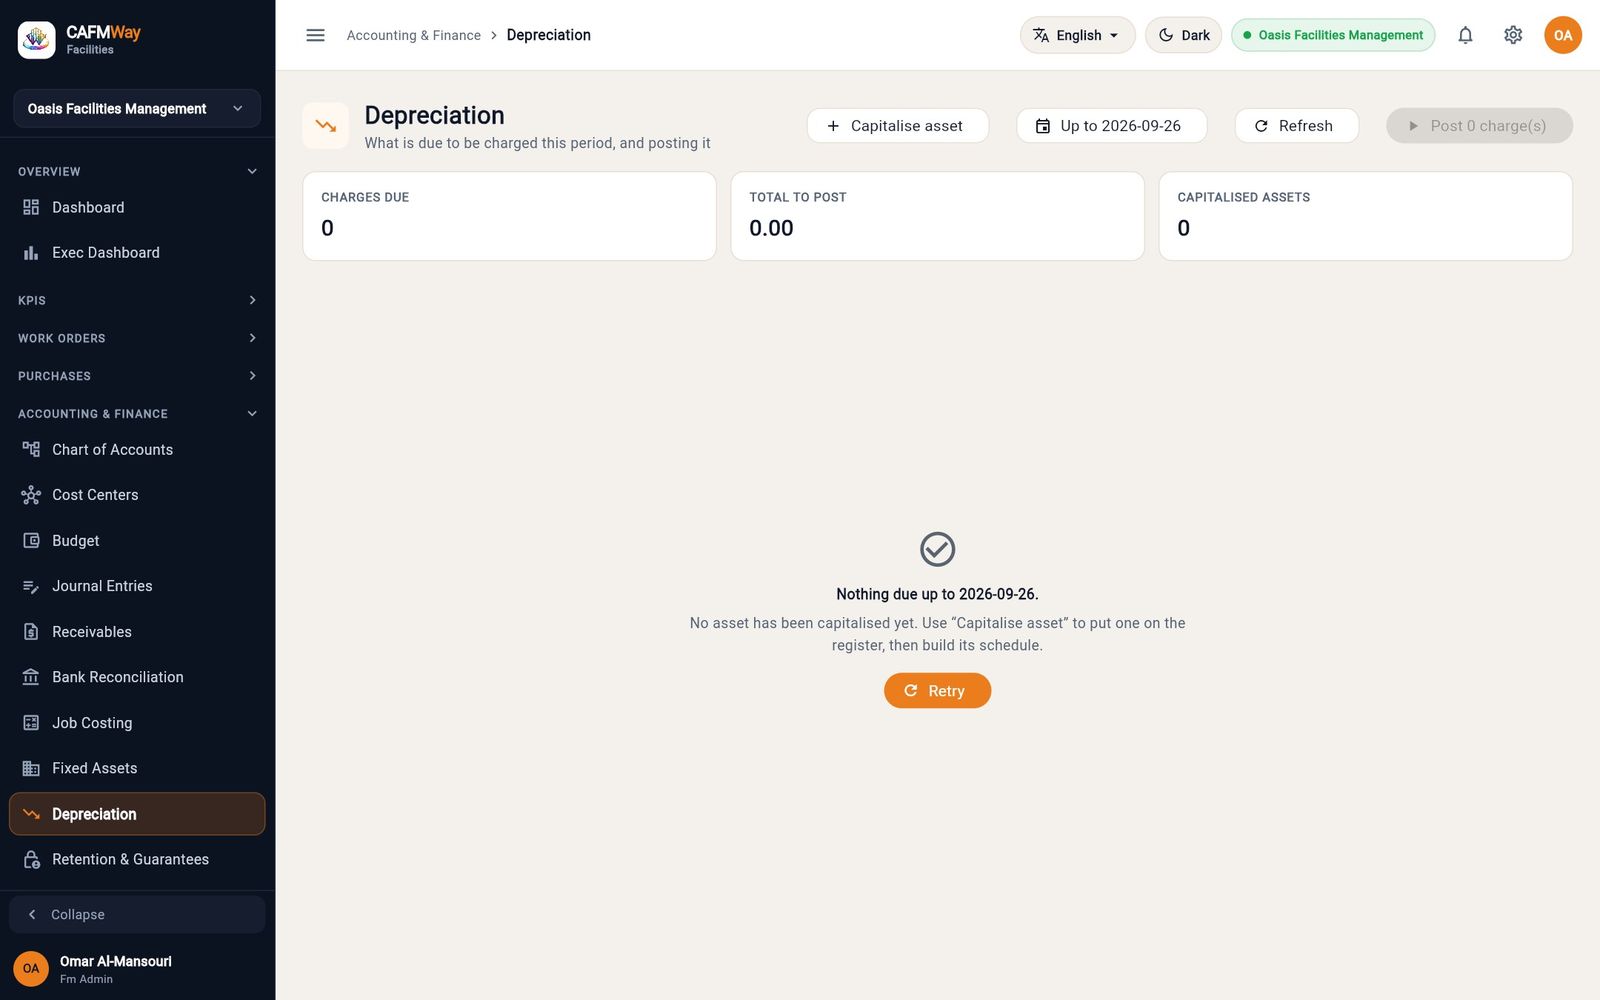
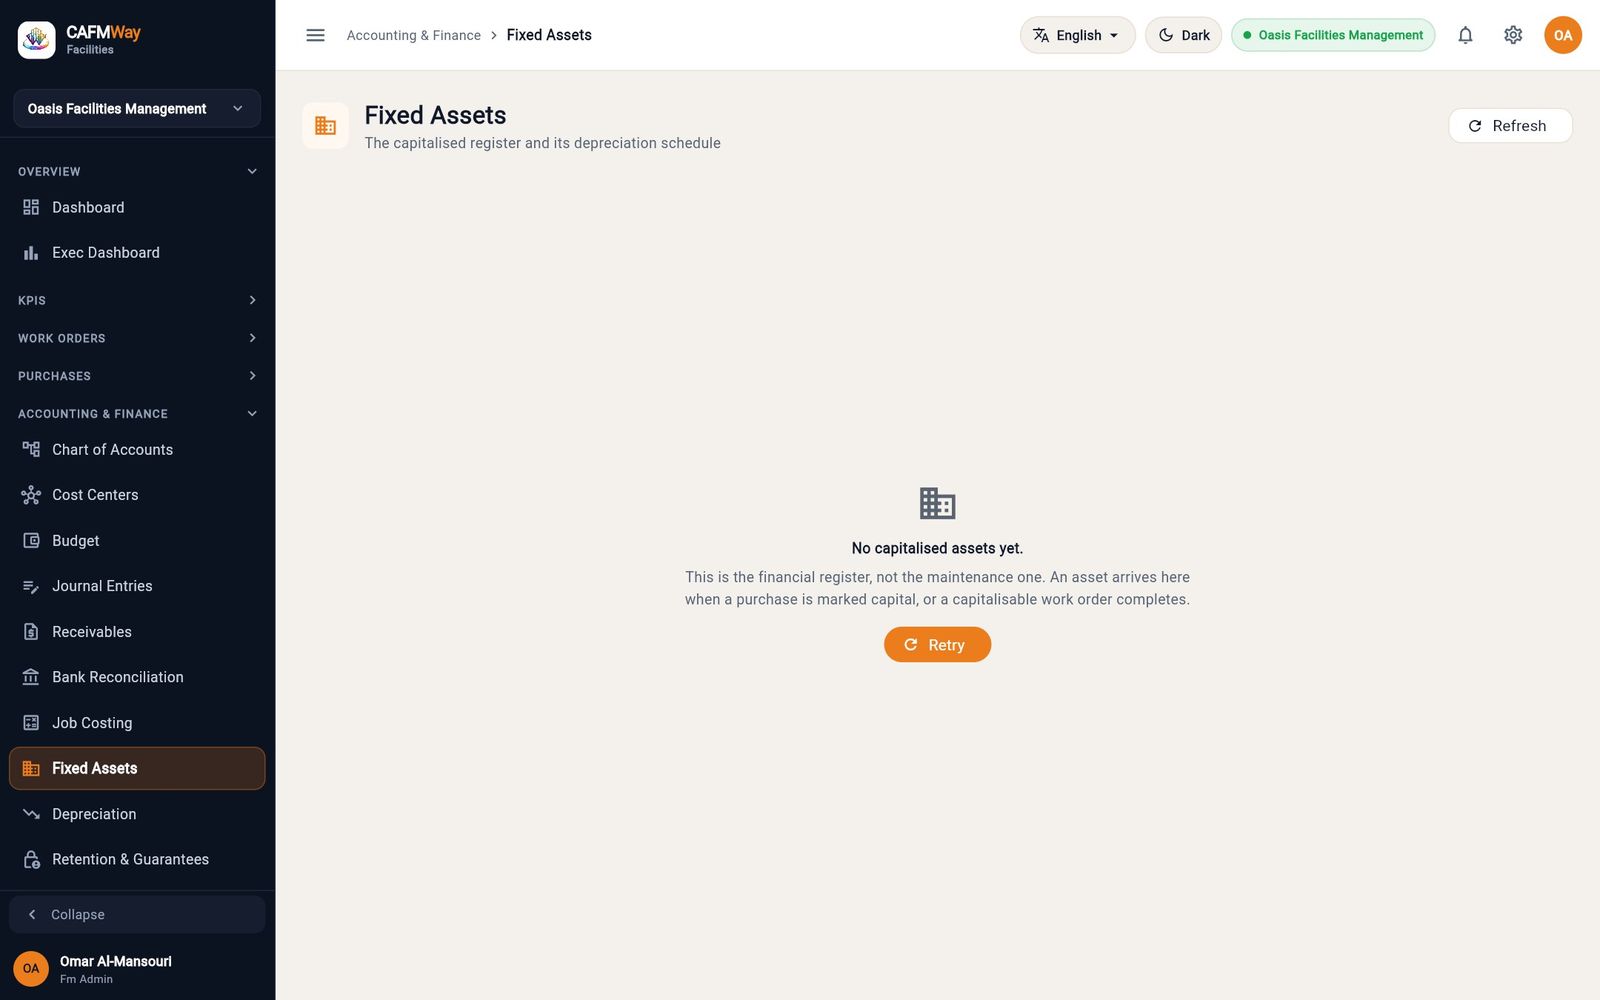
When assets are on the register, the Depreciation page lists every charge due up to the date on the Up to button, with the CHARGES DUE and TOTAL TO POST tiles above it.
- Click the Up to button and choose the last day to charge, normally the month end.
- Click Post {n} charge(s).
- In Post the depreciation run?, click Post. Each asset posts one voucher per month, dated to its own scheduled month. A charge that cannot post, for example into a closed month, is skipped and reported, and the rest still post.
Receivables
- Who: Invoice access; receipts also need Payment Entry access
- Where: Sidebar → ACCOUNTING & FINANCE → Receivables
Receivables holds customer invoices and receipts, on two tabs: Invoices and Customers. An invoice reaches the ledger when it is issued, not when it is drafted.
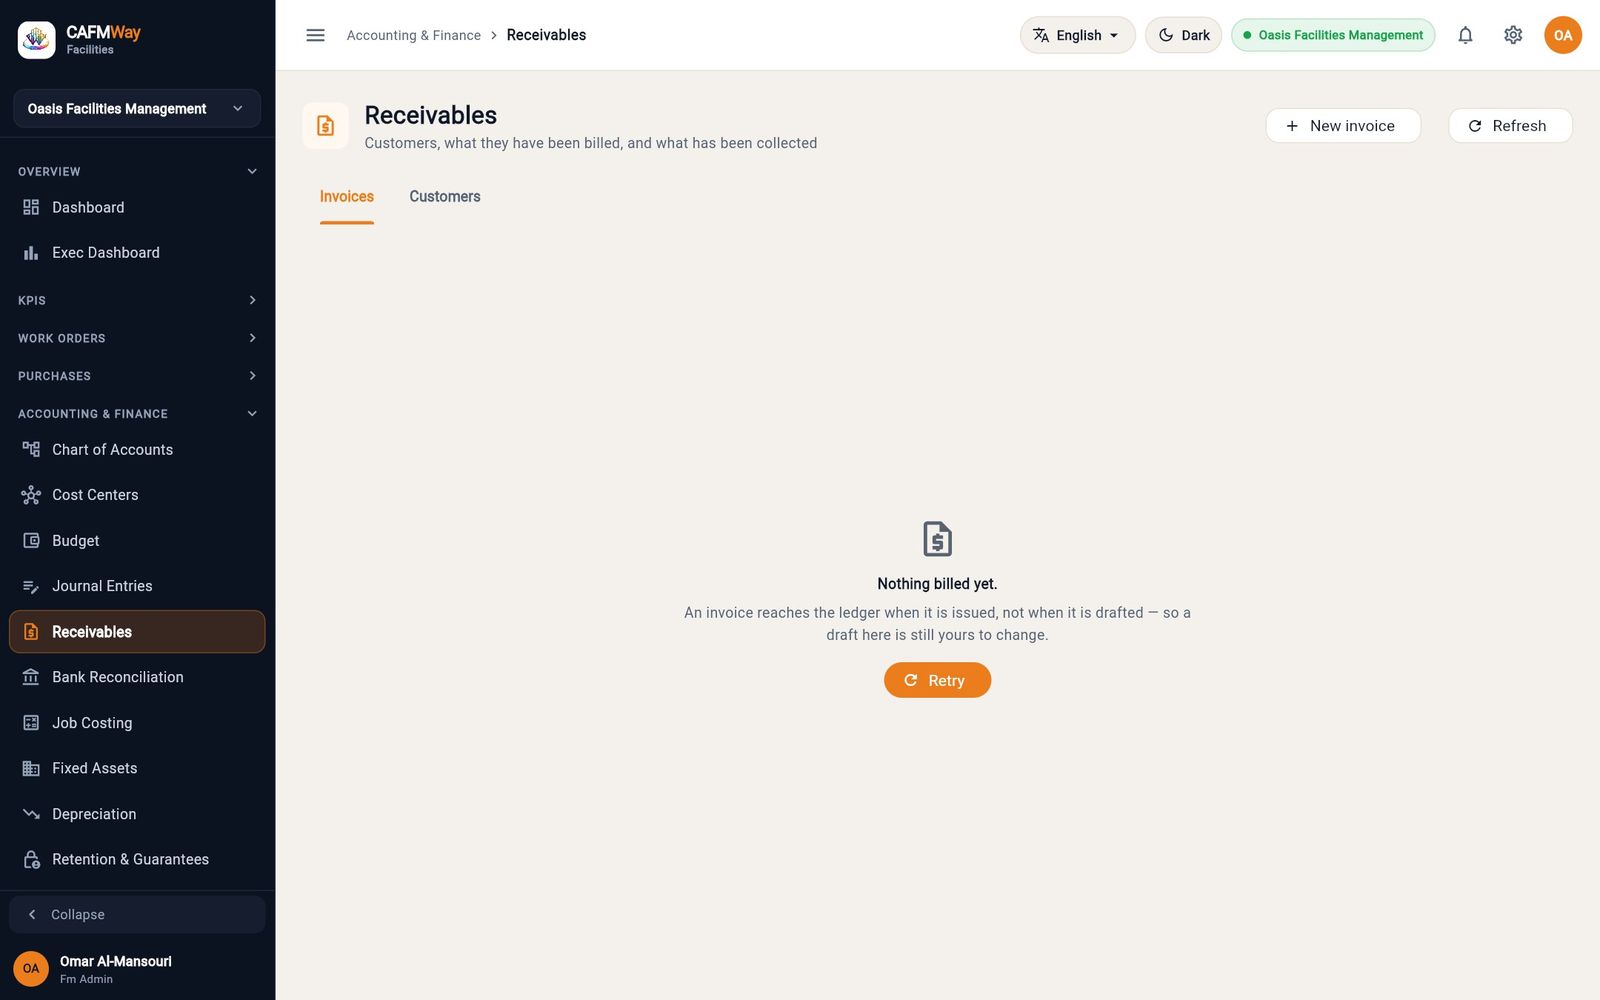
Bank reconciliation
- Who: Journal Entry read access to view; Company write access to import and sign off
- Where: Sidebar → ACCOUNTING & FINANCE → Bank Reconciliation
The page shows the ledger balance of each bank and cash account and when it was last reconciled. Reconciliation matches the bank's statement lines to the postings already in the ledger. It posts nothing itself.
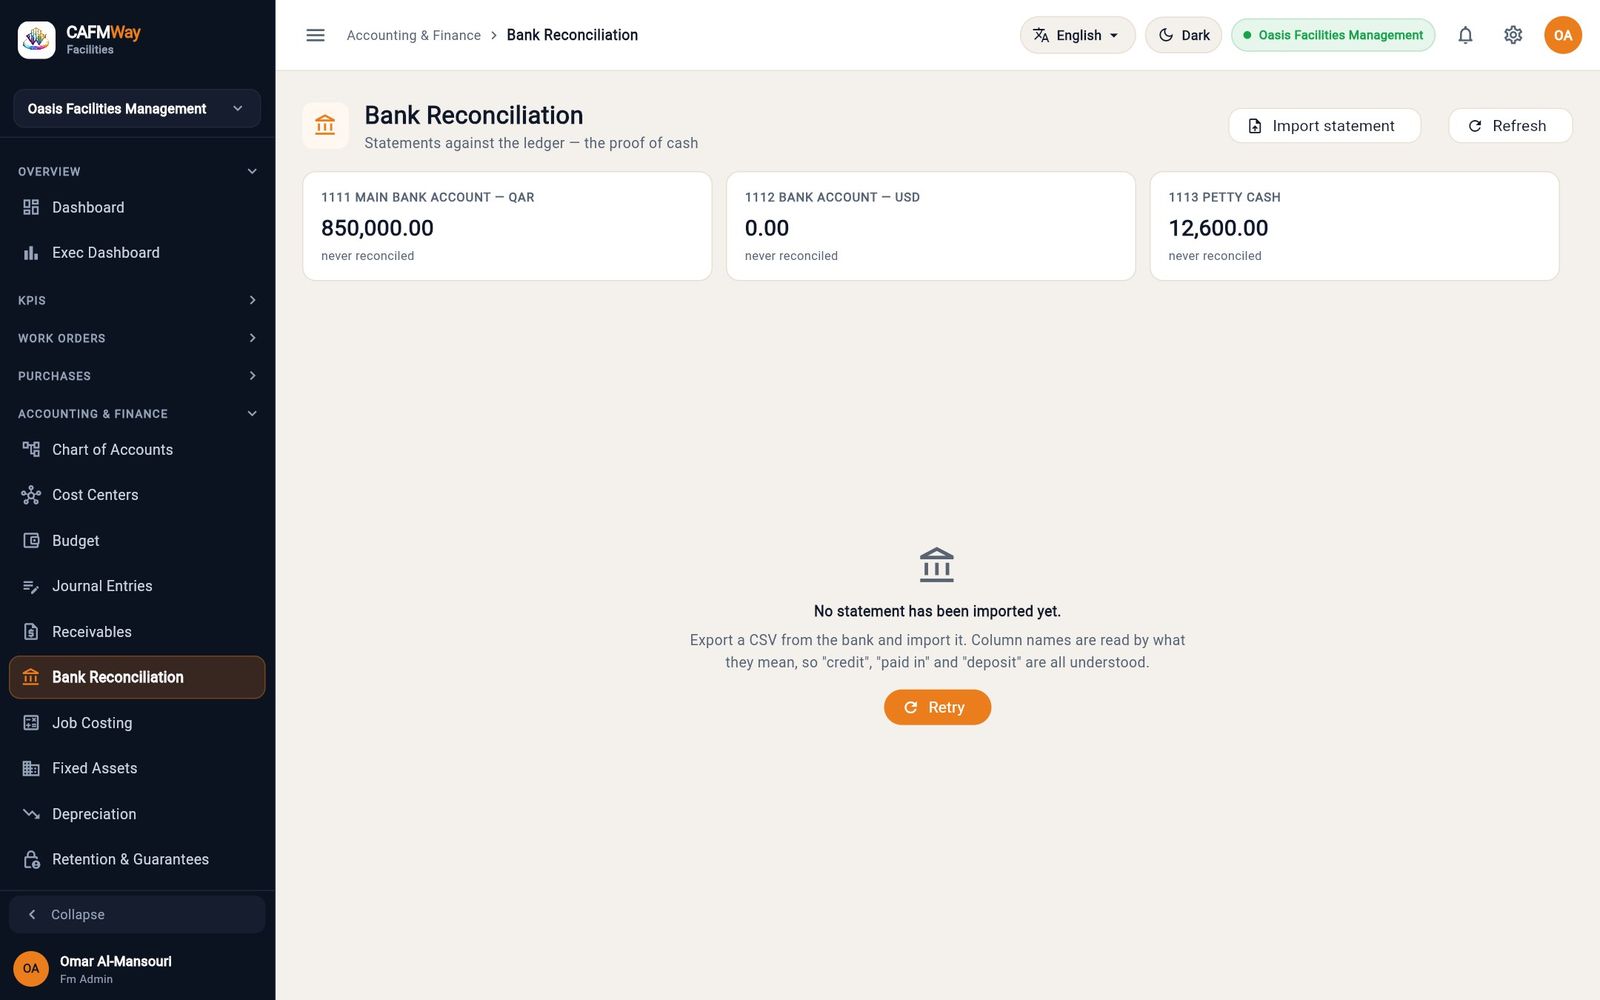
Retention and guarantees
- Who: Journal Entry report access
- Where: Sidebar → ACCOUNTING & FINANCE → Retention & Guarantees
This read-only register shows retention held from you by customers (1140 Retention Receivable), retention you hold from suppliers (2120 Retention Payable) and active bank guarantees with their expiry dates. Retention appears when an invoice is posted with a retention percentage.
Tax and withholding tax
- Who: Journal Entry report access
- Where: Sidebar → ACCOUNTING & FINANCE → Tax & WHT
The Tax page shows, for the month you pick:
- WHT THIS MONTH: withholding tax deducted from payments to non-resident service providers.
- REMIT BY: the deadline for paying it to the tax authority, the 16th of the following month through the Dhareeba portal, with the days remaining.
- Deductions this month: the payments behind the total.
- Tax rules in force: the dated rates the system applies: 5% WHT on services to non-residents, 0% VAT (structure only) and 10% corporate tax.
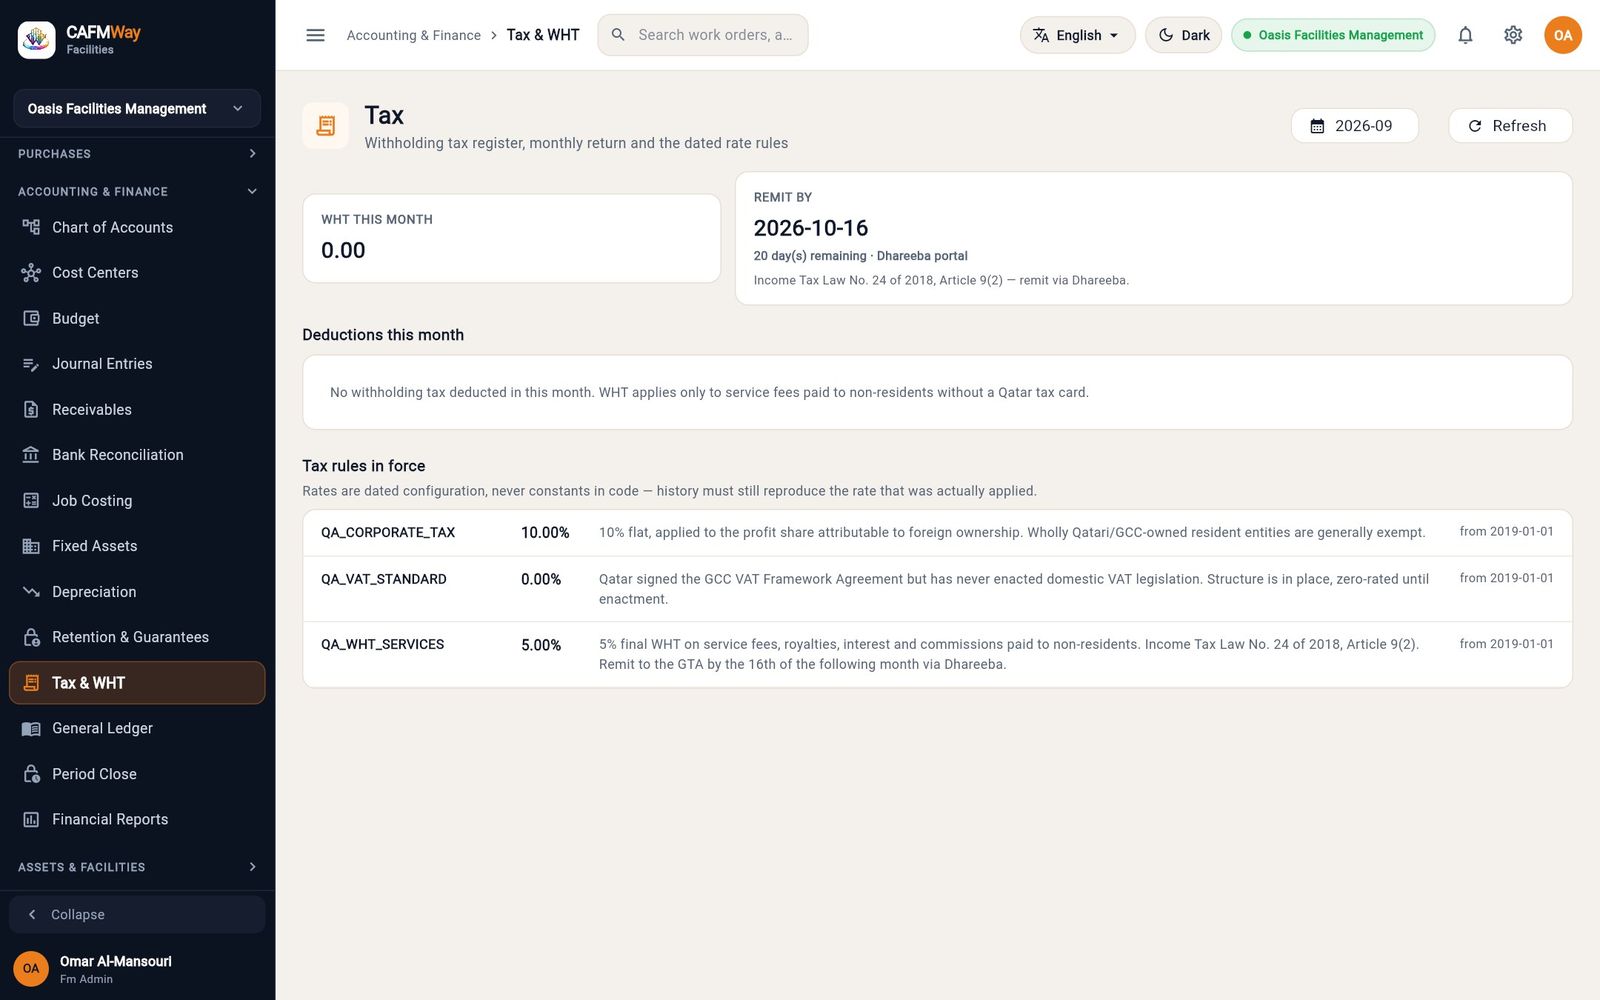
Period close
- Who: Journal Entry submit to close; Company write access as well to reopen (FM Administrator)
- Where: Sidebar → ACCOUNTING & FINANCE → Period Close
Closing a month stops anything else from being posted into it. Before a month can close, ten checks run against it. Checks marked BLOCKING must pass; the others are warnings.
| # | Check | Type |
|---|---|---|
| 1 | All completed work orders have costs posted | Blocking |
| 2 | No draft invoices dated in the period | Warning |
| 3 | Stock and adjustment journals posted (no draft journals) | Blocking |
| 4 | Depreciation run for the period | Blocking |
| 5 | Prior auto-reversing accruals reversed | Blocking |
| 6 | FX revaluation of foreign-currency balances | Warning |
| 7 | Bank reconciliation complete | Confirm manually |
| 8 | Subledger tie-out (AR, AP, inventory, retention, fixed assets) | Blocking |
| 9 | Trial balance sums to zero | Blocking |
| 10 | Budget variance reviewed | Information |
Close a month
- Open Period Close and pick the month in the list on the left. Each month shows its number of postings and whether it is Open or Closed.
- Read the checklist. A failing check is red and says what is wrong.
- Fix what blocks the close, then click Re-run checks.
- When every blocking check passes, click Close Period.
- Confirm with Close period. The month shows Closed.
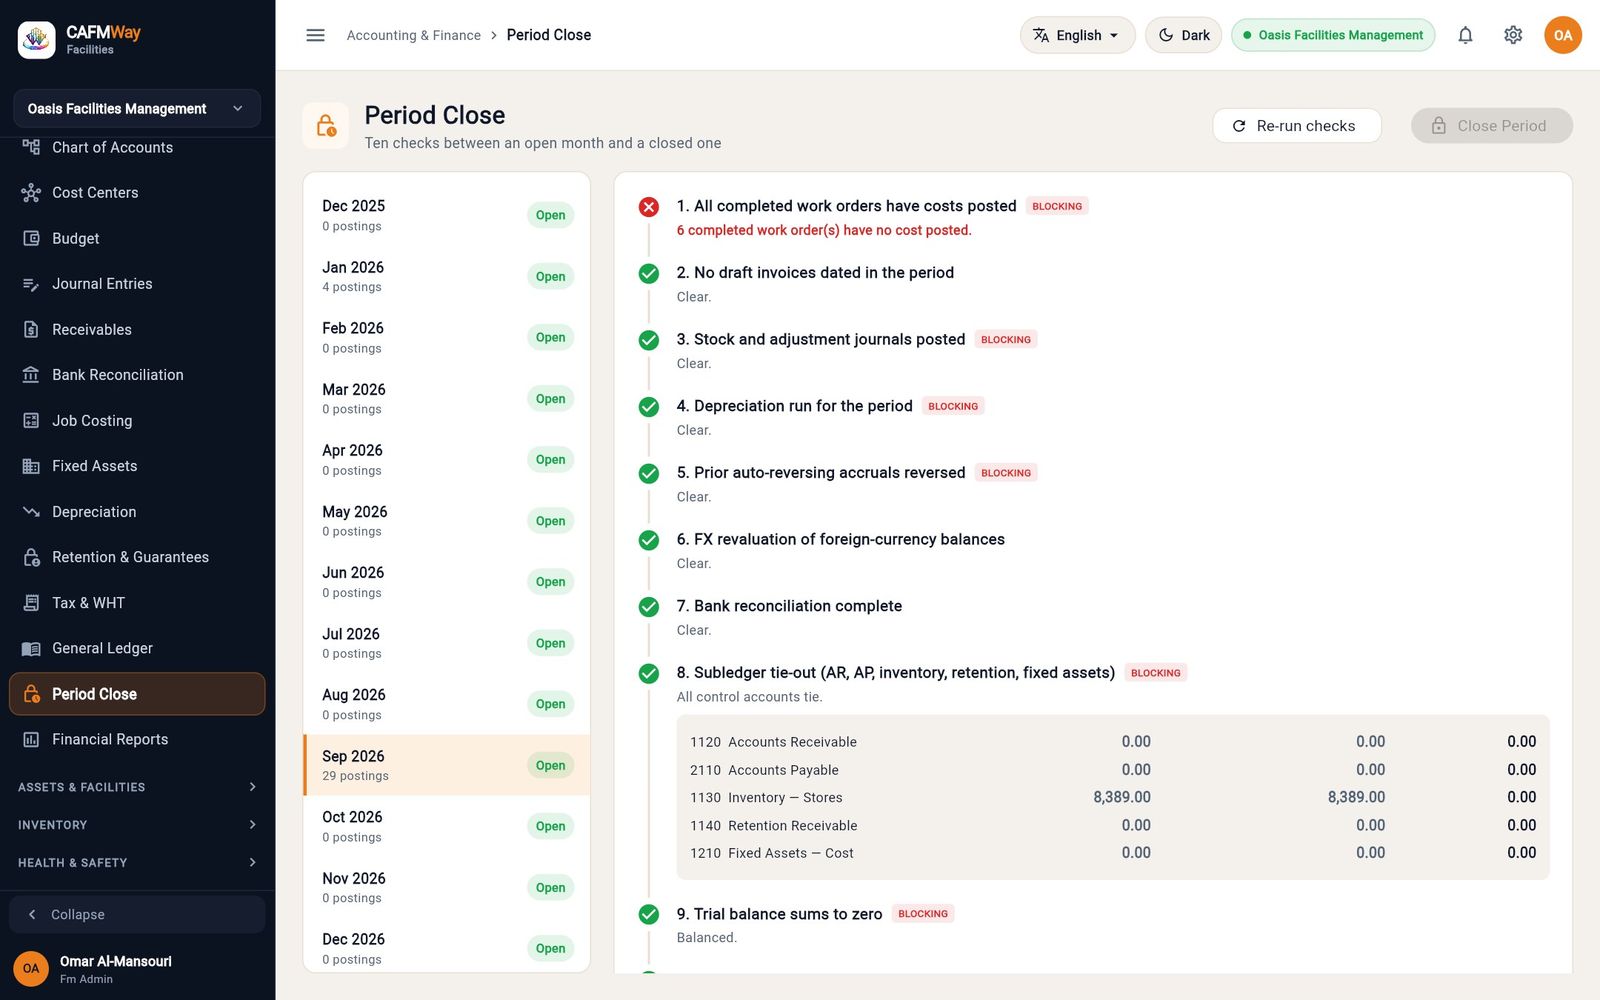
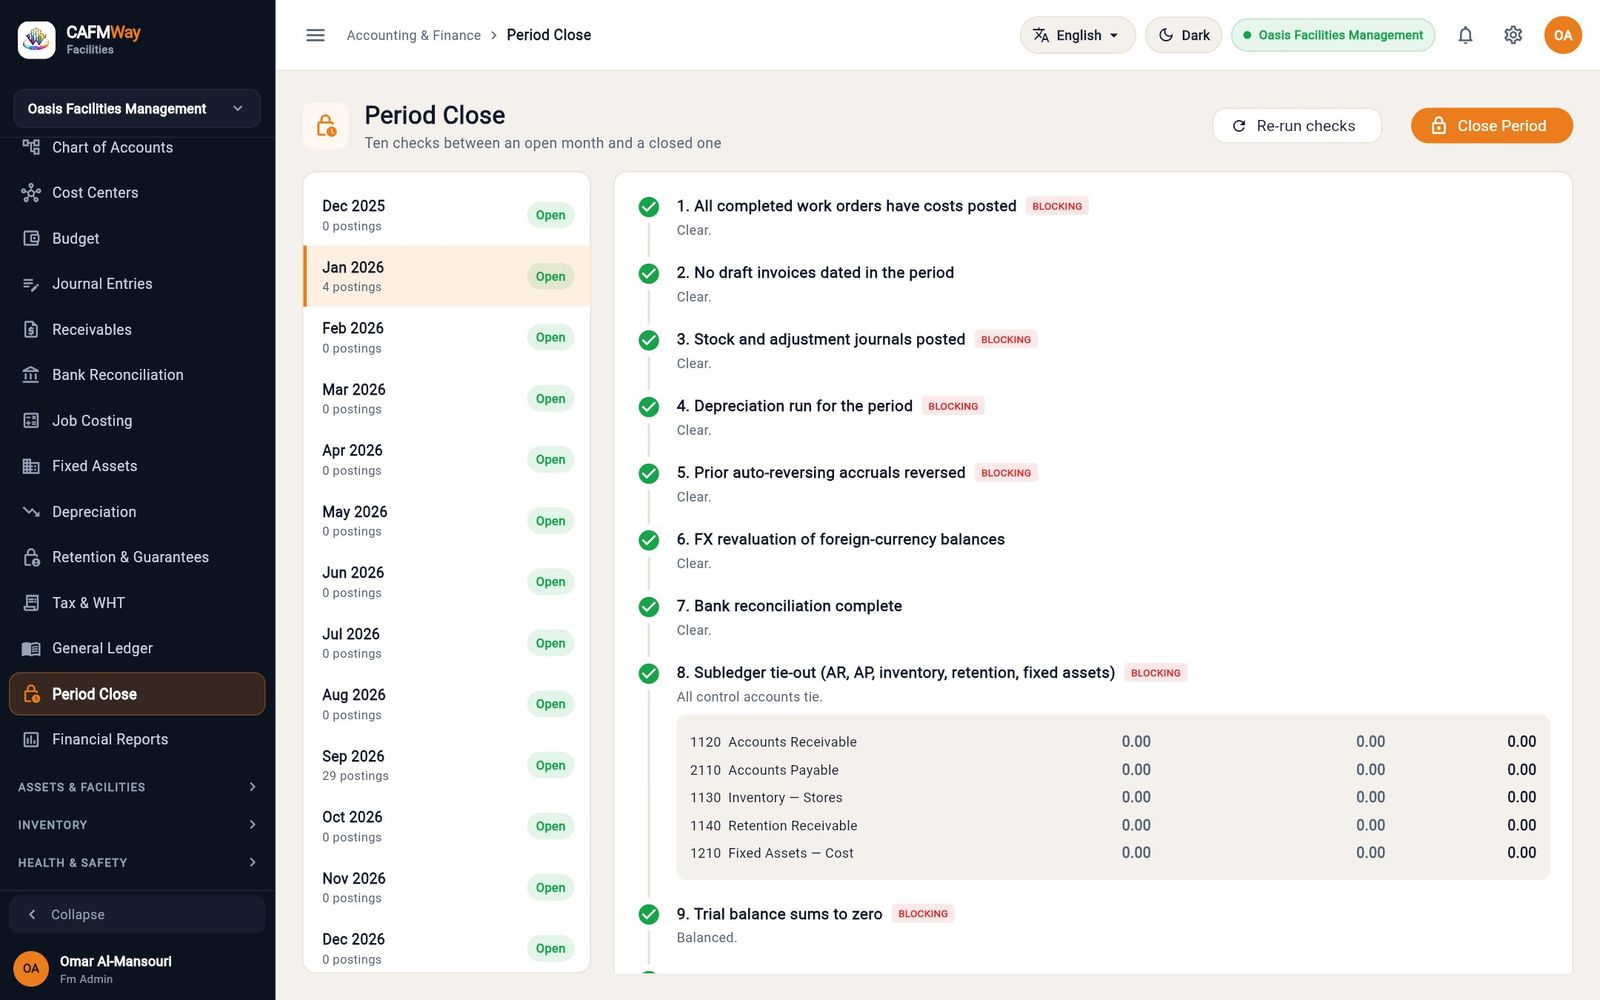
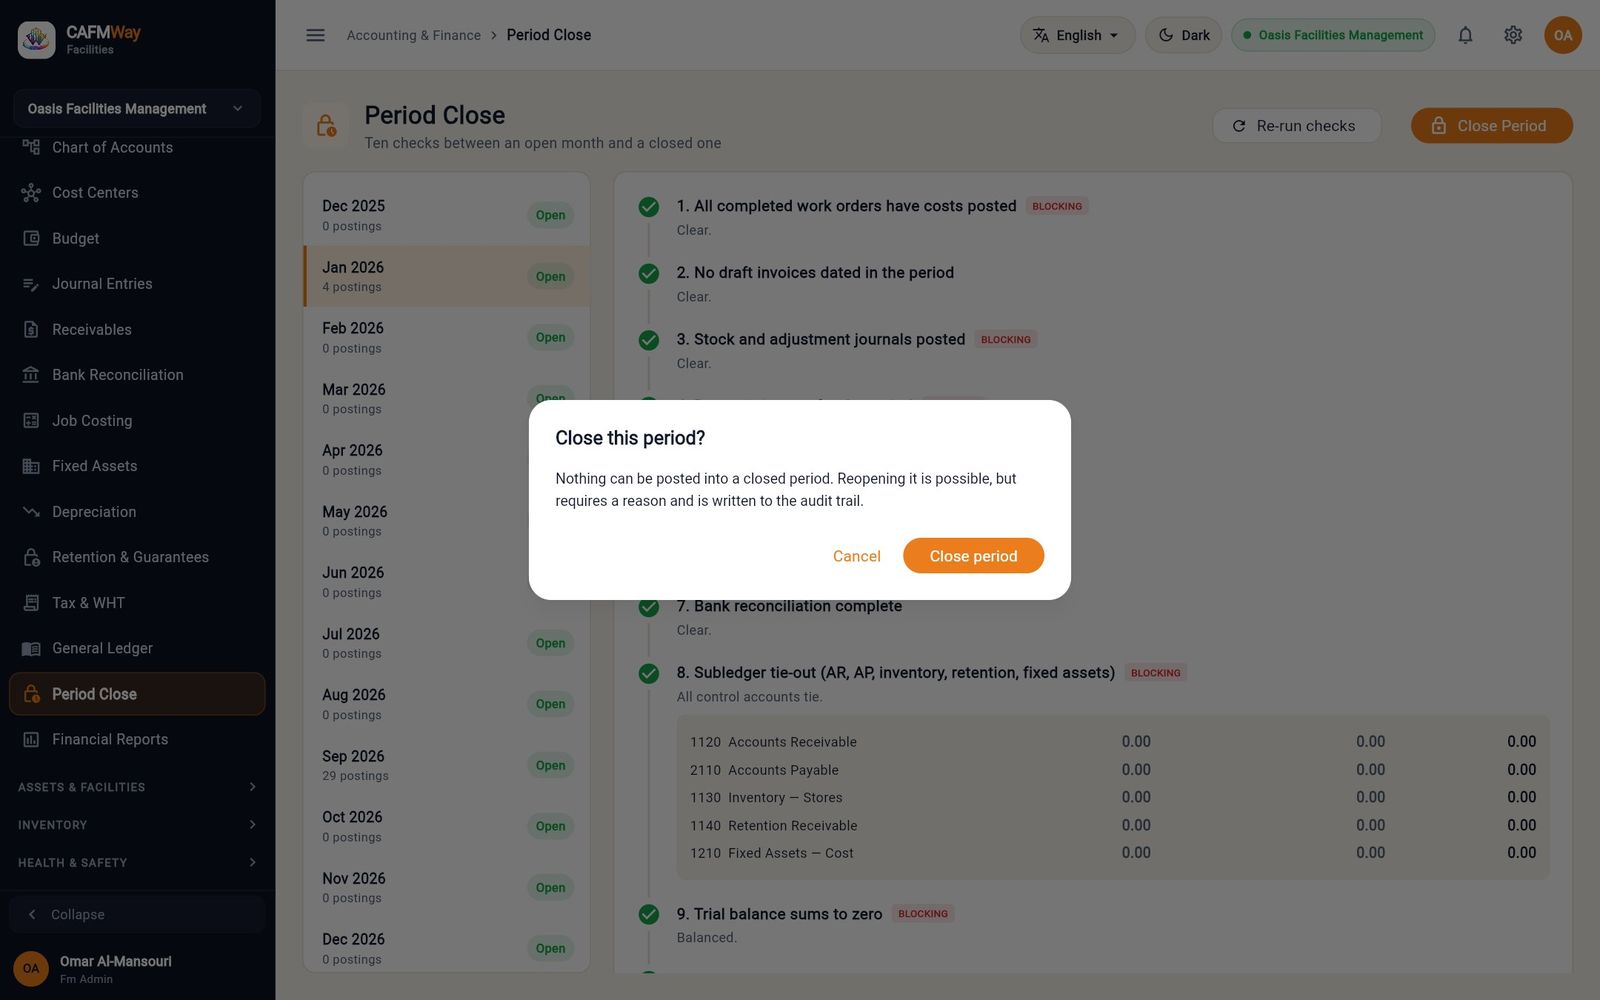
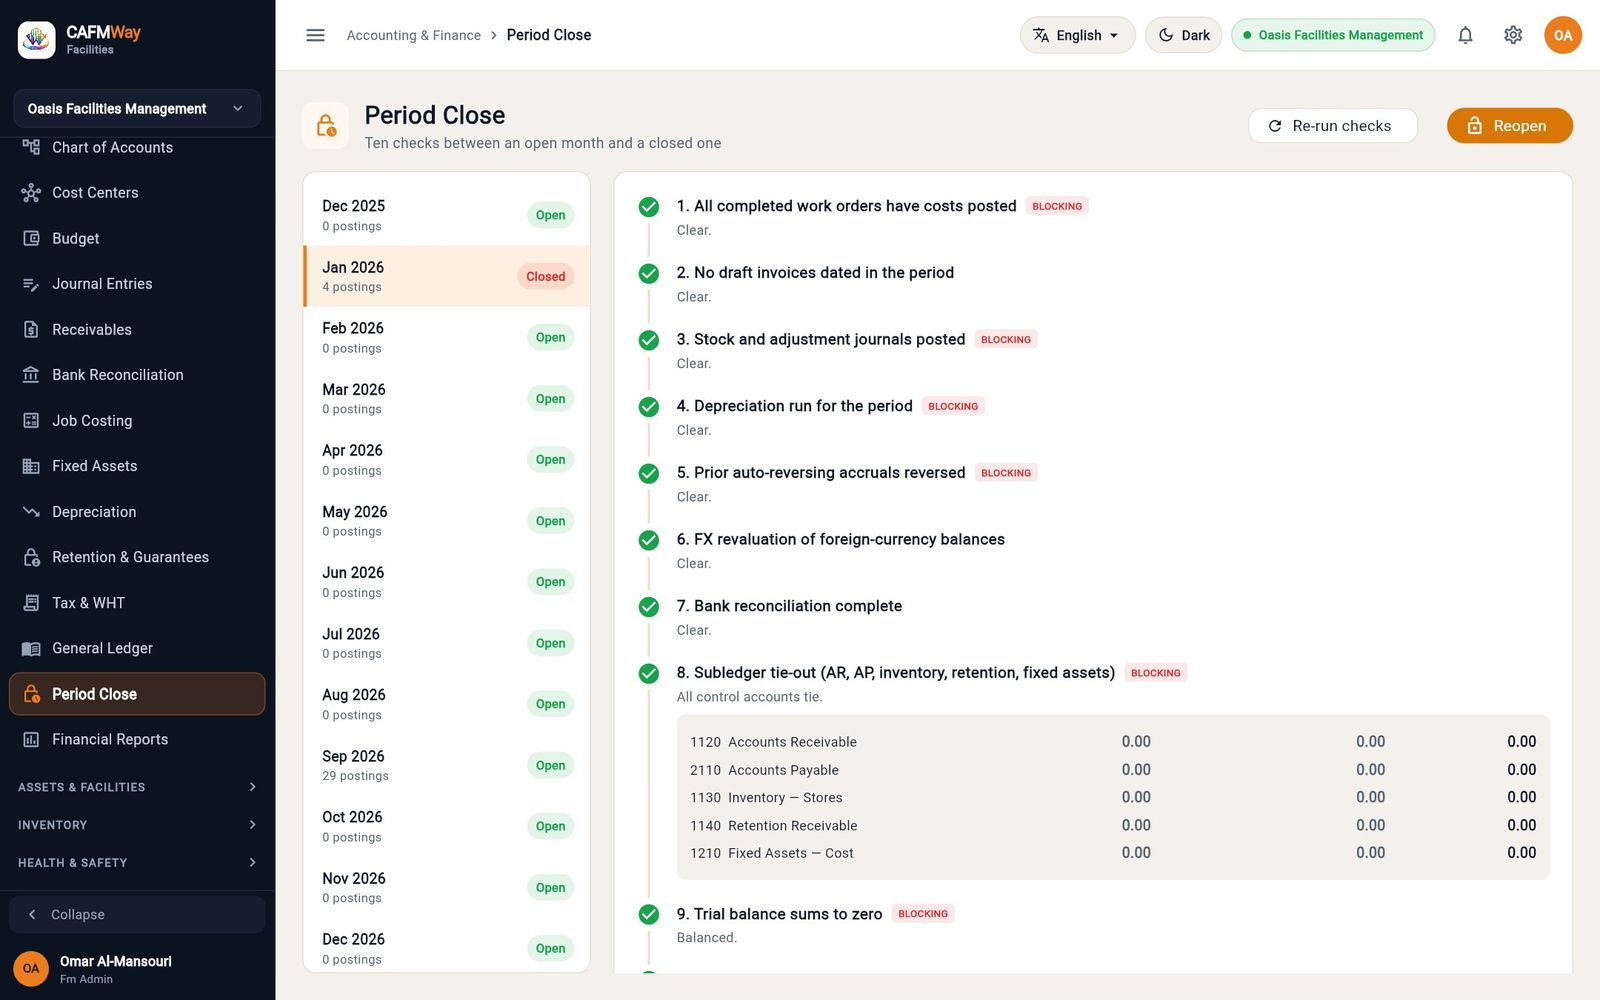
Reopen a month
- Select the closed month and click Reopen.
- Enter the Reason. Reopening is recorded against your name with this reason.
- Click Reopen.
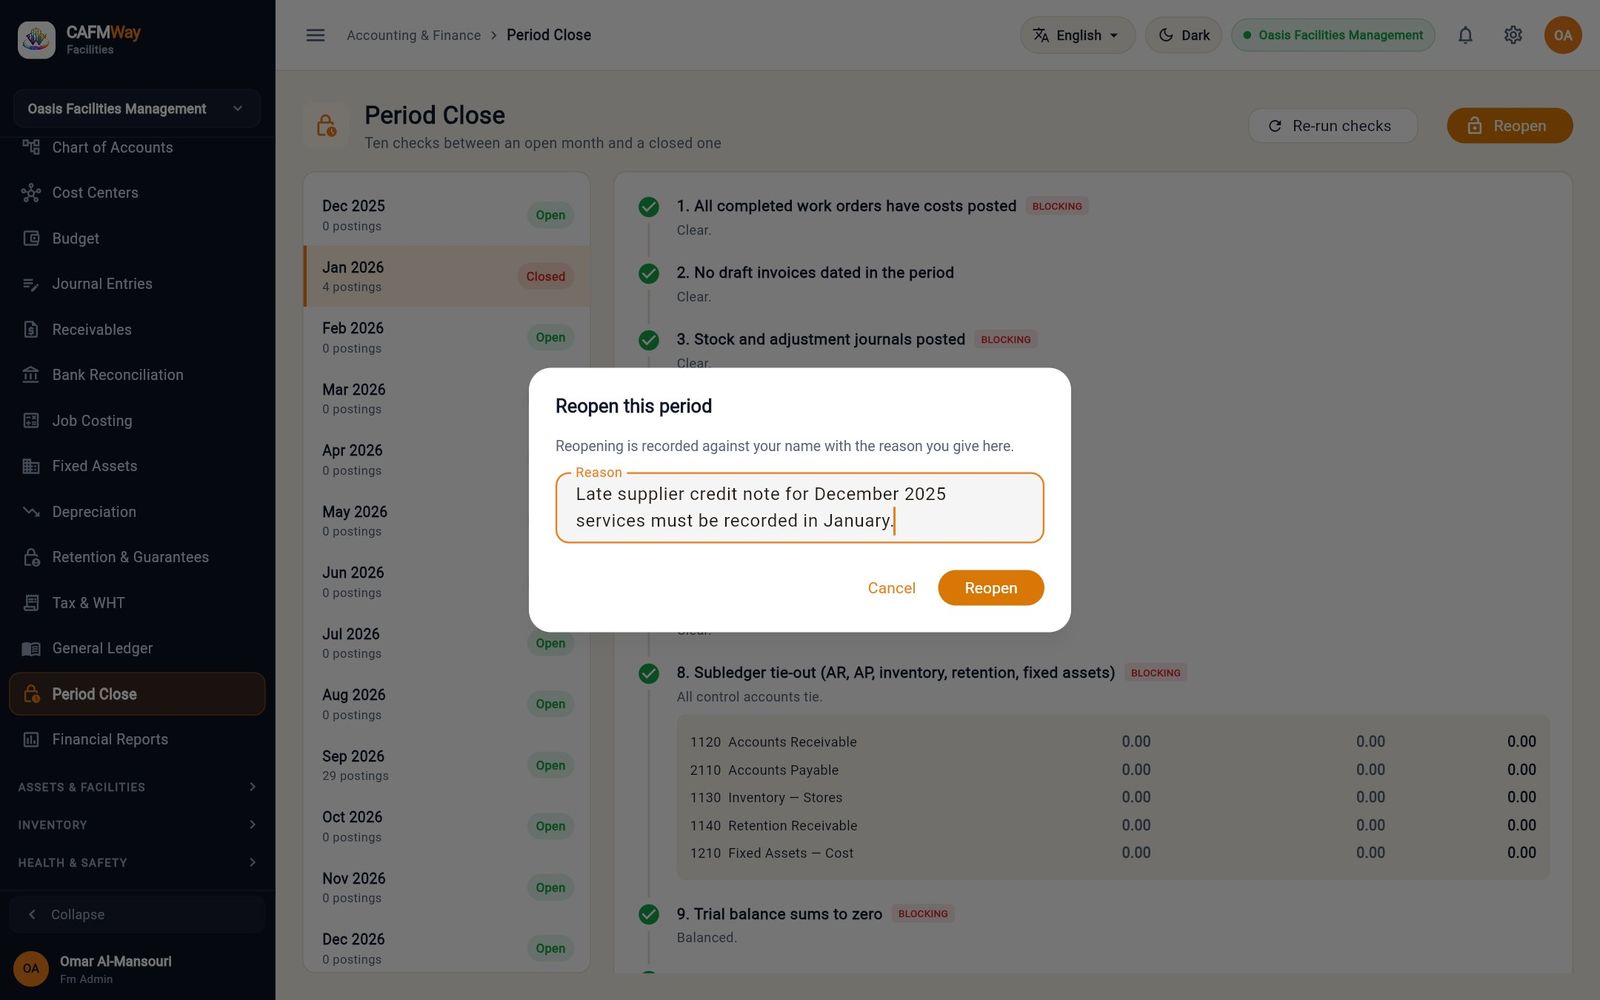
Financial reports
- Who: Journal Entry report access; PPM ROI and Multi-year Spend need Budget access
- Where: Sidebar → ACCOUNTING & FINANCE → Financial Reports
All reports read the ledger for the date range shown at the top right. Click the range to change it.
| Tab | What it shows |
|---|---|
| Trial Balance | Debit and credit balance of every account with postings, with a check that the totals agree |
| Profit & Loss | Revenue, costs and expenses, and the net result with its margin |
| Balance Sheet | Assets, liabilities and equity (including this year's result), with a check that they balance |
| Cash Flow | Operating, investing and financing movements in cash |
| Ageing | Outstanding supplier invoices (Payables) and customer invoices (Receivables) by age |
| Contract Profitability | Revenue, cost and margin per FM contract |
| Cost per m² | Maintenance cost per building divided by its floor area |
| PPM vs Reactive | Share of maintenance spend on planned and reactive work |
| PPM ROI | Preventive against reactive and corrective spend for the year |
| Multi-year Spend | Budget, actual and variance per year, with the categories that grew fastest |
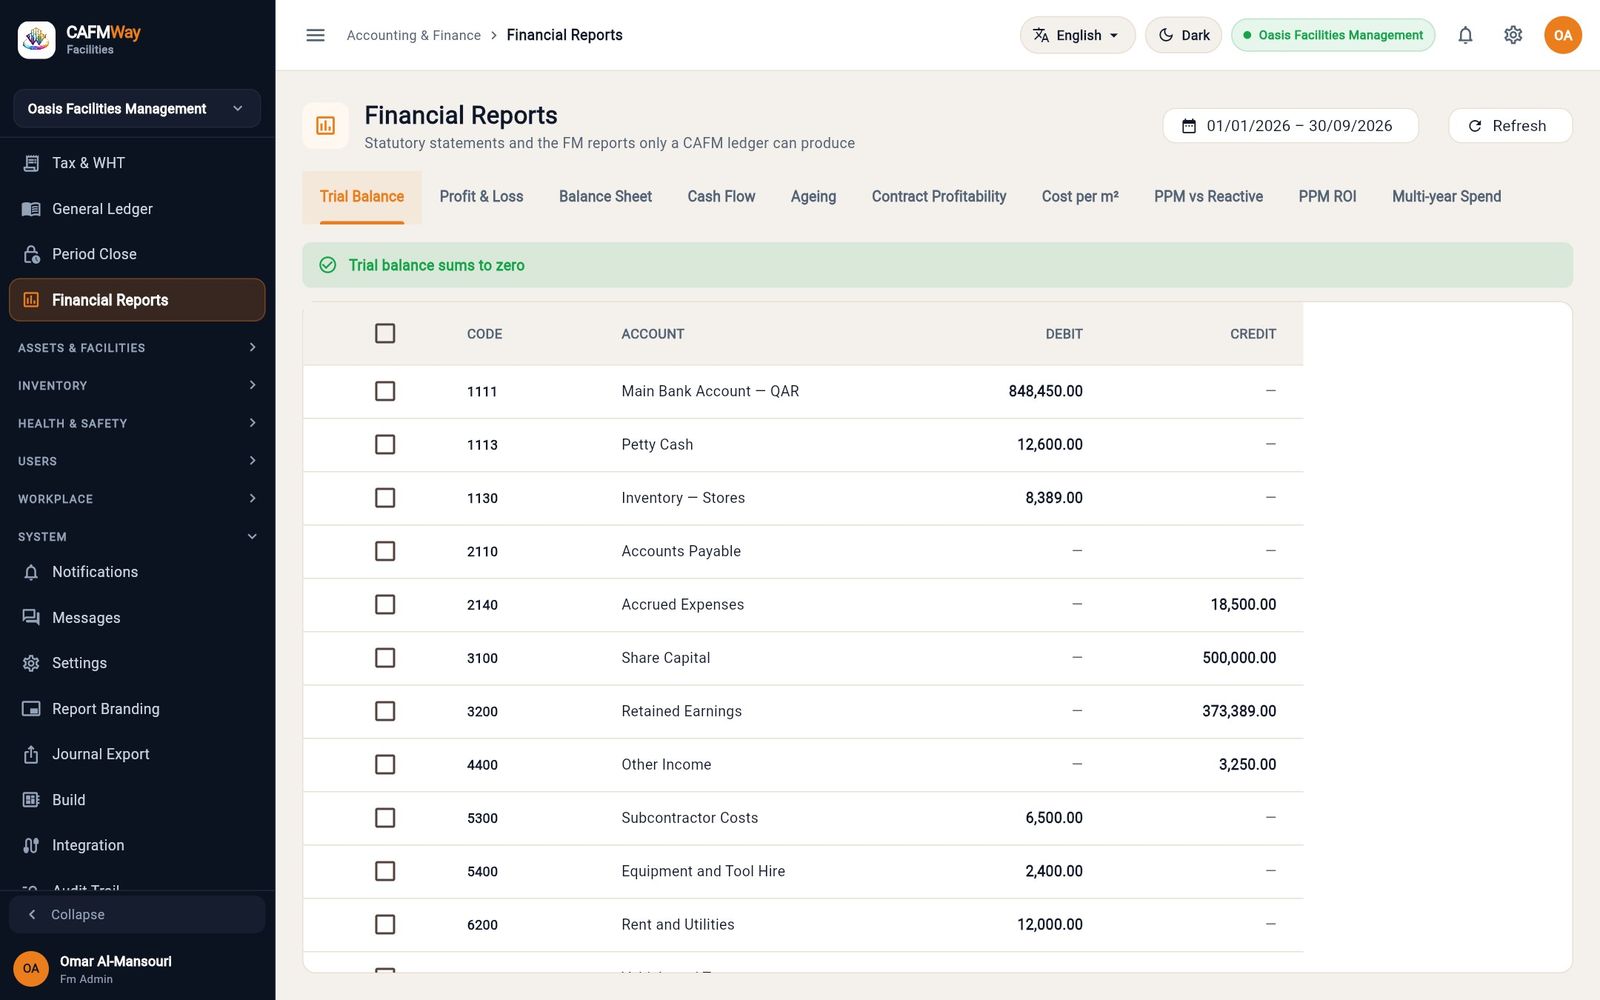
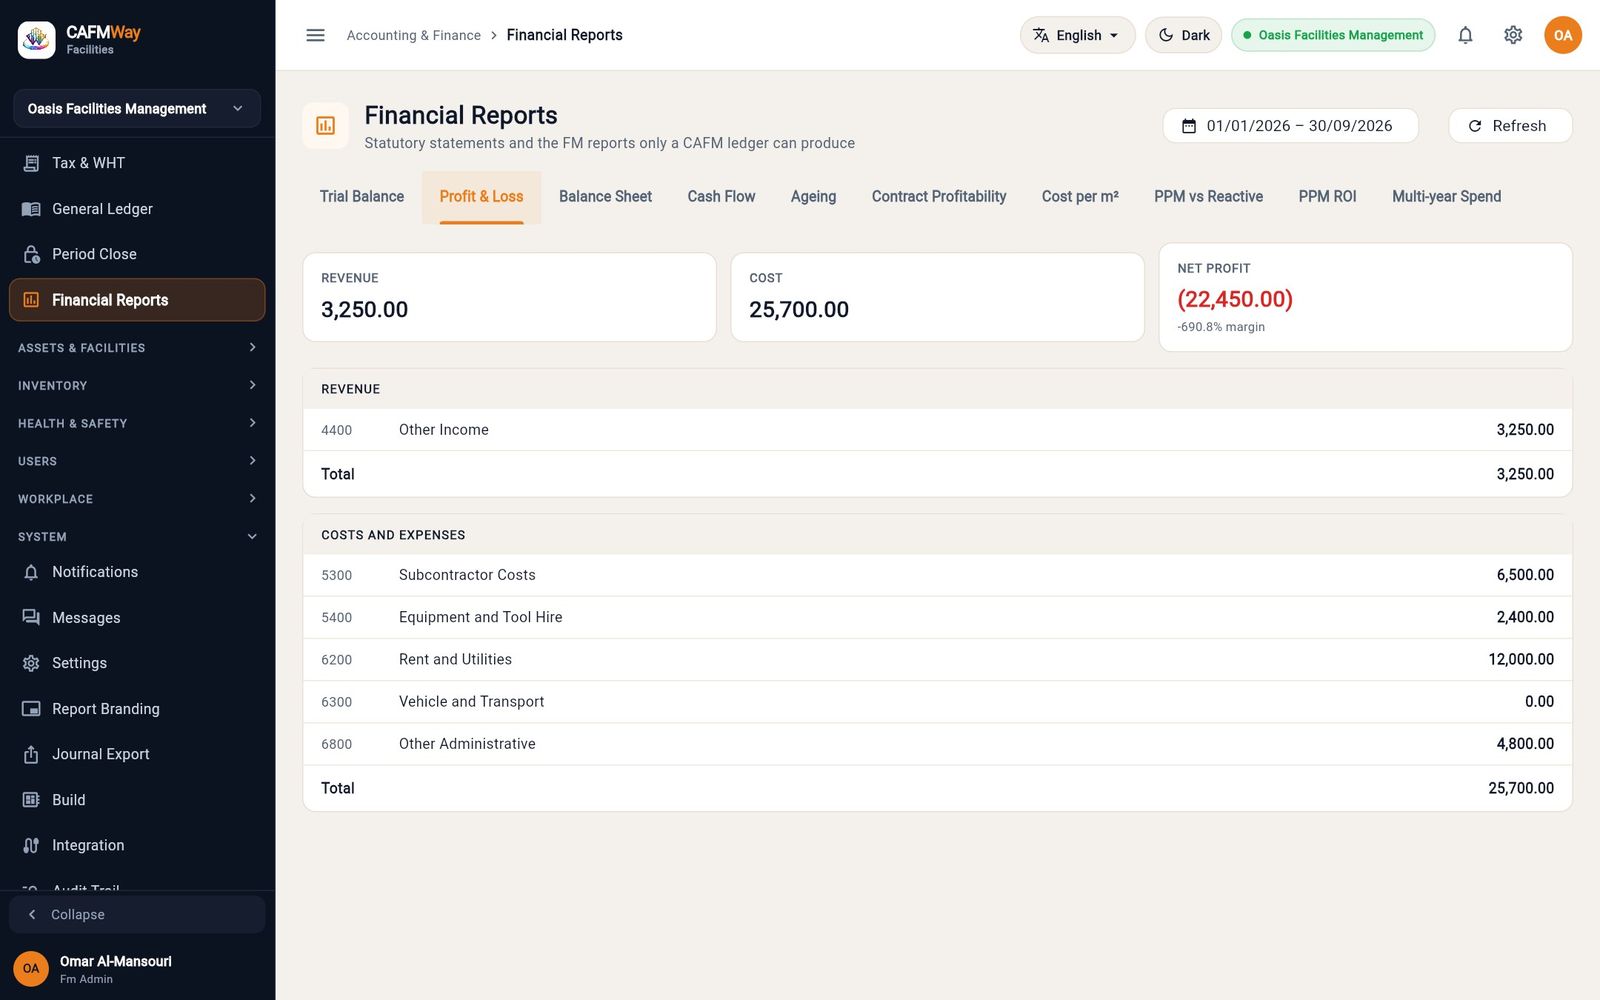
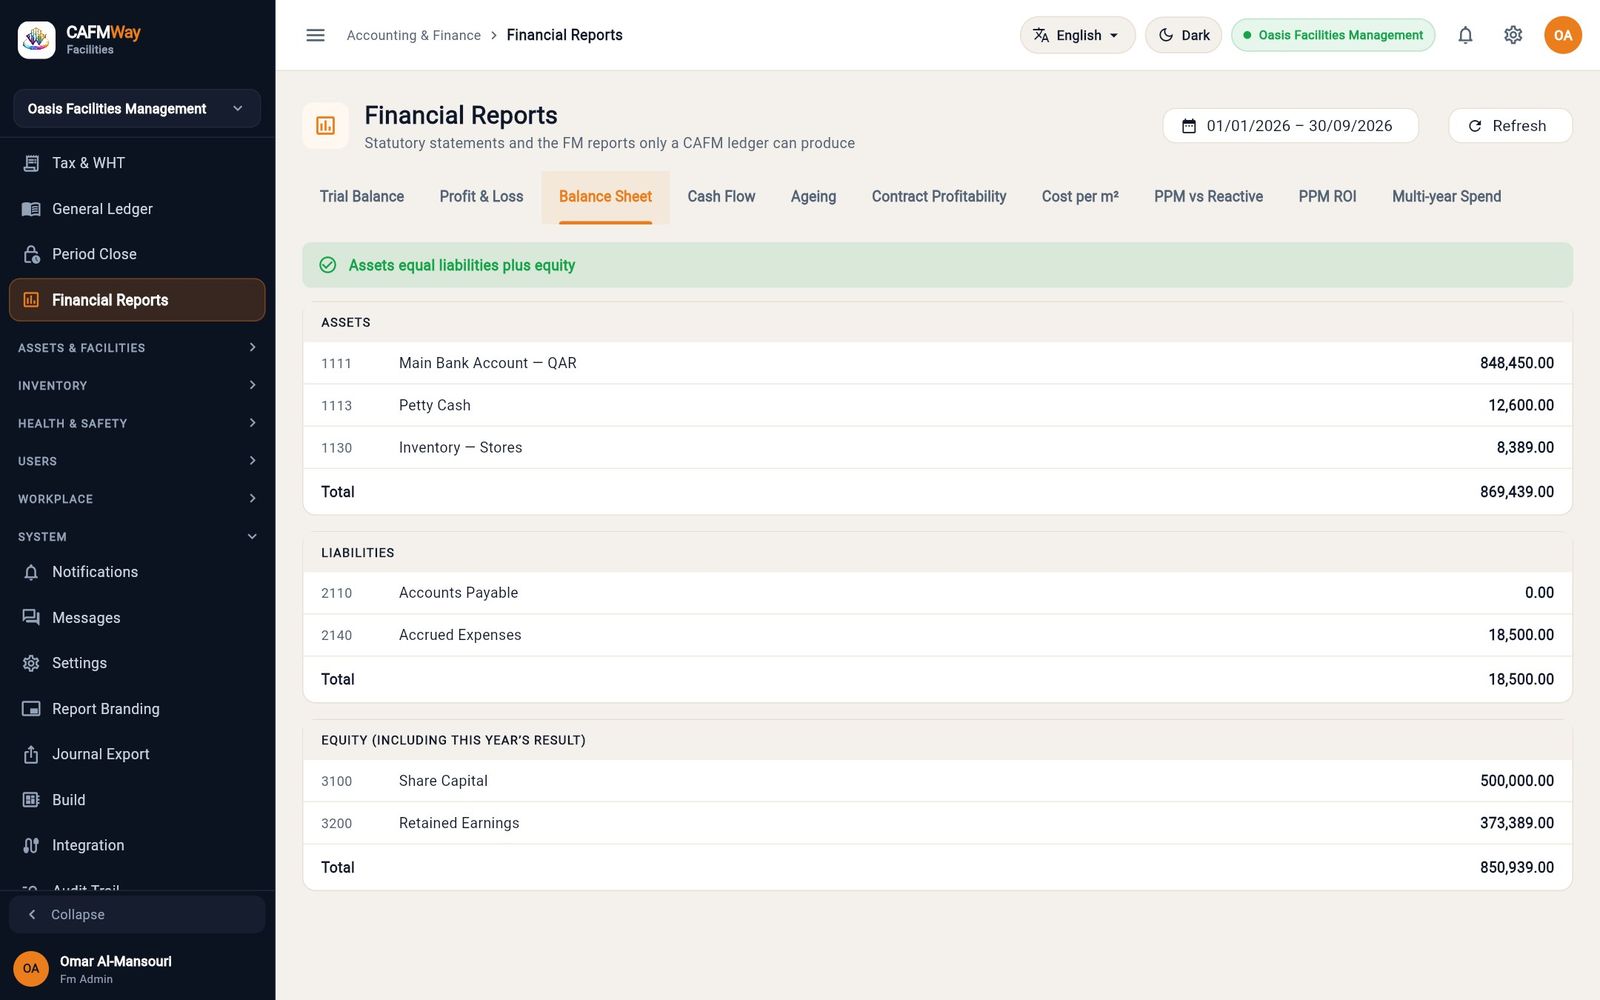
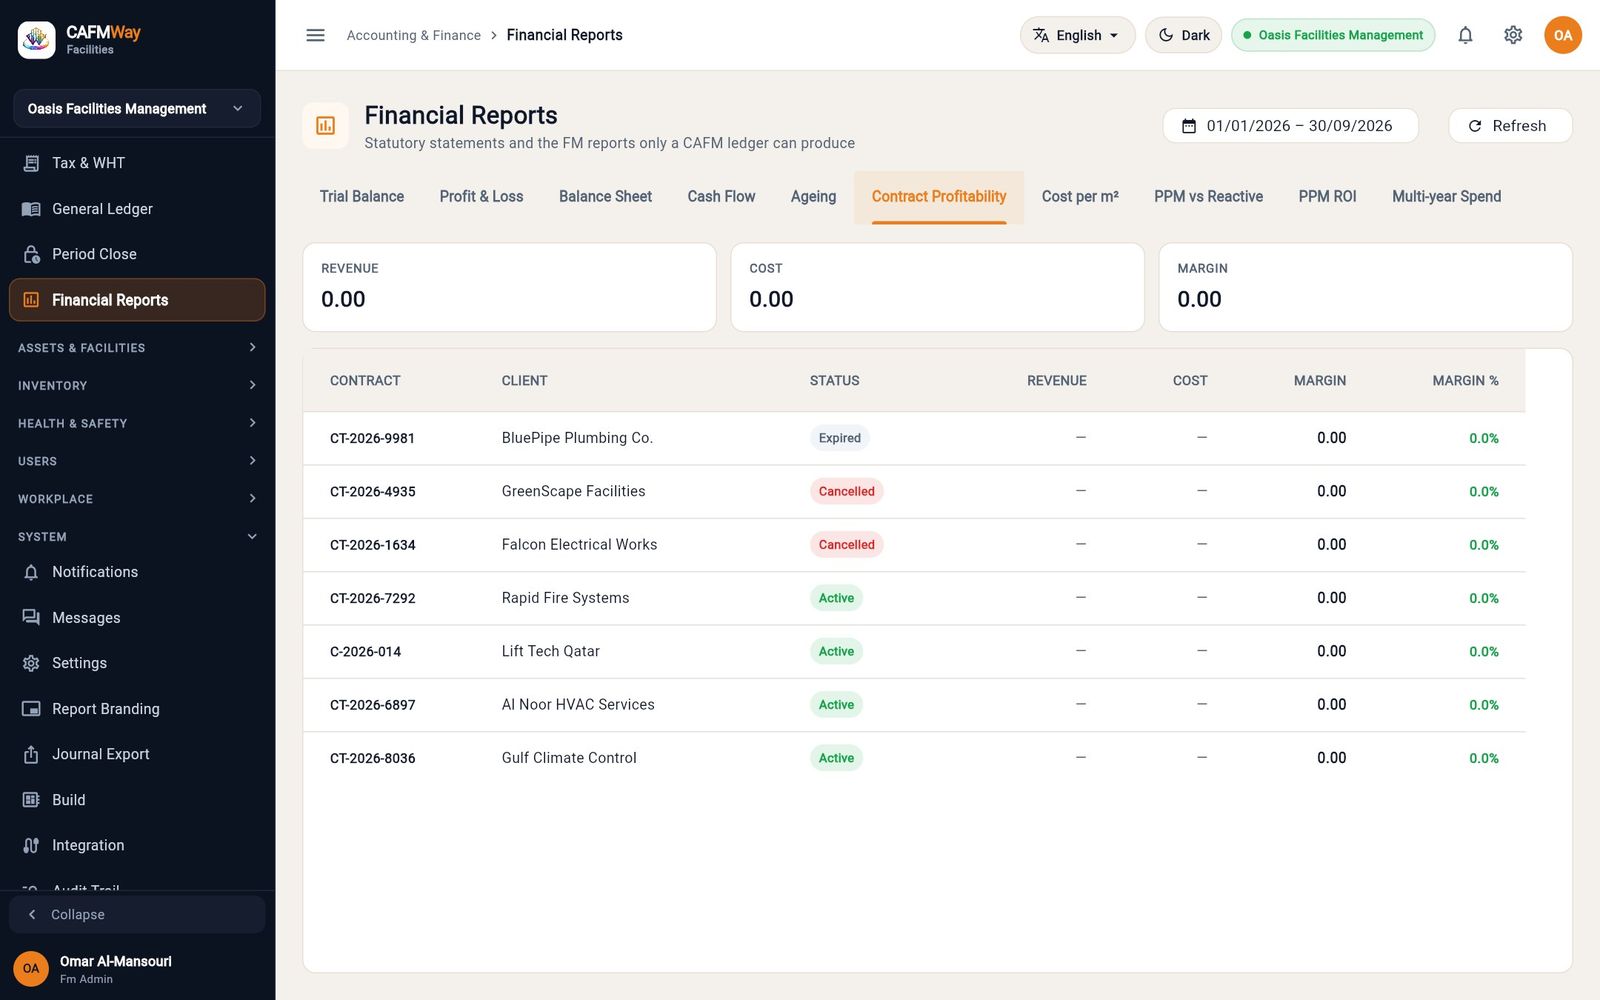
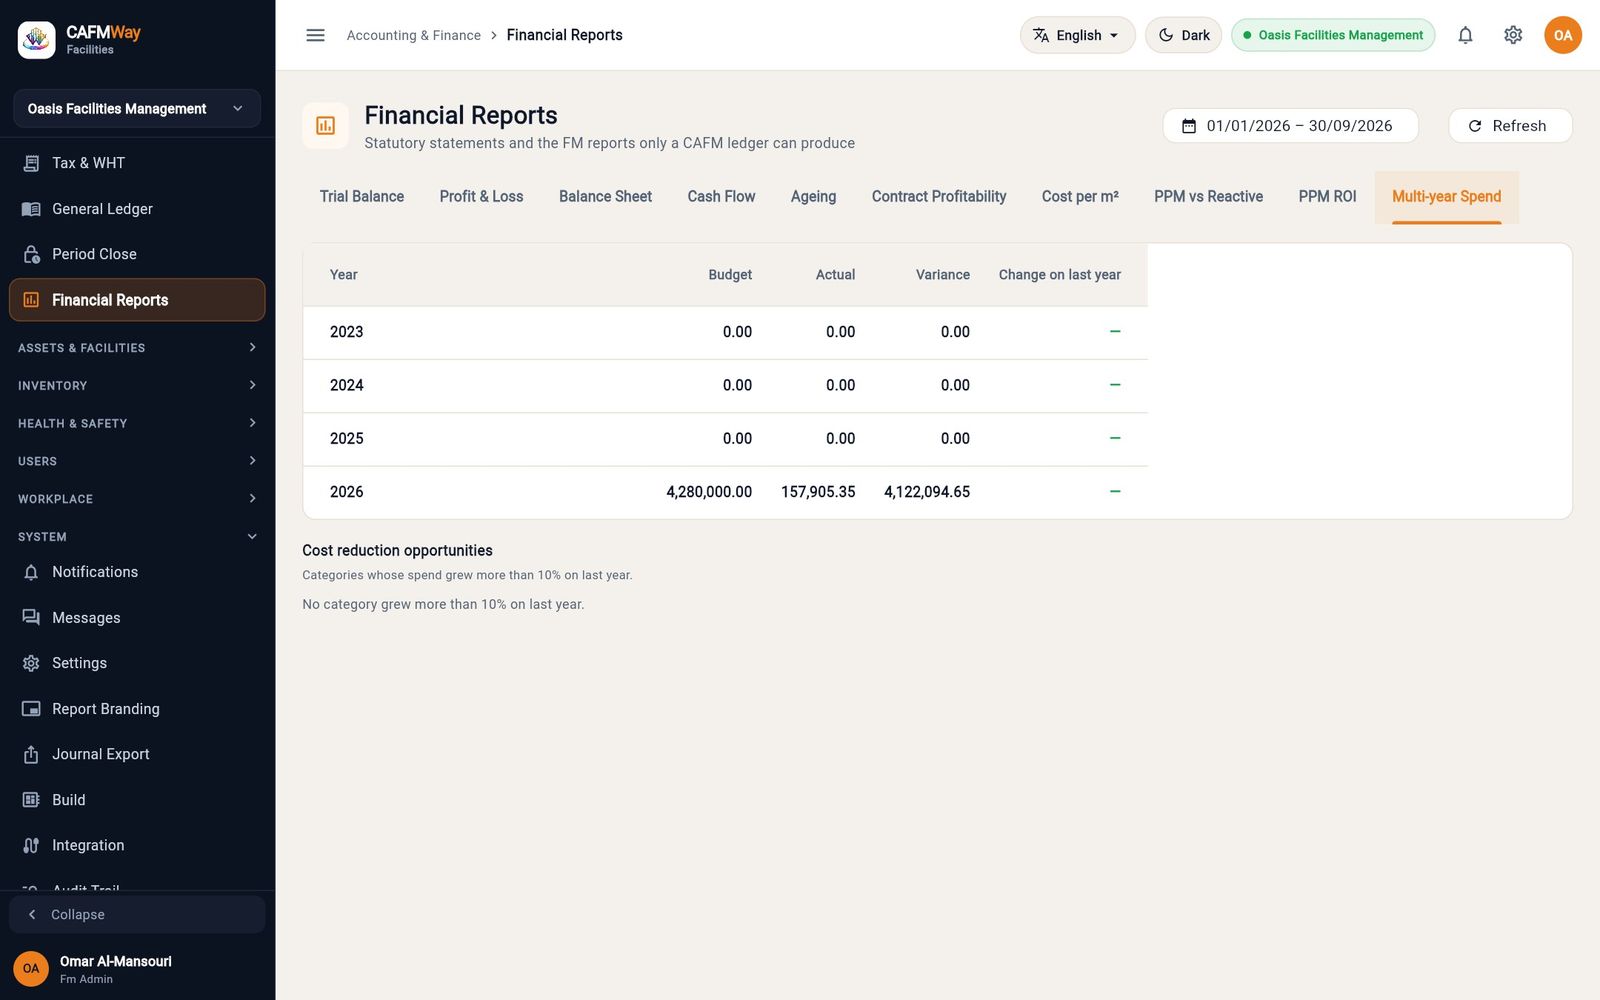
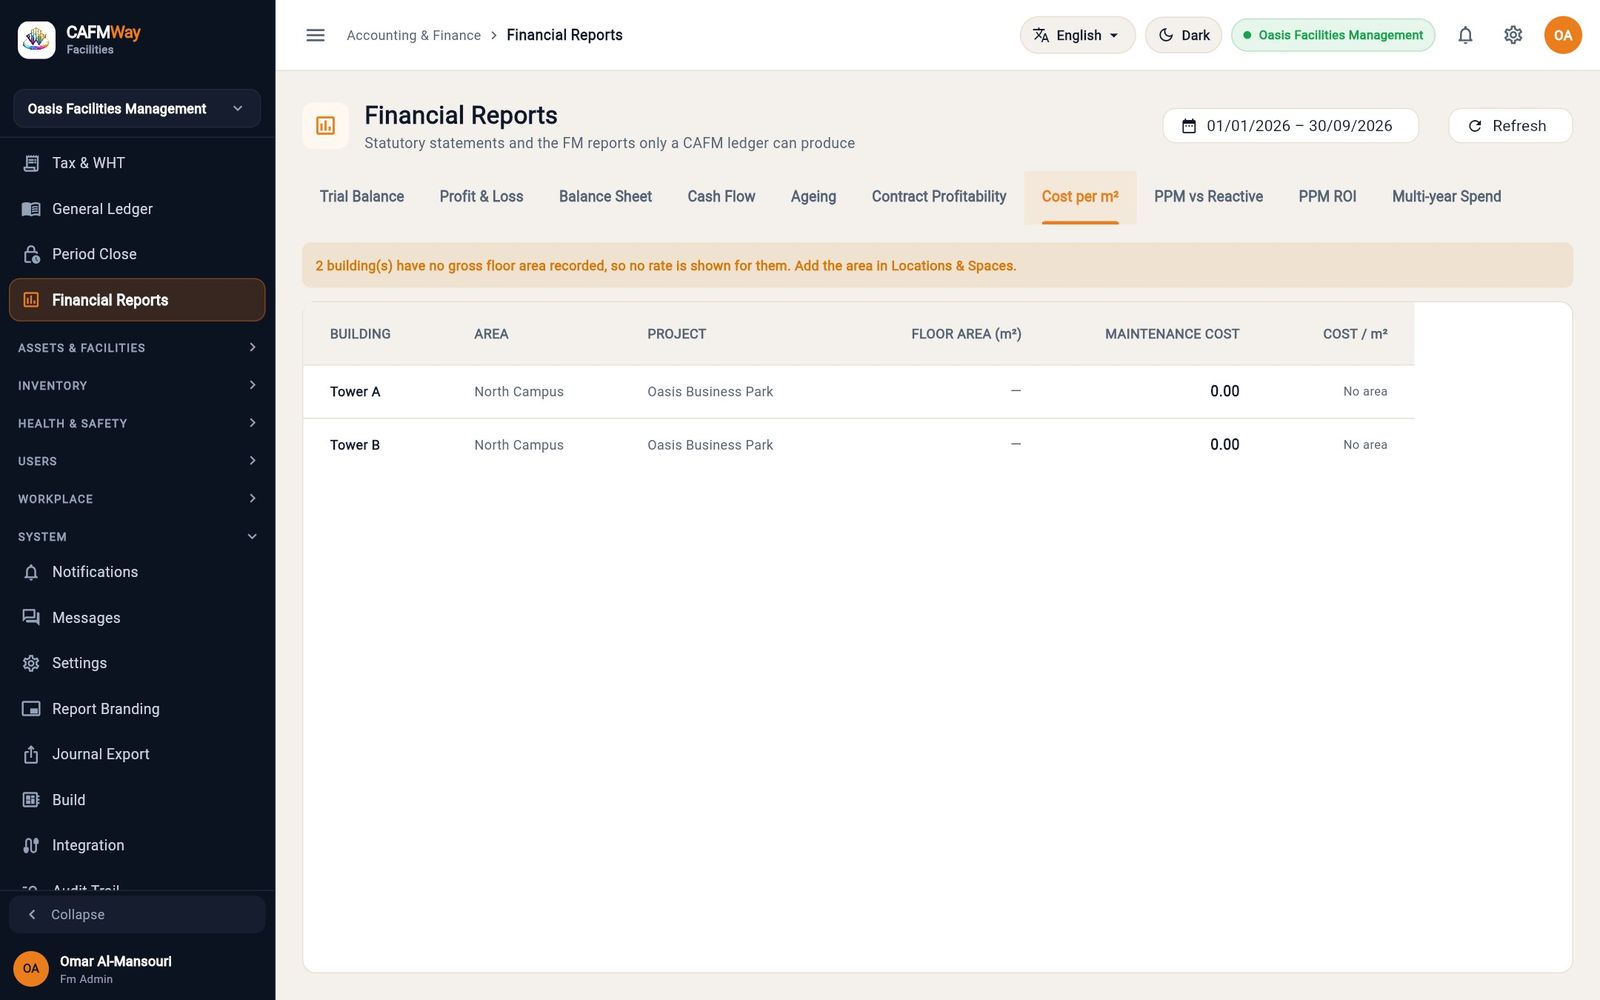
Journal export
- Who: Finance Officer, FM Administrator
- Where: Sidebar → SYSTEM → Journal Export
Journal Export collects the ledger postings of a date range into a batch that can be handed to an external ledger (ERPNext, SAP, QuickBooks, Xero or a CSV file). Sending a batch to a connected ERP is covered in the ERP integration part of this guide.
- Click New Batch.
- Choose the Target system.
- Check the date range. It defaults to the current month.
- Click Create. A message confirms how many entries the batch holds, and the batch appears as Pending with its entry count and debit and credit totals.
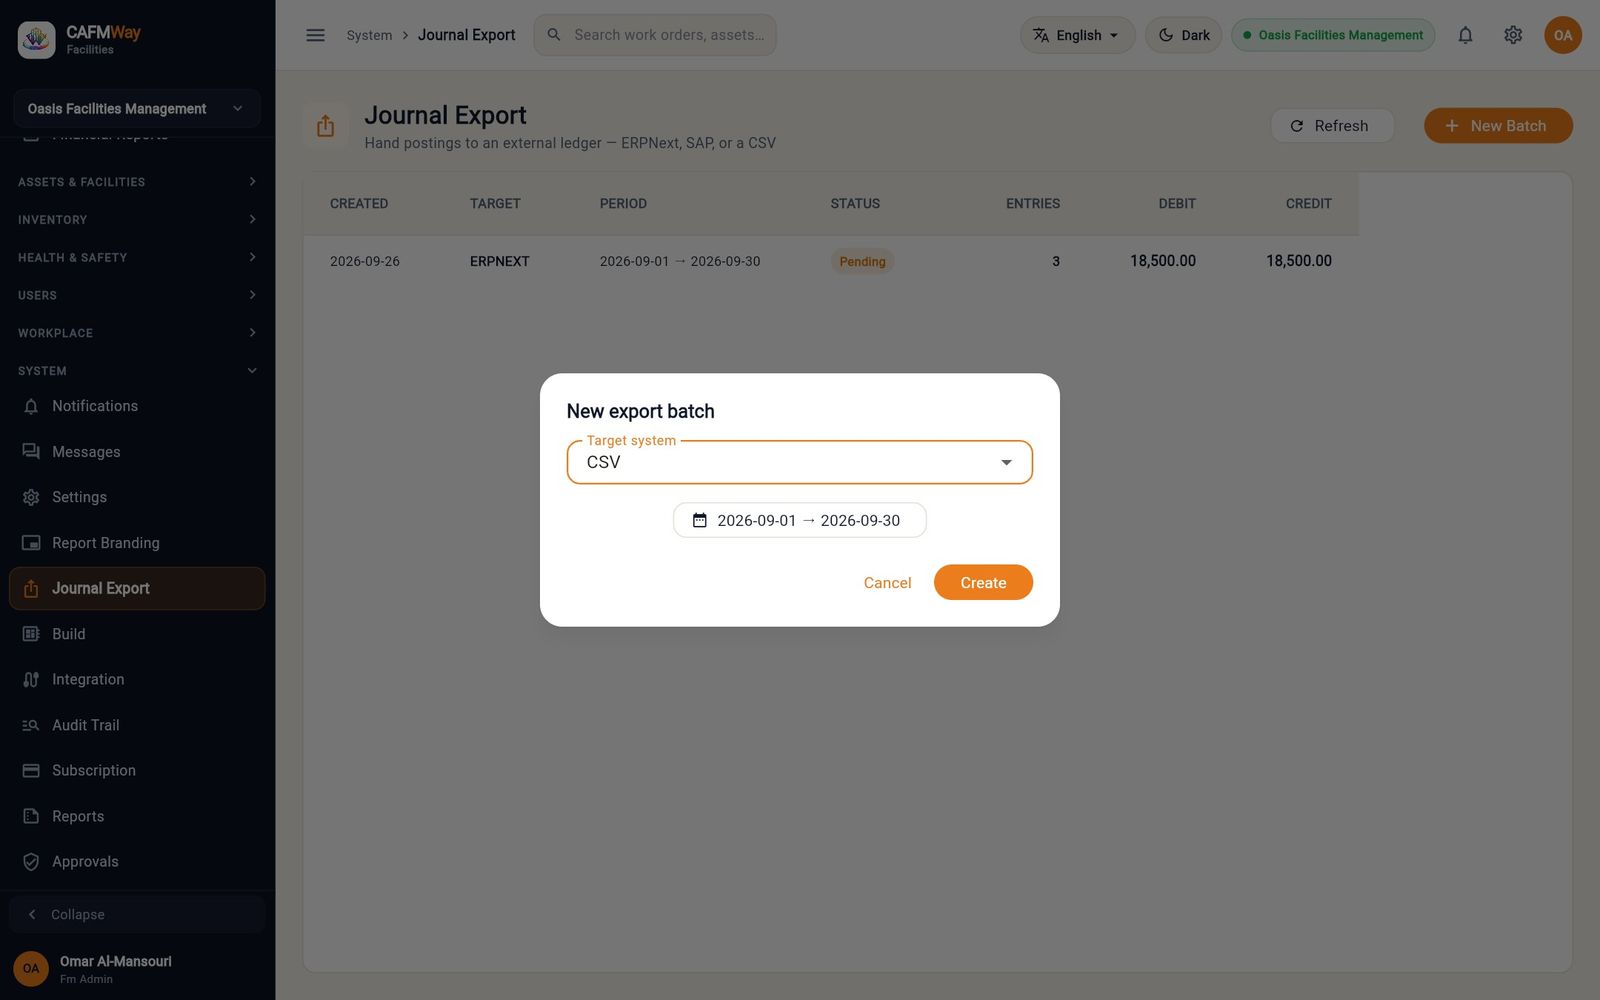
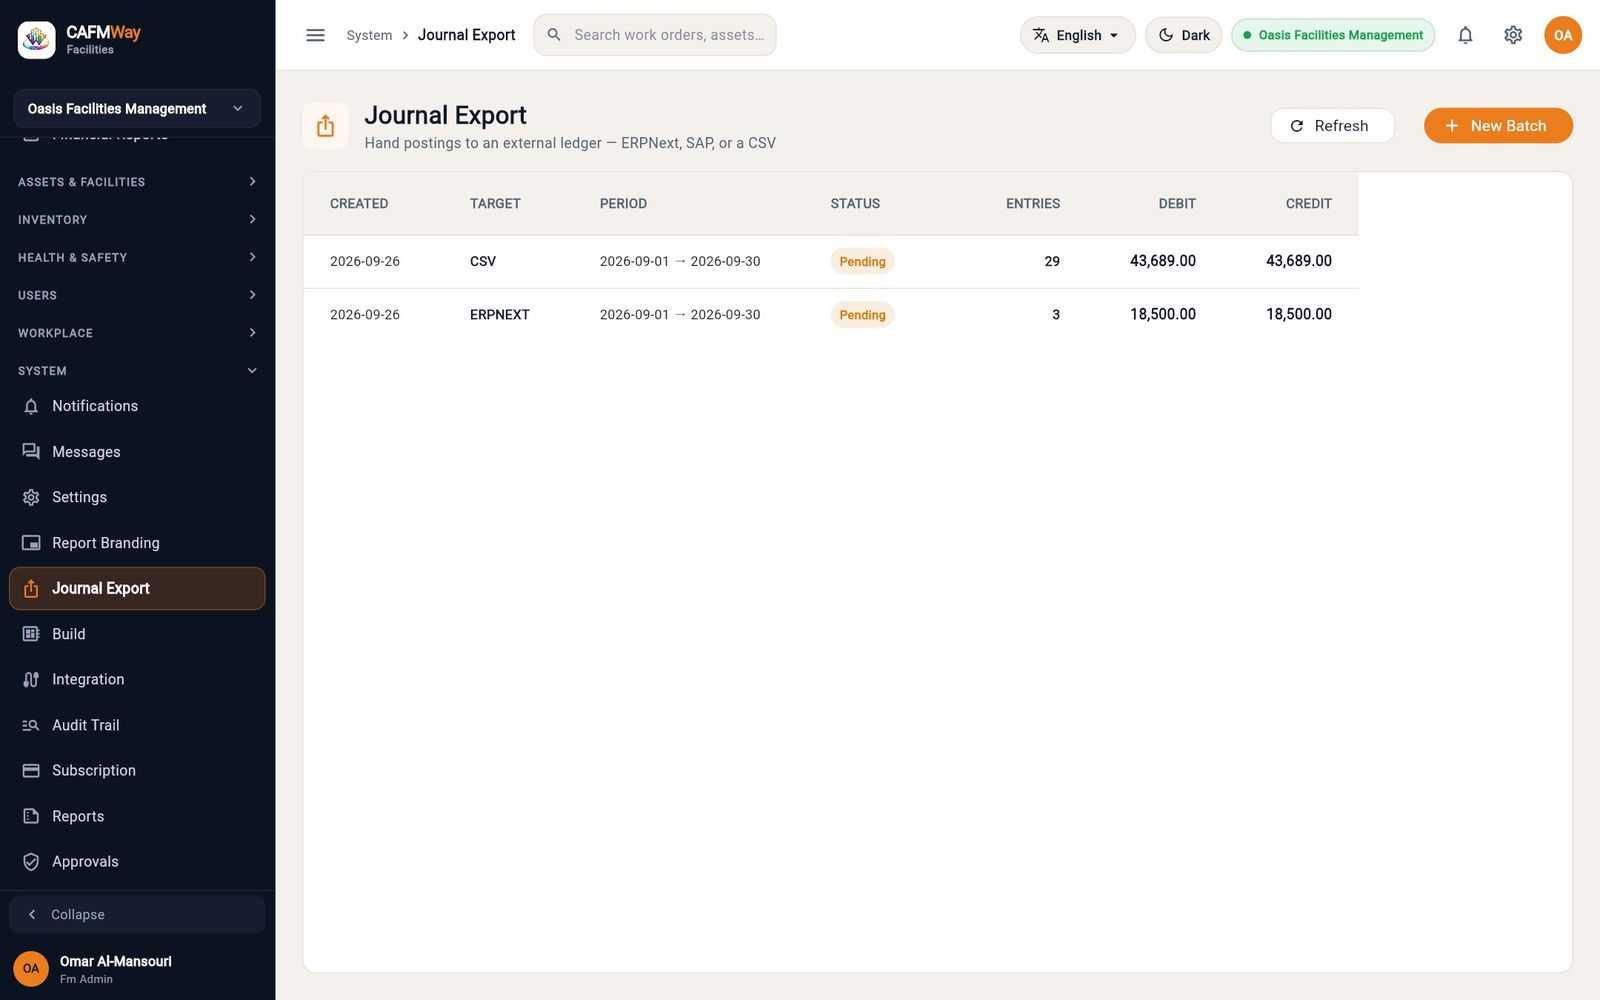
ERP integration
This part explains how CAFM Way exchanges data with your organisation's ERP: ERPNext, Odoo, Oracle Fusion ERP Cloud or SAP S/4HANA. It is written for the FM administrator who sets up the connection, and for the finance team who needs to know what reaches the ledger and when.
Integration at a glance
- Who: FM Administrator, FM Manager (set up and monitor); Finance Officer (journal export)
- Where: Sidebar → SYSTEM → Integration; Sidebar → SYSTEM → Journal Export
CAFM Way is the subledger for facilities work. It is not a second ERP. The integration follows one rule: master data flows in, transactions flow out. The ERP owns suppliers, the chart of accounts, cost centres, warehouses and items, and CAFM Way copies them. CAFM Way owns the facilities transactions and sends the finished accounting documents to the ERP. Each record has one owner, and the other side never overwrites the owner's fields.
flowchart TD
    A[Connector set up
endpoint, settings, secrets] --> B[Test connection]
    B --> C[Choose what it carries]
    C --> D[Preview a pull]
    D --> E[Run the pull]
    E --> F[Master data in CAFM Way
suppliers, accounts, cost centres,
warehouses, items]
    F --> G[Daily work in CAFM Way
purchasing, invoices, journals]
    G --> H[Journal export batch]
    H --> I[Send queue]
    I --> J{Delivered?}
    J -- Yes --> K[Document in the ERP]
    J -- No --> L[Automatic retries]
    L --> M[Not delivered list
Retry]
    M --> I
What travels in each direction
| Data | Direction | ERPNext | Odoo | Oracle Fusion | SAP S/4HANA |
|---|---|---|---|---|---|
| Suppliers | ERP → CAFM | Yes | Yes | Yes | Yes |
| Chart of accounts | ERP → CAFM | Yes | Yes | No | Yes |
| Cost centres | ERP → CAFM | Yes | Yes (analytic accounts) | No | Yes |
| Warehouses & stores | ERP → CAFM | Yes | Yes | Yes | Yes (plants) |
| Item groups | ERP → CAFM | Yes | Yes | No | No |
| Units of measure | ERP → CAFM | Yes | Yes | No | No |
| Items | ERP → CAFM | Yes | Yes | Yes | Yes (products) |
| Journal entries | CAFM → ERP | Yes, submitted | Yes, posted | Off until enabled | Off until enabled |
| Supplier invoices | CAFM → ERP | Yes, with VAT | Only invoices without VAT | No | Off until enabled, only without VAT |
Stock quantities are never synchronised. CAFM Way keeps its own stock balances.
Add an ERP connector
- Who: FM Administrator, FM Manager
- Where: Sidebar → SYSTEM → Integration
A connector is one link to one ERP. Adding it only registers the ERP. Nothing is synchronised until you add credentials and choose what the connector carries.
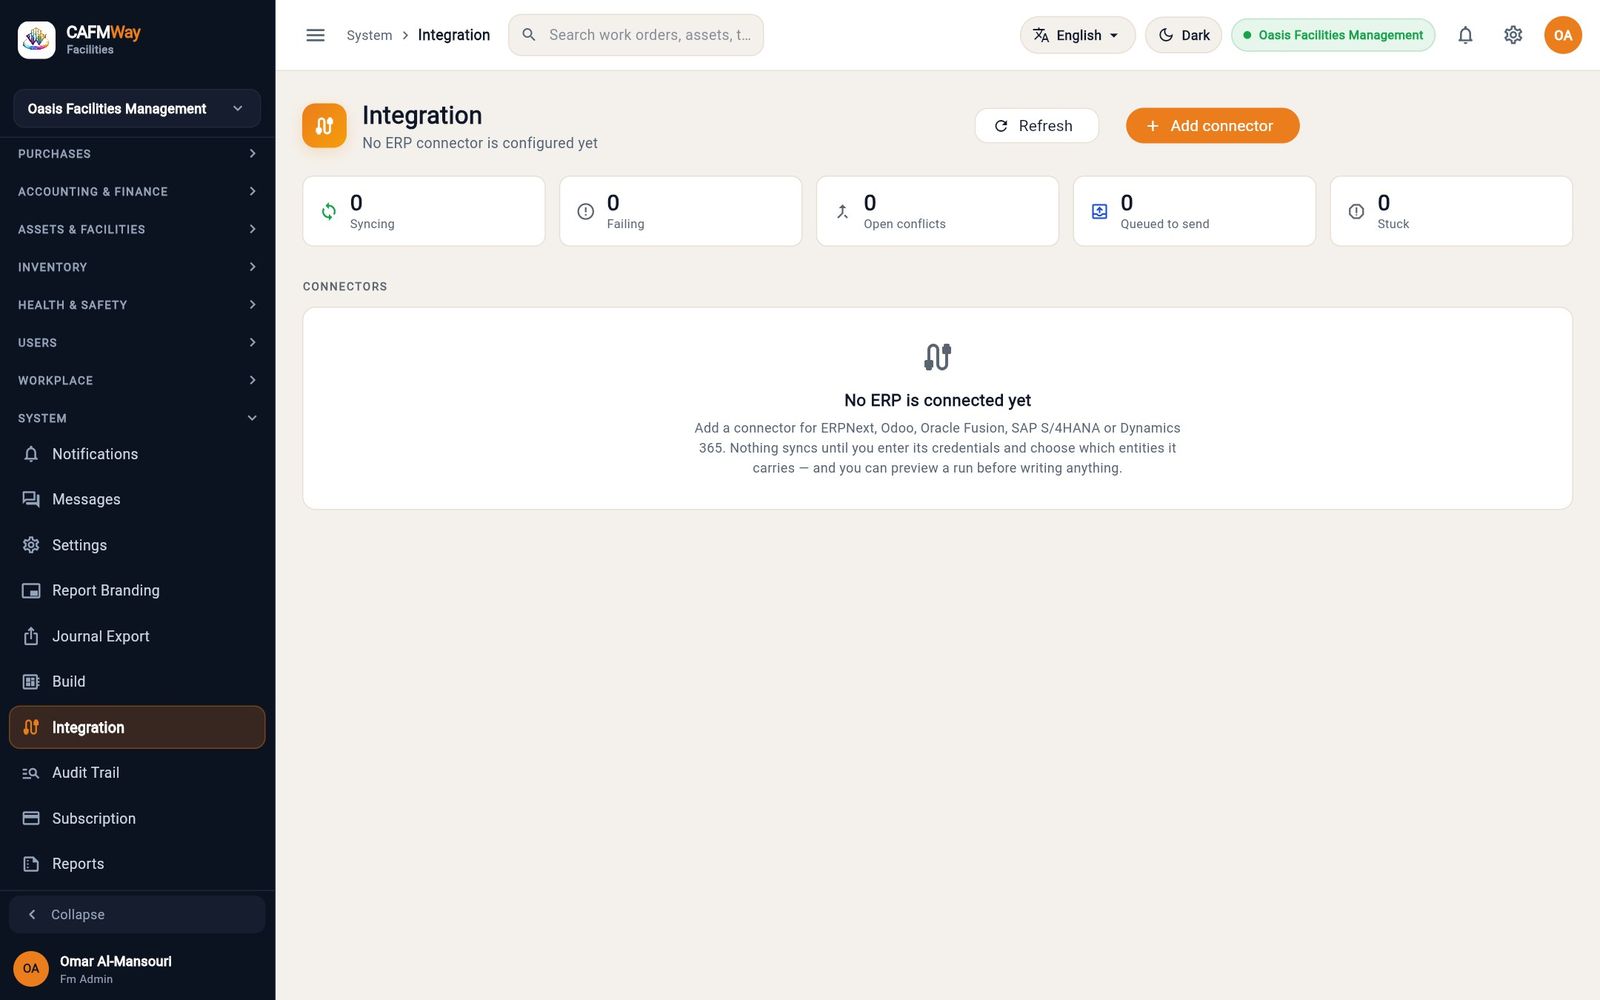
- Open Integration. With no connectors, the page shows No ERP is connected yet.
- Click Add connector. The Add an ERP connector dialog opens.
- In Name, type a name your team will recognise, for example
Head office ERPNext. - In System, choose ERPNext, Odoo, Oracle Fusion ERP Cloud or SAP S/4HANA.
- In Endpoint URL, type the ERP's base address, for example
https://erp.oasis-fm.test. Leave out any path after the host. - Click Add. The connector appears as a card with the status Not syncing and Never synced.
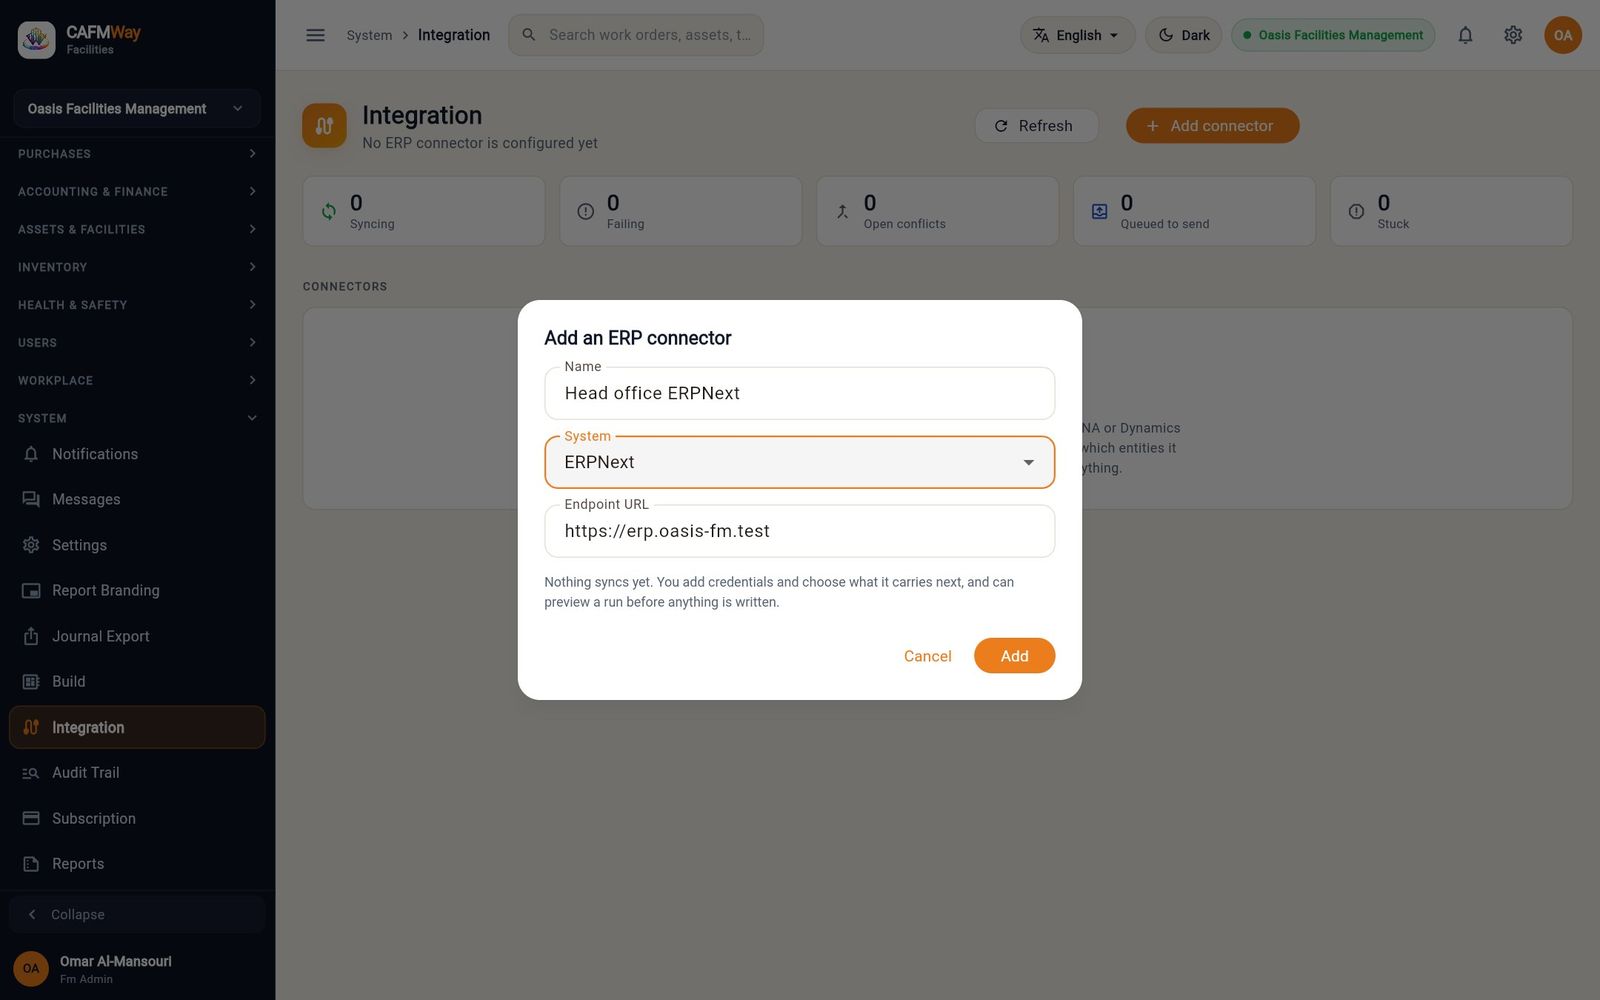
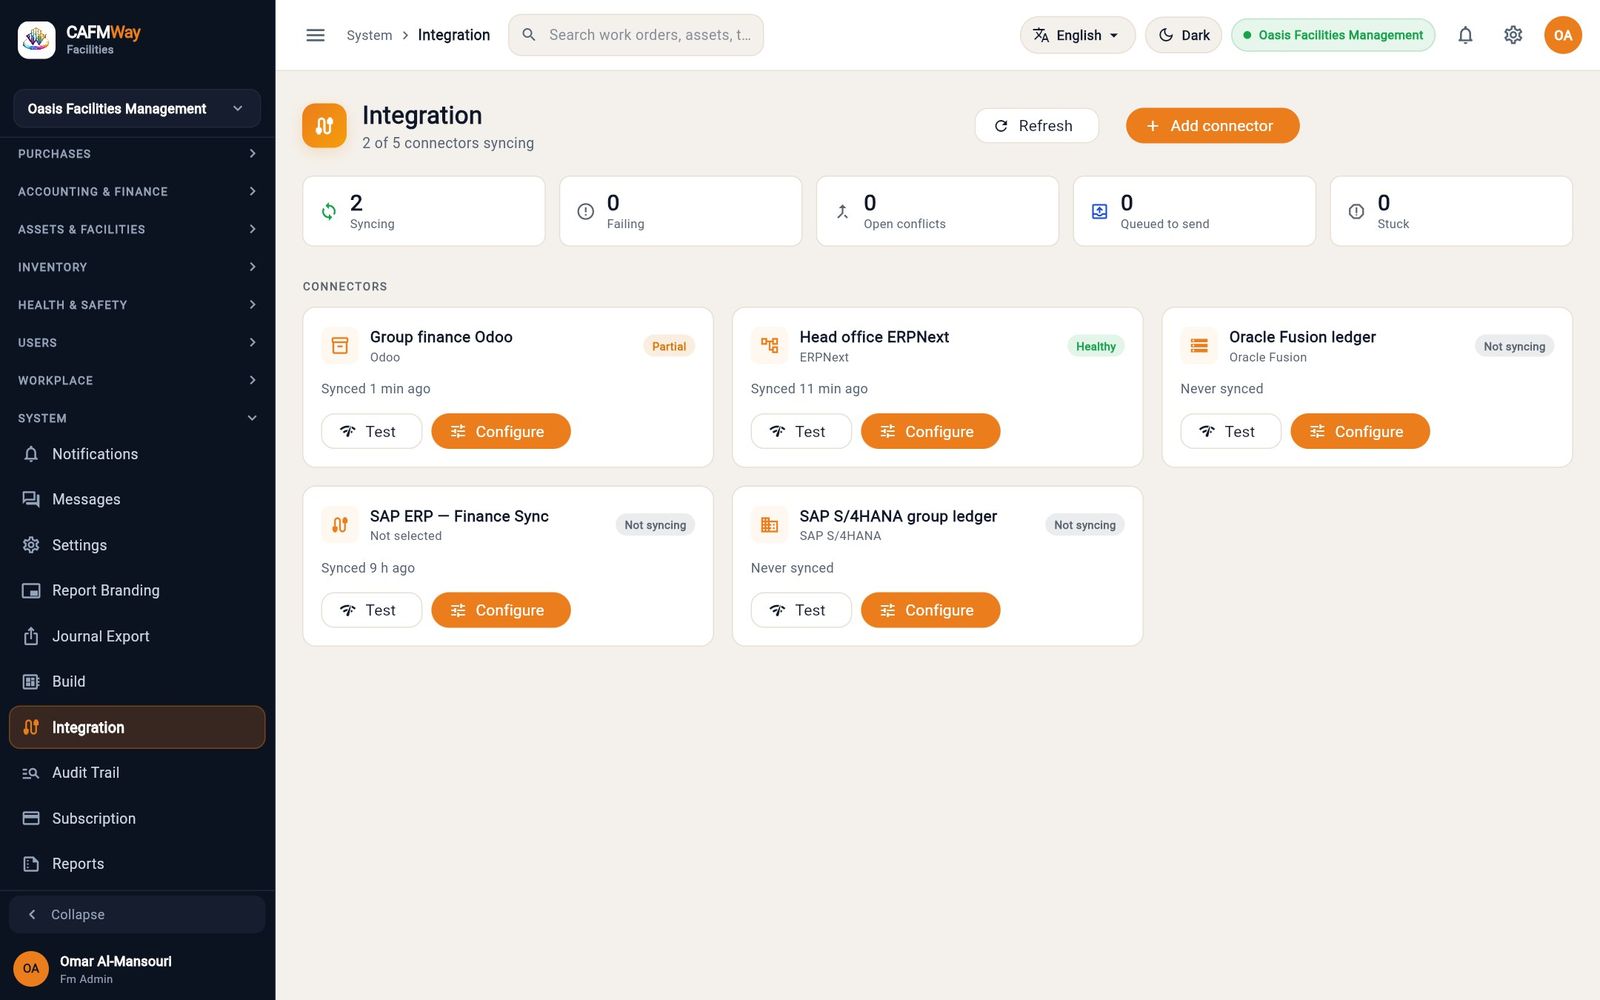
Set up the connection
- Who: FM Administrator, FM Manager
- Where: Integration → connector card → Configure → Connection
The Connection tab holds the address, the ERP type, the schedule and the non-secret settings. Passwords and keys never go here; they go on the Credentials tab.
- On the connector card, click Configure, then open the Connection tab.
- Check Endpoint URL and System. Changing the system switches the adapter but does not move existing mappings.
- Turn on Scheduled sync when you are ready for automatic runs. While it is off, nothing runs on its own and nothing is sent to the ERP, but you can still preview and run pulls by hand.
- In Poll every, choose 5 minutes, 15 minutes, 30 minutes, Hourly, Every 4 hours or Daily. Unchanged records cost almost nothing, so a short interval is fine.
- In Settings, type the ERP's settings as JSON, one
"name": "value"pair per setting. The tables below list the settings for each ERP. - Click Save. The message Connection saved. confirms it. If the JSON is not valid, the message Settings must be valid JSON. appears and nothing is saved.
ERPNext
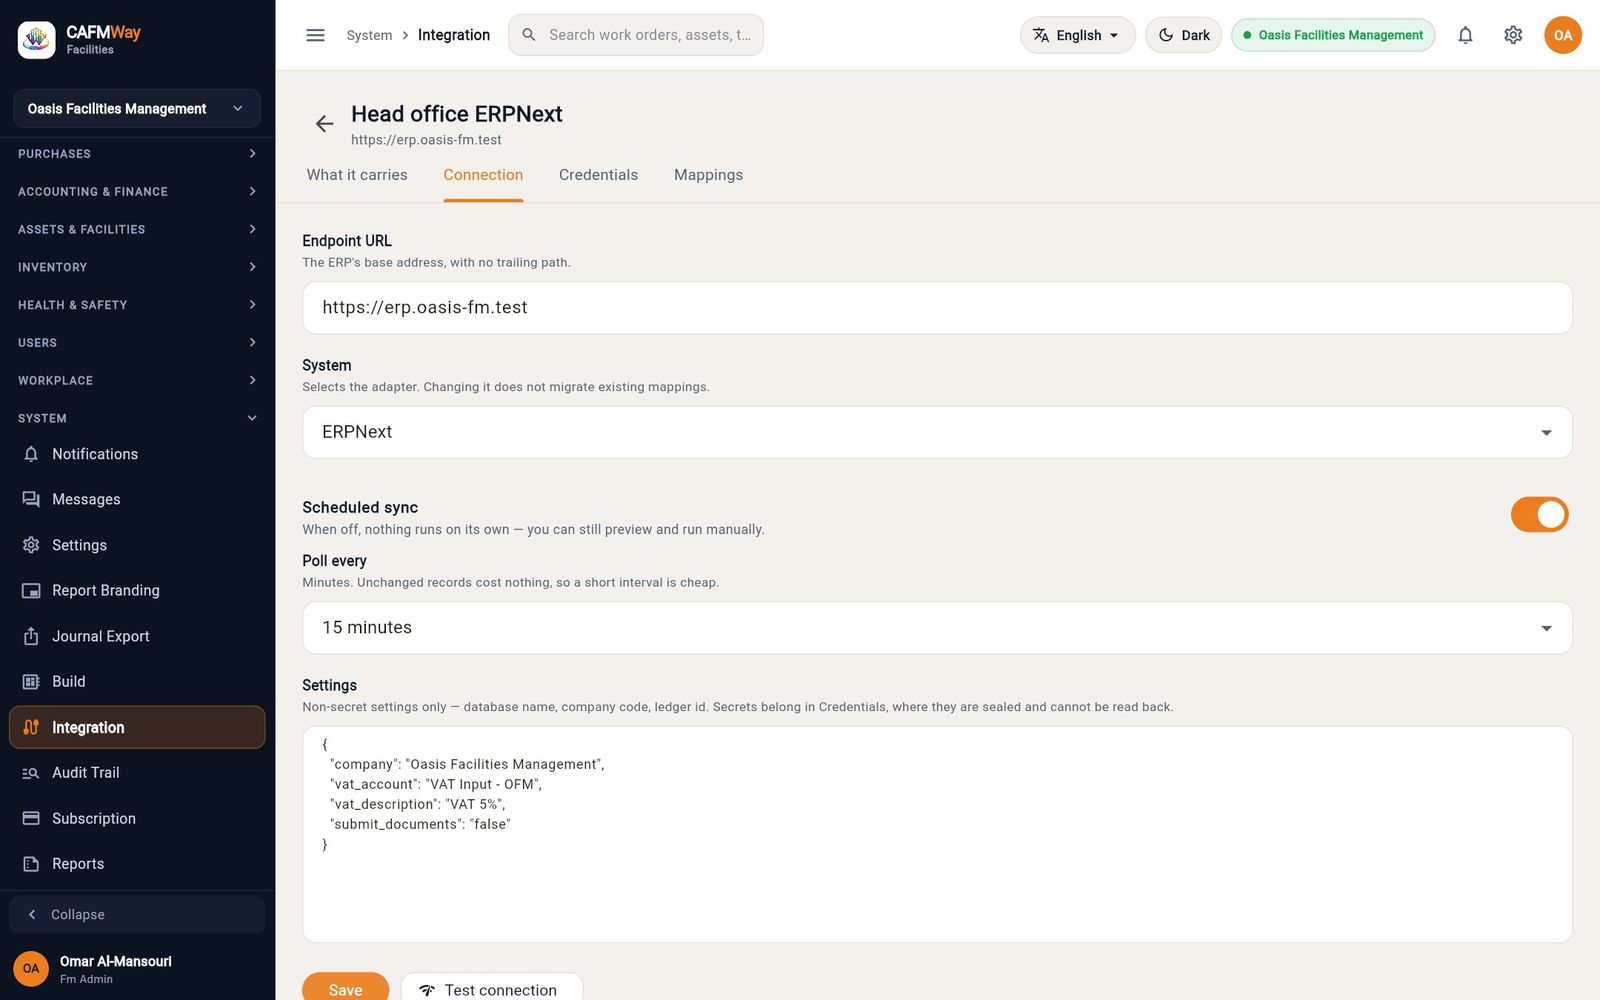
| Setting | Required | Meaning |
|---|---|---|
company | For documents | The company name exactly as it appears in ERPNext. Every journal and invoice is posted to it. |
vat_account | For invoices with VAT | The ERPNext tax account that receives the VAT line, for example VAT Input - OFM. |
vat_description | No | The text on the VAT line. Default VAT. |
submit_documents | No | true (default) submits journals and invoices in ERPNext. false leaves them as drafts for review. |
Secrets: api_key and api_secret, generated in ERPNext under the integration user's Settings → API Access. Optional webhook_secret (see the tip under "Pull master data").
Odoo
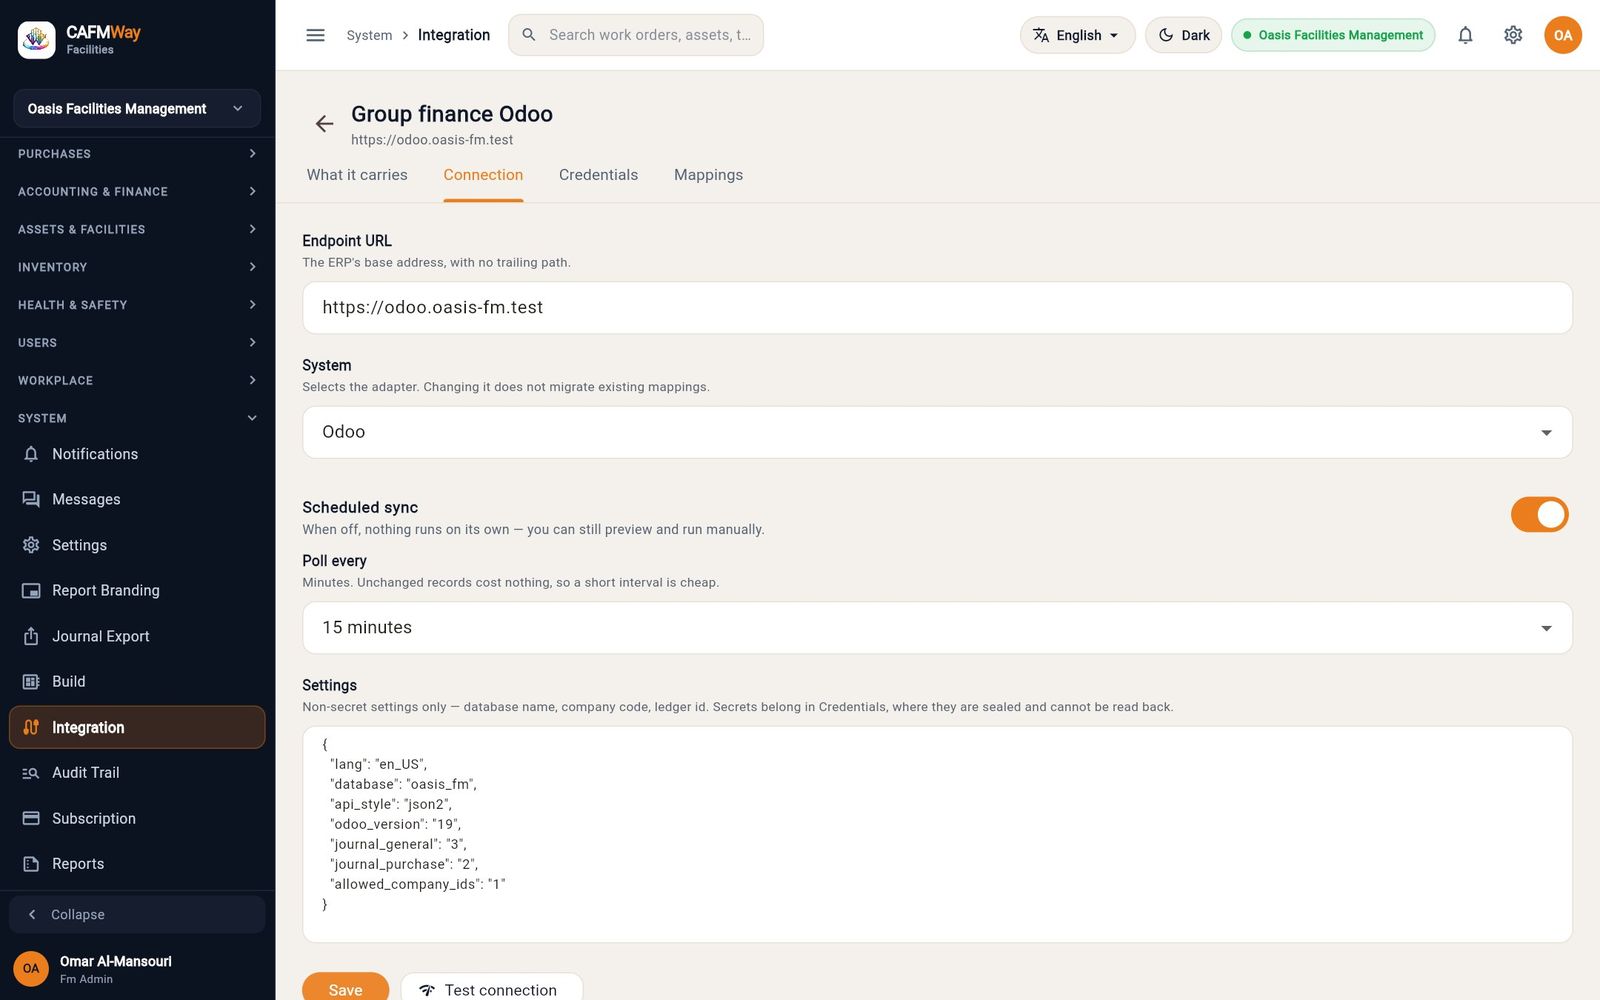
| Setting | Required | Meaning |
|---|---|---|
database | Yes | The Odoo database name. |
api_style | No | json2 (default, Odoo 19 JSON-2 API) or rpc (older JSON-RPC). |
username | With rpc | The Odoo login used with the RPC style. |
odoo_version | No | Default 19. Set 17 or lower for an older Odoo so that stockable items are written the old way. |
allowed_company_ids | Multi-company | Comma-separated Odoo company ids, first one is the main company, for example 1 or 1,3. Without it Odoo answers for the API user's default company. |
lang | No | Language for names returned by Odoo. Default en_US. |
journal_general | No | The id of the Odoo journal that receives journal entries. Default: the first general journal. |
journal_purchase | No | The id of the Odoo journal that receives vendor bills. Default: the first purchase journal. |
submit_documents | No | true (default) posts the entries. false leaves drafts. |
Secrets: api_key (an Odoo API key of the integration user). Optional webhook_secret.
Oracle Fusion ERP Cloud
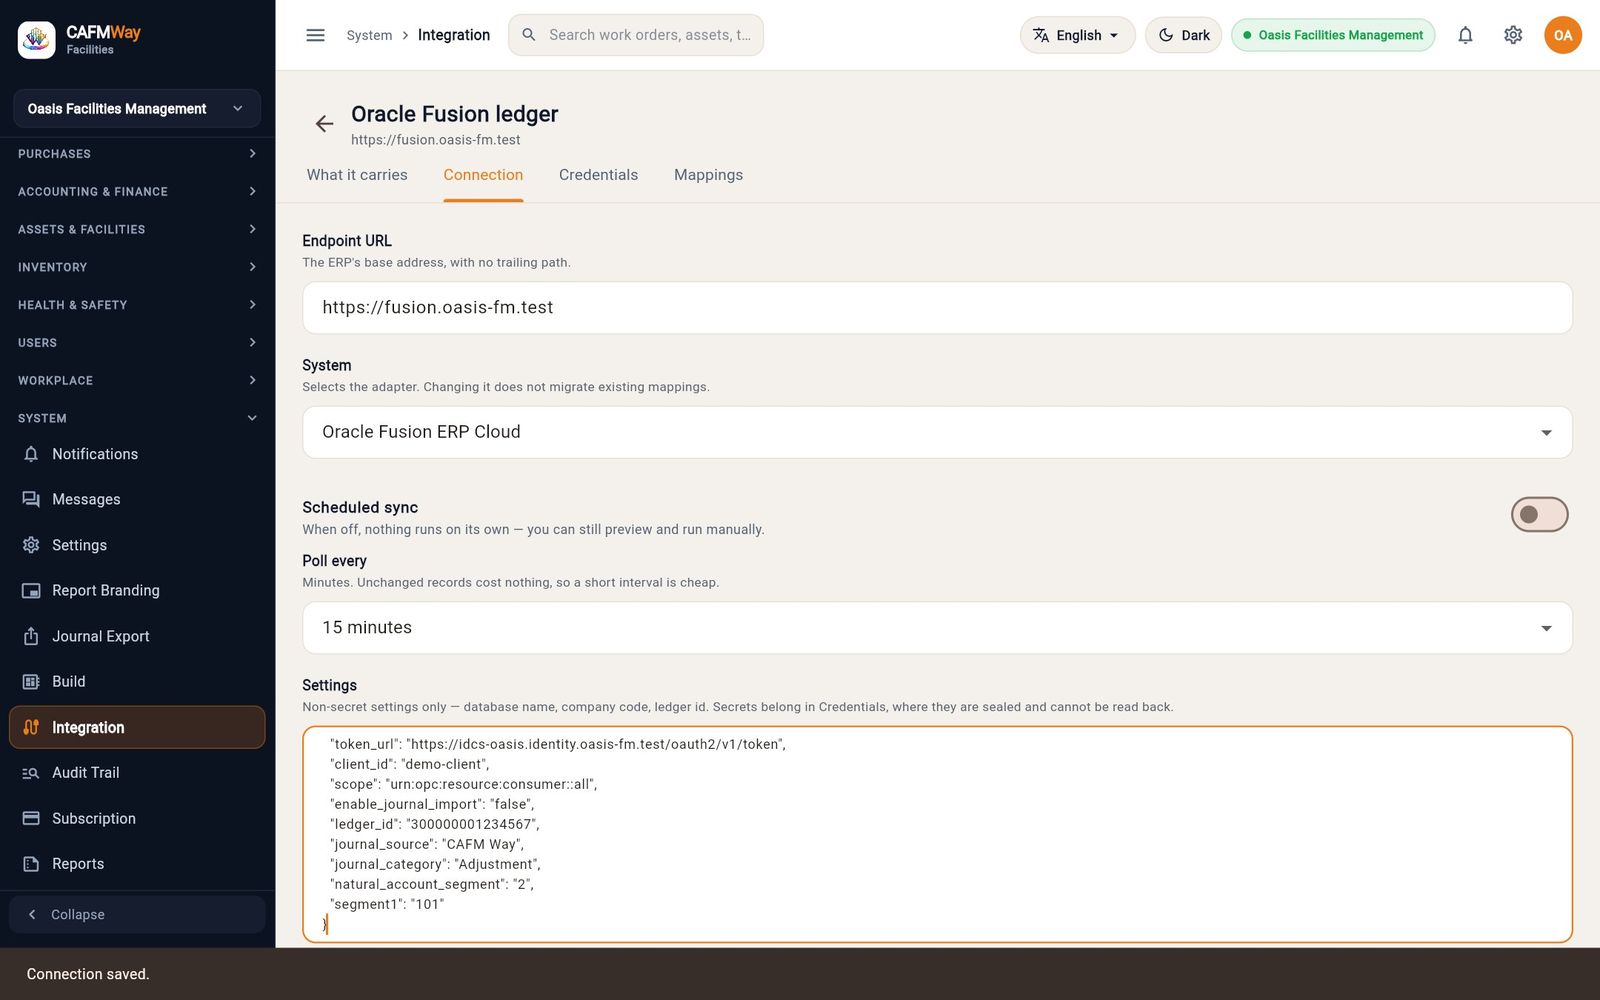
| Setting | Required | Meaning |
|---|---|---|
token_url, client_id | For OAuth | The identity domain's token address and the confidential application's client id, for example demo-client. Store the client secret as the client_secret secret. |
scope | No | OAuth scope. Default urn:opc:resource:consumer::all. |
username | Instead of OAuth | Basic sign-in with the password secret. Use this only on test pods. |
enable_journal_import | No | Default false. Journals are refused until this is true. |
ledger_id | For journals | The target ledger's id in Fusion. |
fbdi_columns | For journals | The column order of your pod's GL interface template. |
natural_account_segment | No | Which chart-of-accounts segment carries the natural account. Default 2. |
segment1 … segment30 | For journals | Fixed values for the other segments, for example the company segment 101. |
journal_source, journal_category | No | Default Manual and Adjustment. |
trust_account_codes | No | Default false. When true, a CAFM Way account code that is not linked to a Fusion account is sent as the natural account as is. |
Secrets: client_secret (OAuth) or password (basic).
SAP S/4HANA
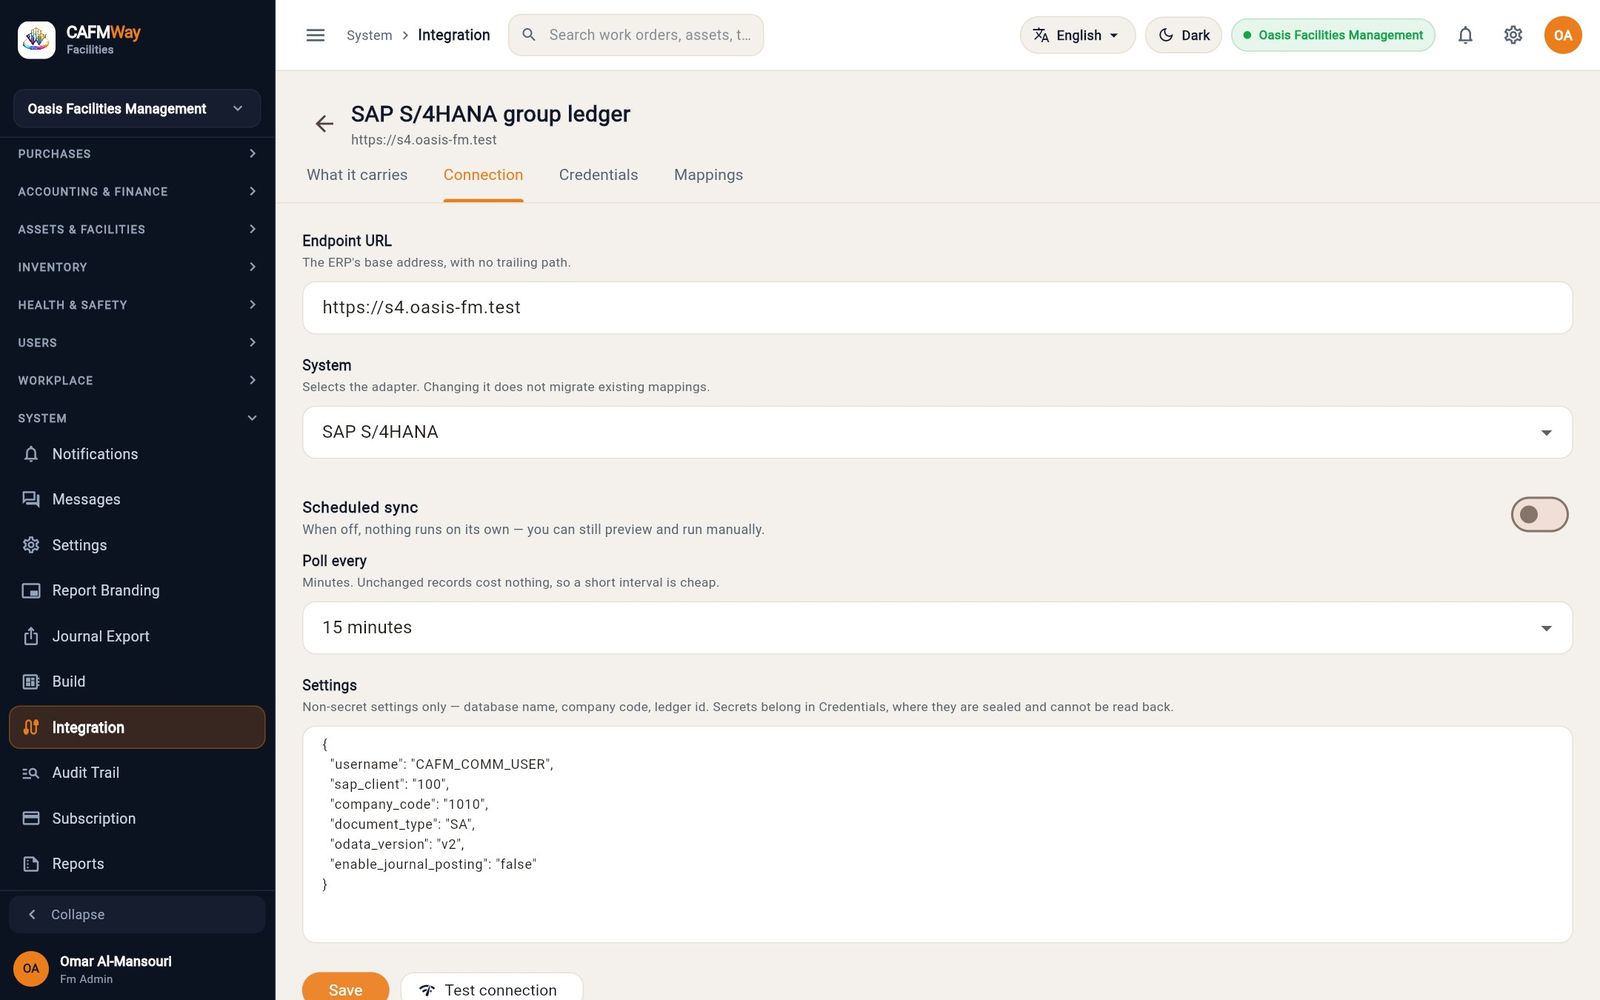
| Setting | Required | Meaning |
|---|---|---|
username | For basic sign-in | The communication user. Store its password as the password secret. Without a username, the access_token secret is sent as a bearer token. |
sap_client | Usually | The SAP client number, for example 100. |
company_code | For documents | The company code that journals and invoices post to, for example 1010. |
odata_version | No | v2 (default) or v4. |
enable_journal_posting | No | Default false. Journals and supplier invoices are refused until this is true. |
document_type | No | The journal document type. Default SA. |
service_<entity>, entityset_<entity>, key_<entity> | No | Override the OData service, entity set or key for one entity when your release names it differently. |
Secrets: password (with username) or access_token. The communication arrangement for each scenario, for example journal posting, must exist in SAP.
Store the credentials
- Who: FM Administrator, FM Manager
- Where: Integration → Configure → Credentials
Secrets are sealed on the server. After you save one, nobody can read it back, not even an administrator. The page only shows its name and the last four characters.
- Open the Credentials tab. Under Still needed, a button is shown for each secret this ERP expects that is not stored yet.
- Click the secret's button, for example api_key. A dialog opens.
- Paste the value in Value and click Replace. The secret moves to the list with a masked hint such as
••••91c2. - Repeat for every secret the ERP needs. For a secret that has no button, click Add another secret and type its name and value.
- To change a secret later, click its pencil icon (Replace). To delete it, click its bin icon (Remove).
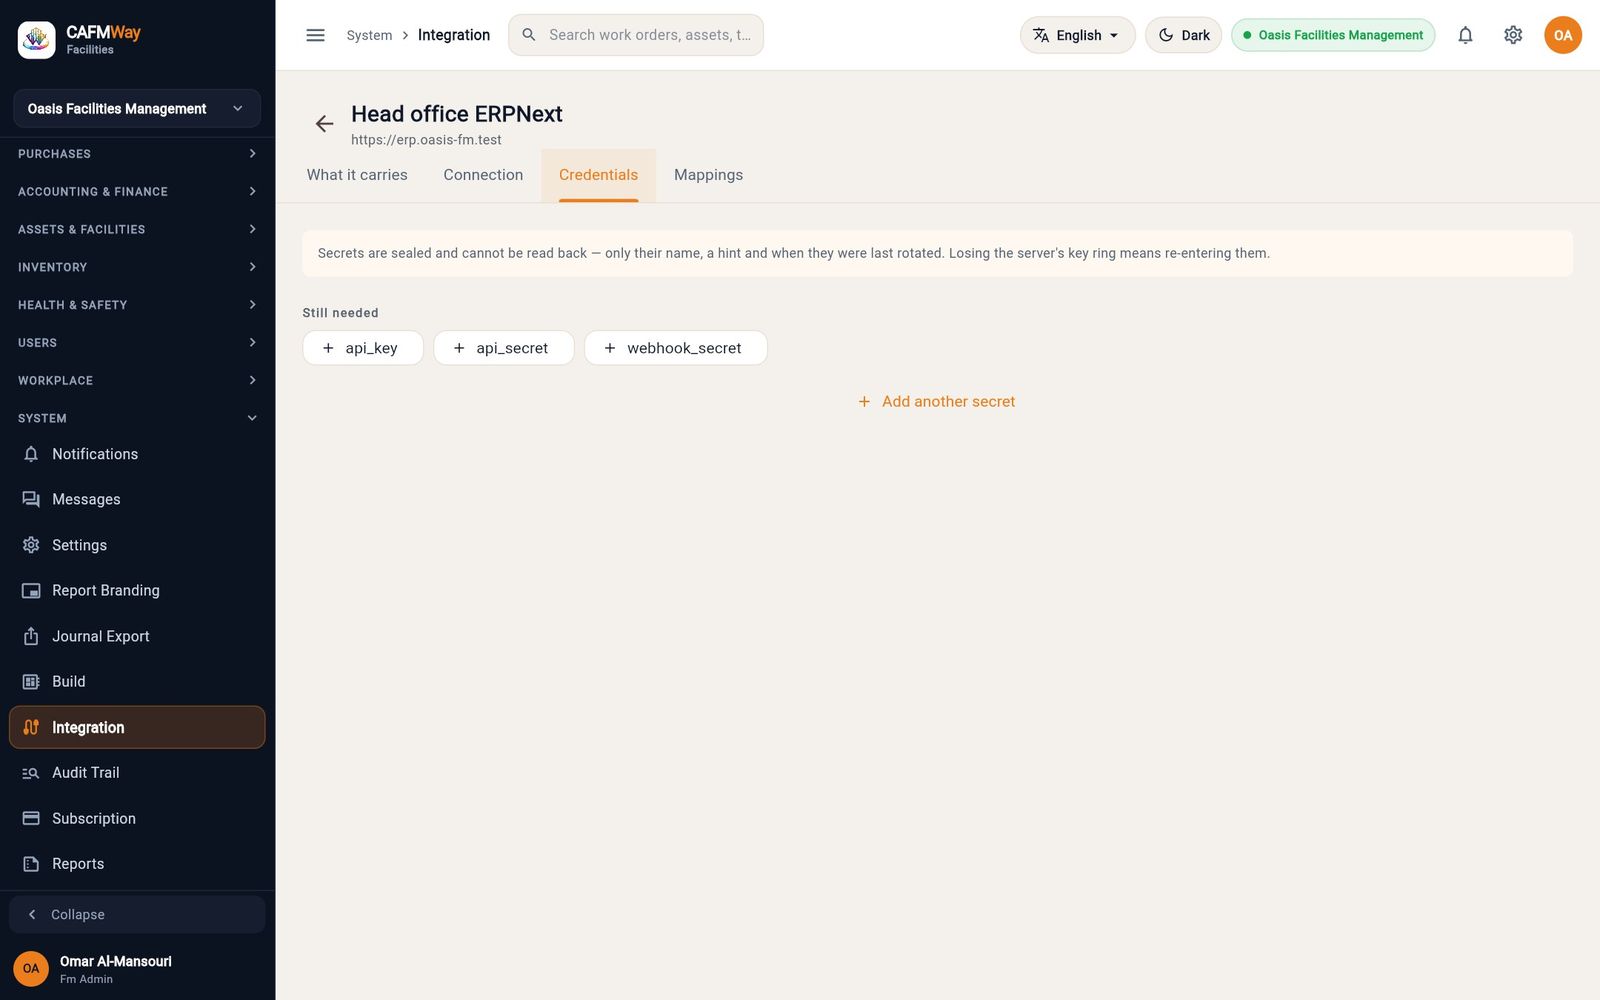
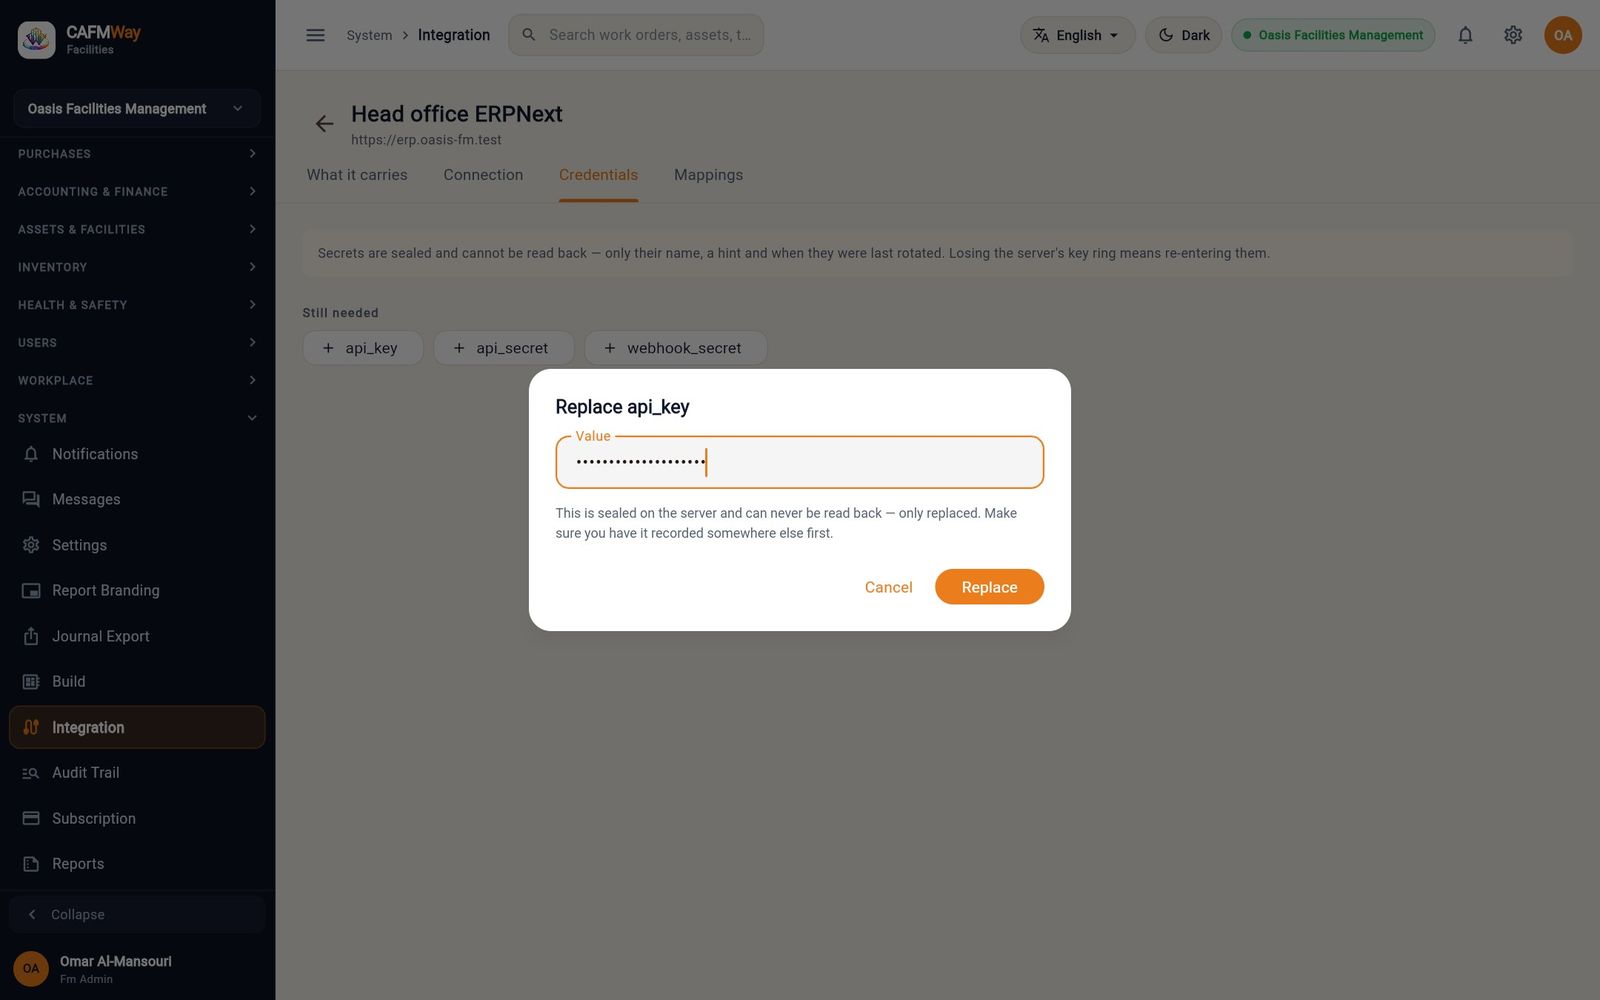
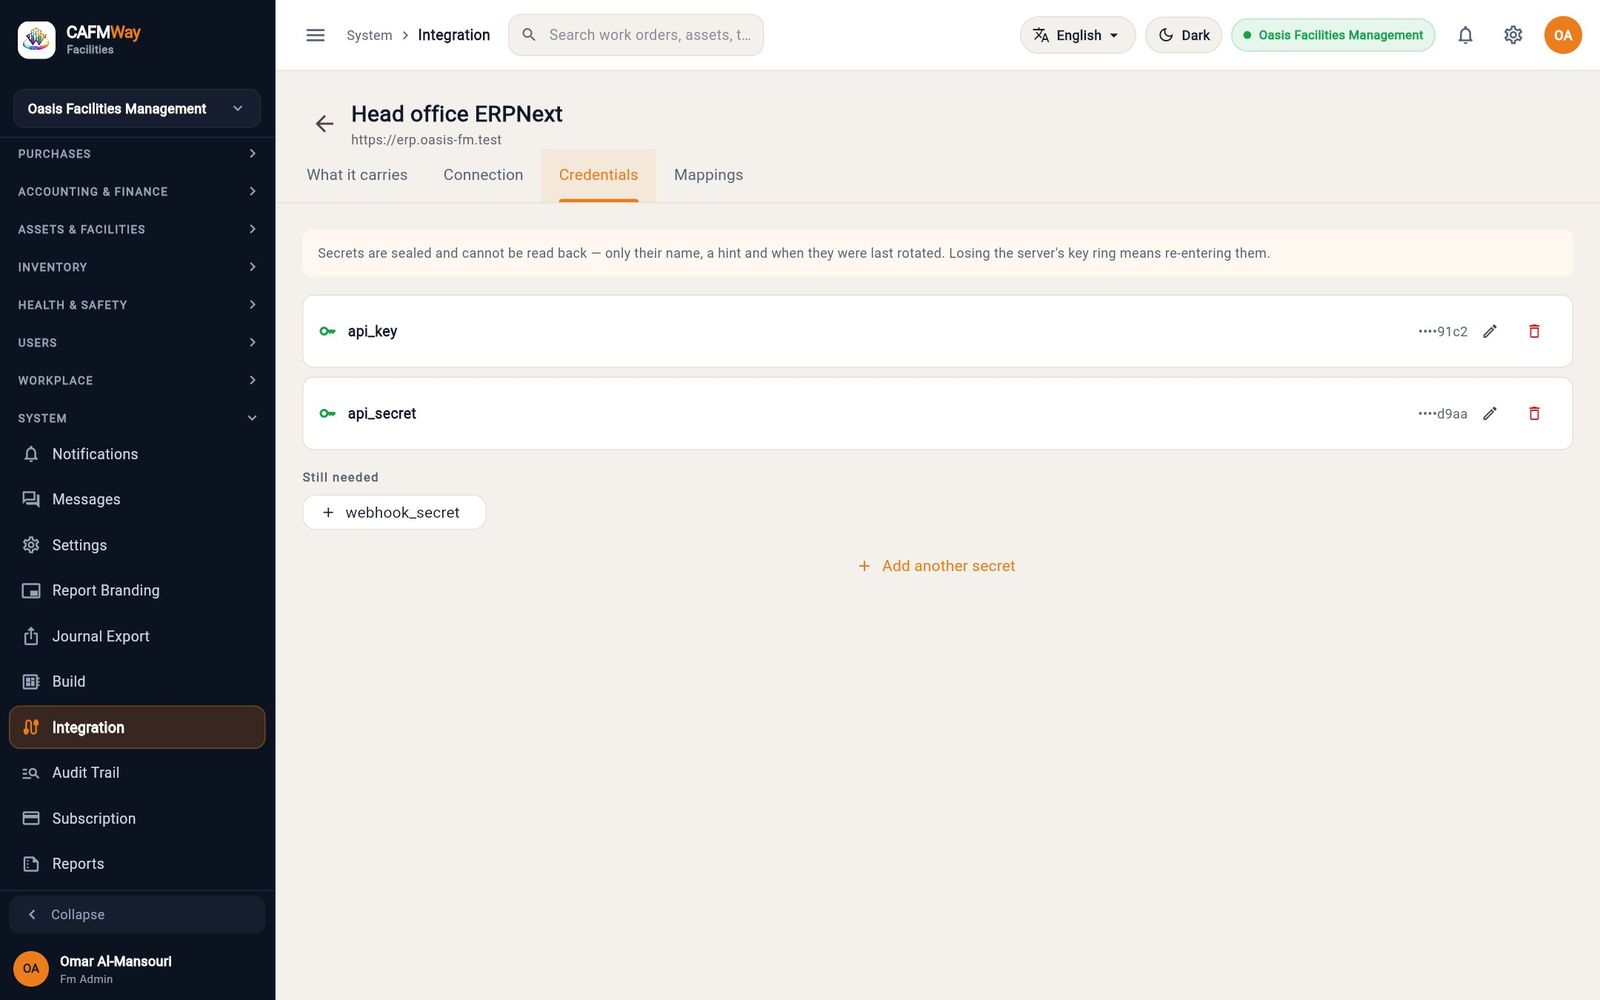
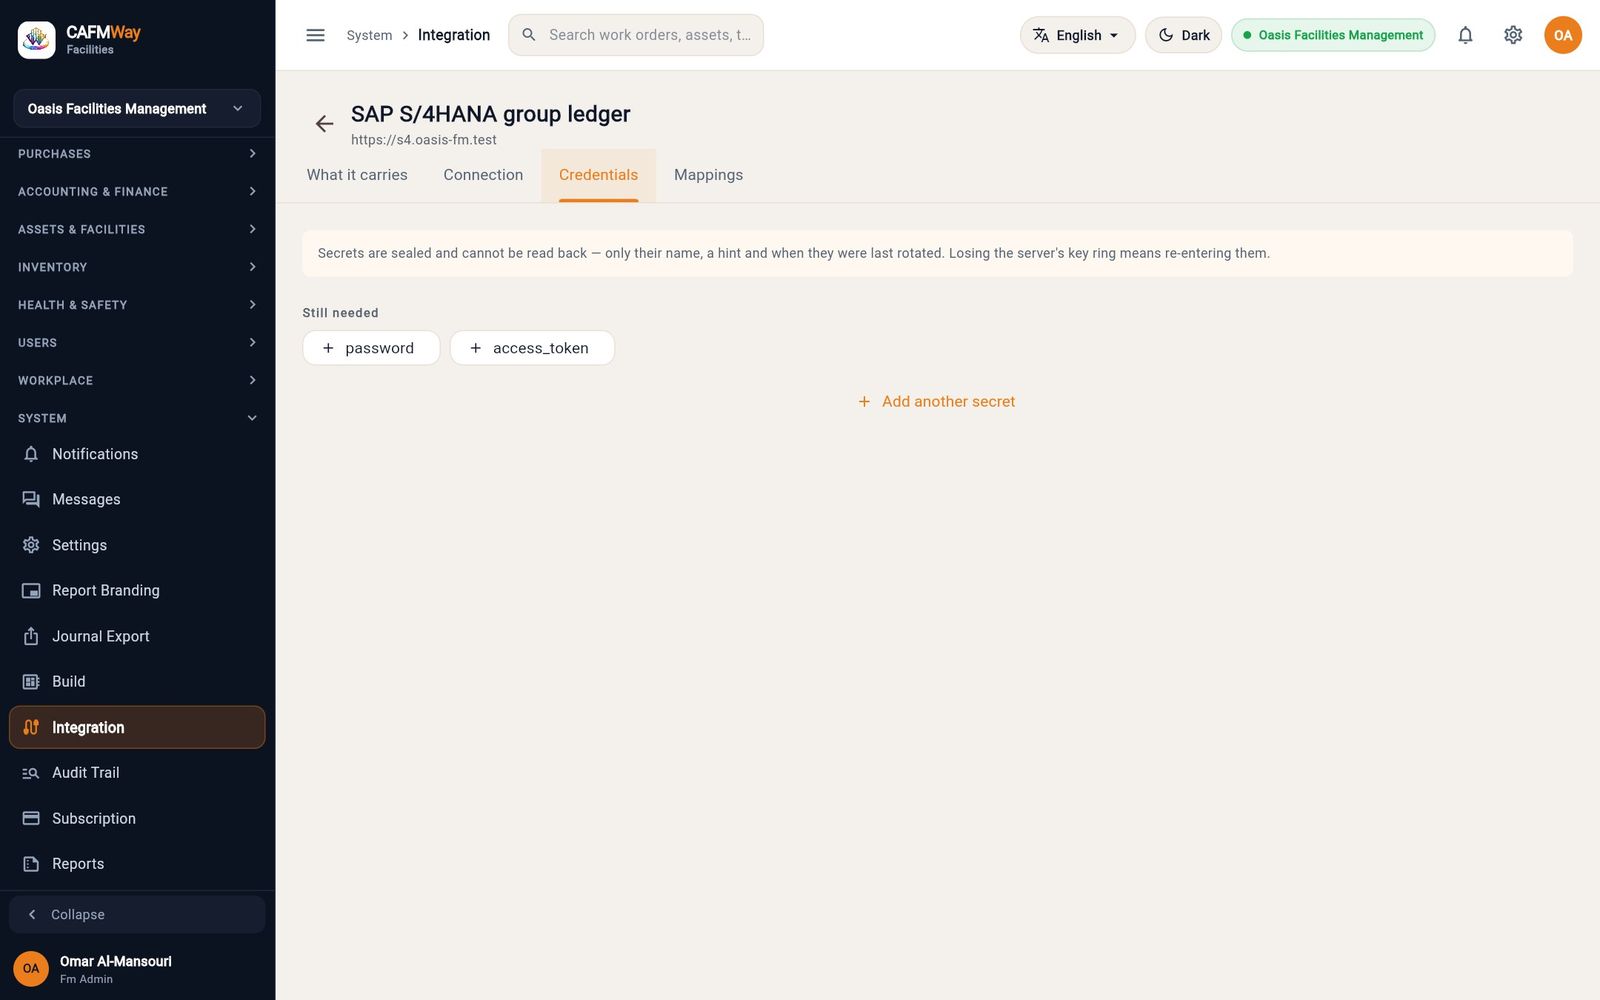
Test the connection
- Who: FM Administrator, FM Manager
- Where: Integration → connector card → Test, or Configure → Connection → Test connection
- Click Test on the card, or Test connection on the Connection tab.
- If CAFM Way reaches the ERP and the credentials work, the dialog shows Connected, the ERP version and The credentials work.
- If not, the dialog shows Could not connect and the ERP's own reason. Correct the address, settings or secret, then test again.
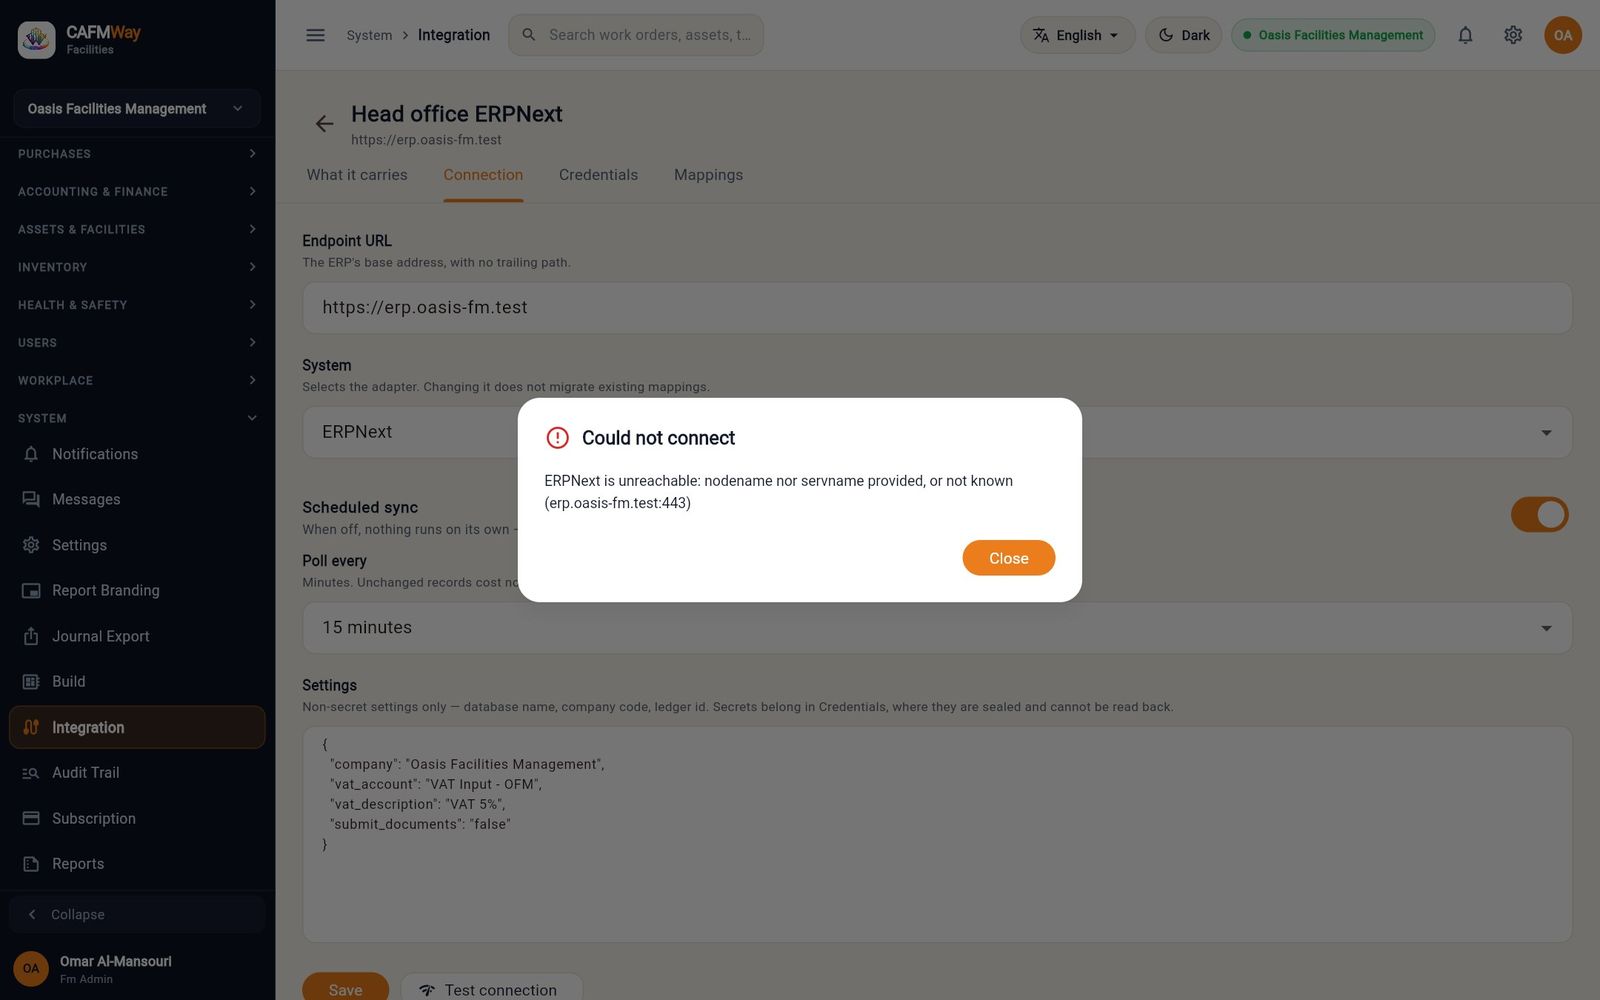
The result of a test is saved on the connector. A failed test marks the card Failing and prints the reason on it. A successful test clears a paused connector.
| Message after the ERP name | Usual cause |
|---|---|
is unreachable: nodename nor servname provided, or not known | The host name in Endpoint URL does not exist, or DNS cannot resolve it. |
has no 'client_secret' secret configured | A required secret is missing on the Credentials tab. |
resolves only to addresses a connector may not reach | The host is on a private network that this installation does not allow. |
| HTTP 401 or 403 from the ERP | Wrong key, secret or password, or the integration user lacks rights in the ERP. |
Map fields and translate codes
- Who: FM Administrator, FM Manager
- Where: Integration → Configure → Mappings
Each ERP adapter already knows the standard field names of its ERP. Use mappings only when your ERP differs from the standard.
- A field mapping says what this ERP calls one of CAFM Way's fields, for example a custom field that holds the VAT number.
- A value mapping translates a code, for example CAFM Way's unit
EAisNosin ERPNext andUnit(s)in Odoo.
Add a field mapping
- Next to FIELD MAPPINGS, click Add. The Map a field dialog opens.
- In Entity, choose the record type, for example
supplier. - In Our field, type the CAFM Way field, for example
tax_id. - In Their field, type the ERP field, for example
custom_vat_registration_no. - In Applies to, choose Both directions, Inbound only or Outbound only.
- In Transform, choose how the value is cleaned on the way: None, UPPERCASE, lowercase, Trim spaces, Number, Yes / no or Date.
- Click Save.
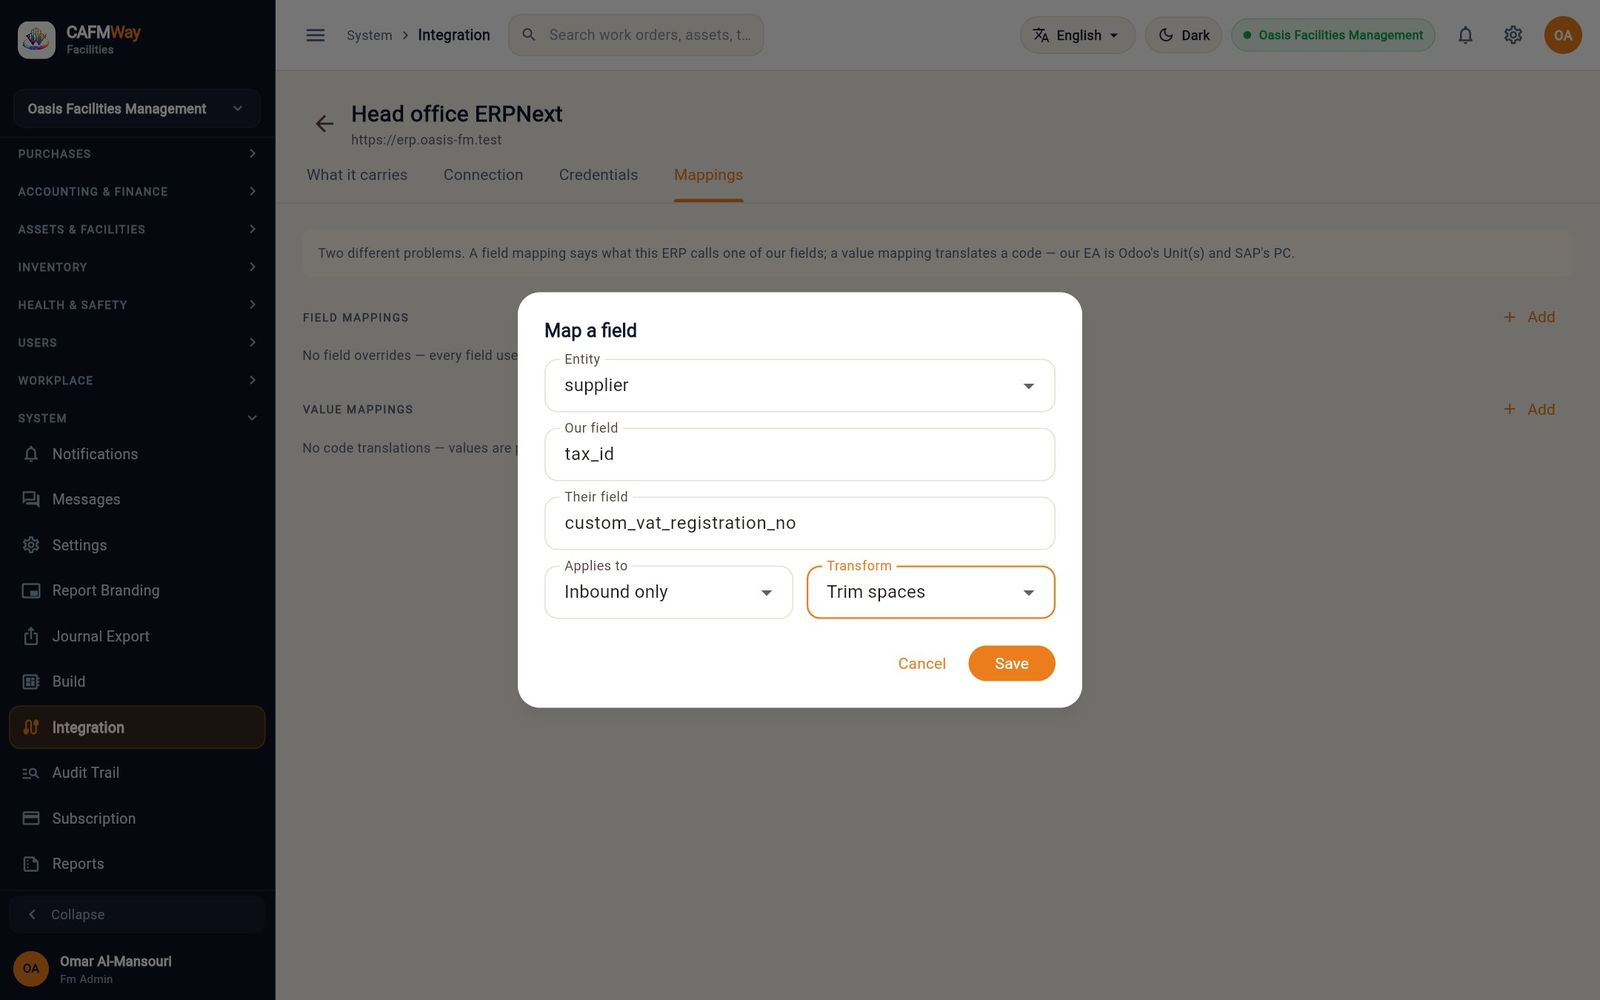
Add a value mapping
- Next to VALUE MAPPINGS, click Add. The Translate a code dialog opens.
- In Kind of code, choose Unit of measure, Currency, Tax code, Payment terms, Supplier group or Warehouse type.
- In Ours, type the CAFM Way code, for example
EA. - In Theirs, type the ERP code, for example
Nos. - Click Save.
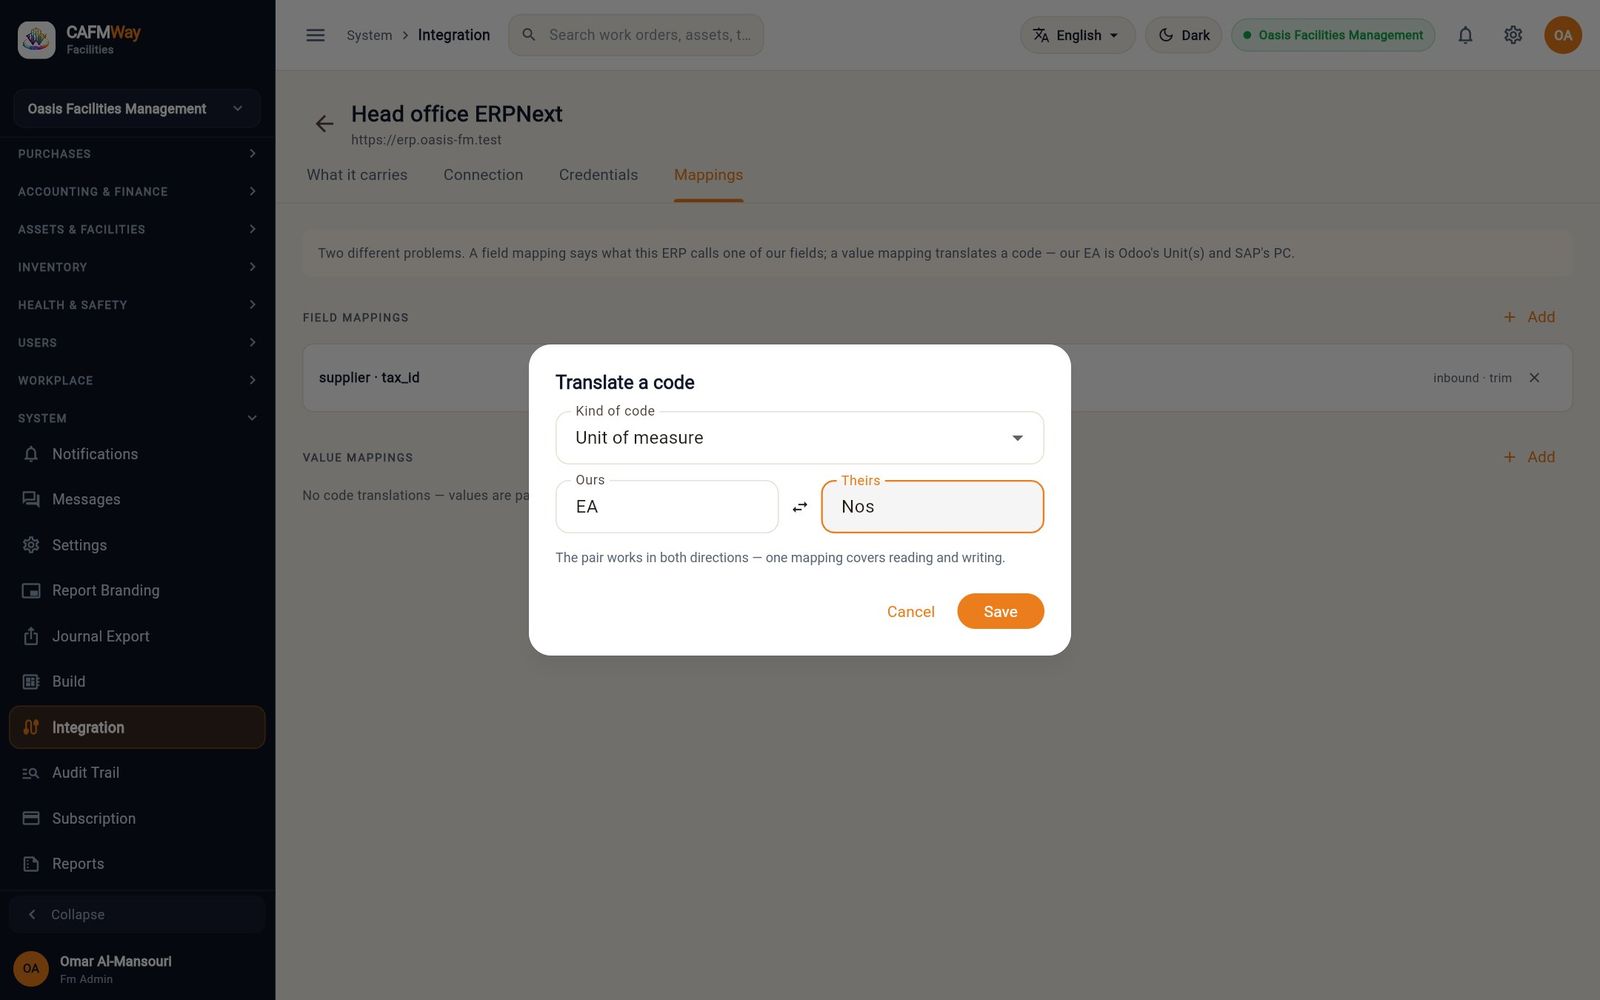
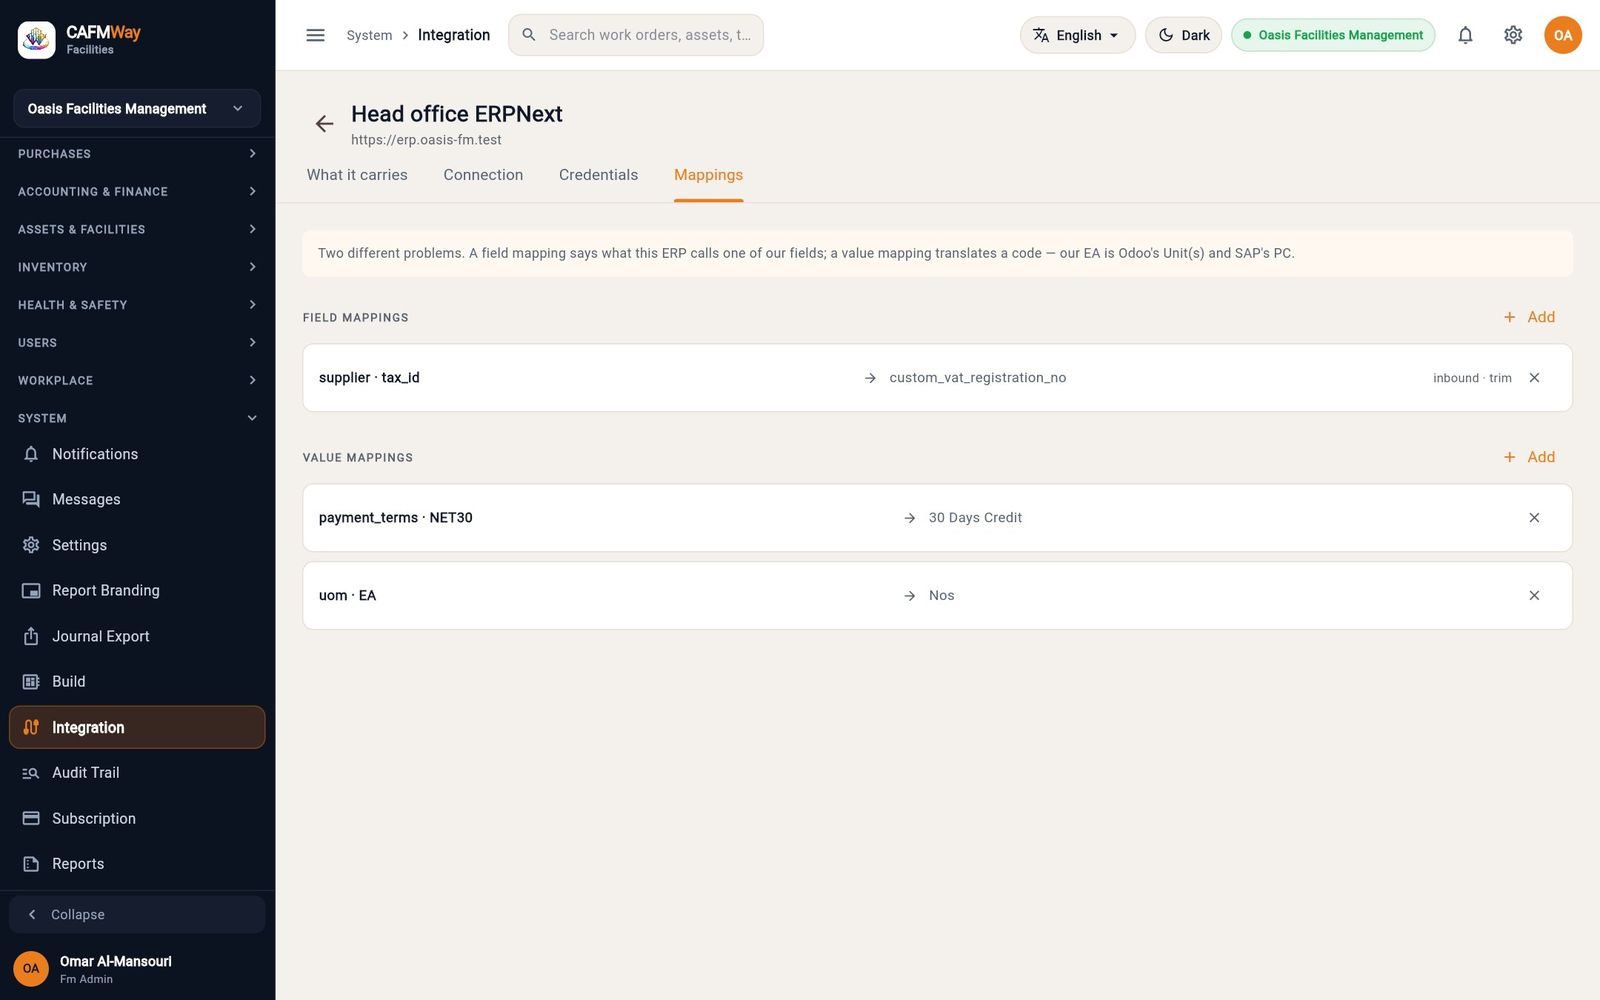
To delete a mapping, click the × at the end of its row.
Choose what the connector carries
- Who: FM Administrator, FM Manager
- Where: Integration → Configure → What it carries
This tab lists every kind of record the integration knows. Each row has a switch, a status line, a direction and, for master data, Preview and Run.
- Turn on the switch of each entity this connector should carry. The change is saved at once.
- Leave the direction of master data at ERP → CAFM. Documents and journals show CAFM → ERP.
- Read the status line under the name:
- Never synced: the entity has not been pulled yet.
- Up to a date: records changed up to that time have been pulled.
- Outbound only: a document CAFM Way sends; it has no Preview or Run.
- This system does not carry it: this ERP has no such data; the row is greyed out.
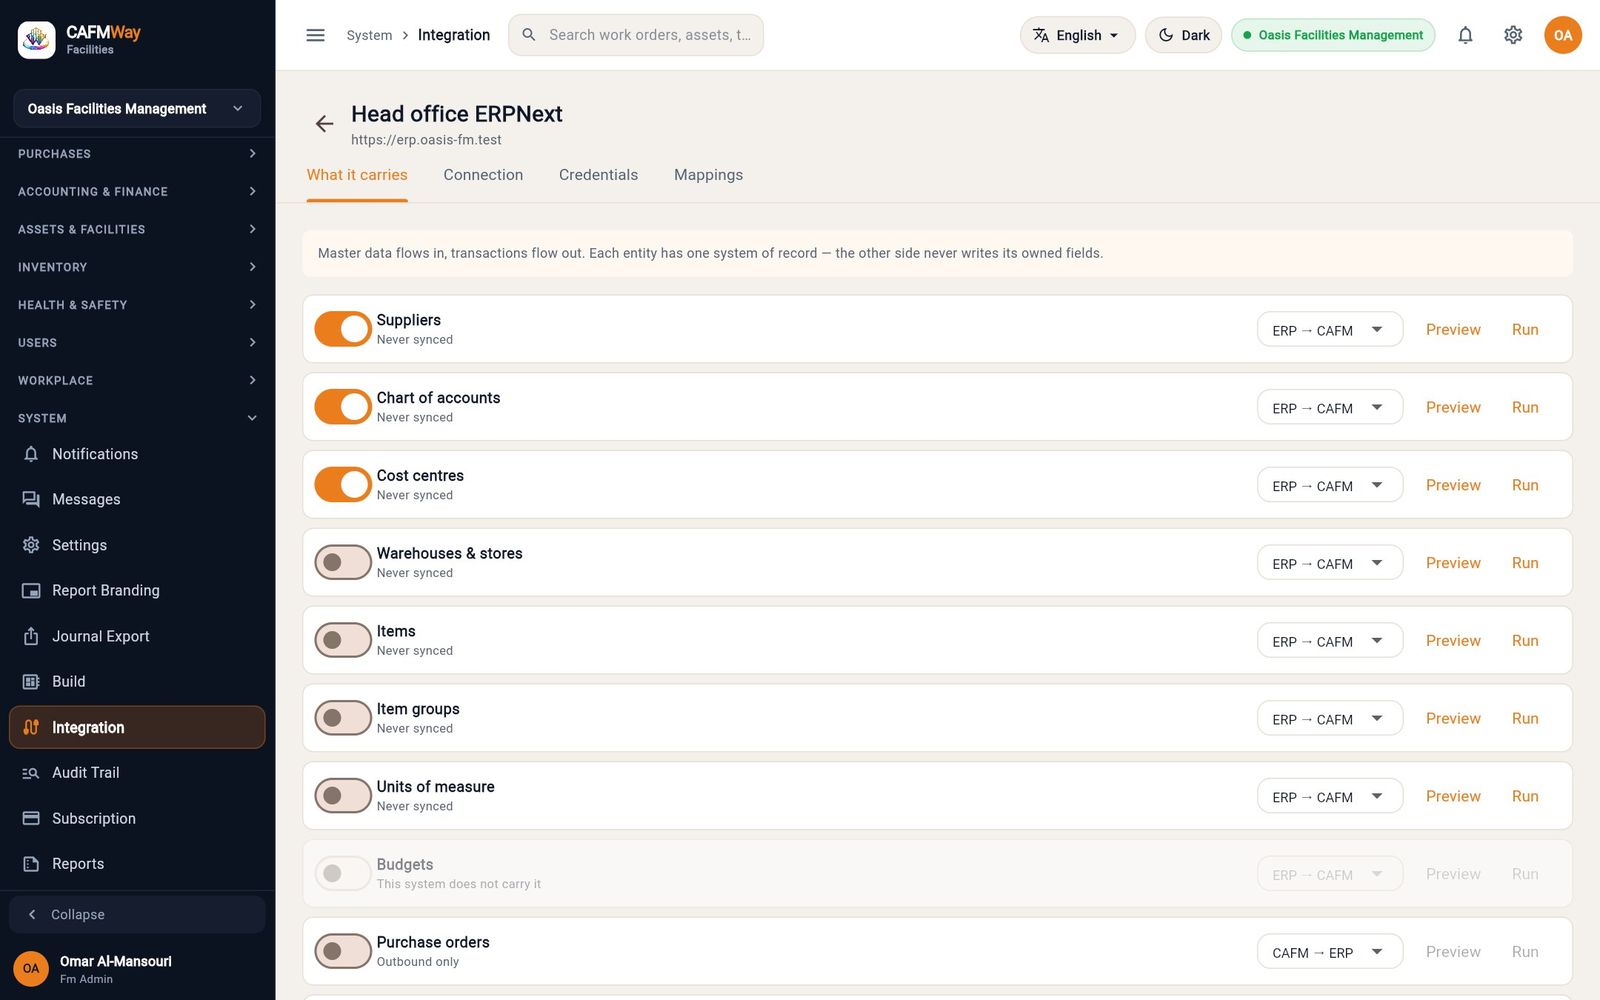
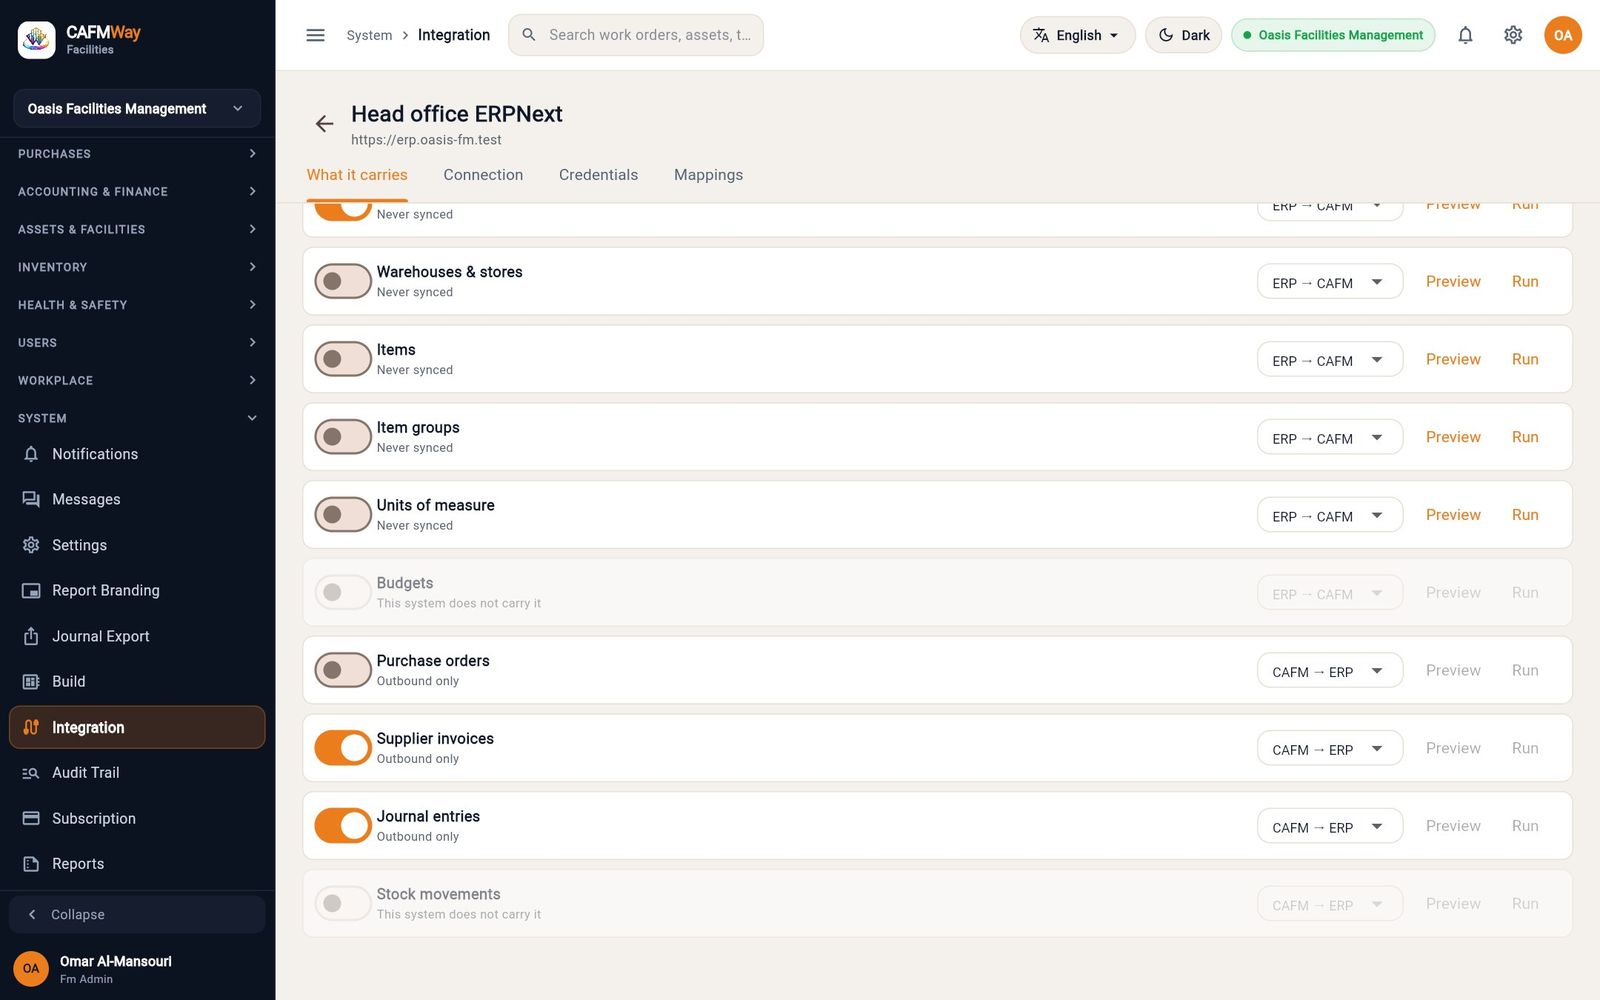
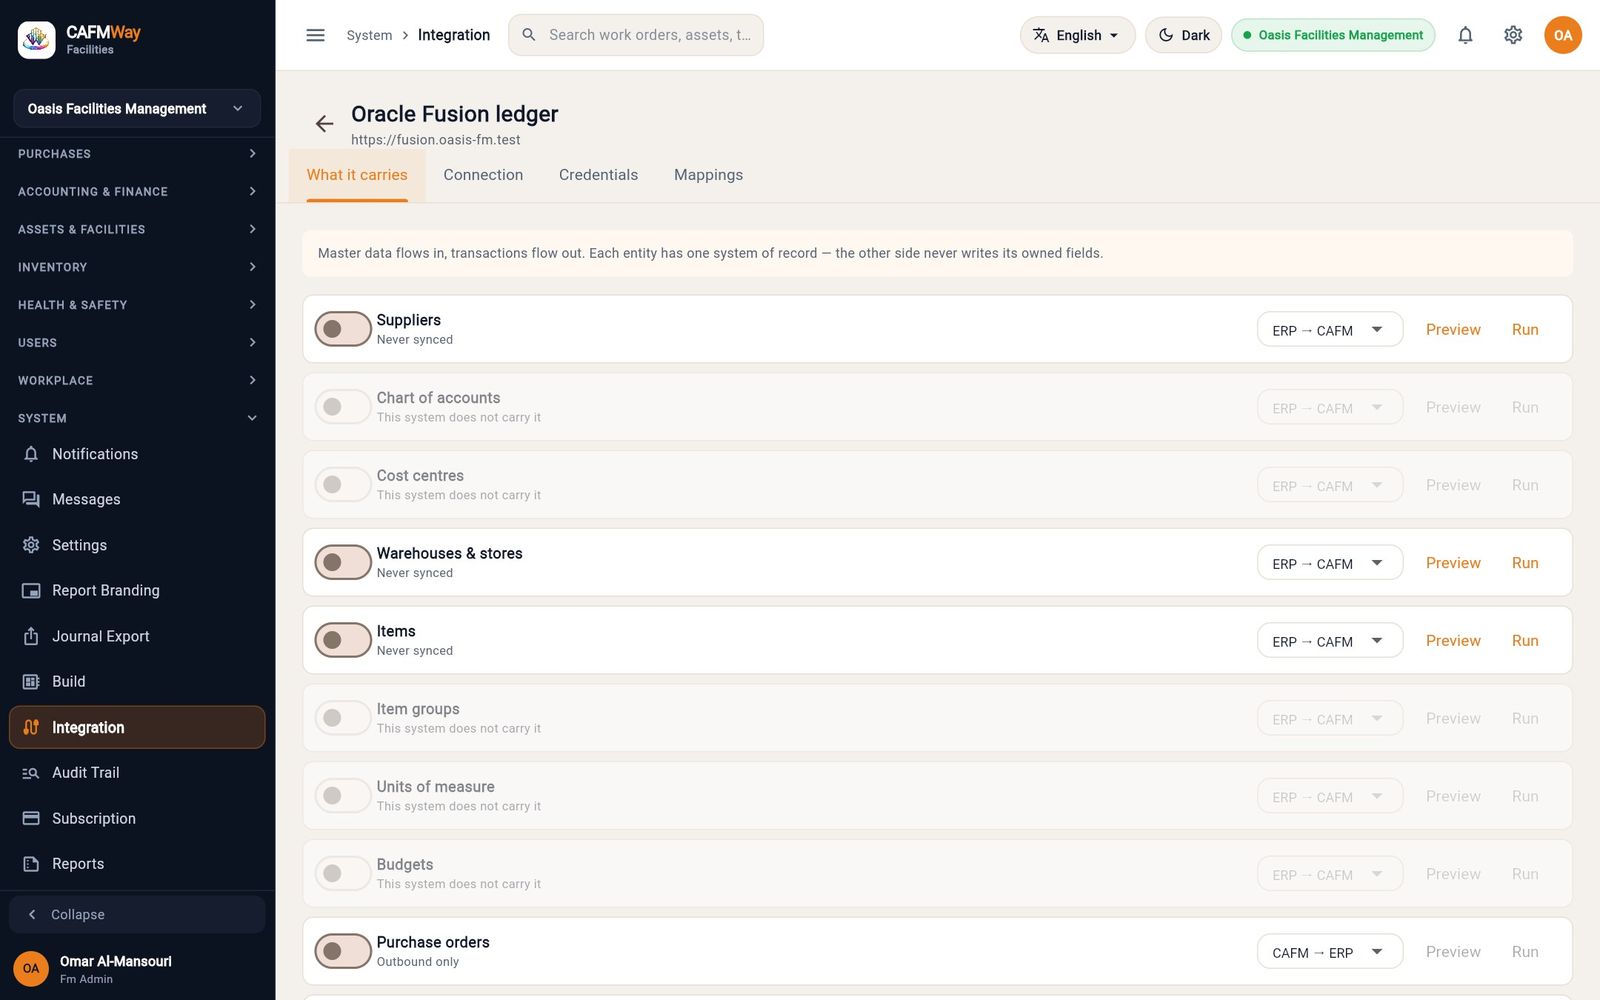
Pull master data from the ERP
- Who: FM Administrator, FM Manager
- Where: Integration → Configure → What it carries → Preview / Run
Always preview a pull before running it for the first time.
- On the entity row, click Preview. CAFM Way reads the ERP and writes nothing. The dialog Preview — nothing was written shows:
- Received: records the ERP returned.
- New: records that would be created in CAFM Way.
- Updated: linked records whose ERP values changed.
- Unchanged: linked records with nothing new.
- Conflicts: records changed on both sides.
- Failed: records that cannot be applied, with the reason.
- Examples: up to 20 sample records.
- If the preview looks right, click Run. The dialog Sync complete shows the same counters for the real run.
- Check the result in CAFM Way, for example PURCHASES → Suppliers or ACCOUNTING & FINANCE → Chart of Accounts.
- For automatic pulls, turn on Scheduled sync on the Connection tab. At each interval CAFM Way pulls every switched-on entity in this order: units of measure, item groups, chart of accounts, cost centres, warehouses, suppliers, items.
If the ERP cannot be reached, the dialog is titled Run failed and shows the reason.
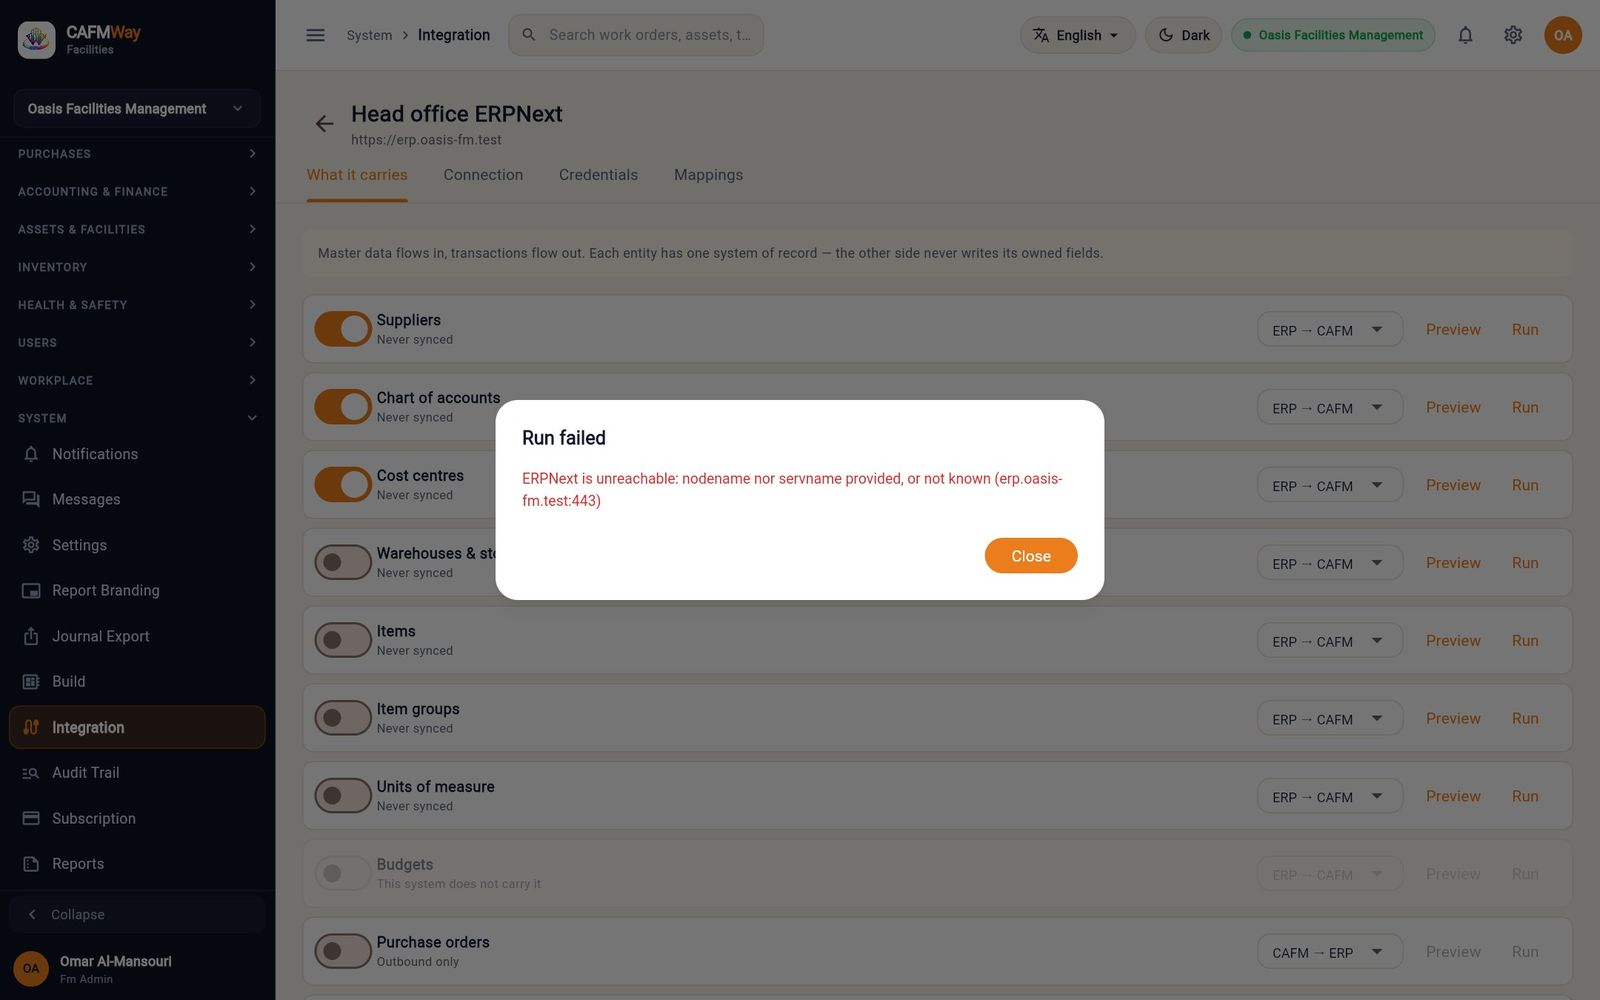
Send journals and documents to the ERP
- Who: FM Administrator, FM Manager, Finance Officer
- Where: Sidebar → SYSTEM → Journal Export; Integration → What it carries
Journal entries and supplier invoices leave CAFM Way through a send queue. Each item in the queue is one document for one connector. A background sender delivers the queue every 20 seconds.
A journal export batch collects a period's postings so that each posting is exported once:
- On every connector that should receive journals, switch on Journal entries (CAFM → ERP) and turn on Scheduled sync.
- Open Journal Export and click New Batch. The New export batch dialog opens.
- In Target system, choose the ledger, for example ERPNext, and pick the period.
- Click Create. The batch appears in the list with the status Pending and its entry count, debit and credit totals.
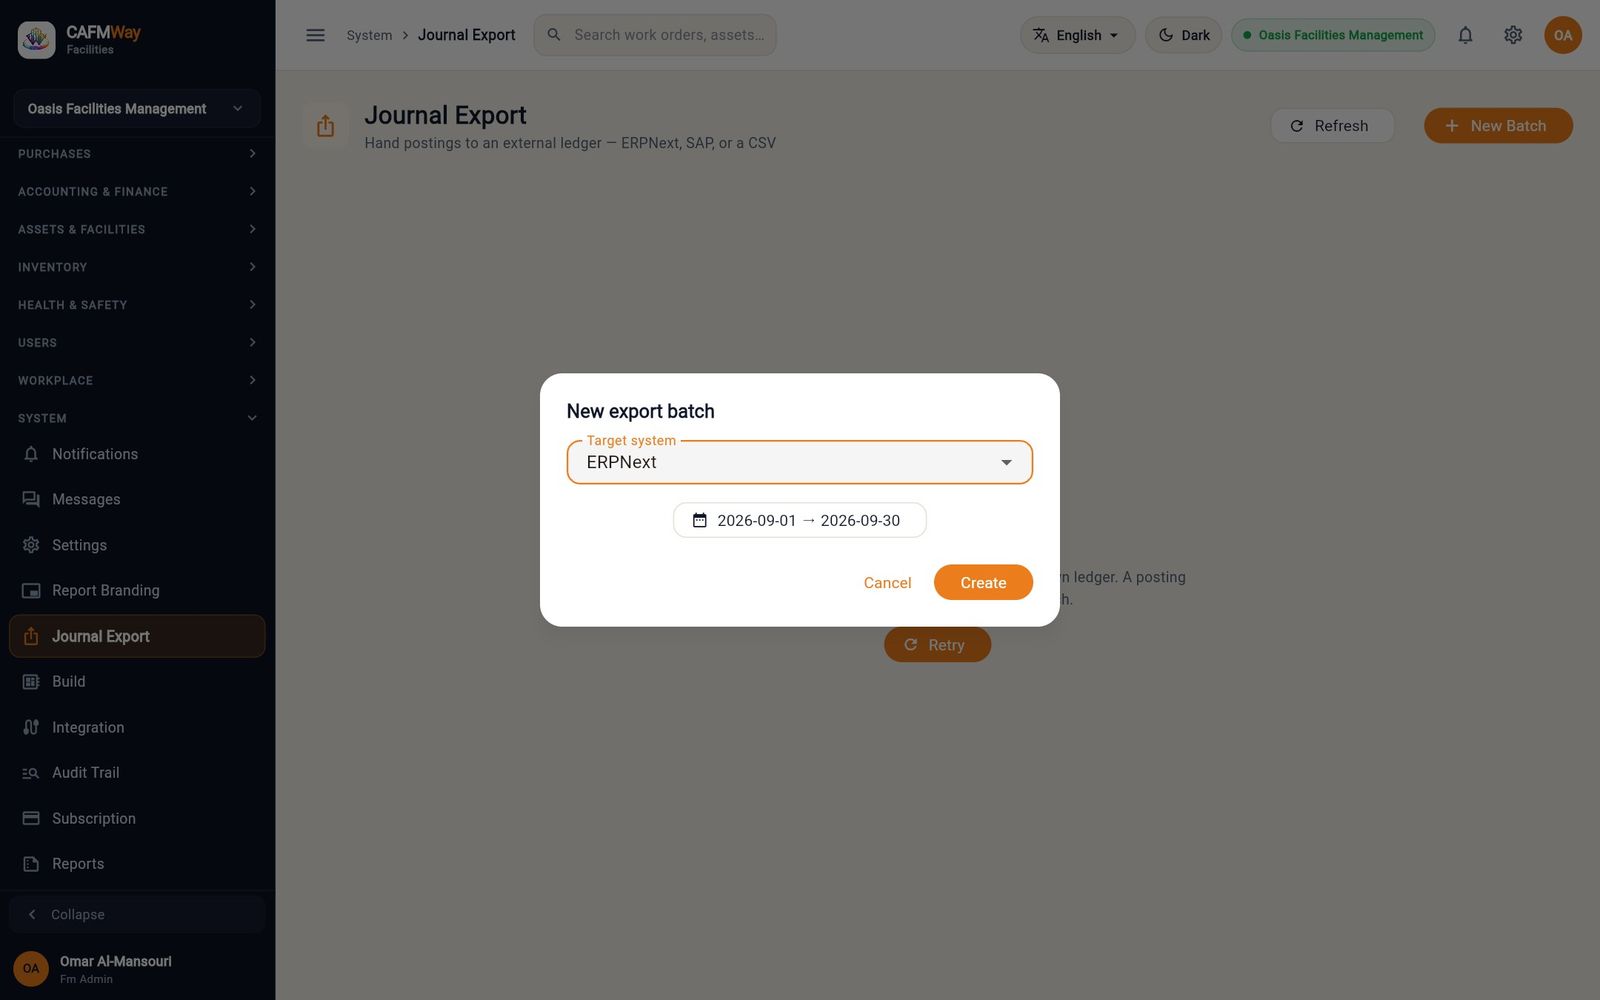
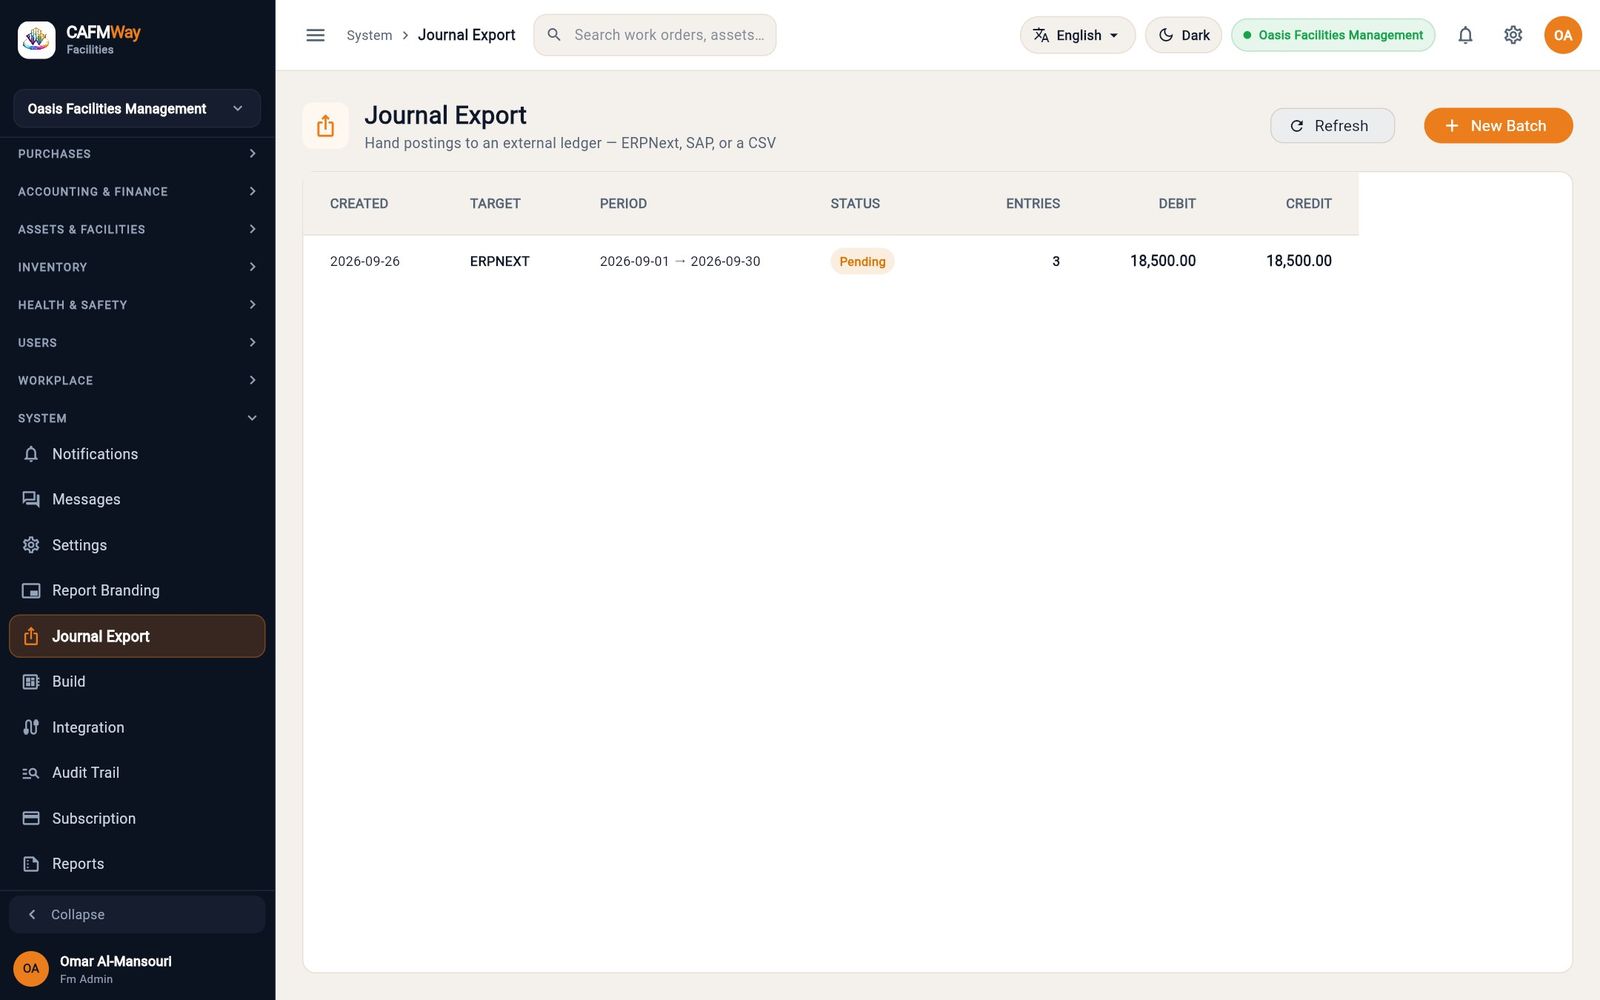
When the batch is dispatched, CAFM Way groups its lines by voucher and queues one journal per voucher for every connector that has Journal entries switched on. The batch then shows Dispatched, and Success once the ERP has accepted every journal.
Monitor syncing, retries and failures
- Who: FM Administrator, FM Manager
- Where: Sidebar → SYSTEM → Integration
The top of the Integration page shows how many connectors are syncing or need attention. Click Refresh to reload the figures.
| Tile | Meaning |
|---|---|
| Syncing | Connectors with Scheduled sync on and no fault. |
| Failing | Connectors whose last run or test failed. |
| Open conflicts | Records waiting in Held for review. |
| Queued to send | Documents waiting in the send queue. |
| Stuck | Documents that could not be delivered. |
Each connector card shows a status chip, when it last synced, how many documents are queued, how many conflicts are open, and the last error in red.
| Chip | Meaning |
|---|---|
| Healthy | Scheduled sync is on and the last run succeeded. |
| Partial | The last run had failures on some entities or records. |
| Failing | The last run or test failed. The reason is printed on the card. |
| Paused | After five failures in a row CAFM Way pauses the connector: 2 minutes after the fifth, 4 after the sixth, and so on up to 60 minutes. A successful test resumes it. |
| Behind | The last sync is older than twice the poll interval. |
| Not syncing | Scheduled sync is off. |
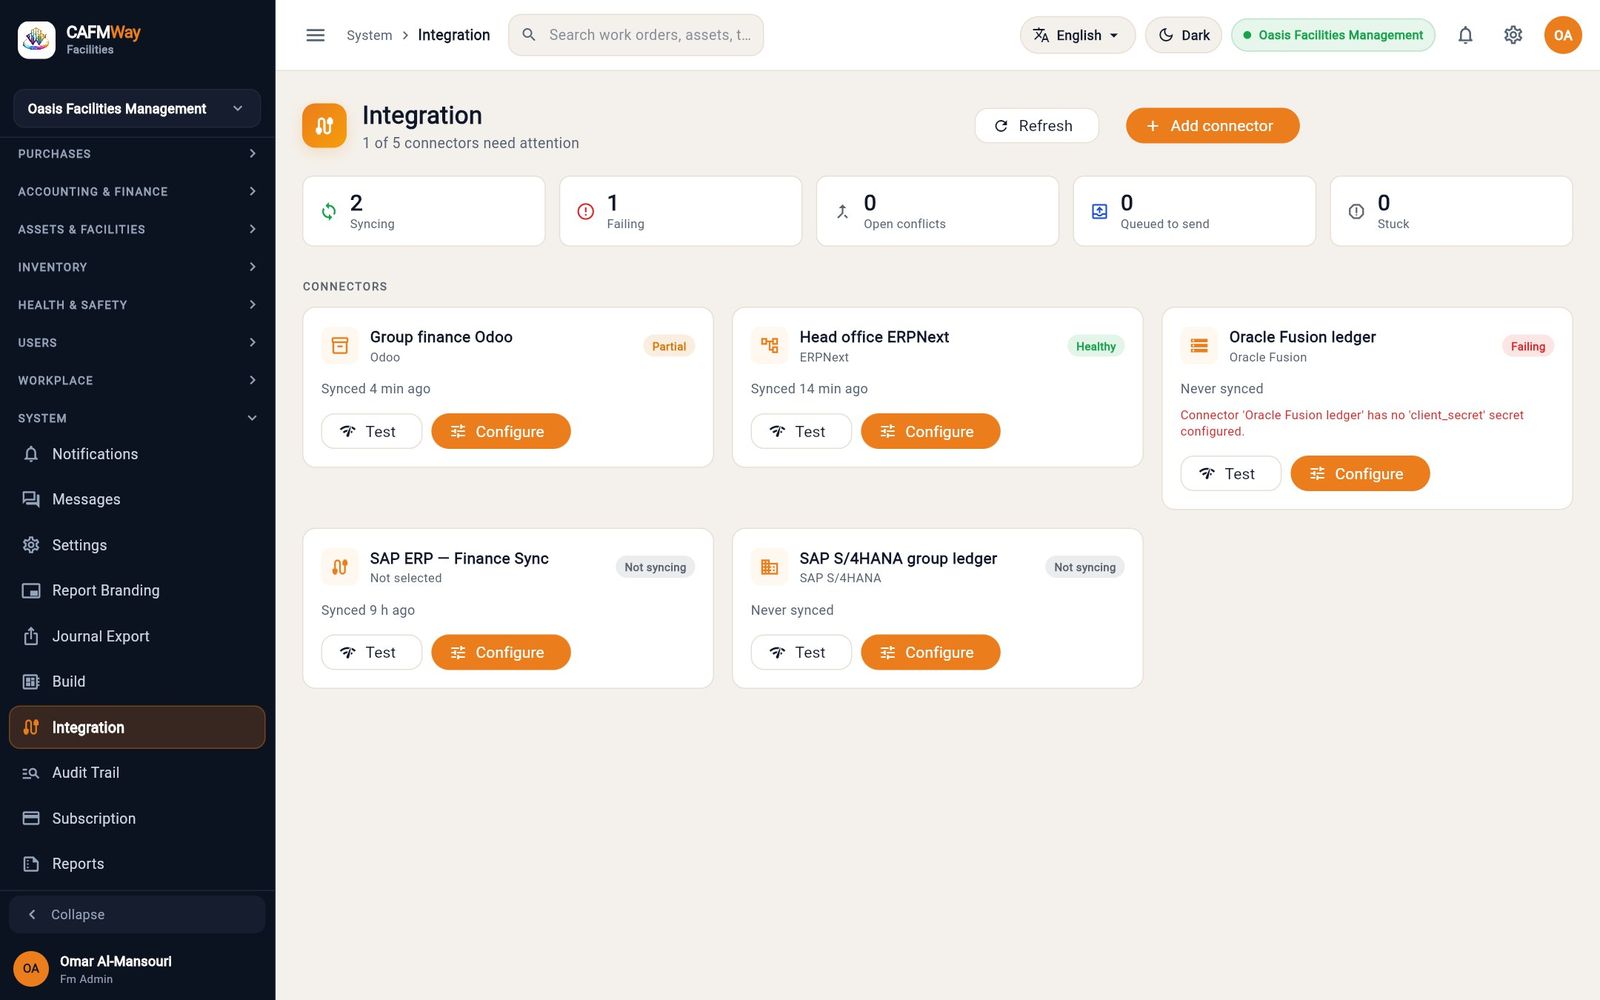
How the send queue retries
flowchart TD
    P[Pending] --> S[Sending]
    S -- Accepted --> OK[Sent]
    S -- Temporary error --> F[Failed
waits, then retries]
    F --> S
    S -- Setup error --> D[Not delivered]
    F -- 8th attempt fails --> D
D -- Retry --> P- A temporary error, such as a timeout or an ERP that is down, is retried after 30 seconds, 2 minutes, 10 minutes, 30 minutes, 2 hours and then every 6 hours.
- After 8 failed attempts, or at once on a setup error (a refused request, a missing secret, a missing setting such as
company, or a switch such asenable_journal_postingthat is off), the item moves to Not delivered. - Each item carries a fixed identity, so a retry never creates a second queue entry for the same document.
Retry an item that was not delivered
- On the Integration page, find the Not delivered section. It appears only when an item is stuck.
- Read the error under the item. Fix its cause first, for example add the missing setting or secret.
- Click Retry. The item returns to the queue with its attempt count reset, and the Queued to send tile goes up by one.
Resolve conflicts
- Who: FM Administrator, FM Manager
- Where: Integration → Held for review
A conflict arises when the same record changed in CAFM Way and in the ERP since the last pull. CAFM Way does not guess; it holds the record for you.
- On the Integration page, the Held for review section lists each held record with the fields that differ.
- Click Review. A dialog compares In CAFM with In the ERP, changed fields first.
- Choose one:
- Take theirs: the ERP's values win. They are applied at the next pull, through the normal checks.
- Keep ours: CAFM Way's values stay, and this ERP version is marked as seen.
- Ignore: close the conflict without a decision.
Worked examples
The three examples below follow what CAFM Way actually sends and receives. Names and numbers are demo data.
Dashboards and KPIs
This part covers the screens you look at before you act: the Dashboard, the Executive Dashboard, global search and the two KPI screens. It is written for FM managers, supervisors and helpdesk staff who start their day in the web app.
The Dashboard
- Who: every user; the figures follow the records the user may read
- Where: Sidebar → OVERVIEW → Dashboard
The Dashboard is the first page after sign-in. It shows the state of today's work and gives one-click shortcuts to the most common tasks.
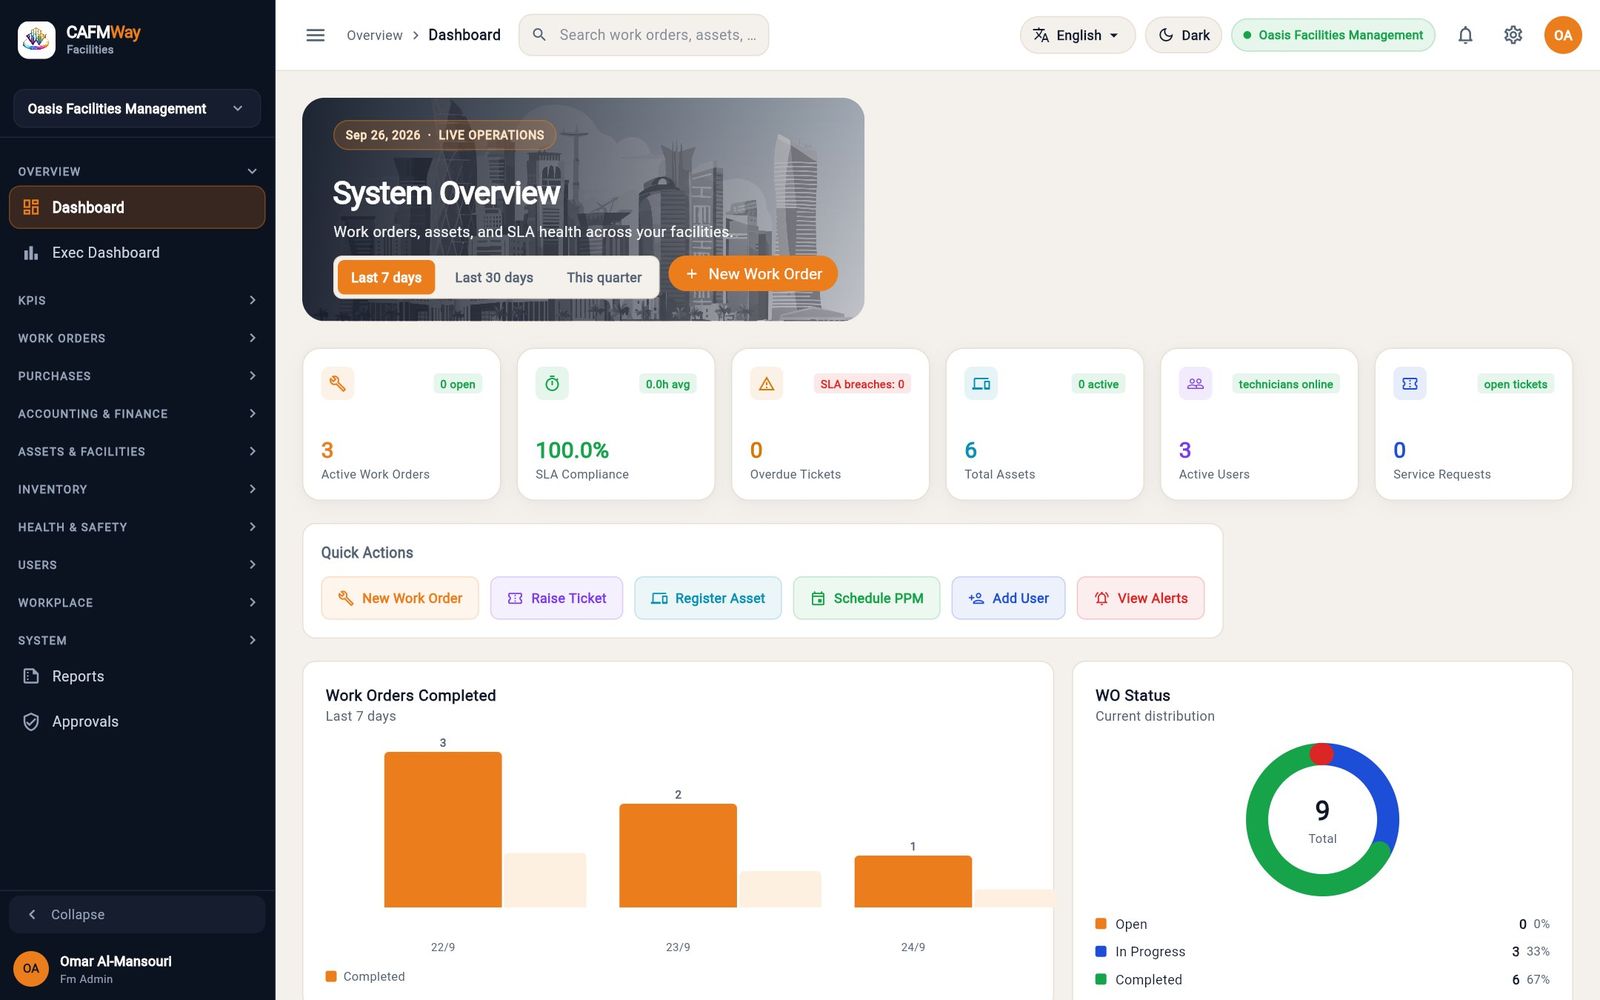
The page has four areas:
| Area | What it shows |
|---|---|
| System Overview banner | Today's date, a period switch (Last 7 days, Last 30 days, This quarter) and a New Work Order button. The period changes the Work Orders Completed chart. |
| KPI cards | Active Work Orders, SLA Compliance, Overdue Tickets, Total Assets, Active Users and Service Requests, each with a small badge (open count, average time, SLA breaches, and so on). |
| Quick Actions | New Work Order, Raise Ticket, Register Asset, Schedule PPM, Add User, View Alerts. |
| Charts and lists | Work Orders Completed by day, WO Status (open, in progress, completed, overdue), Recent Activity with View All, and Active Alerts. |
- Choose the period in the banner. The Work Orders Completed chart redraws for that period.
- Click a quick action to jump straight to the form. For example, Register Asset opens the asset wizard and Schedule PPM opens the PPM calendar.
- Click View Alerts to open the alerts panel. It lists SLA breaches and critical issues; when there are none it reads No active alerts.
- Click View All under Recent Activity to open the full work order list.
Find anything with search
- Who: every user
- Where: the search box in the top bar, or press ⌘K (Ctrl+K on Windows)
Global search finds work orders, service requests, assets and locations by number, code or words in the title.
- Click Search work orders, assets, tickets... in the top bar, or press ⌘K. Before you type, the box offers quick links to Work Orders, Assets, Reports and Settings.
- Type at least part of a number, code or title, for example
HVACorchiller. Results appear as you type, grouped by record type. - Use the arrow keys to move through the list and press Enter to open the selected record, or click it. Press Esc to close the box.
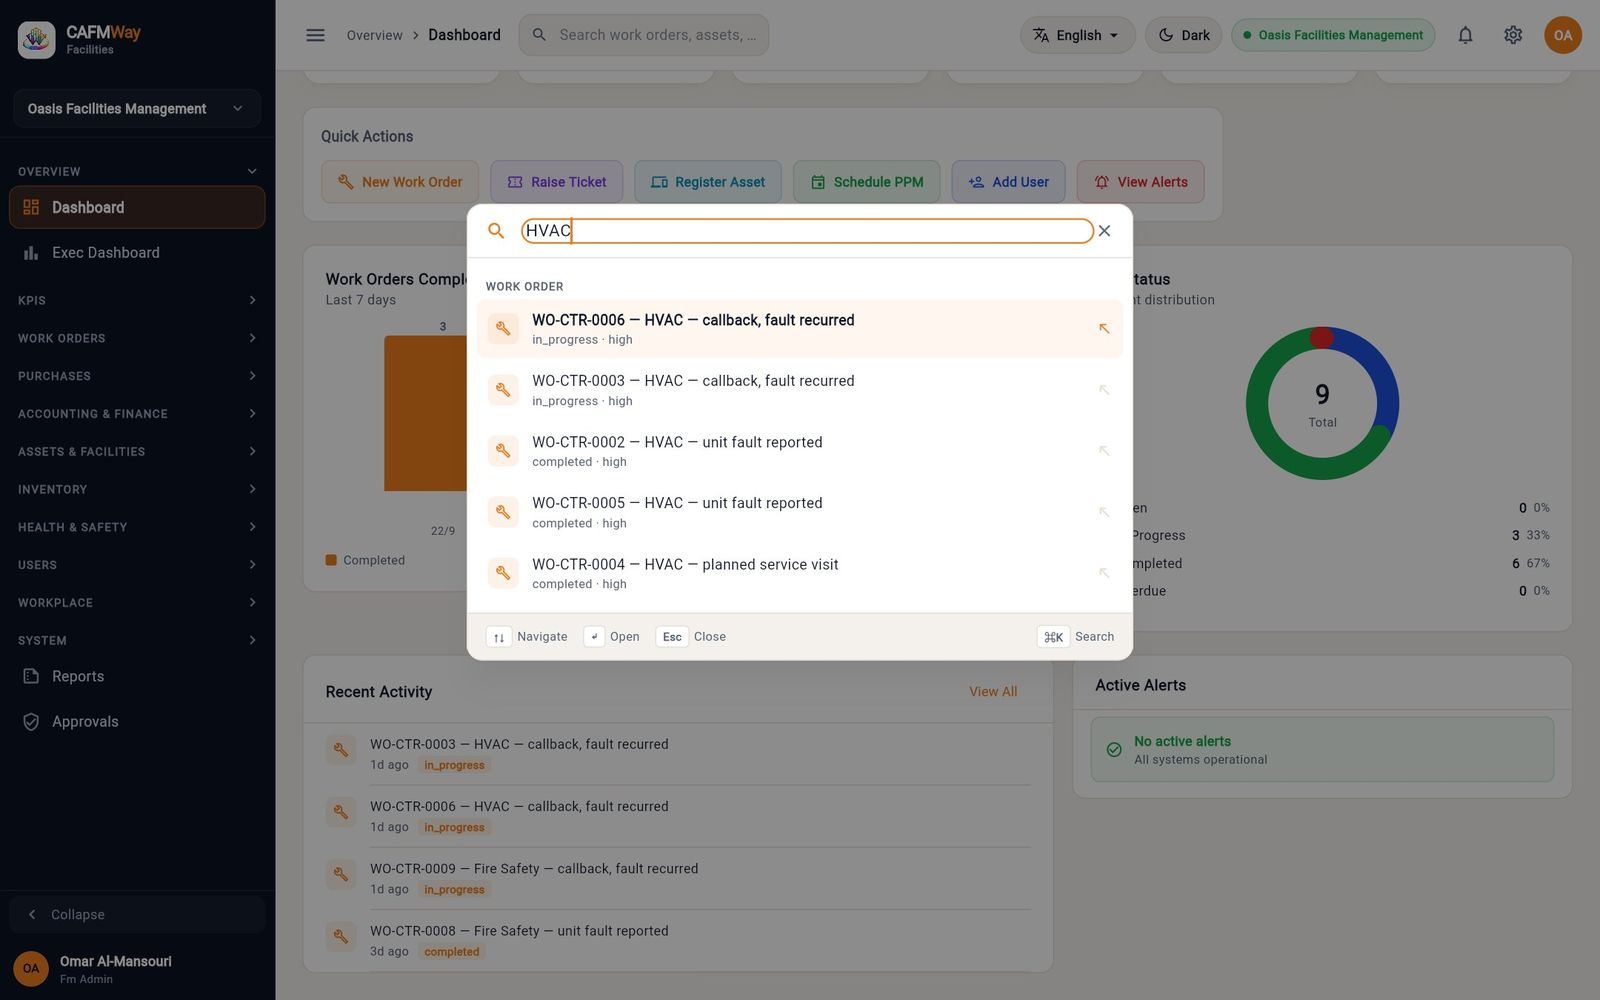
Executive dashboard
- Who: FM Administrator, FM Manager and any role with the report permission on dashboards
- Where: Sidebar → OVERVIEW → Exec Dashboard
The Executive Dashboard is a one-page summary for management: requests, work orders, SLA and spend for the financial year.
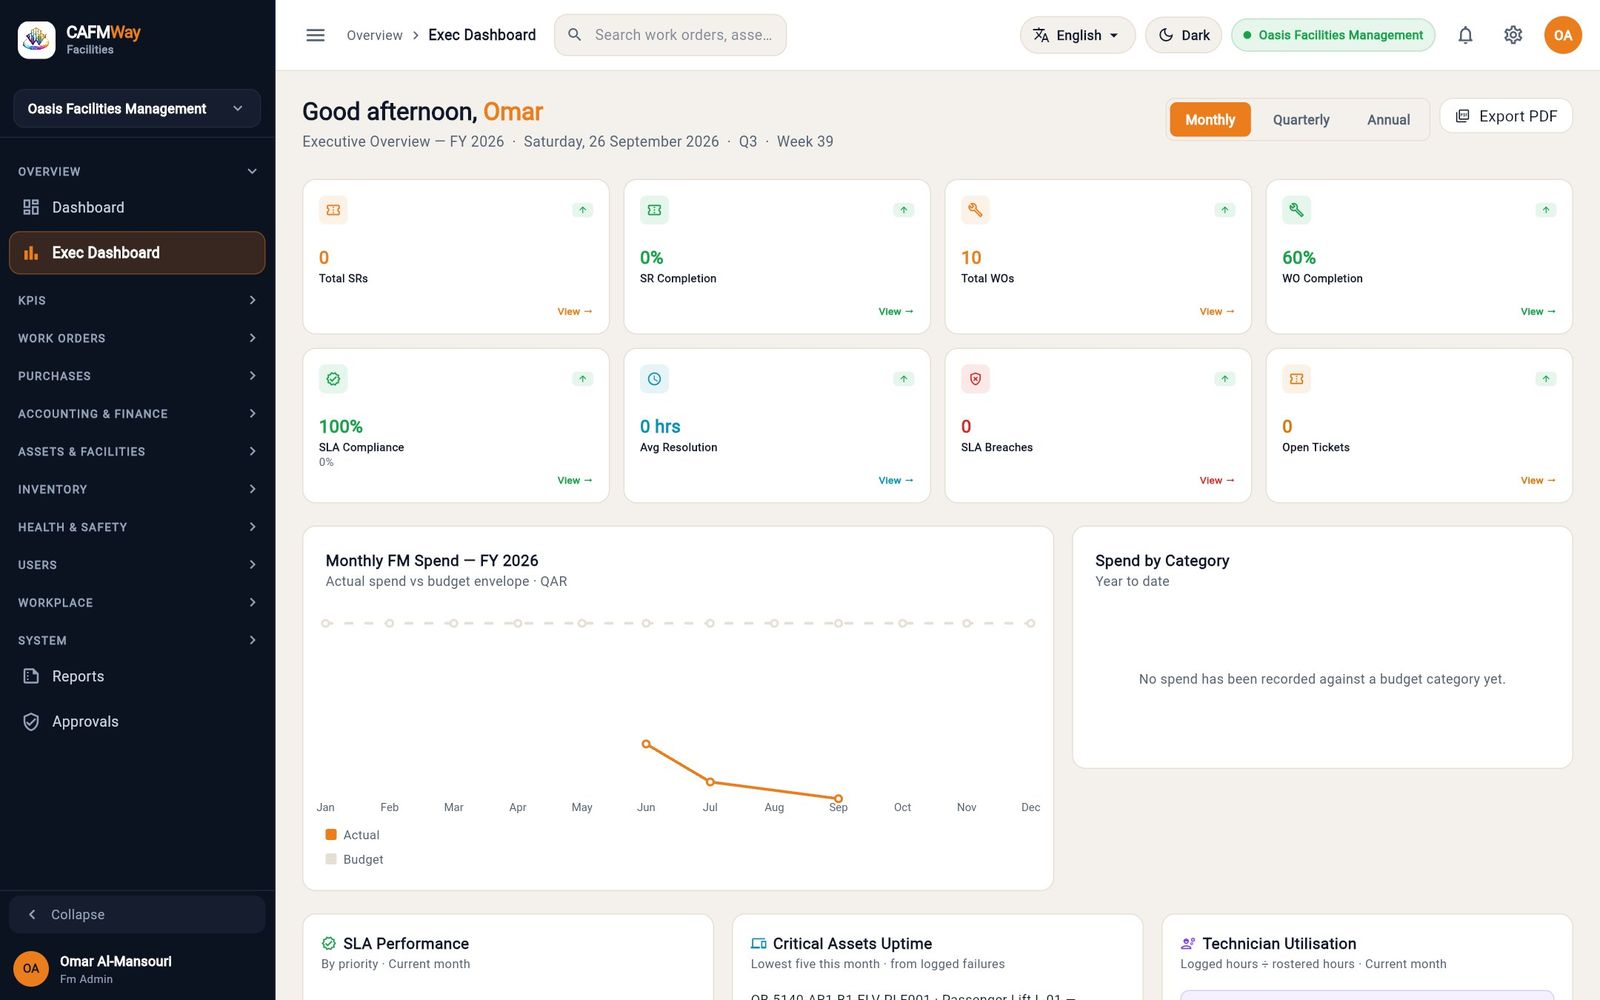
- The eight tiles show Total SRs, SR Completion, Total WOs, WO Completion, SLA Compliance, Avg Resolution, SLA Breaches and Open Tickets. View → on a tile opens the matching list.
- Monthly FM Spend compares actual spend with the budget envelope month by month, in QAR. Spend by Category splits the year's spend by budget category.
- Lower down, SLA Performance (by priority, this month), Critical Assets Uptime (the five critical or high-criticality assets with the most logged downtime), Technician Utilisation (logged hours against rostered hours) and the Department Performance Scorecard.
Export PDF saves the tile figures as a one-page PDF for a management pack.
KPI Reports
- Who: users with the analytics module
- Where: Sidebar → KPIS → KPI Reports
KPI Reports shows the headline service figures for a chosen window and, below them, the Report Catalogue.
- Pick the window at the top right: 1M, 3M, 6M, YTD or 12M. The cards reload for that window.
- Read the cards: Total SRs, SR Completion, Total WOs, WO Completion, SLA Compliance, Avg Resolution, SLA Breaches, Open Tickets.
- Scroll to the Report Catalogue and click Open on a report to run it. The catalogue is the same one the Report Centre uses (see Run and print a report). Run History lists reports you ran before.
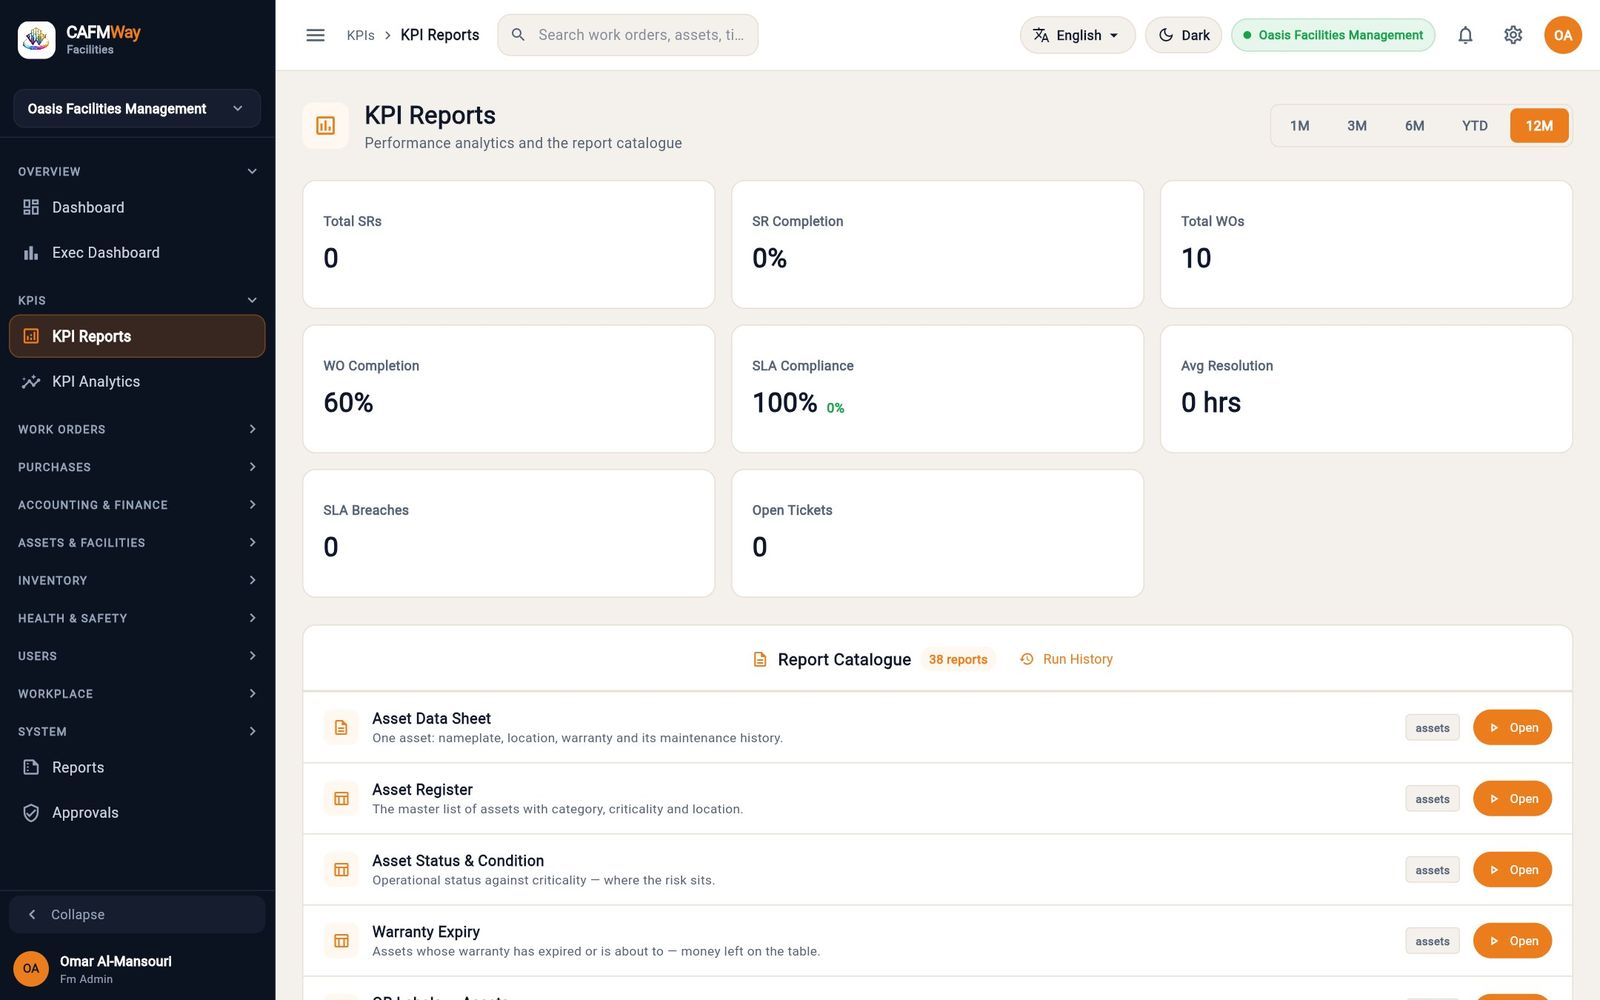
KPI Analytics
- Who: users with the analytics module and the report permission on dashboards
- Where: Sidebar → KPIS → KPI Analytics
KPI Analytics adds rankings and trends to the same figures.
- Technician Performance Rankings ranks technicians by completion rate, with their work order count and mean time to repair (MTTR).
- SLA Compliance Trend plots compliance against the 95 % target over the chosen window.
- Work Order KPIs by Category gives, per work category, the active and closed counts, the SLA percentage and MTTR.
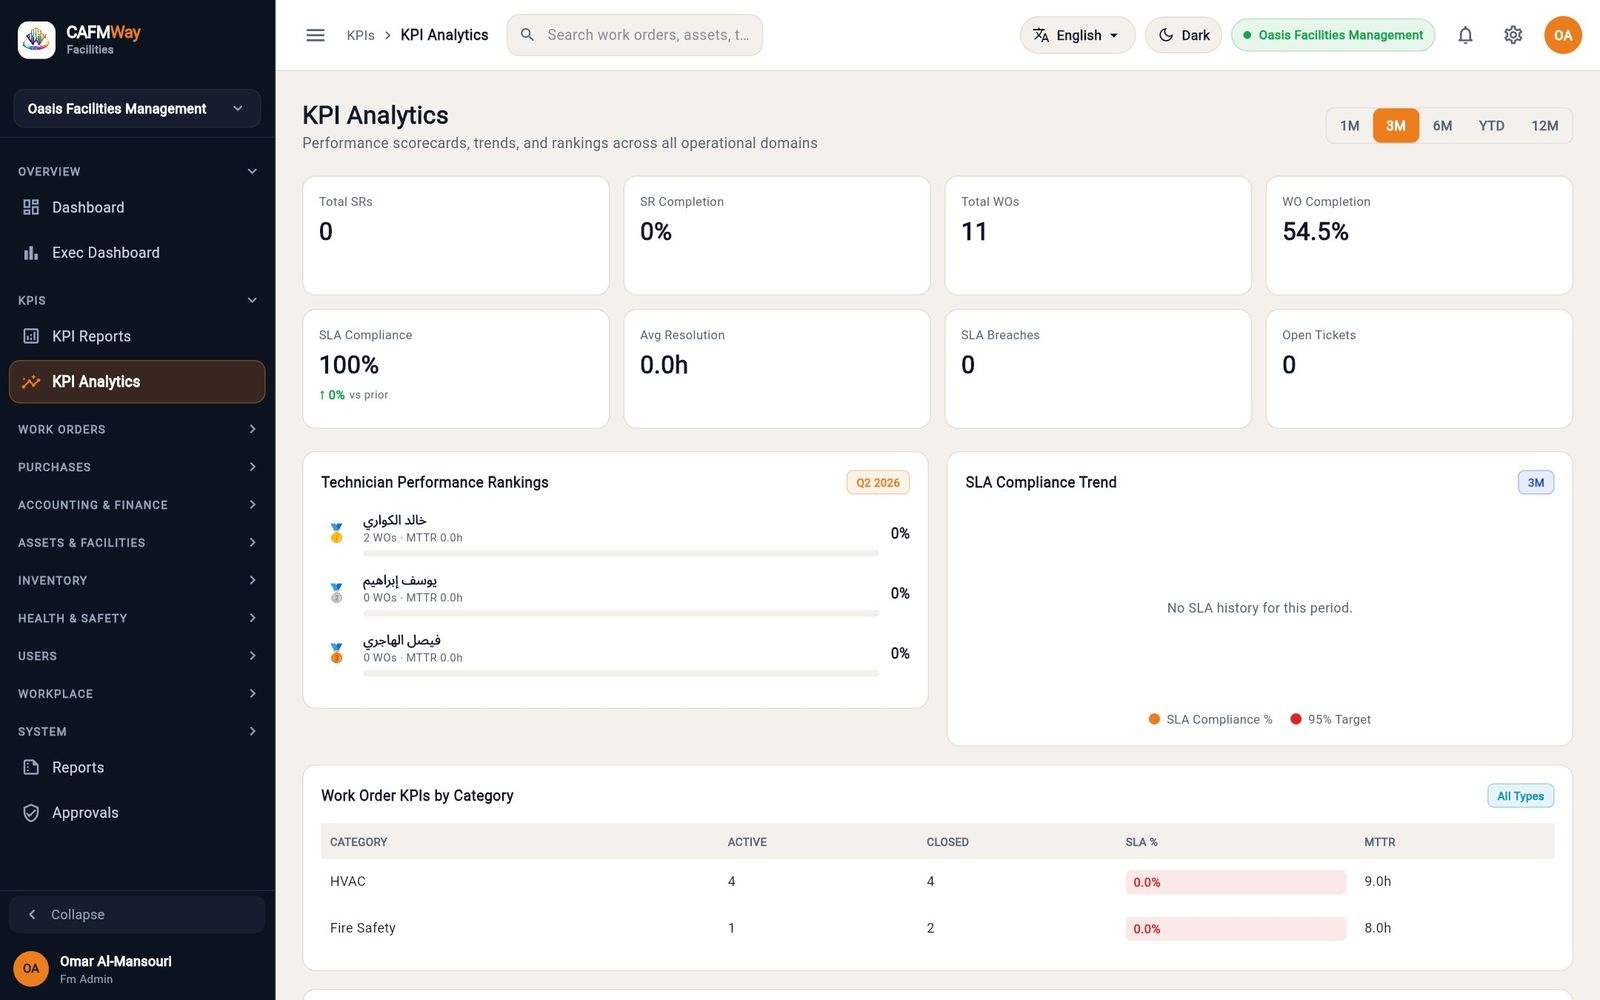
Equipment, fleet and asset reliability
These screens sit under ASSETS & FACILITIES next to the asset register. They hold the things that are not building assets (tools and vehicles), long networks such as pipes and cables, and the failure history that drives predictive maintenance. They are used by the FM manager, the asset manager and supervisors.
Register a tool or piece of equipment
- Who: users with the resources module (FM Administrator, FM Manager, Supervisor)
- Where: Sidebar → ASSETS & FACILITIES → Equipment
Equipment is the pool of tools and portable plant your technicians borrow: test instruments, lifts, generators. Each item has a code, a name, a category and a status.
- Open Equipment. The Register tab lists every item with its status.
- Click New. The New Equipment form opens.
- Enter a Code (for example
EQ-007) and a Name (Digital Manifold Gauge Set). Both are required. - Enter a Category, for example
HVAC, and choose a Status: Available, In Use, Maintenance or Retired. - Click Create Equipment. The item appears at the top of the list.
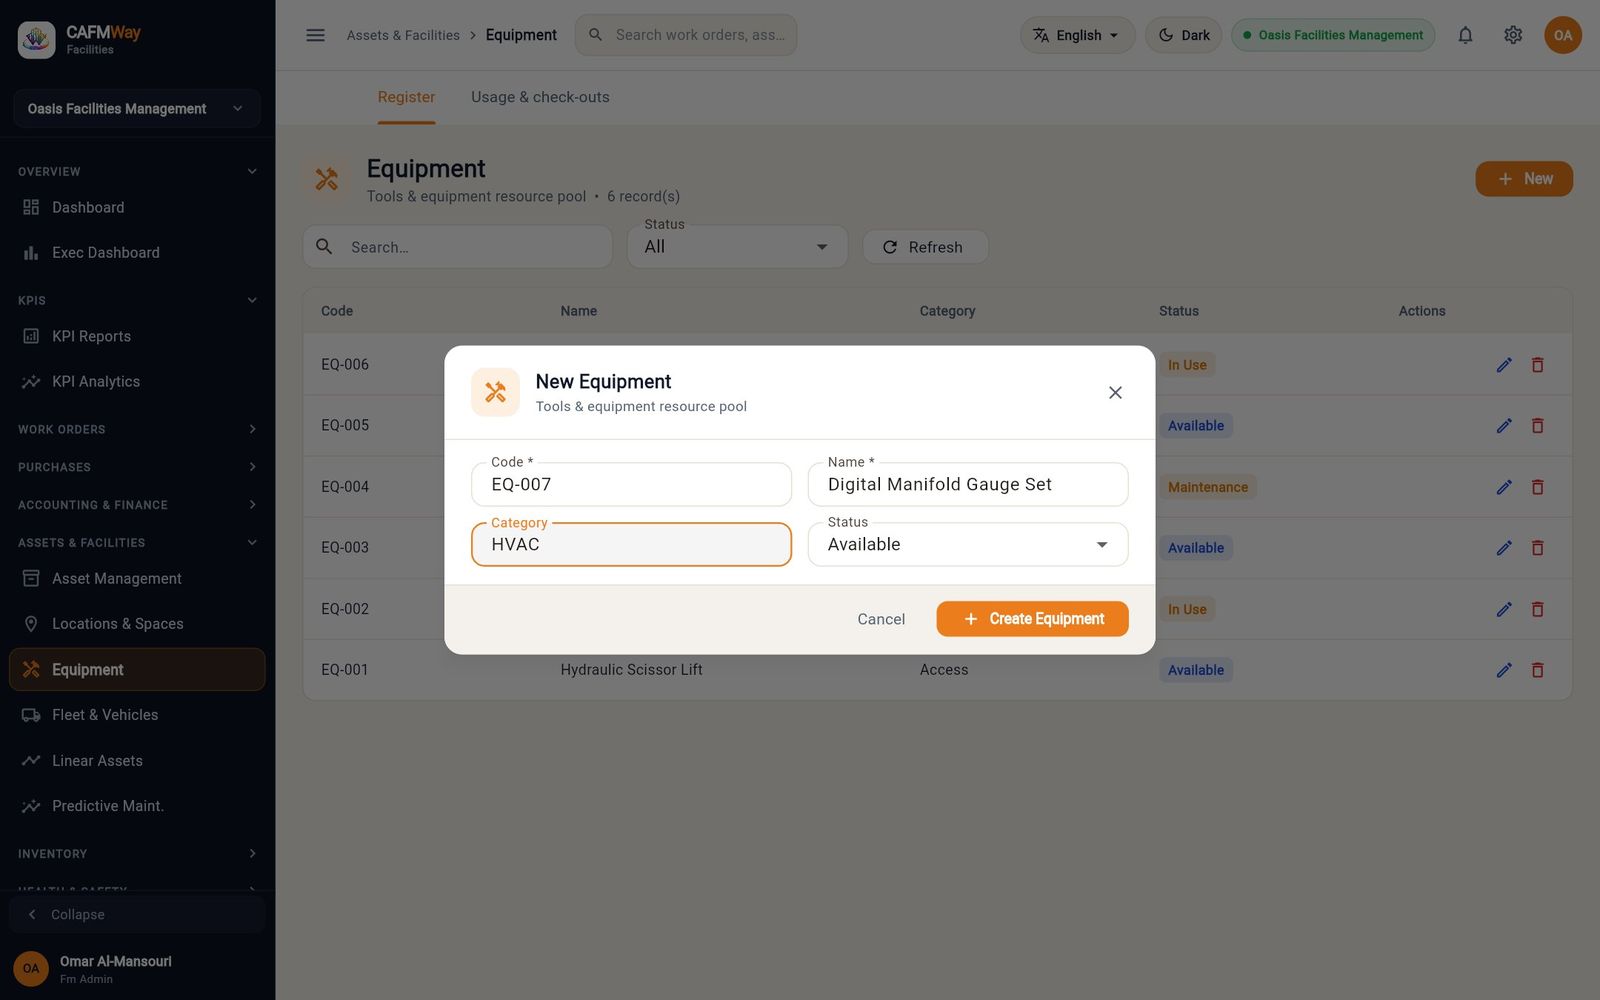
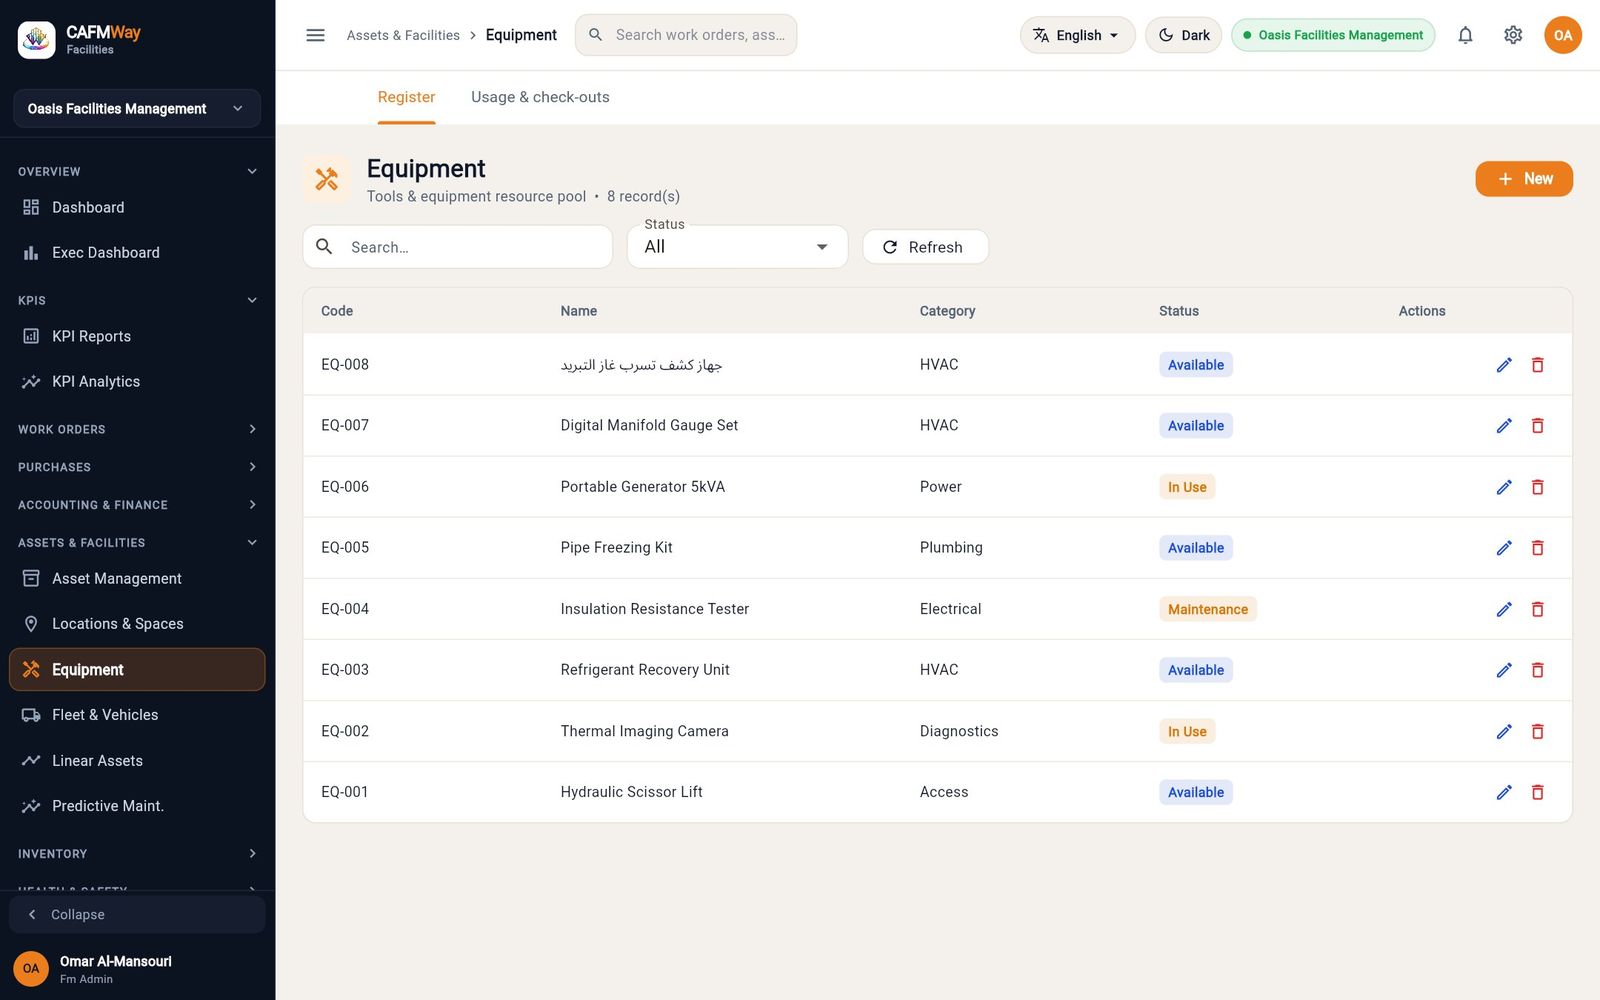
Use the pencil icon on a row to change its status, for example to Maintenance when a meter goes for calibration, and the bin icon to delete it.
Usage and check-outs
The Usage & check-outs tab shows, for the chosen window (Last 90 days by default), how often each item was checked out, the hours it was out, its utilisation and how many days it has been idle. Technicians check tools out and back in from the technician app. When a tool is out, it appears under Checked out now with Mark returned, which a supervisor can use if the technician forgot to return it in the app.
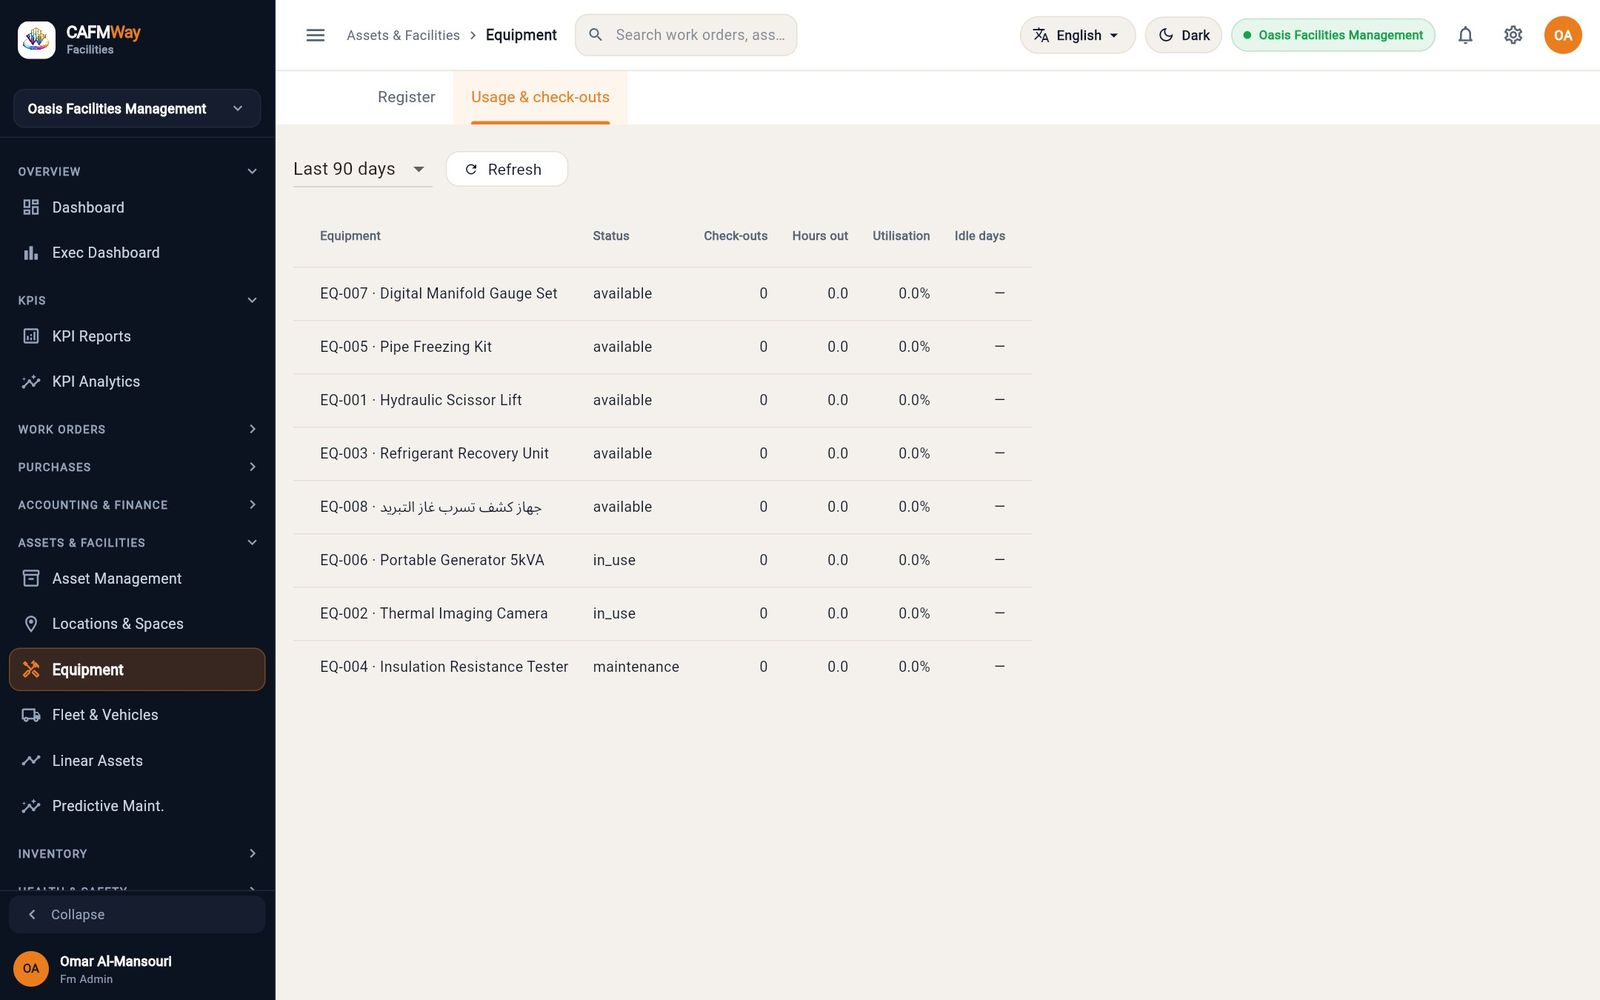
Register a vehicle and log fuel
- Who: users with the resources module
- Where: Sidebar → ASSETS & FACILITIES → Fleet & Vehicles
The fleet register holds your service vehicles, the driver each one is assigned to and the next service date. Fuel fills logged against a vehicle give its consumption and cost per kilometre.
Register the vehicle
- Open Fleet & Vehicles and click New.
- Enter the Plate No (required), Make, Model and Year.
- Choose a Status and enter the Fuel Type.
- Click Assigned driver and pick the technician who drives the vehicle. Start typing a name to narrow the list. The assigned driver can log fuel for this vehicle from the technician app.
- Enter the current Odometer reading and pick the Next Service date.
- Click Create Fleet & Vehicles.
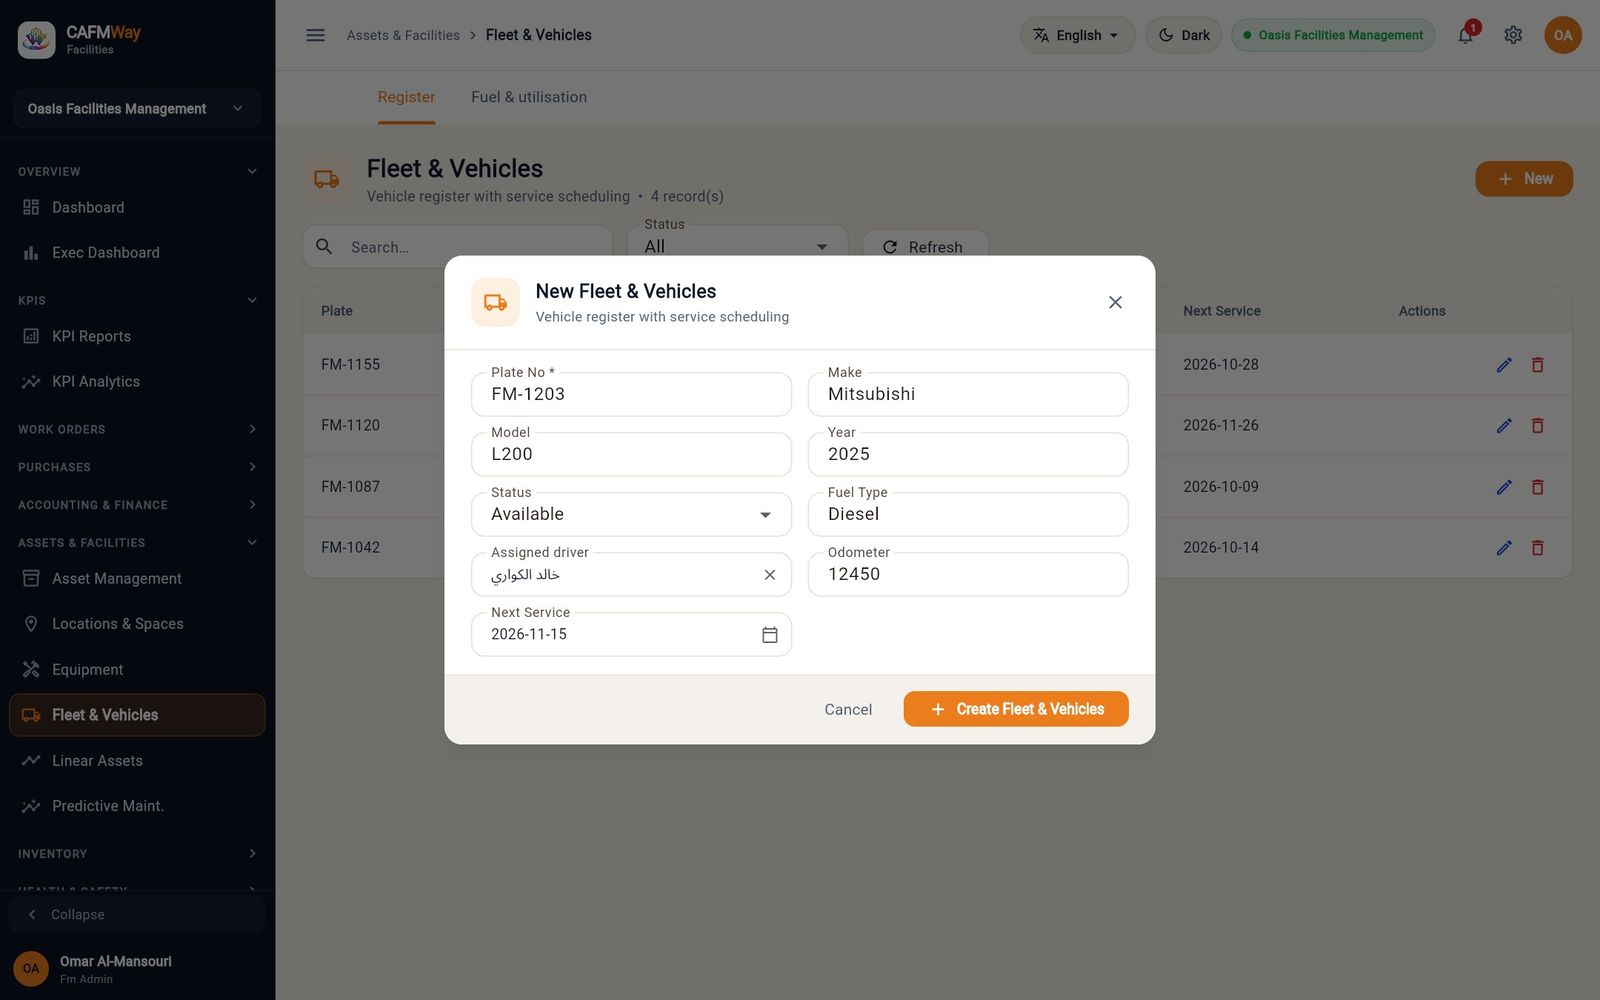
Log a fuel fill
- Open the Fuel & utilisation tab. Each vehicle has a Log fuel button.
- Click Log fuel on the vehicle's row. The dialog title shows the plate number.
- Enter the Litres, the Cost (QAR), the Odometer (km) at the pump and the Station. Litres are required.
- Click Save.
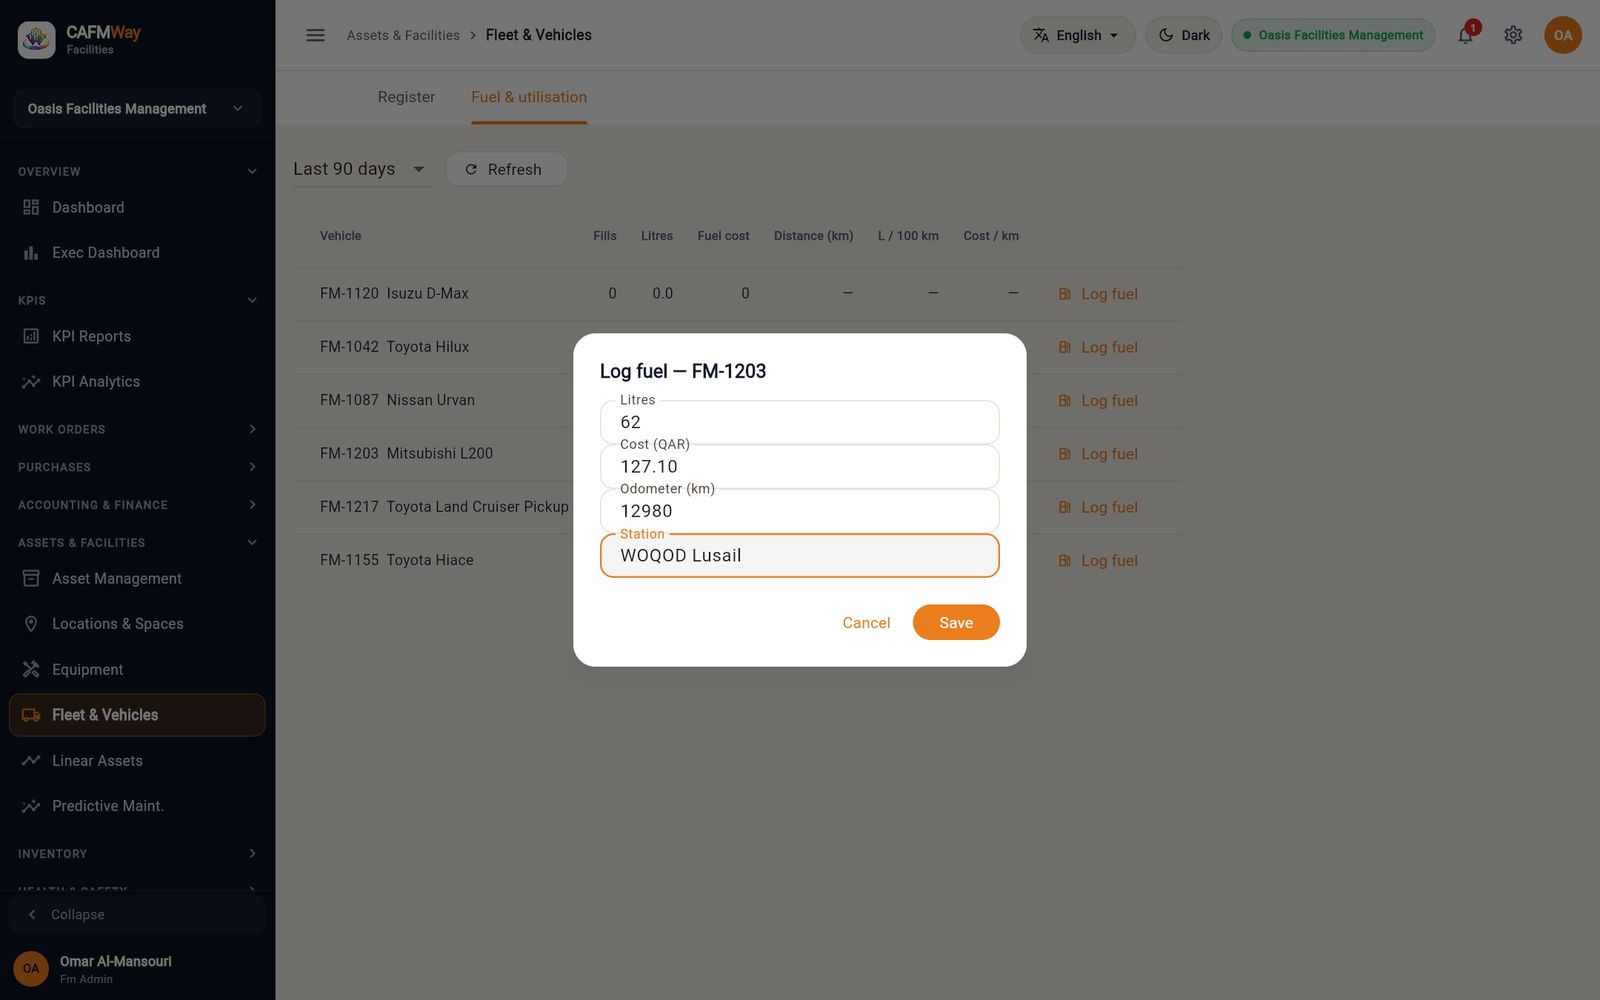
From the second fill onwards the table works out the Distance (km) between fills, L / 100 km and Cost / km for the window you choose.
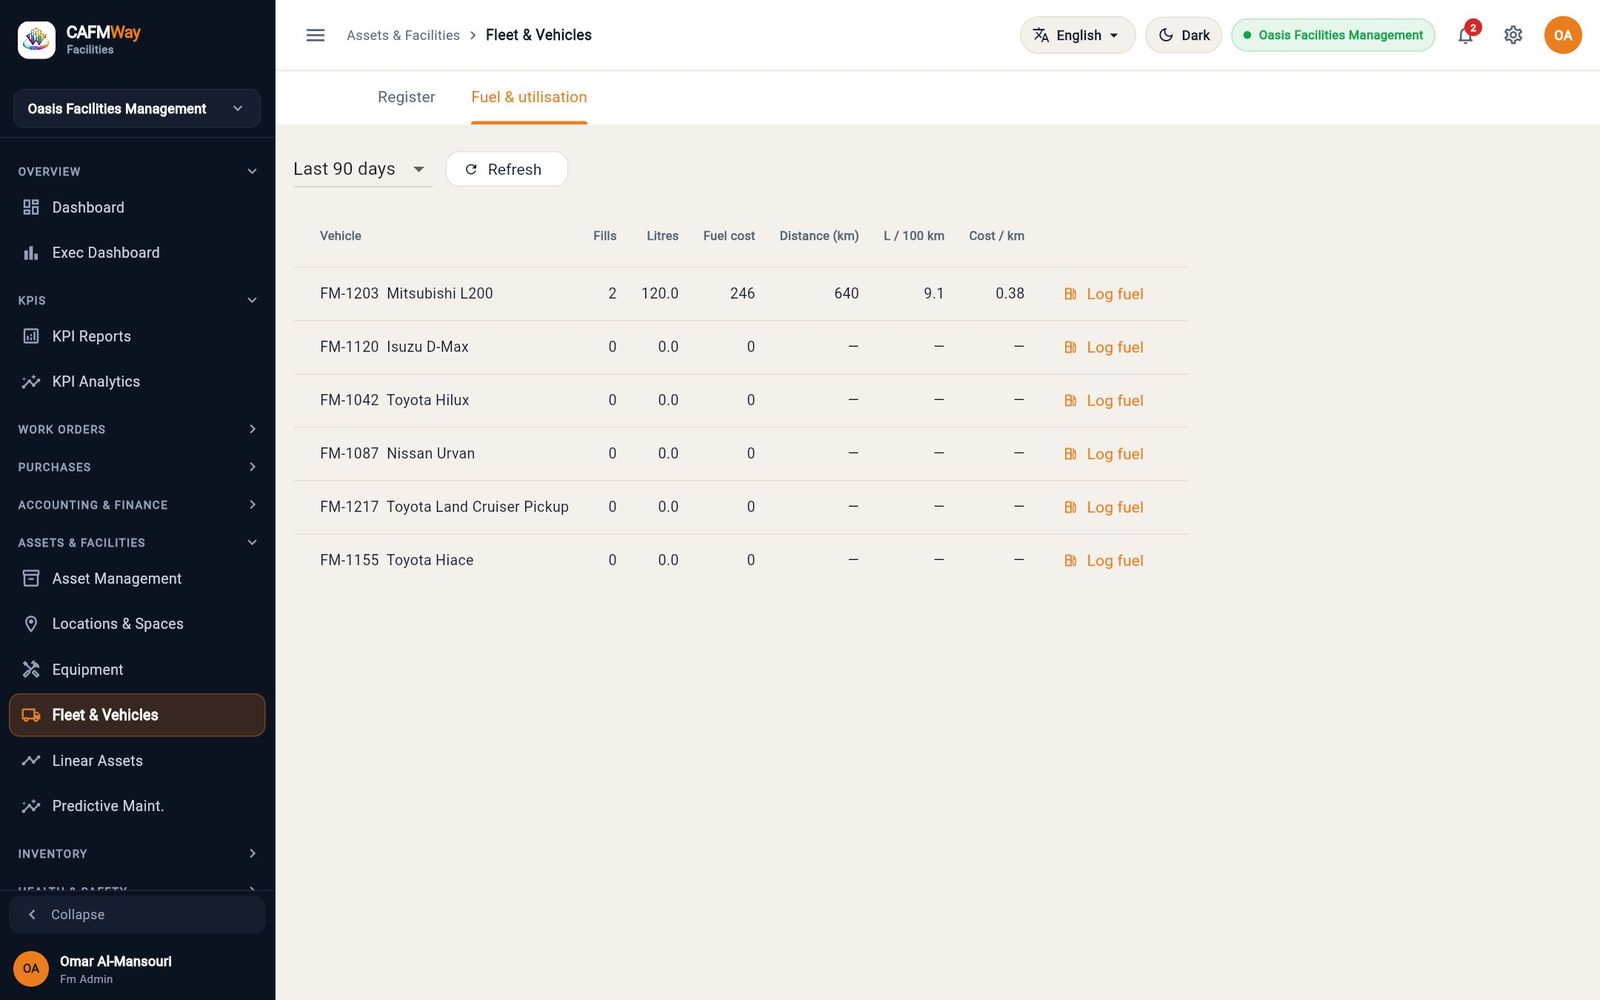
Record a linear asset
- Who: users with the assets module
- Where: Sidebar → ASSETS & FACILITIES → Linear Assets
Linear assets are networks measured by length rather than counted: roads, pipelines, cabling and drainage.
- Open Linear Assets and click New.
- Enter a Code and Name, both required, for example
LIN-PP-002"Domestic water main — North Campus". - Choose the Type: Road, Pipeline, Cable or Drainage.
- Enter the Total Length (m), the Unit and a Status such as
Operational. - Click Create Linear Assets.
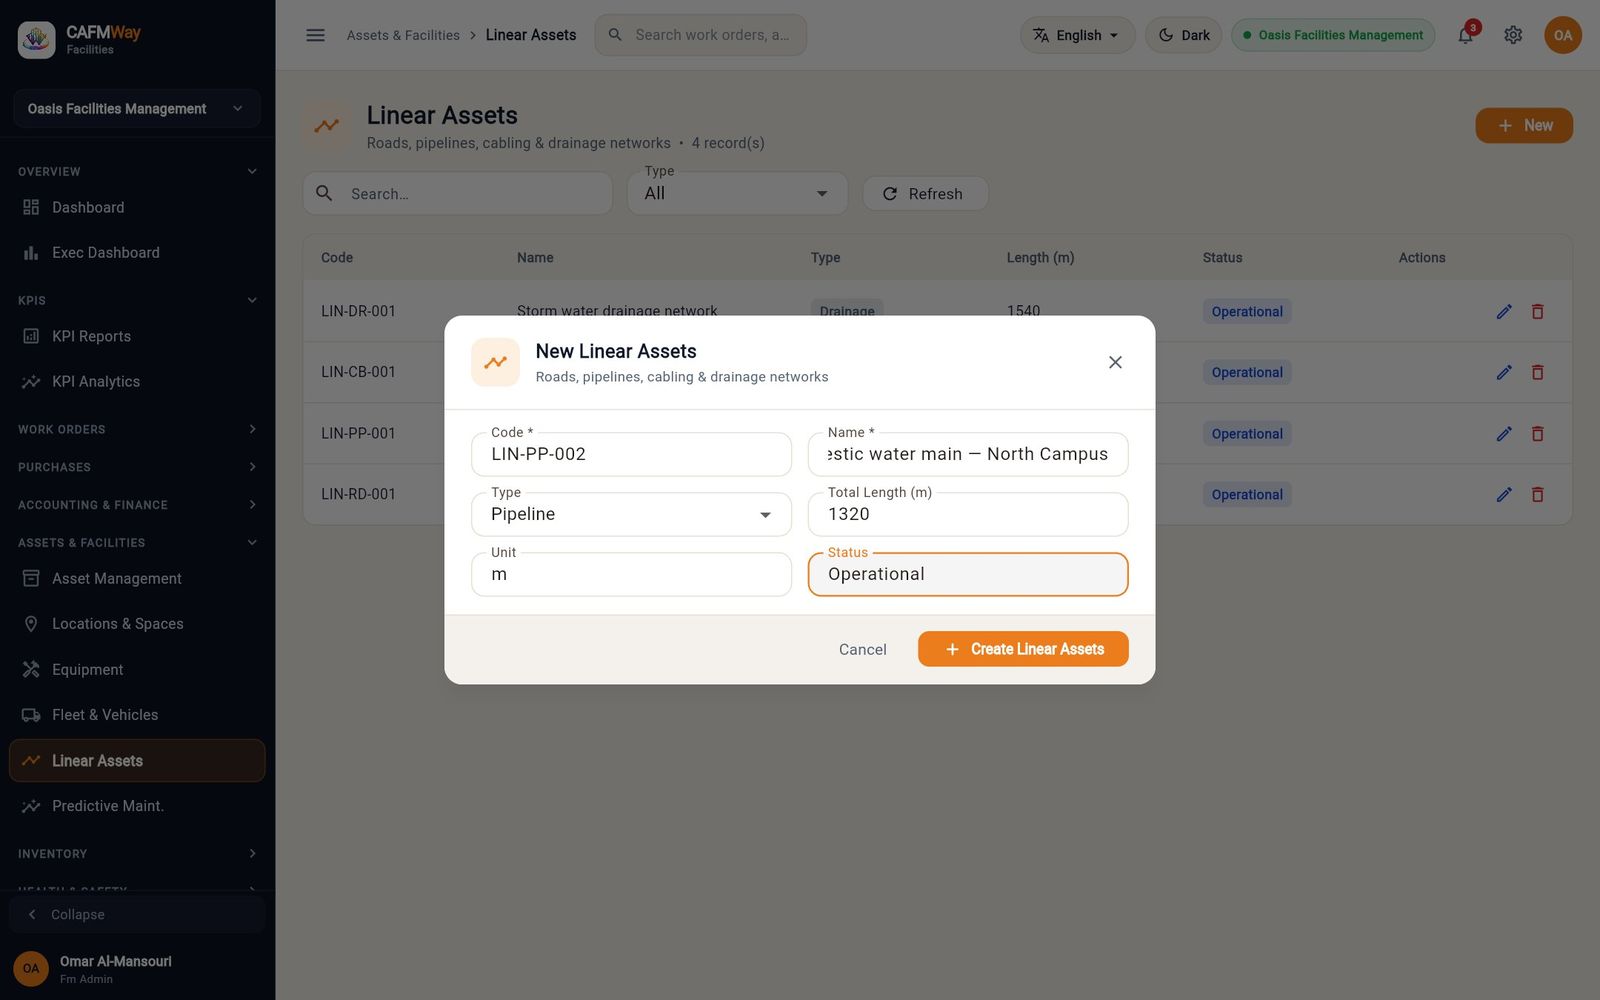
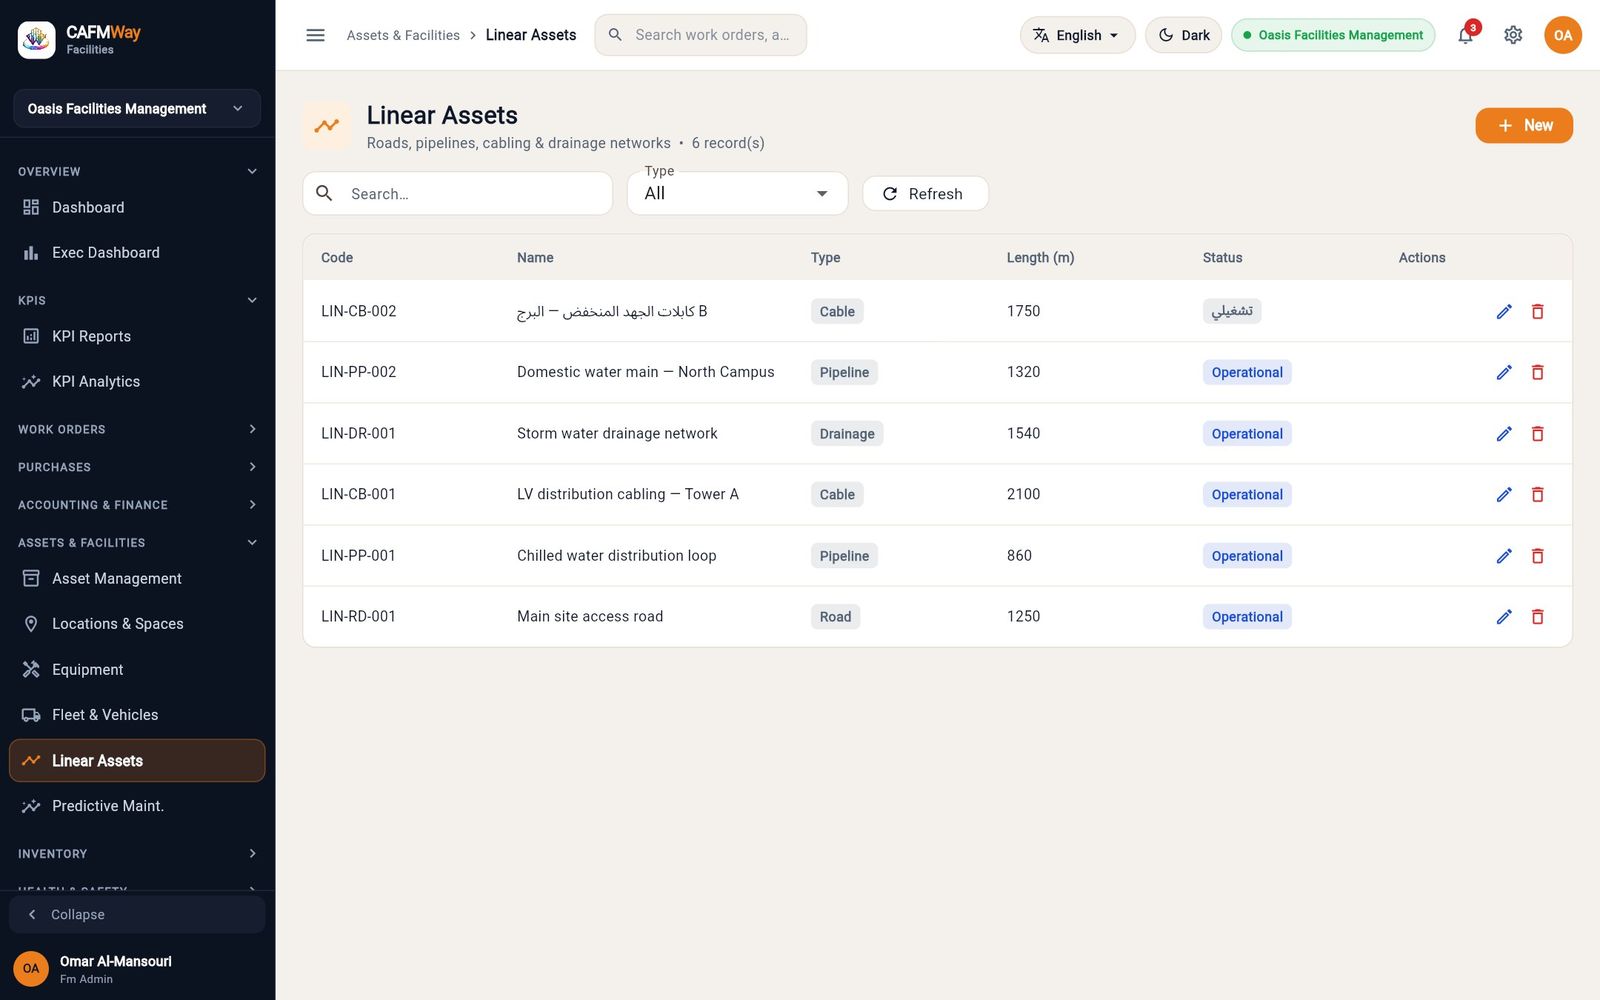
Use the Type filter to list one kind of network, for example all pipelines.
Predictive maintenance: log failures and readings
- Who: asset manager, FM manager, supervisors
- Where: Sidebar → ASSETS & FACILITIES → Predictive Maint.
Predictive maintenance scores each asset's risk of failing from its recorded history: how old it is, how hard it runs, how often it has failed, its latest condition readings and how critical it is. It then recommends an action, a maintenance interval, and an expected cost and downtime. The more failures and readings you record, the better the forecast. The screen has four tabs: Risk Dashboard, Failure Patterns, Condition Monitoring and Failure Log.
Record a failure
Record every breakdown, even small ones. The failure mode is what makes pattern analysis possible.
- Open the Failure Log tab and click New.
- Click Asset and pick the asset, for example Chiller CH-01 — Tower A Roof.
- Choose the Failure Mode (Wear, Electrical, Mechanical, Corrosion, Blockage, Leak, Overheating, Control Fault, Operator Error, Other) and the Severity (Minor, Major, Critical).
- Pick the Failed On and Resolved On dates and enter the Downtime (hours).
- Enter the Repair Cost. It feeds the predicted-cost estimate.
- Describe the Cause, then click Create Failure Log.
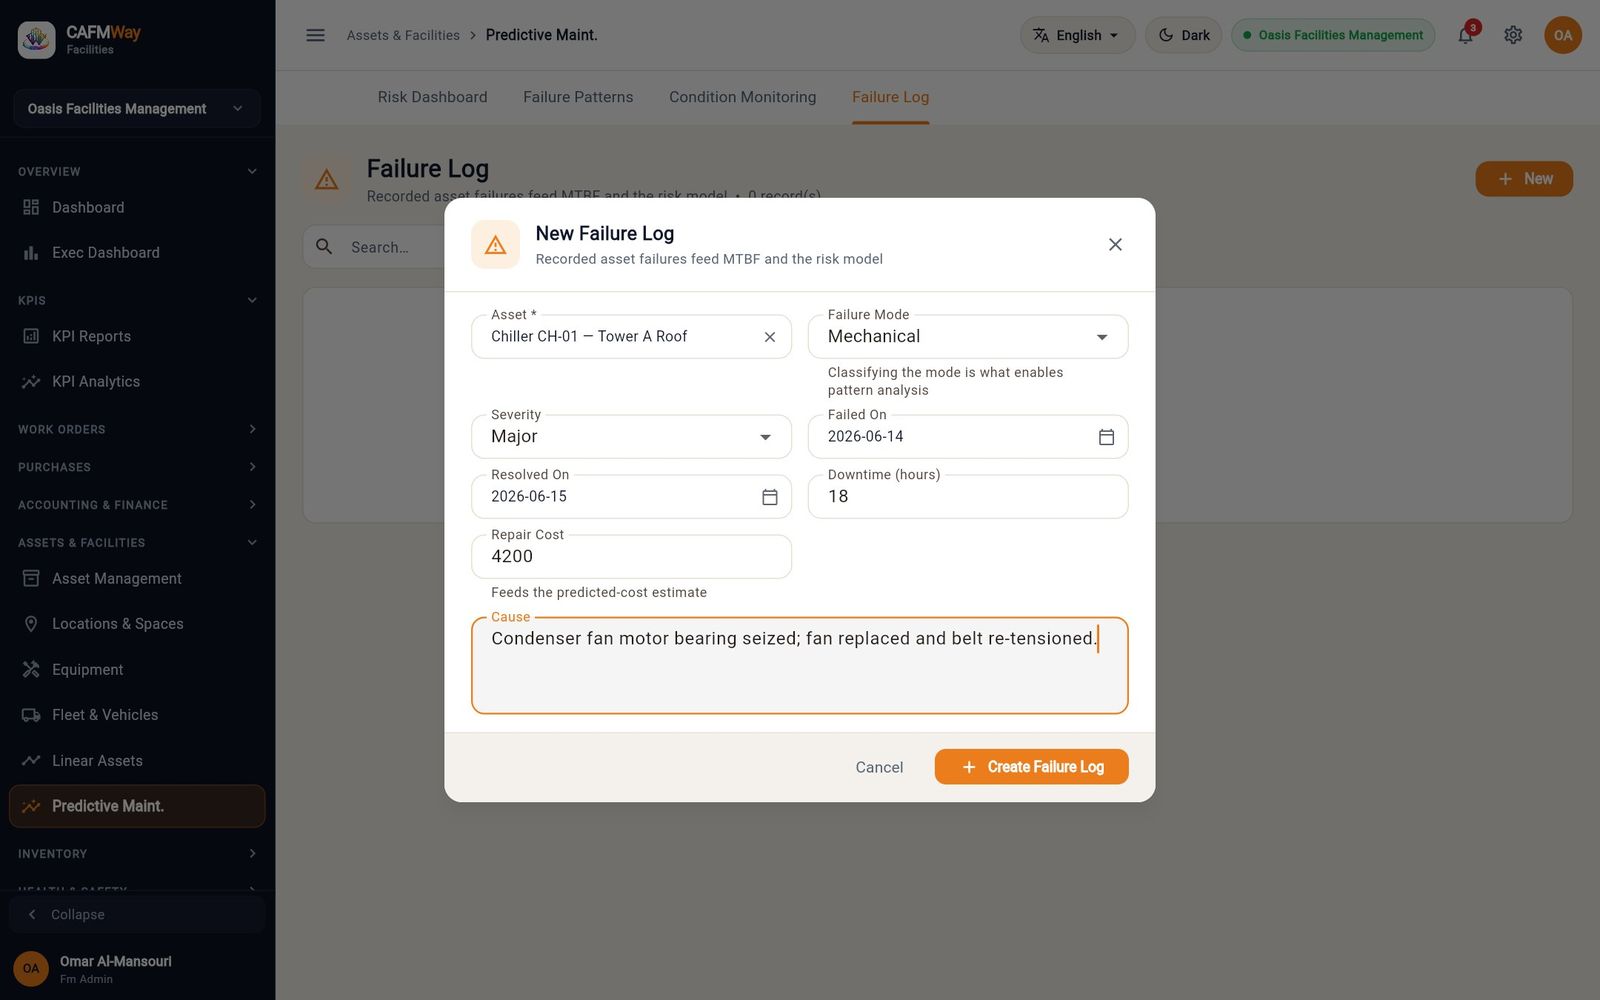
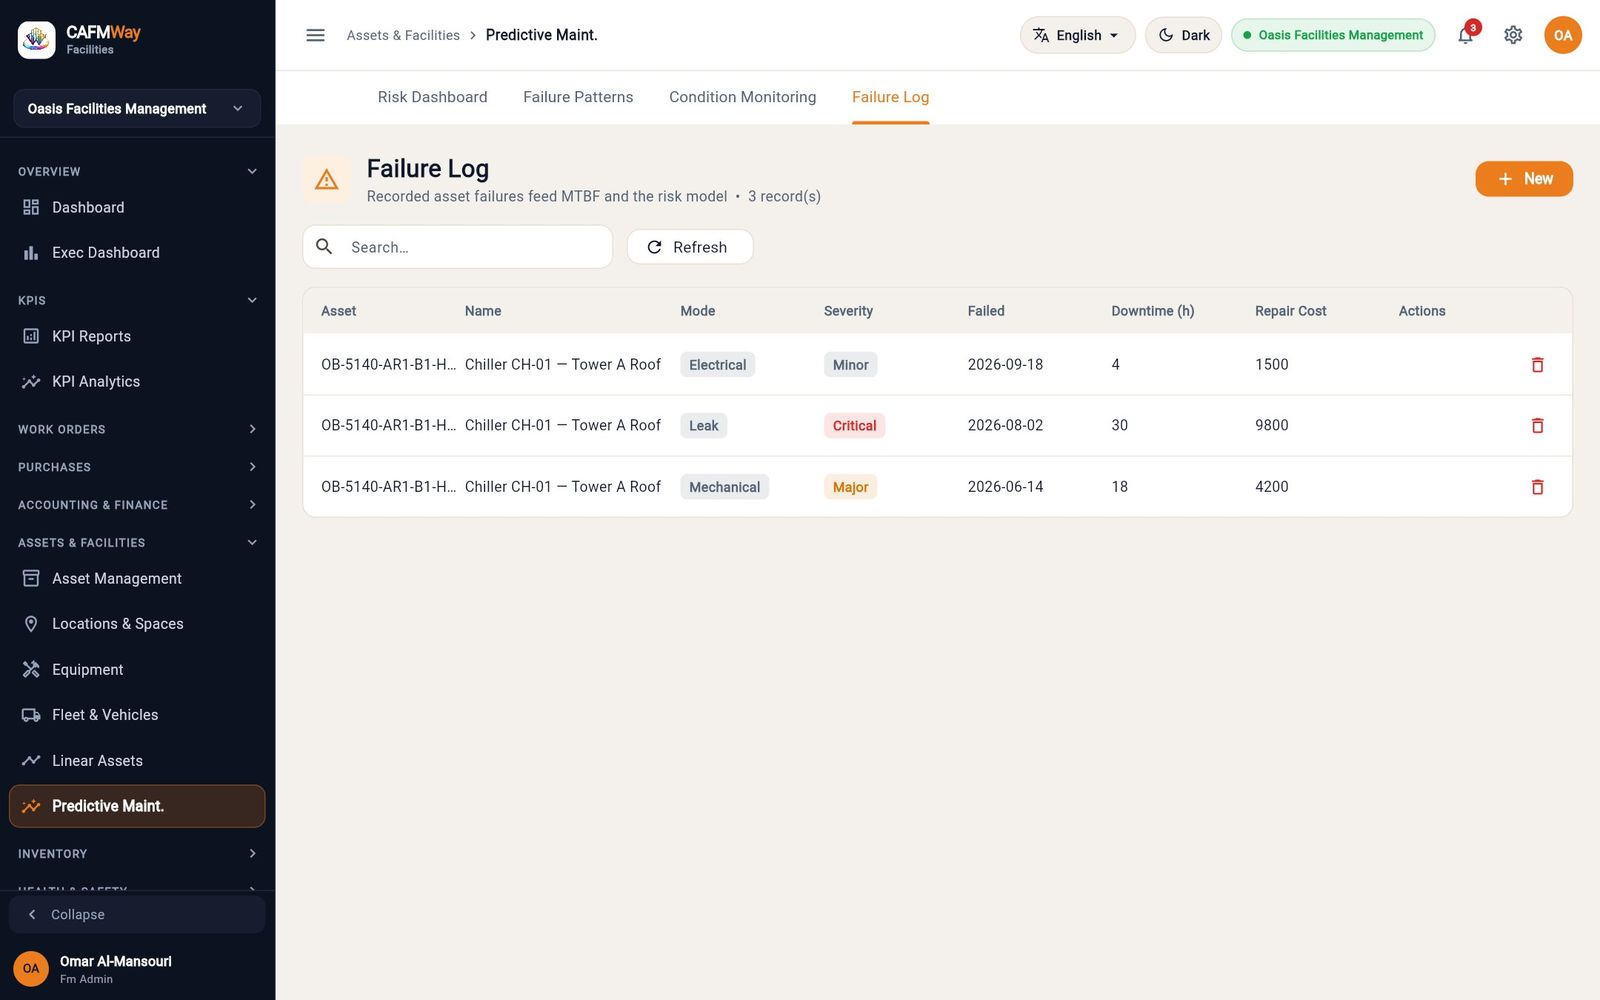
Read the failure patterns
The Failure Patterns tab ranks failure modes over the last year by how often they occur, with the downtime and cost each one caused. Use it to see whether one mode (for example leaks) keeps coming back.
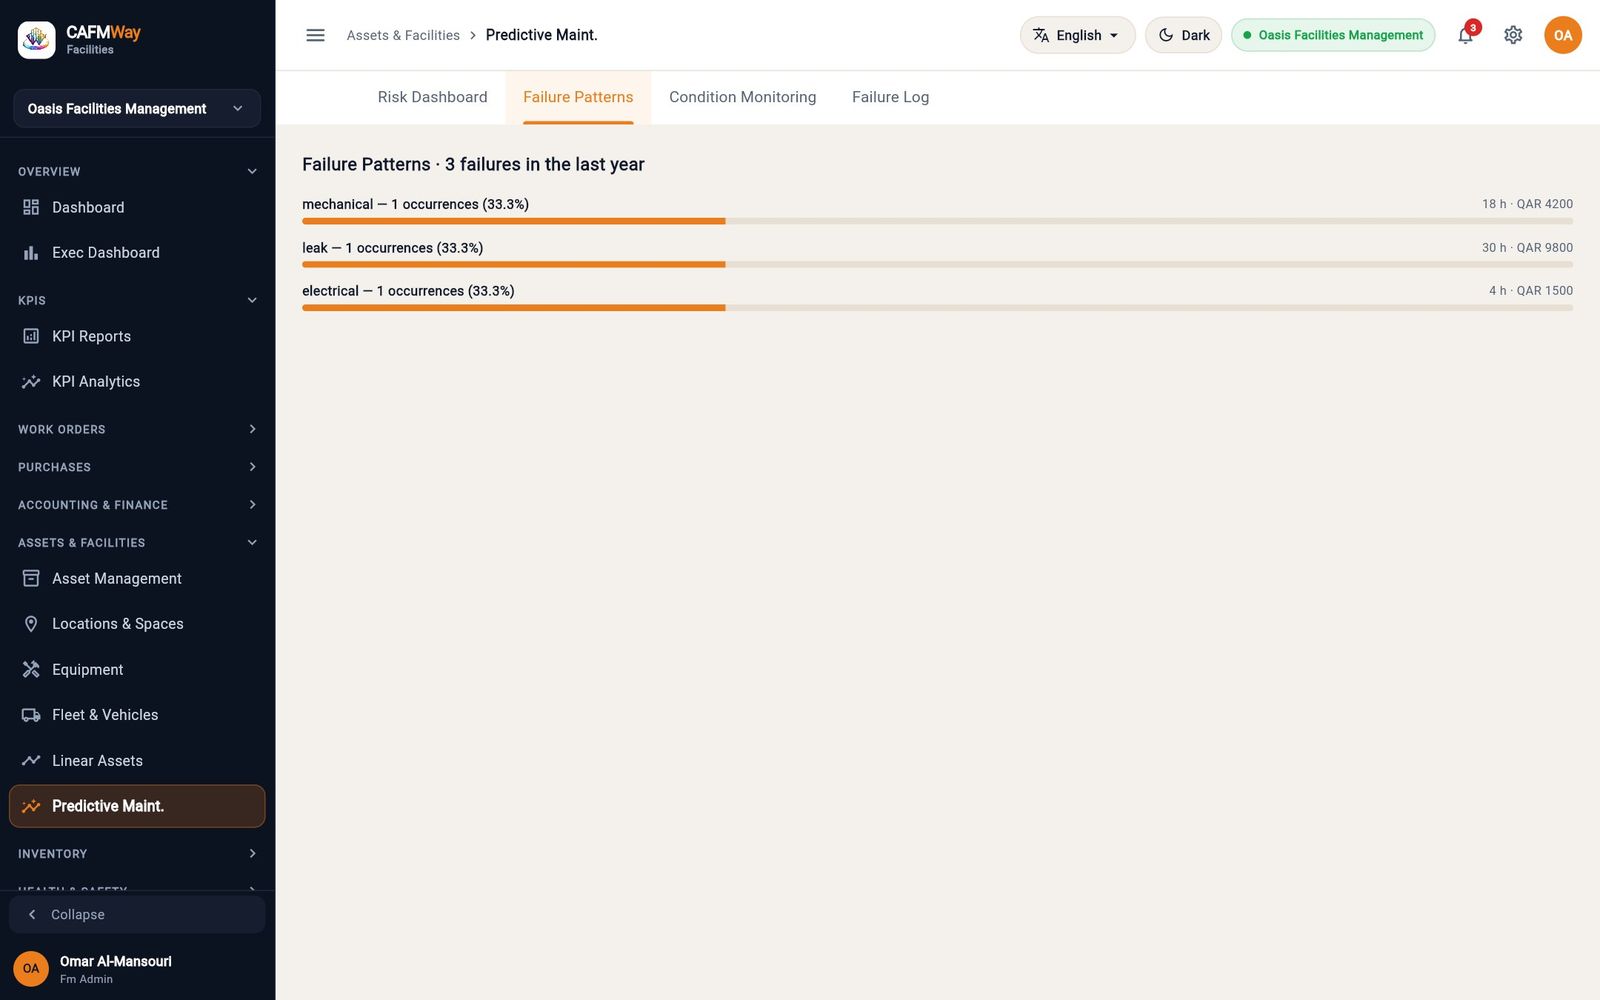
Record a condition reading
- Open Condition Monitoring and click New.
- Pick the Asset, type the Metric (for example
vibration,temperature,pressure), the Value and the Unit. - Click Create Condition Readings. The reading is listed with its status and source (manual here, or an API feed).
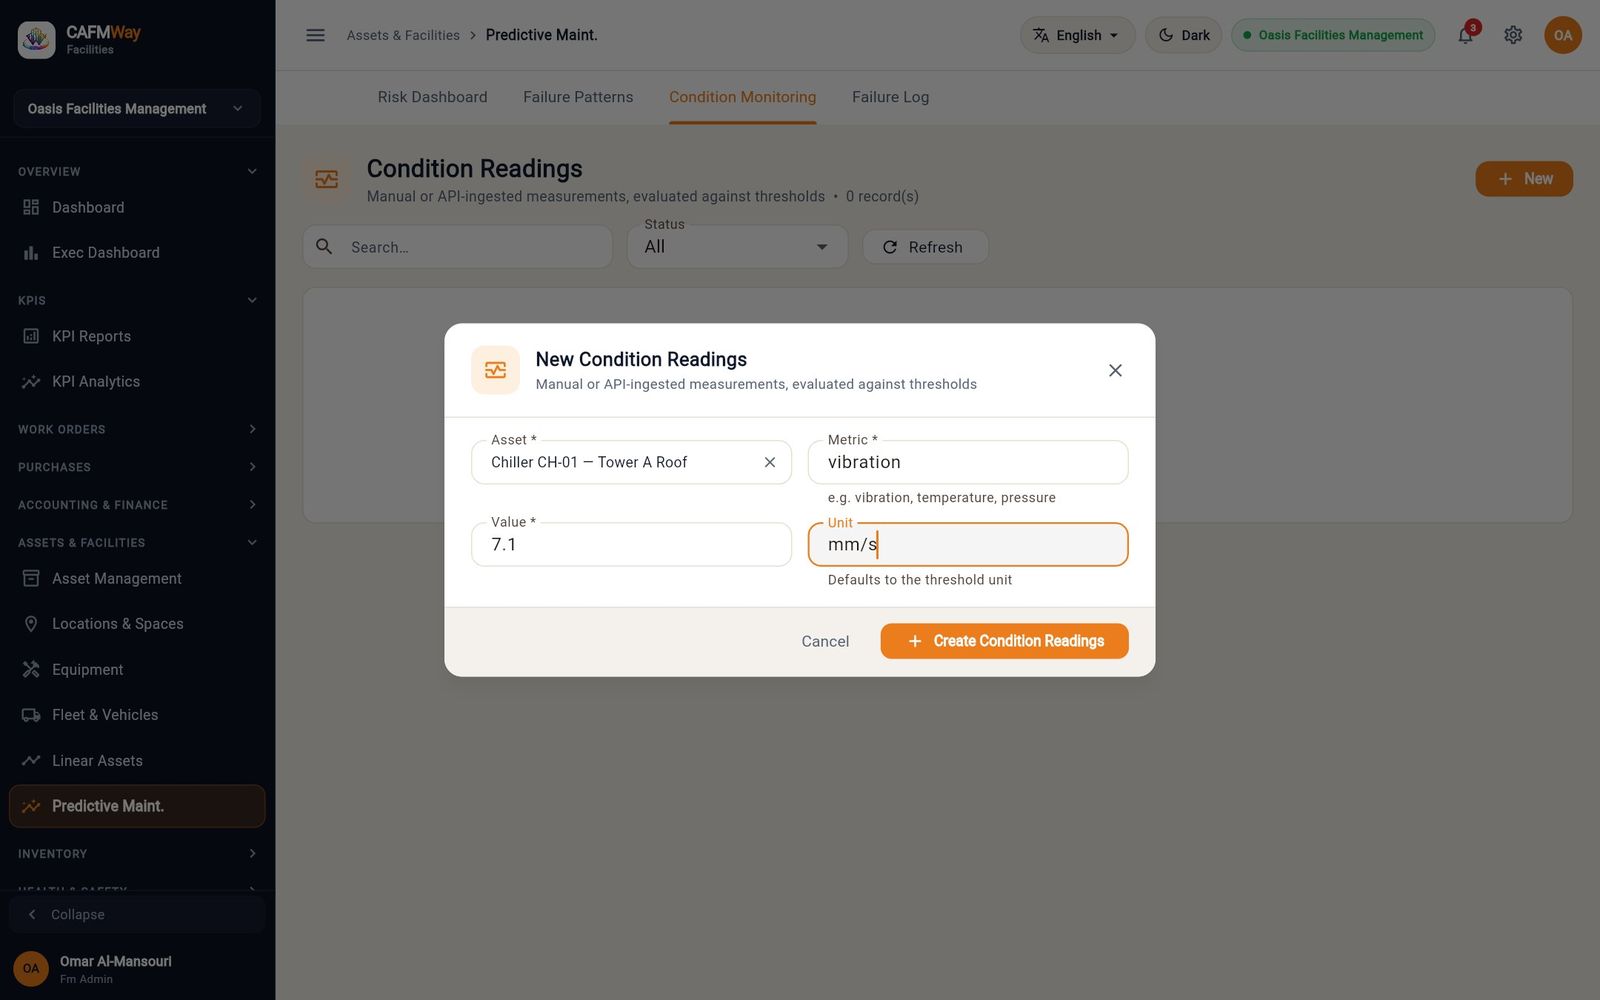
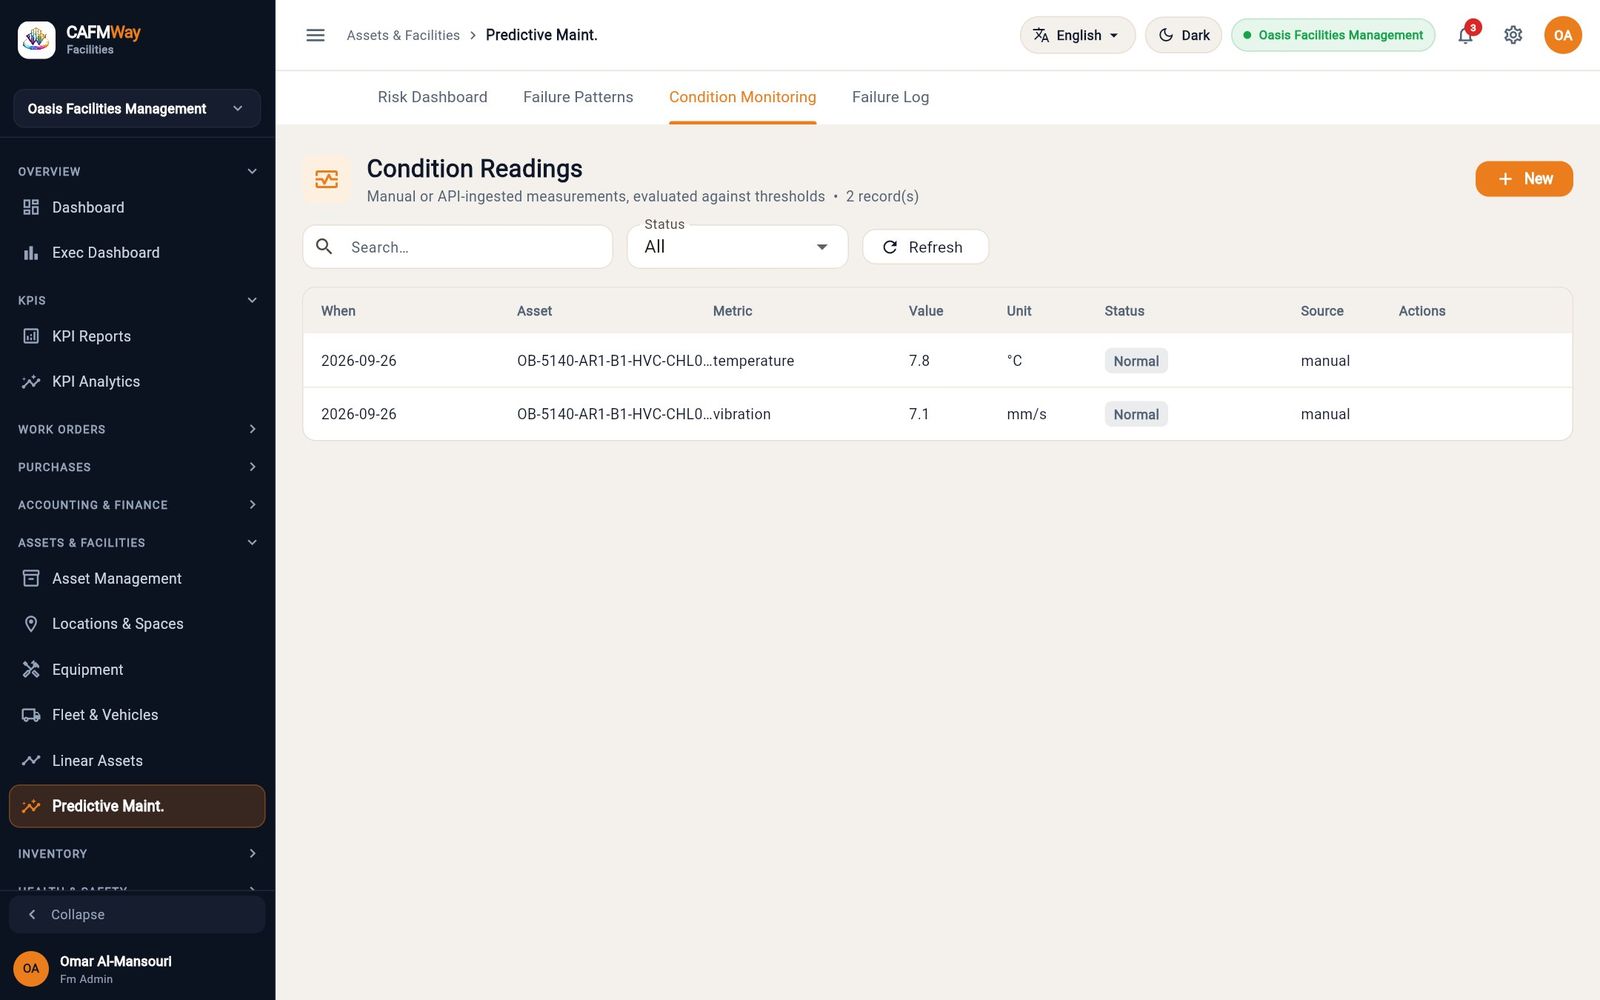
The risk dashboard
The Risk Dashboard shows, for the next 30, 90 or 180 days, the Assets at Risk, Condition Alerts, Predicted Cost and Predicted Downtime, then a card per asset at medium or high risk with the recommended action.
The risk score runs from 0 to 100: up to 25 points for age against design life, 15 for operating hours, 30 for failure history (count and time between failures), 20 for the latest condition reading and 10 for criticality. At 40 points an asset becomes medium risk; at 70, high risk.
Health and safety
The HEALTH & SAFETY section holds the records an HSE officer keeps: permits to work, risk assessments, checklists, observations, training and PPE, with a dashboard that pulls them together. Incidents are covered in the work orders part of this guide. The worked example in this part follows one job: brazing the chilled water bypass on Chiller CH-01 in the Tower A roof plant room.
Safety dashboard
- Who: HSE officer, FM manager
- Where: Sidebar → HEALTH & SAFETY → Safety Dashboard
The Safety Dashboard is built only from your own records; nothing on it is typed in.
| Tile | How it is worked out |
|---|---|
| LTI frequency rate | Lost-time injuries per 1,000,000 hours worked. Hours come from the rosters of field staff. |
| Near-miss frequency | Near misses per 200,000 hours worked. |
| Incidents | Incidents in the period, not counting near misses. |
| Safety audit score | Average score of completed site-audit checklists. |
| Checklists done on time | Checklists due in the period that were completed by their due date. |
| Valid training certificates | Share of training certificates not expired; also counts those expiring within 30 days. |
| PPE in date | Share of issued PPE that has not passed its expiry. |
| Permits within validity | Share of live permits that have not passed their end date. |
Choose the window (for example Last 12 months) at the top and click Refresh after you add records in another screen.
Issue a permit to work
- Who: requester: any user with create permission on permits; approver: HSE officer or FM manager
- Where: Sidebar → HEALTH & SAFETY → Permits To Work
A permit to work authorises dangerous work (hot work, confined space entry, work at height, electrical work) for a fixed period. The permit must be approved before the work starts and must be on site while the work is done.
flowchart TD
    A[New permit
Pending] --> B{Approver decides}
    B -- Approve --> C[Approved]
    B -- Reject --> R[Rejected]
    C --> D[Active
work under way]
    D --> E[Closed]
    D --> F[Expired]
Request the permit
- Open Permits To Work and click New.
- Enter a Title that names the work and the place, for example
Hot work — CH-01 plant room brazing. - Choose the Type: Hot Work, Confined Space, Height or Electrical.
- Pick Valid From and Valid To.
- In Description, write the scope of work and the precautions: fire watch, extinguishers, isolation, gas test.
- Click Create Permits To Work. The permit gets the next number, for example
PTW-2026-0006, and the status Pending.
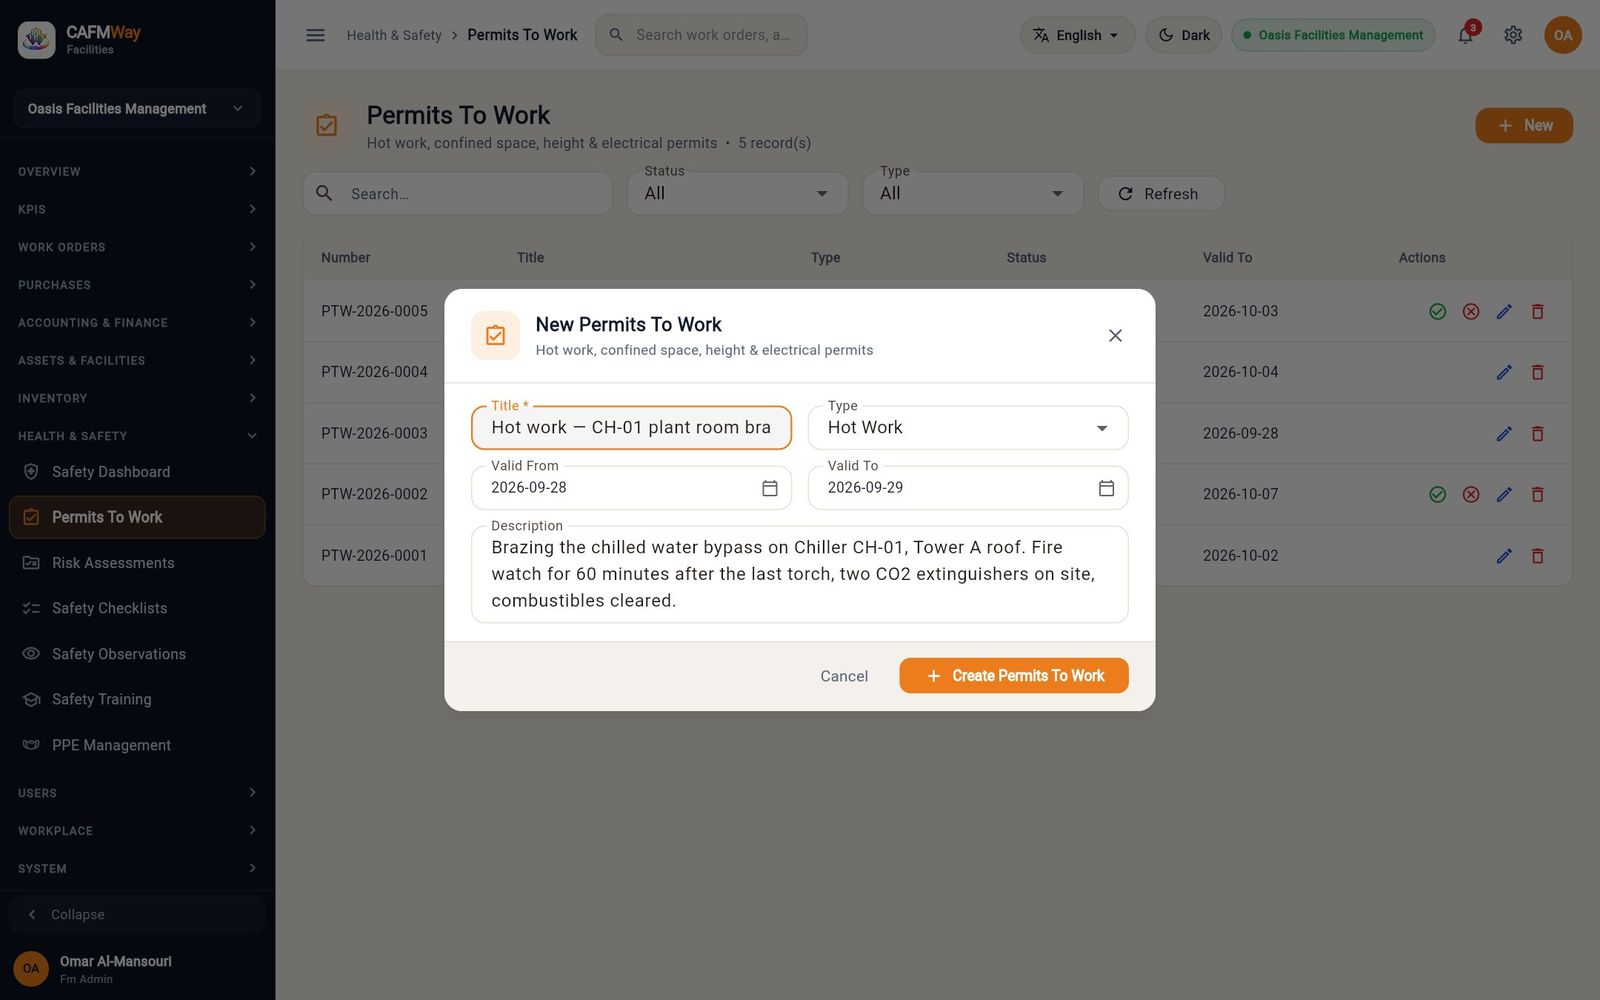
Approve the permit
- In the list, find the permit with status Pending. Pending permits show two extra icons: a green tick (Approve) and a red cross (Reject).
- Click Approve. The status changes to Approved at once, and the icons disappear. Click Reject instead to refuse the permit.
Start and close the work
- When work starts on site, click the pencil icon on the permit.
- Change Status to Active and click Save Changes.
- When the work is finished and the area is safe, open the permit again and set Status to Closed. A permit that ran past its end date without being closed can be set to Expired.
Assess a risk
- Who: HSE officer, supervisor
- Where: Sidebar → HEALTH & SAFETY → Risk Assessments
A risk assessment scores an activity by likelihood and severity, lists the controls, and records the risk that remains after them.
- Open Risk Assessments and click New.
- Enter a Title and describe the Activity.
- Enter Likelihood (1-5) and Severity (1-5).
- List the Controls you will put in place.
- Enter the Residual Risk (1-25) you expect once the controls are in place, and choose the Status (Open, Reviewed, Closed).
- Click Create Risk Assessments. The assessment gets a number such as
RA-2026-0006.
The list shows L (likelihood), S (severity) and the Score, which the system works out as L × S.
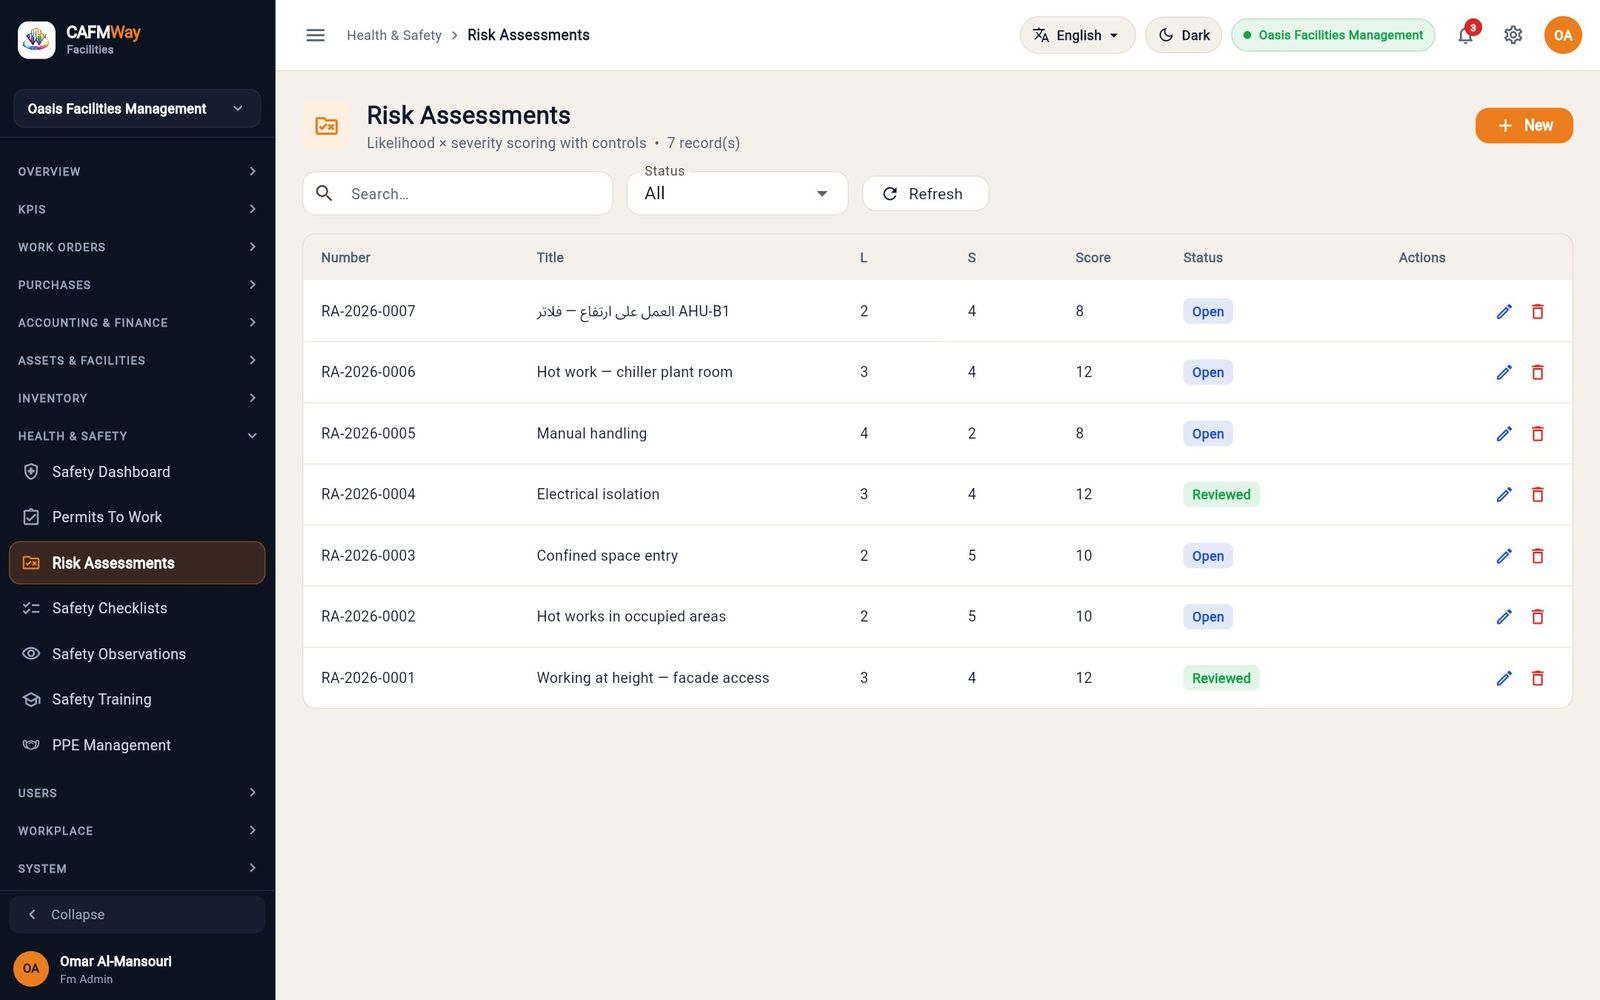
Record a safety checklist
- Who: supervisors, HSE officer
- Where: Sidebar → HEALTH & SAFETY → Safety Checklists
A safety checklist records the result of a pre-task check, an equipment inspection or a site audit: how many items were checked, how many passed and failed, the score, the findings and the corrective actions.
- Open Safety Checklists and click New.
- Under CHECKLIST, enter the Title, choose the Type (Pre Task, Equipment Inspection, Site Audit) and enter the Inspector.
- Click Location and pick the place from Locations & Spaces, for example Tower A.
- Under RESULTS, choose the Status (Draft, In Progress, Completed, Failed) and the Due Date.
- Enter Total Items, Passed Items, Failed Items and the Score (0-100).
- Describe the Findings and the Corrective Actions, then click Create Safety Checklists.
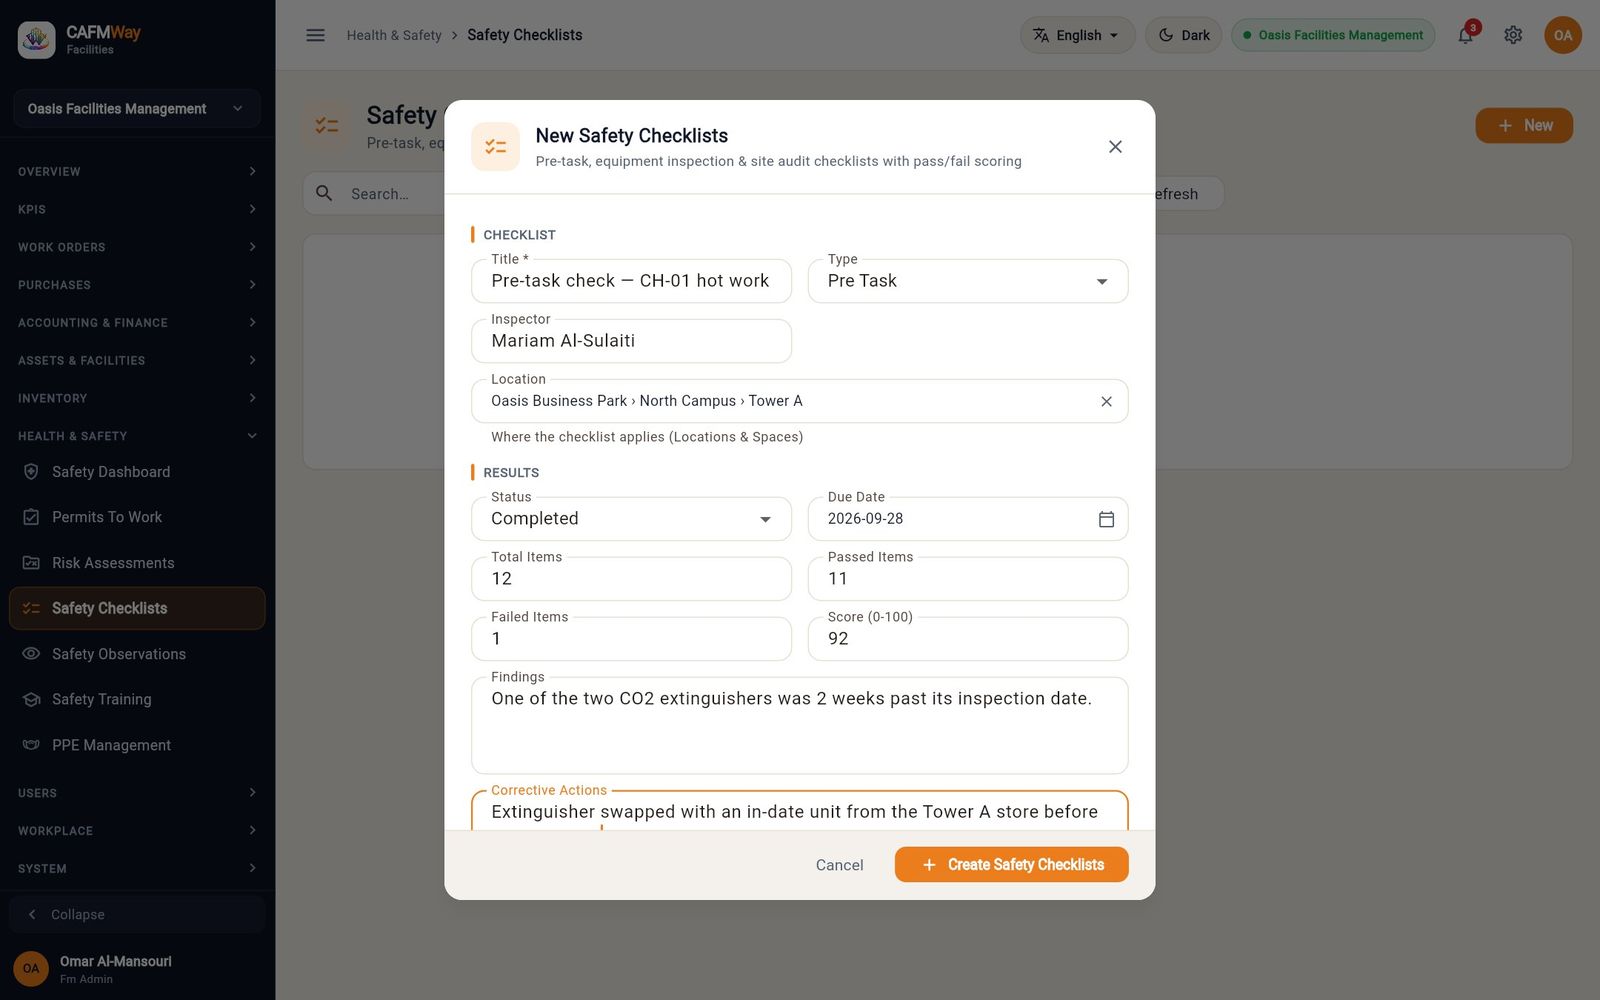
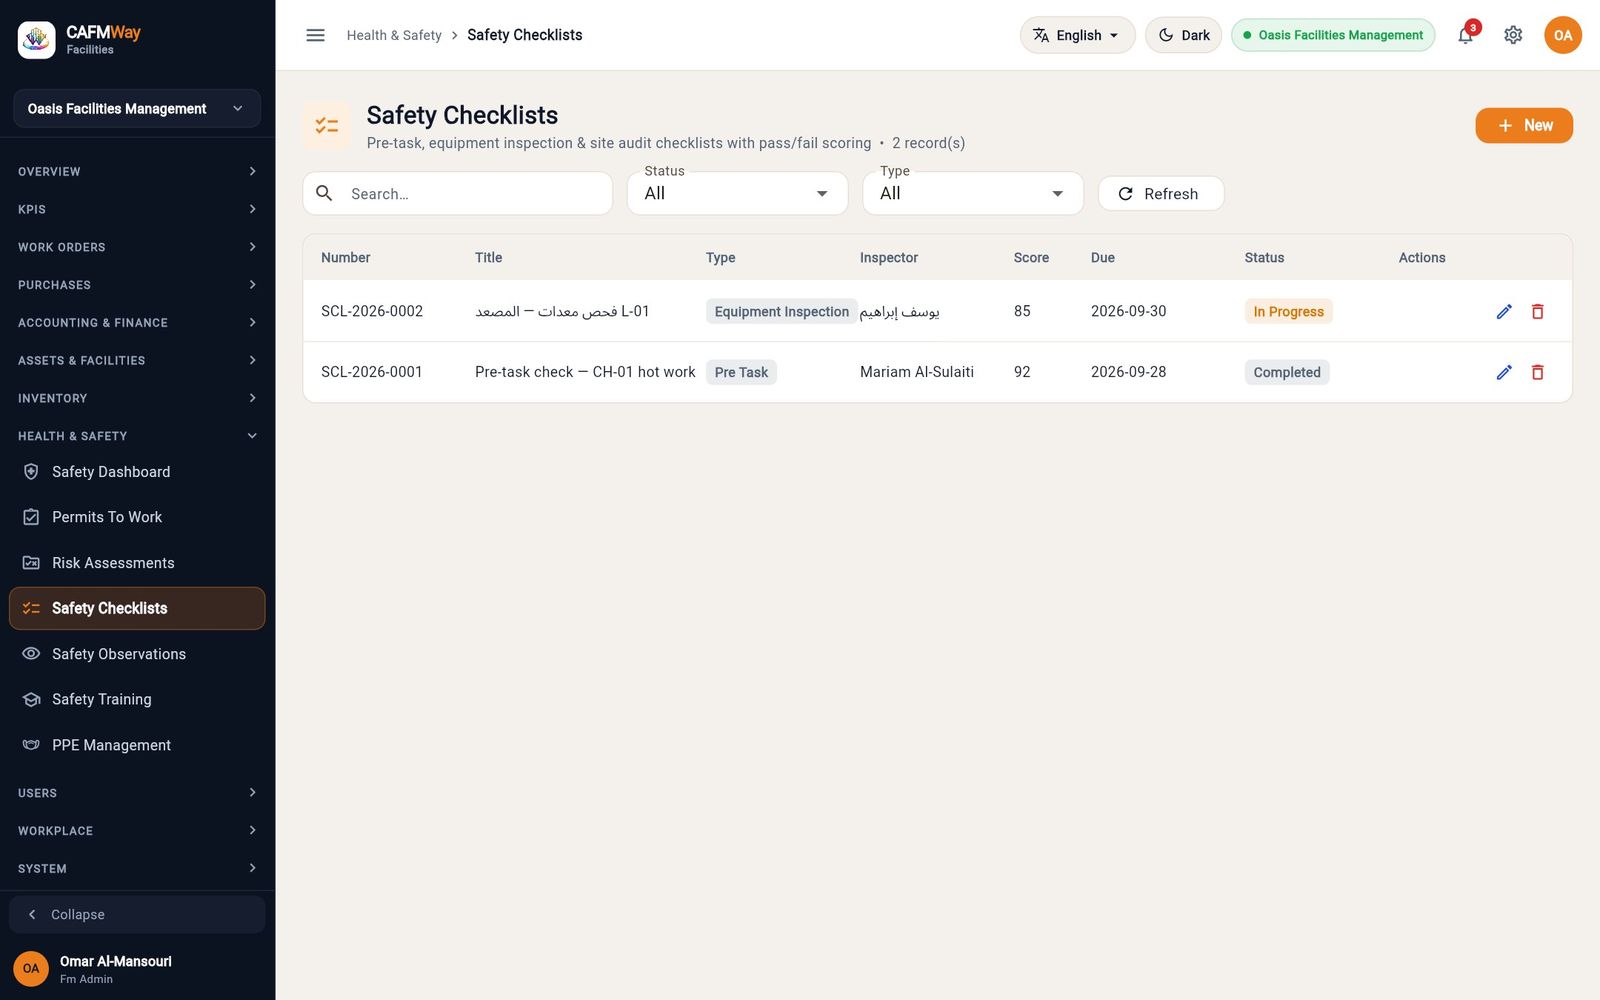
Record a safety observation
- Who: anyone with access to the H&S section
- Where: Sidebar → HEALTH & SAFETY → Safety Observations
Observations capture what people see on site: unsafe conditions, unsafe behaviour, and good practice worth recognising.
- Open Safety Observations and click New.
- Choose the Type: Unsafe Condition, Unsafe Behavior or Positive.
- Write a Description (required) that says what was seen and where.
- Leave Status as Open, then click Create Safety Observations.
- When the hazard has been dealt with, edit the observation and set Status to Actioned, then Closed once it is checked.
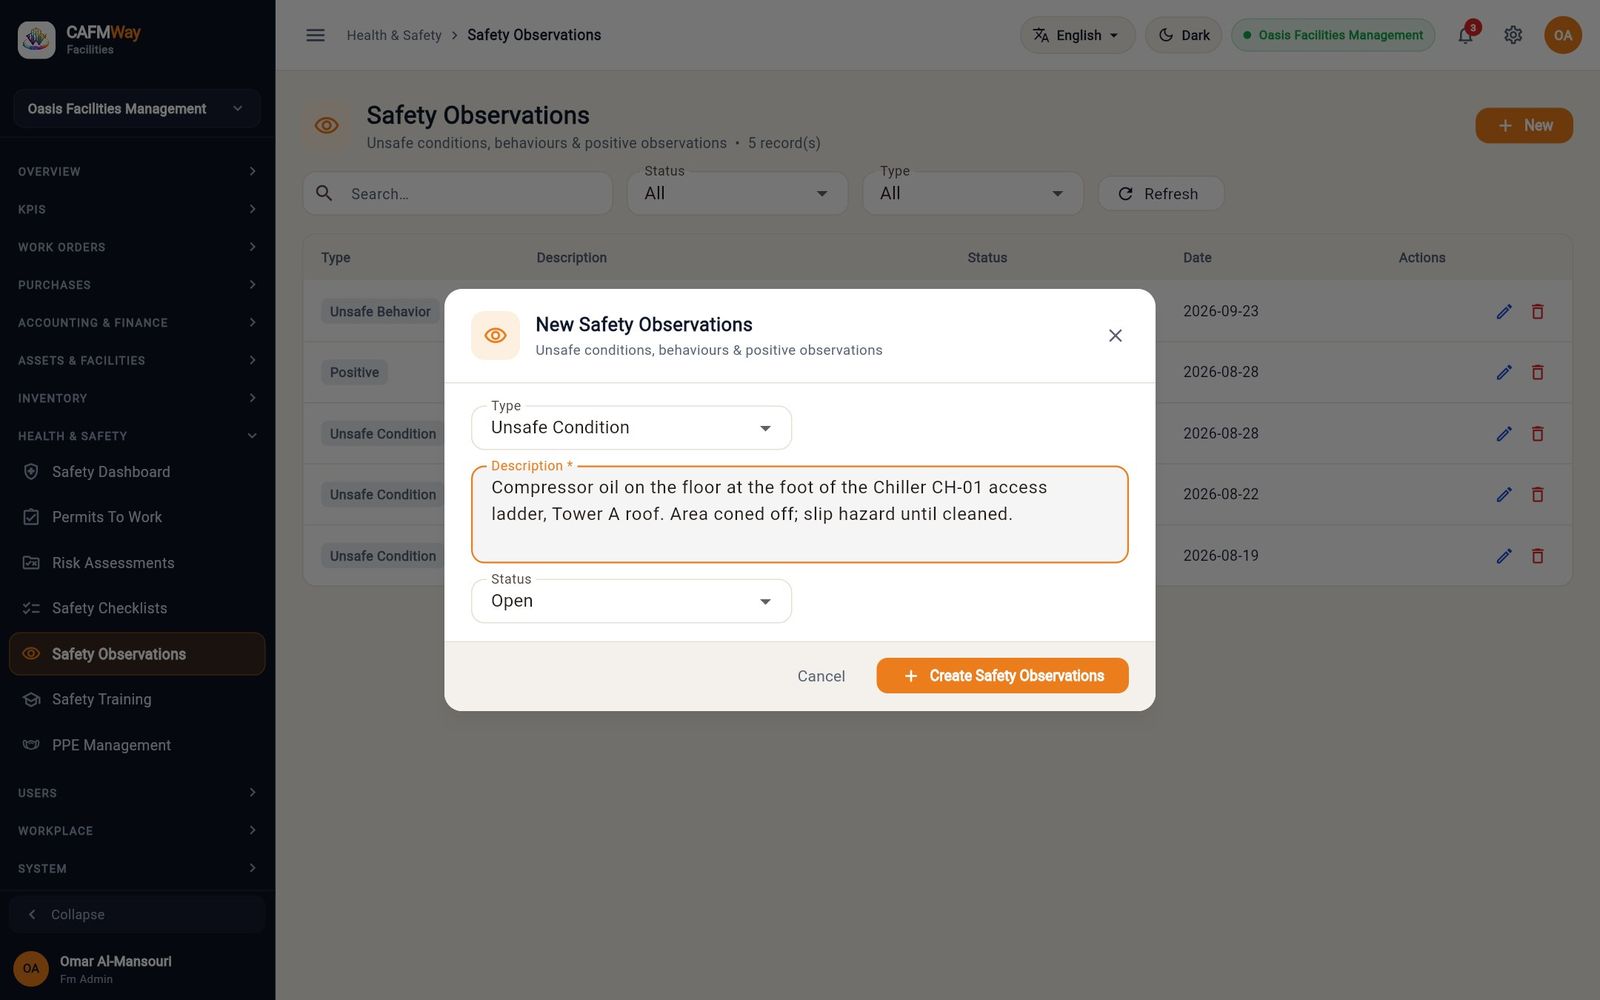
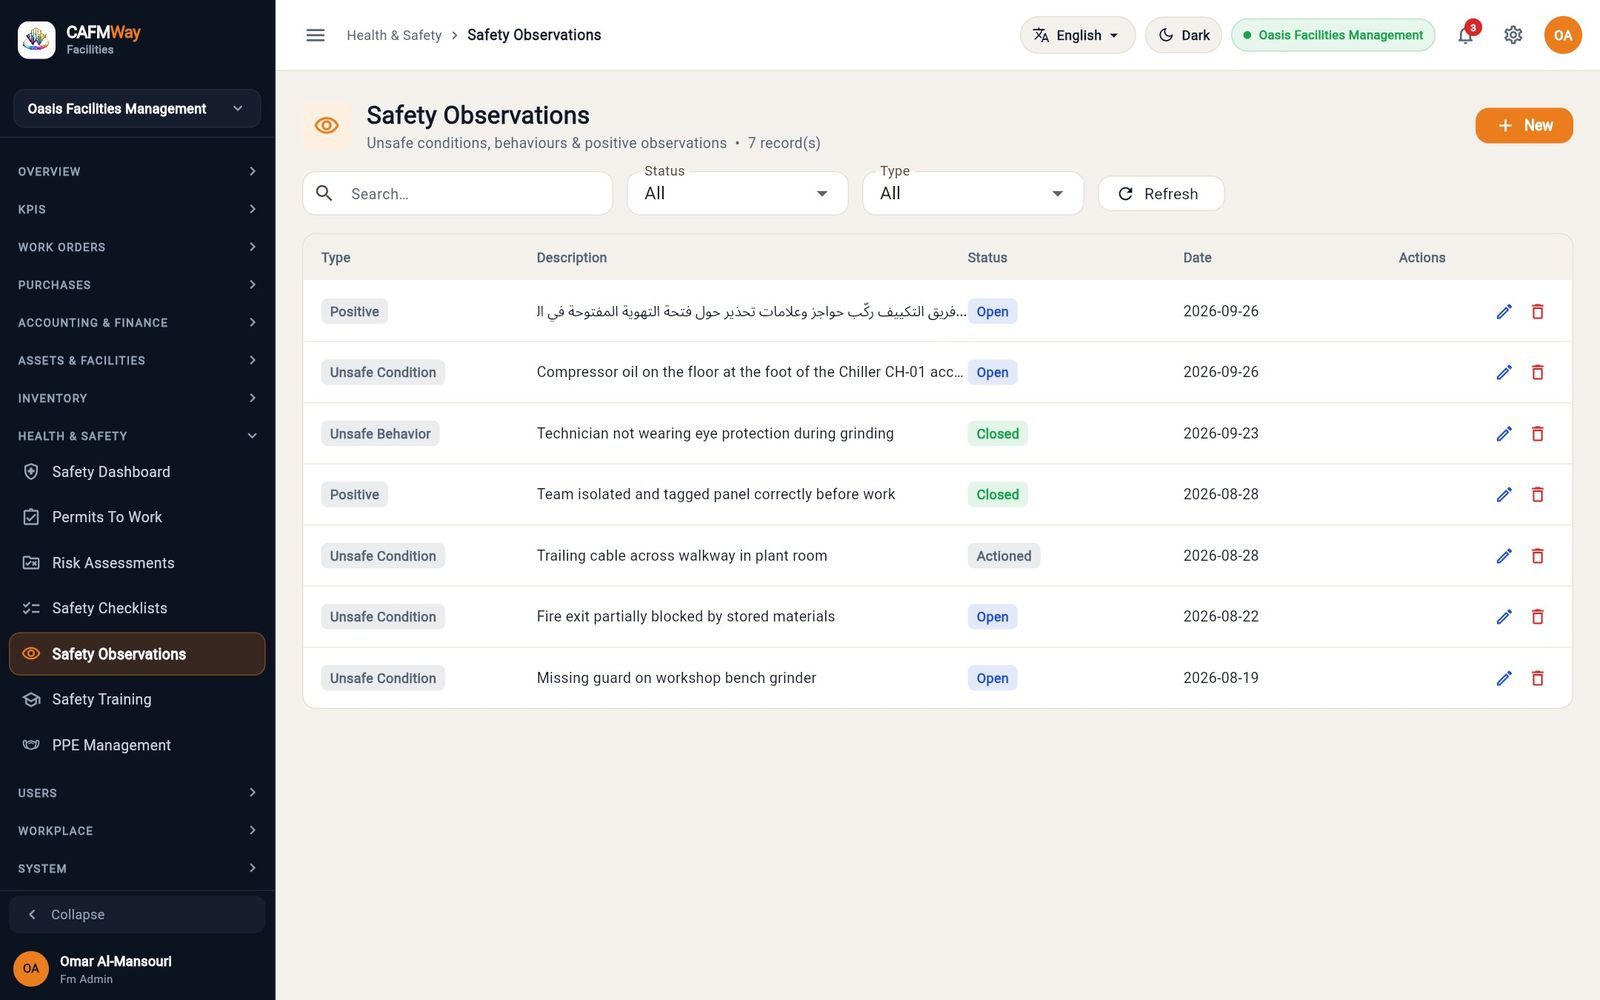
The Safety Dashboard counts observations by type.
Record safety training
- Who: HSE officer, HR
- Where: Sidebar → HEALTH & SAFETY → Safety Training
Training records show who is trained in what and when each certificate runs out.
- Open Safety Training and click New.
- Under TRAINEE & COURSE, enter the Employee and Course (both required), the Role / Position, and choose the Category (Induction, Fire Safety, First Aid, Working At Height, Confined Space, Manual Handling).
- Under PROVIDER, enter the Training Provider, Trainer, Certificate No., Training Hours and Score (0-100).
- Under STATUS & DATES, pick the Completed Date and Certificate Expiry, and choose the Status (Scheduled, Completed, Expired).
- Click Create Safety Training.
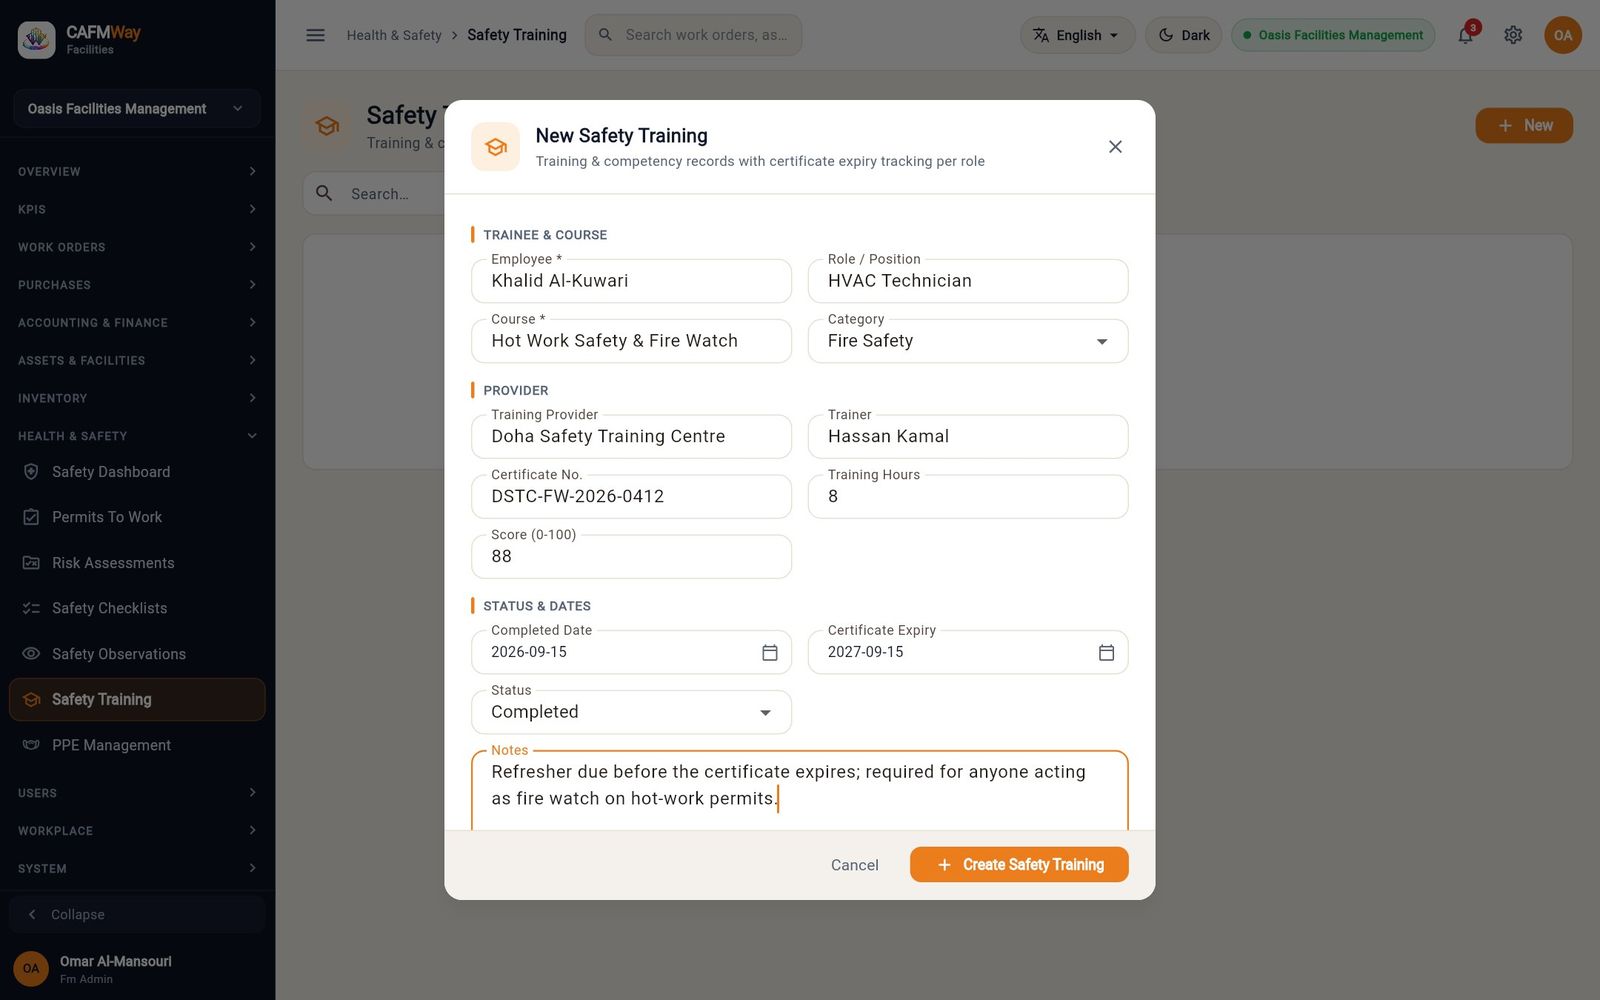
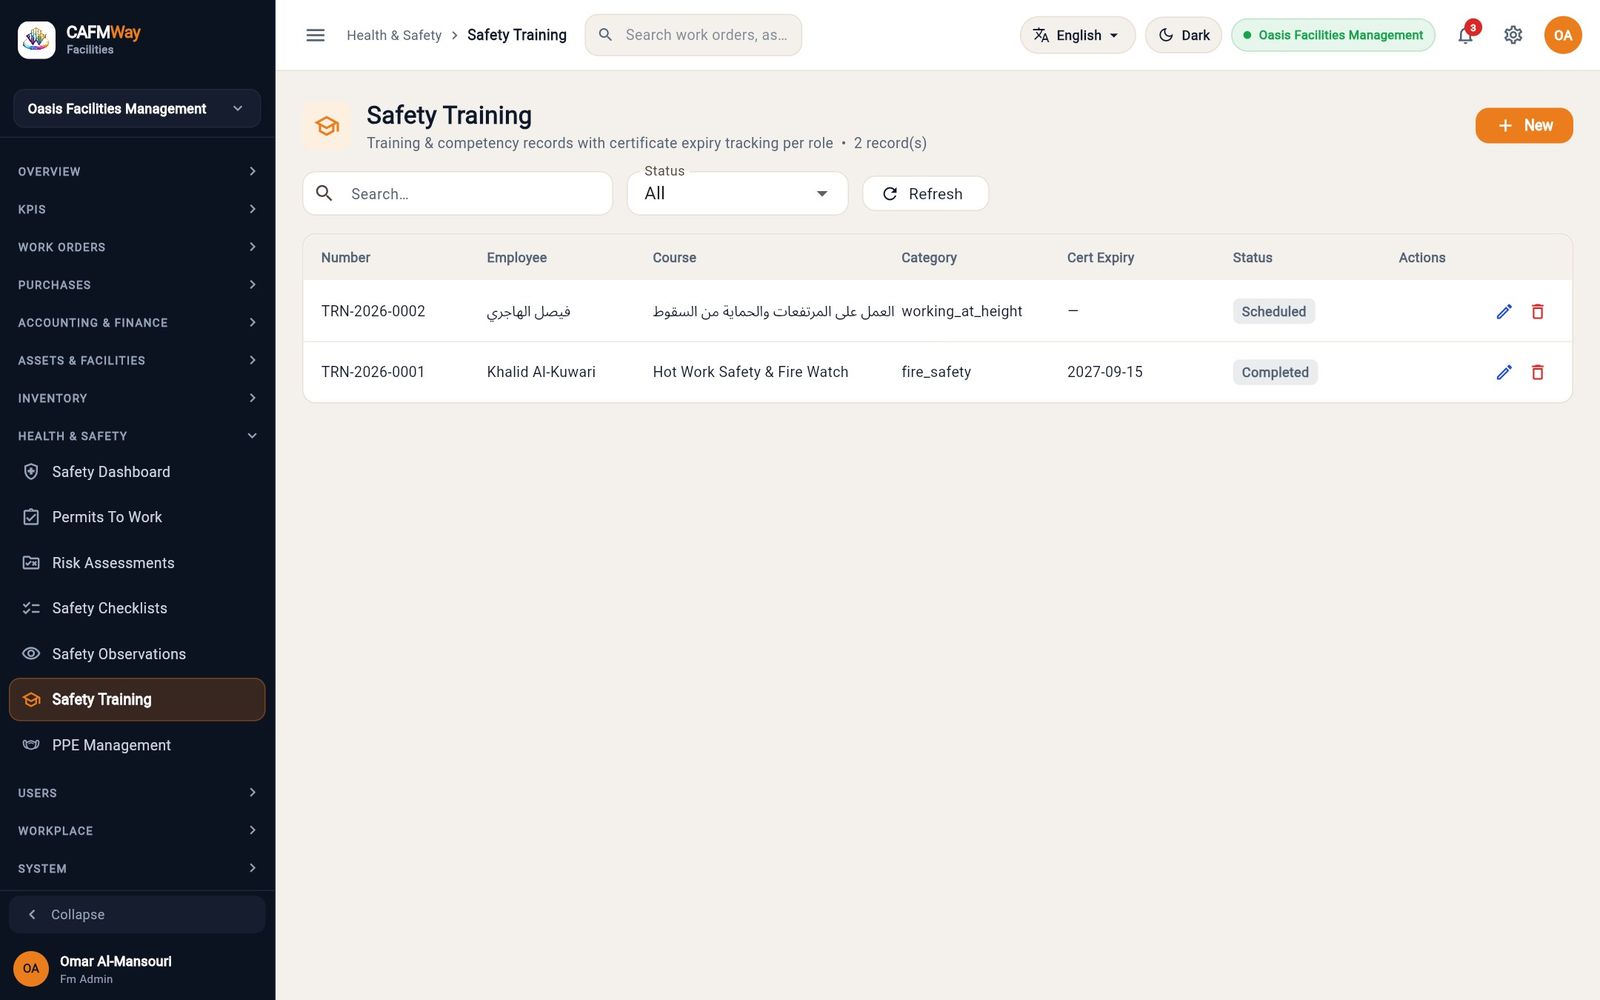
Issue PPE
- Who: storekeeper, HSE officer, supervisor
- Where: Sidebar → HEALTH & SAFETY → PPE Management
PPE Management tracks each item of personal protective equipment issued to a person: what it is, which task it is for, its condition, and when it must be inspected, returned or replaced.
- Open PPE Management and click New.
- Under ITEM DETAILS, enter the PPE Item (required), choose the Category (Head, Eye, Hearing, Respiratory, Hand, Foot, Body, Fall Protection) and the Task Type (Hot Work, Height, General, Electrical, Confined Space), and enter the Brand, Size and Serial No.
- Under ISSUANCE, enter Issued To (name), Quantity, Condition (New, Good, Worn, Damaged), Unit Cost (QAR) and Supplier, and leave Status as Issued.
- Under DATES & INSPECTION, pick the Issued Date, Expiry Date and Next Inspection. Leave Return Date empty until the item comes back.
- Click Create PPE Management. The record gets a number such as
PPE-2026-0001.
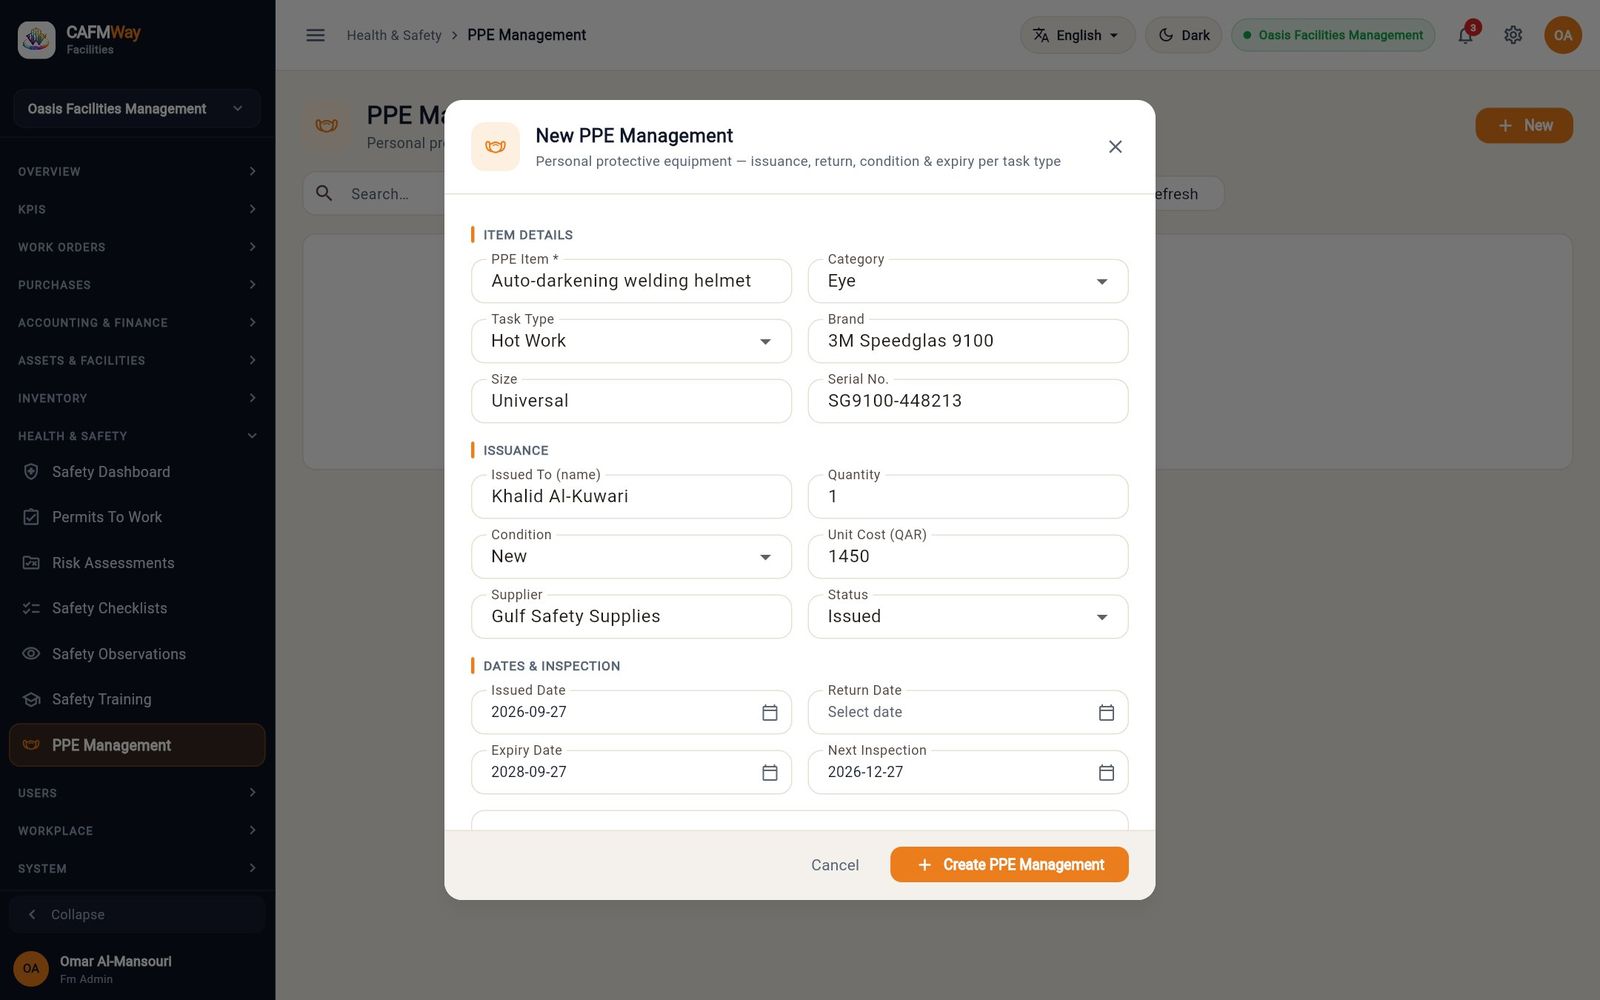
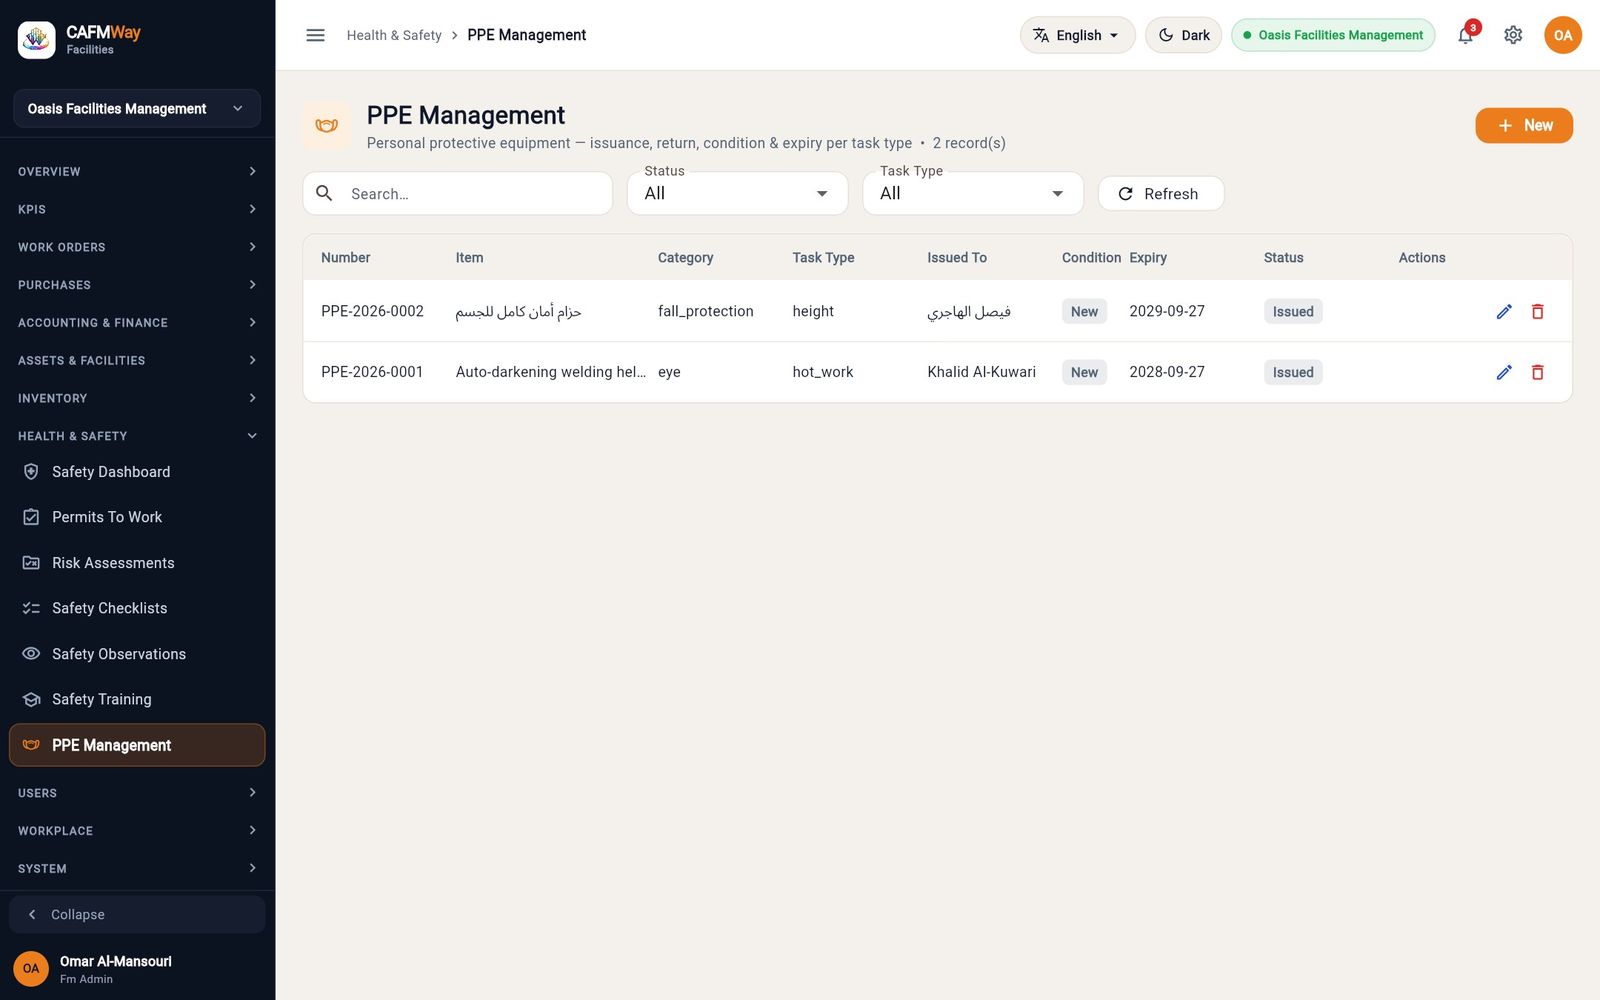
When the item is returned, edit the record: set Status to Returned, pick the Return Date and update the Condition. Use Lost or Expired when that applies. Filter the list by Task Type to see, for example, everything issued for hot work.
People and shifts
The USERS section also holds guests, working patterns, rosters and leave. Users & Roles, Roles & Permissions and Organisation & SLA are covered in the administration part of this guide.
Give a guest a login
- Who: users with the users module
- Where: Sidebar → USERS → Guests
A guest login lets someone staying in or visiting a building (a hotel guest, a tenant, a visiting consultant) raise their own work orders from the requestor app for the length of their stay, instead of phoning the helpdesk.
- Open Guests and click New Guest.
- Enter the FULL NAME as it should appear on jobs, and the EMAIL. The guest signs in with this email or with the guest ID.
- Enter the PHONE (optional) and choose the LOCATION the guest is staying in.
- Set STAY STARTS and STAY ENDS. The login works only between these times: before the start the guest is told the access has not started, after the end that it has ended.
- Enter a PASSWORD and repeat it in CONFIRM PASSWORD.
- Click Create Guest. The Guest created box shows the GUEST ID, for example
G-4633. Click the copy icon to copy it, then Done.
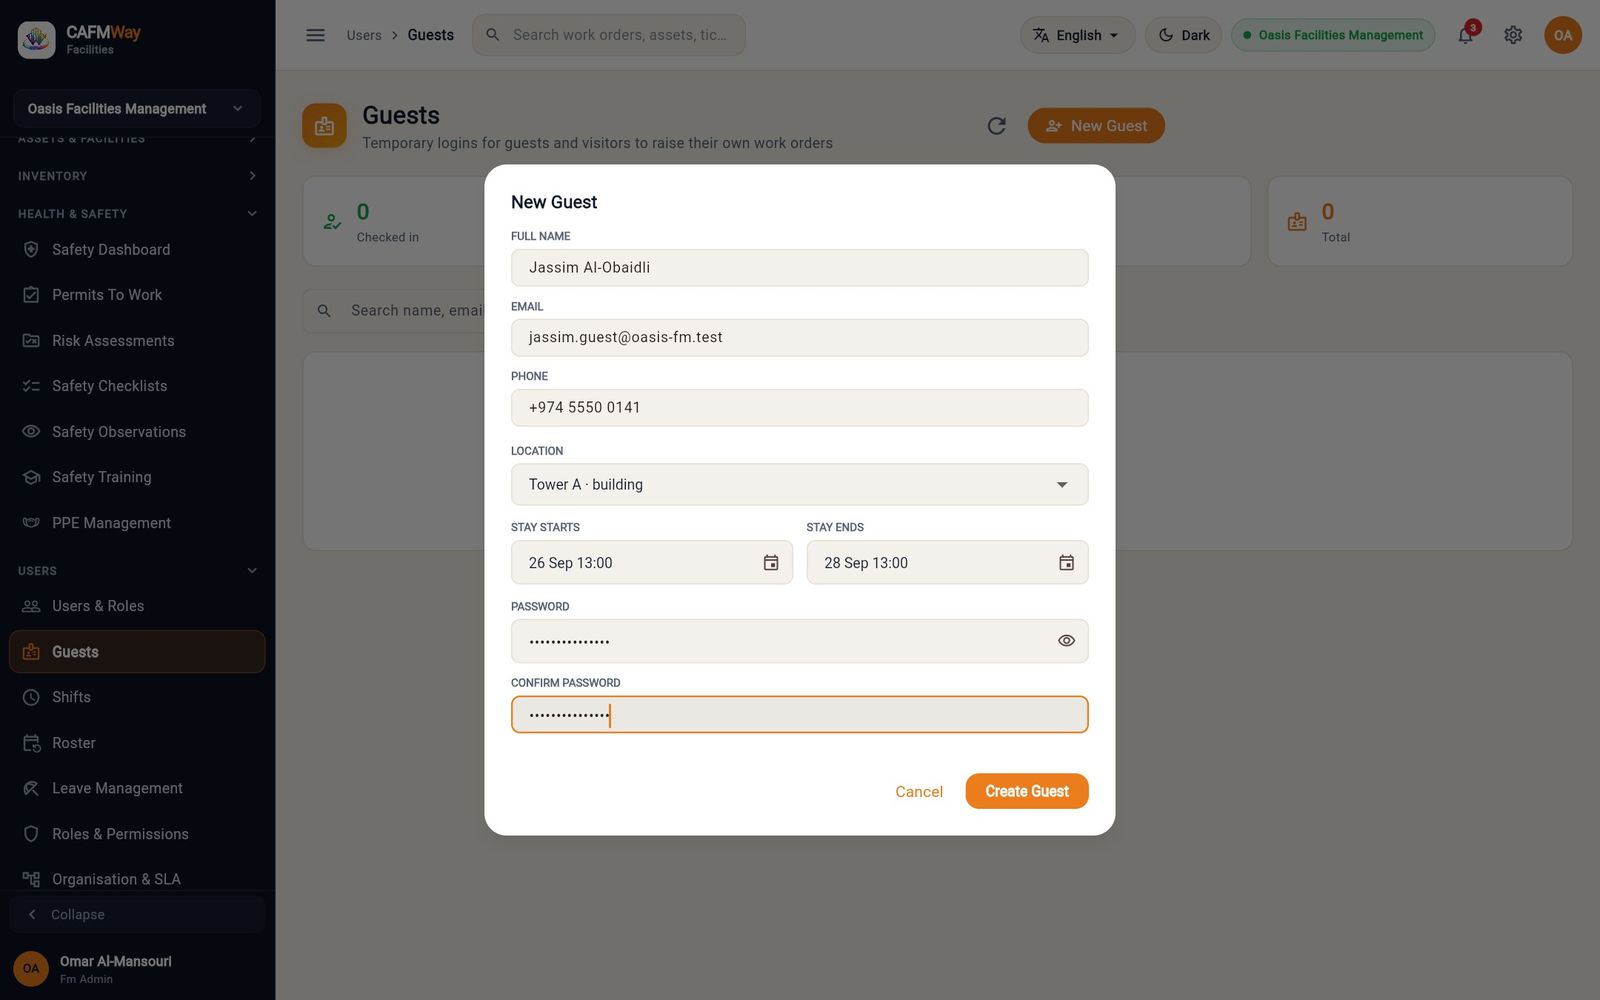
Give the guest their ID and password in person or by a secure channel.
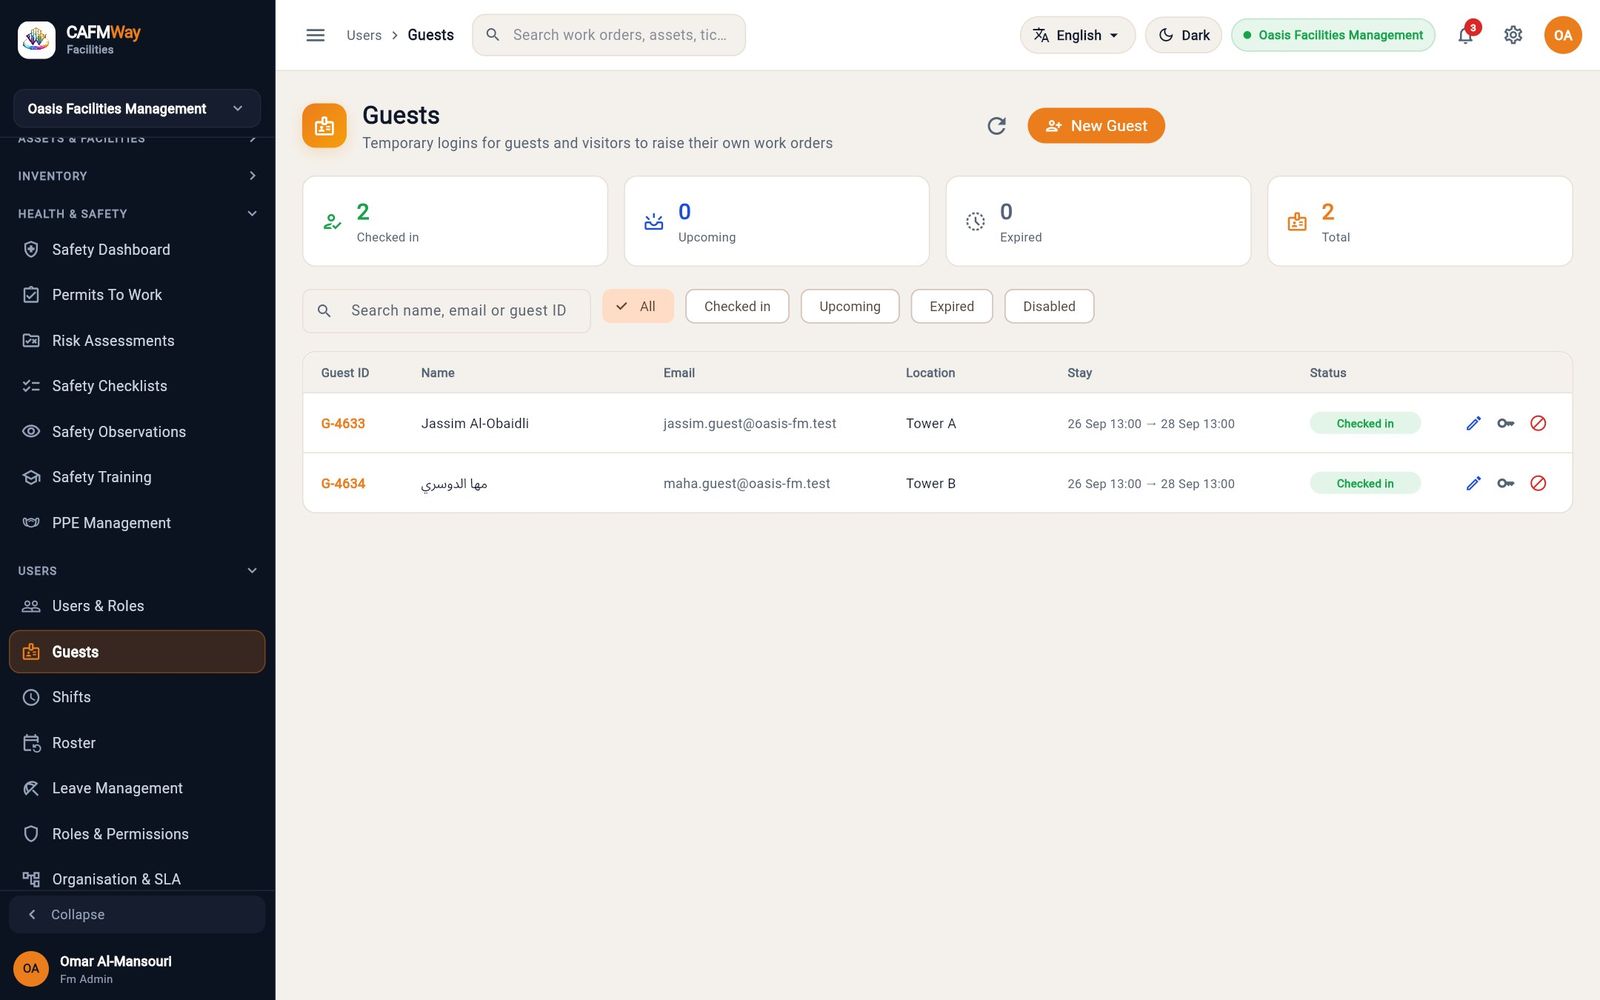
The counters at the top show guests Checked in, Upcoming, Expired and the Total; the chips filter the list the same way. On each row, the pencil edits the guest, the key icon (Set password) sets a new password, and the red icon (End access) ends the stay early.
Define shifts
- Who: FM manager, supervisor
- Where: Sidebar → USERS → Shifts
A shift is a working pattern: start time, end time and working days. Shifts are then assigned to people in the roster.
- Open Shifts and click New.
- Enter the Shift Name, for example
HVAC Day Shift (Sun–Thu). - Enter the Start Time and End Time as HH:MM in 24-hour time, for example
06:30and14:30. An end time earlier than the start time means the shift runs past midnight. - Enter the Working Days as ISO day numbers separated by commas: Monday = 1 … Sunday = 7. A Sunday-to-Thursday week is
7,1,2,3,4. If you leave it empty, Monday to Friday is used. - Turn Active on, then click Create Shifts.
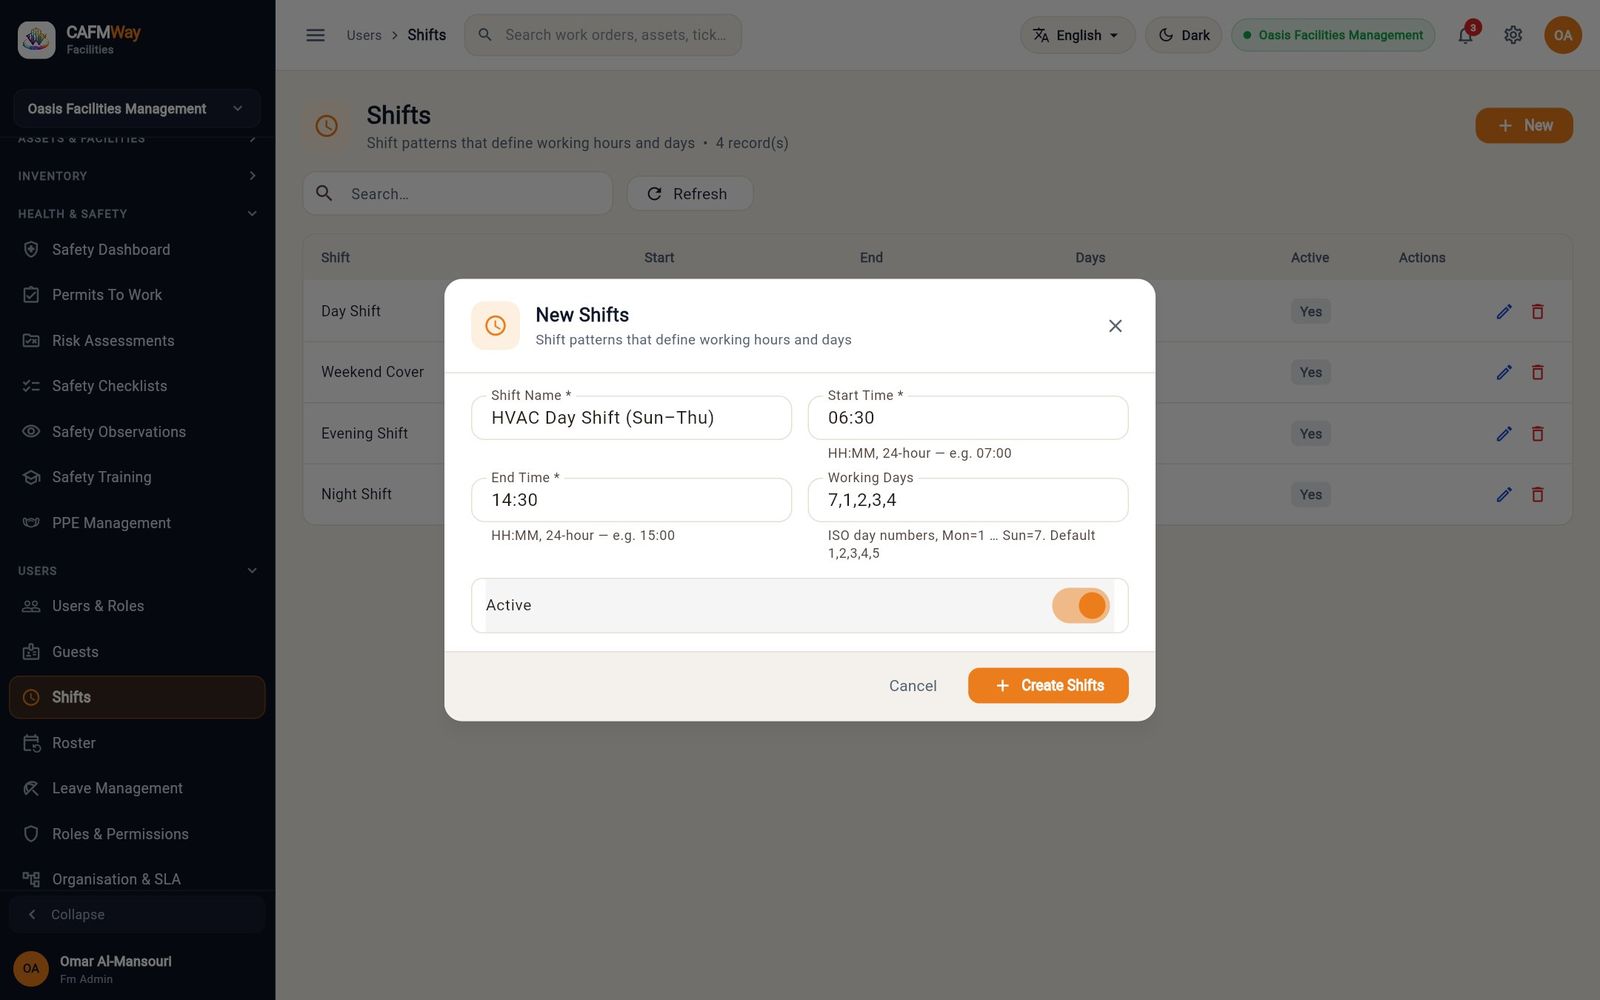
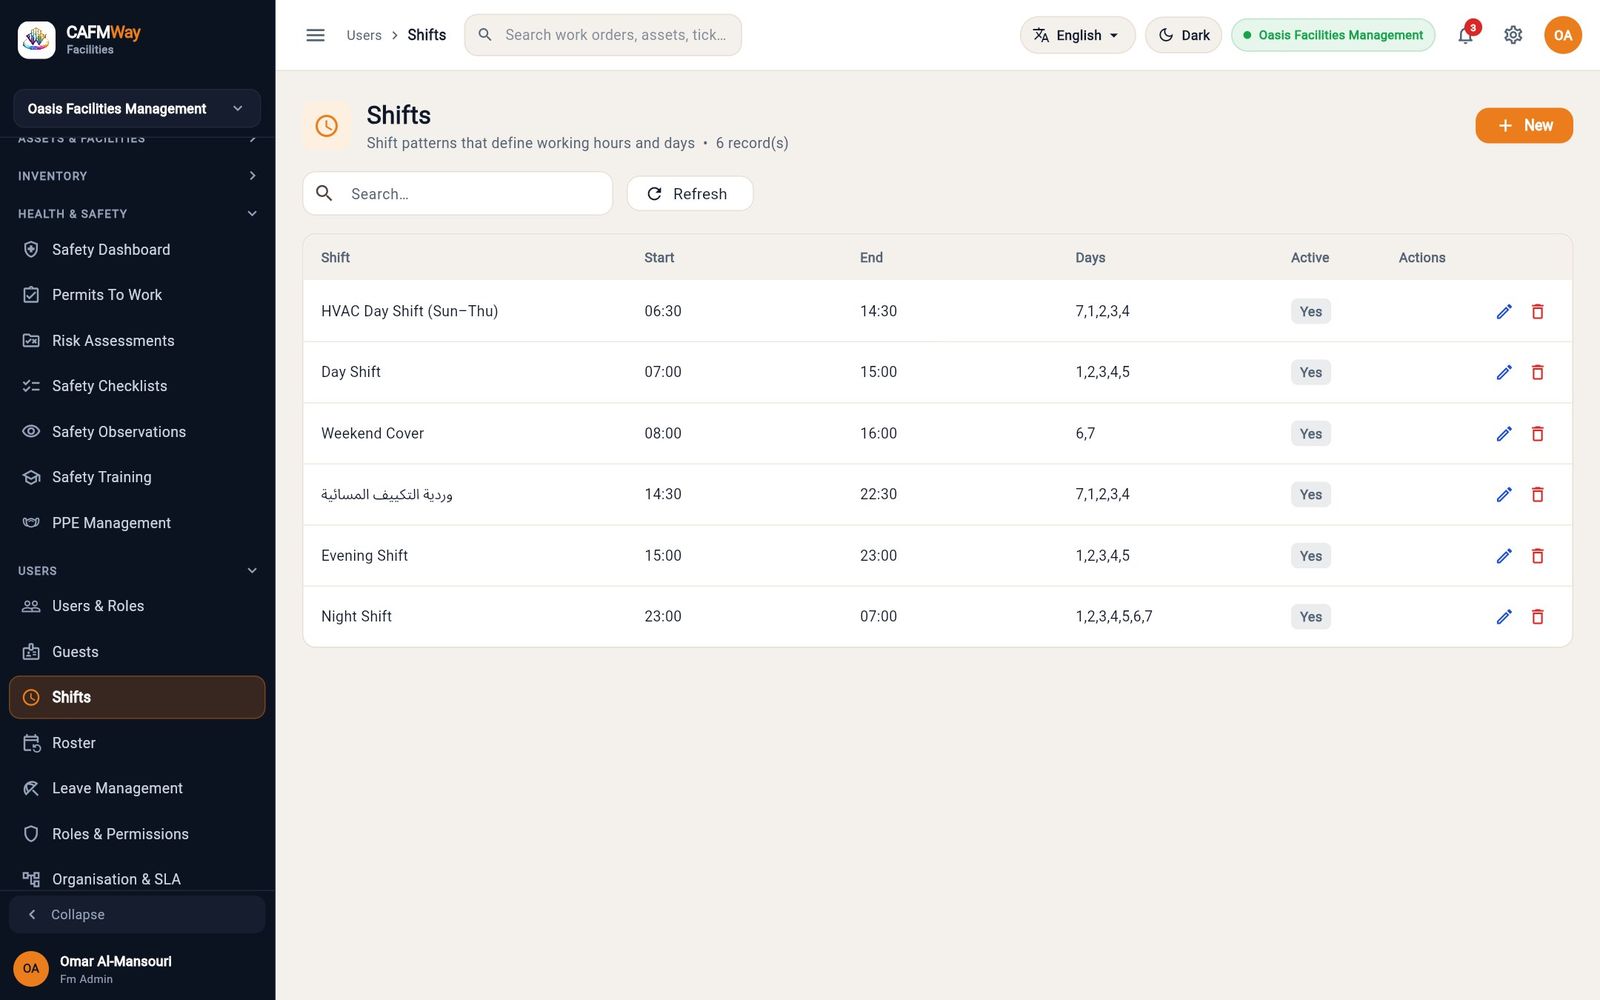
Roster the team
- Who: FM manager, supervisor
- Where: Sidebar → USERS → Roster
The roster assigns a shift to a technician from one date to another. The rostered hours feed technician utilisation on the Executive Dashboard and the hours-worked figure on the Safety Dashboard.
- Open Roster and click New.
- Click Technician and pick the person, for example Khalid Al-Kuwari of the HVAC team.
- Click Shift and pick the shift, for example HVAC Day Shift (Sun–Thu).
- Pick the From date. Pick a To date, or leave it empty for an open-ended roster.
- Click Create Roster.
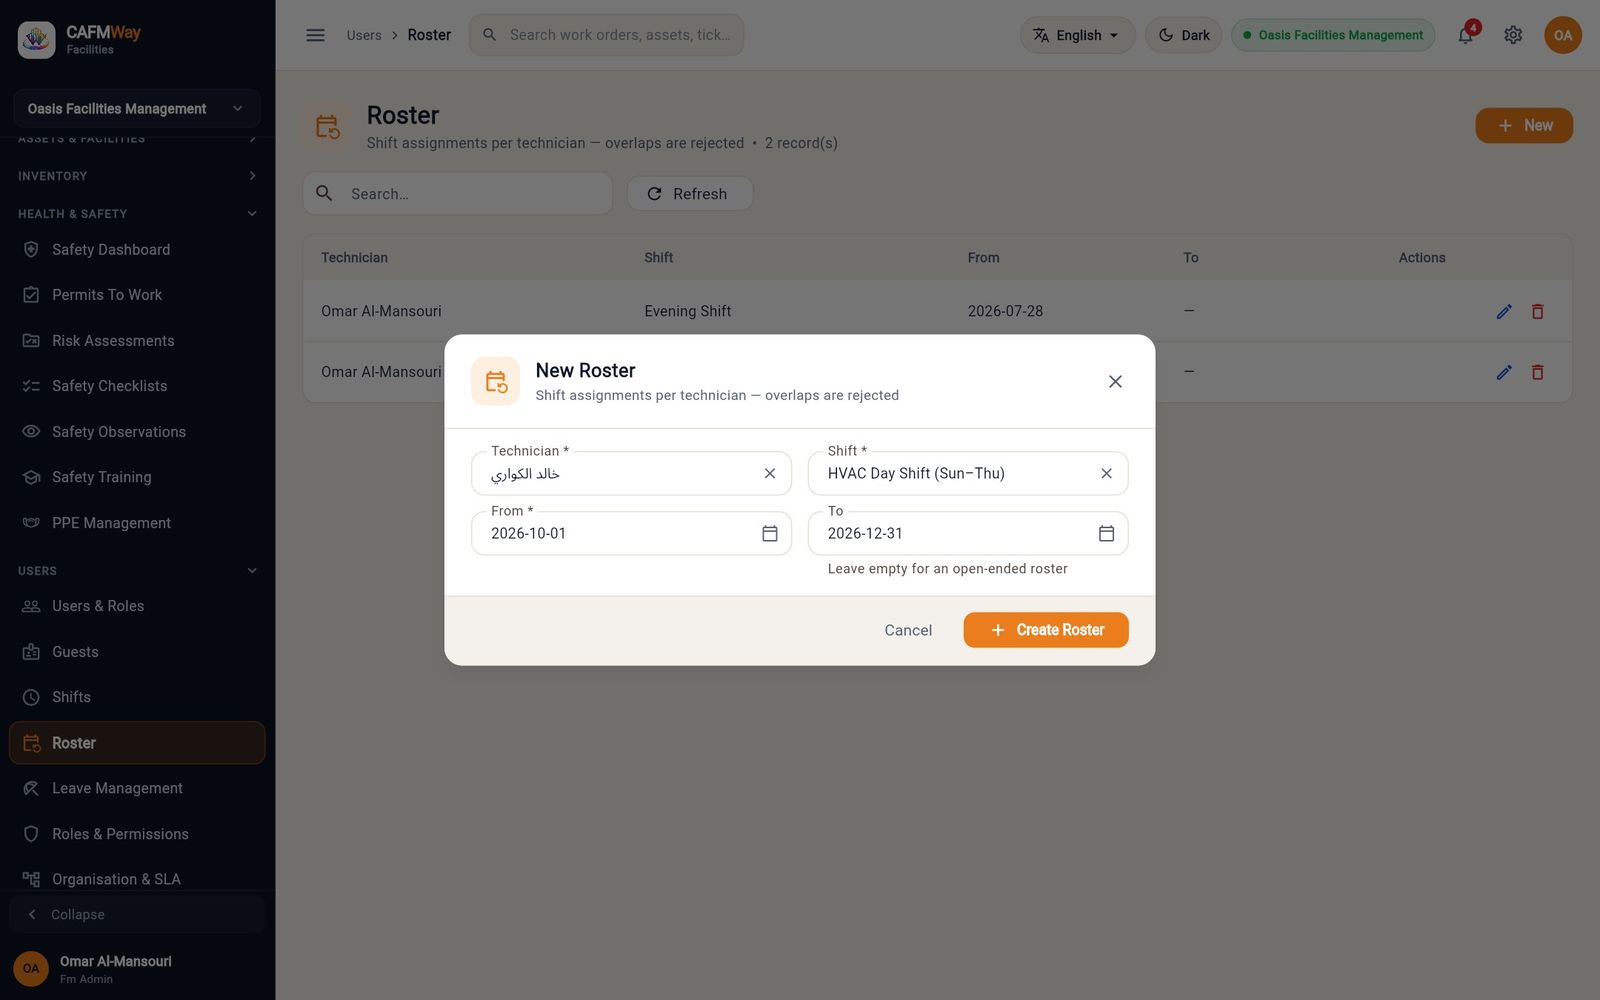
Repeat for each member of the team. For the HVAC team in this example, Khalid Al-Kuwari covers the day shift and Faisal Al-Hajri the evening shift for the same quarter.
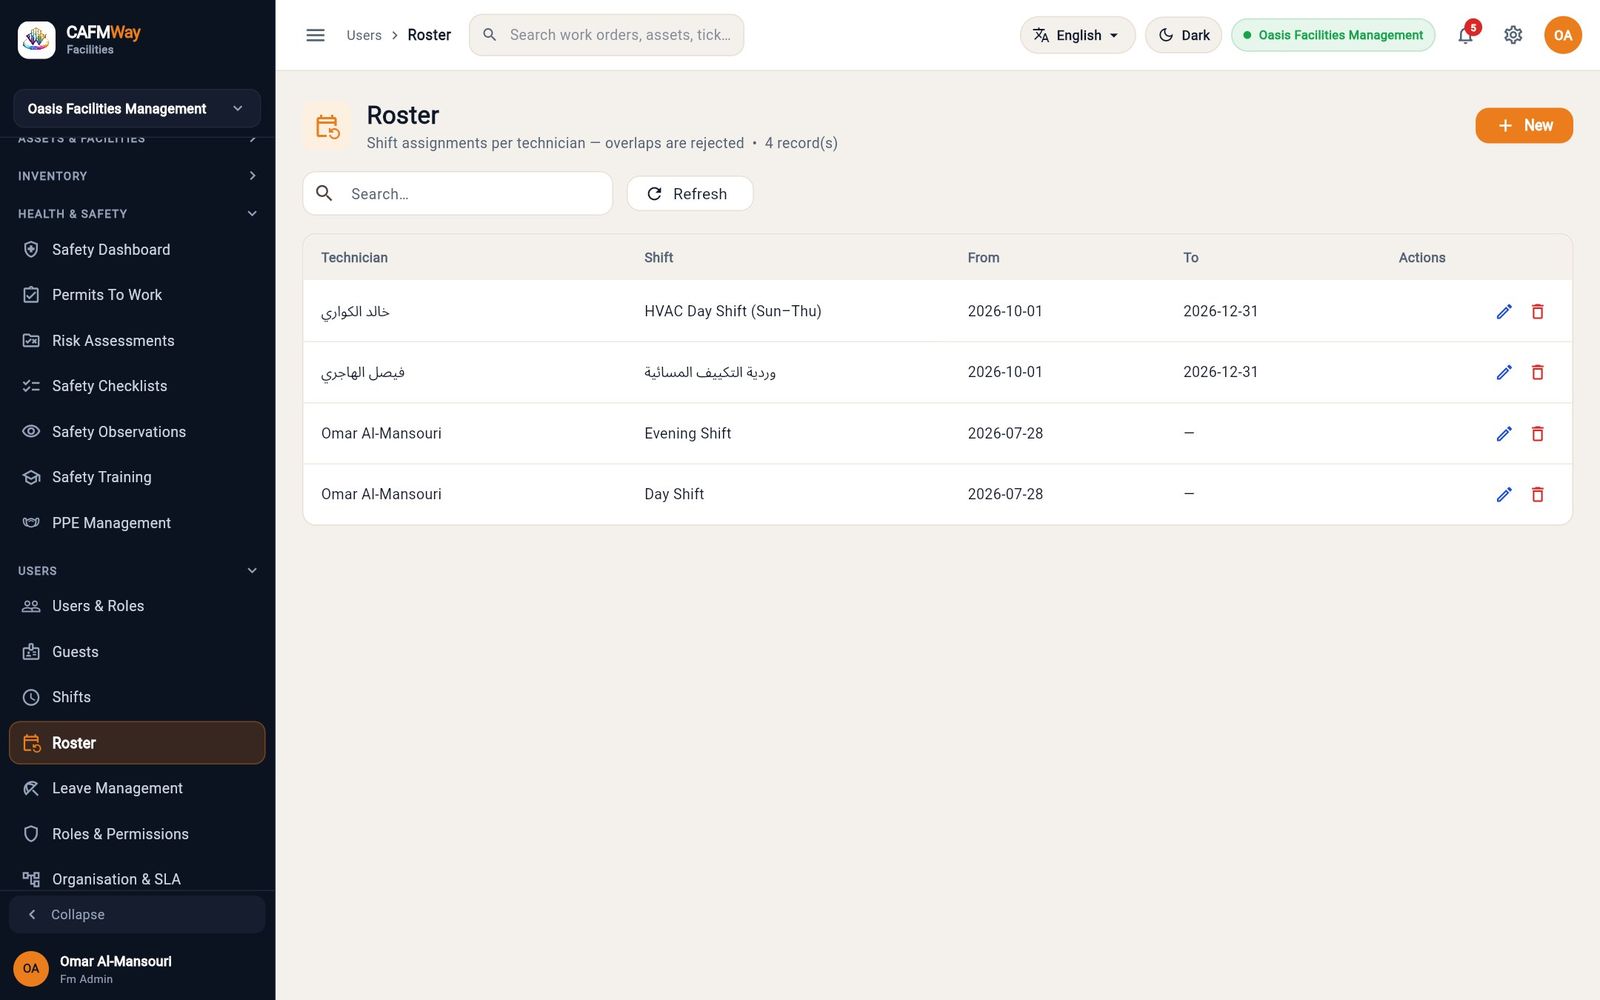
Request leave
- Who: employees file their own leave; managers with write permission can file for others
- Where: Sidebar → USERS → Leave Management
- Open Leave Management and click New.
- Click Employee and pick the person.
- Choose the Leave Type: Annual, Sick, Unpaid or Emergency.
- Pick the From and To dates, both required.
- Write the Reason, including who covers the work, and click Create Leave Management. The request is saved as Pending.
Workplace
The WORKPLACE section covers the services a facilities team runs for the people in the building: meeting room booking, waste collection and the document library.
Book a meeting room
- Who: anyone with the resources module can book; FM manager or workplace coordinator approves
- Where: Sidebar → WORKPLACE → Space Booking
Space Booking has three tabs: Calendar (a week of every bookable space), Bookings (the list, where bookings are approved) and Bookable Spaces (the catalogue of rooms, desks and facilities).
Add a bookable space
- Open the Bookable Spaces tab and click New.
- Enter the Name, choose the Type (Room, Desk, Facility) and enter the Capacity.
- Turn Active on and click Create Bookable Spaces.
Book a time slot
- Open the Calendar tab. Use the arrows to move between weeks, or This week to come back.
- Find the room's row and the day's column, and click Book. Past days have no Book link.
- Enter the Title of the meeting.
- Click From and To and set the times on the clock.
- Click Book. The booking appears in the cell in orange (Pending).
Approve the booking
- Open the Bookings tab. Pending bookings show a green tick (Approve) and a red cross (Reject).
- Click Approve. The status changes to Approved and the calendar shows the booking in green.
Waste collection points and logs
- Who: soft services supervisor, HSE officer
- Where: Sidebar → WORKPLACE → Waste Management
Waste Management records where waste is collected and how much is collected each time, by type: general, recyclable, hazardous and organic.
Add a collection point
- Open the Collection Points tab and click New.
- Enter the Code and Name, for example
WP-006"Tower A Roof — Used Oil & Filters". - Click Location and pick the place from Locations & Spaces.
- Choose the Waste Type and click Create Waste Collection Points.
- Click the QR icon (Generate QR) on the new row. The point gets a QR code that collectors can scan instead of choosing the bin from a list.
Log a collection
- Open the Collection Logs tab and click New.
- Pick the Collection Point, choose the Waste Type and enter the Weight (kg) (required).
- Pick the Collected On date and click Create Waste Collection Logs.
Document library
- Who: users with the resources module
- Where: Sidebar → WORKPLACE → Documents
The document library is a register of controlled documents (procedures, manuals, drawings, certificates, contracts) with their category, version and tags.
- Open Documents and click New.
- Enter the Title (required) and the Category, for example
HSE. - In File URL (required), paste the link to the file on your document server.
- Enter Tags (comma separated) to make the document easy to find, for example
hse,hot-work,procedure. - In Linked Entity Type, name the kind of record the document belongs to, for example
Permit. - Click Create Document Library. The document is listed as version 1.
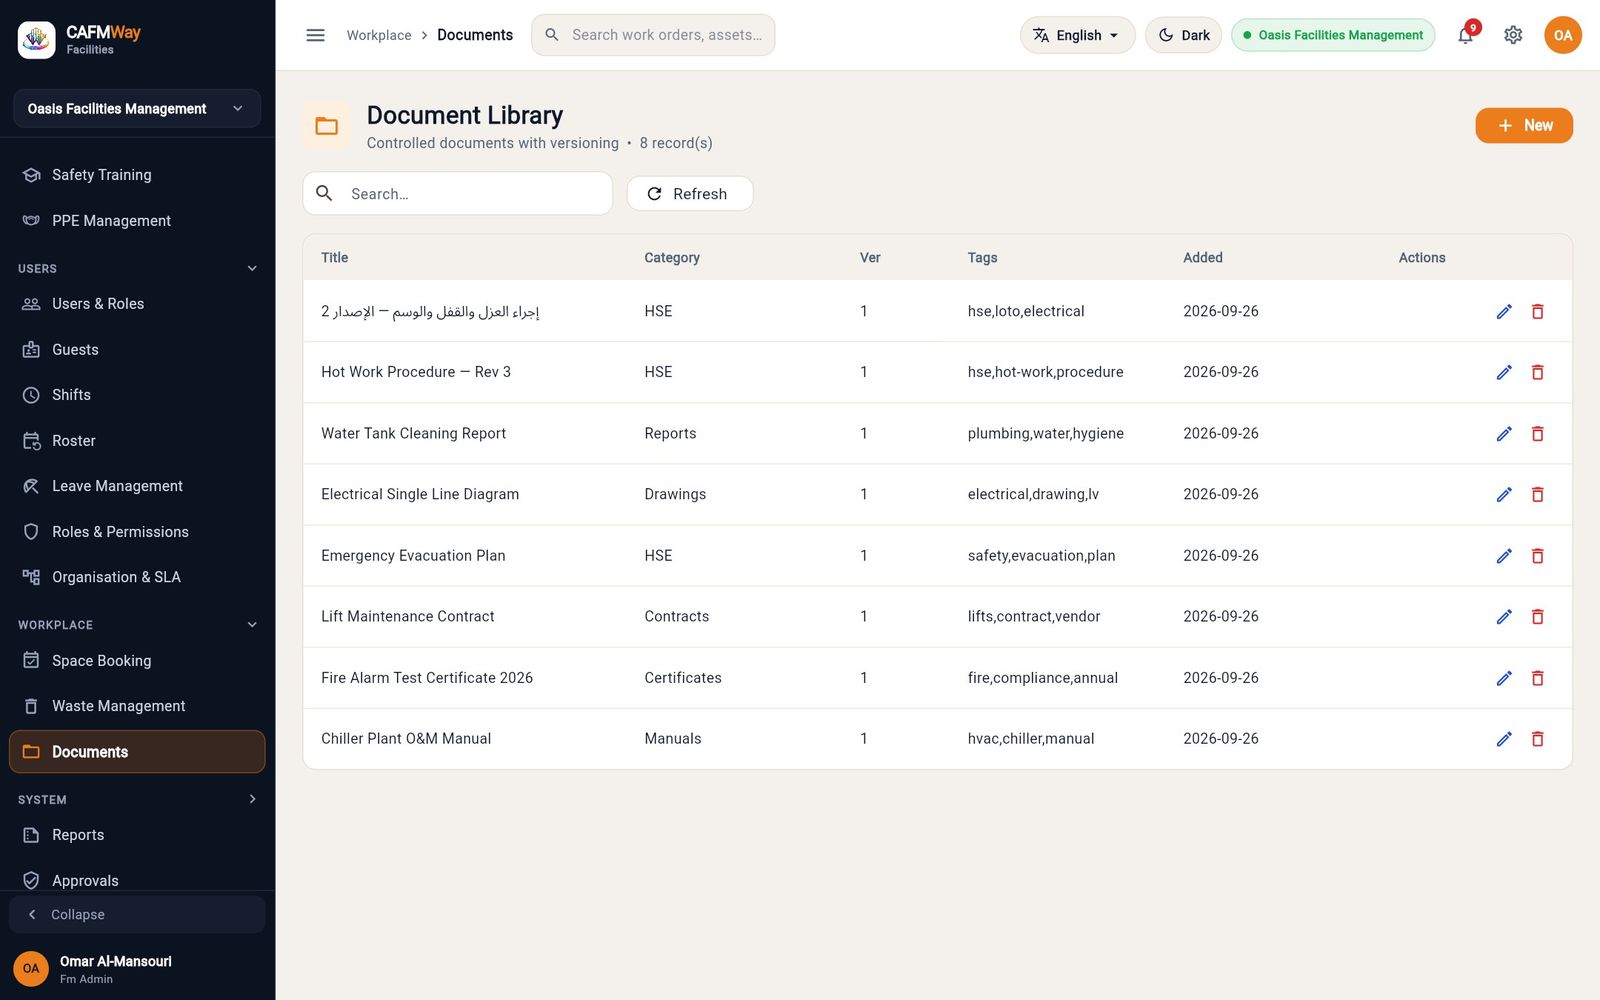
Notifications and messages
Notifications
- Who: every user
- Where: the bell in the top bar; Sidebar → SYSTEM → Notifications
CAFM Way notifies you about work that concerns you: new work orders waiting for assignment, jobs completed, mentions in messages, condition alerts and approvals.
- The bell in the top bar shows the number of unread notifications. Click it to see the five most recent. Click Mark all read to clear the count, or View all notifications to open the full list.
- On the Notifications page, switch between All and Unread.
- Click a notification to open the record it is about. Once you have opened it, the notification is removed from the list. An orange dot marks unread items.
- Click the × at the end of a row to delete that notification. Mark All Read marks the whole list read.
Send a message to a technician
- Who: every user
- Where: Sidebar → SYSTEM → Messages
Messages is the in-app chat. Each work order has its own conversation, and you can also start a direct conversation with anyone in the company. Technicians read and answer from the technician app.
- Open Messages. The left column lists your conversations with the latest message and an unread count.
- Click New Message.
- Type a name or email in Search people by name or email, and tick the person, for example Khalid Al-Kuwari. Tick more than one person to start a group conversation.
- Click Start Chat. The conversation opens on the right.
- Type the message in Type a message… use @ to mention someone and click Send.
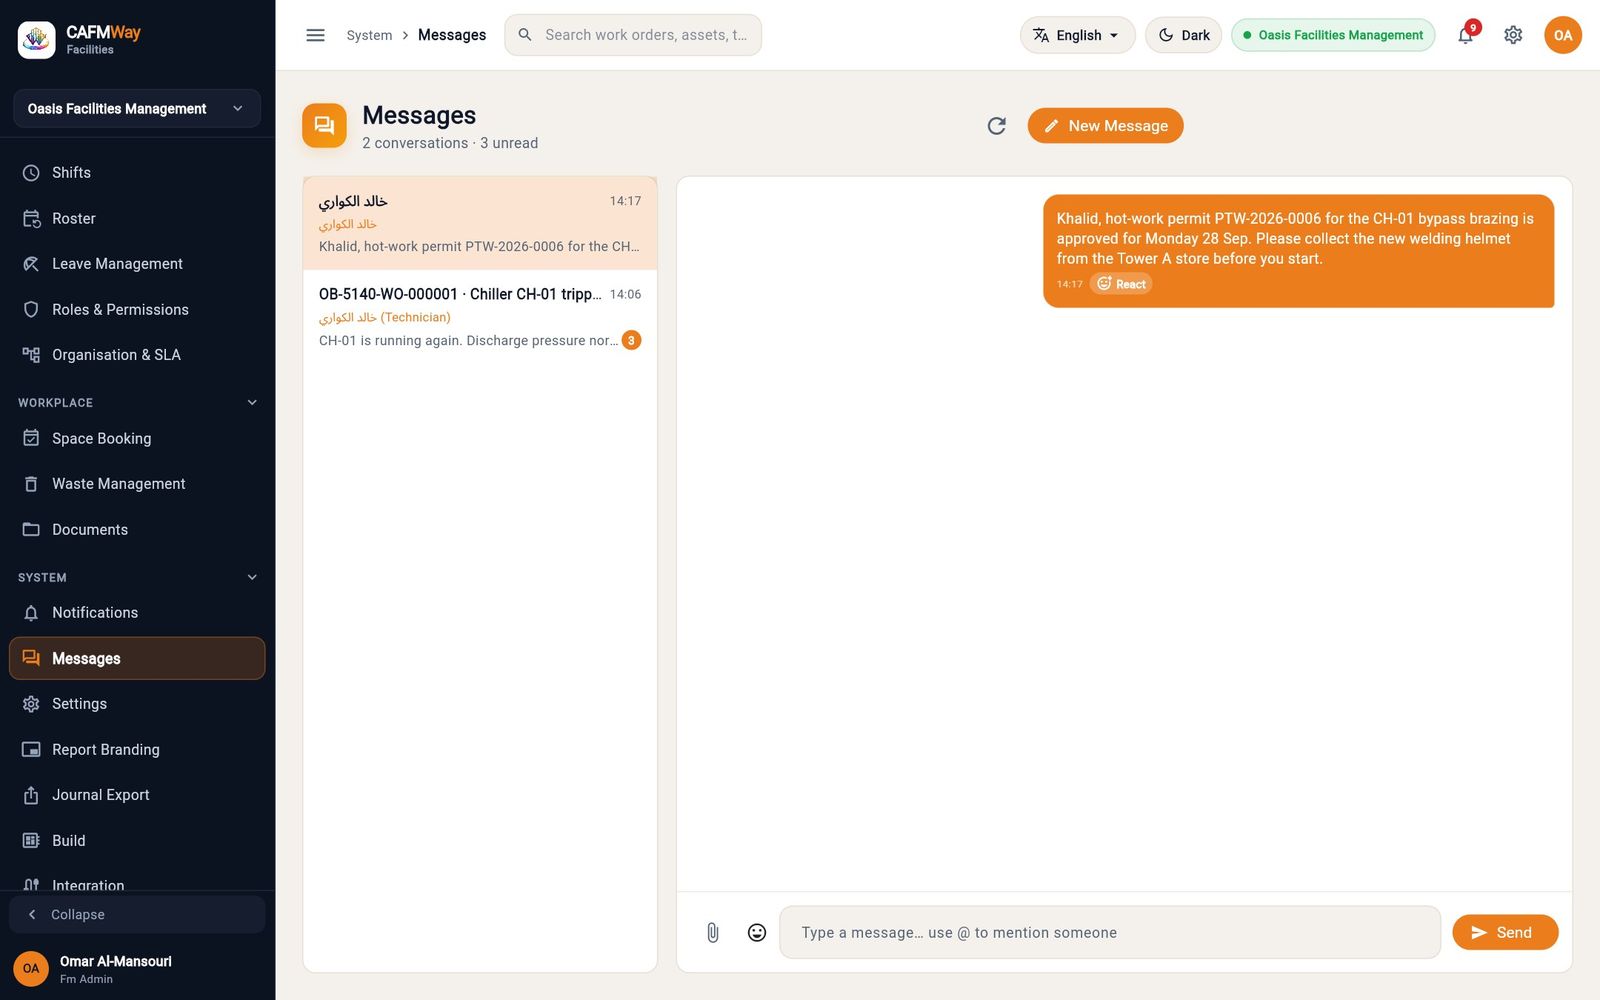
Reports and branding
Run and print a report
- Who: users with the analytics module; each report appears only if your role may read its data
- Where: Sidebar → Reports
The Report Centre lists every report you are allowed to run, grouped by module: assets, contractors, contracts, finance, governance, health and safety, inventory, locations, planned maintenance, work orders. Each card has a template label that tells you what kind of page it prints:
| Template | Prints |
|---|---|
| Register | A list of records with totals, for example the asset register or the training register. |
| Record | One record on its own page, for example a single permit or an asset data sheet. |
| Statement | Financial figures, for example the trial balance or contractor SLA penalties. |
| Labels | Sheets of QR stickers for assets or locations. |
| Calendar | A month grid, for example the PPM calendar. |
| Executive | A summary page for management. |
A small page icon on a card means the report prints in landscape.
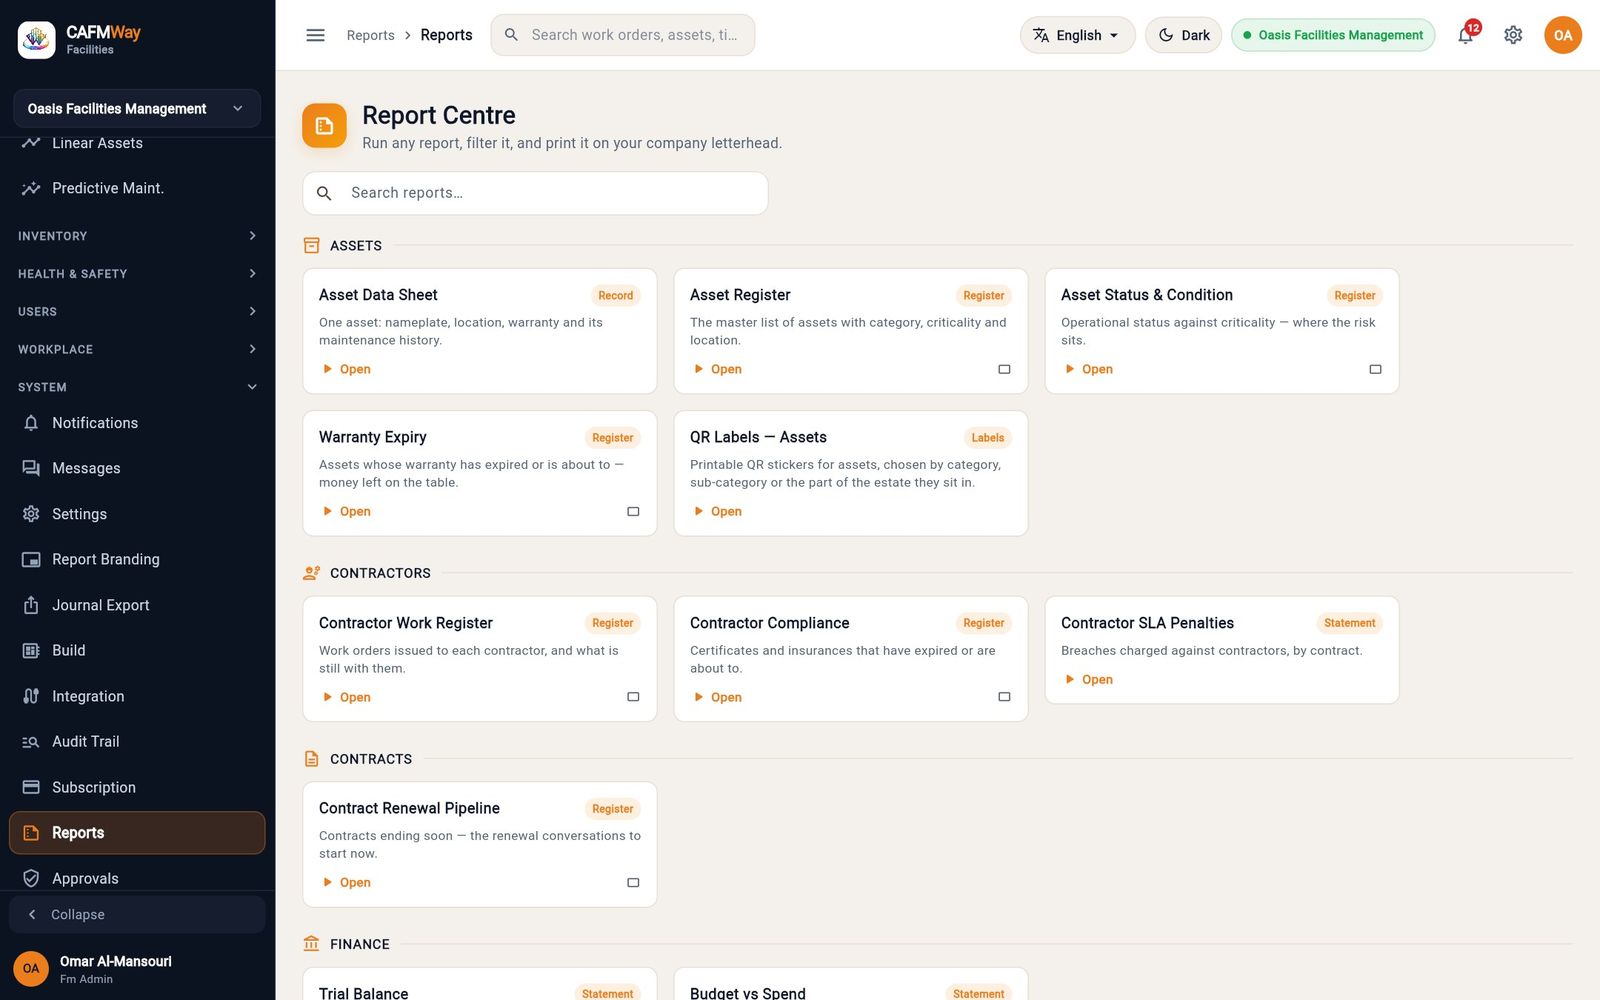
Print the permit for the work site
- Type in Search reports… to narrow the list, for example
permit. - Click Open on Permit to Work. The report opens full screen.
- Choose the Permit from the list, for example
PTW-2026-0006, and click Run. - Choose the print language with EN or AR at the top.
- Click Preview to see the printed page, with your company name and header from Report Branding, the scope of work and the signature blocks for the requester, approver and the person who closes the permit.
- Click Print (or the printer icon at the bottom of the preview) to print or save the page as PDF.
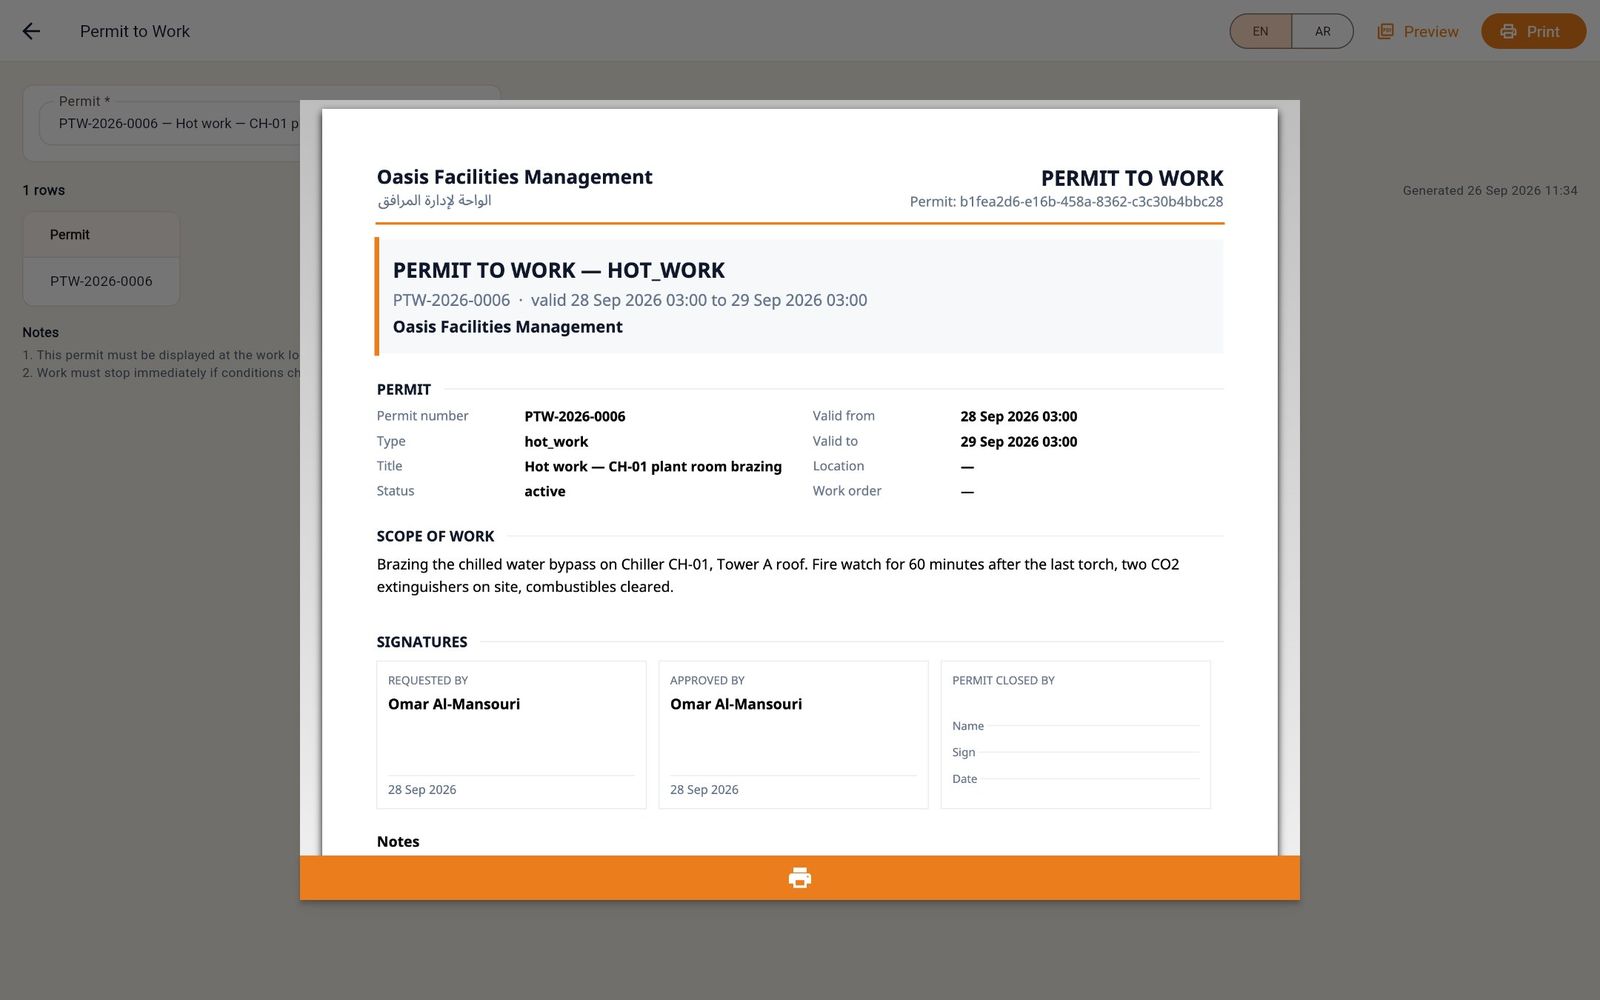
Run a register
Register reports list records and can have filters (dates, location, status) above the Run button. The result shows the row count, the grouping, and the time it was generated, followed by notes that explain the figures.
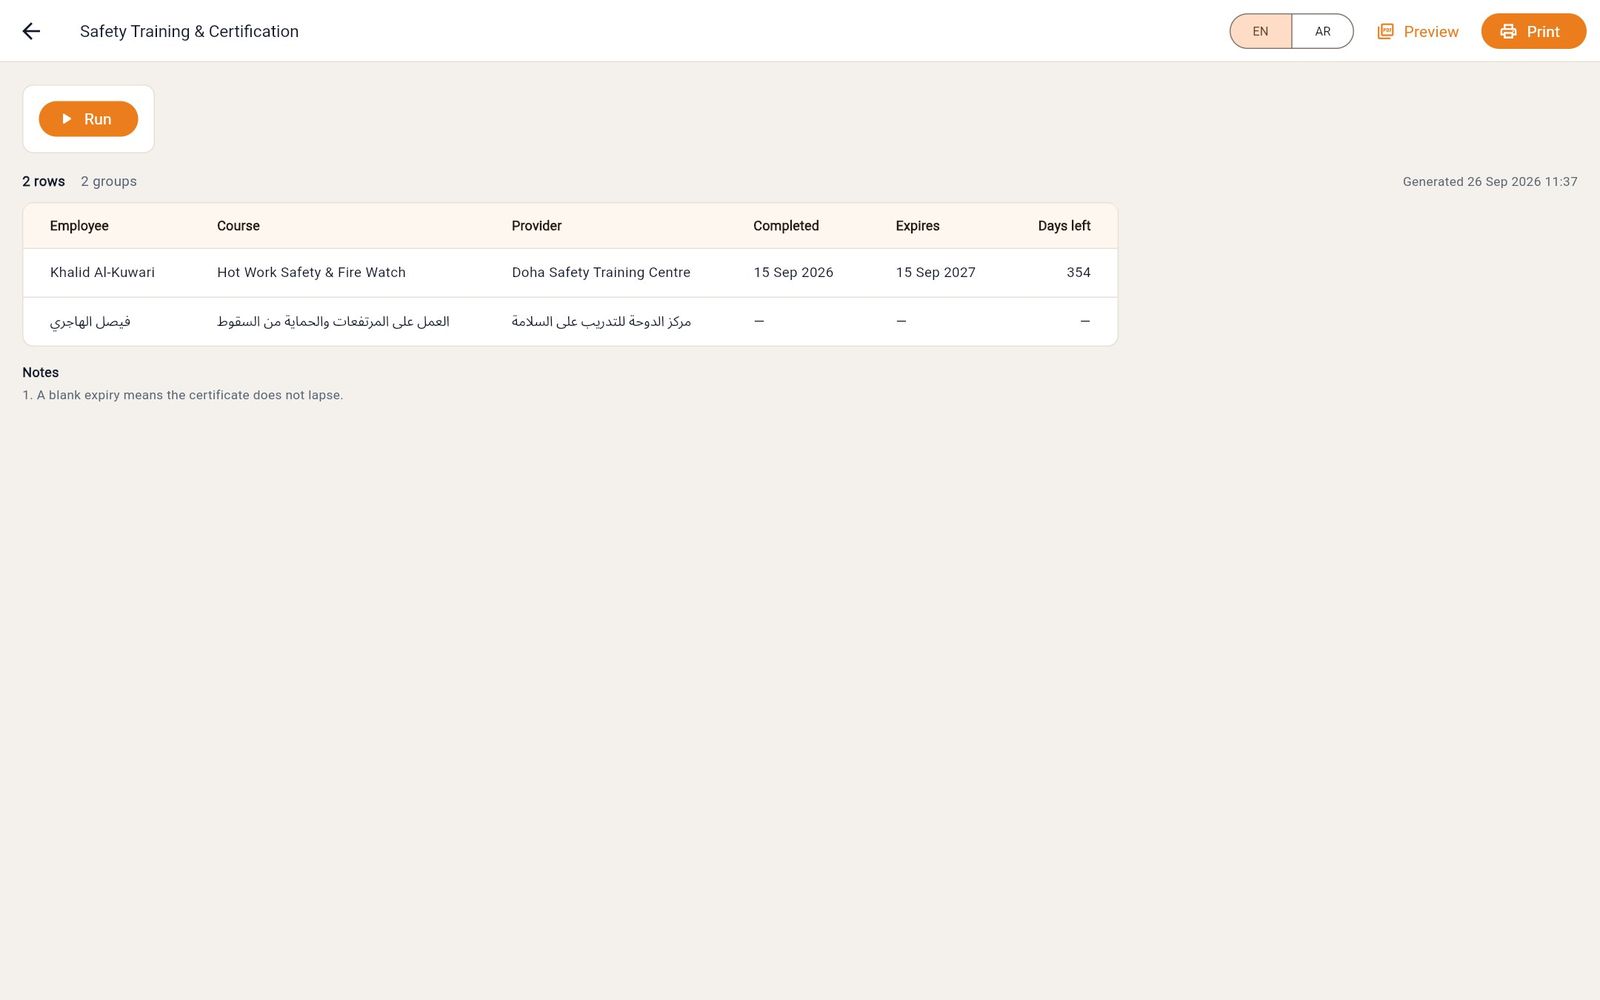
Click the arrow at the top left to go back to the Report Centre.
Brand your reports
- Who: FM Administrator (settings module)
- Where: Sidebar → SYSTEM → Report Branding
Report Branding sets what every printed report carries: your company name in English and Arabic, your legal name and commercial registration number, your logo, and the page settings. The Live preview on the right redraws a sample report as you change things. Choose a template (Register, Record, Executive, Statement, Labels, Calendar) and a language (EN or AR) to preview it.
- On the Identity tab, check Company name (English). It is printed in the header of every report.
- Enter Company name (Arabic), for example
الواحة لإدارة المرافق. It is used on Arabic reports. - Enter the Legal name and CR number. They are printed in the footer.
- Click Save. The preview shows the new names.
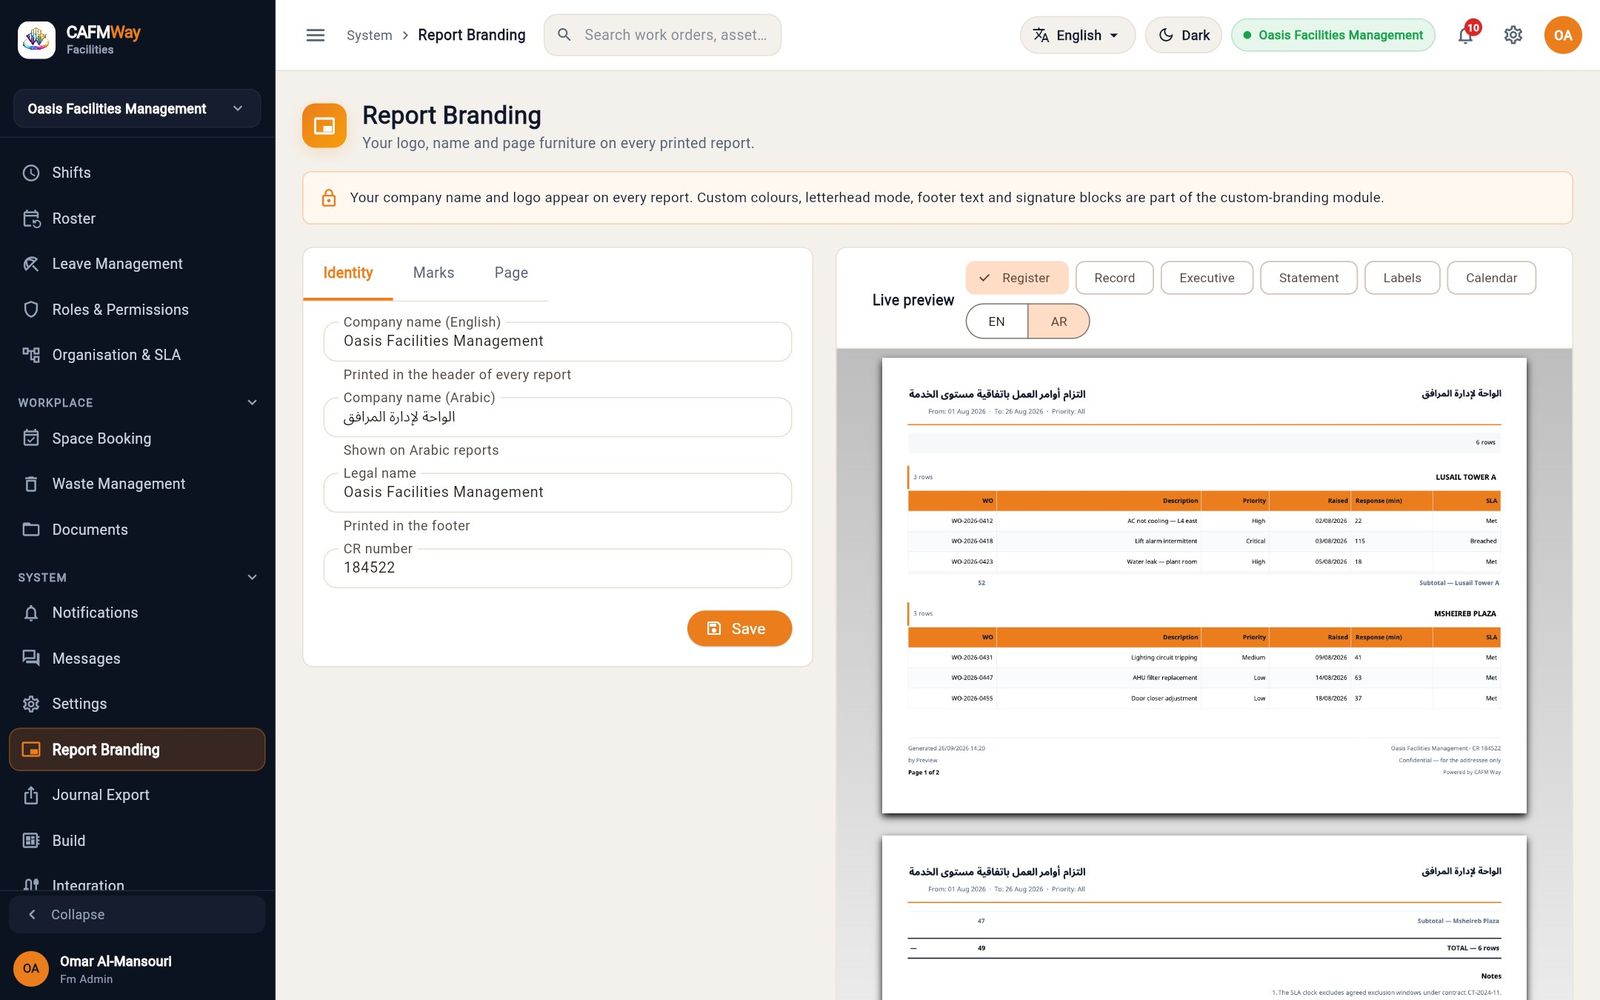
- On the Page tab, choose the Paper size and click Save.
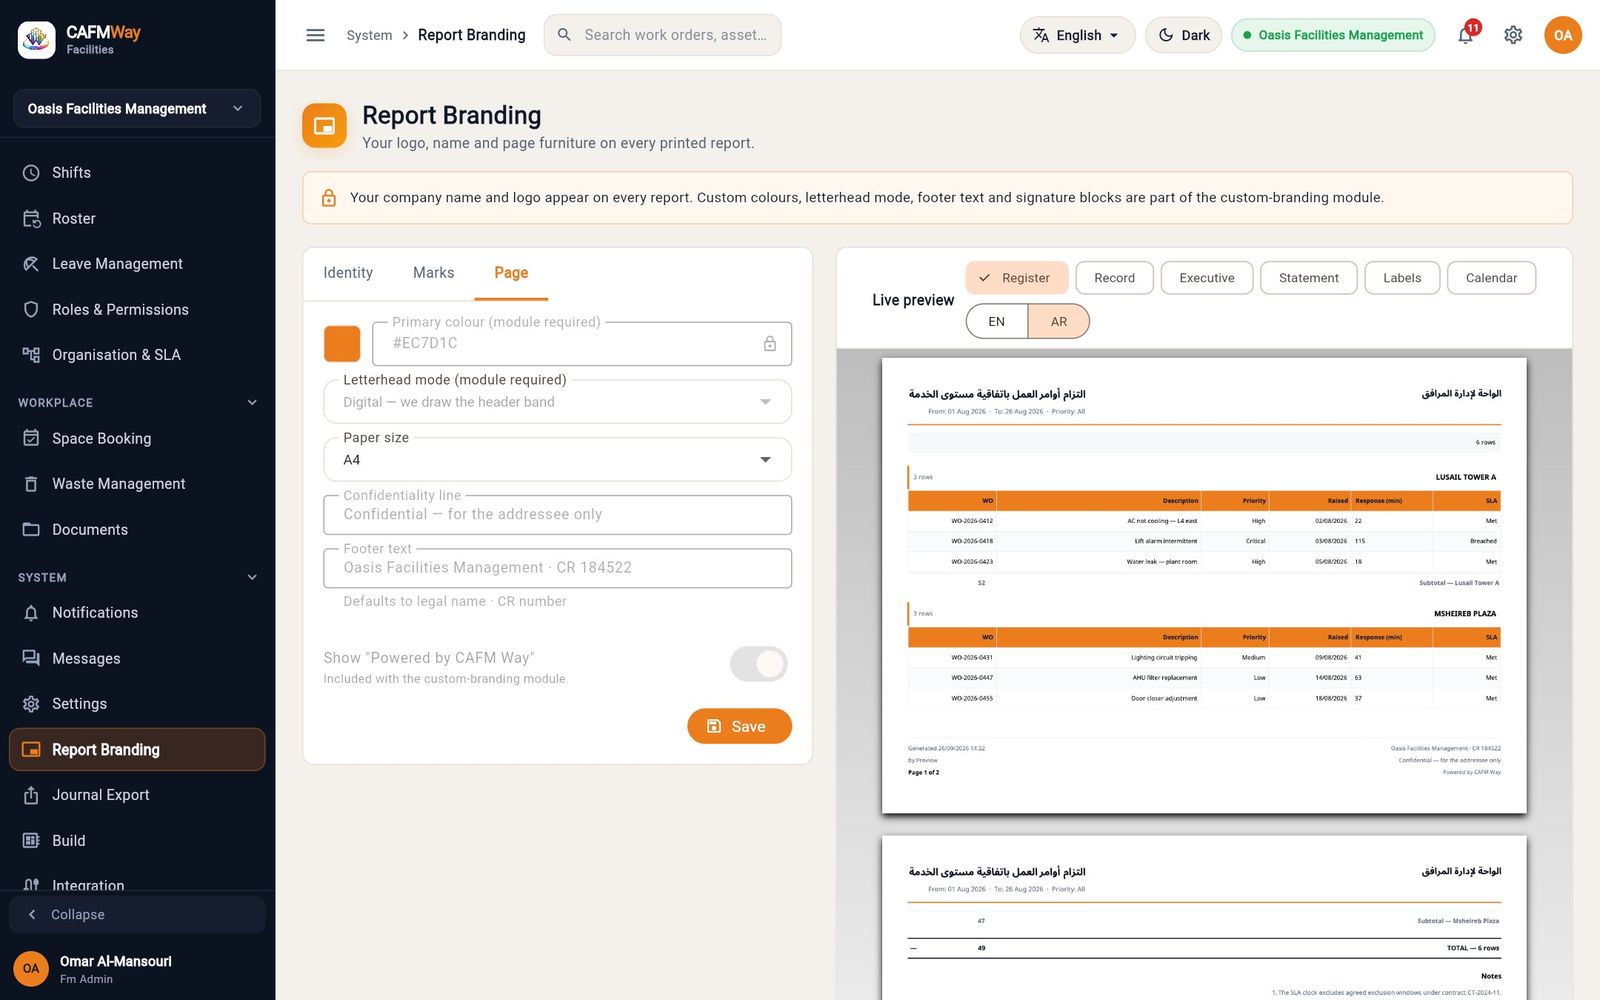
Settings, custom fields and audit
System settings
- Who: FM Administrator
- Where: Sidebar → SYSTEM → Settings, or the gear icon in the top bar
System Administration gathers the company-wide settings and points to where the rest are kept.
| Tab | What it holds |
|---|---|
| General | Company Profile (company name and plan), System Preferences (Dark Mode), and Configured elsewhere, which tells you where priorities and SLA targets, depreciation methods, logo and report headers, and language are set. |
| Notifications | Where your notifications appear (the bell and the Notifications page; push notifications on phones once signed in to the mobile app). |
| Integrations | Links to Integration (ERP connectors) and Journal Export. |
| Security | Active Sessions: each signed-in browser or device with its IP address and last-seen date, with Revoke to sign it out. Who did what links to the audit trail and to users and roles. |
| Billing | Your plan; seats, invoices and payments are on the Subscription page. |
| Approvals | Which documents need approval before they take effect (see the approvals part of this guide). |
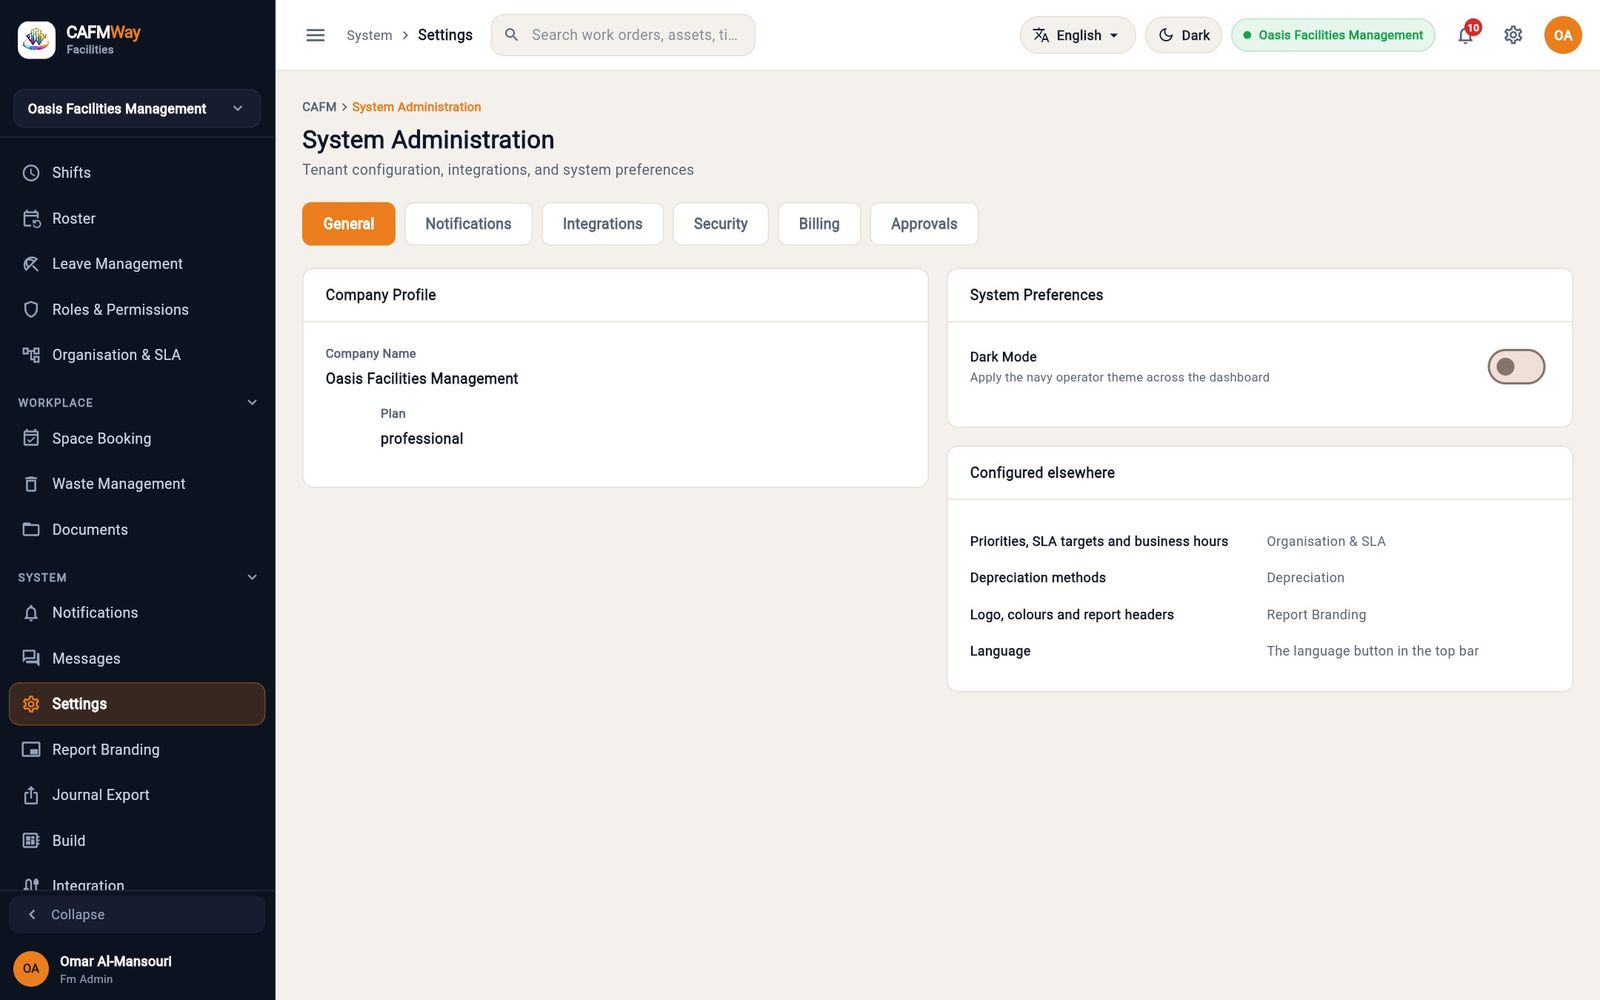
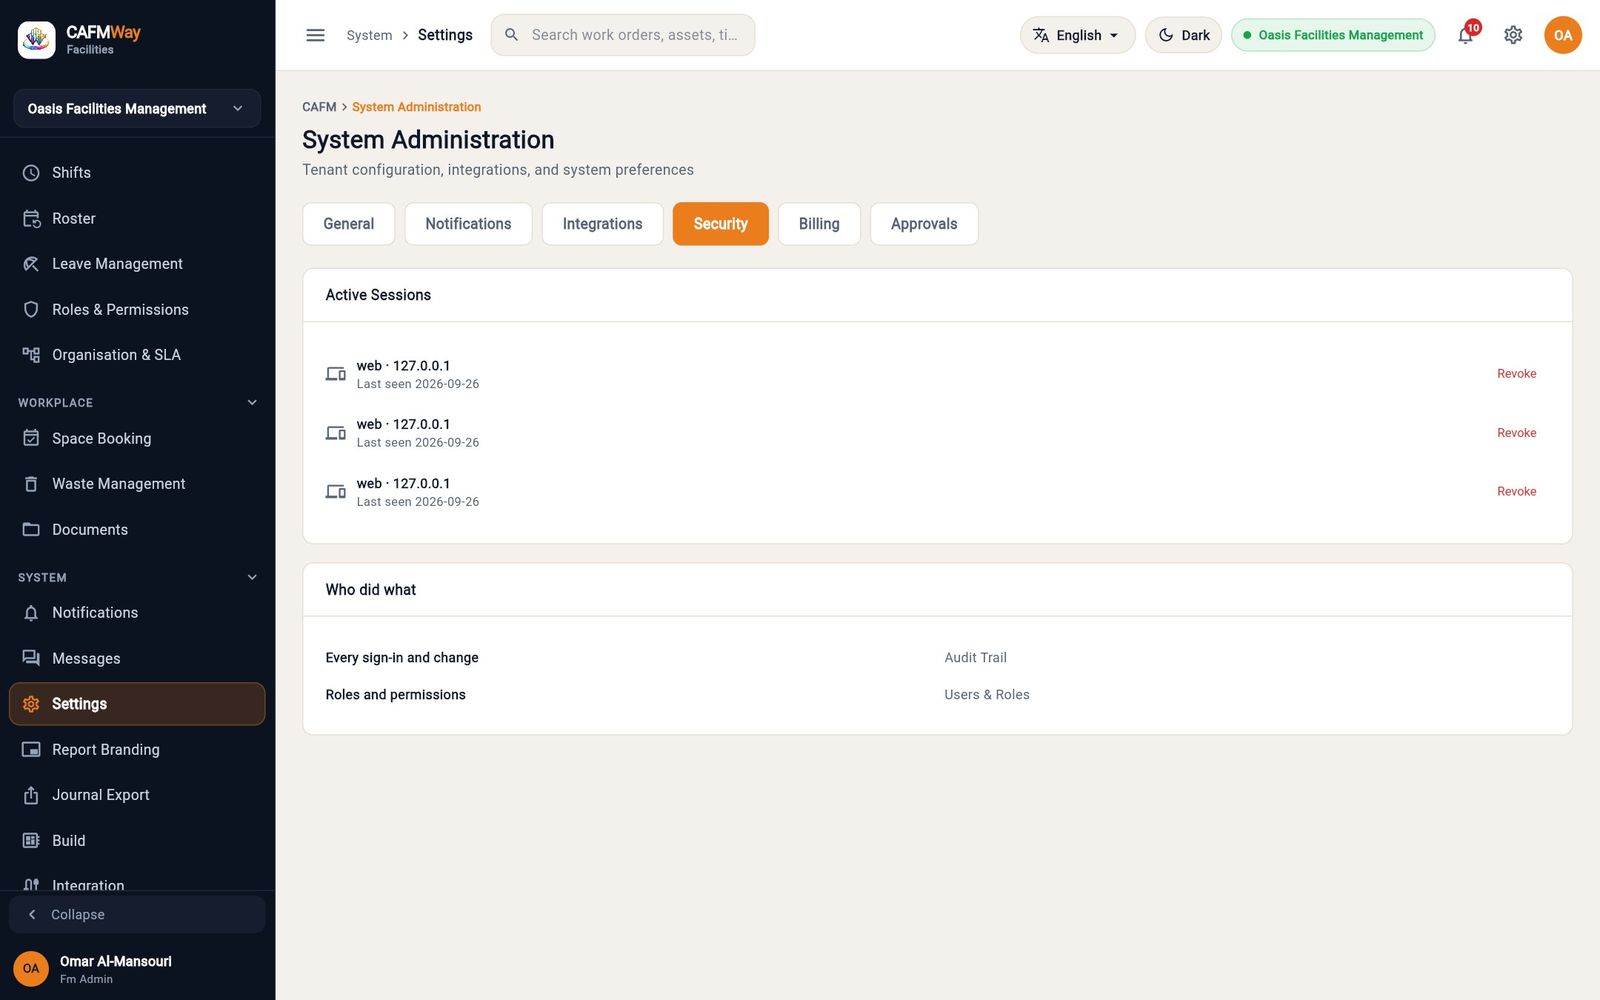
Add your own fields (Build)
- Who: FM Administrator (settings module)
- Where: Sidebar → SYSTEM → Build
Build lets you add your company's own fields to the standard forms, for example the refrigerant type of a chiller. The fields belong to your company only and appear on its forms in the dashboard and in both mobile apps.
- Open Build. The tiles show how many forms you have extended, how many custom fields exist, and how many forms are available. Search for a form with Search a form or module, or tick Only forms I have extended.
- Click the form, for example Asset.
- Click Add field.
- Enter the Label people will read, for example
Refrigerant type. The Stored name fills in from the label (lower case, digits and underscores); it cannot be changed later. - Choose the Type: Yes / No, Amount, Short text, Date, Date & time, Decimal, Whole number, Percentage, Choice list or Long text.
- For a Choice list, type the Choices, one per line, at least two.
- Optionally group fields under a Section, set the Order, and add a Placeholder or Hint text.
- Turn on Required if the record cannot be saved without the field, or Read-only if people may see but not type into it. Shown on the form is on by default.
- Click Add field.
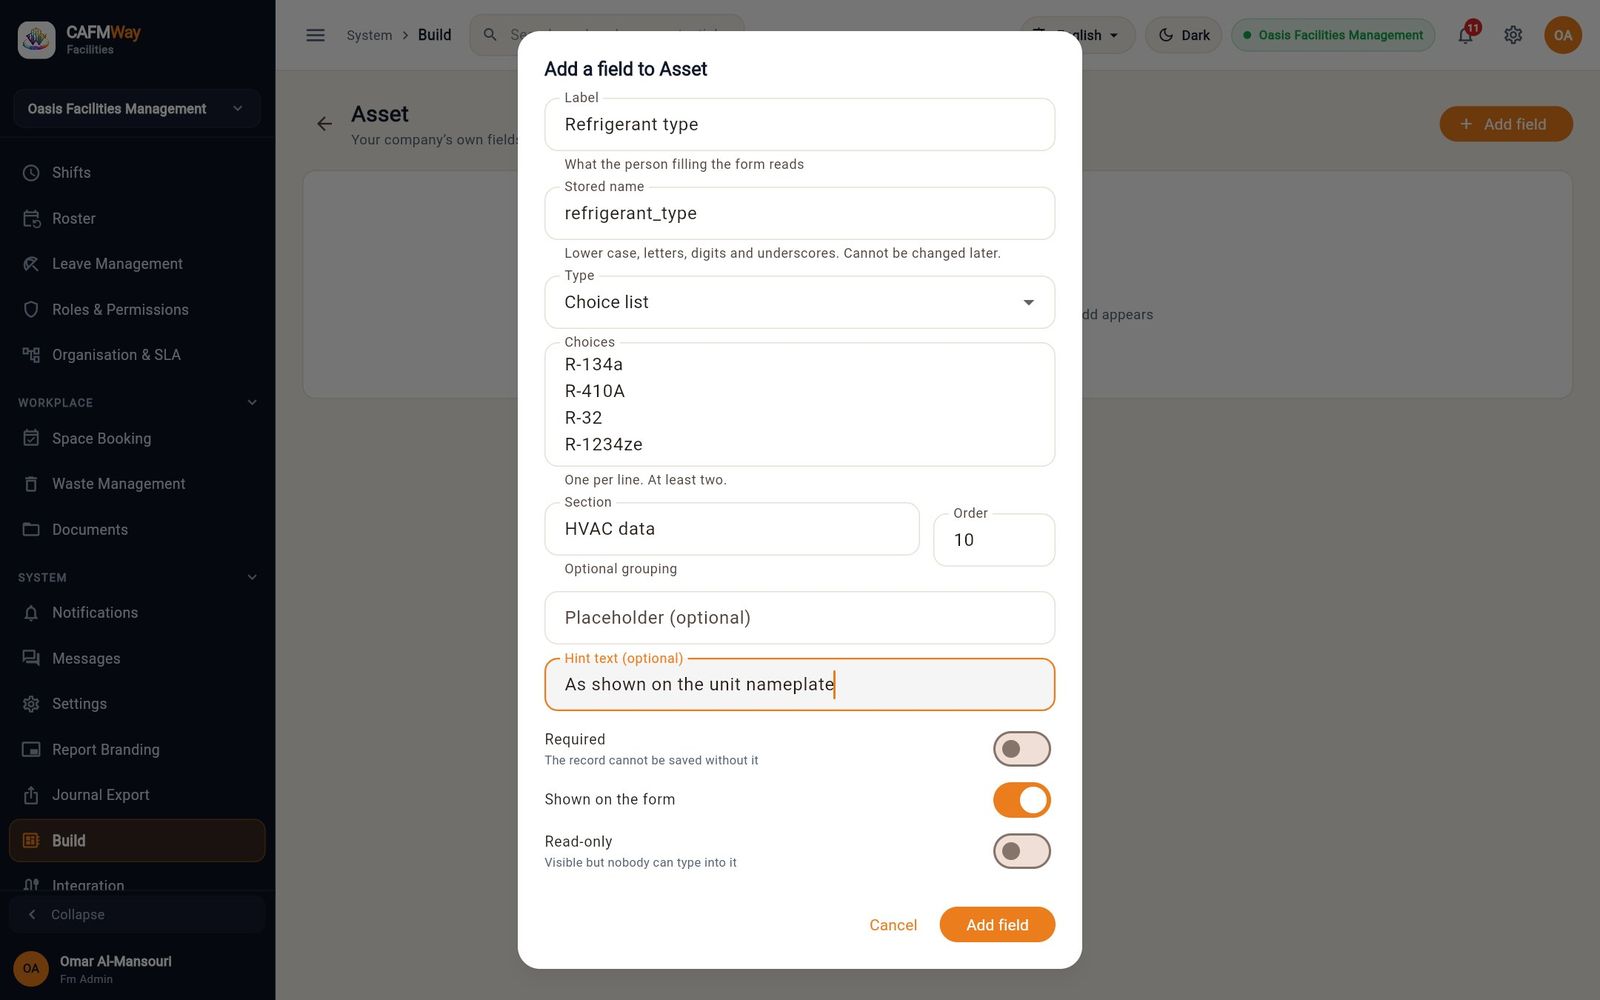
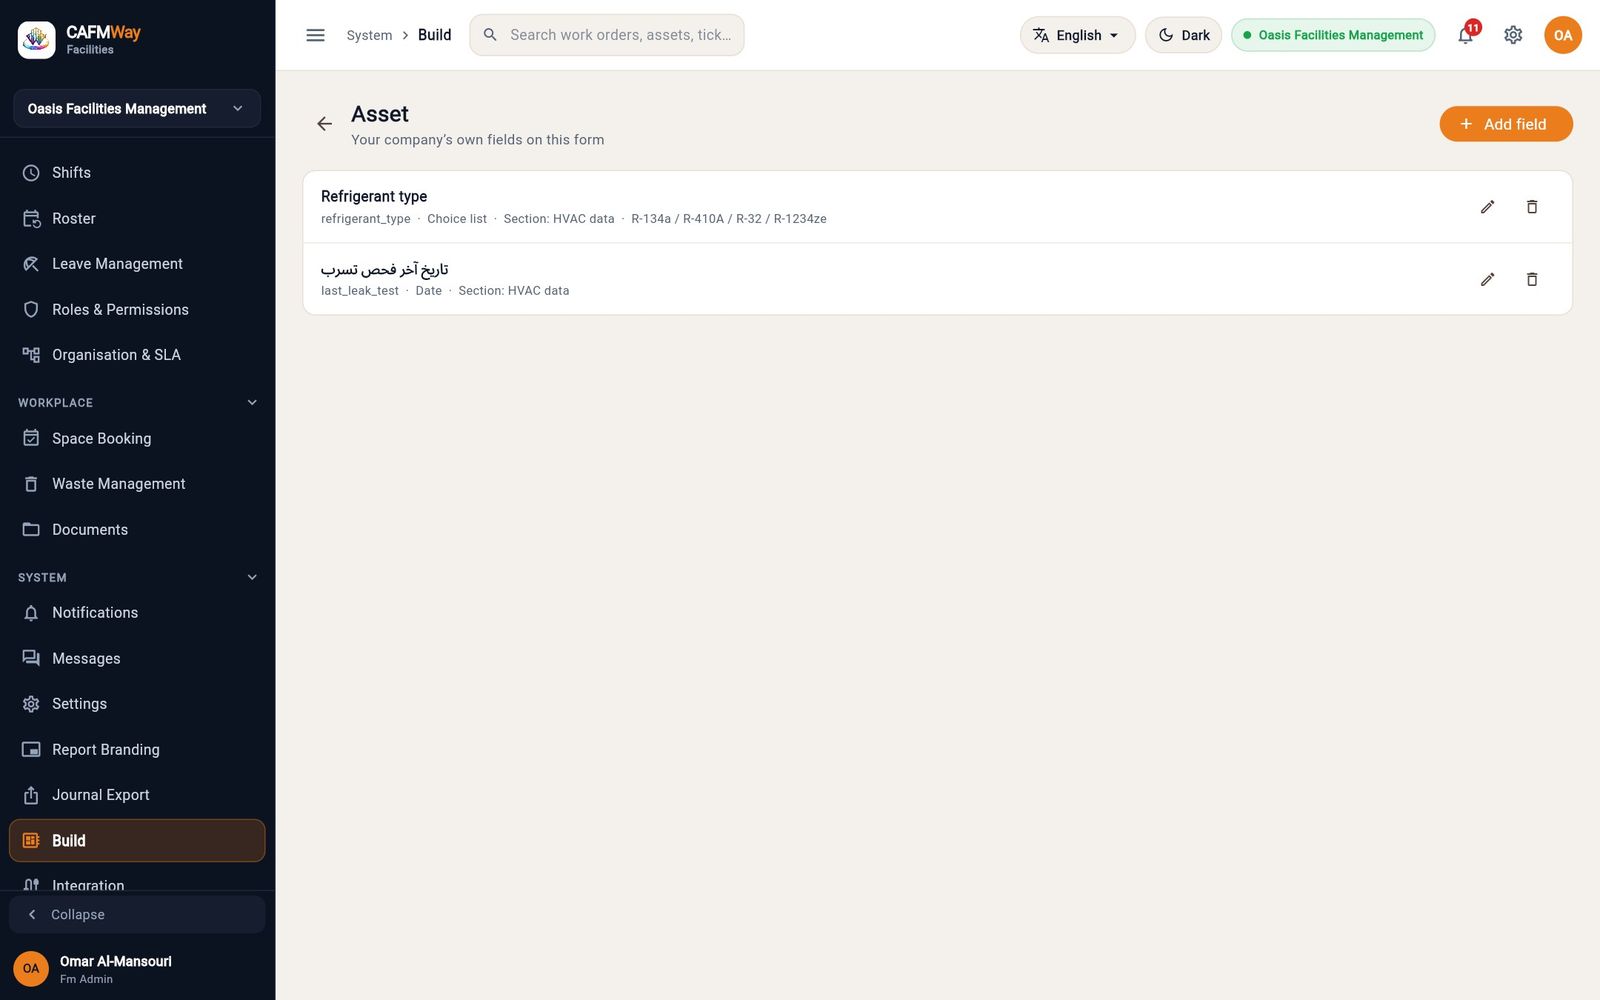
The new fields appear on the asset's Overview tab under Additional fields. Fill them in and click Save.
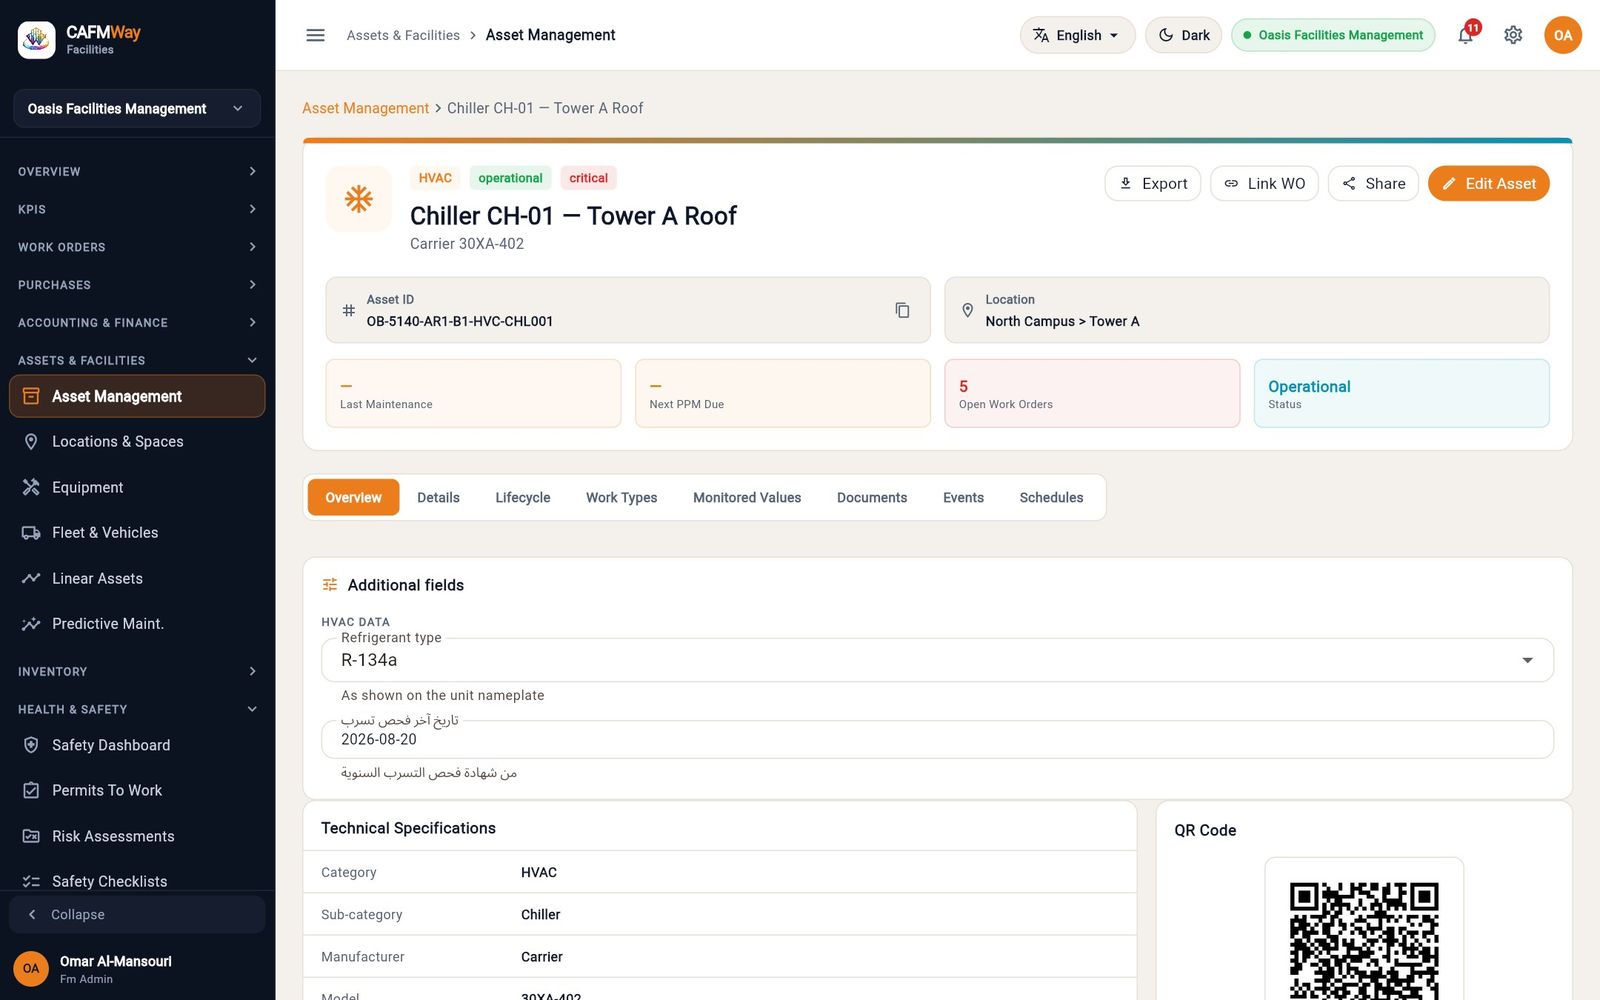
Audit trail
- Who: FM Administrator, auditor (compliance module)
- Where: Sidebar → SYSTEM → Audit Trail
The audit trail records who did what and when: record changes, status changes, sign-ins and profile updates. Records in the audit trail cannot be changed.
- Open Audit Trail. The tiles show Total Events Today, Approvals, Deletions and Failed Logins.
- Pick the day with the date button.
- Narrow the list with Search user, action, module… and the All Modules, All Users and All Actions filters. Clear removes the filters.
- Click a row to see the event: who, when, the IP address, the module and the full description.
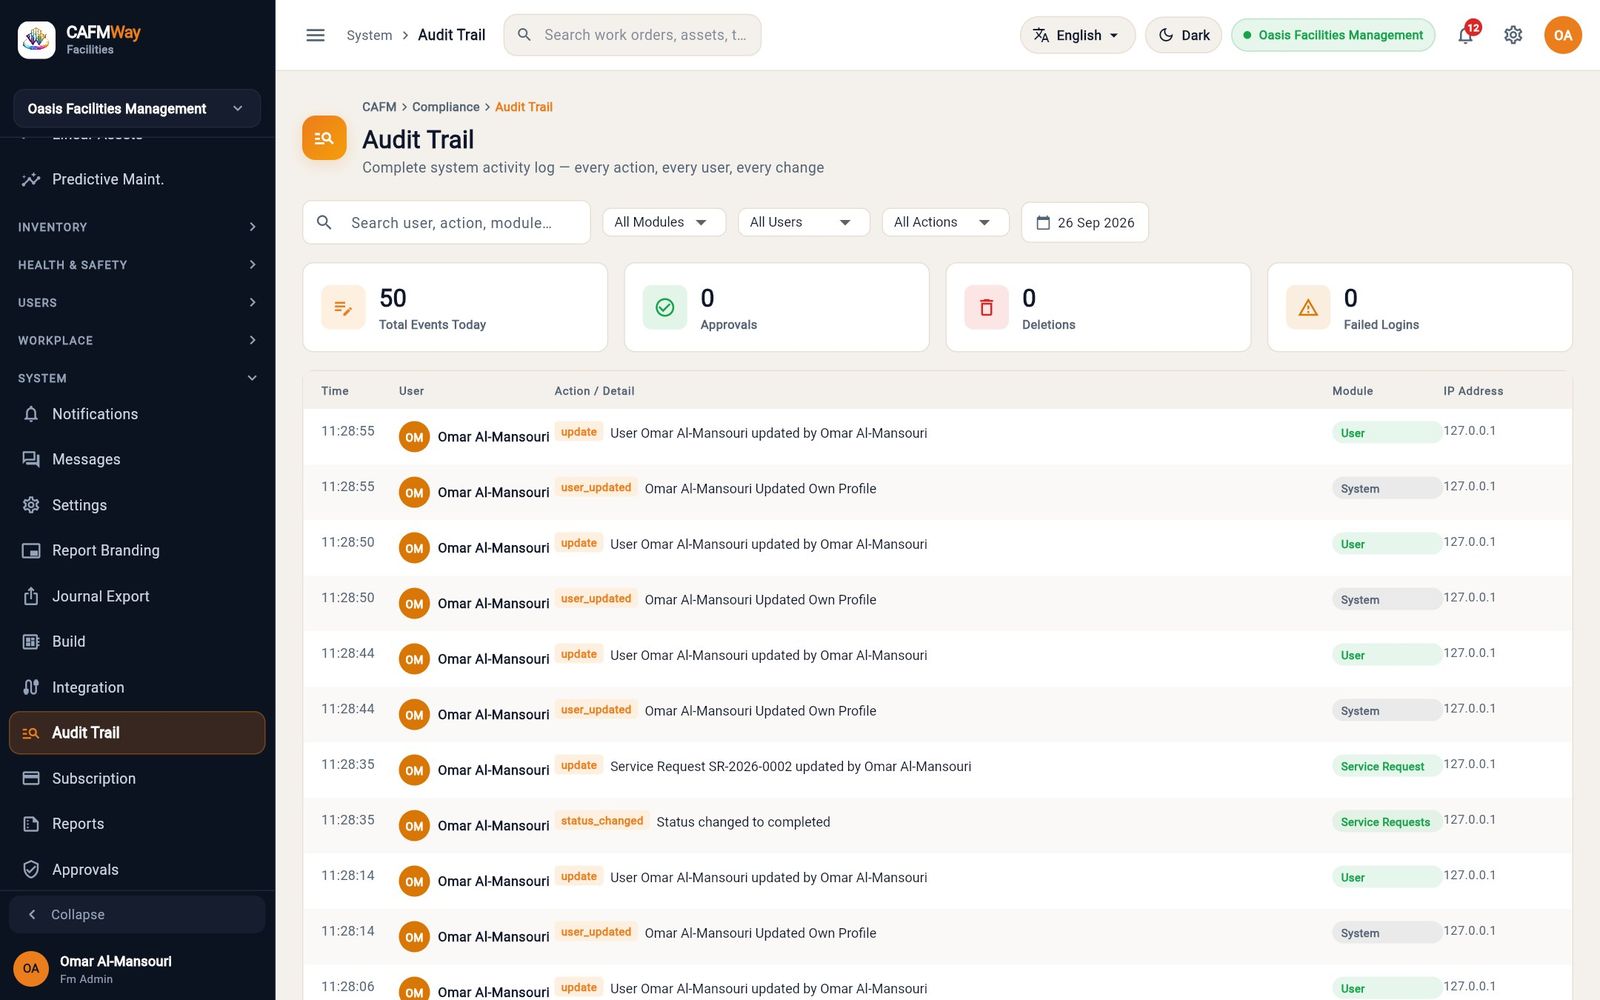
Subscription
Your company's subscription sets how many people can sign in and how many areas, buildings and open spaces you can manage. You can see it and ask CAFM for more at any time.
Your subscription
- Who: FM administrators
- Where: SYSTEM → Subscription
The Overview tab shows:
- the current plan, the annual amount, the next payment date and the status
- User Seats: seats used out of seats paid for, and who is using them by role. Contractor responsible persons use seats too.
- Facilities: buildings and open spaces used out of those allowed
A Finish setting up your workspace banner lists anything left from the first-time setup. Continue setup opens the setup wizard.
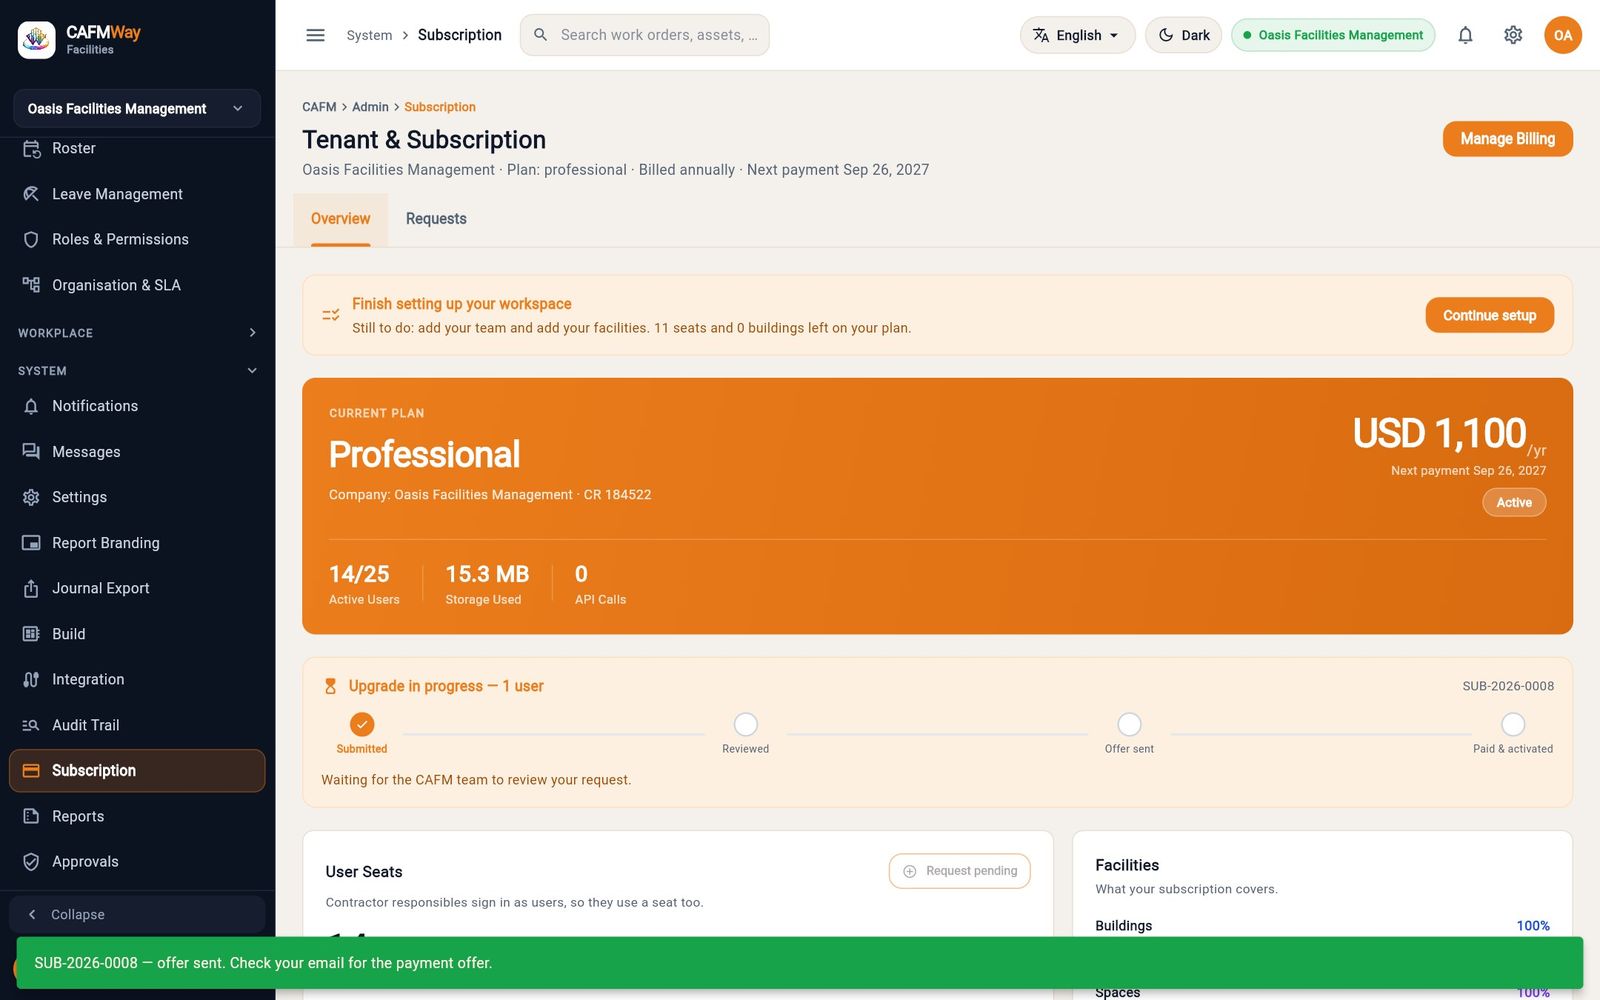
Request more user seats
- Click Request more user seats.
- Enter how many more people need to sign in, and optionally a note for the CAFM team.
- Click Send request.
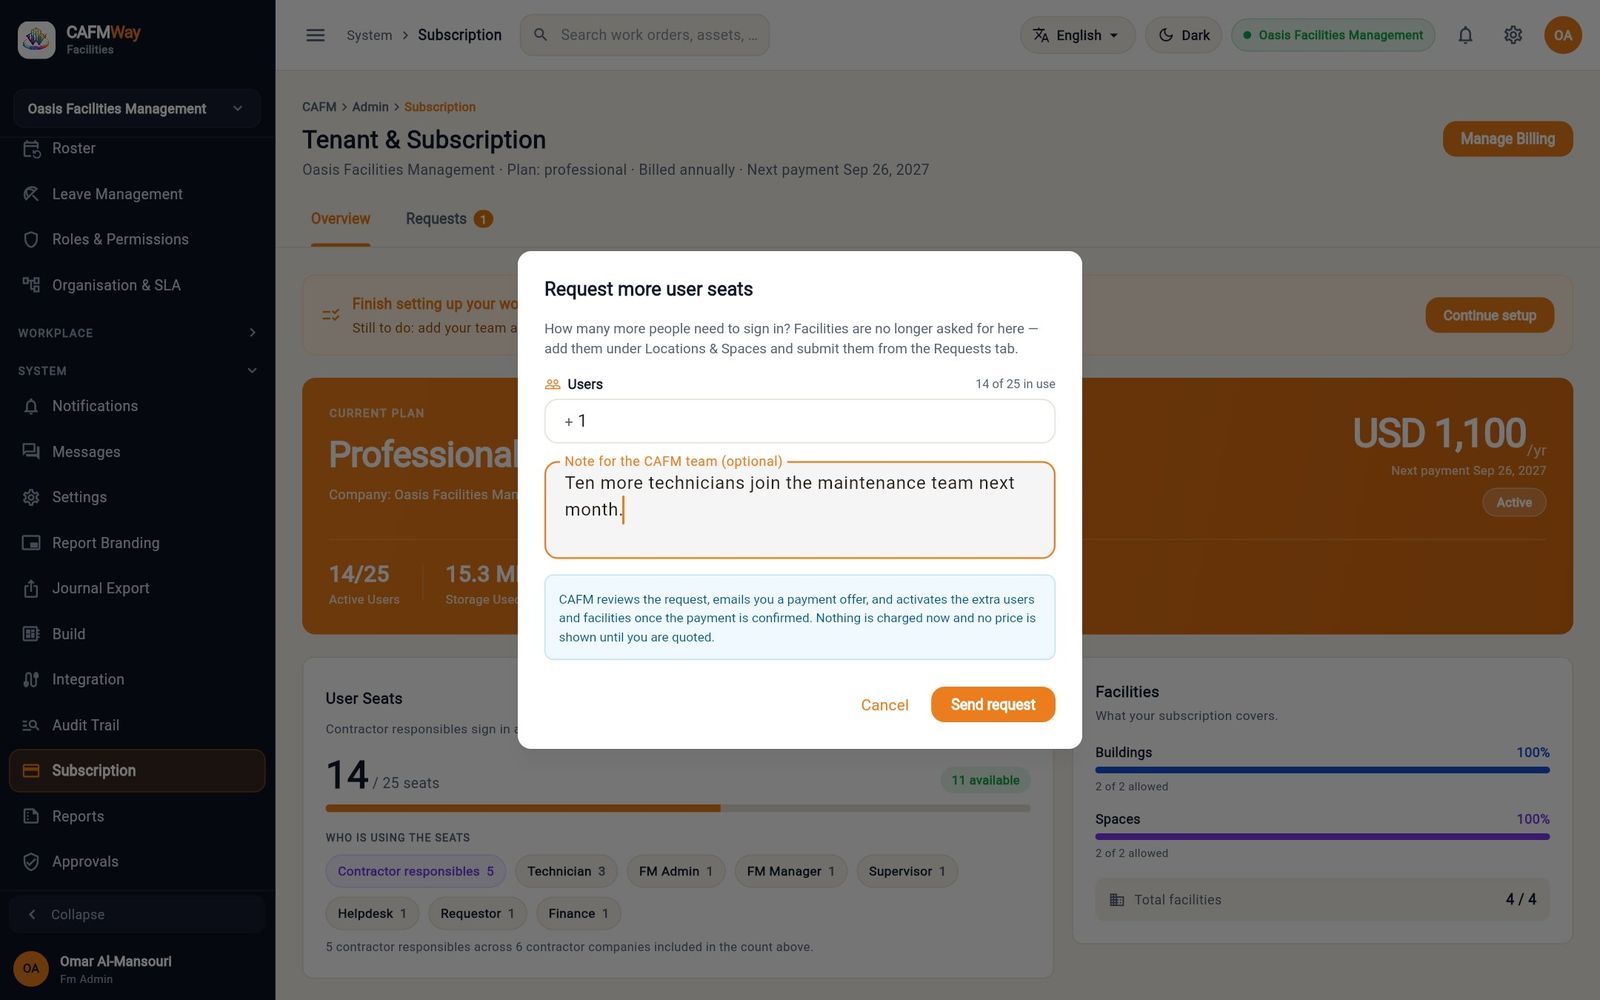
CAFM reviews the request, emails you a payment offer, and raises your seat limit once the payment is confirmed. The button shows Request pending meanwhile.
Request more facilities
When you add an area, building or space beyond your limit (see Beyond your subscription), it waits on the Requests tab until you send it.
- Open the Requests tab. Facilities not yet sent are listed. The small bin removes one you added by mistake.
- Click Submit request, add an optional note, and click Send request.
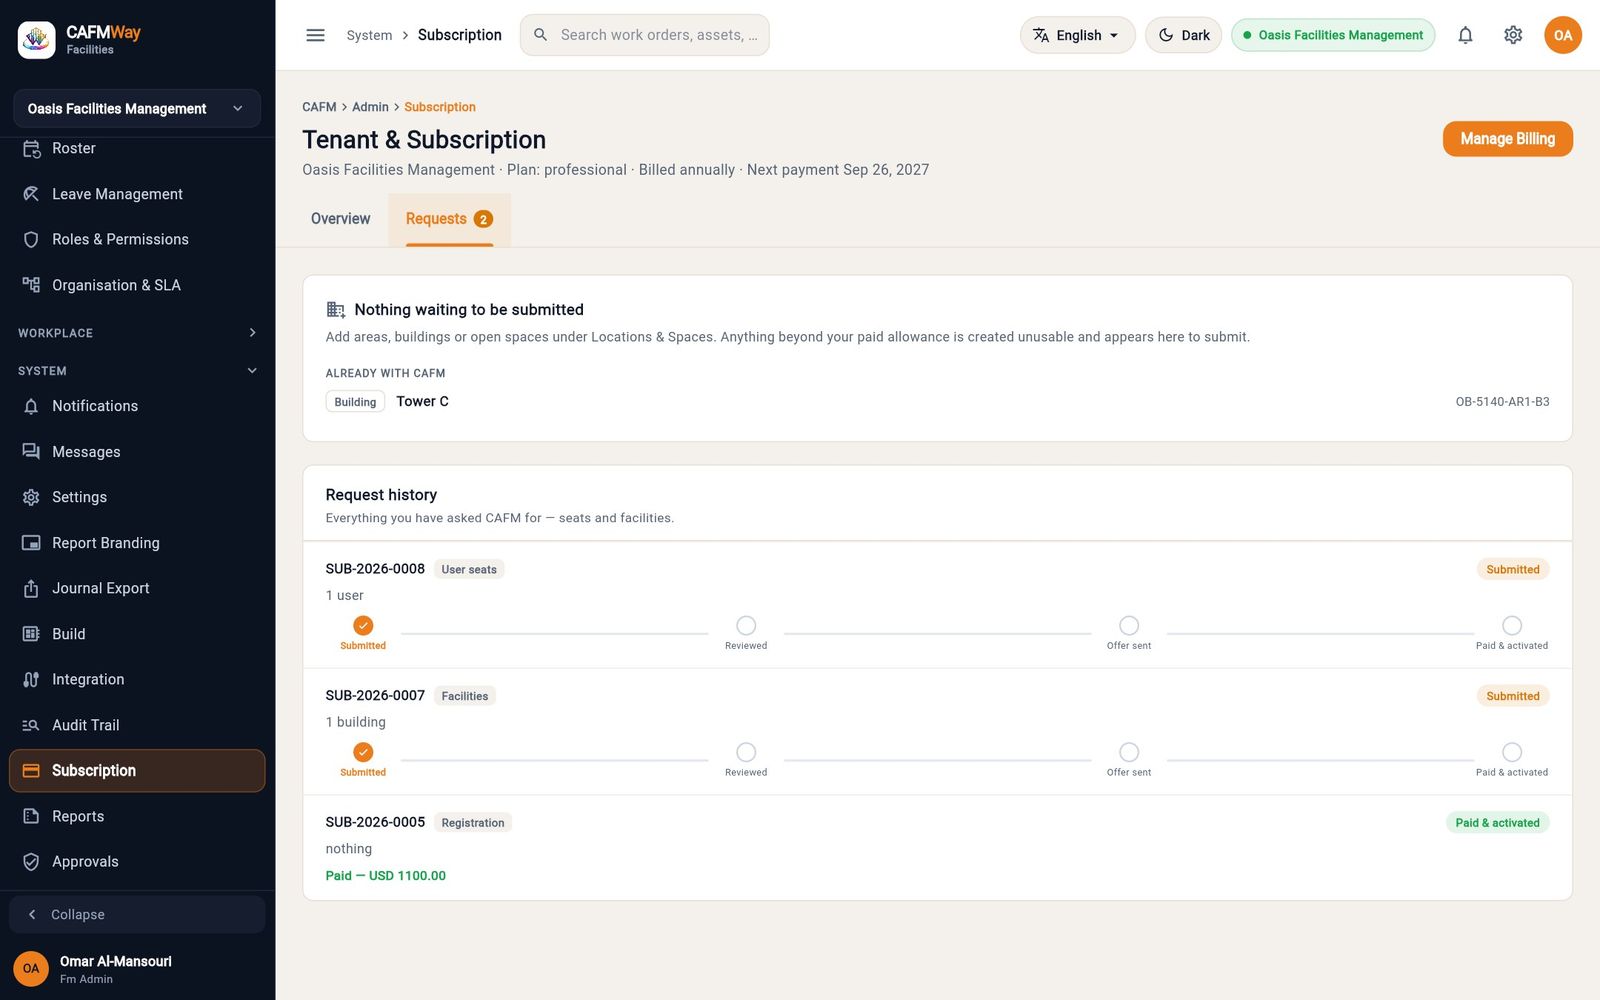
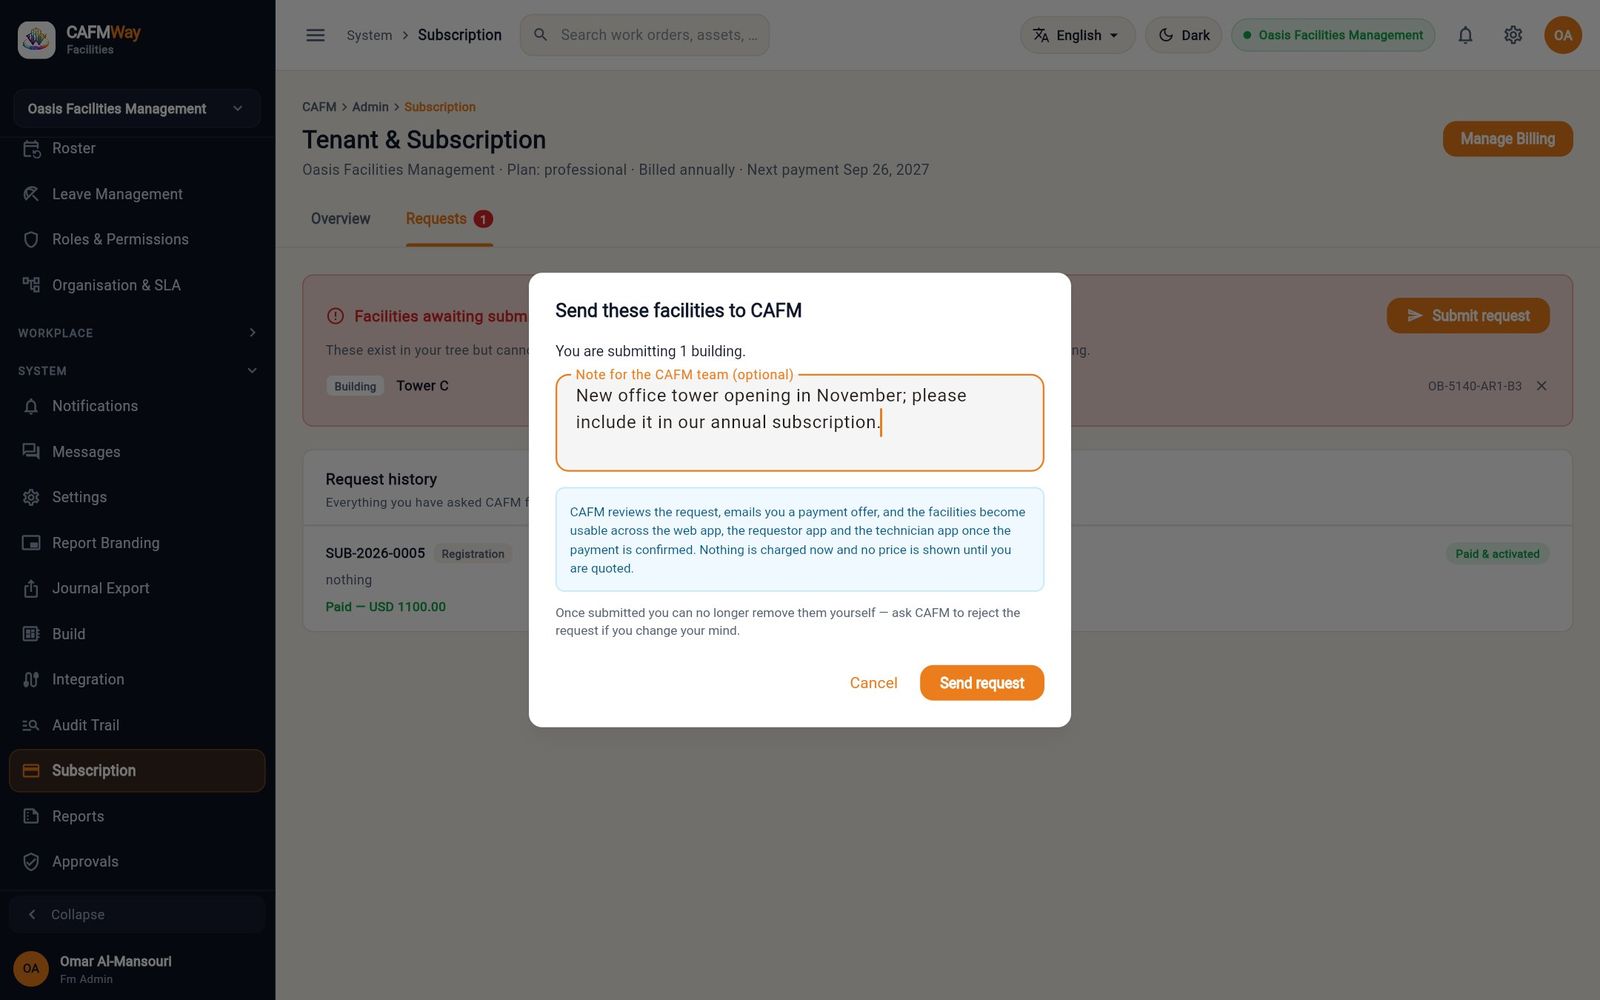
CAFM prices the request and emails a payment offer. After the payment is confirmed, the new facilities become usable across CAFM Way and an invoice is issued. If CAFM declines, the facilities come back to you as drafts.